# SimpleLocalize
> SimpleLocalize is a translation management system (TMS) for software localization. Developers, translators and product teams manage translation keys and translations for web, mobile and desktop apps in one online editor, sync translation files with the CLI, REST API, GitHub App or IDE plugins, auto-translate with DeepL, Google Translate or OpenAI, and serve translations from a CDN (Translation Hosting).
Key facts:
- Pricing is per translation key; the number of languages, projects and translations does not change the price.
- Plans: Community (free, 500 keys, 1 member), Developer (2,000 keys, 5 members), Team (6,000 keys, 25 members), Business (15,000 keys, 100 members). Every paid plan can be extended with extra key packs. Current prices: https://simplelocalize.io/pricing/
- Supports 30+ file formats, including JSON, YAML, XLIFF, Android strings.xml, iOS Localizable.strings and .xcstrings, gettext PO/POT, RESX, Java properties, ARB, CSV and Excel.
- REST API base URL: https://api.simplelocalize.io (authentication with the `X-SimpleLocalize-Token` header).
---
# General: Introduction
Source: https://simplelocalize.io/docs/
---
# General: Get started
Source: https://simplelocalize.io/docs/general/get-started/
This guide will help you get started with SimpleLocalize and set up your localization project. Get started from scratch or migrate your existing translations to SimpleLocalize.
## Import your content
In your new project, follow the onboarding steps to import your existing translation files. Choose a file format, upload your source translations.
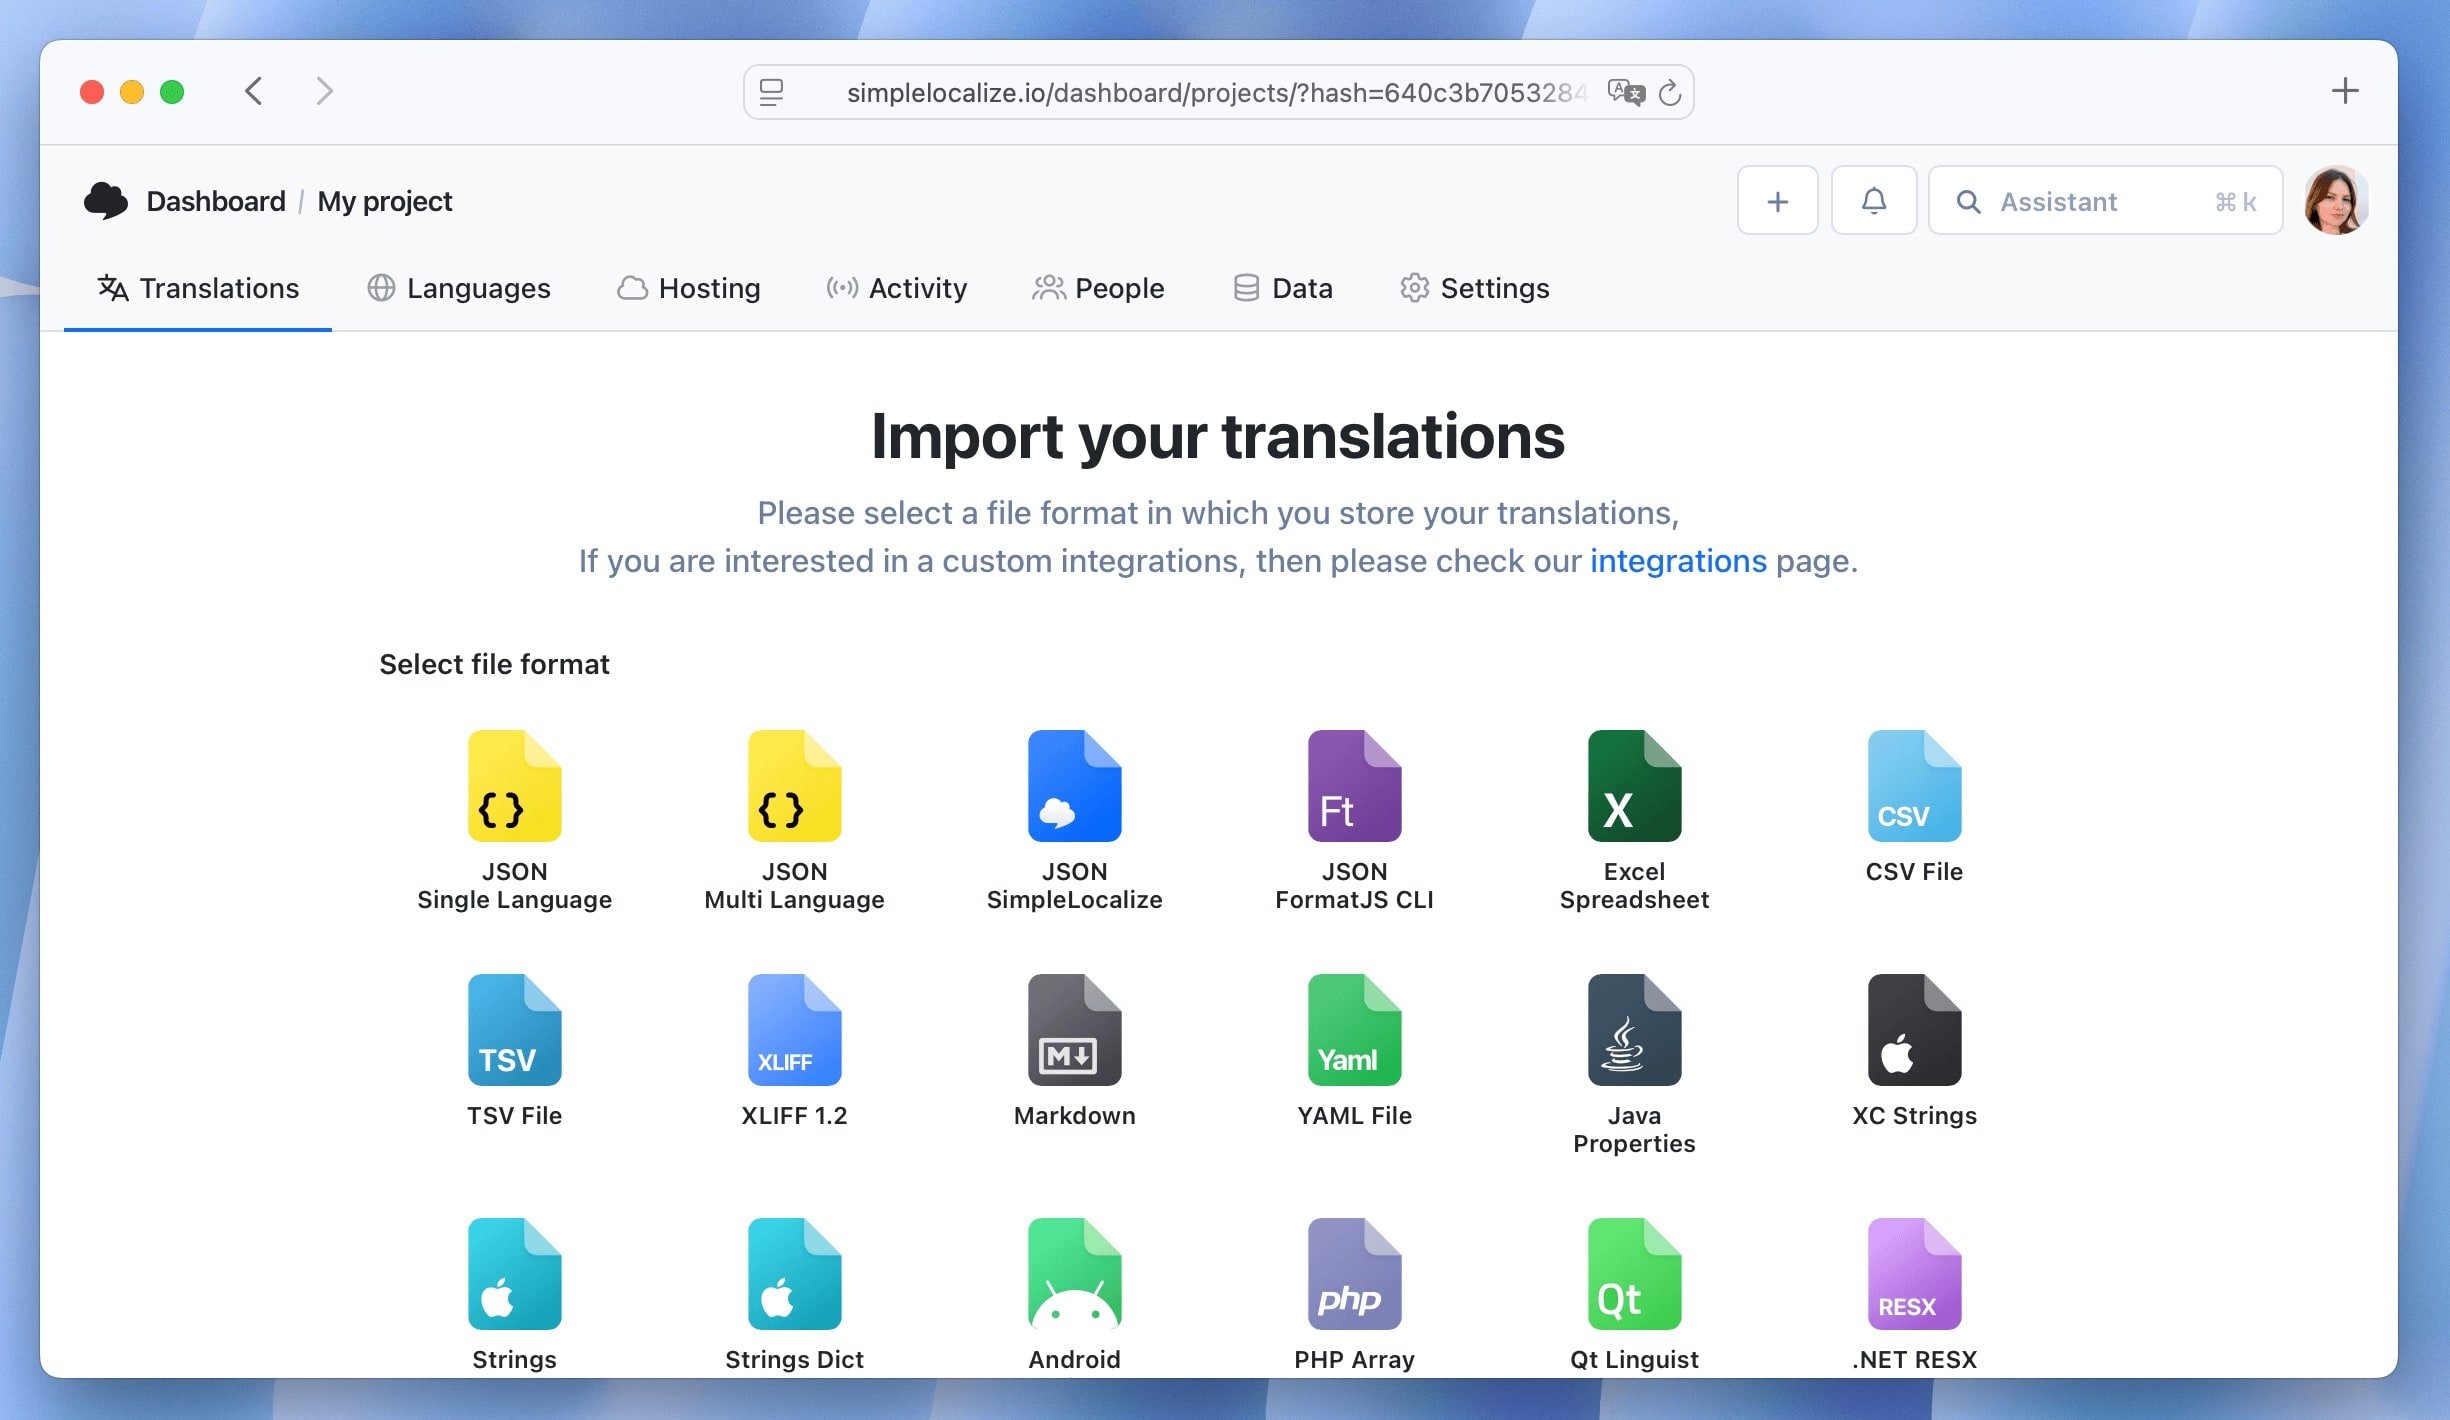
If you have more than one file with translations, you can upload other files after the onboarding from the "**Data**" tab in your project.
After importing, you can start managing your translations in SimpleLocalize.
"**Translations**"
tab shows all your translation keys and their translations in different languages in the translation editor.
Here, you can manage translations, add new keys (plus button), search and filter translations, bulk edit translations.
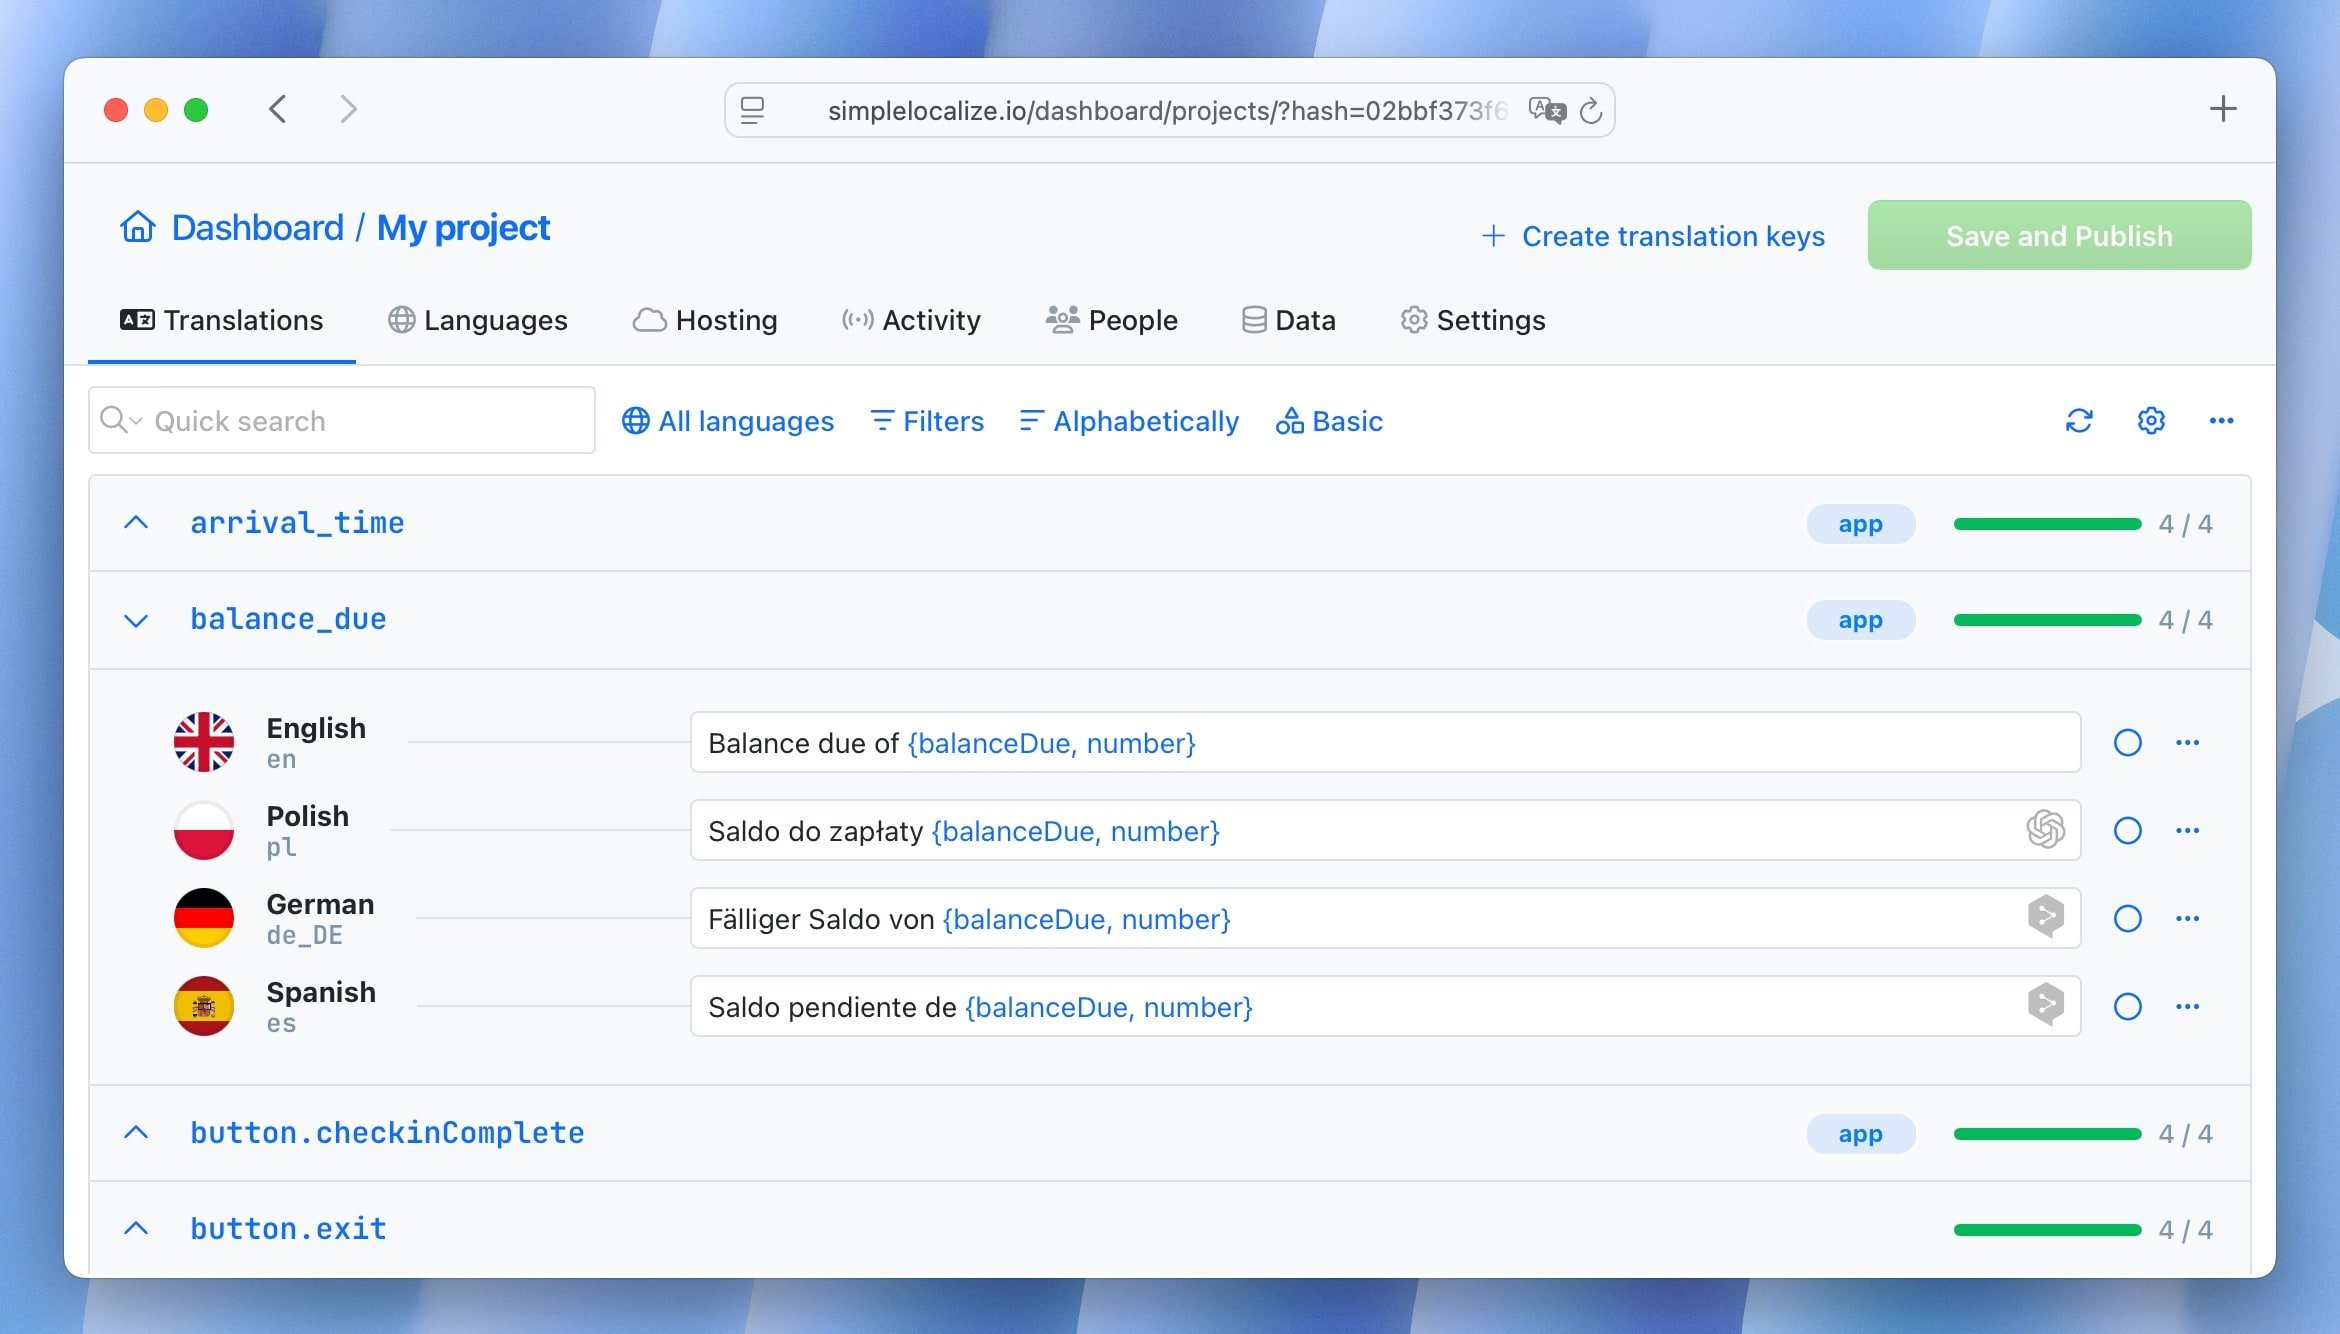
You can also customize the view and options of the translation editor to fit your needs. Give you a few minutes to explore the translation editor and its options, in doubt you feel free to contact us: [contact@simplelocalize.io](mailto:contact@simplelocalize.io)
Learn more about [using the translation editor](/docs/translation-editor/get-started/).
## Add languages
Languages will be automatically created when you import translation files. You can also add new languages from the "**Languages**" tab in your project.
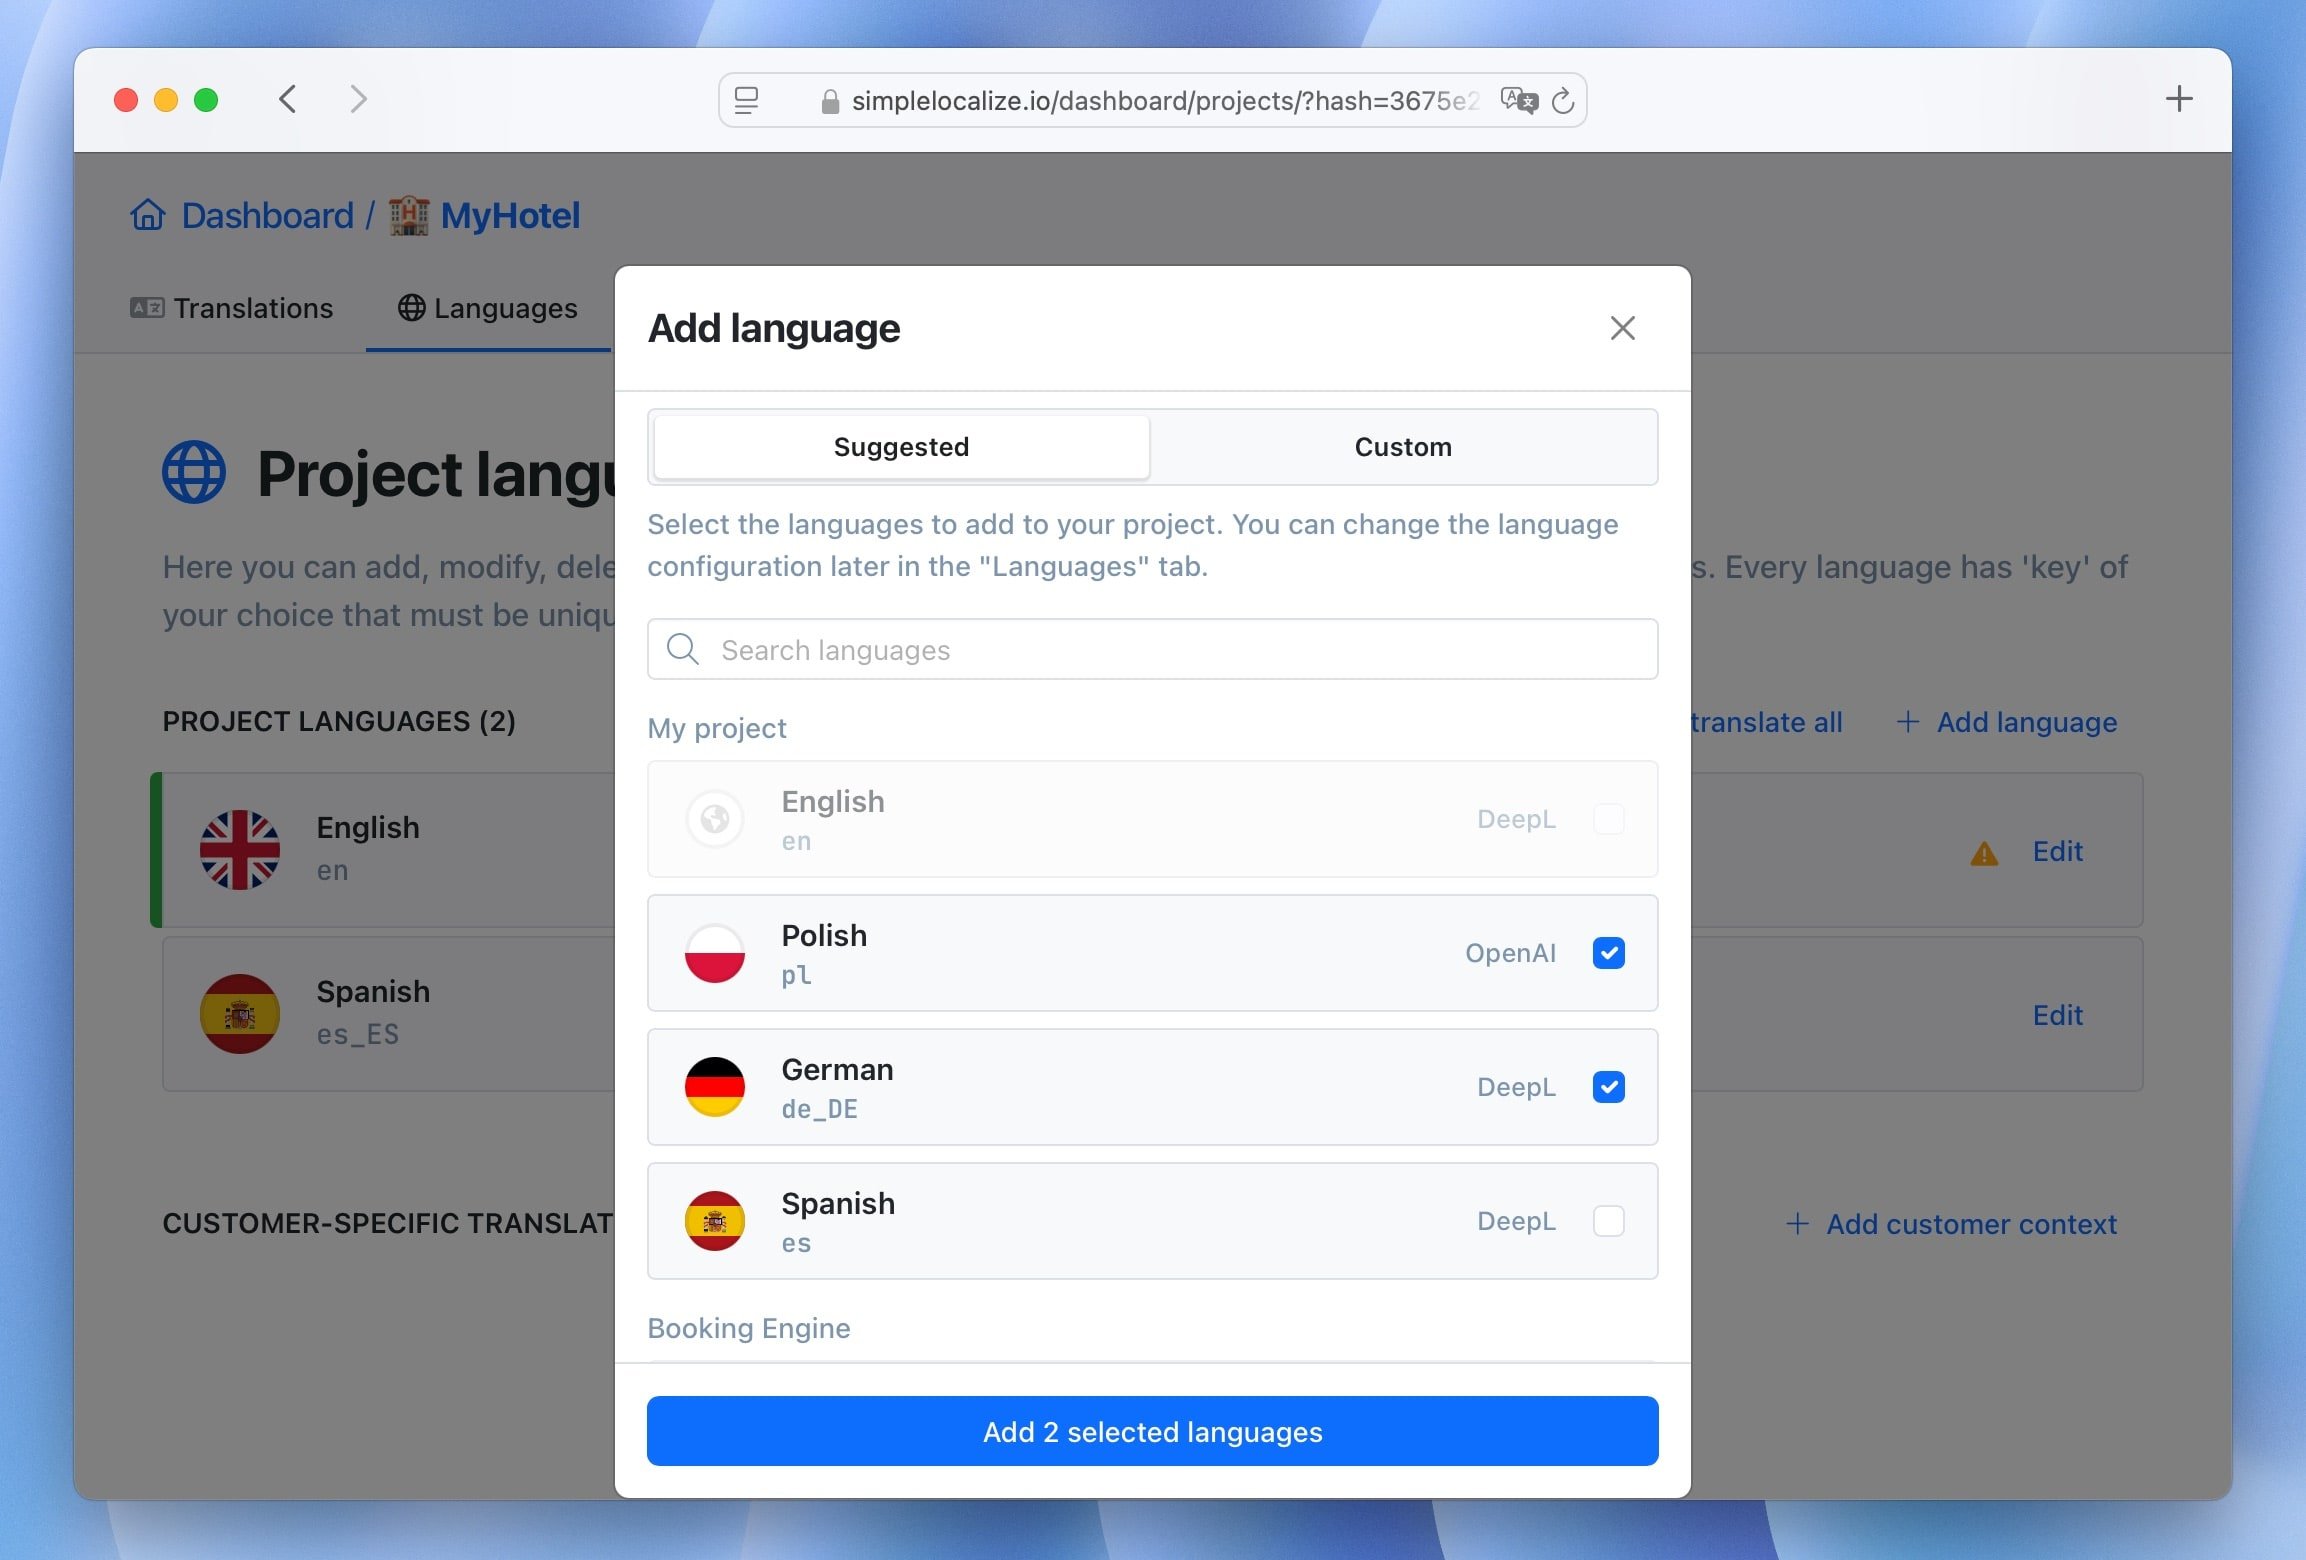
Learn more about [managing languages](/docs/general/languages/).
## Auto-translate
Before you start auto-translating, we recommend choosing your **preferred machine translation provider** in the language settings.
DeepL and OpenAI will give you the best results for most languages, but you can also choose Google Translate if you prefer it.
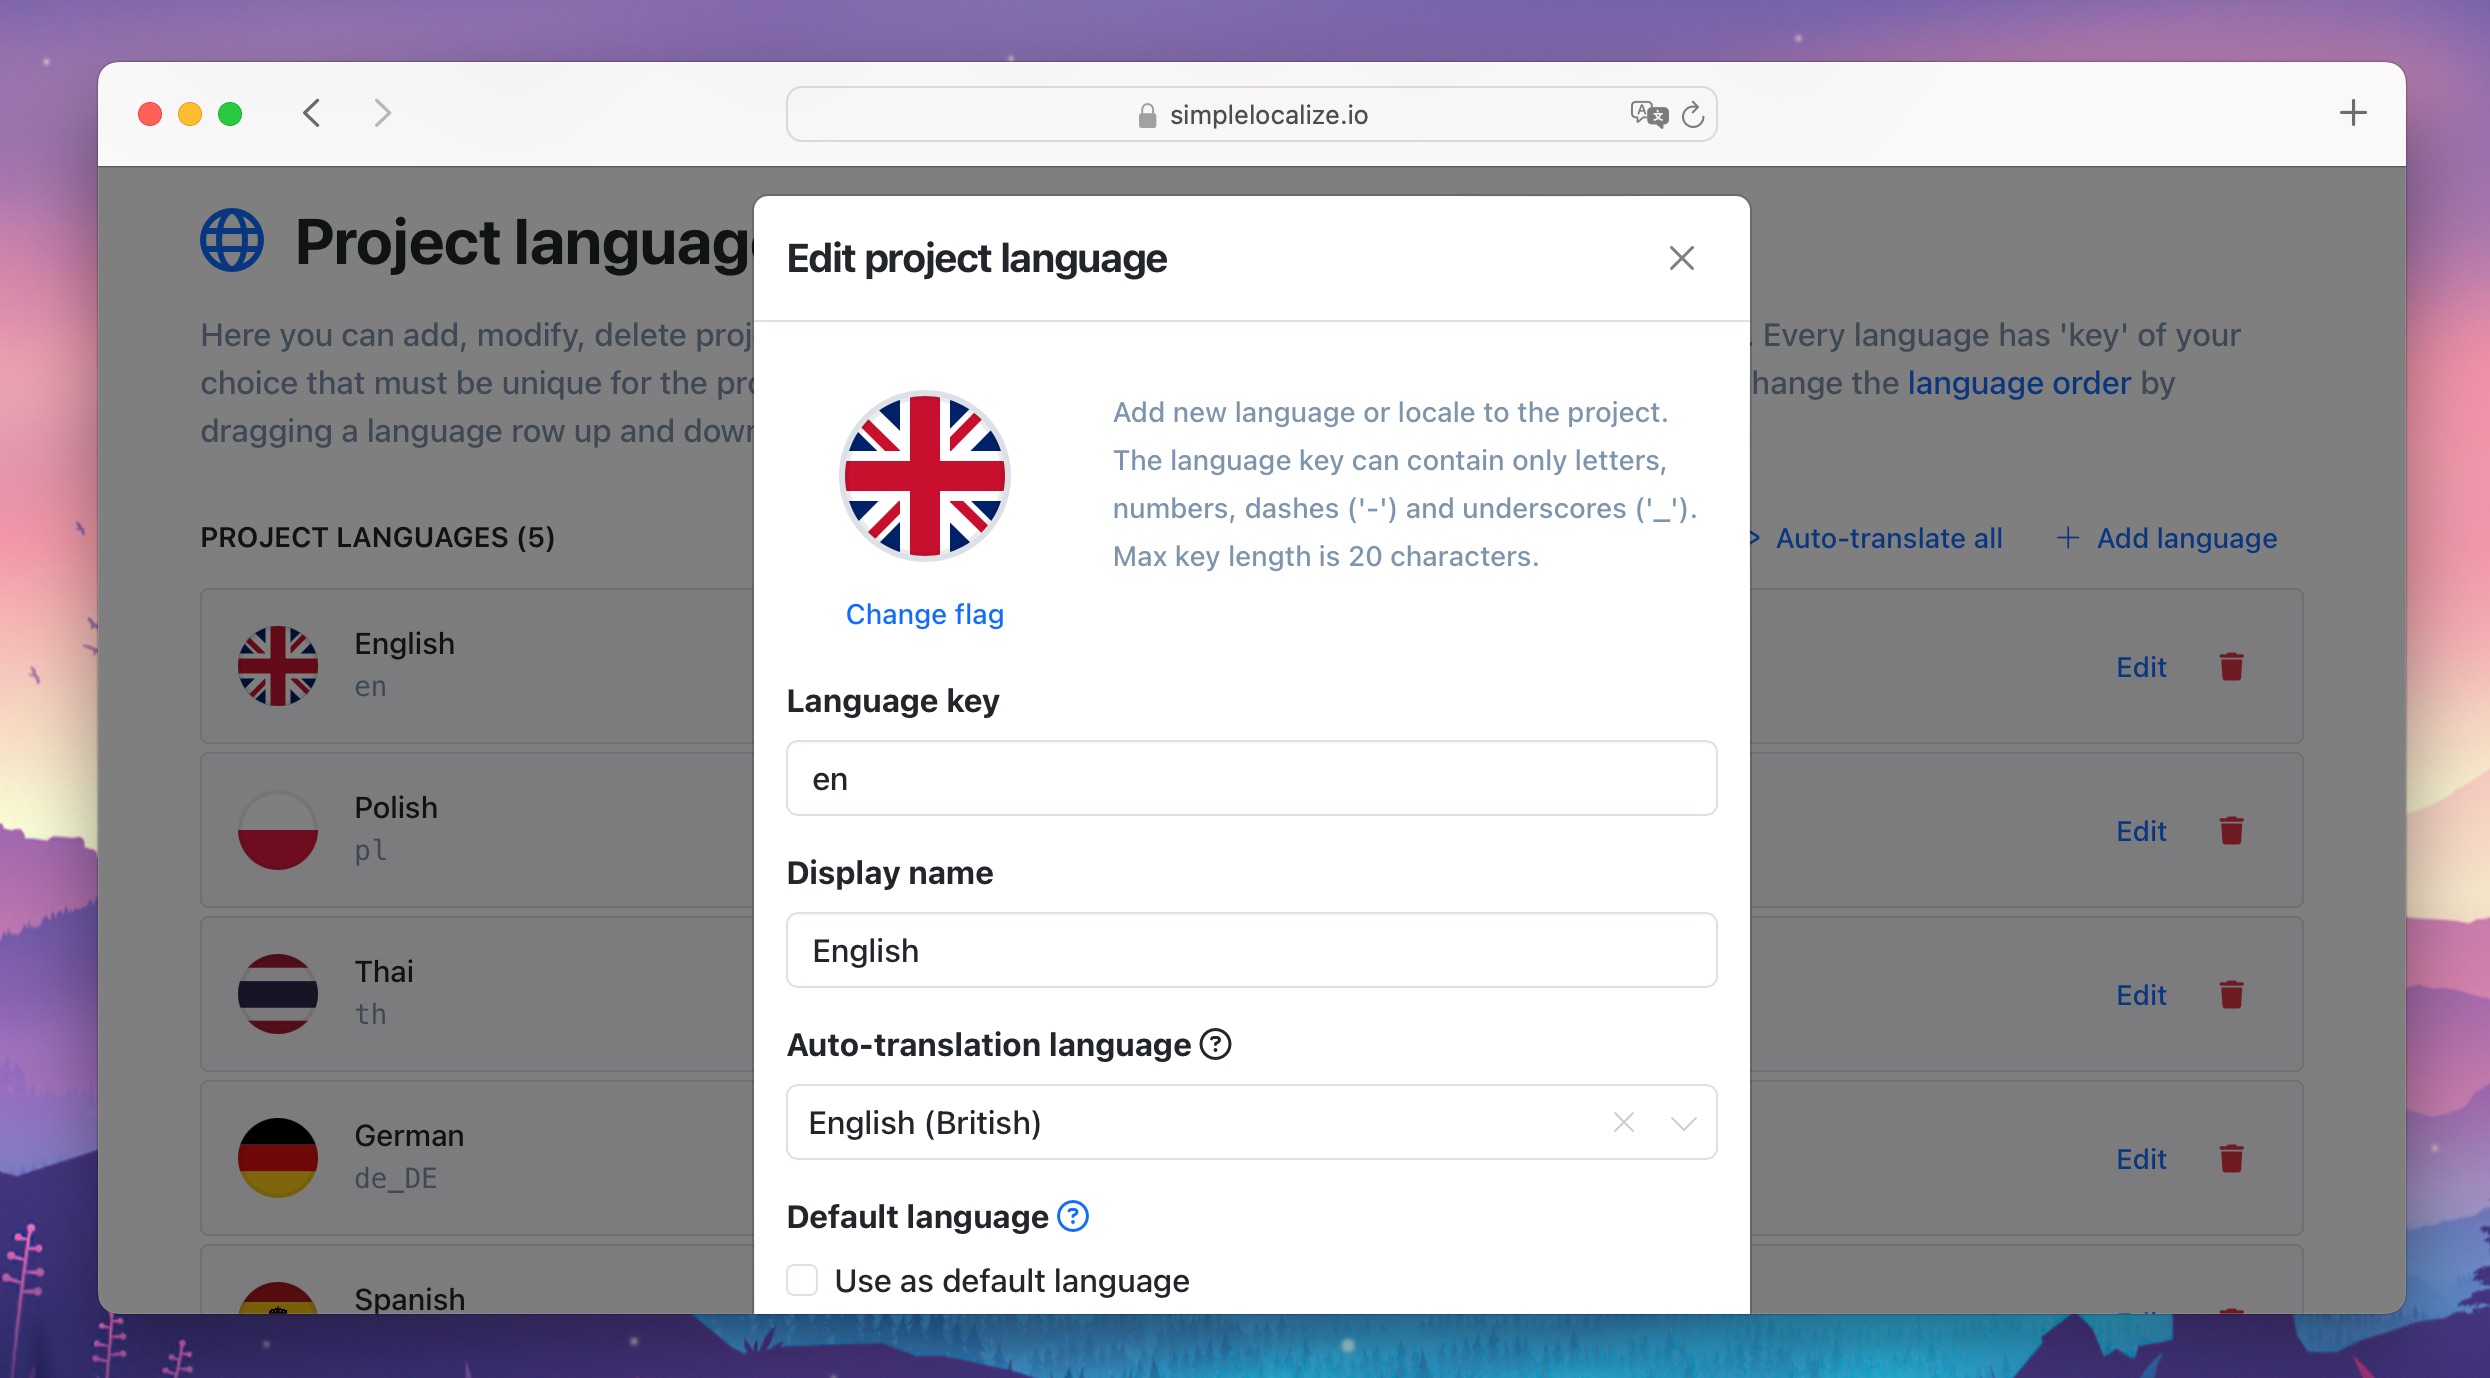
Now, you can auto-translate all or selected languages from the "**Languages**" tab or selected translations from the "**Translations**" tab.
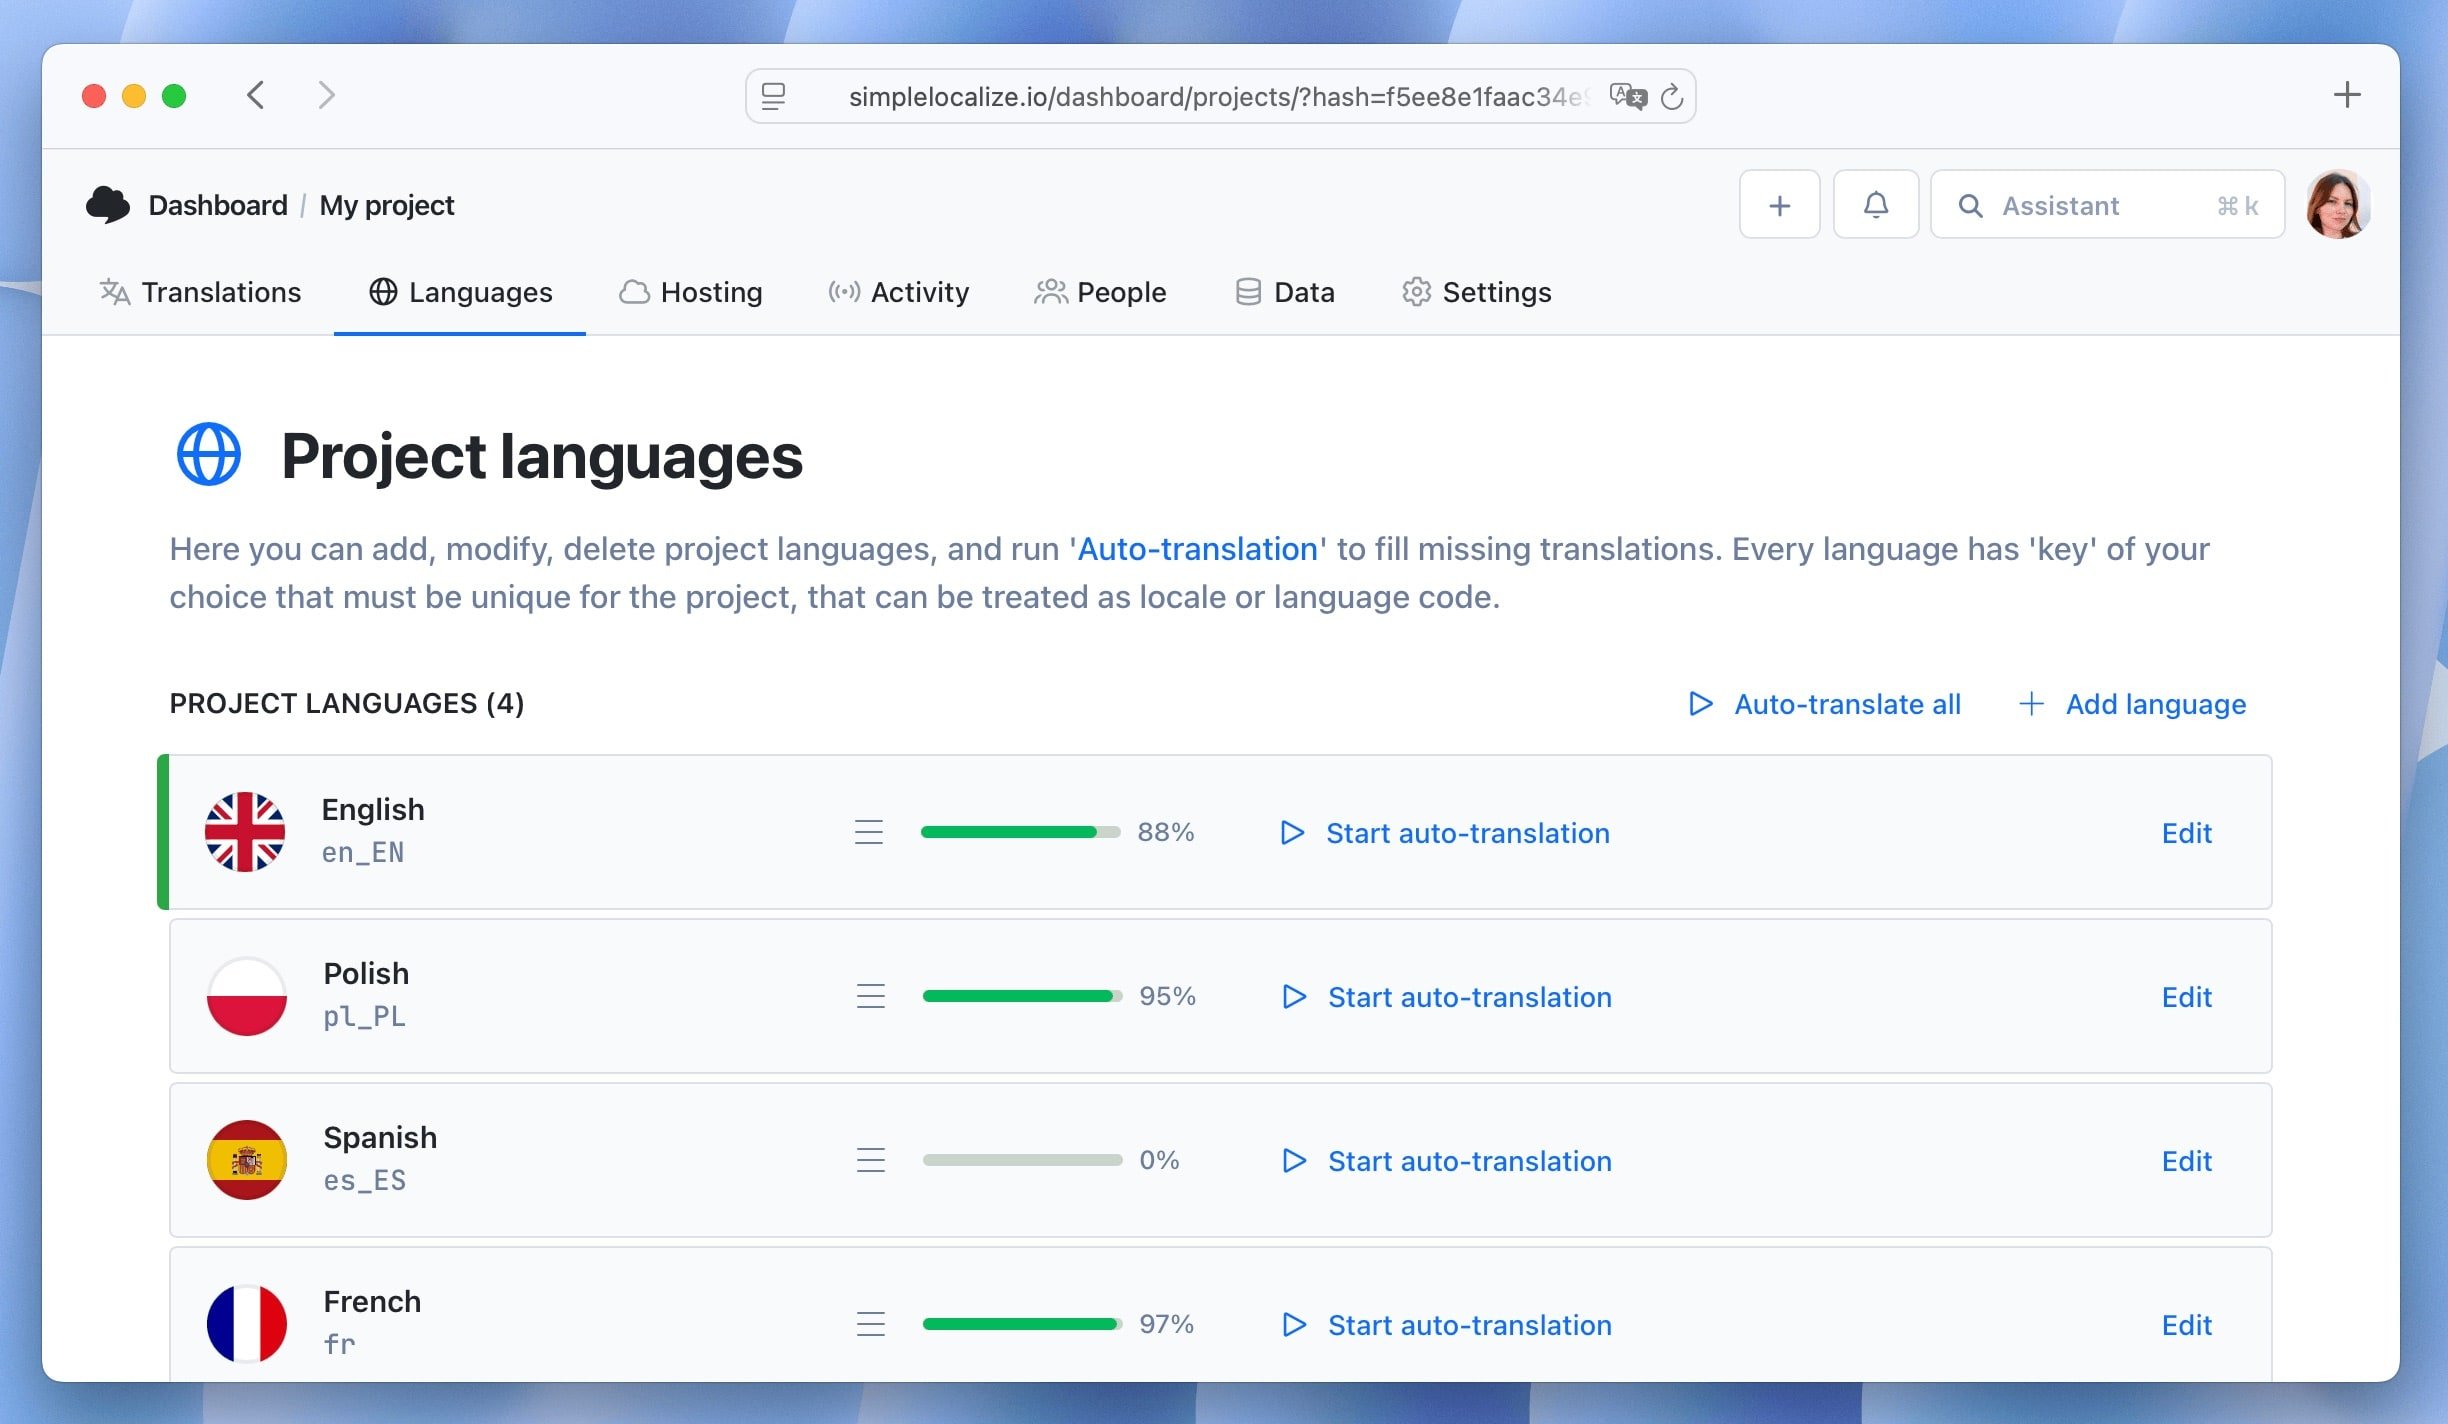
Auto-translation has an auto-translation character limit depending on your plan. You can check your remaining characters in [Billing & Usage](/dashboard/subscription/). You can also [use your custom API keys](/docs/general/auto-translation/#custom-api-key) to avoid the limit or purchase additional characters.
Learn more about [auto-translation](/docs/general/auto-translation/).
## Invite your team
You can invite your team members to collaborate on your localization project from the "**People**" tab in your project. Note that your team members assigned as **Project administrators** will have access to the current project only.
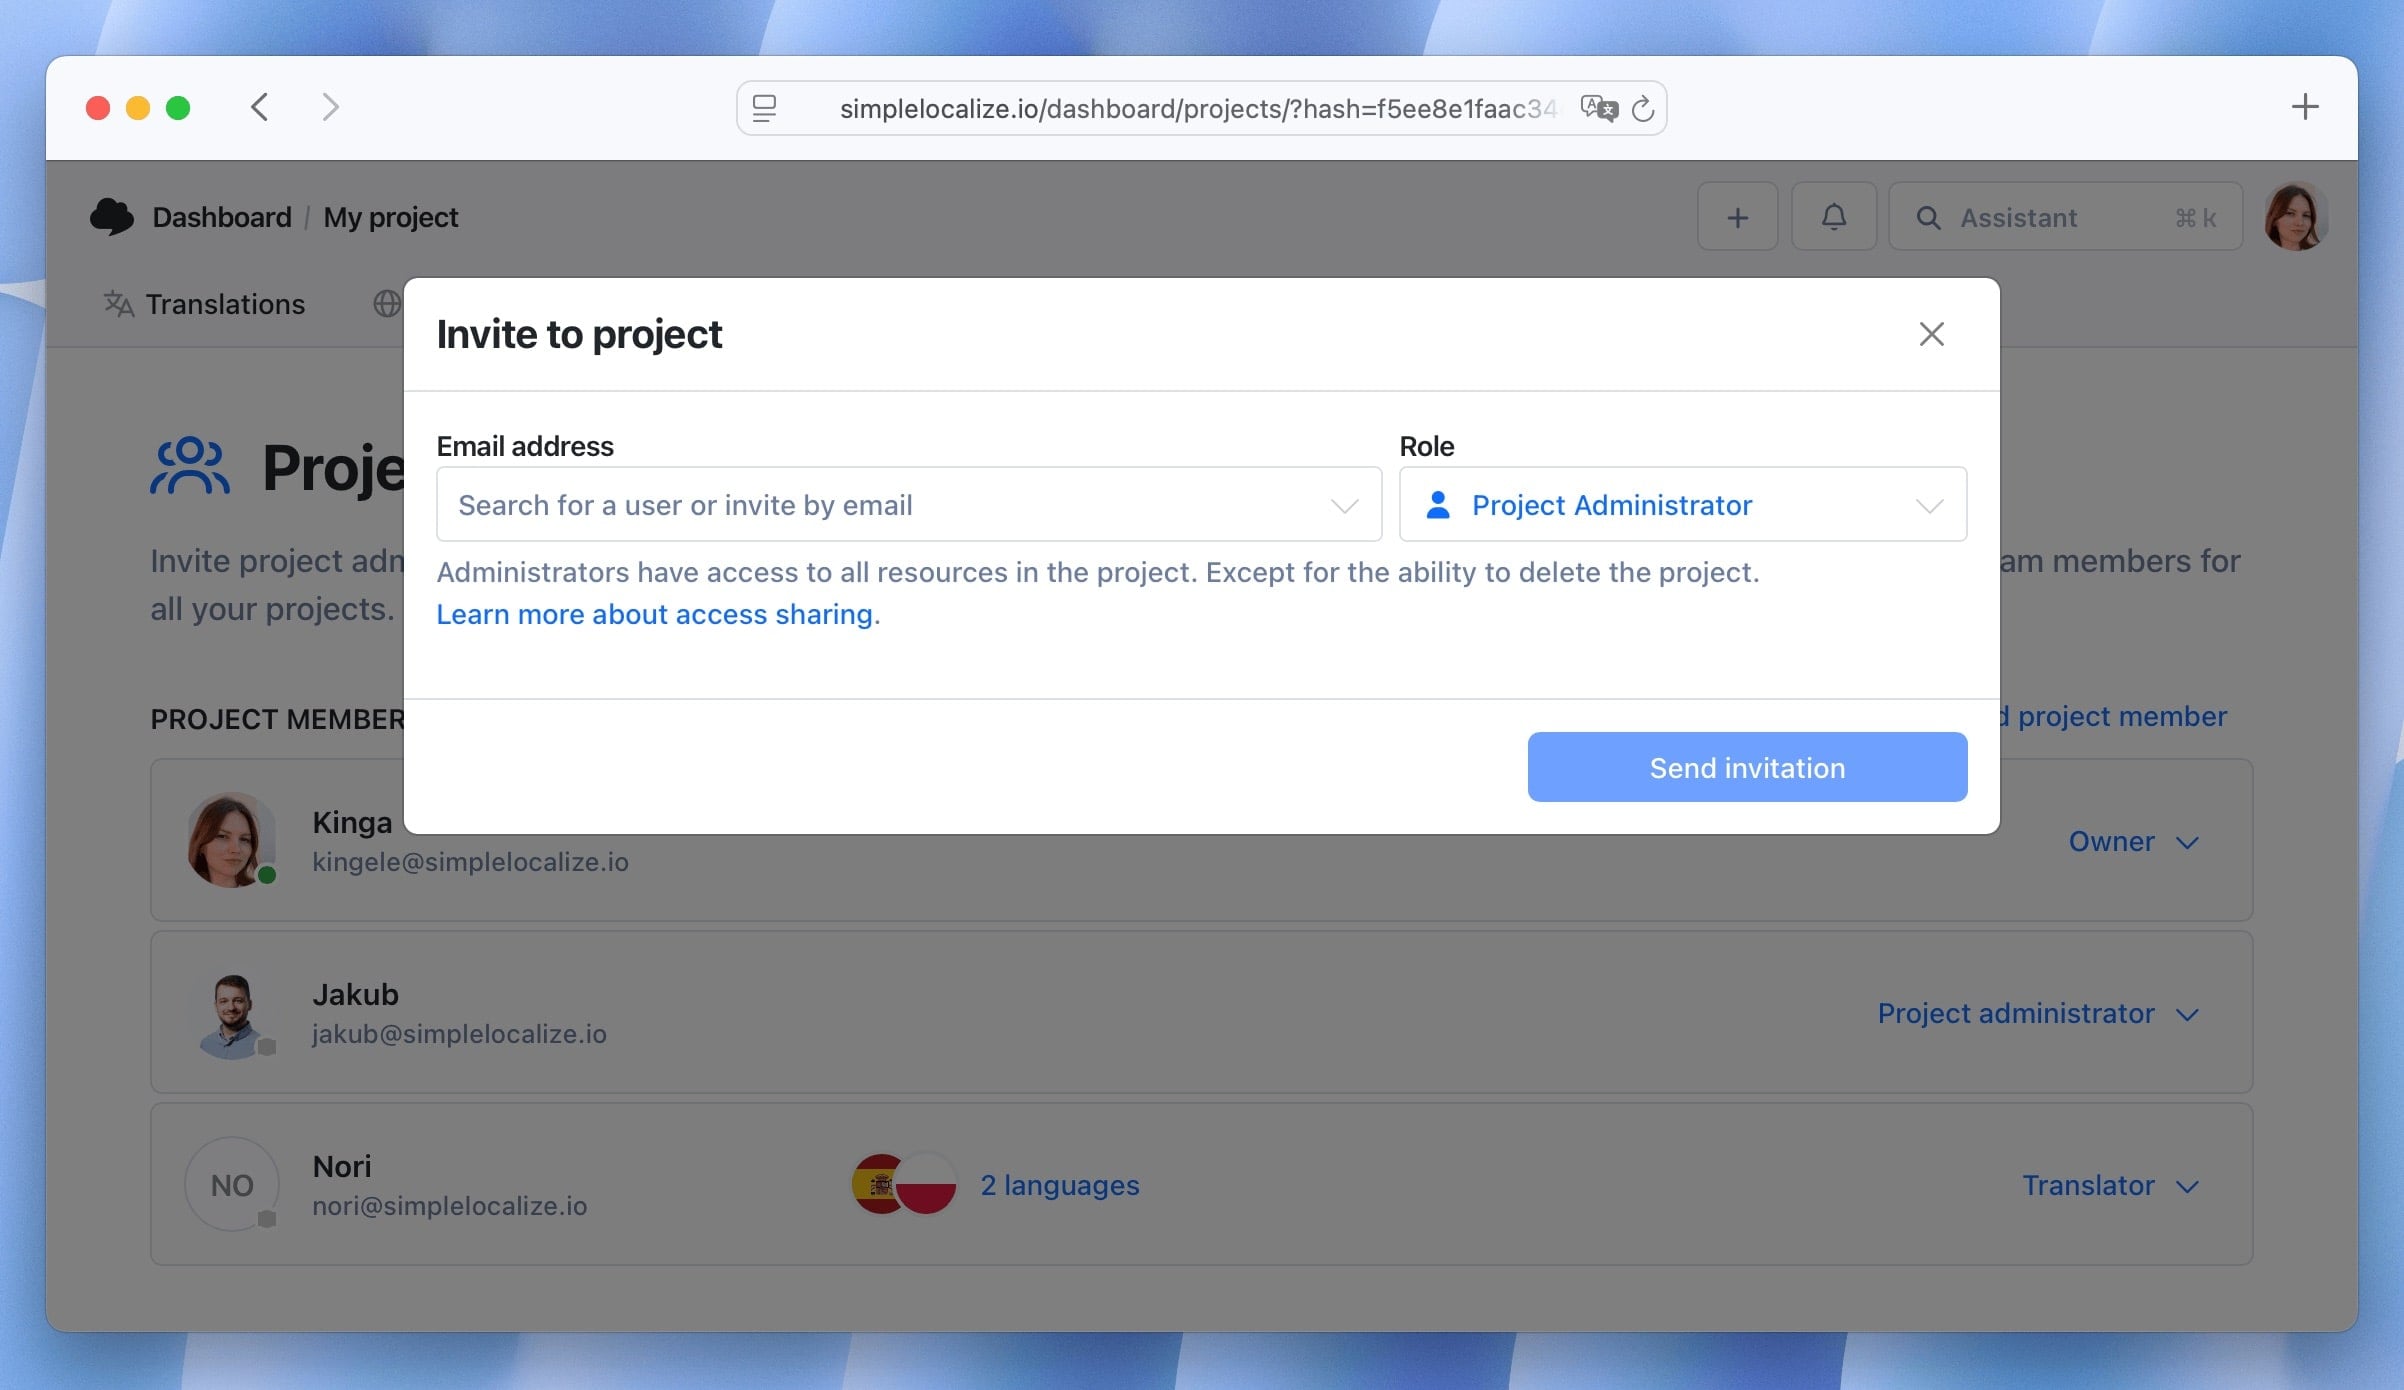
Invite your team as **Administrators** to your organization to access all projects. Go to your account settings in the top right corner and open the "**Team**" section. Here, you can invite new team members and manage their access, roles and permissions.
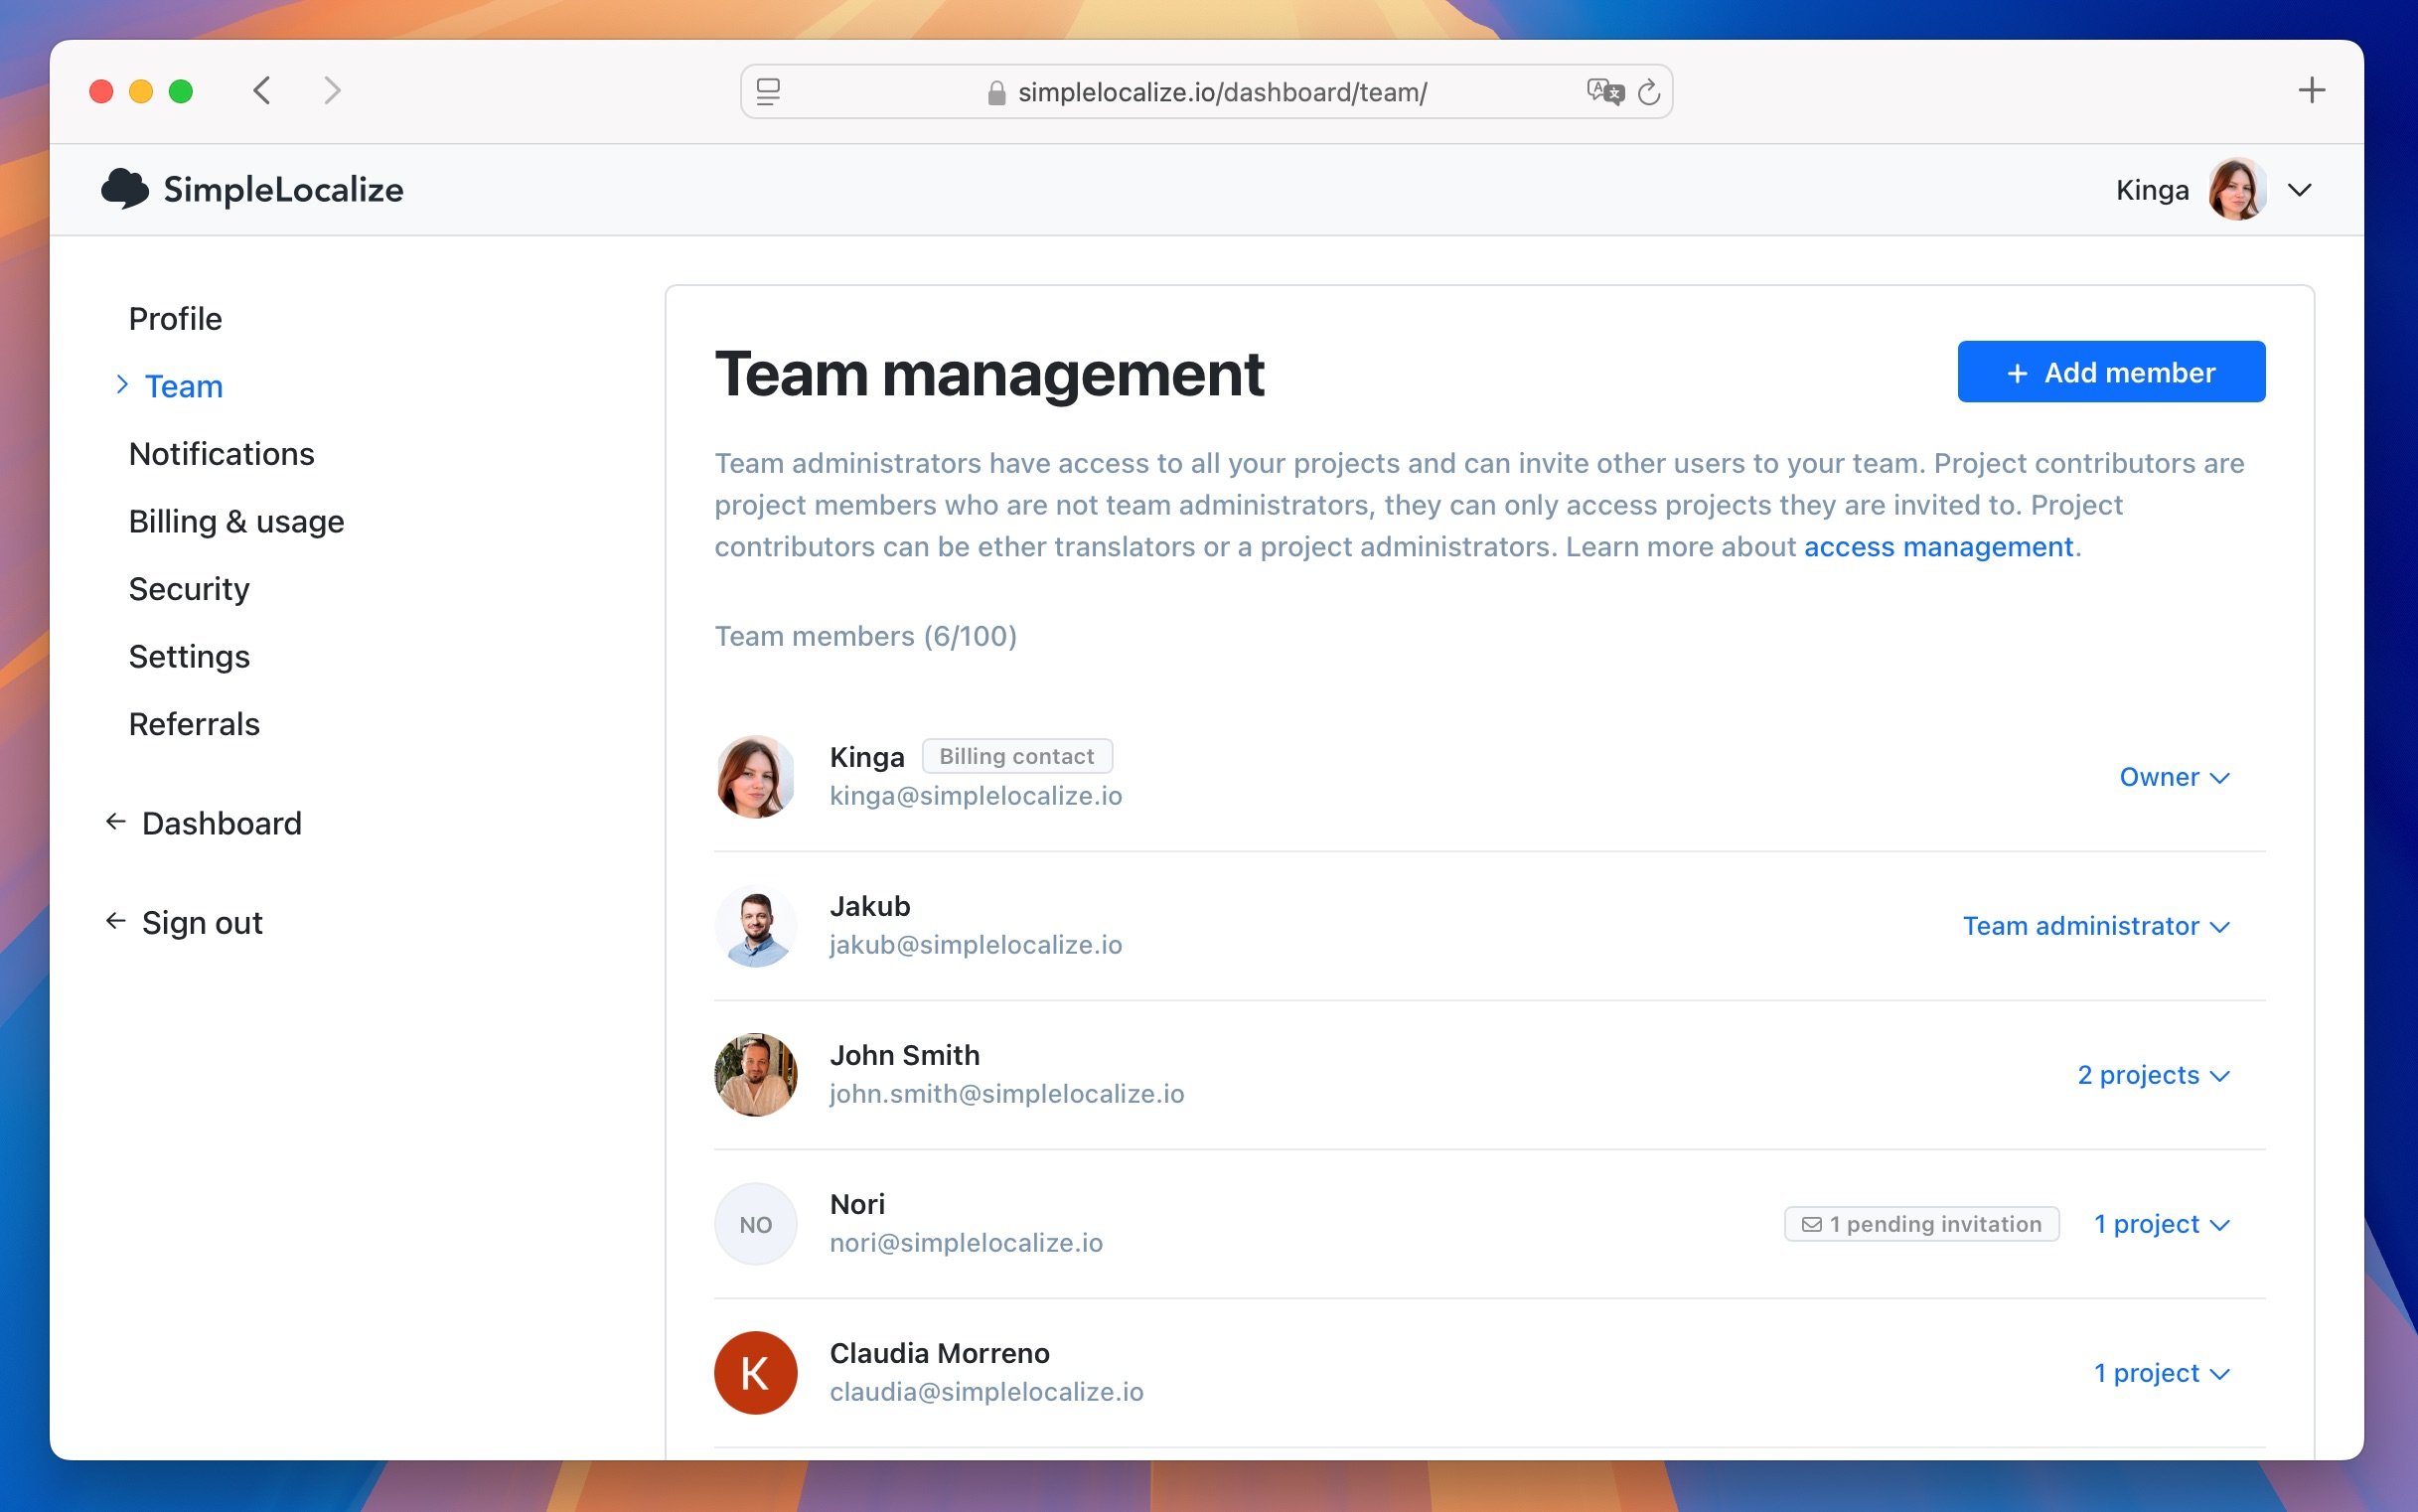
Learn more about [project sharing and team management](/docs/general/project-sharing/).
## Build your workflow
**Export your translations** and integrate with your app. You can download translation files manually from the "**Data**" tab in your project.
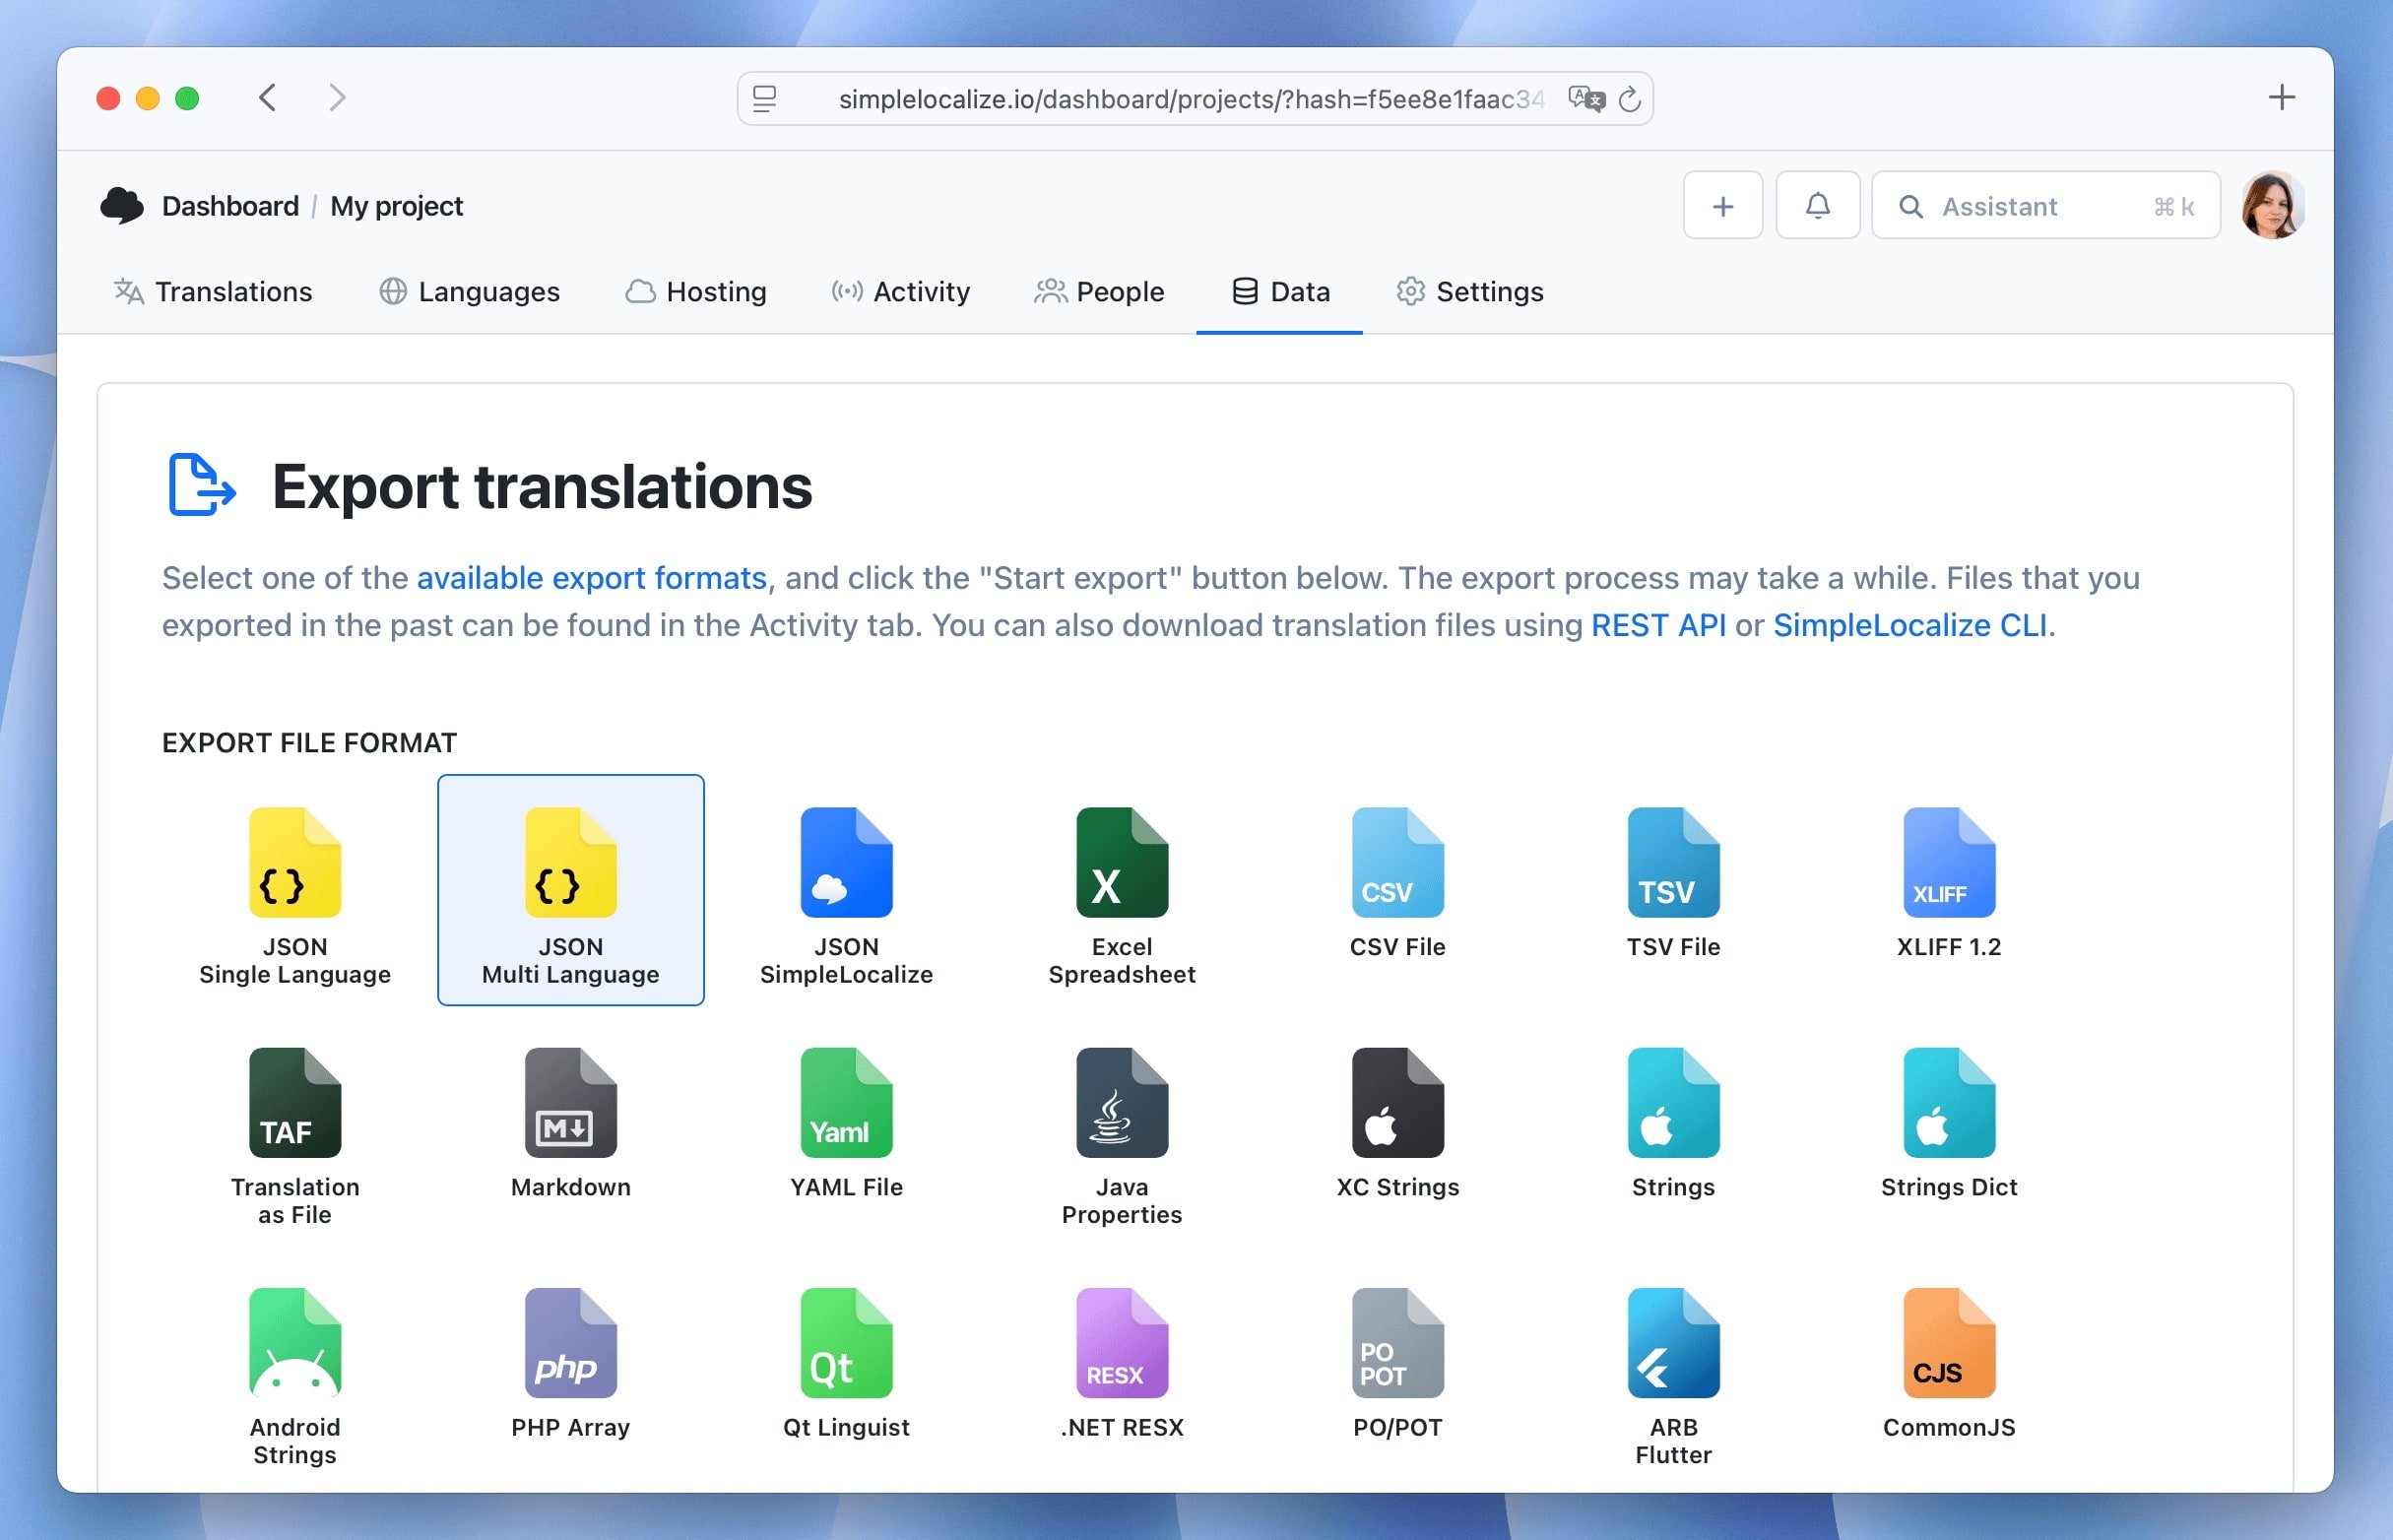
There are several ways to integrate SimpleLocalize with your app for a really sooth **continuous localization workflow** and automatic translation updates. Decide which method works best for you:
- [Translation hosting](/docs/translation-hosting/get-started/): download translation files directly from the cloud.
- [SimpleLocalize CLI](/docs/cli/get-started/): use CLI to download translations and integrate with your build process.
- [GitHub App](/docs/integrations/github-app/): sync your translations with your GitHub repository.
- [GitHub Actions](/docs/integrations/github-actions/): automate your localization workflow using GitHub Actions.
- [REST API](/docs/api/get-started/): manage your translations using SimpleLocalize localization API.
Check all available [integrations](/integrations/).
## Beyond the basics
Automate and improve your localization workflow with additional SimpleLocalize features:
### Developer tools
Install SimpleLocalize developer tools to manage your translations directly from your code editor:
- [VS Code extension](/docs/integrations/vscode/): manage translations without leaving your IDE
- [IntelliJ IDEA plugin](/docs/integrations/intellij/): manage translations in JetBrains IDEs
- [MCP server](/docs/integrations/model-context-protocol/): manage translations using AI agents, e.g. ChatGPT, Claude etc.
### Automations
Set up automations to **automate repetitive tasks** in your localization project. For example:
- **Run auto-translation** when new keys are added or translation edited in the default language
- **Mark translations as "Needs review"** when edited
- **Clear other languages** translations when the default language is edited
- **Auto-publish translations** to CDN after auto-translation
- **Notify your team** on Slack, Discord or Teams when something happens via [webhooks](/docs/general/webhooks/)
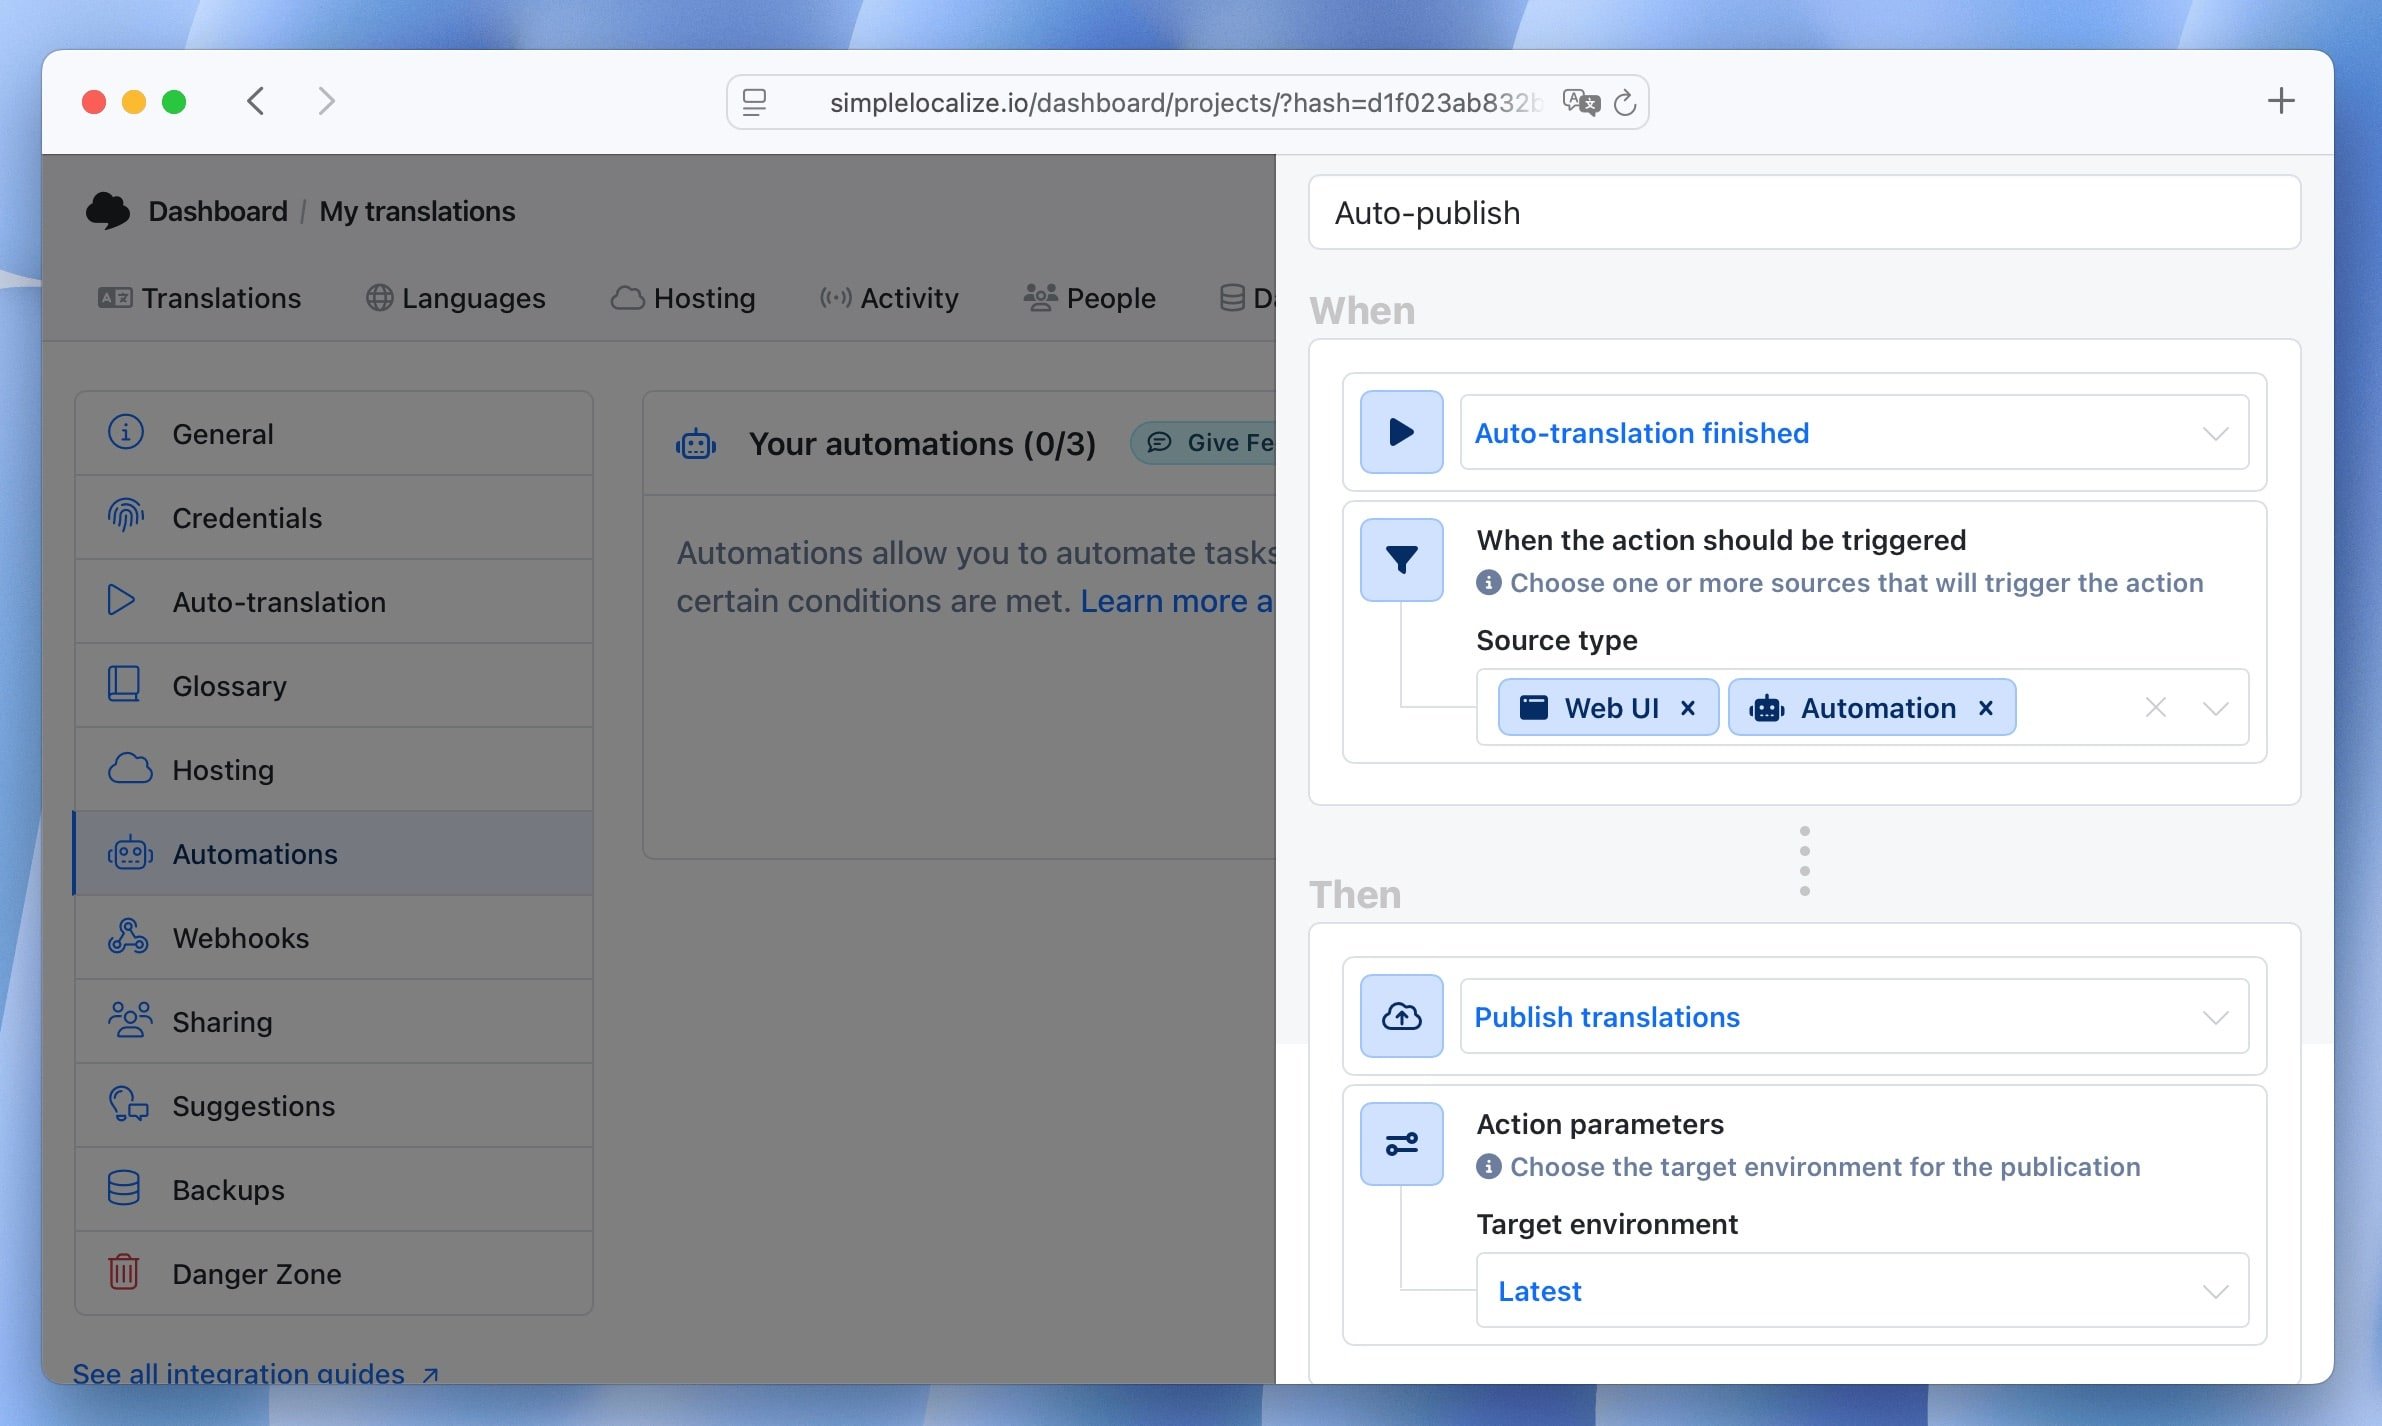
Learn more about [using automations](/blog/posts/automations/).
### Crowdsource translations
Gather translation suggestions and reports about missing or wrong translations from your users with **Community**. You can enable it in the project settings and share a public link to your Community page.
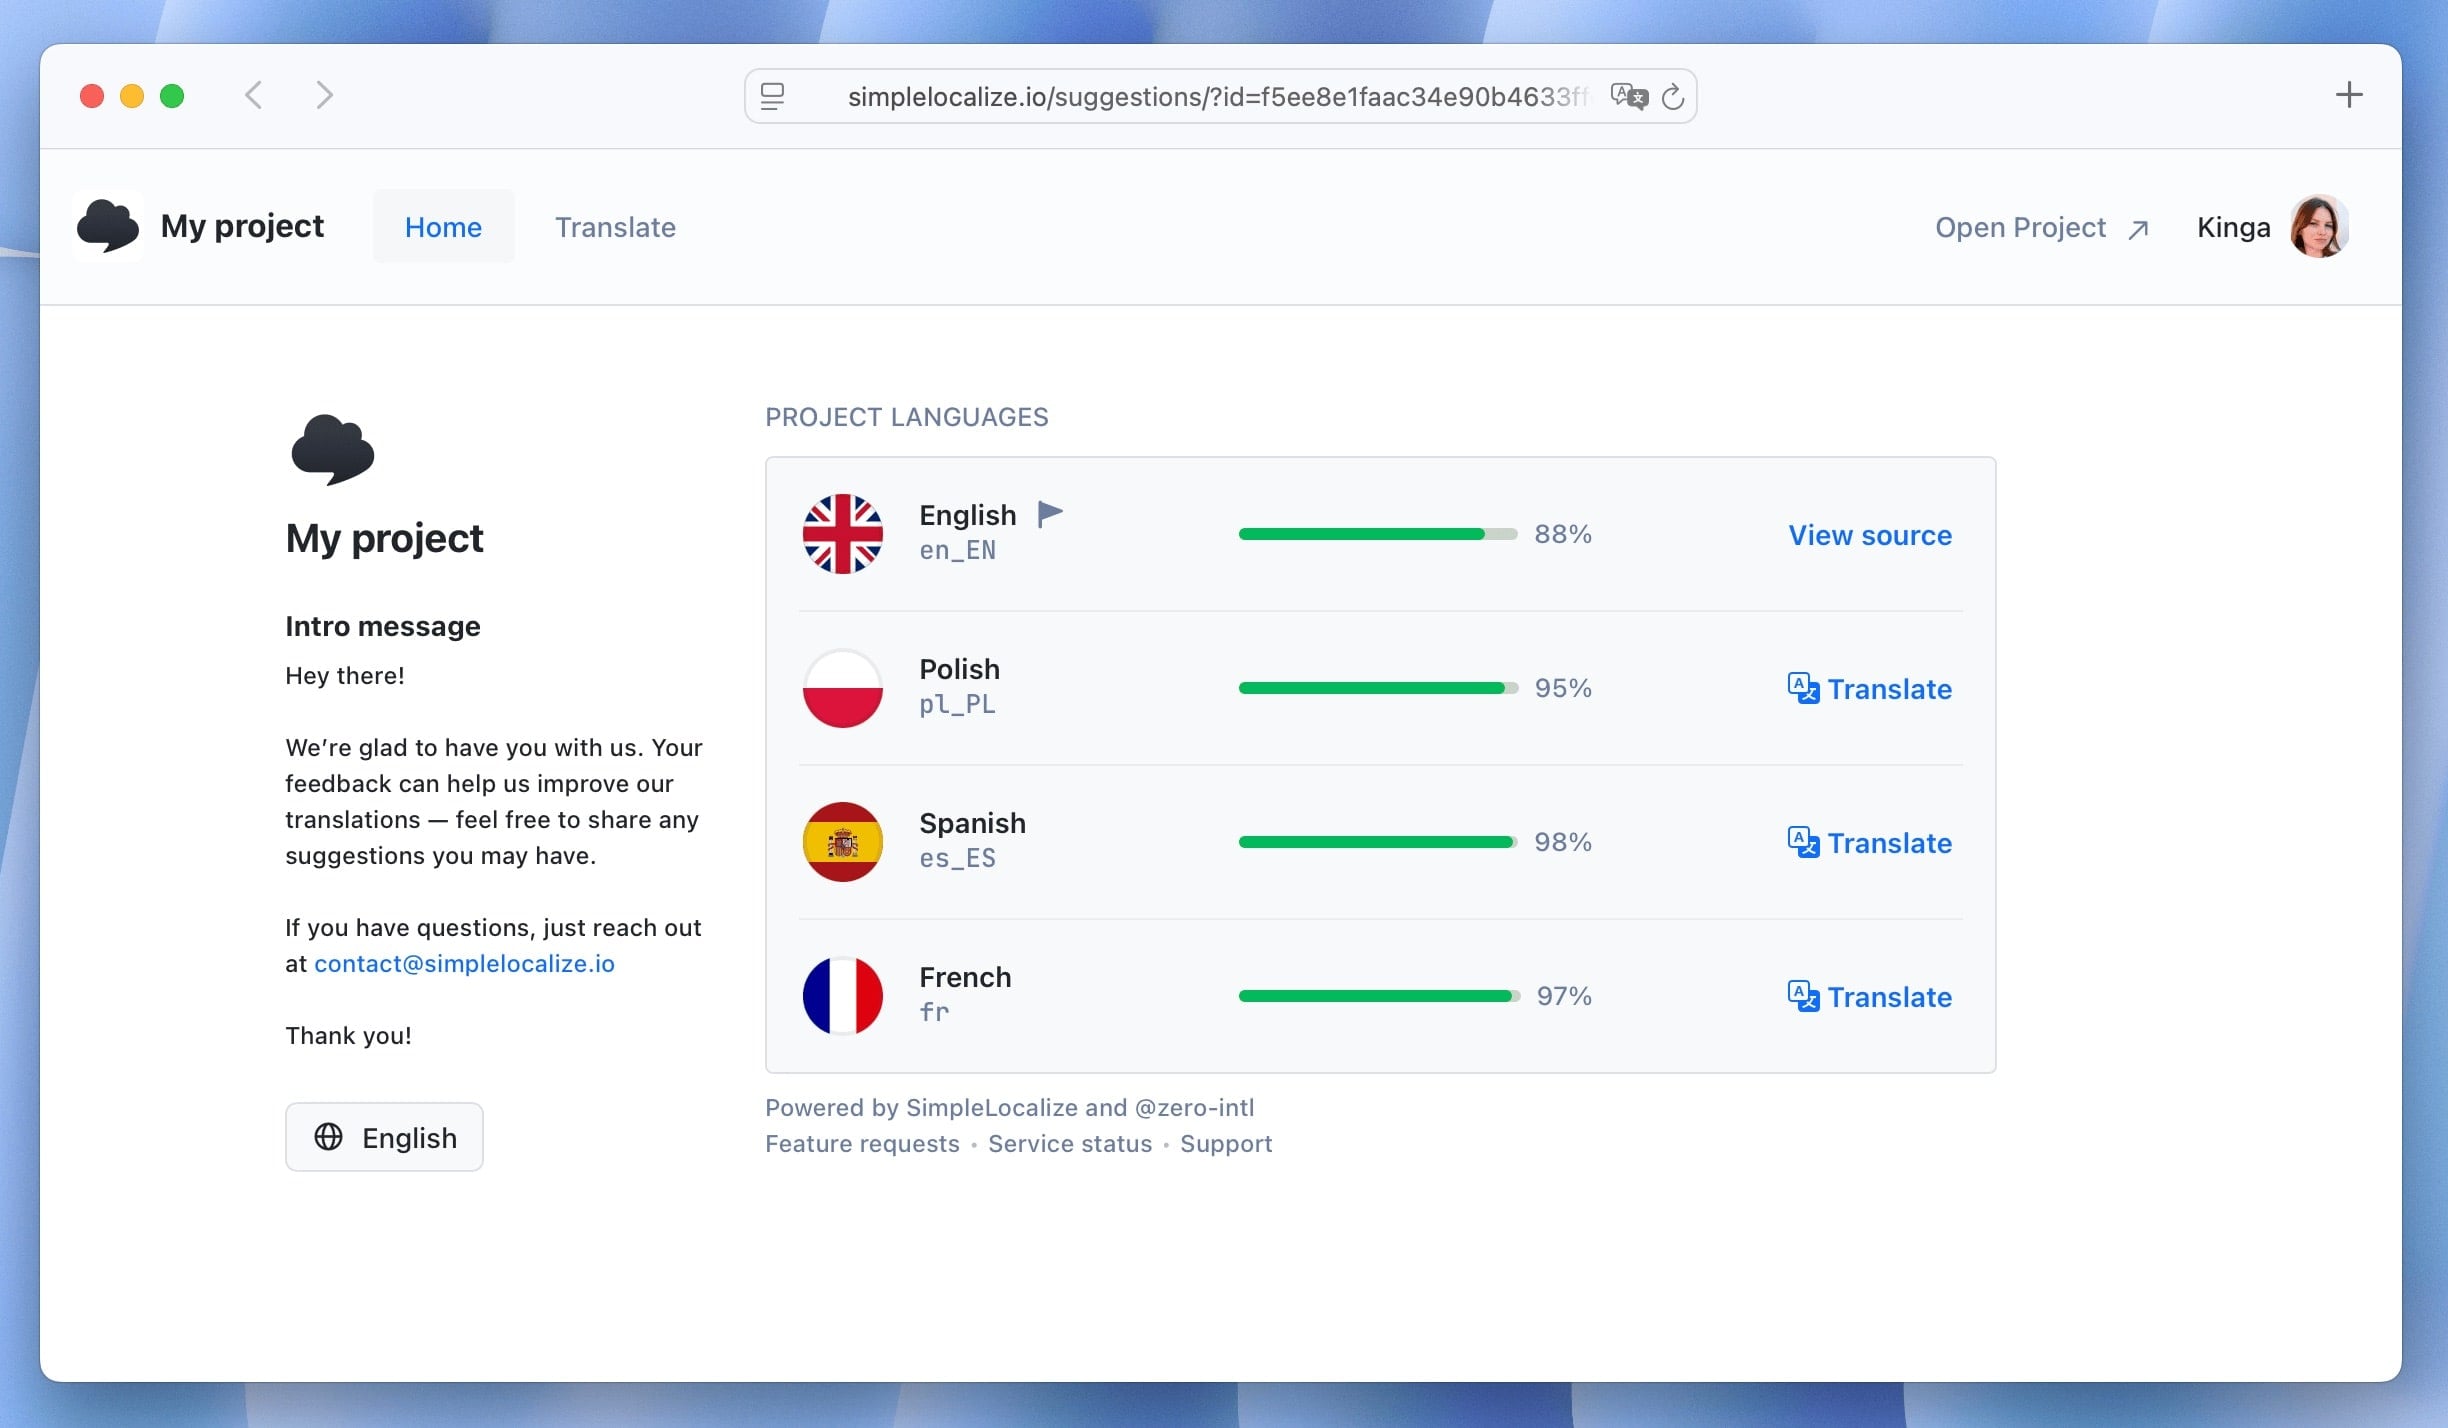
Learn more about [Community](/docs/general/public-suggestions/).
---
# General: Access sharing
Source: https://simplelocalize.io/docs/general/project-sharing/
Invite your team and translators to SimpleLocalize and work together on your multi-language projects.

## Roles
In SimpleLocalize, we distinguish 5 user roles: owner, administrator, project administrator, developer, and translator. Each role has its own set of permissions and access levels.
### Owner
Owner is the highest role in SimpleLocalize. The owner is the user who created the subscription and has full access to all projects and subscription settings.
The project owner has the highest authority in the project. The project owner can:
- manage subscription settings,
- manage the project settings,
- invite other project members to the organization and projects,
- delete projects,
- set users as [administrators](#administrator),
- [transfer ownership to another user.](#transfer-project)
### Administrator
Administrator role is having access to all the projects automatically within the subscription.
Administrators have all the permissions of project owner, except for the following:
- delete projects,
- manage the subscription,
- view invoices,
- increase auto-translation limit.
To set a user as an administrator, go to the [Team](/dashboard/team/) section and select **Add as Administrator** from the dropdown menu.

### Project administrator
Project administrator is a role that has access to only selected projects, they still can manage the project settings, but they cannot manage access levels for other projects and users.
### Developer
Developer rights are equal to the Project administrator role, but with the following limitations:
Developers:
- don't have access to the project **Settings** tab,
- can only view the **People** tab; they can't invite, remove, or change the role/access of project members, and can't view or manage shareable invitation links.
### Translator
Translator is the role designed to be focused only on translations.
By default, translators have access to the following tabs:
- **Translations** tab
- **Languages** tab
- **Data** tab
- **Activity** tab
## Permissions
You can set permissions for translators to restrict their access to some parts of the project.
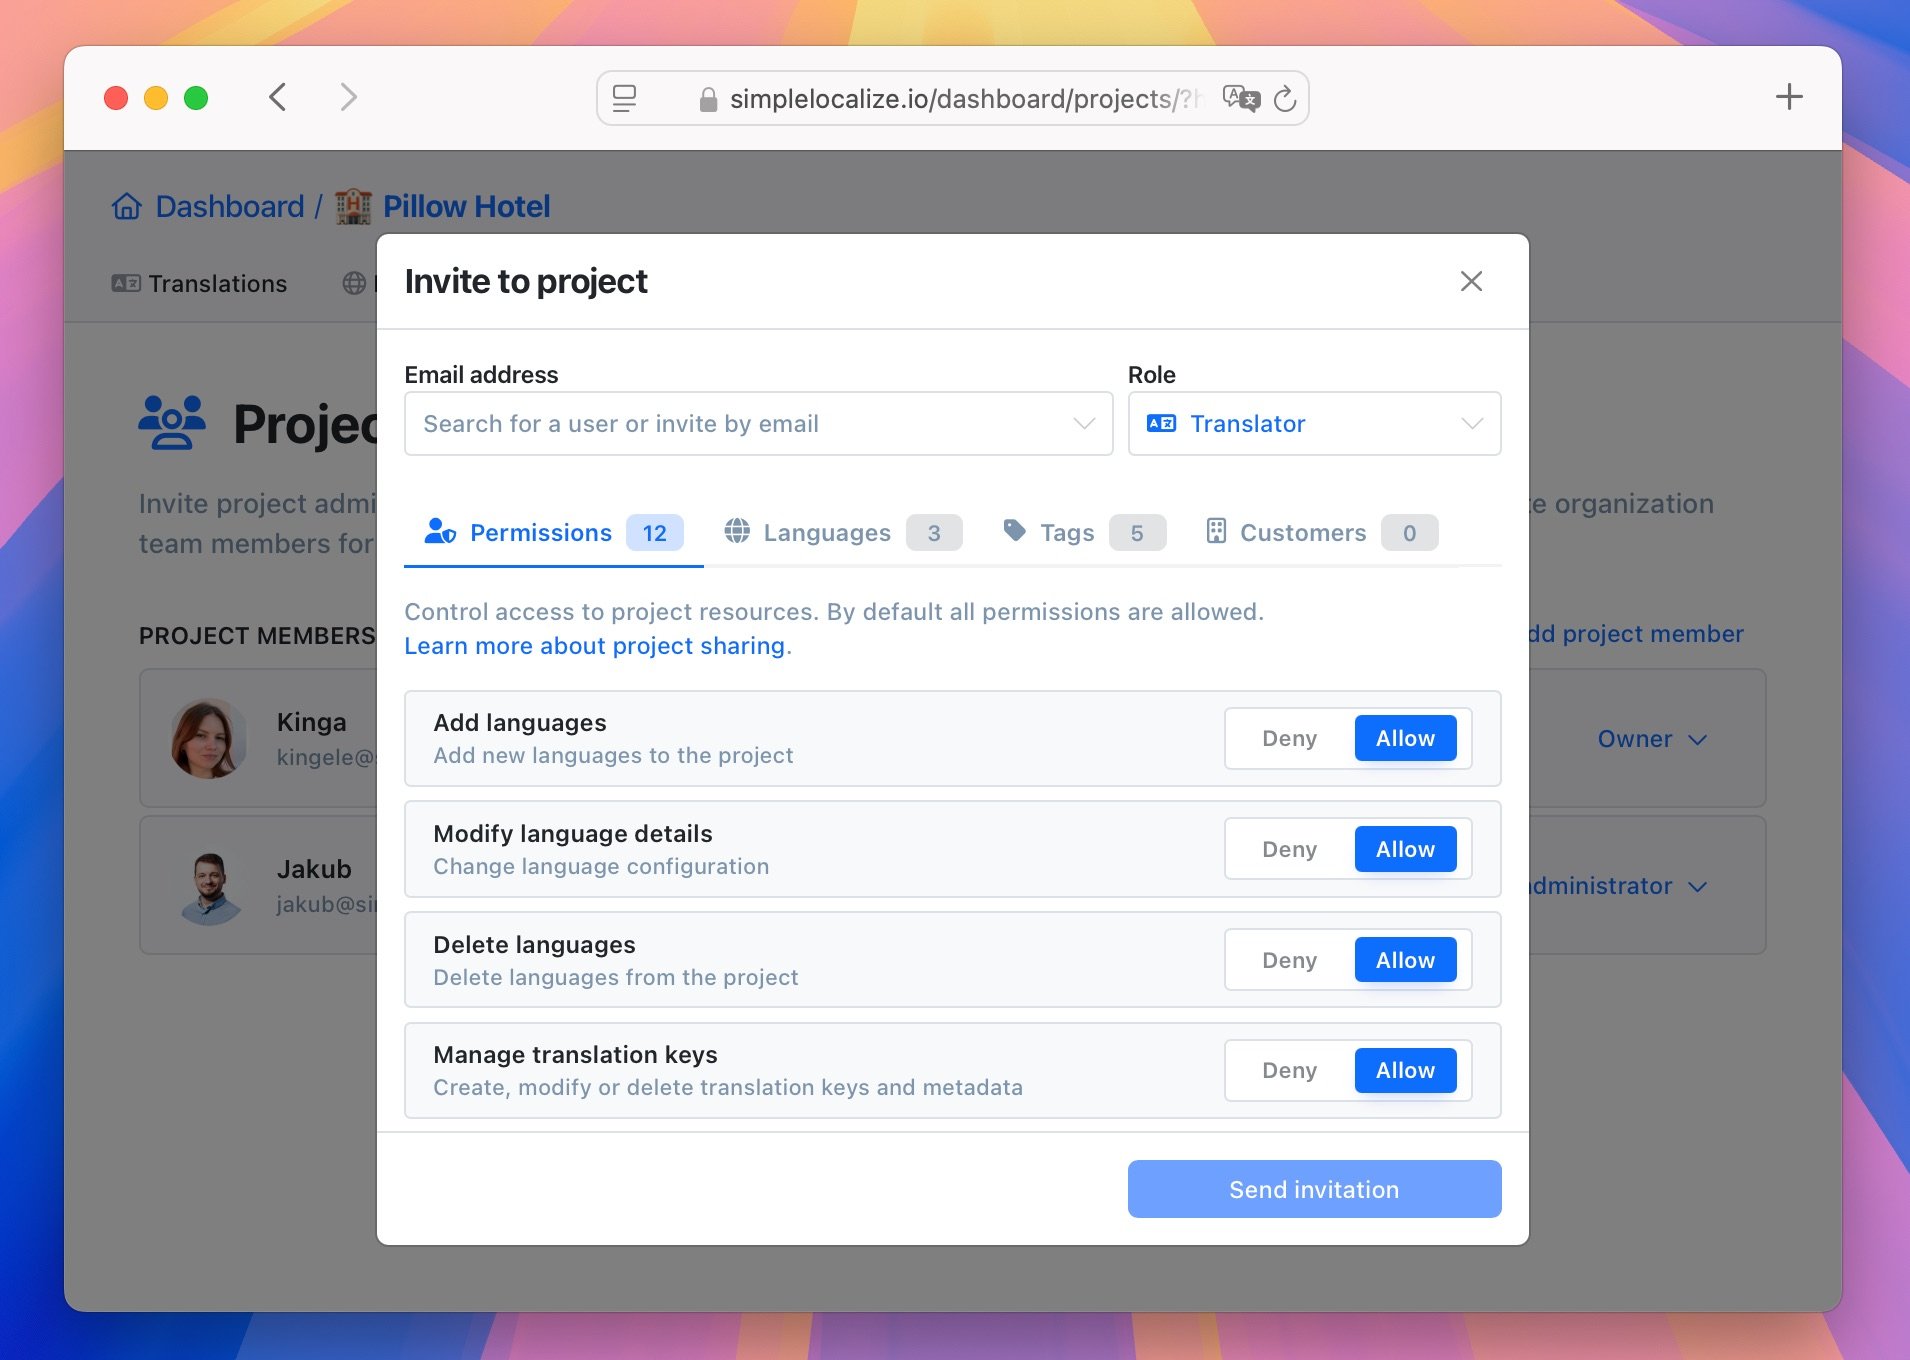
List of available permissions:
- **Manage languages**: allows adding, modifying, and deleting project languages in the 'Languages' tab.
- **Manage translation keys**: allows adding, modifying, and deleting translation keys in the 'Translations' tab.
- **AI & Auto-translation**: allows using auto-translation and AI features.
- **Publish translations**: allows publishing translations in the 'Translations' tab via the 'Save & Publish' button.
- **Import files**: allows importing data from the 'Data' tab, regardless of the assigned languages, tags, and other user permissions.
- **Export files**: allows exporting data from the 'Data' tab, regardless of the assigned languages, tags, and other user permissions.
- **View activity**: allows viewing activity in the 'Activity' tab.
- **Comments & Suggestions**: allows viewing and adding comments and suggestions.
- **Change description**: allows changing descriptions for translation keys in the 'Translations' tab.
- **Change translations**: allows changing translations for translation keys in the 'Translations' tab. It applies to all languages to which the translator has 'Edit' access.
- **Review translations**: allows reviewing translations for translation keys in 'Translations' tab. It applies to all languages to which the translator has 'Edit' access.
- **Change customer translations**: allows changing customer context translations for translation keys in 'Translations' tab. It applies to all languages to which the translator has 'Edit' access.
- **Review customer translations**: allows reviewing customer context translations. It applies to all languages to which the translator has 'Edit' access.
### Language access
By default, every translator has access to all project languages. They can view and modify translations for every language. With the language access permissions
you can restrict translator language access to **view only**, or **hide** some languages completely from the UI.
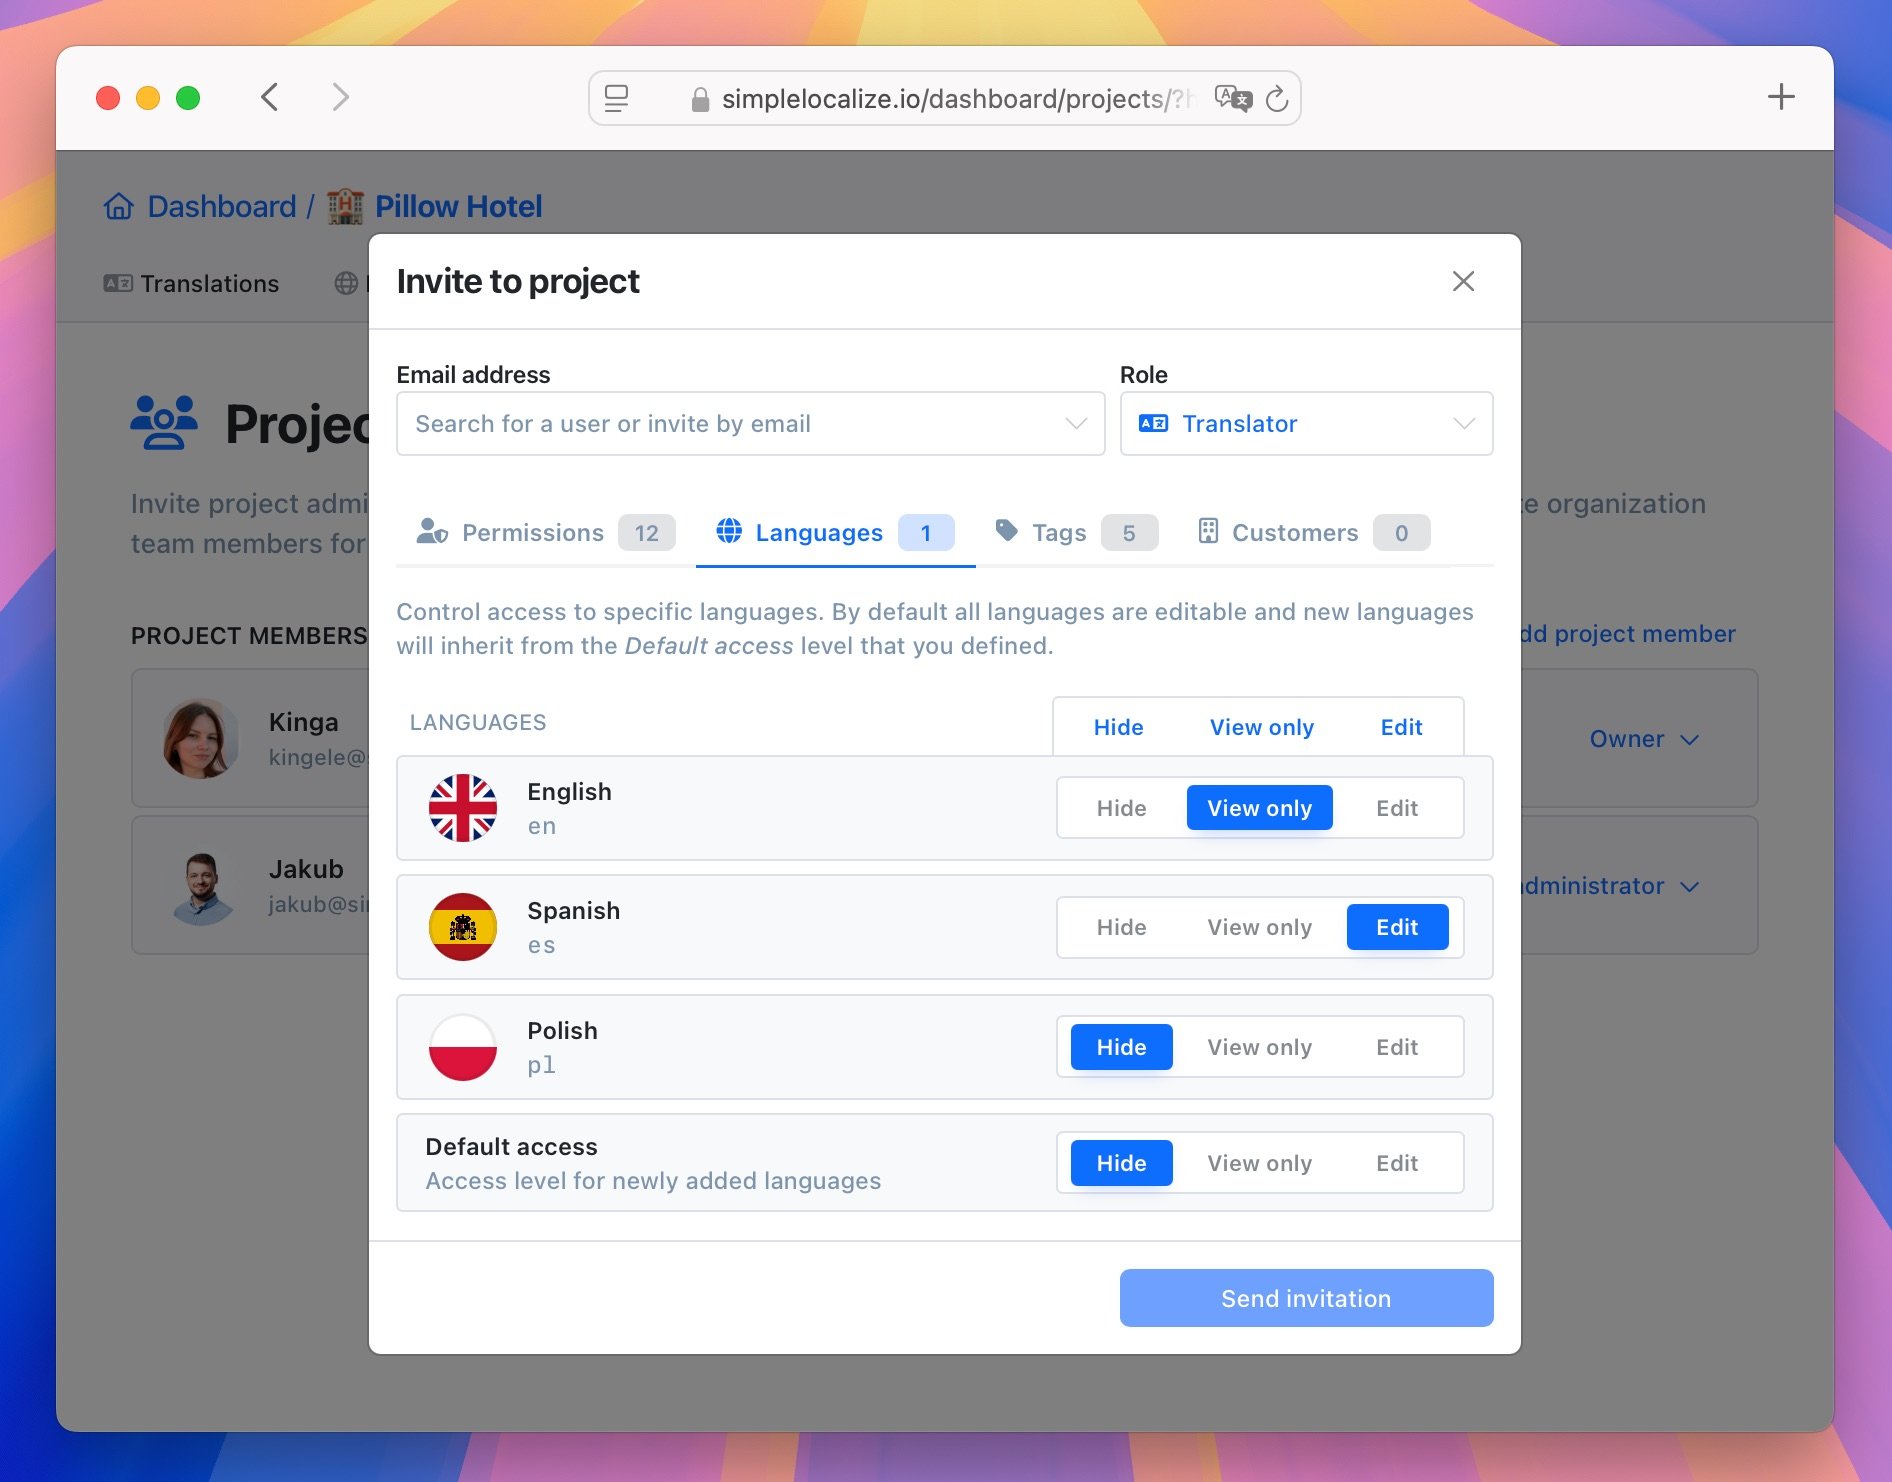
At the bottom of the language list, you can **adjust the default access for newly added languages**. You can set the default access to **view only**, **edit** or **hide**.
### Tags access
By default, every translator has access to all project tags. They can view translations for every tag. With the tags access permissions you can restrict translators access to **view translations with specific tags only**, or **hide** translations with tags completely from the UI.
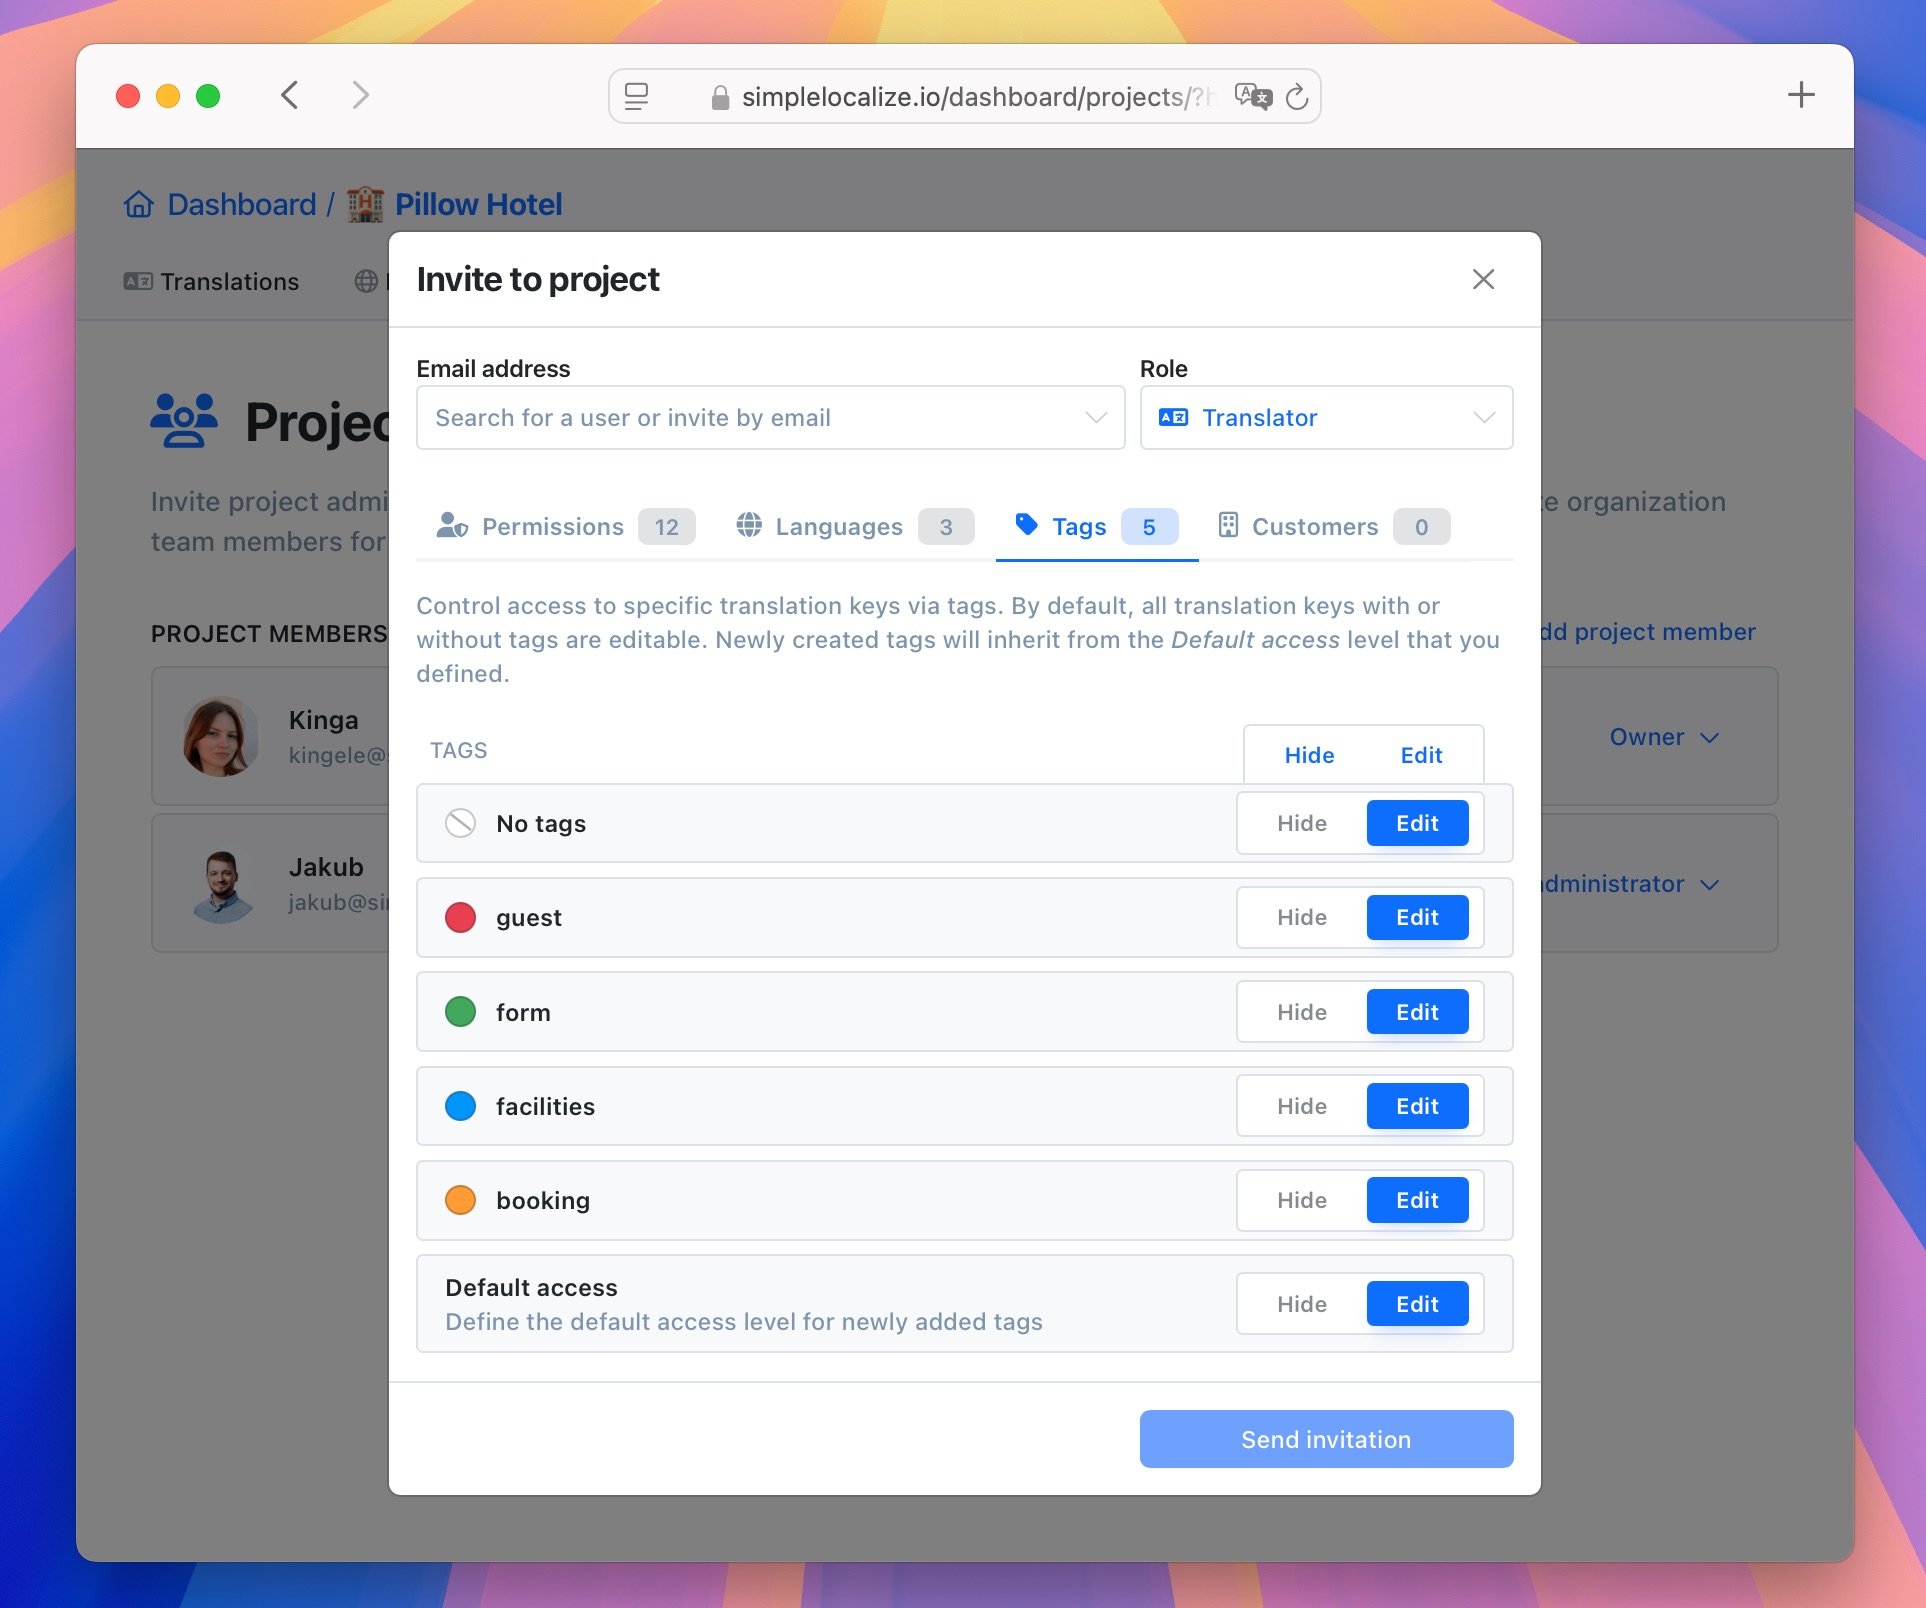
You can set the default access for newly added tags at the bottom of the tags list.
### Customer context access
By default, every translator has access to all customer context translations. They can view and modify customer context translations in languages they have access to.
With the customer context access permissions, you can restrict translator access to **view only**, or **hide** customer context translations completely from the UI.
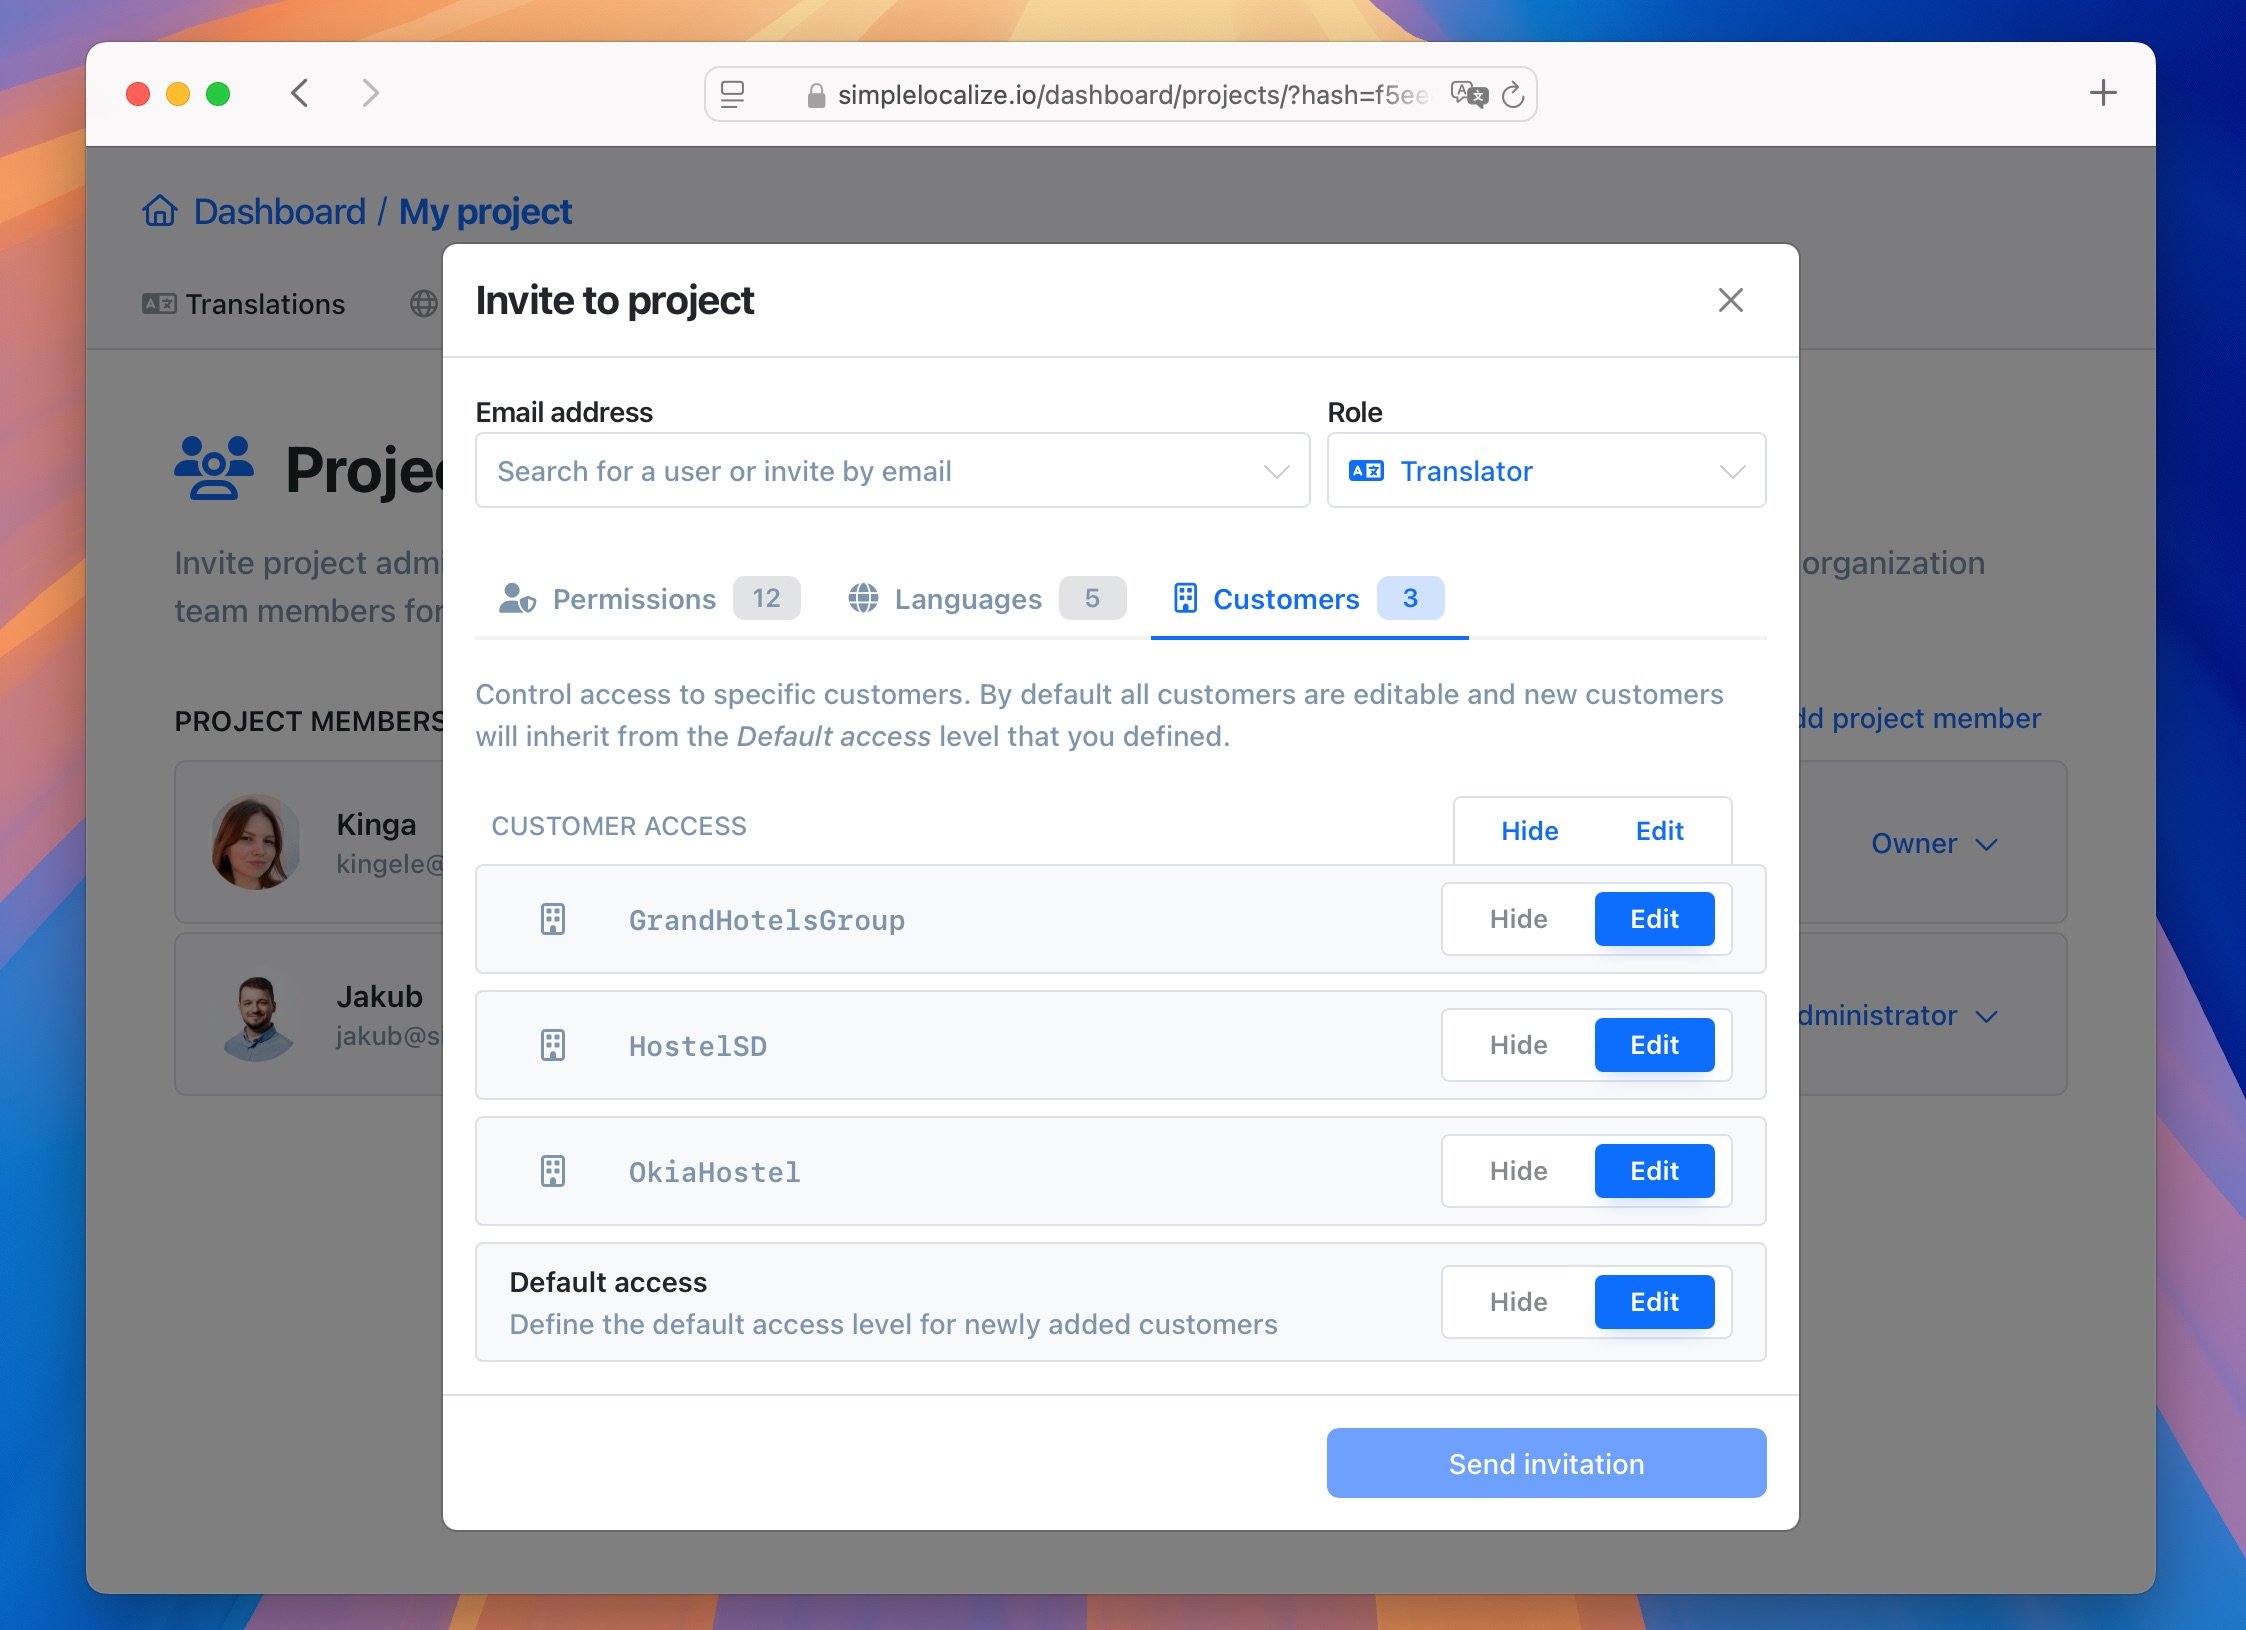
At the bottom of the customer's list, you can **adjust the default access for newly added customers**.
> With this feature, you can share your project with your customers and allow them to provide translations for their own context, without giving them access or preview to other customers translations.
## Share project access
Shareable project links are an easy way of inviting more people at once to a project without knowing their e-mail address.
You can find the **Share project** option in the '**People**' tab.
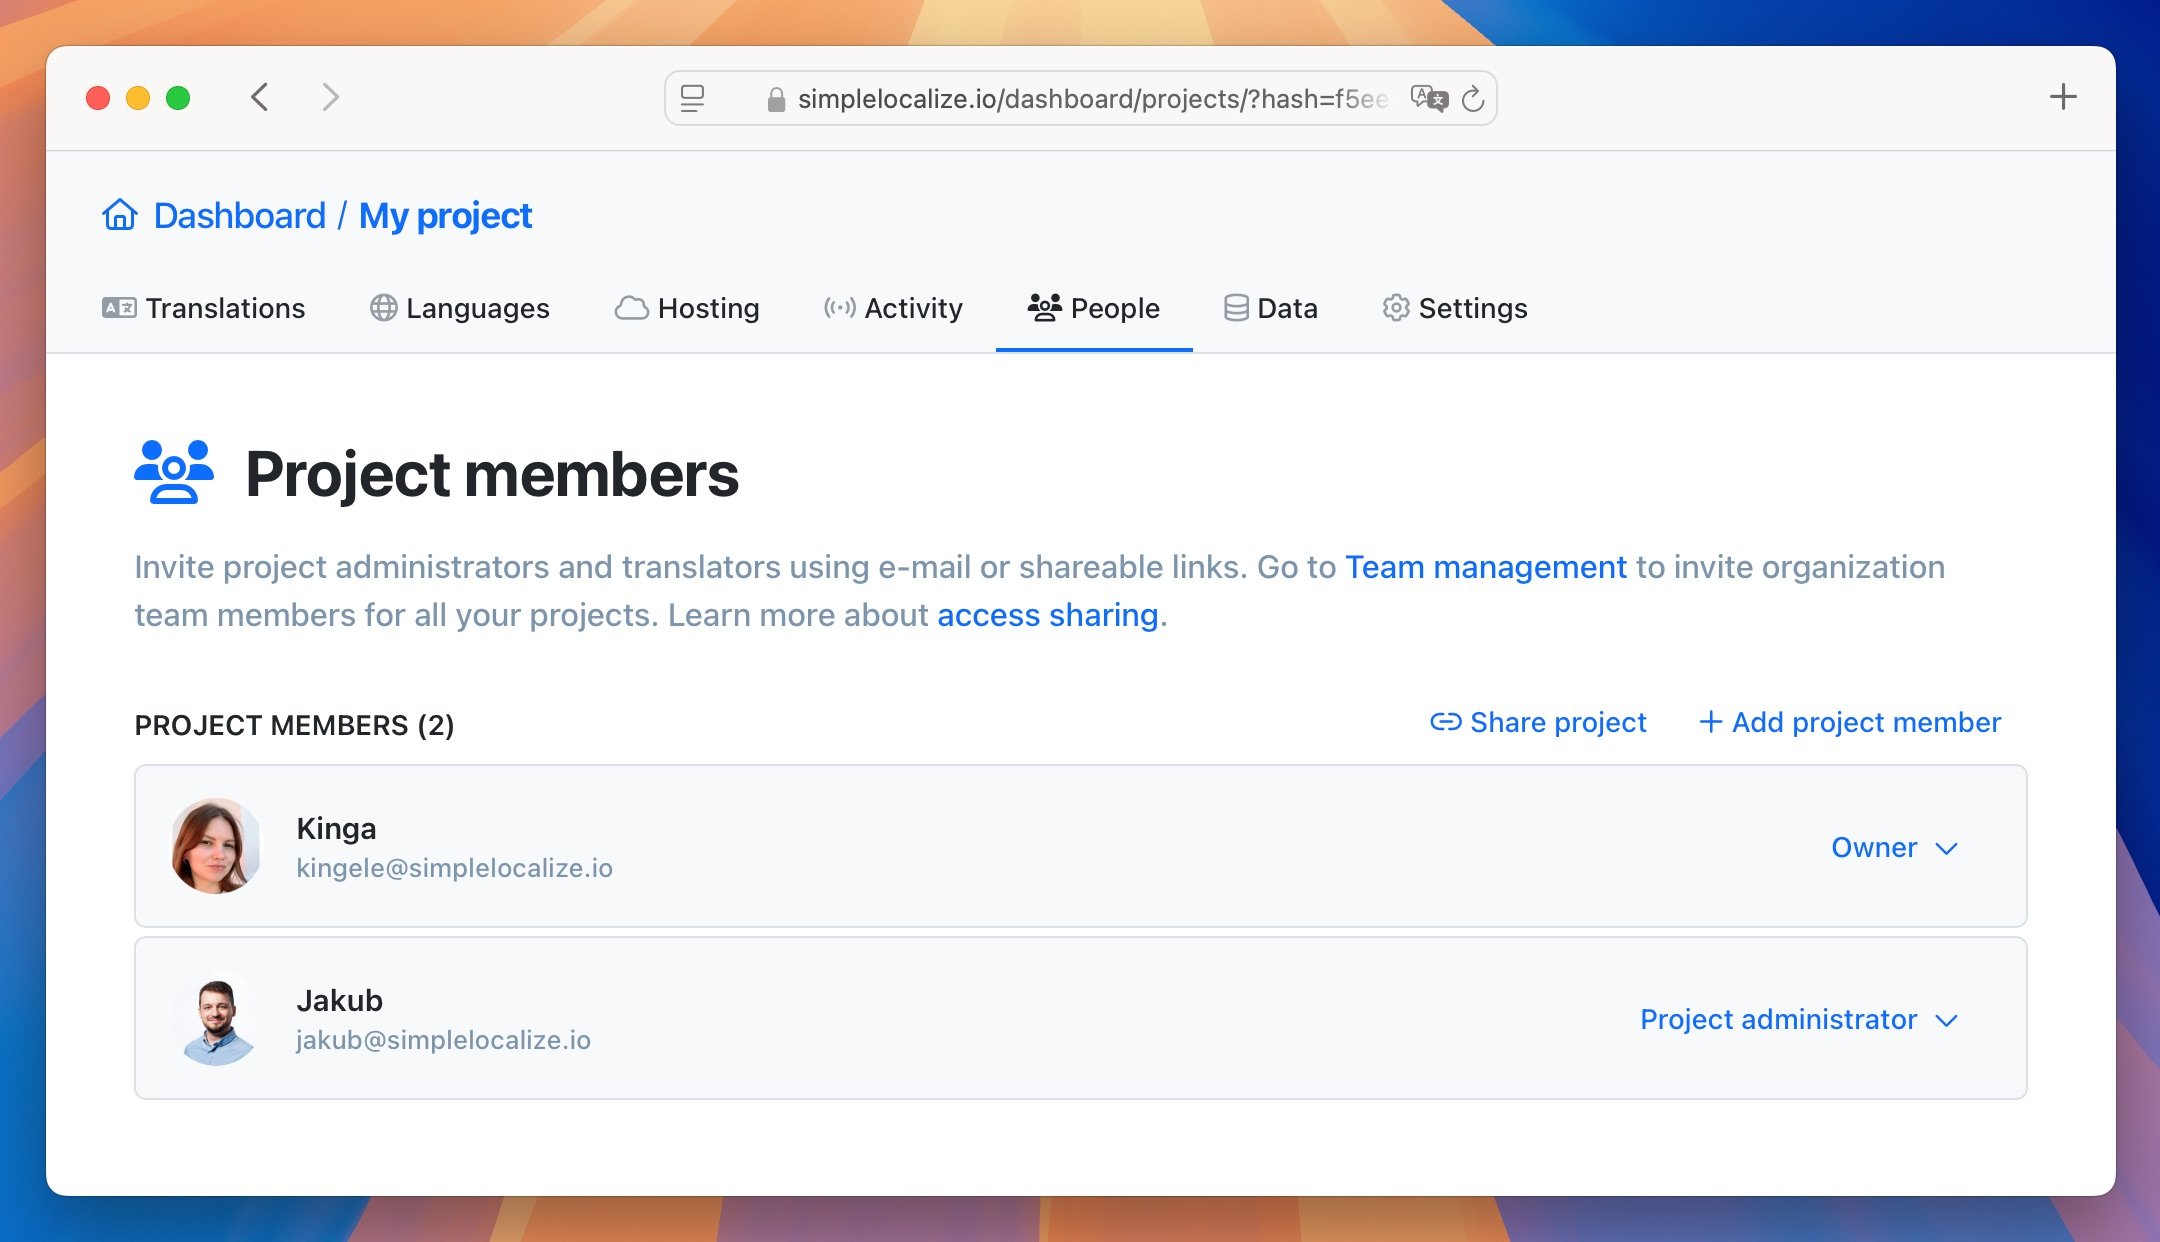
Click on **Create shareable link** button to generate a new shareable link. There are two types of shareable links. One is for inviting [project administrators](#administrator-role) and the second one is for inviting [translators](#translator-role).
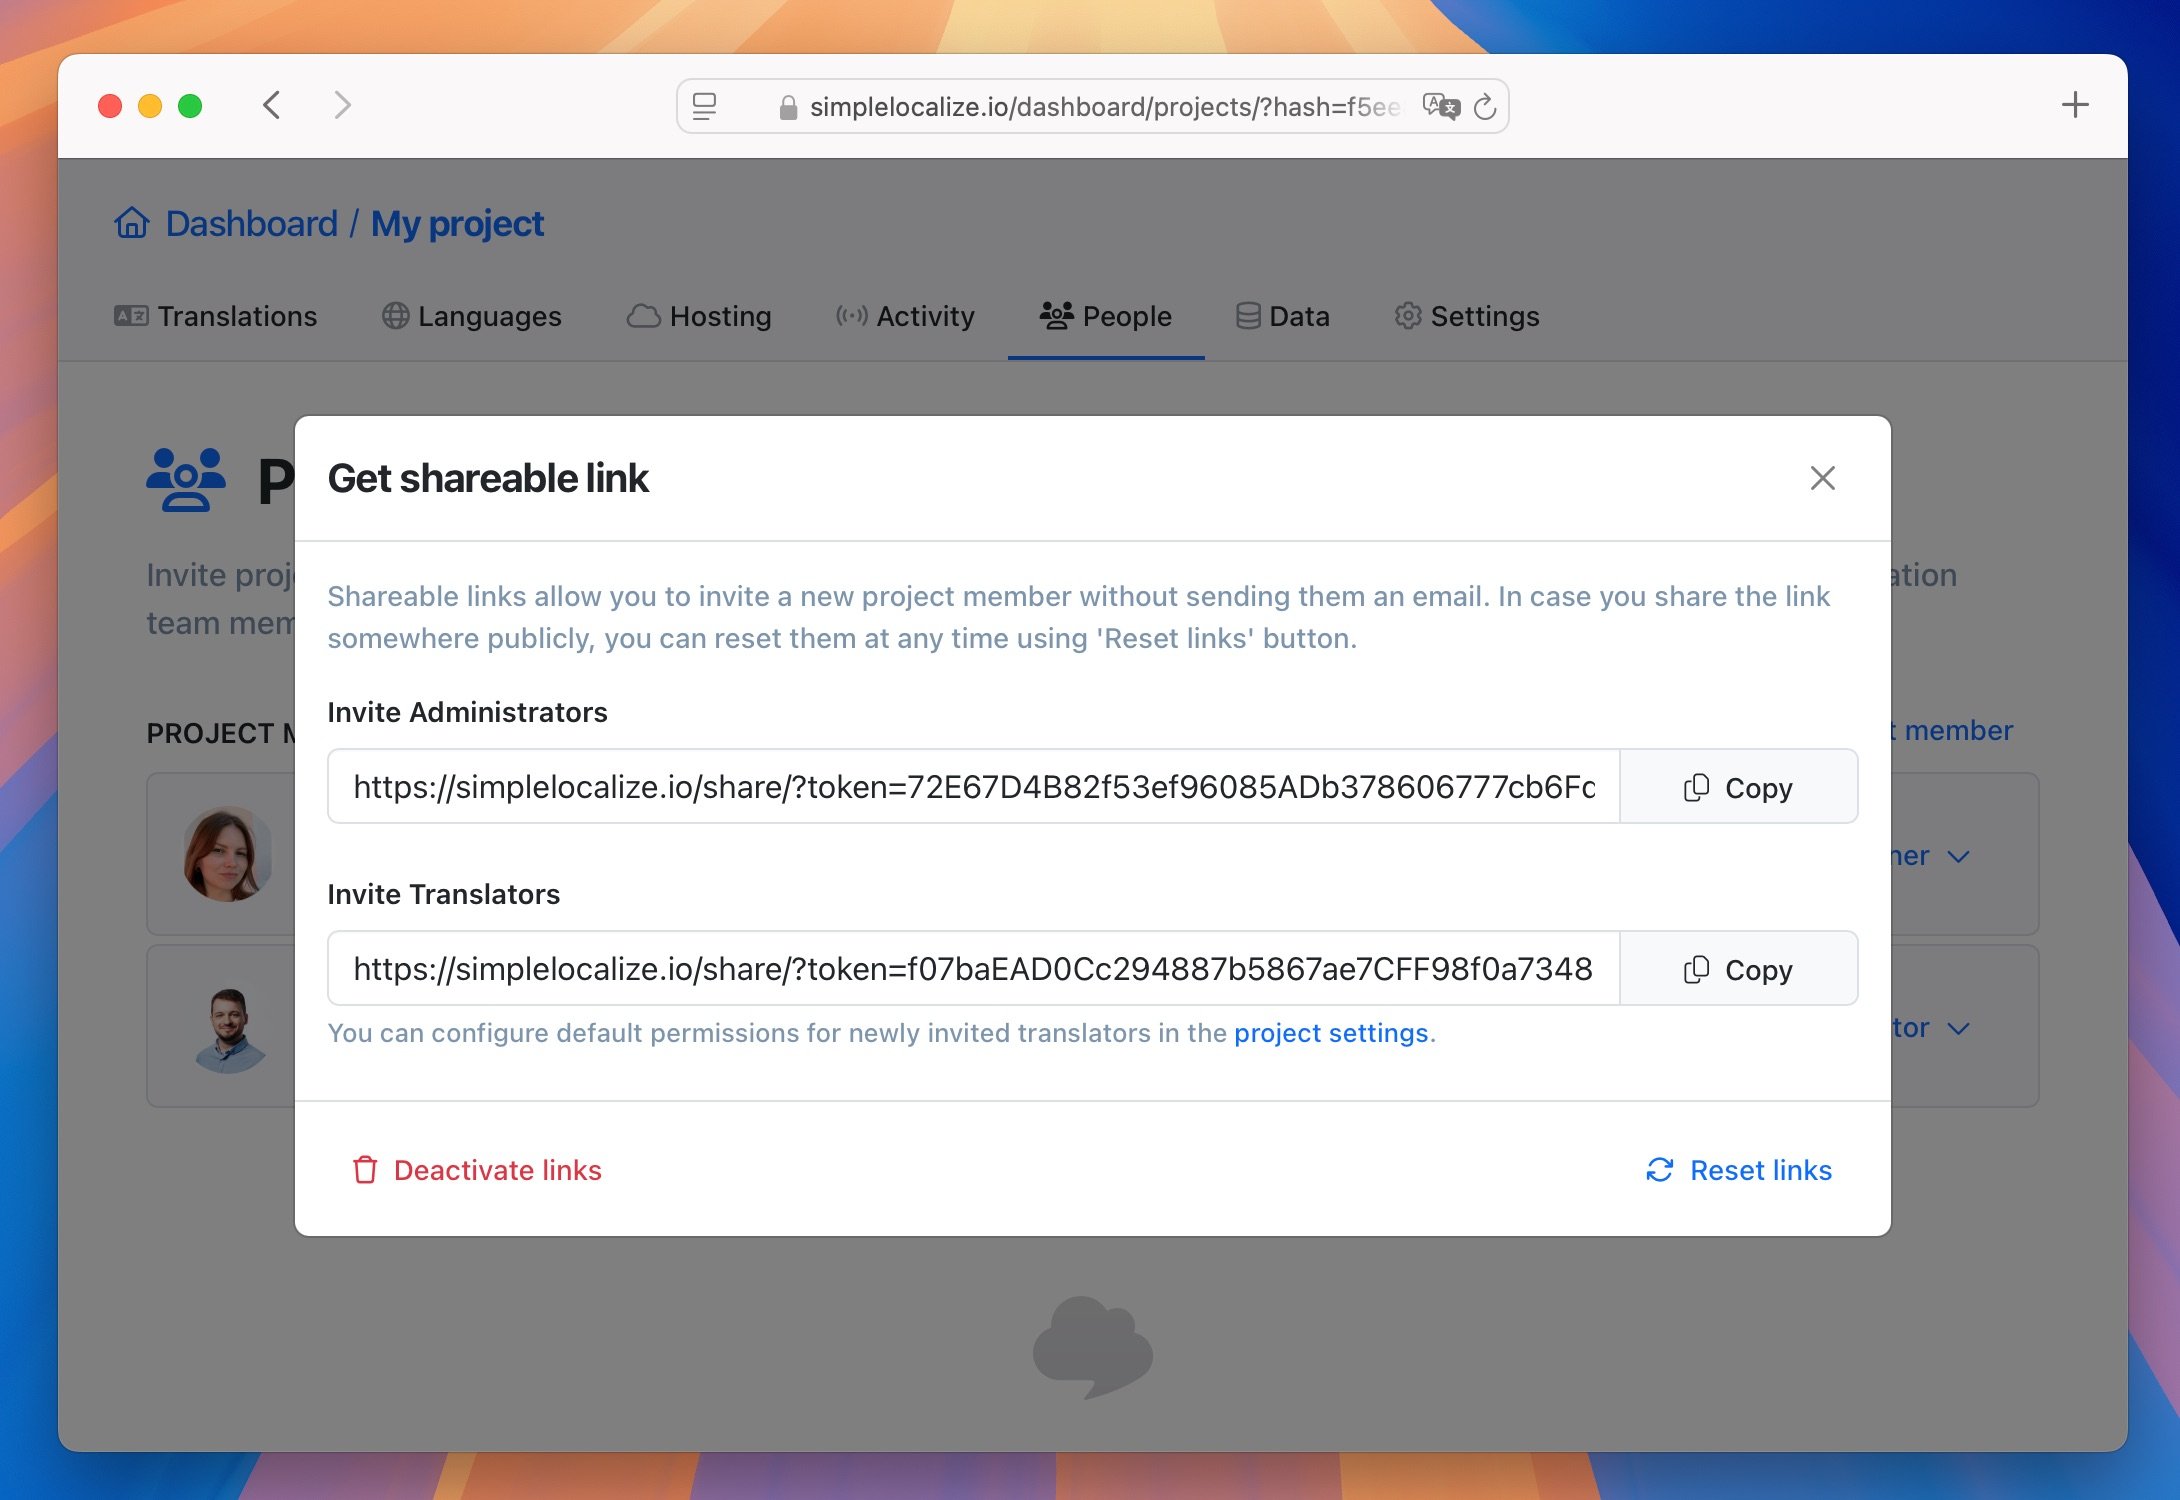
A person who would like to use the invitation link must create an account first in SimpleLocalize.
You can reset shared links by clicking the '**Reset link**' button or deactivate them by clicking the '**Deactivate links**' button.
If you decide to enable them again, the system will generate new links.
## Add project member
To invite a project member, go to the '**People**' tab in your project and click '**Add member**' button on the right side.
There, enter the **e-mail address** of the person you want to invite to the project and select the role you want to assign to the person.
Available roles are [Administrator](#administrator), [Project Administrator](#project-administrator), [Developer](#developer) and [Translator](#translator).
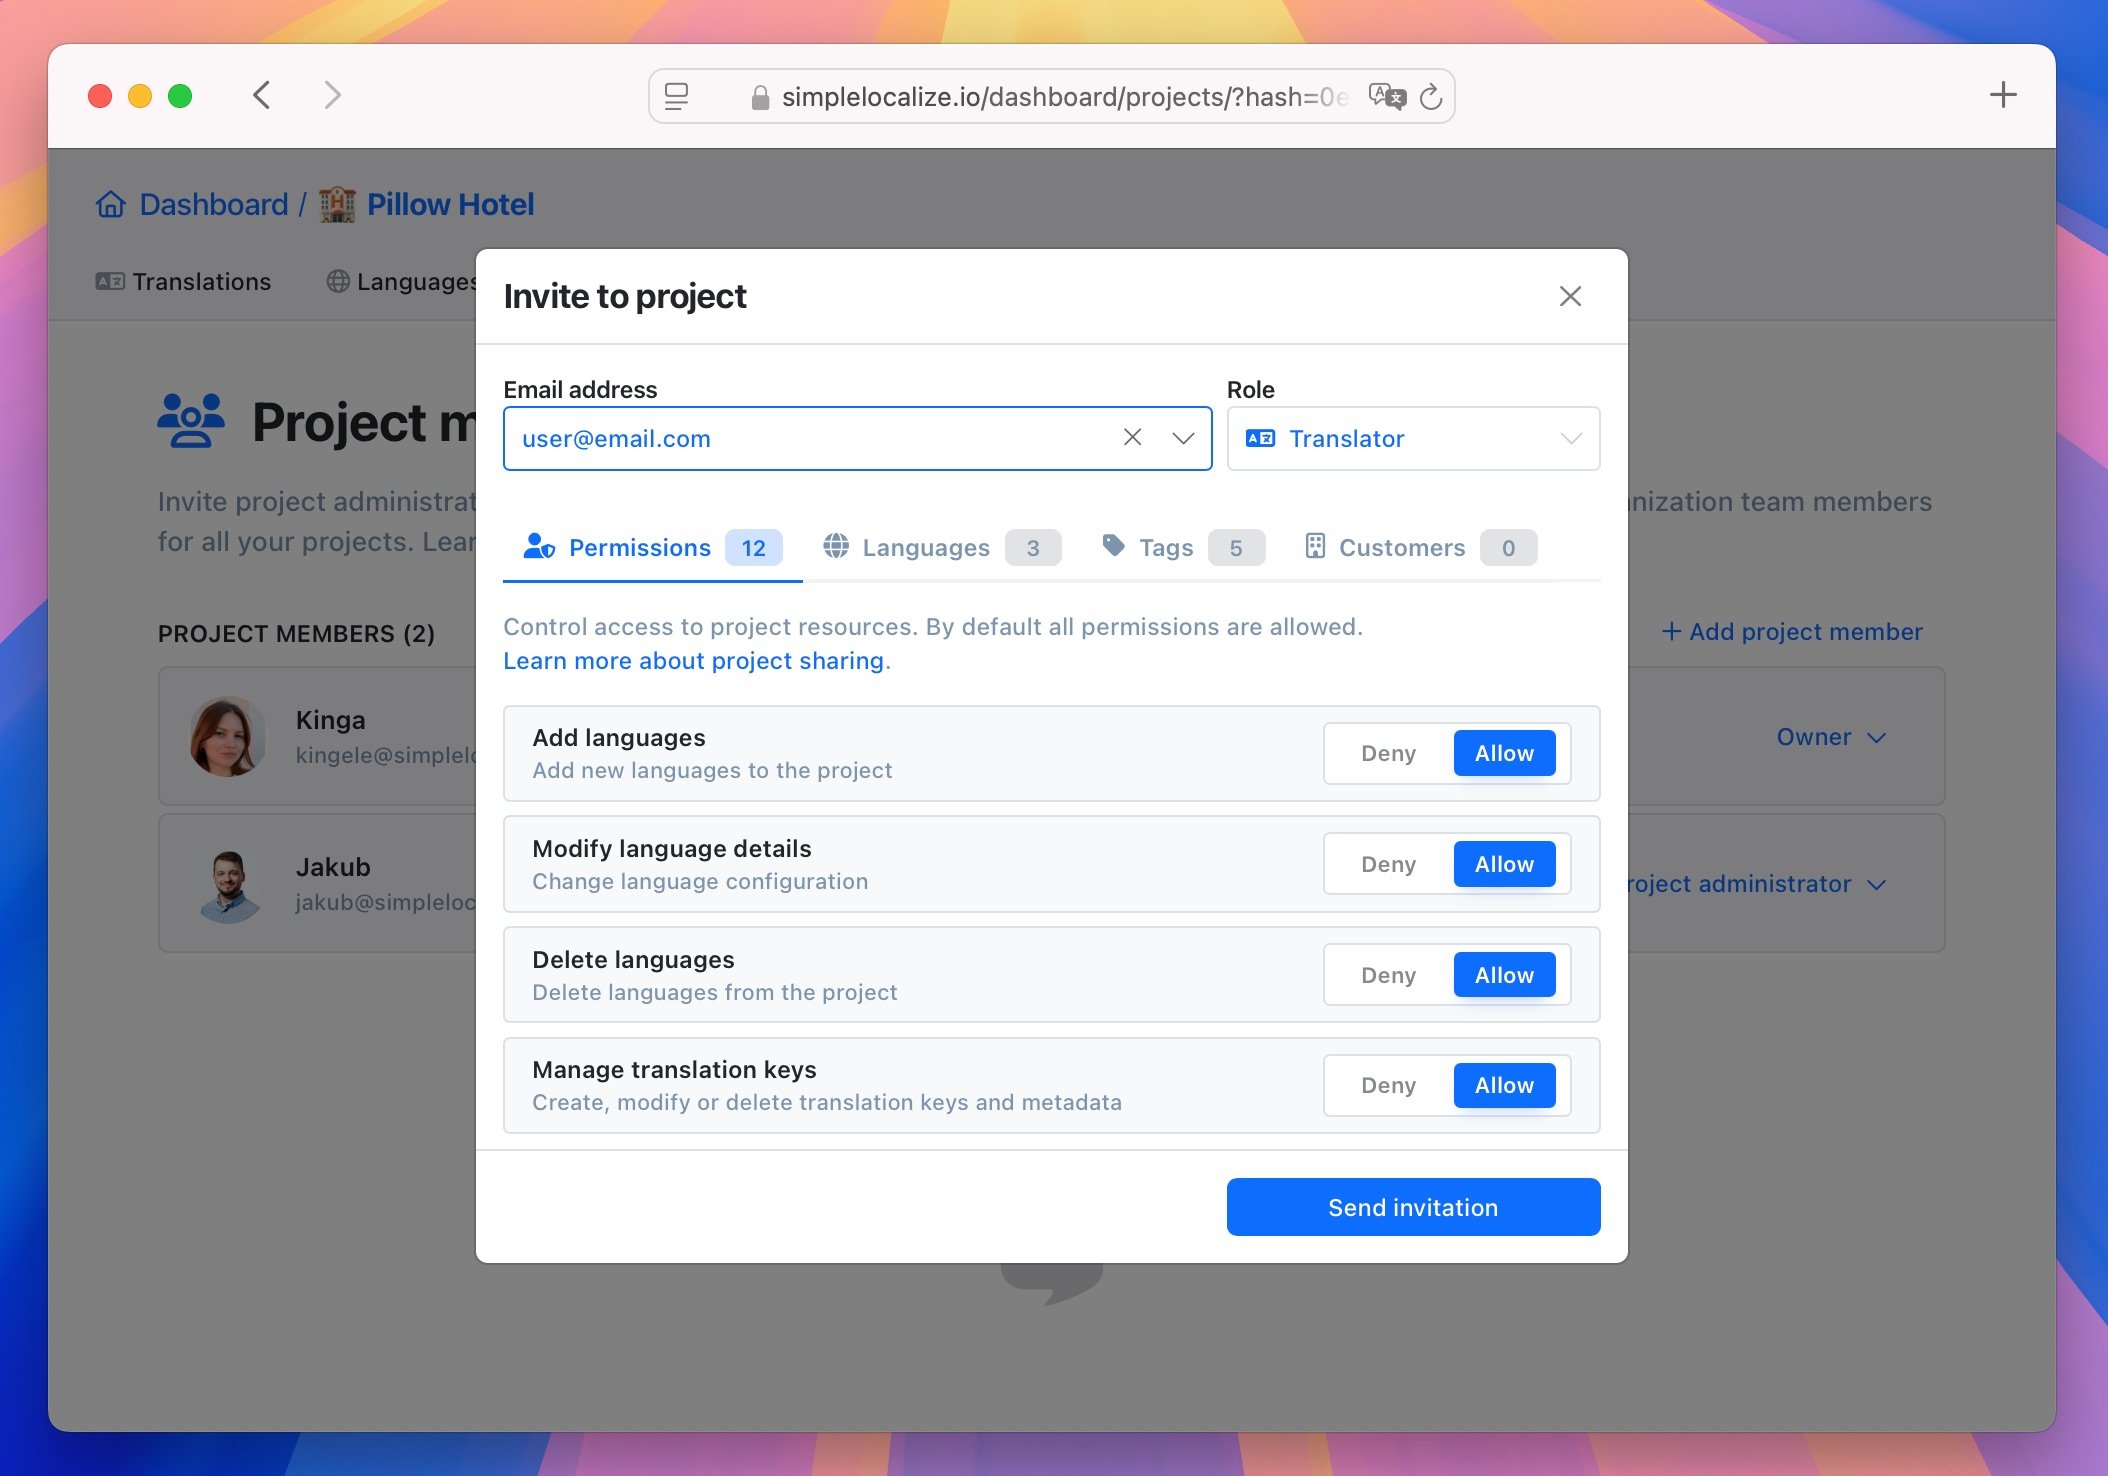
SimpleLocalize will send an e-mail with an invitation automatically after you click the **Send invitation** button.
The invitation e-mail will contain an invitation link which will redirect the recipient to the new account page, or the invitation page where he/she can accept the invitation. After that, the invited person can sign in to the account.
## Add team member
SimpleLocalize allows you to manage your team members in one place. As a subscription owner or administrator, you can invite your team members to the subscription and manage their roles and access levels.
To manage your team members, please go to the [Team](/dashboard/team/) section.

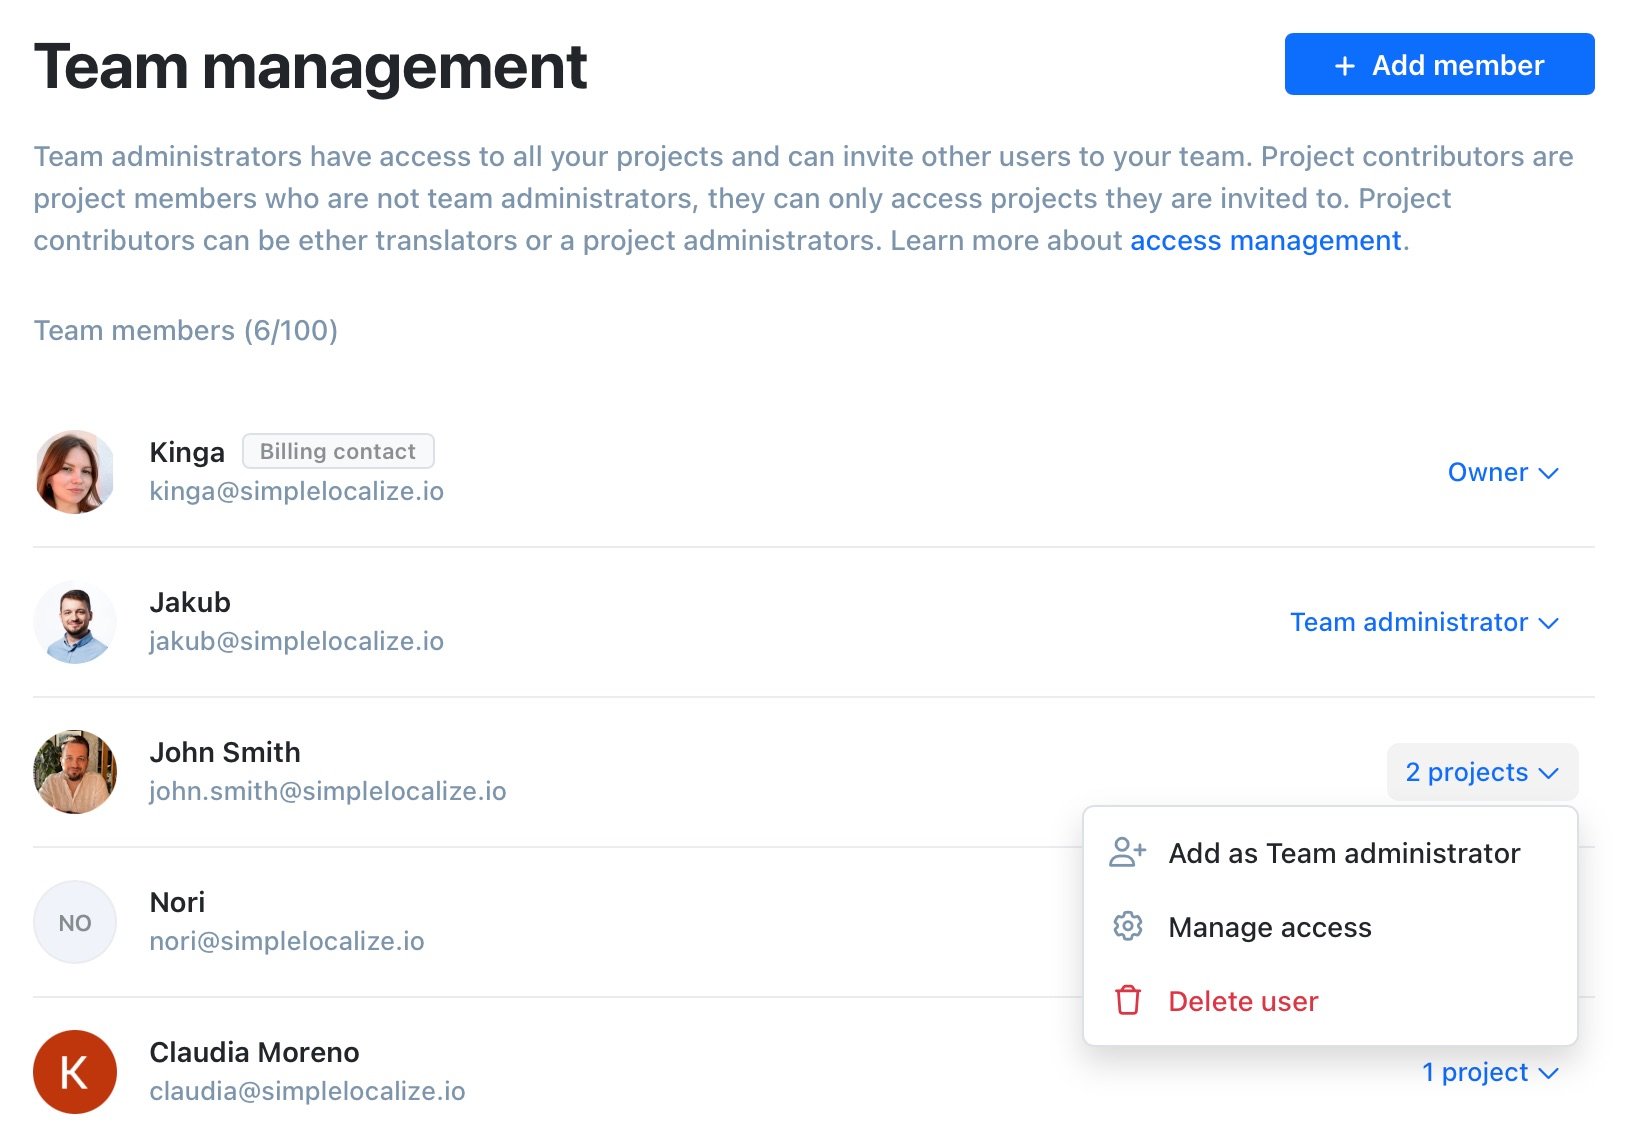
There, you can see the list of all team members and their roles. You can invite new team members by clicking the '**Add member**' button. You can also change the roles, permissions, and projects for each team member.
##### Manage access
In the Team section, you can manage the project access for each team member. You can set the role for each team member in each project. You can also remove the team member from the project.
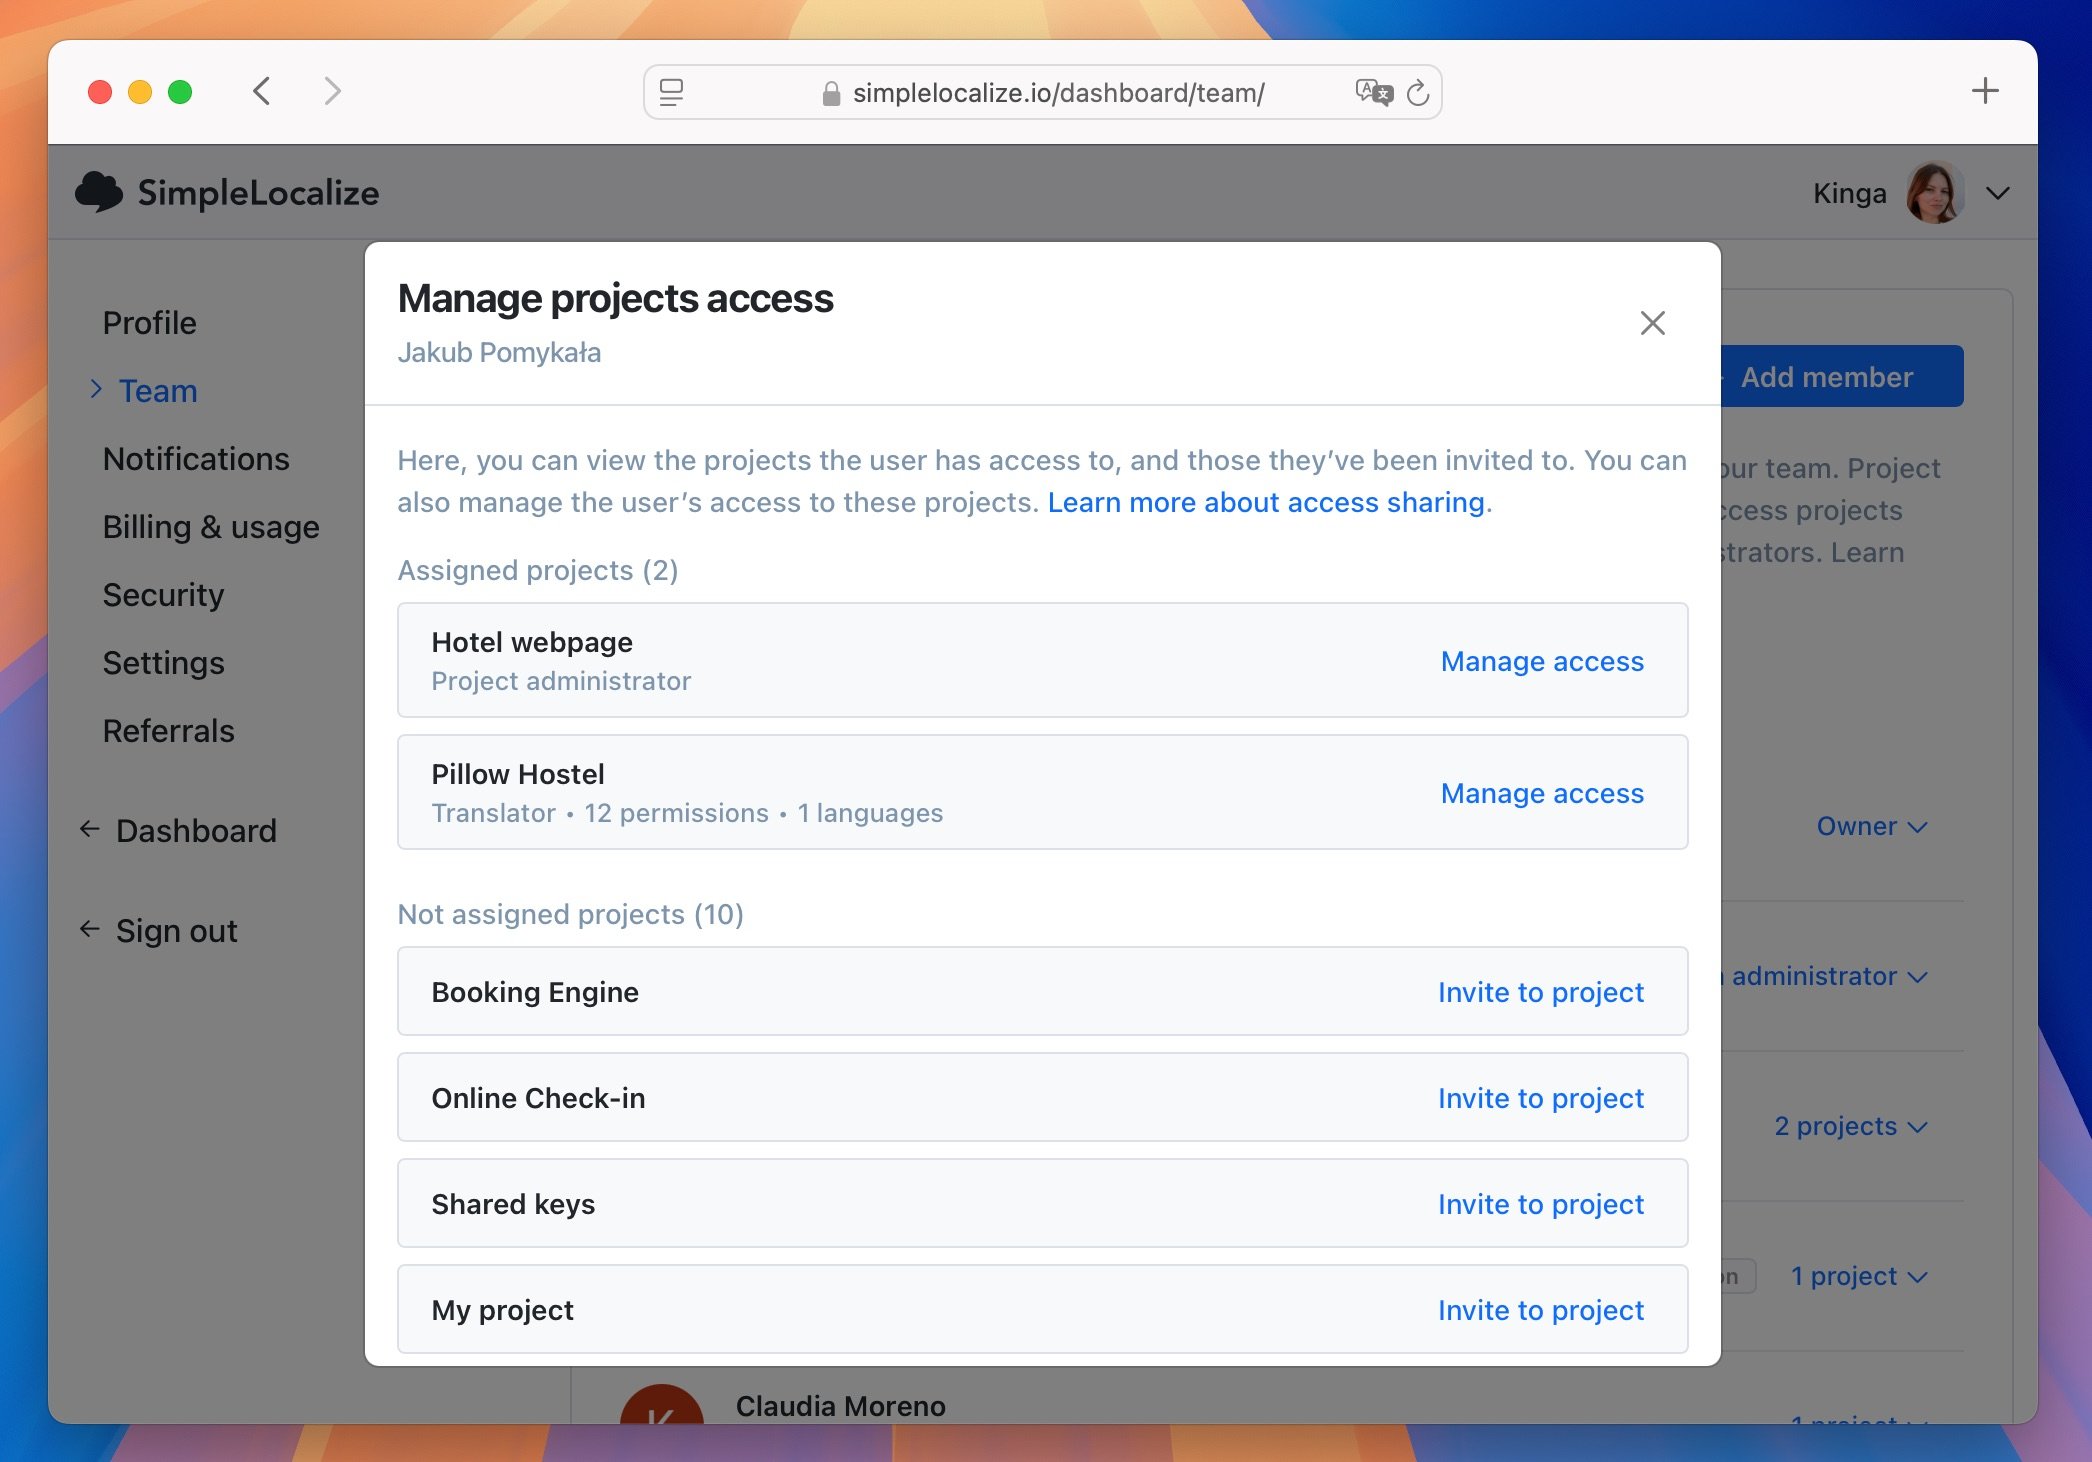
Click on **Manage access** option in the dropdown menu to manage the accesses and permissions for the team member.
In the popup, you can view the list of projects the team member has access to. You can change the role and permissions for each project and invite the team member to new projects.
## Groups
Groups let you define a set of access once and give it to many people at once, instead of configuring every person
project by project. A group is a **template** that it holds one role, a set of permissions, and the list of projects with
the language and customer context access inside each of them.
You can find groups in the **Groups** tab of the [Team](/dashboard/team/) section. Click **Create group** to add one.
The configuration is the same as inviting a team member: pick the role, choose the permissions, and select the projects
together with the language and customer access for each of them.
Groups do not replace the permission system, they are materialized into the regular per-project access. This means
that after somebody is added to a group, their access can still be adjusted individually, and removing them from the
group never takes any access away.
### Custom access
Because individual access can be changed at any time, a person may end up with access that no longer matches their
group. For example, after a manual change, or after the group itself was changed without being applied. Such people
are marked with **Custom access** in **Manage people**, with the exact areas that differ: permissions, languages,
customers, or projects. The group row in the list shows how many people it concerns.
To bring somebody back in line with the group, use **Reset to group access** next to the warning. It gives the person
exactly the access of the group, which also means removing them from the team projects the group does not include.
## Billing contact
The billing contact is the additional user who is responsible for the subscription billing and receiving invoices.
By default, the billing contact is the same as the subscription owner.
To change the billing contact, please open the [Billing & usage](/dashboard/subscription/) page and click **Change address** button.
If a subscription administrator is assigned as the billing contact, then the user is also allowed to:
- Manage the subscription.
- View invoices.
- Buy additional auto-translation characters.
- Increase translation keys limit.
## Transfer project
The project owner can transfer the project ownership to another user that has an active subscription plan.
Head to the **People** tab in the project you want to transfer ownership to and click the **Owner** role name. There, you can use the **Transfer ownership** button.

In the popup, you can select the user to whom you want to transfer the project. Remember, only the project owner can transfer the project ownership.
## Transfer subscription
If you want to transfer the subscription to another user, please go to the [Team management](/dashboard/team/) page. Click
the owner role name and use the **Transfer ownership** option.
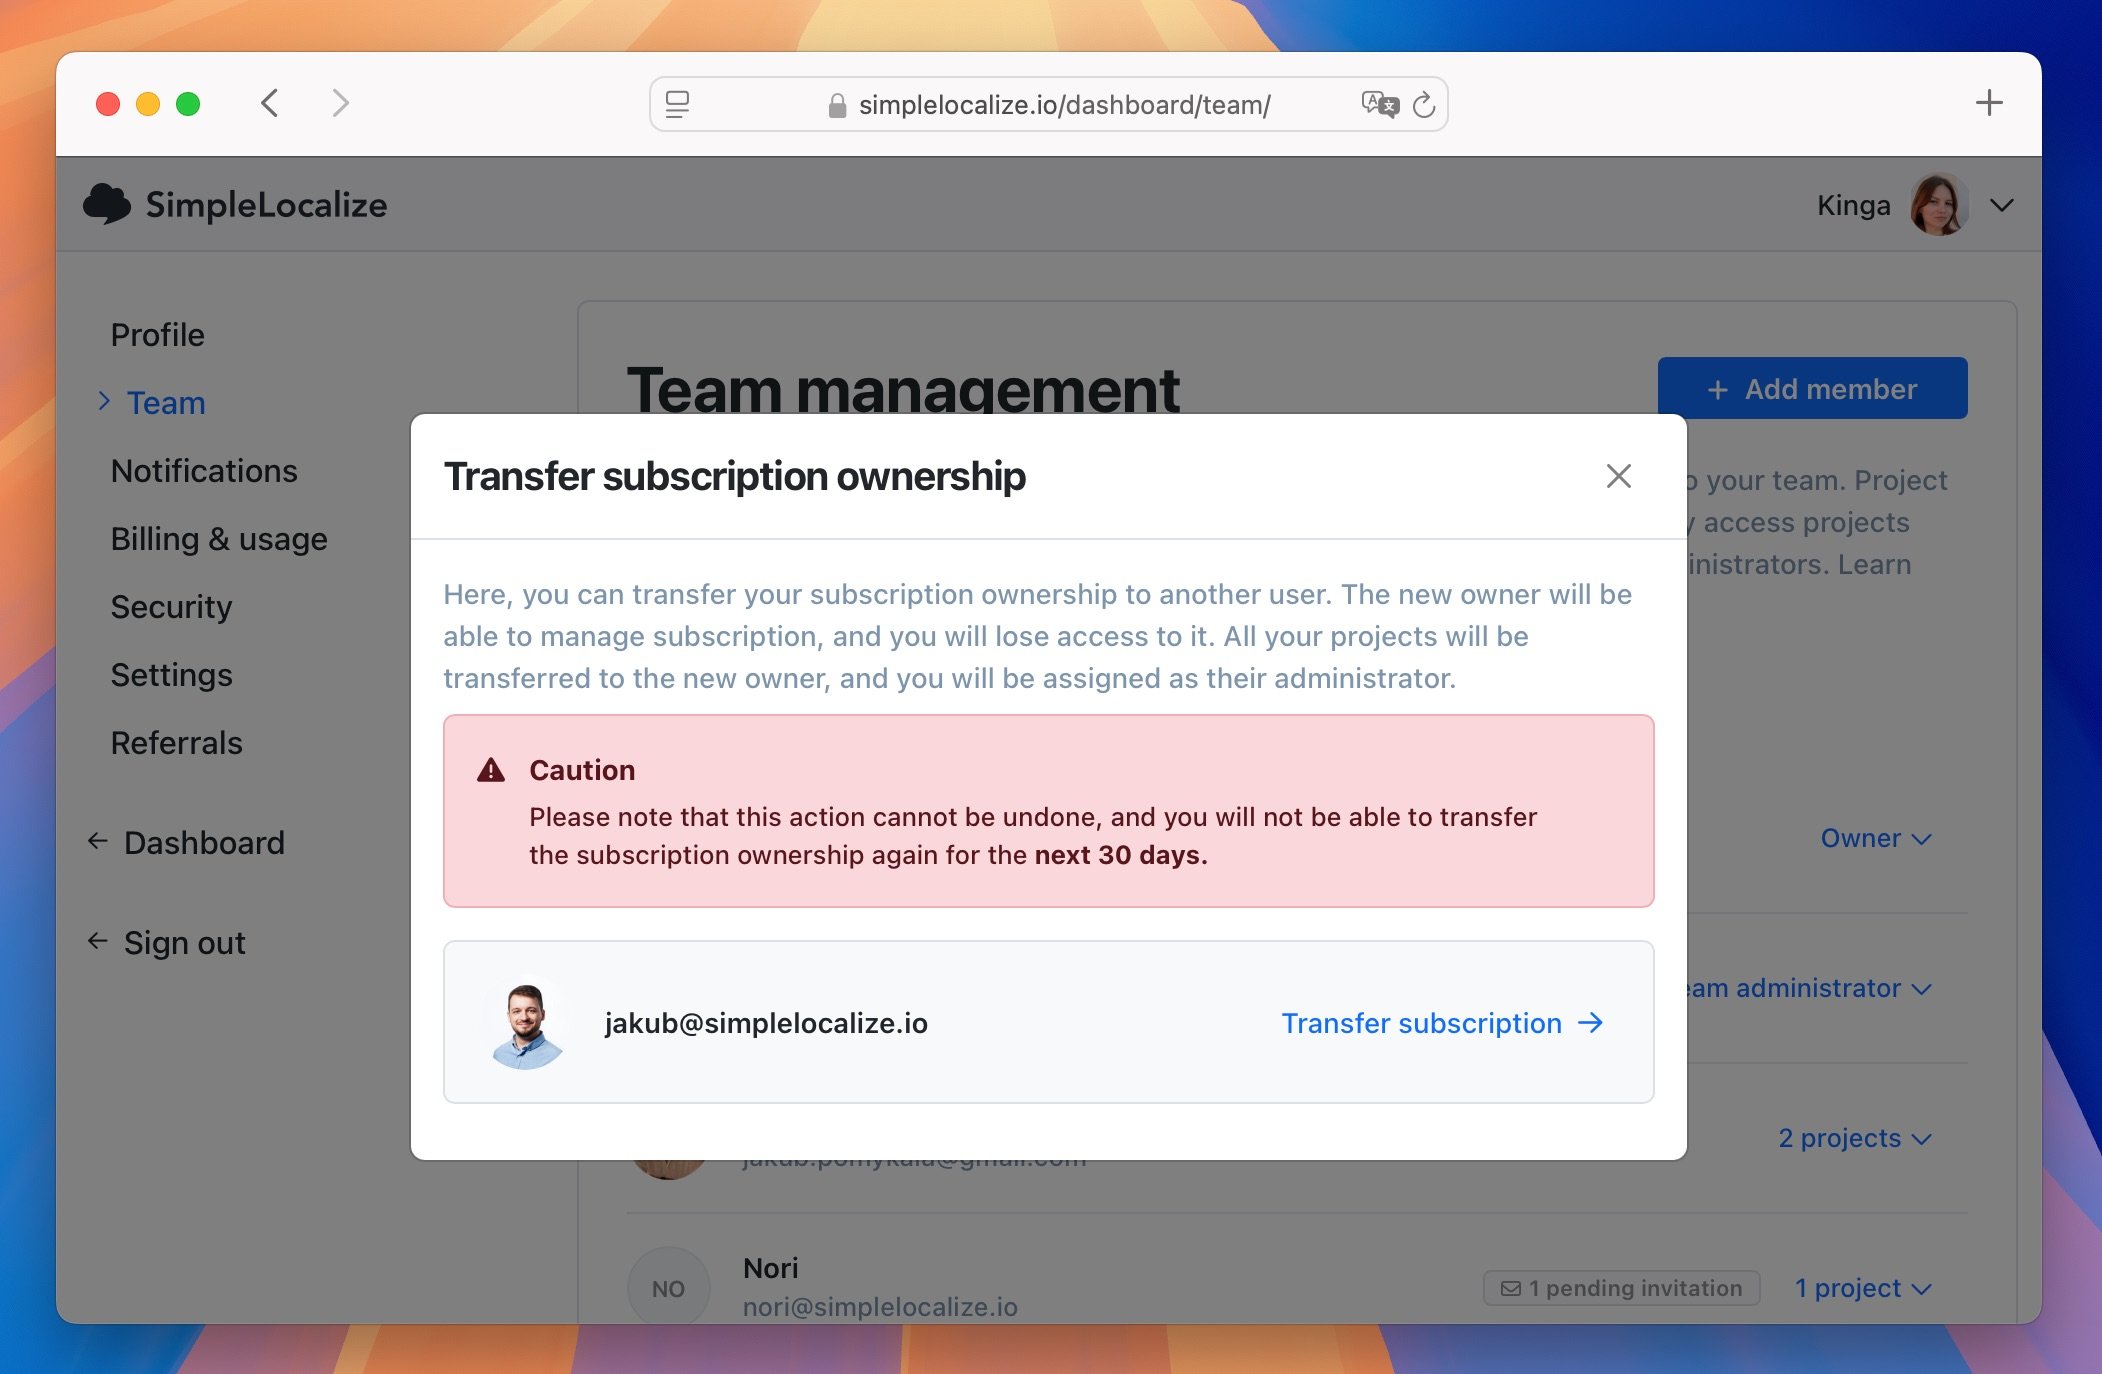
In the popup, you can select the user to whom you want to transfer the subscription.
Once you click the '**Transfer subscription**' button, the subscription will be transferred to the selected user.
The selected user will become the subscription owner, be able to manage the subscription, and become the project owner for all projects.
After the subscription transfer, you will become an administrator in the subscription and will have access to all projects, but you will not be able to manage the subscription anymore.
## Corporate SSO
To learn more about connecting SAML2/OIDC Single Sign-On to SimpleLocalize, please visit the [SAML2/OIDC Single Sign-On](/docs/general/corporate-sso/) page.
---
# General: Auto-translation
Source: https://simplelocalize.io/docs/general/auto-translation/
Auto-translation (AT) is a feature that allows you to translate your texts automatically using MT (machine translation) services,
or AI models (LLMs). It's a great way to pre-translate your content quickly, and then review and edit translations as needed.
Supported auto-translation providers:
- [SimpleLocalize AI](#simplelocalize-ai): Auto-translation on autopilot. Picks the right model for each text, uses your project context and automatically fixes detected issues.
- [OpenAI](https://openai.com): AI-powered service that can translate texts with a great quality and understanding of context and variables.
- [Google Translate](https://translate.google.com): One of the most popular translation services. Decent quality translations and fast processing times.
- [DeepL](https://www.deepl.com/translator): Machine translation service with AI features. Known for its high-quality translations, especially for European languages.
- [Anthropic](https://www.anthropic.com): Claude models by Anthropic, used with your own Anthropic API key.
- [Gemini](https://ai.google.dev): Google Gemini models, used with your own Google AI Studio API key.
- [OpenRouter.ai](https://www.openrouter.ai): Service that allows you to connect more AI providers and models for auto-translation, including OpenAI, Anthropic, Mistral, Gemini, LLaMA and others.
- [Custom AI](/docs/general/auto-translation/#custom-ai-models): You can also use your own AI model for auto-translation by providing a endpoint and API key in your project settings.
> Auto-translation is available for all plans, but the number of characters you can translate depends on your plan. See [pricing](/pricing) for more details.
## How to auto-translate?
With the auto-translation feature, you can translate automatically a single translation, an entire language or all languages at once.
**By default, all auto-translation requests update only untranslated texts in your project.** You can change this behavior in the additional options section to force translate all texts.
### Single translation
Directly in the Translation Editor click on the **Auto-translation** button.

Quick Auto-translate option uses the translation provider configured in the [language settings](/docs/general/languages/).
> You can also click on the auto-translation button with Shift key pressed to open the auto-translation popup and select a different provider.
### All translations in a key
Right-click on a translation key in the Translation Editor and select **Auto-translate** from the context menu to translate all missing texts in that key.

### One language
Head to the **Languages** tab, click on **options** button (three dots) and choose **Auto-translate** to translate all missing texts in that language.

In the auto-translation popup you can select the translation provider, adjust source and target language, and choose additional options:
- **Override existing translations** (to re-translate all texts, even those that already have a translation)
- **Allow using keys as source text** (for keys without source text).
The auto-translation process runs in the background, so you can continue working on your project while the translations are being processed.
### All languages
To translate all missing texts in all languages, use **Auto-translate** option in the **Languages** tab. SimpleLocalize will select all not translated languages, but you can uncheck the ones you would rather not translate.
Next, check the translation provider and extra options, and click **Auto-translate**.

## SimpleLocalize AI
SimpleLocalize AI is auto-translation on autopilot. Instead of choosing a model yourself, you choose **SimpleLocalize AI** as the translation provider and it takes care of the rest. It runs on SimpleLocalize, so you don't need an API key, and it uses auto-translation characters from your plan.
### Your project context
Every translation gets the context you already have in your project:
- [AI context](#ai-context) and [glossary](#glossary)
- key description, tags and screenshots
- comments and pending suggestions left for the key
- the current translation, when you translate a text again, so small changes in the source text don't rewrite the whole translation
- the same key translated in other languages
- similar texts are already translated in your project to keep terminology and style consistent
When the same source text is already translated and **reviewed** in another key of your project, SimpleLocalize AI reuses that translation. It's instant and doesn't use auto-translation characters.
### Automatic issue fixing
Each translation is checked with your project [QA checks](/docs/translation-editor/qa-checks/) before it's saved. When the checks find issues like missing variables, broken HTML or ICU syntax, glossary mismatches or a text over the character limit, SimpleLocalize AI fixes the translation and checks it again. The fix is used only when it has fewer issues than the original translation.
### Data privacy
SimpleLocalize AI uses a mix of in-house hosted open-source models and OpenAI models to translate texts. Texts sent to OpenAI are **NOT stored on the OpenAI side.**
Your data are NOT used to train our models, you translations does NOT leak to another organizations.
## Automation
You can automate the auto-translation process by using the [Automations](/docs/general/automations/) feature.
With auto-translation automation, you can run auto-translation automatically when:
- new texts are added to your project
- source texts are updated

## AI context
You can fine-tune the auto-translation process by providing additional context to translation services that use AI like **OpenAI, Anthropic, Gemini, OpenRouter.ai and DeepL**.
For example, you can specify the tone of voice, style, or any other specific instructions for the translation, or just give more background information about your project.
To provide additional context, navigate to your project **Settings** and then to the **Auto-translation** tab. There, scroll down to the **AI Context** section and enter your instructions in the text field.
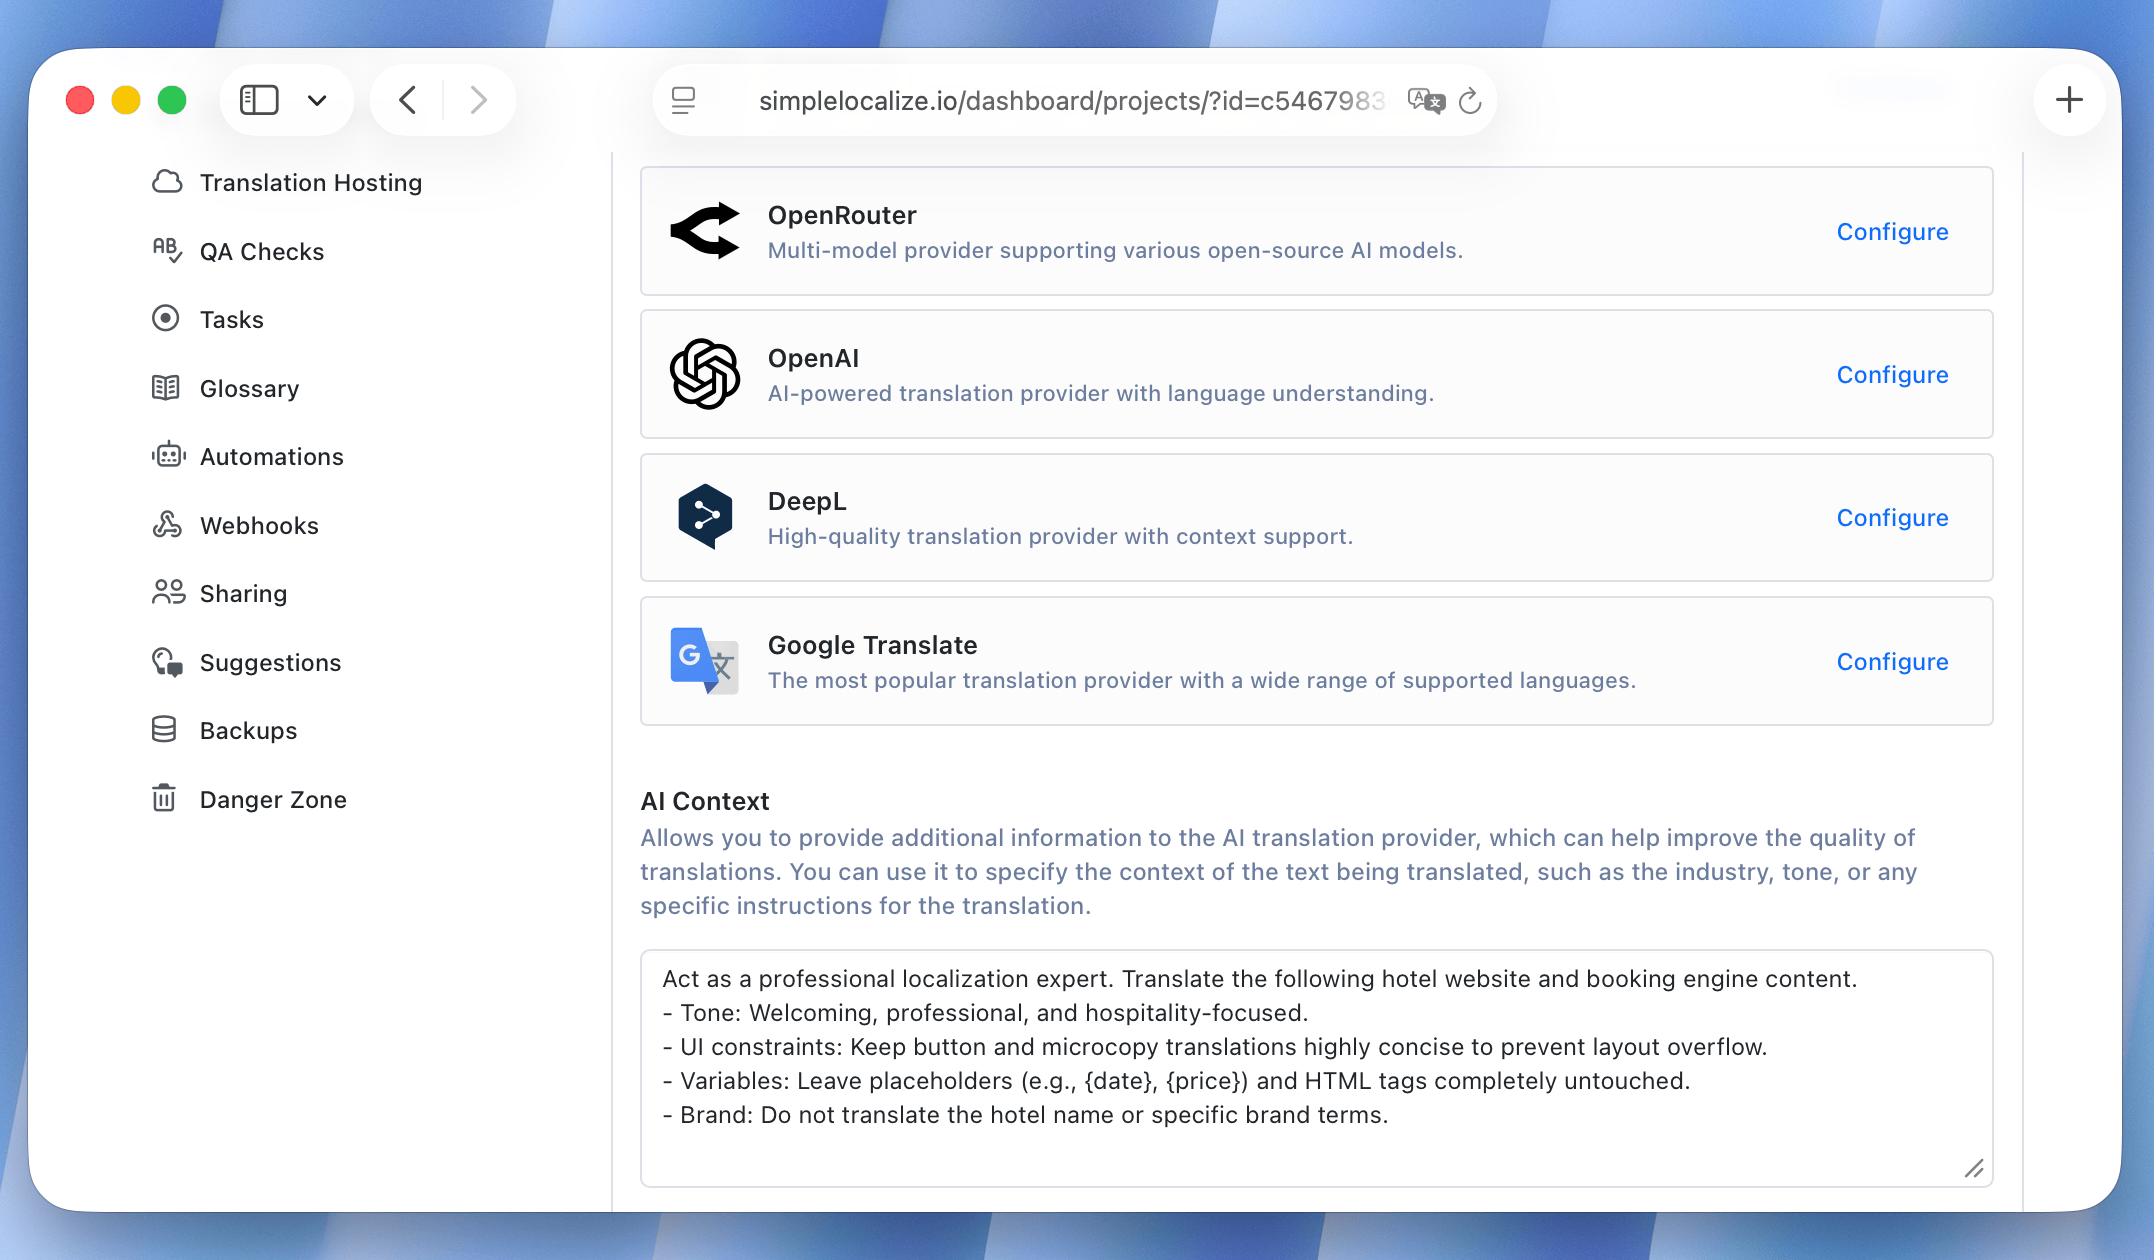
### AI context examples
Good context is short and specific. Describe what your product is, who reads the texts, which tone to use, and any rules the translations must follow.
**Mobile banking app**
```text
Mobile banking app for retail customers. Use a formal but friendly tone
and the polite form of address, like "Sie" in German.
```
**Online store**
```text
Online store selling outdoor gear. Keep brand and product names untranslated.
Use a casual, energetic tone.
```
**Developer tool**
```text
Developer tool. Keep technical terms like API, webhook and CLI in English.
Texts are UI labels, so keep translations short.
```
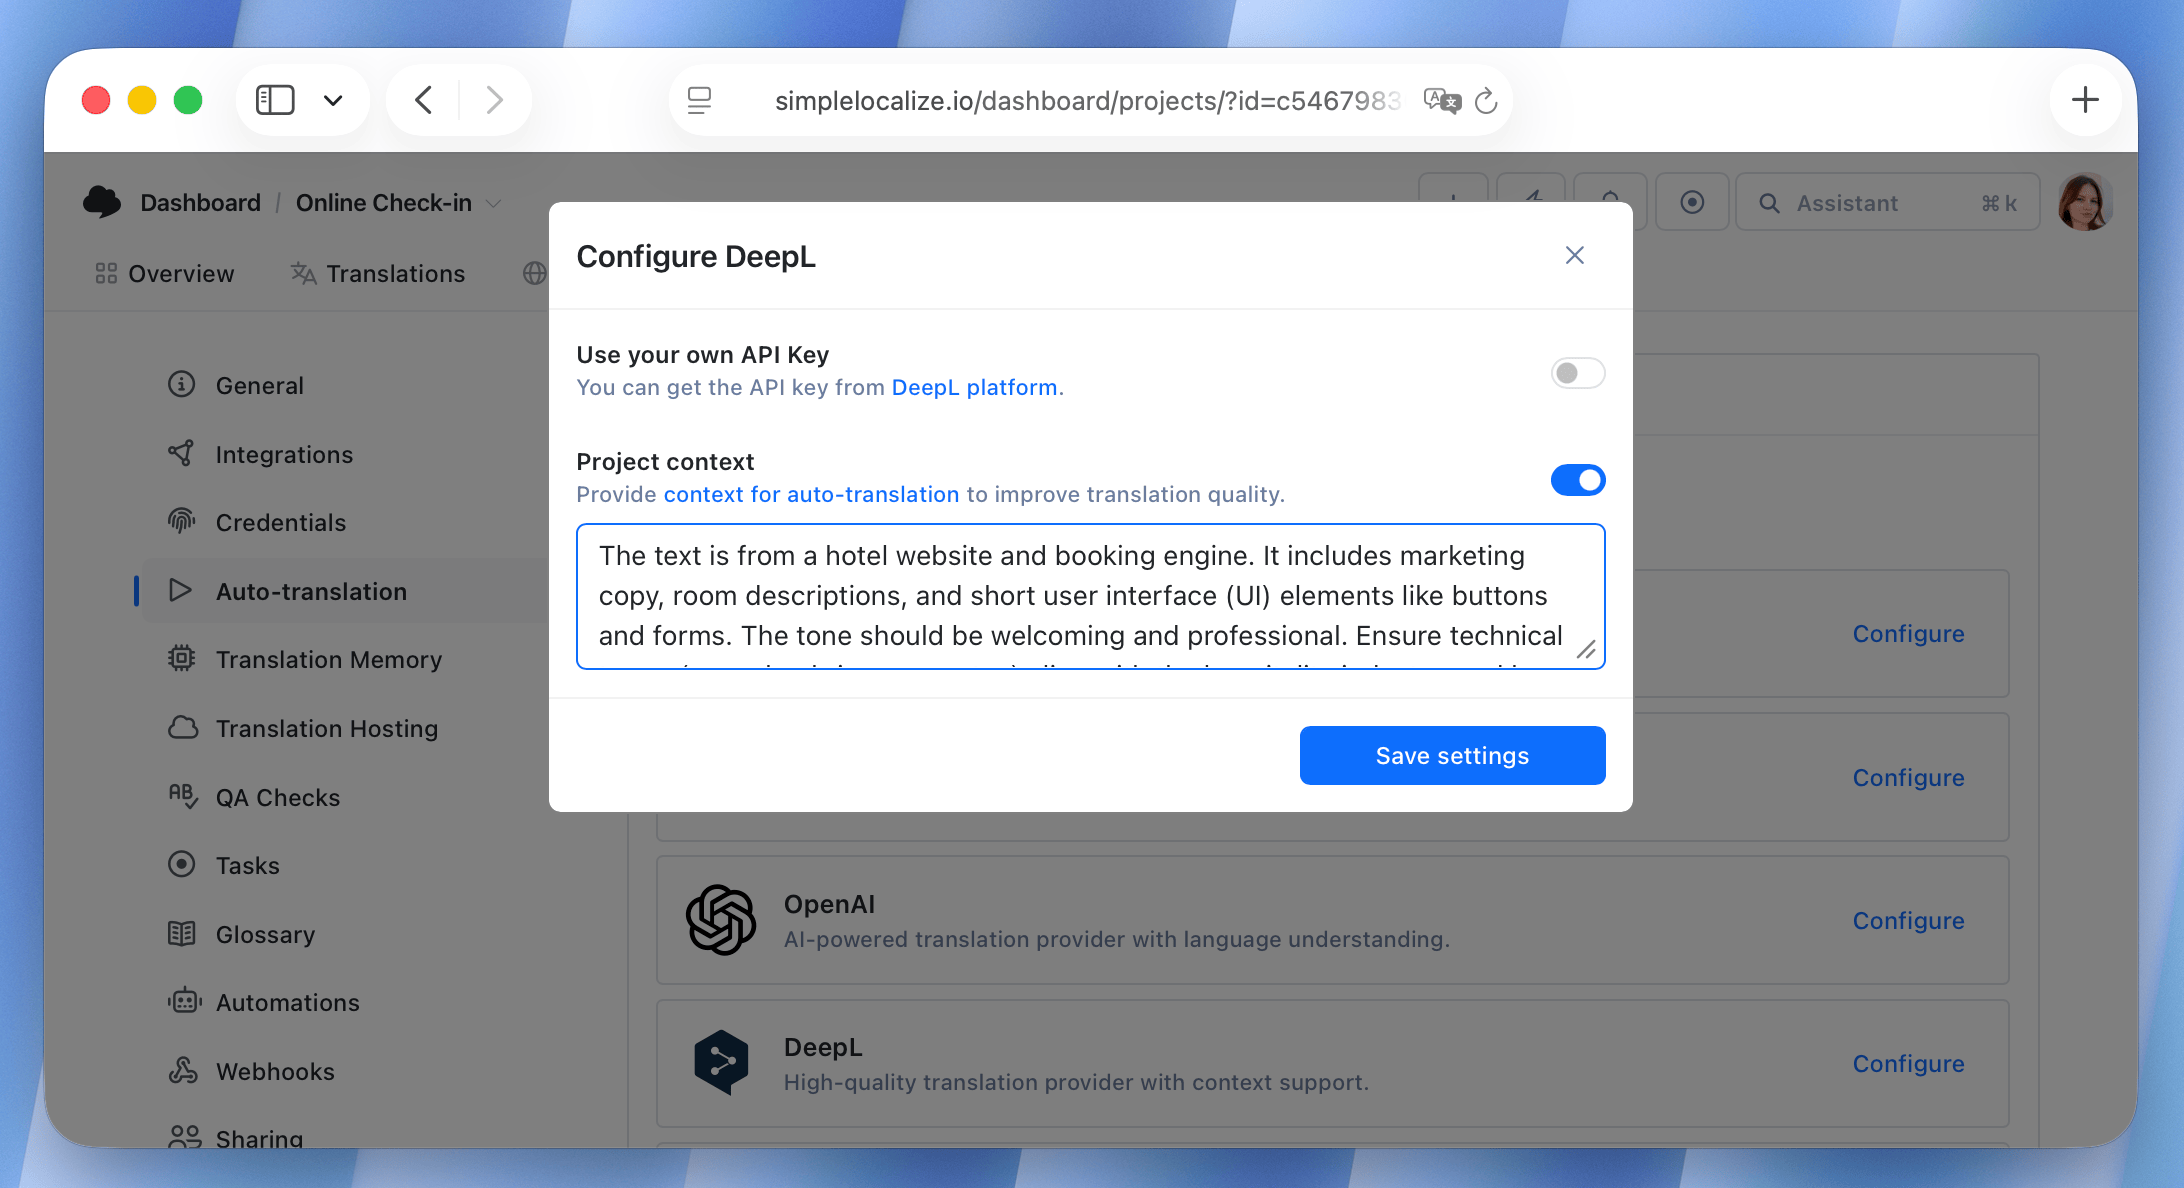
To provide context for **DeepL**, click on the **Configure** button next to the DeepL provider and and provide your instructions in the **Project context** field.
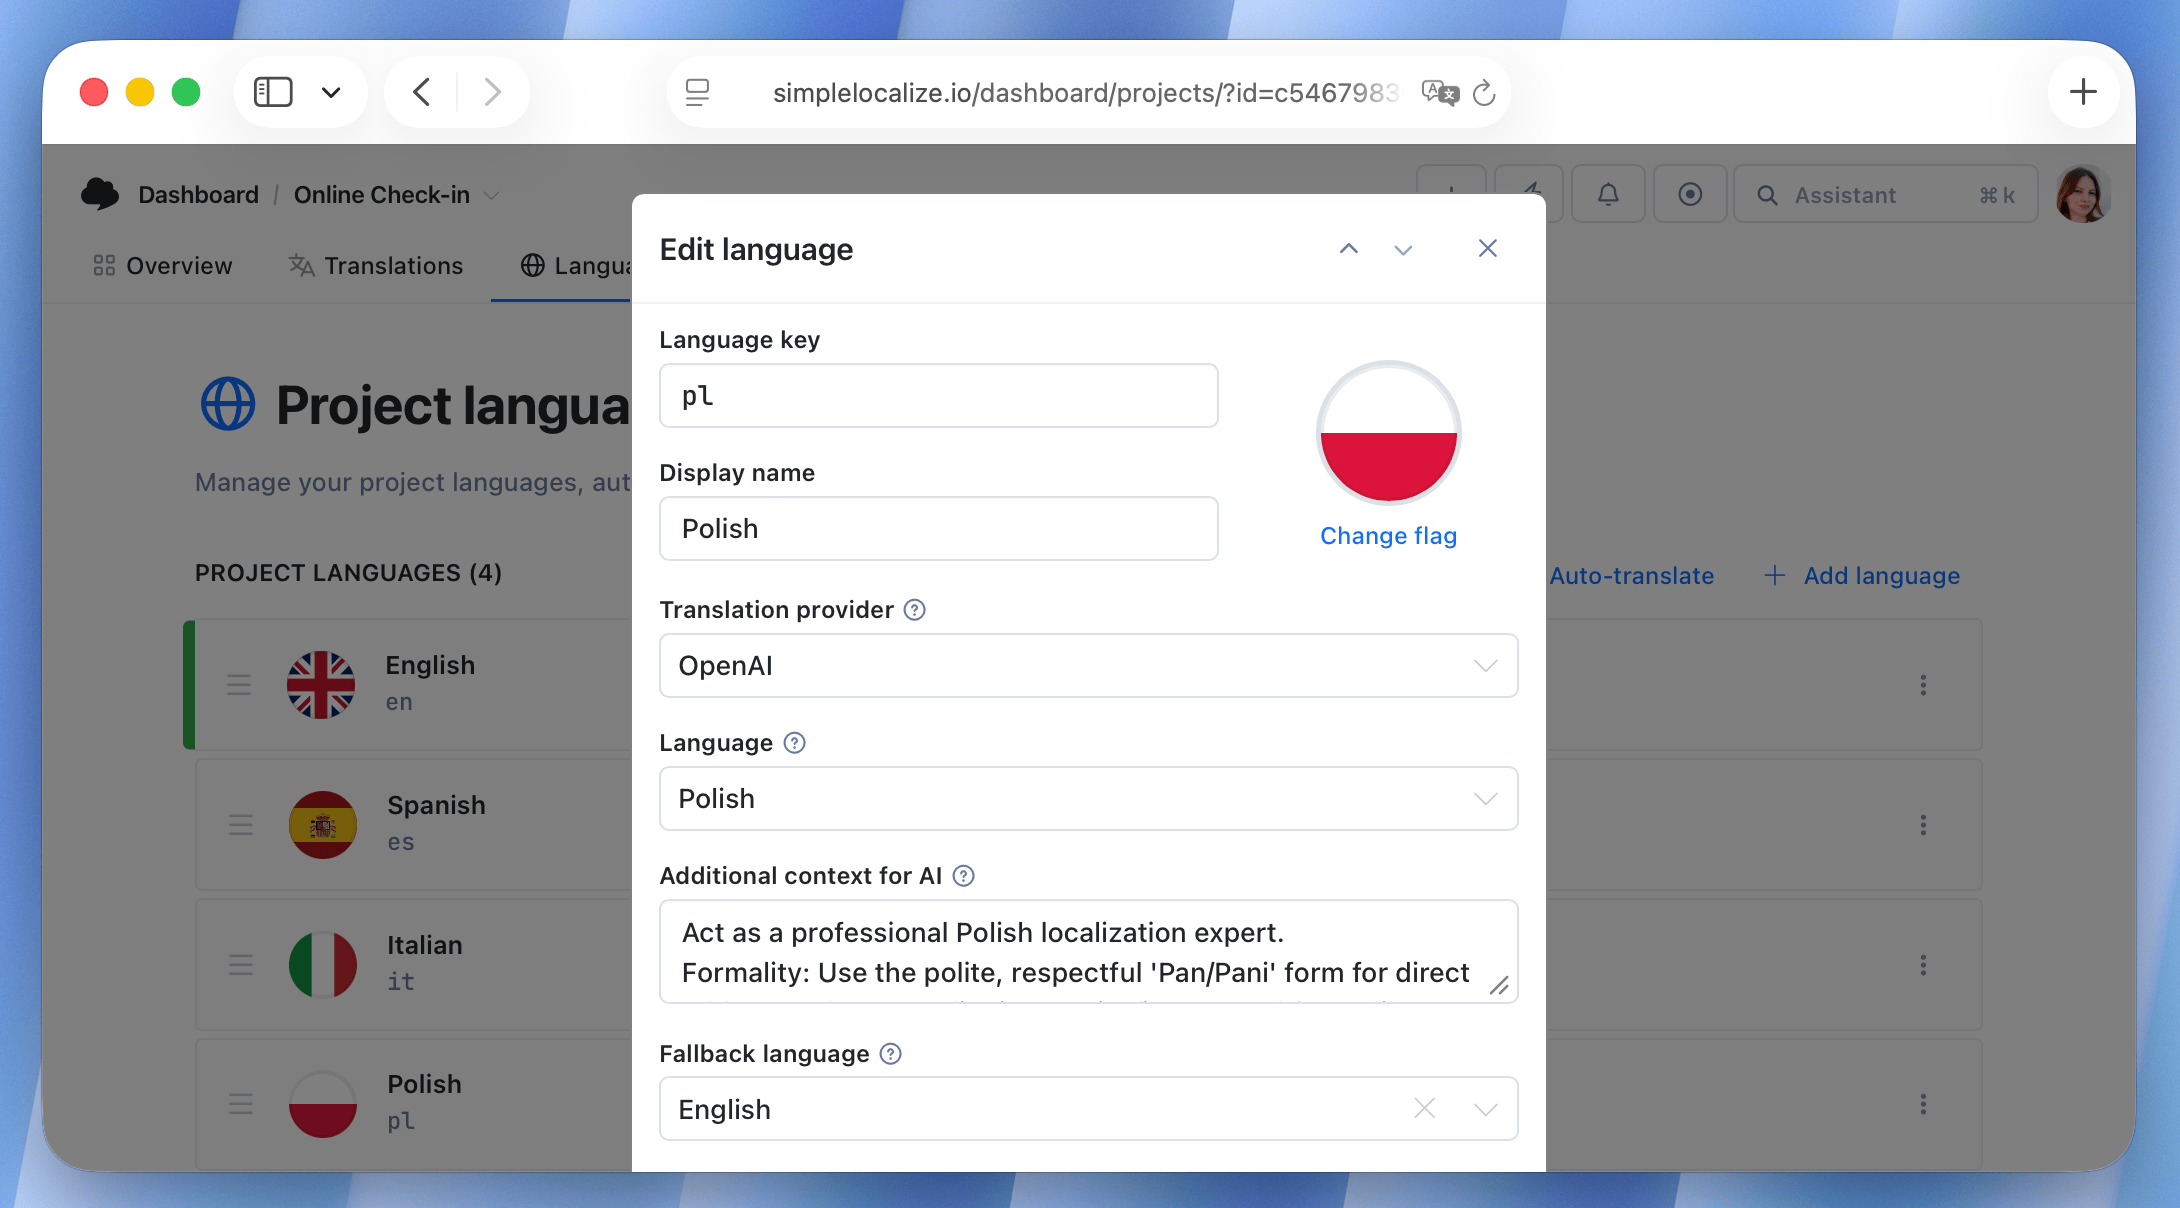
For AI models, you can also set the **context for specific languages** in the **Languages** tab. Click on the language options (three dots), open **Settings**, and enter your custom prompt in the **Additional context for AI** field.
SimpleLocalize additionally provides the AI provider with context from translation keys and translation data (e.g. key description, key settings), which helps improve translation quality.
> Read more: [Tips for effective auto-translation in software localization](/blog/posts/auto-translation-tips/#use-system-prompts-and-project-context).
## Glossary
[Glossary](/docs/translation-editor/glossary/) helps keep translations consistent when using auto-translation. They allow you to give **AI provider or DeepL** hints on how to translate specific words or phrases.
To create a glossary, navigate to project **Settings** and then to the **Glossary** tab. Enter the terms you want to include in the glossary, along with their translations.
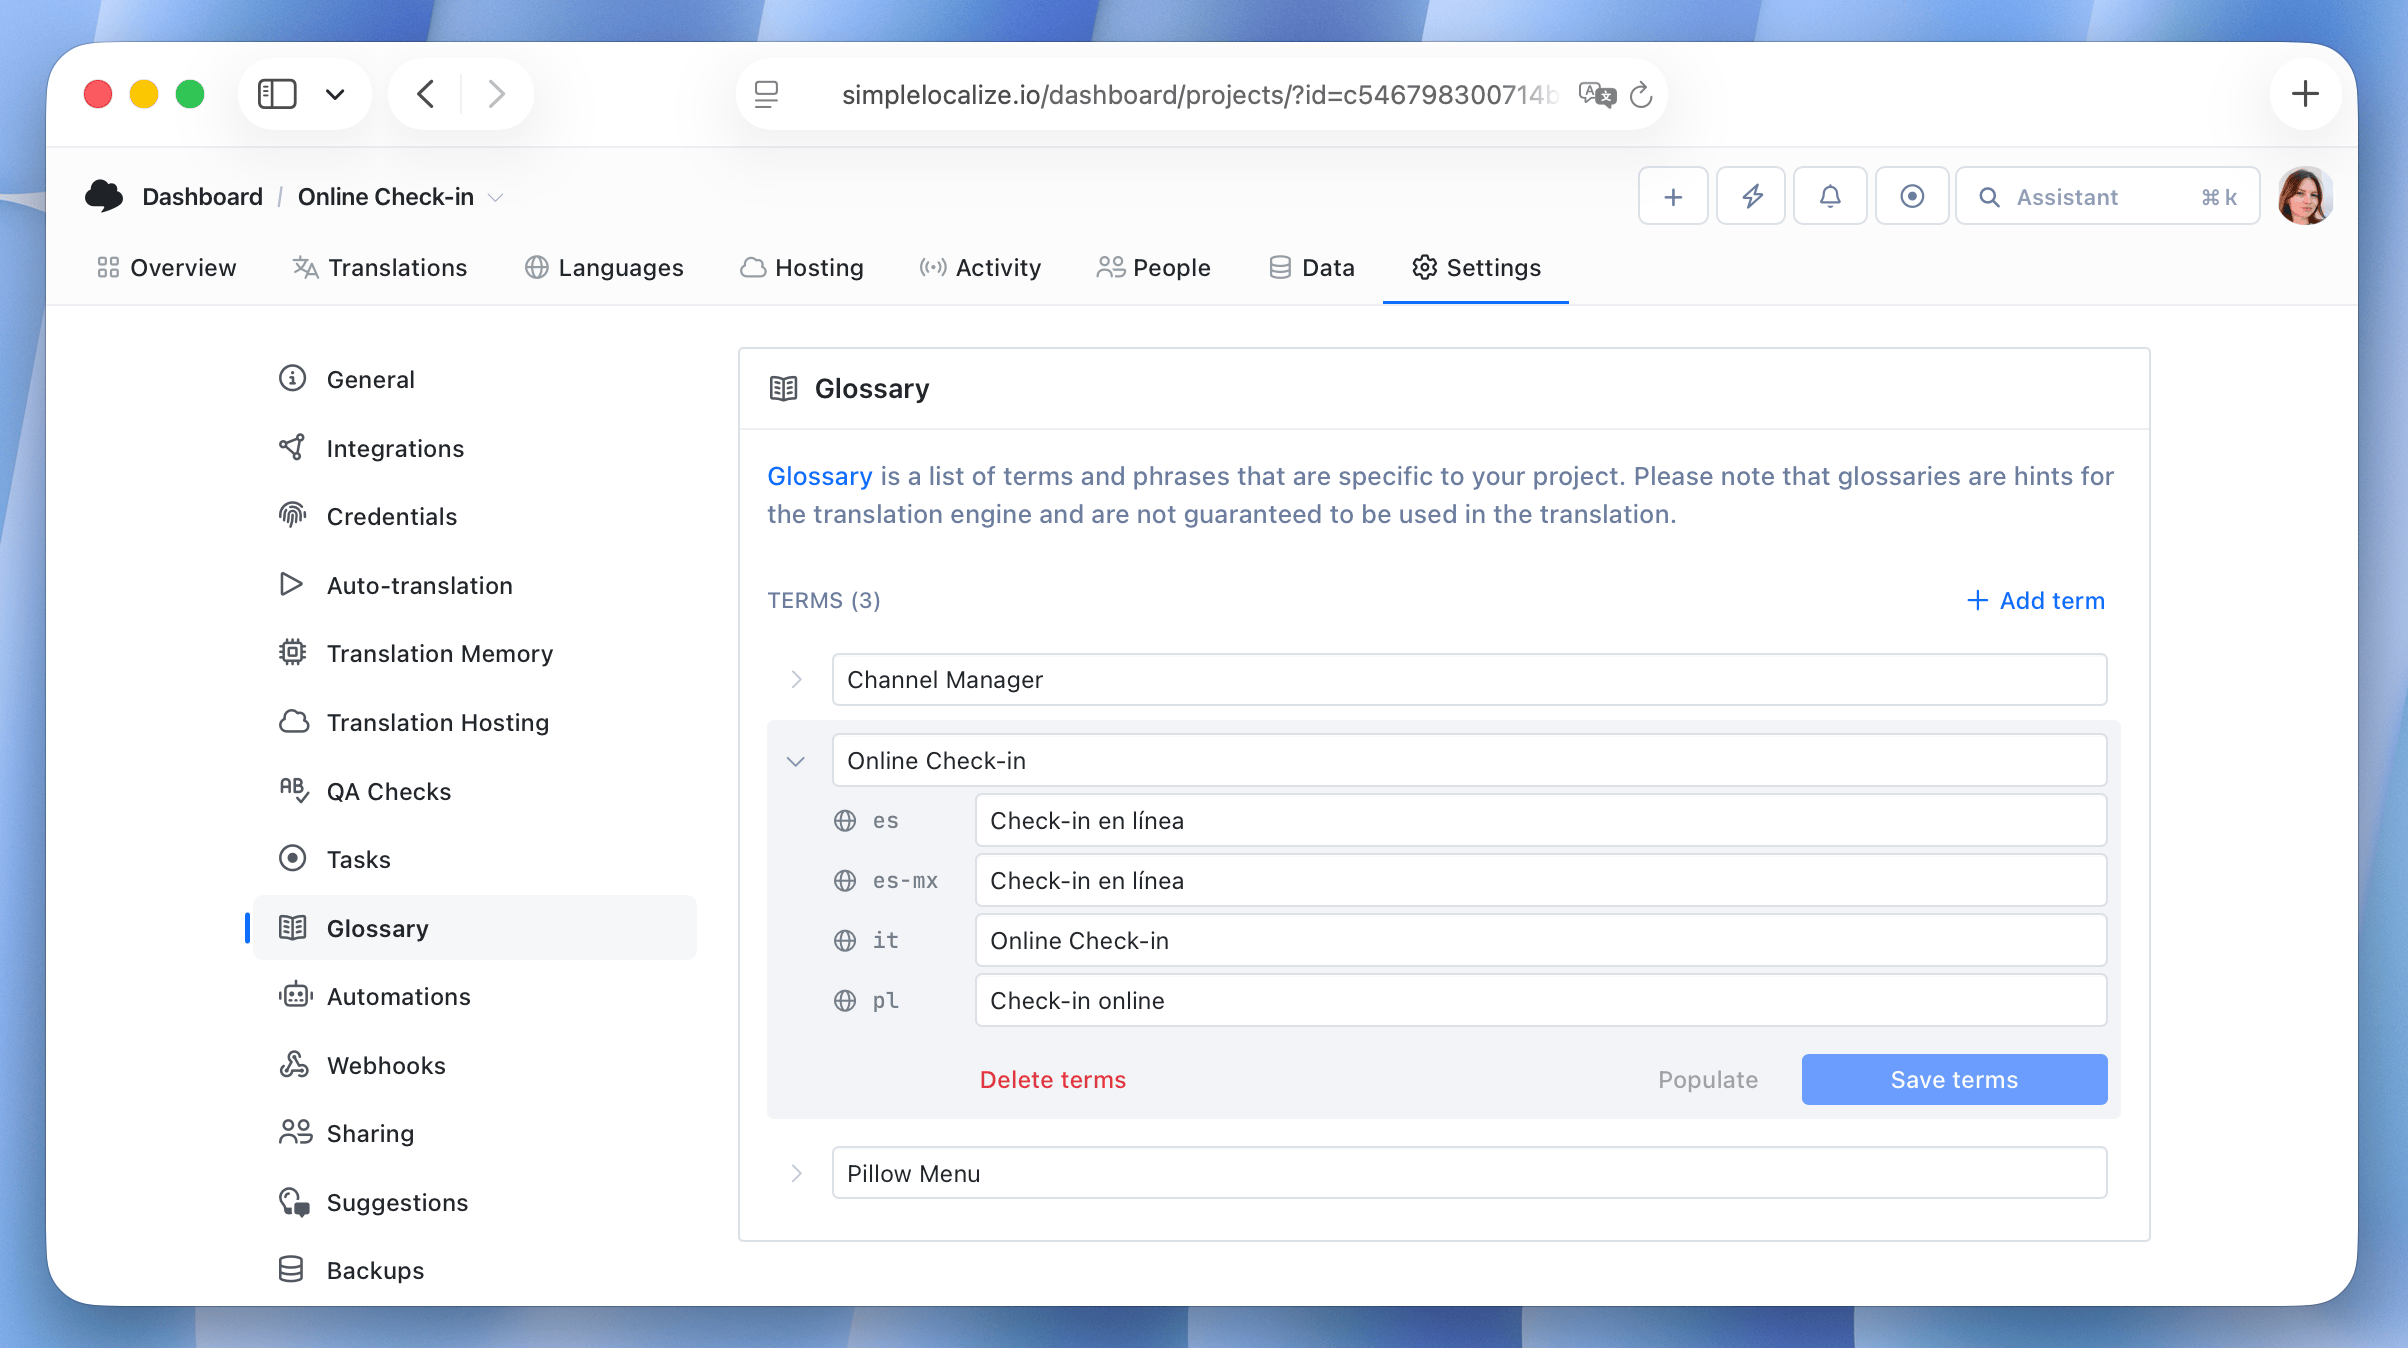
Please note that glossaries are hints and are not guaranteed to be used in the translation.
#### DeepL glossary
**When using your own DeepL API key**, SimpleLocalize automatically fetches glossaries from your DeepL account and uses them during auto-translation. Glossaries are **automatically matched** based on the source and target language pair. If there are multiple glossaries for the same language pair, the most recently created one is used.
**When using SimpleLocalize built-in DeepL**, you can create and manage glossaries directly in SimpleLocalize project settings (available from Team plan).
## Custom AI models
You can use your own AI models for auto-translation by providing an endpoint and API key in your project settings.
This option allows you to use any AI model that supports one of the popular endpoints:
- `/v1/responses` - newer endpoint, that supports more features **(recommended)**
- `/v1/chat/completions` - legacy but still widely supported
#### Responses endpoint
Example request:
```json
{
"model": "model name",
"input": "prompt text"
}
```
Expected response:
```json
{
"output": {
"type": "message",
"content": [
{
"type": "output_text",
"text": "Translated text"
}
]
}
// cut other fields for brevity
}
```
> More details: [OpenAI responses endpoint documentation](https://developers.openai.com/api/reference/resources/responses/methods/create)
Example OpenAI-compatible API providers:
- [Gemini documentation](https://ai.google.dev/gemini-api/docs/openai)
- [Claude documentation](https://platform.claude.com/docs/en/api/openai-sdk)
- [Mistral documentation](https://docs.mistral.ai/api/response/overview)
### Local AI models
You can also run an AI model locally on your machine for auto-translation. To do this, set up a local server that exposes one of the supported endpoints mentioned above. Use [LM Studio](https://lmstudio.ai/) to run your local models and expose the API endpoint to SimpleLocalize via [ngrok](https://ngrok.com/).
## Settings
You can find more auto-translation settings in your project **Settings** under the **Auto-translation** tab.
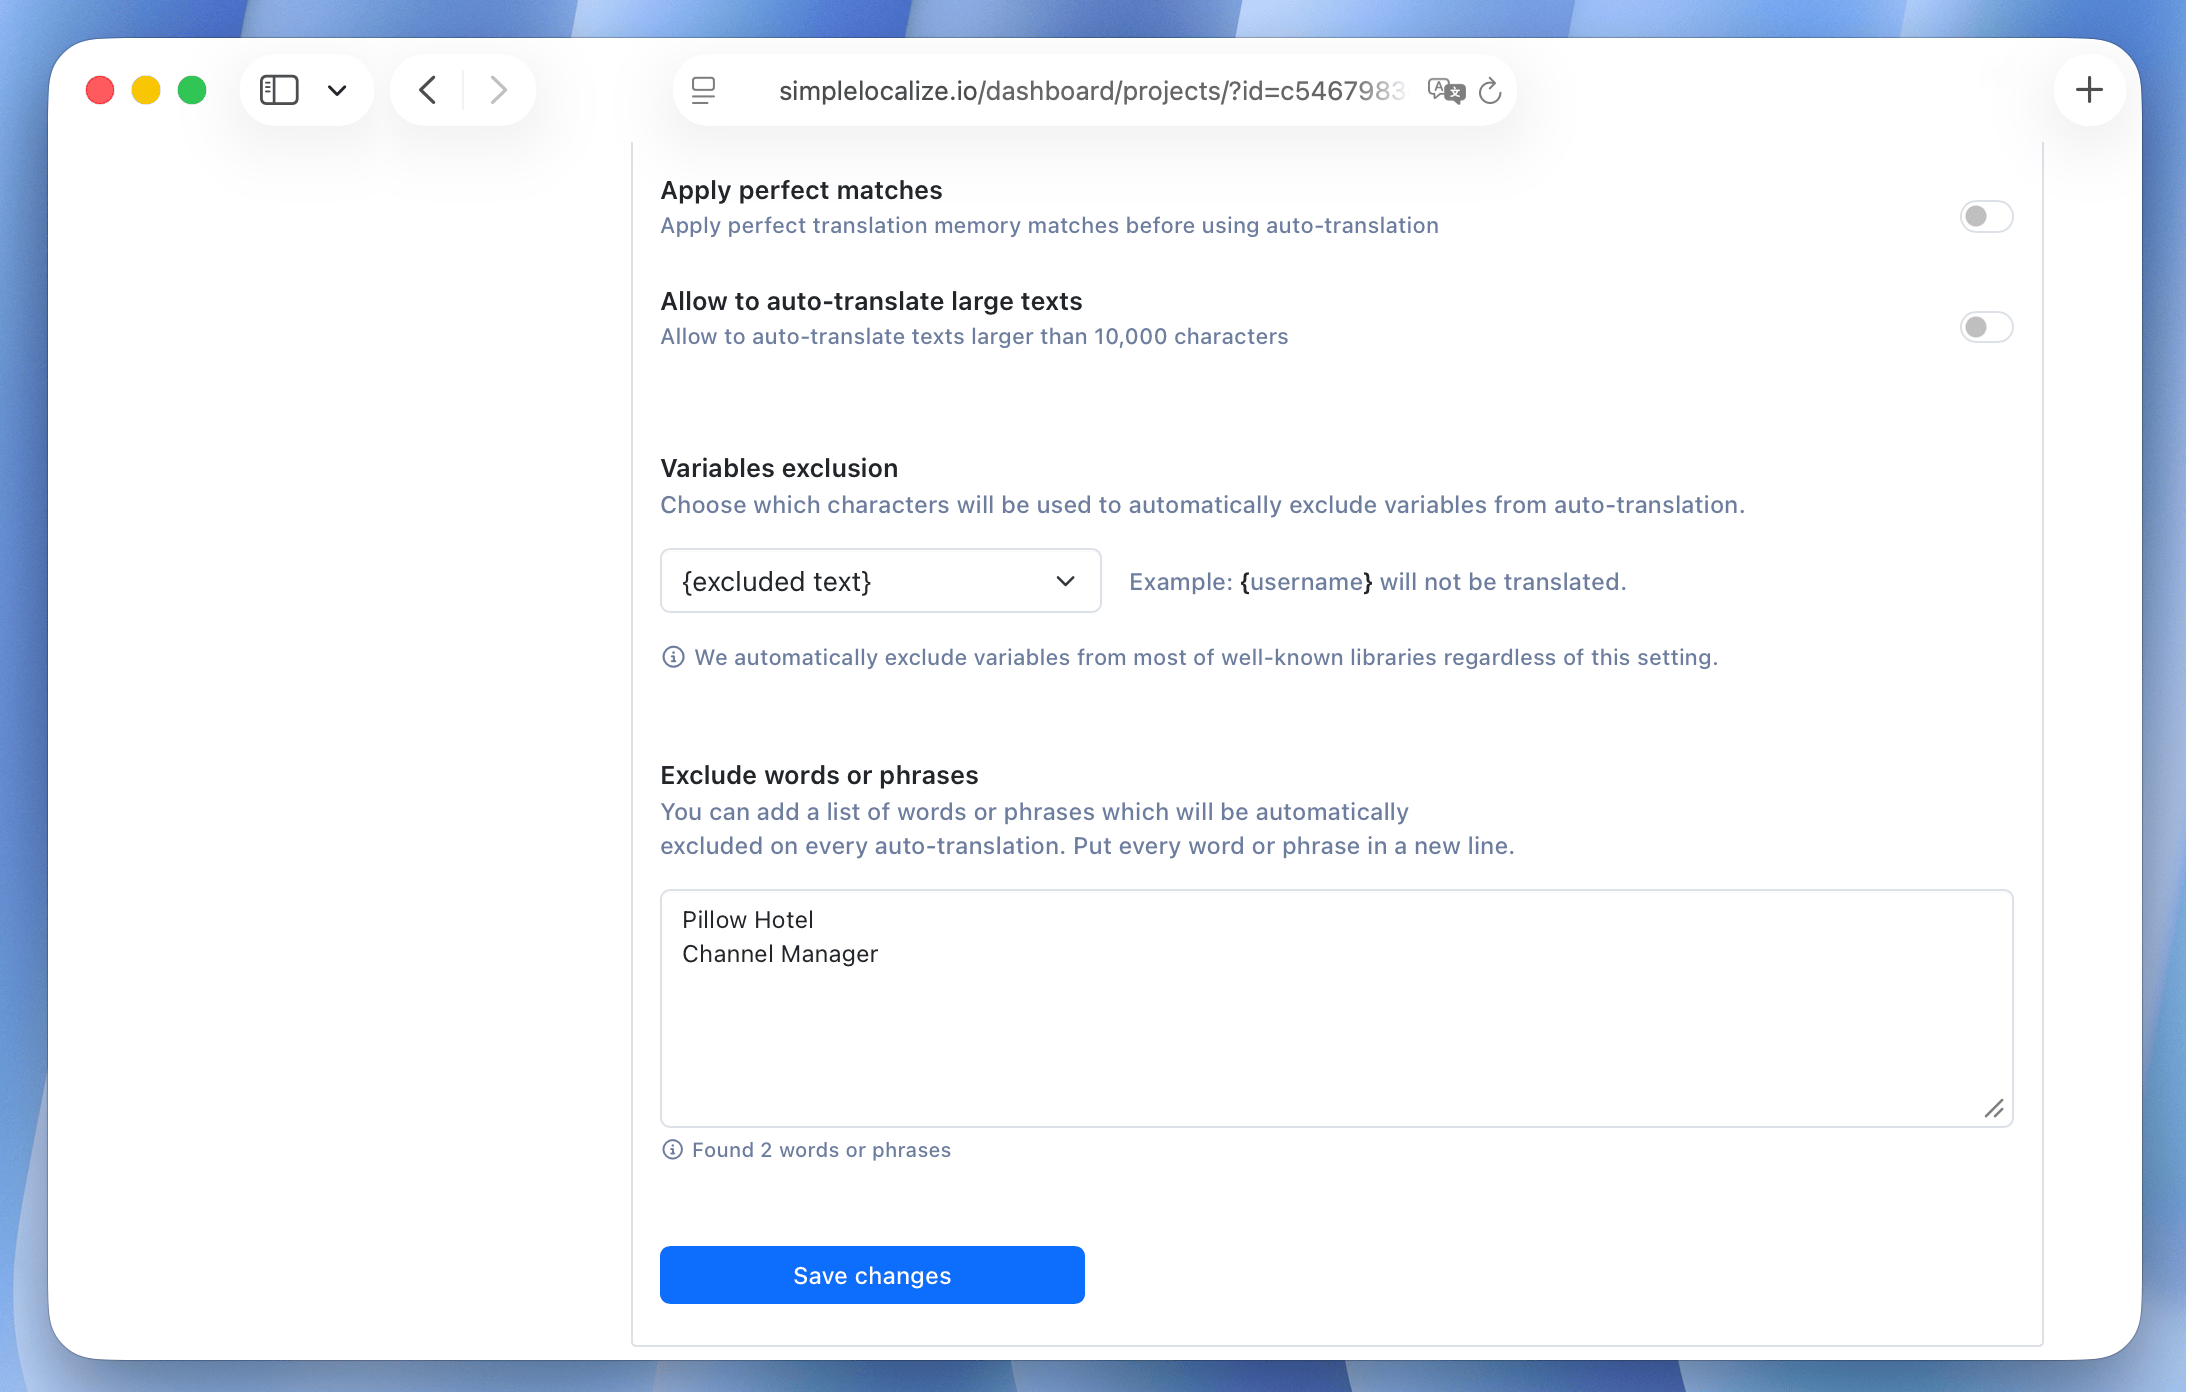
- **Apply perfect matches**: When enabled, SimpleLocalize will automatically apply translations that are an exact match in the Translation Memory, before running auto-translation. This can save you time and reduce costs if you have many repeated texts in your project.
- **Allow to auto-translate large texts** (over 25,000 characters)
### Custom API key
Use your own API key to auto-translate texts using OpenAI, Anthropic, Gemini, DeepL, Google Translate API, or OpenRouter.
Choose your provider, click on **Configure** and enter your API key to use your own translation service.
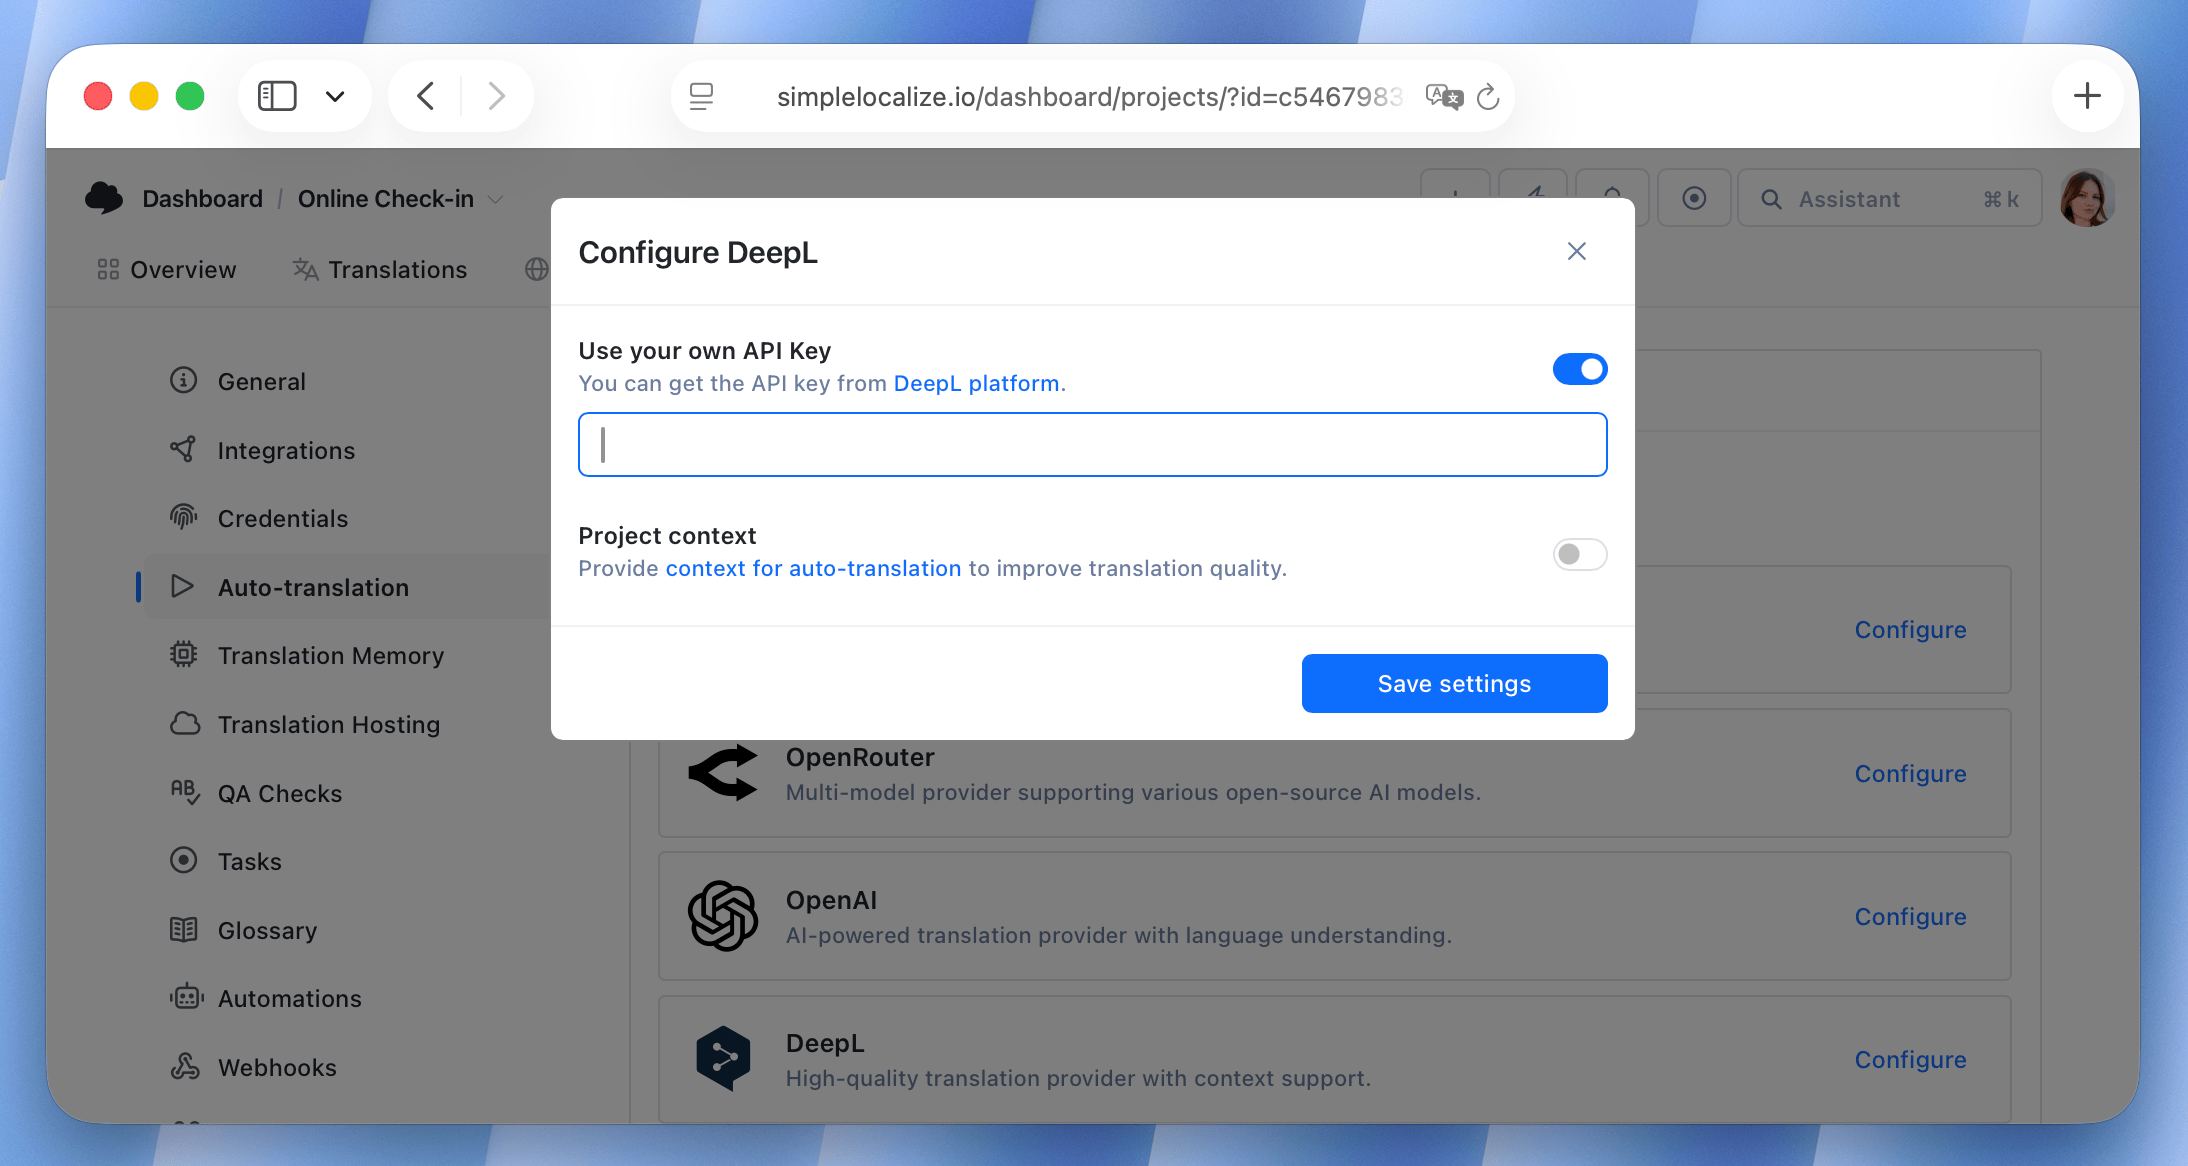
> Using your own API key for auto-translation doesn't affect the auto-translation quota, so you can translate as many characters as you want.
### Variable exclusion
Exclusion variables help auto-translation providers to better understand which words or phrases **should NOT be translated** during the auto-translation process.
**Example**
Translation: `Hello {firstName}, how are you?`
Found variable: `{firstName}` won't be translated.
Translated into Polish: `Witaj {firstName}, jak się masz?`
You can change the default brackets `{}` used for excluding words to:
- `[]` - `Hello [username], how are you?`
- `<>` - `Hello , how are you?`
- `()` - `Hello (username), how are you?`
### Exclude words or phrases
You can add a list of words or phrases which will be automatically excluded on every auto-translation. This option is always enabled. Put every word or phrase in a new line.
#### Message format (ICU) exclusion
[ICU formatting](https://icu.unicode.org) is a widely used format used in many frameworks and apps. SimpleLocalize automatically detects ICU messages and excludes variables used in those messages.
```text
{gender, select,
male {He}
female {She}
other {They}
} will respond shortly.
```
SimpleLocalize will find additional values to translate: `He`, `She`, `They` and `will respond shortly.`
The example translated into Polish will produce a translation like below:
```text
{gender, select,
male {On}
female {Ona}
other {Oni}
} odpowie wkrótce.
```
---
# General: Automations
Source: https://simplelocalize.io/docs/general/automations/
Automations in SimpleLocalize allows you to automate repetitive tasks such as clearing translations, auto-translating strings, changing review status, or publishing translations.
They work by defining triggers and actions. When a trigger event occurs, the corresponding action is executed automatically.
## Triggers
The trigger is an event that initiates the automation: "Translation change" or "Auto-translation finished".
Trigger translations can be filtered by language, source type (API, Web, CLI or integrations) and review status.
By default, translations are triggered when the default language is changed, which is a recommended way to use it with the "Translation change" trigger.

## Actions
The action is a task performed when the trigger is activated. You can choose from the following actions:
- Clear translation
- Auto-translate strings
- Change review status
Actions can be customized with filters to specify the translations that should be affected by the action:
- Language
- Review status
- Translation status (translated, untranslated, or all)
By default, when there are no filters set, the action will be applied to all translations other than the one that triggered the automation.
## Auto-translation automation
The auto-translate action allows you to automatically translate strings on change of the default language (when a translation is changed or added in the default language)

> To make the auto-translation automation work, auto-translation job must be first run manually for the languages you want to auto-translate. This is necessary to get the auto-translation settings (language, provider) for the chosen languages.
## Publish translations after auto-translation
You can create an automation that will publish translations after auto-translation is done. This way, you can automatically translate strings and publish them to your application without manual intervention.
Create a new automation with the trigger set to "Auto-translation finished" and choose the source of the auto-translation job (Web, CLI, API or another automation).
Then, add the action "Publish translations" and save the automation.

> Publication is executed within a few minutes after the auto-translation job is finished. When multiple triggers are activated in a short period, the publication is delayed to prevent multiple publications in a short time.
## Automation execution
- Automations are automatically triggered when the trigger event occurs.
- The automation is run in order from the top of the list to the bottom.
- If the trigger event occurs, the automation will be executed in the order they are listed.
- Automations never trigger other automations, but you can create multiple automations for a single trigger.
- Every automation run creates an activity log entry that shows the trigger event, and the action performed.
- Automation for changes made outside of Web UI (CLI, API) are batched and executed every few seconds.
## Automations on Web UI
Automations execute also when you change translations on the Web UI, directly in the translation editor.
Whenever you have unsaved changes in the Translation Editor and there is at least one active automation that can be triggered,
you will see an option to enable or disable automations for the current save operation.

Using this option, you can temporarily disable automations for changes you are making.
---
# General: Descriptions
Source: https://simplelocalize.io/docs/general/descriptions/
A description is a short note attached to a translation key that gives extra context. It's especially useful for
short or ambiguous keys, where the text alone isn't enough to translate correctly. For example, a key `charge` with
value `Charge` could mean "charge the battery" or "charge a credit card", depending on context.
SimpleLocalize stores **two separate descriptions** for every translation key.
## Code description
Written by developers, directly in source code or translation files. For example, the `description` field in the
[Browser extension JSON](/docs/file-formats/browser-extension-json/) format, or a comment in gettext PO files.
It's meant to travel with the code and update automatically as the codebase changes. It cannot be edited on UI,
and it updates only on import.
## Translator description
Written manually in the [Translation Editor](/docs/translation-editor/get-started/), usually by a translator or project manager, to clarify a key
that doesn't have (or needs more than) a code description.
## Why two fields instead of one?
Descriptions are kept separate so that re-uploading translations from your codebase never silently overwrites
context a translator has manually added in the editor, and vice versa. Both can be shown in the
Translation Editor.
## How uploads map to each field
By default, a `description` found in a file uploaded via the [CLI](/docs/cli/upload-translations/) is saved as the
**code description** only, and the translator description is left untouched.
Uploads from other sources write the `description` field straight to the **translator description** instead.
If you want a CLI upload to update the translator description rather than the code description, use the
`UPDATE_DESCRIPTIONS` [import option](/docs/general/options/#update_descriptions):
```properties
simplelocalize upload --apiKey \
--uploadPath ./path/to/translations.json \
--uploadOptions UPDATE_DESCRIPTIONS
```
## How downloads map to each field
Downloaded files don't include descriptions by default. Add the `INCLUDE_DESCRIPTIONS`
[export option](/docs/general/options/#include_descriptions) to include them — by default this exports the
**translator description**.
To export the **code description** instead, e.g. to get back exactly what's in your codebase, regardless of
whether a translator has since added their own note you can combine it with `USE_CODE_DESCRIPTIONS`
[export option](/docs/general/options/#use_code_descriptions):
```properties
simplelocalize download --apiKey \
--downloadPath ./path/to/translations.json \
--downloadOptions INCLUDE_DESCRIPTIONS,USE_CODE_DESCRIPTIONS
```
Descriptions are stored per translation key, not per language, so the exported description is the same
regardless of which language you download.
## Descriptions as AI context
Both code and translator descriptions are passed to the AI provider as context during
[auto-translation](/docs/general/auto-translation/#ai-context), helping it produce more accurate, disambiguated
translations.
## Generate descriptions from code
Keys without any description can be described automatically with [Context Harvester](/docs/integrations/context-harvester/).
It finds where each key is used in your source code, generates a short description with AI, and saves it to a file
you review in your repository before uploading it as code descriptions.
---
# General: Languages
Source: https://simplelocalize.io/docs/general/languages/
In SimpleLocalize, every project language (or locale) has **language key** that is used during file export as filename, and **language name** which can be treated as a user-friendly display name.
You can set up the language keys as [country codes](/data/countries/), [language codes](/data/languages/), [locale codes](/data/locales/), or any other format that suits your project.
## Language keys
**Language keys are used to identify languages and locales in your project.**
They are used as a part of the filename in exported files, and they are used to identify languages in the SimpleLocalize application,
REST API, hosted resources, and CLI commands.
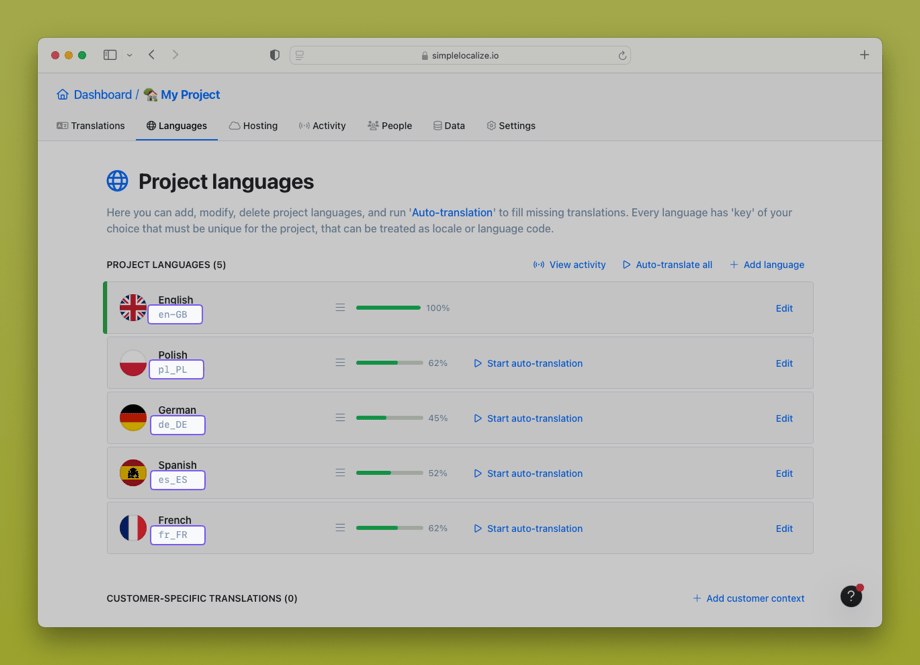
Language keys can have up to 20 characters and can contain only letters, numbers, dashes, and underscores. They are case-sensitive, so `en` and `EN` are treated as different entities.
### Best practices
When choosing language keys for your project, it is important to follow some best practices to ensure that your project is organized and easy to manage. The most common practice is to use [ISO 639-1](https://en.wikipedia.org/wiki/ISO_639-1) language codes, which are two-letter codes that represent languages. For example:
- `en` - English
- `de` - German
- `fr` - French
- `es` - Spanish
- `pl` - Polish
You can also use [ISO 3166-1](https://en.wikipedia.org/wiki/ISO_3166-1) country codes, which are two-letter codes that represent countries. For example:
- `US` - United States
- `DE` - Germany
- `FR` - France
- `ES` - Spain
- `PL` - Poland
or a combination of both, like `en`, `en_US`, `en_GB`, `es`, `es_MX` and use [fallback languages](#fallback-languages) option feature.
> You can find a full list of language, country, and locale codes in our [World Data Resources](/data/) including JSON format and [hosted country flag icons](/blog/posts/hosted-flag-icons/).
## Add a new language
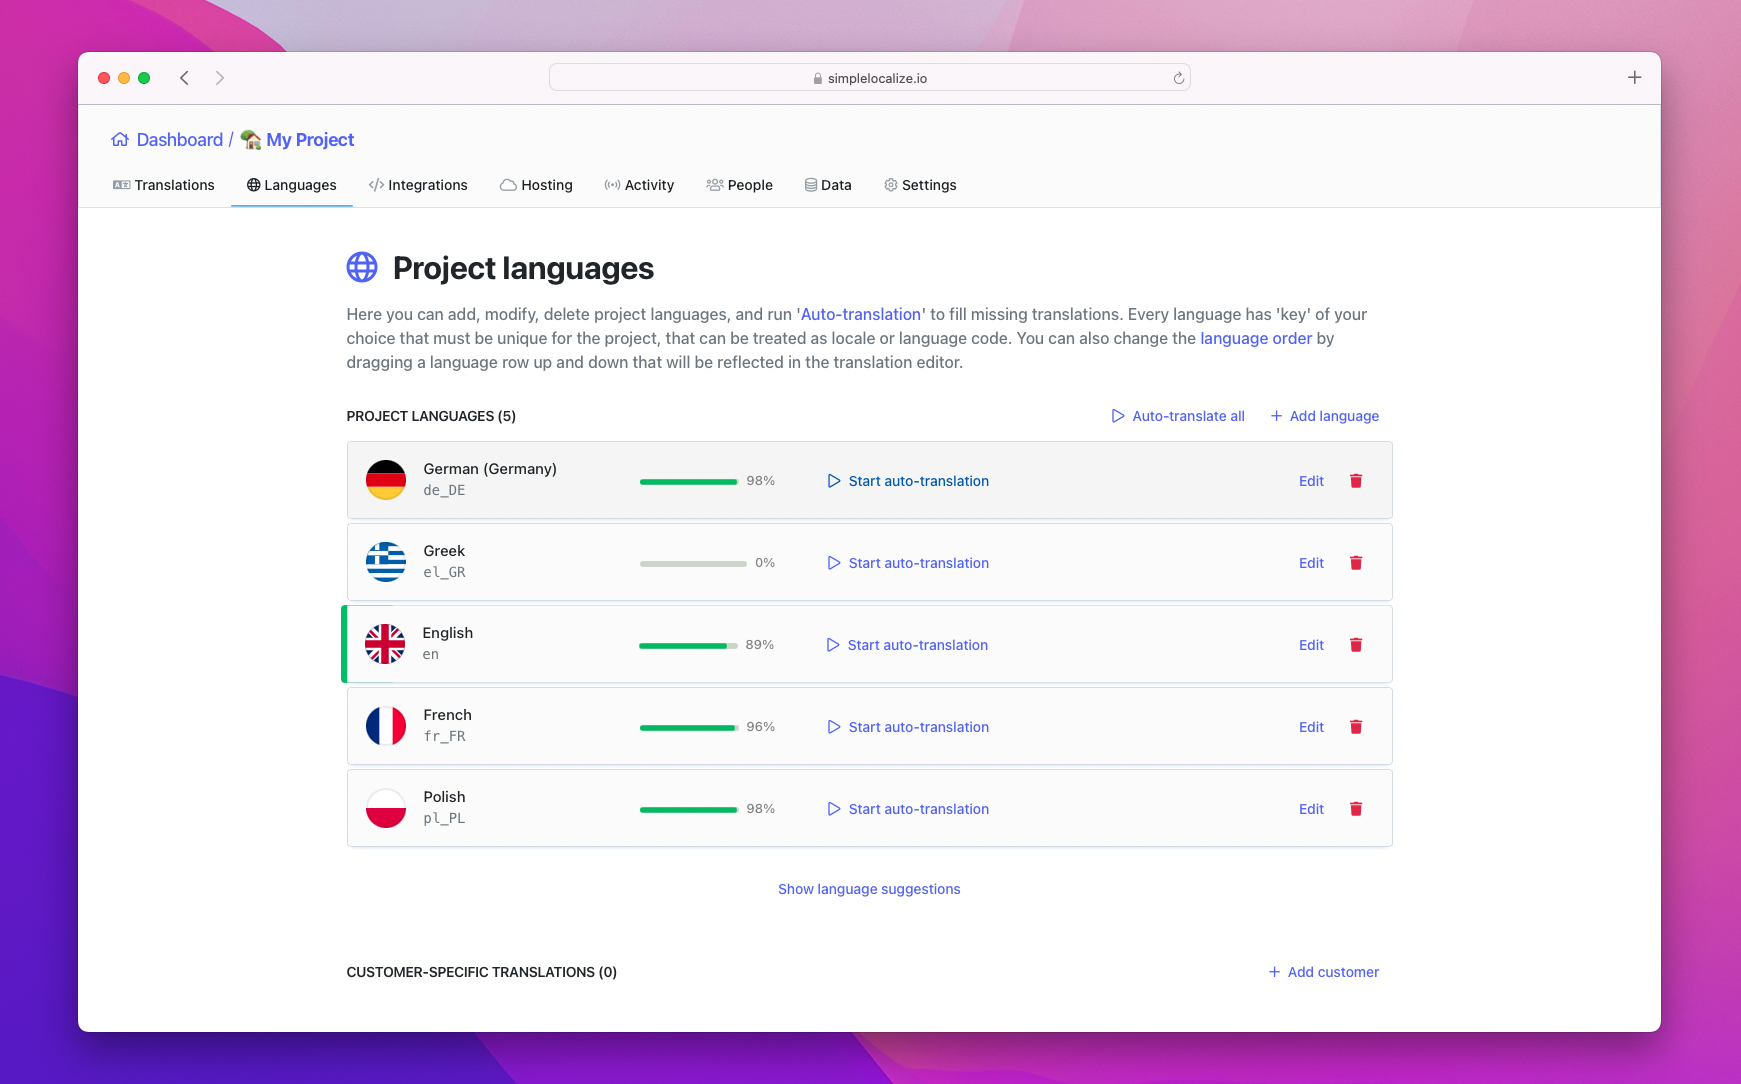
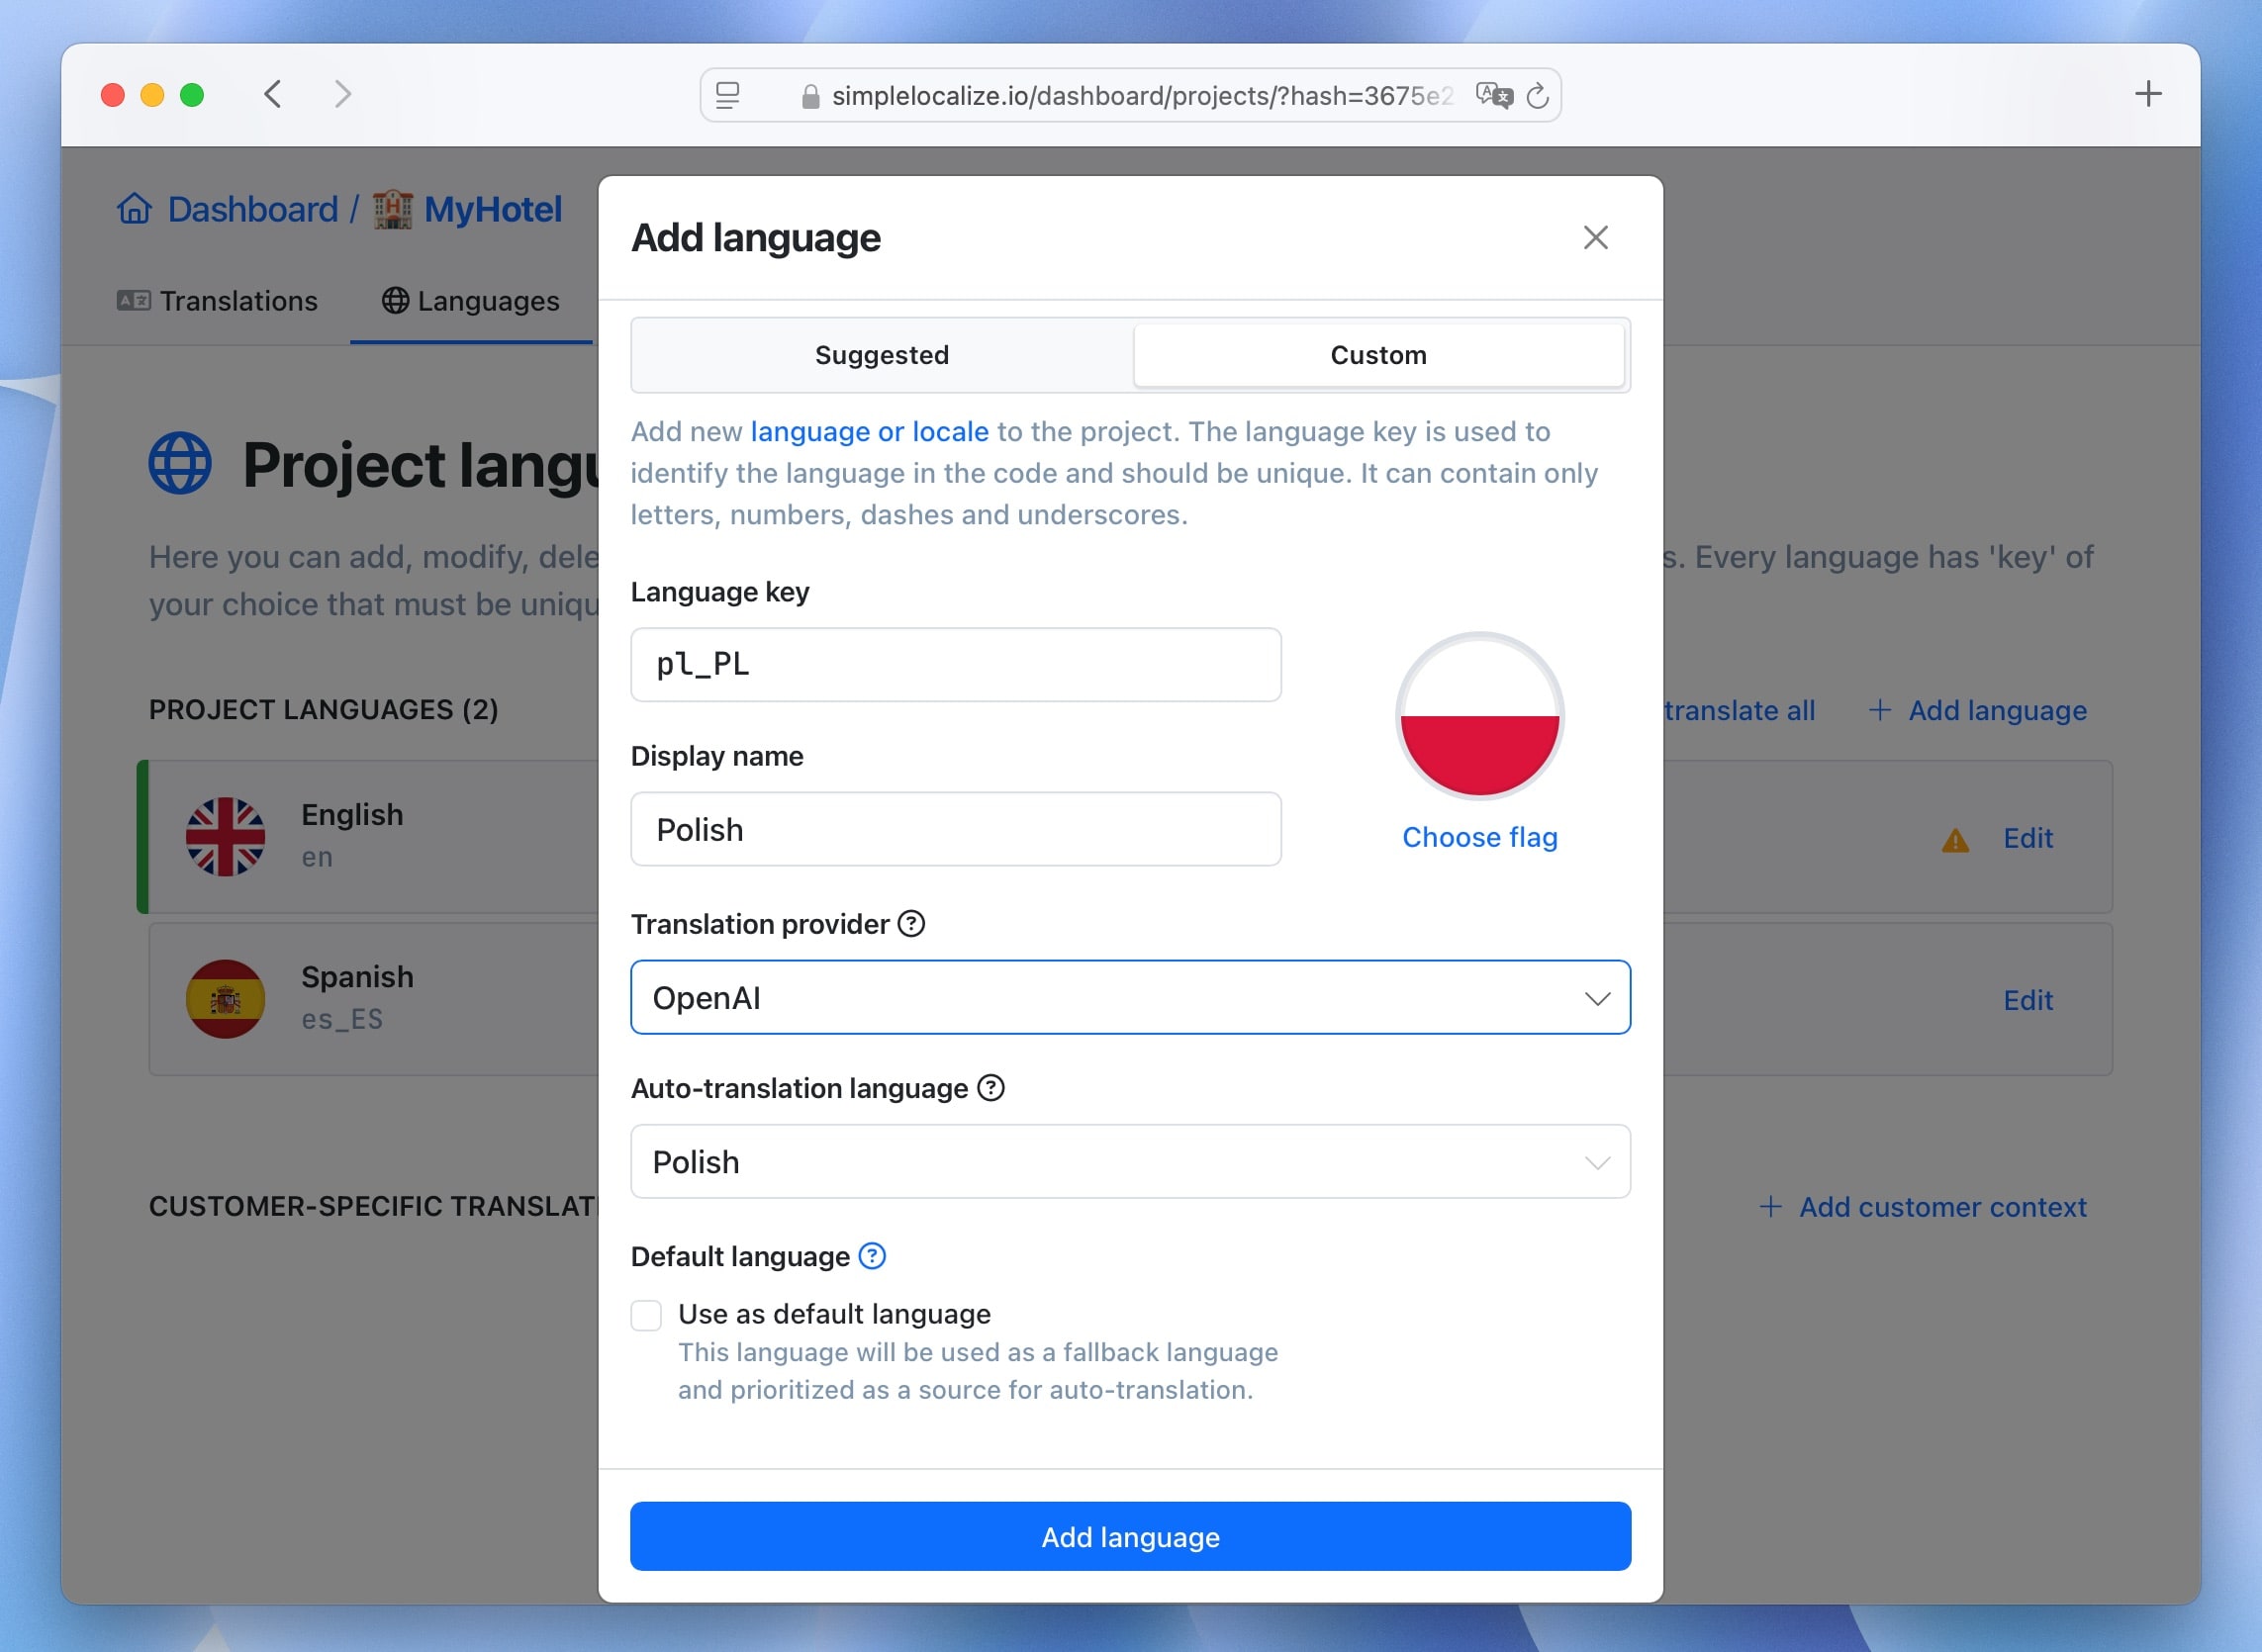
Click the **Add language** button to add a new language to your project. You can choose the languages from the list, or you can enter a custom language key and display name.
In **Suggested** languages, you can find the most popular languages and search for the language you want to add. On the list, you will also find languages that are used in your other projects, so you can quickly add them to the current project.

In **Custom** languages, you can enter any language key and display the name. This is useful when you want to use a custom format for your language keys or when you want to add a language that is not available in the list.
## Reorder languages
You can rearrange language order which will affect order in the 'Translations' tab and in the exported files. You can save language order for the whole project, which will be used as the default order for every
project contributor. Every user can rearrange the language order on their own. Translators cannot change the project order, but they can adjust the view for themselves.

To change language order, drag-and-drop the languages on the list. When the order is done, save the changes for the project or just for your own use.
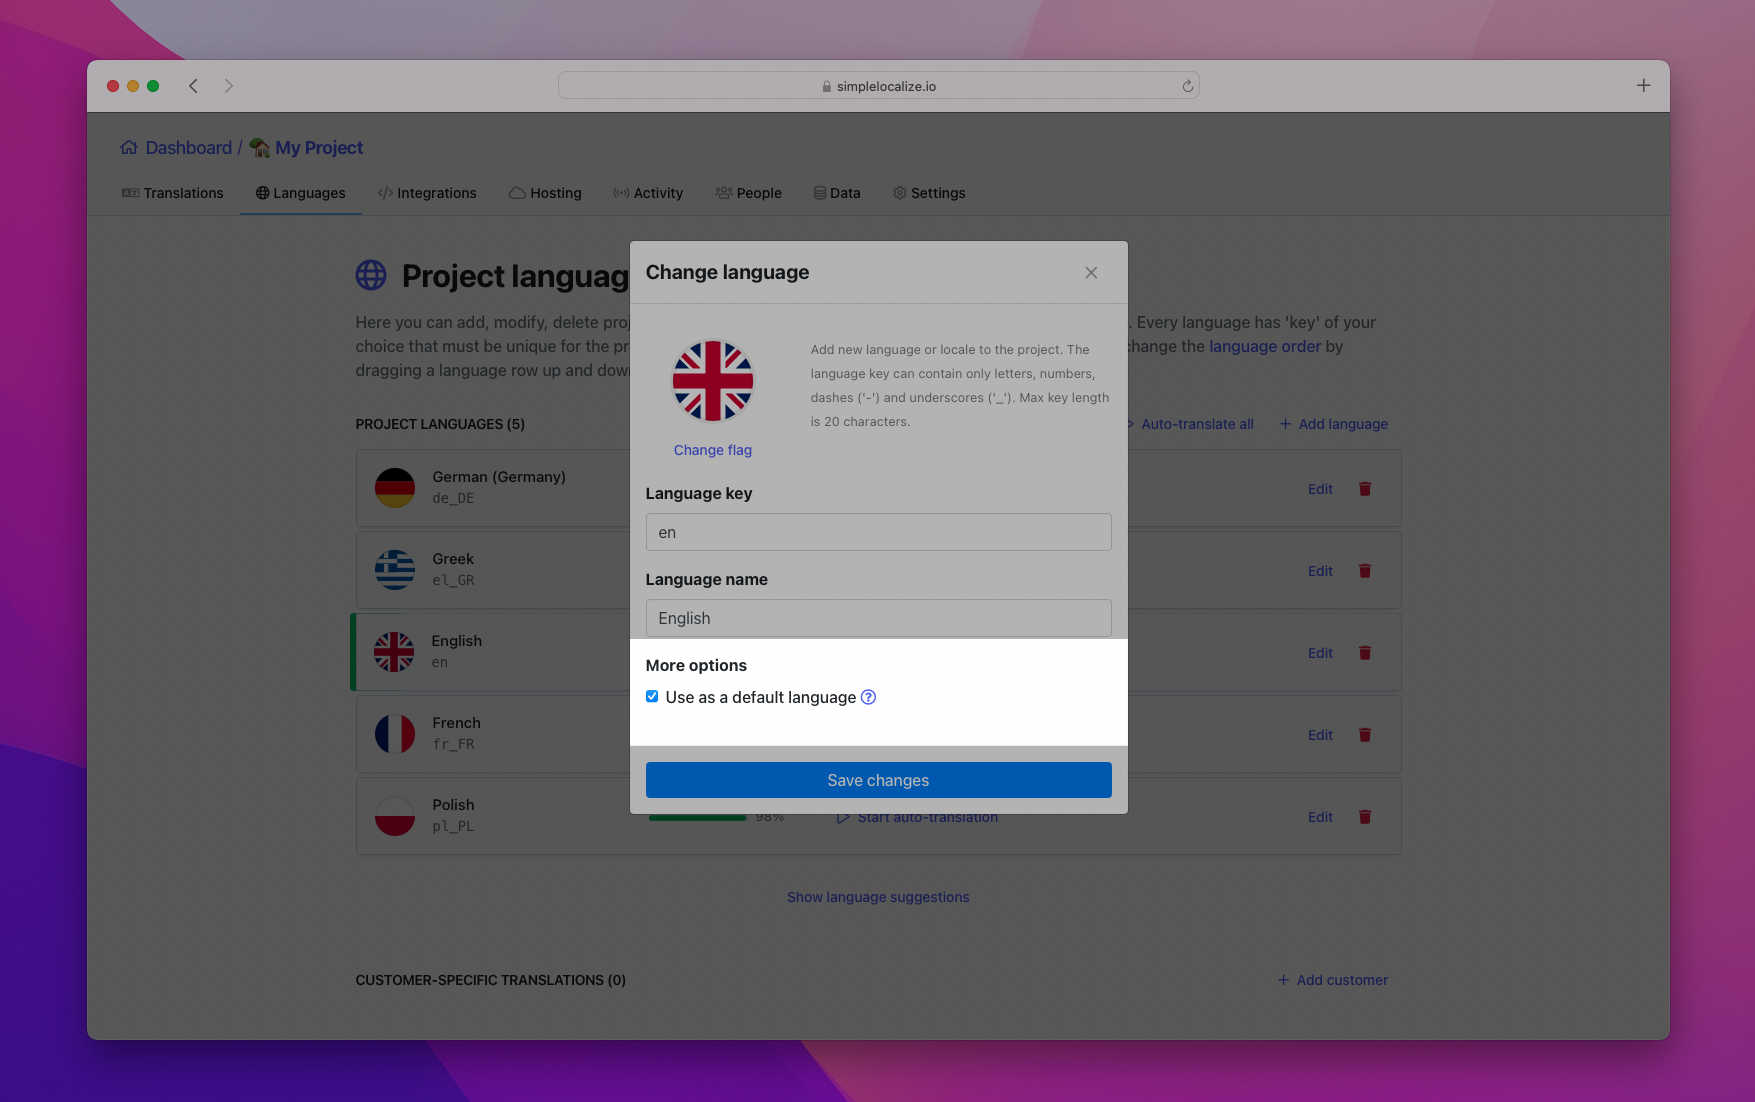
## Default language
The default language has a special role in the project, and it is used in a few different ways.
It is the language that will be prioritized during [the auto-translation](/docs/general/auto-translation/) process,
it will be used as a fallback language for translation in [translation hosting,](/docs/translation-hosting/get-started/)
and it will be treated as a source language in some areas of the application to display additional information.
## Fallback languages
For each language (except the default language), you can set up a fallback language.
This is useful when you want to provide a secondary option for translations that might be missing in a specific language.
Fallback languages are chained. This means if a translation is unavailable in the first fallback language, the system will check the next fallback language in the chain, and so on.
Ultimately, if no translation is found, the system will resort to the default language or leave the translation empty.
To use fallback languages, in your exports you have to use `ENABLE_FALLBACKS` option, and have selected the default language.
## Language flags and icons
By default, the [flag icons](/data/flags/) are displayed automatically based on language keys.
SimpleLocalize uses ISO 3166-1 standard with 'Alpha-2' notation.
The 'Alpha-2' means that we use only 2-letter country codes. The flag will show up regardless letter case. For example:
- `es_MX` - results with a Mexico flag
- `es_ES` - results with a Spanish flag
- `es_es` - results with a Spanish flag
- `es` - results with a Spanish flag
There are a few exceptions in showing country flags:
- `zh_hans` or `zh_hant` will show the Chinese flag.
- A language key which starts from `en` shows a Great Britain flag.
You can also change a flag for languages regardless of the language key. Adjust the flag manually for your project needs, so they correspond to the selected language.
Flags setup is a great way to organize your project, as you can recognize the language and location with just a glance.

---
# General: Notifications
Source: https://simplelocalize.io/docs/general/notifications/
Notifications help you stay up to date with activity in your SimpleLocalize projects.
You can receive in-app (Notification center) and email notifications about new comments, mentions,
translation suggestions, and updates, without having to monitor the editor constantly.
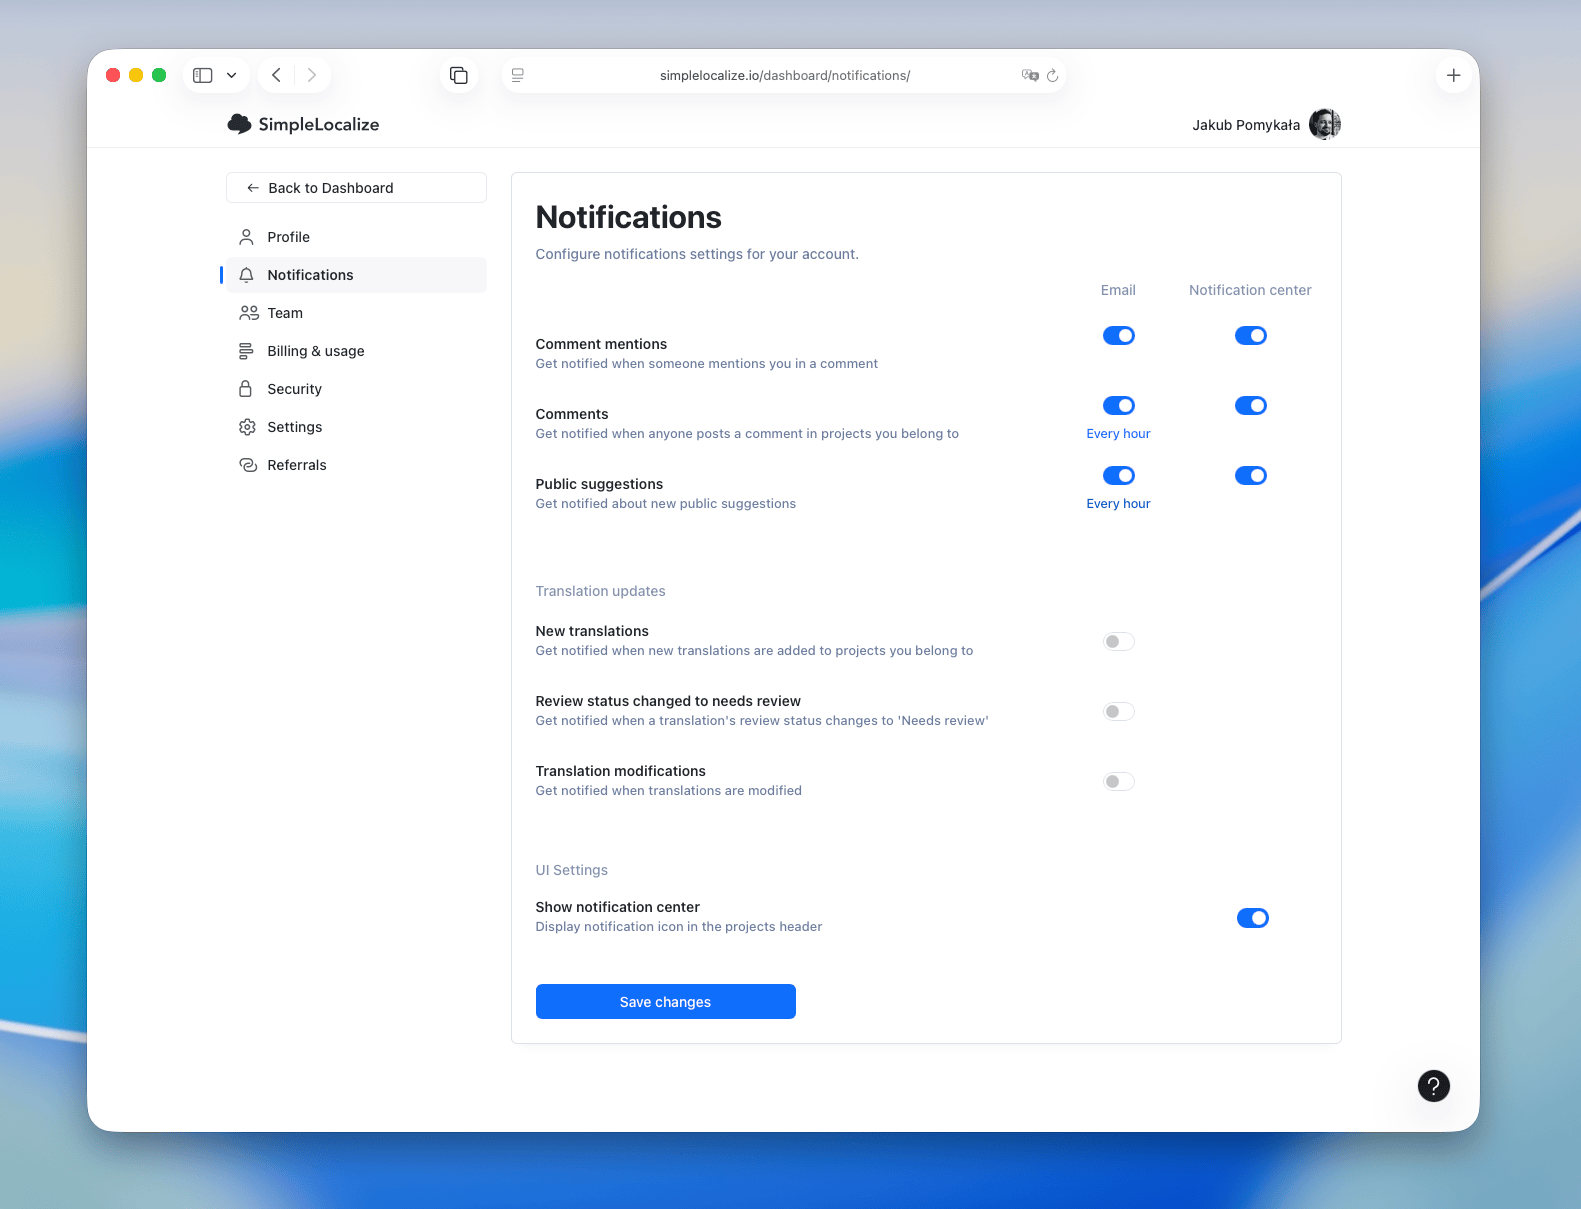
You can manage your notification settings in your user profile under **Notifications**.
## Fine-tune notifications for each project
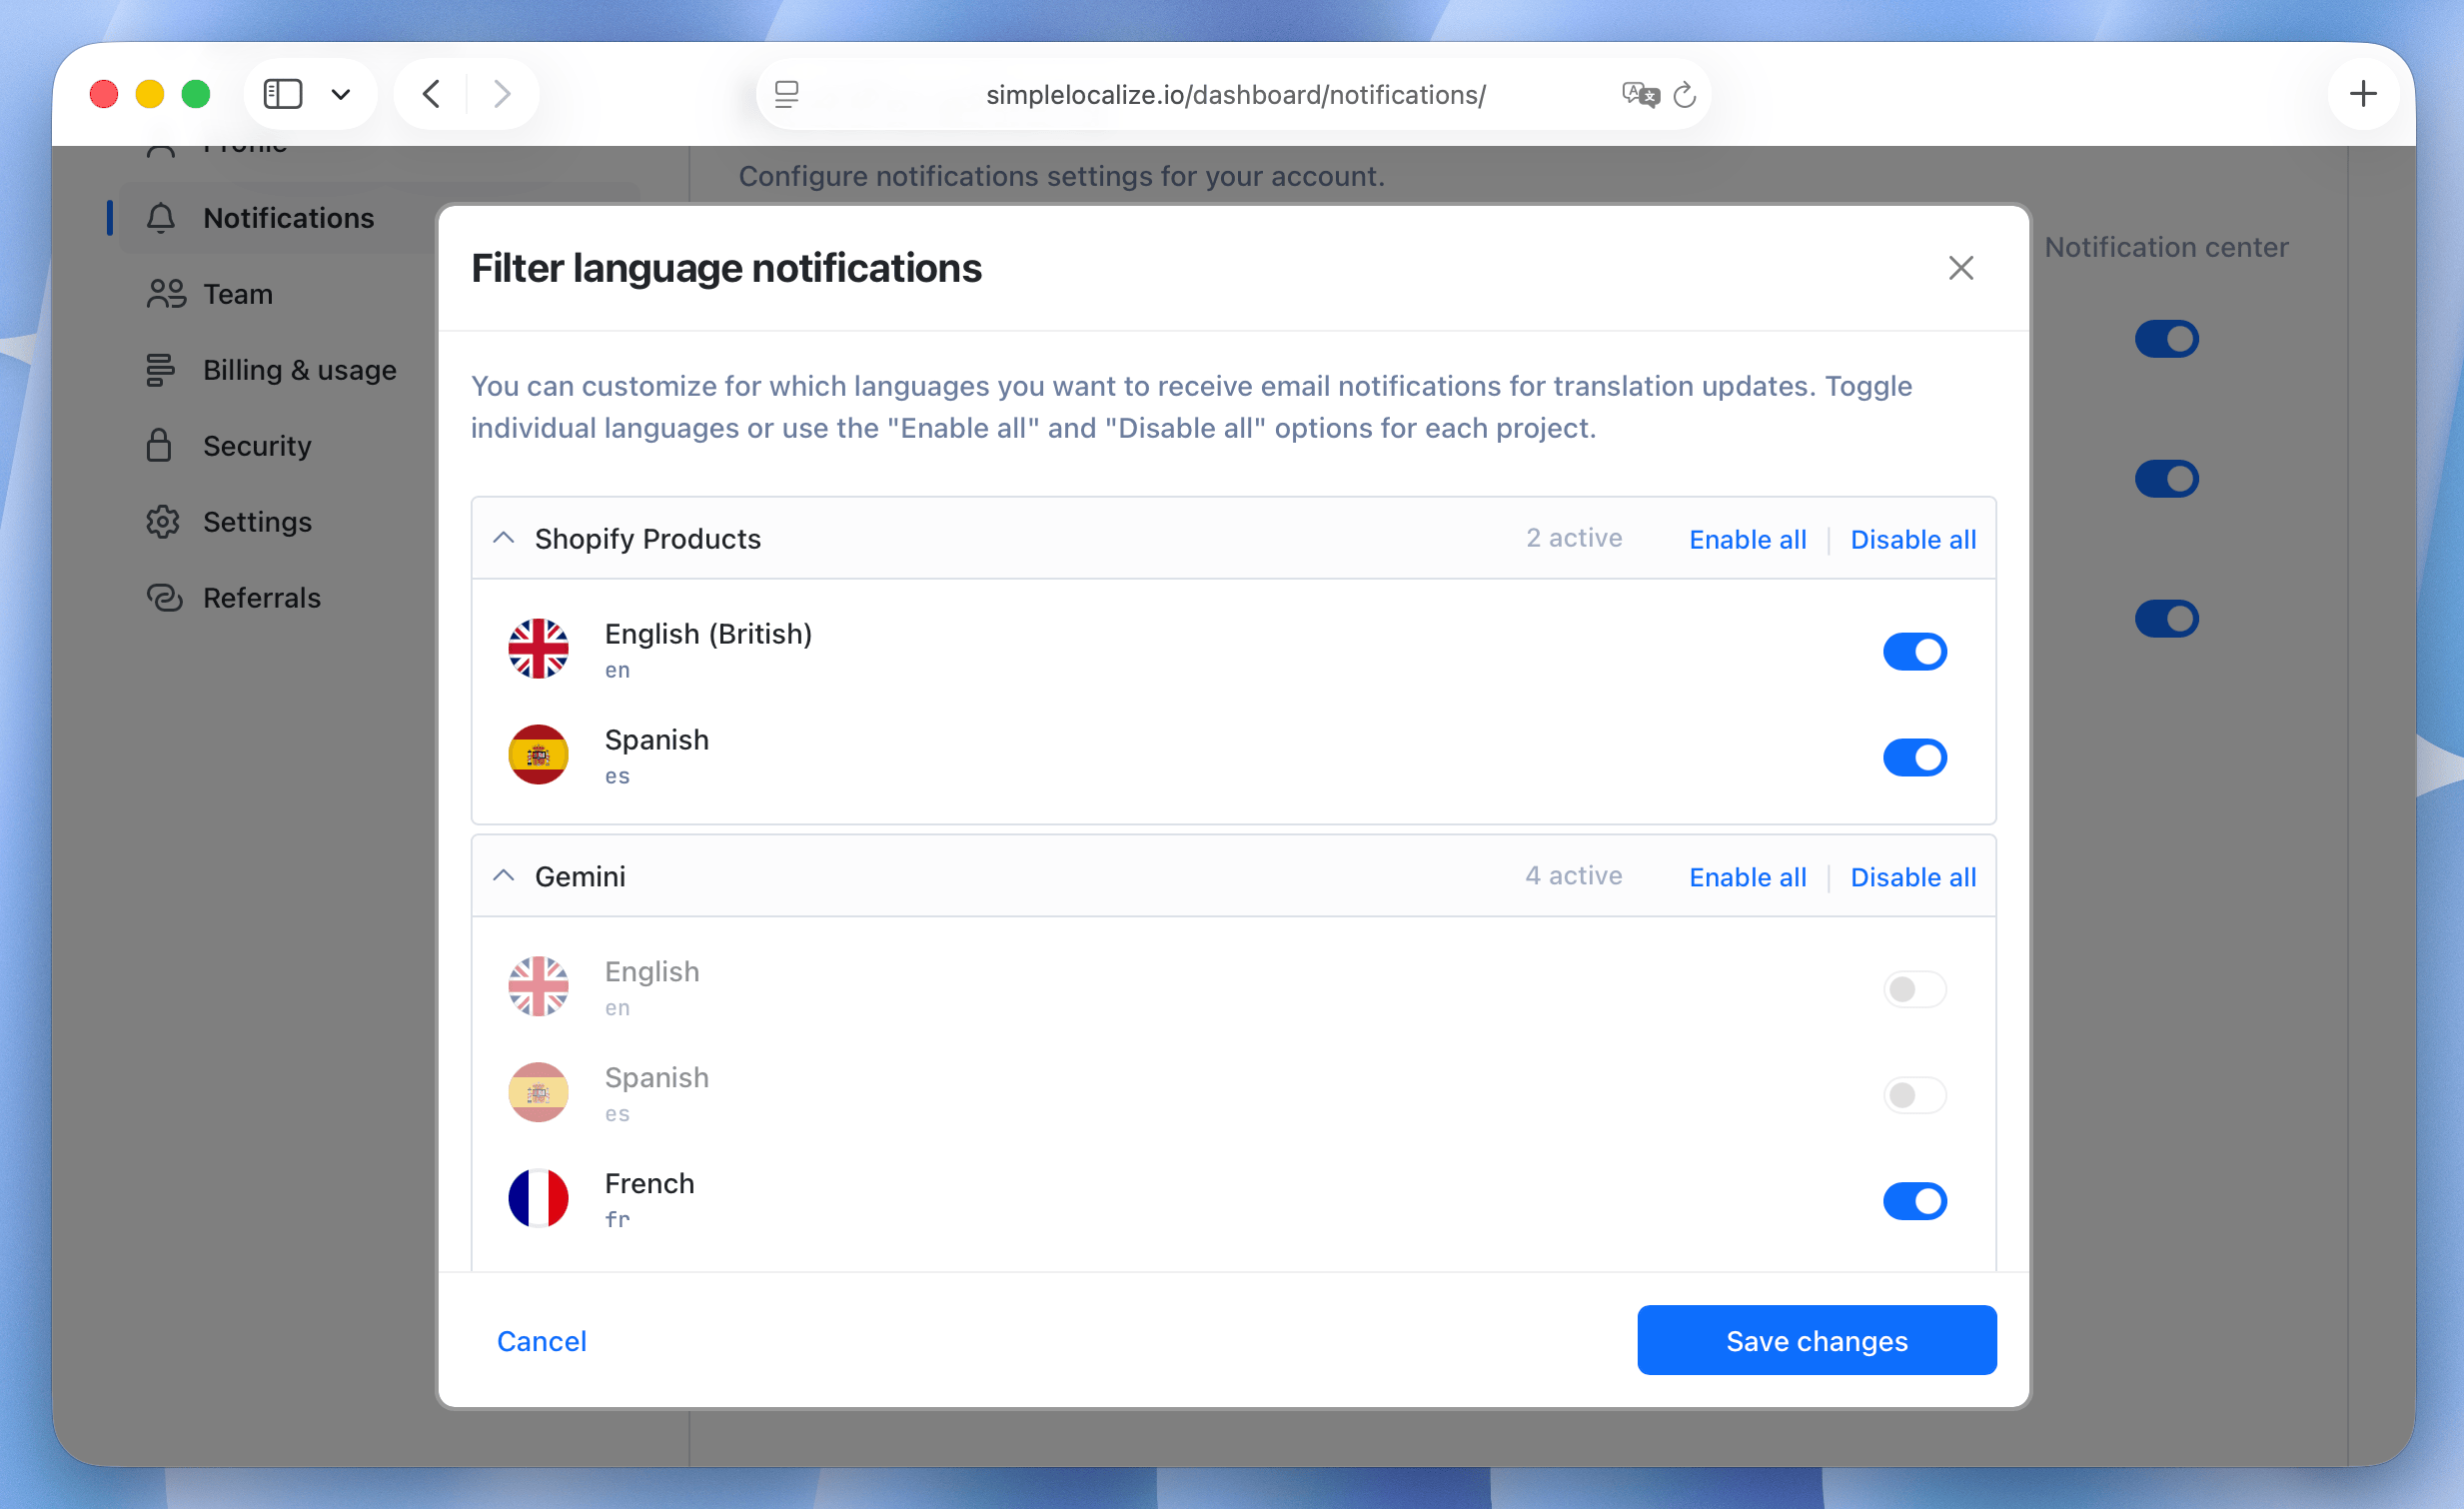
You can customize notification preferences separately for each project you have access to.
The **Fine-tune notifications for each project** option allows you to:
- Enable or disable notifications per project
- Select which **languages** you want to receive notifications for
- Configure everything from a single, unified list of all projects you have access to
Language-based filtering applies to translation updates and other language-related notifications. You will only receive notifications for the languages you select. It does not apply to the [translator summary](#translator-summary).
## Comments
Comments and suggestions notifications help you stay informed about discussions and feedback related to your translations.
Learn more about [writing comments in the translation editor](/docs/translation-editor/comments/) and [Community](/docs/general/public-suggestions/).
### Mentions
Get notified only when you are mentioned in comments within your projects. They are sent immediately after the mention is made.
### Comments
Get notified about any new comments added to translation keys in your projects. You can choose how often you want to receive these notifications: every hour, every 3 hours, daily, or weekly.
In-app notifications are sent immediately.
## Community suggestions
Get notified when your users suggest translations or report issues on the Community page of your projects. Reported issues send in-app notifications only.
You can choose how often you want to receive these notifications: every hour, every 3 hours, daily, or weekly. In-app notifications are sent immediately.
## Translation updates
You can receive email notifications for key translation events, such as:
- when a new translation key is added,
- when an existing translation is updated,
- or when its review status changes to Need Review.
To adjust your preferences, open your user profile and go to Notifications.
> Notifications are not sent to the user who performed the action.
To receive translation update notifications, translators must have the **Change permission** in the project and access to the relevant language. Project administrators and project owners always receive these notifications
if they are enabled for their account. Translation updates are grouped by key, with language names listed below. Default languages appear first and are underlined.
Emails are sent at most once per hour and include up to 250 translation keys per batch.
### New translations
New translations notifications are sent when new translation keys are added to your projects.
### Needs review translations
Need review notifications are sent when a translation's review status changes to 'Need Review'.
Users have to have permission to review translations, and the language for him must be visible.
### Translation modifications
Translation modification notifications are sent when existing translations are updated in your projects.
Users have to have permission to edit translations, and the language for him must be writable.
## Translator summary
The translator summary is an email that tells translators what is waiting for them in a project: the number of missing translations, translations to review and translations with [QA check](/docs/translation-editor/qa-checks/) issues in each of their languages.
The email contains buttons that open the translation editor already filtered to missing, not reviewed or problematic translations.
### Who receives the summary
- Only members of the project with the **Translator** role. People from other projects and people who have not accepted their invitation yet never receive it.
- Only languages the translator can edit (read and write access).
- Missing translations and issues are included only if the translator has the permission to change translations. Translations to review are included only if they have the permission to review translations.
- Issues are included only when quality checks are enabled in the project.
- Deprecated translation keys are skipped.
- Translators who have nothing to do in their languages do not receive an email.
- Translators who disabled email messages in their account do not receive the summary. Language selection from [Fine-tune notifications for each project](#fine-tune-notifications-for-each-project) does not apply to it.
### Daily summary
Project owners and administrators can turn on **Daily summary for translators** in project **Settings** → **General**.
When it is on, the summary is sent every weekday (Monday to Friday) at 7:00 UTC. It is off by default.
A translator receives the daily summary only when something changed for them since their last summary. If nothing changed, the same summary is sent again at most once a week, as a reminder.
### Notify translators manually
Project owners, administrators, and developers can send the summary right away with **Notify translators** in the project actions menu.
Before sending, you see how many translators will be notified, and you can click the number to see who exactly. If nobody has anything to do, the button is disabled.
You can notify translators manually up to 5 times per hour in each project. A manual summary is always sent, even if nothing changed since the last one.
### Activity
Every sent summary is recorded in the project activity as **Translators notified**, together with the number of notified translators.
Project owners, administrators, and developers can expand the entry to see who was notified. Translators see only the number.
## UI settings
If you are not interested in receiving any in-app notifications, you can hide the notification icon by disabling the **Show notification center** in the **UI Settings** section.
---
# General: Pluralization
Source: https://simplelocalize.io/docs/general/pluralization/
**Pluralization and message selection** is the process of adapting translations to account for different grammatical forms in various languages. Different languages have different rules for pluralization, which can affect how messages are displayed based on for example numerical values.
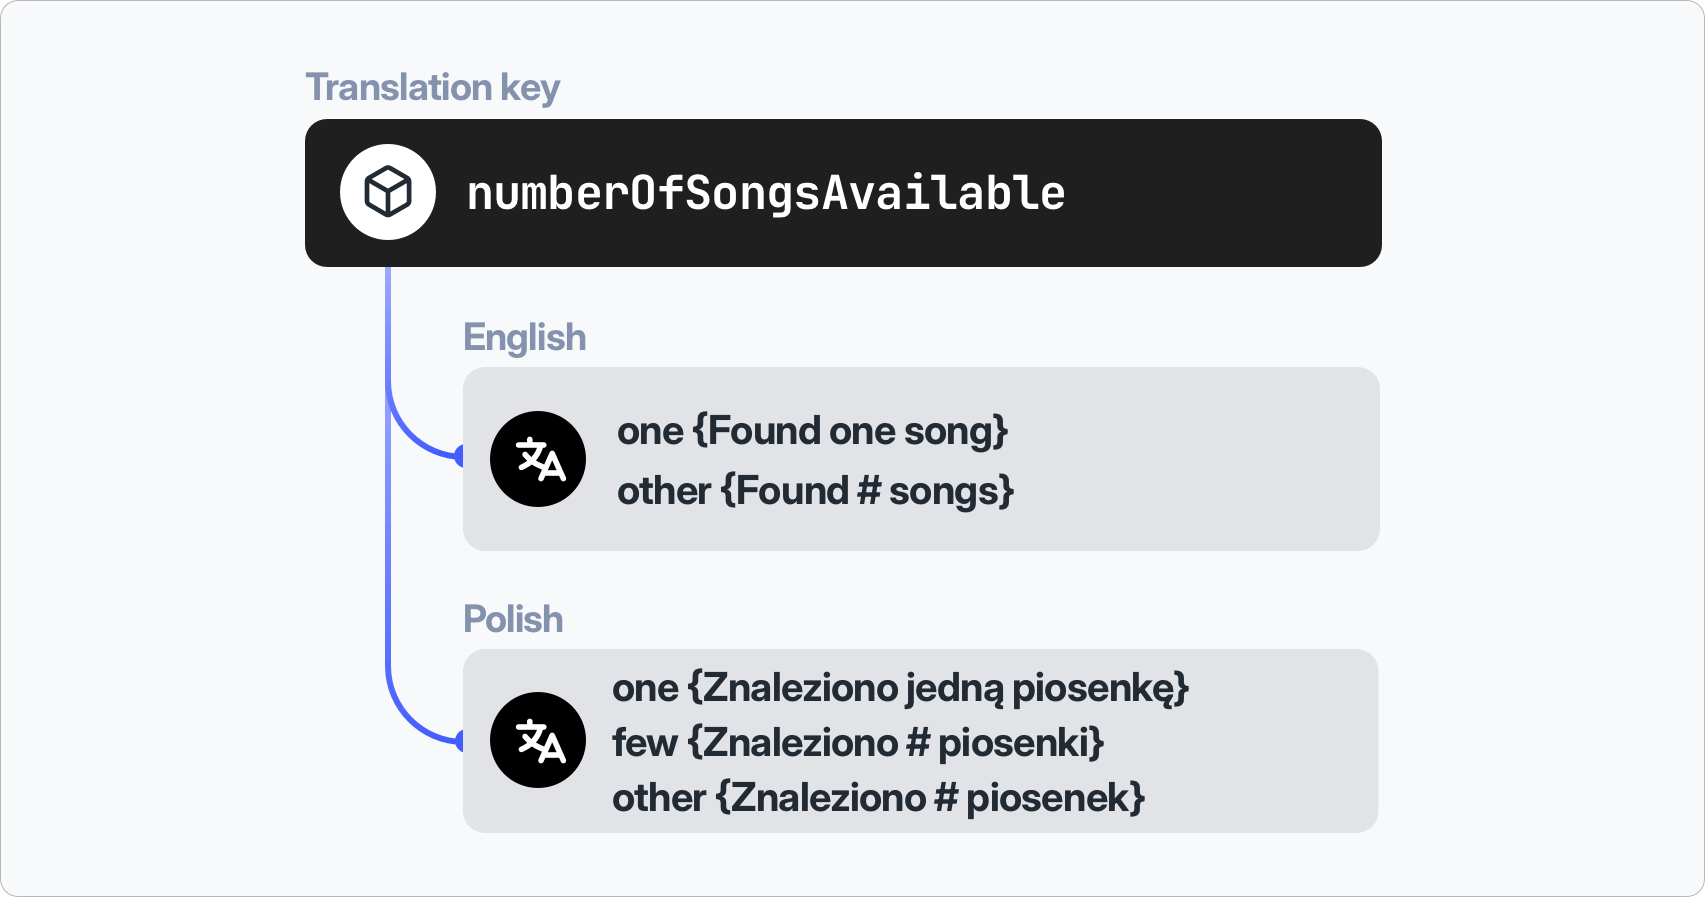
SimpleLocalize aims to unify the pluralization process by providing a consistent way to define and use plural forms across different languages for different file formats.
That means you can import and export translations with plural forms in a way that is compatible with the specific requirements of each file format.
For this purpose, SimpleLocalize uses the [**ICU MessageFormat**](https://en.wikipedia.org/wiki/International_Components_for_Unicode) syntax, which is widely supported and allows for complex message formatting, including pluralization.
## Pluralization example
Let's look at an example of how pluralization works in [Android Strings](/docs/file-formats/android-strings/) file format for English and Polish languages.
```xml
Found one songFound %d songs
```
```xml
Znaleziono jedną piosenkęZnaleziono %d piosenkiZnaleziono %d piosenek
```
For the Polish language, there are three plural forms: **"one"**, **"few"**, and **"other"**. Each form corresponds to different numerical values,
while English only has two forms: **"one"** and **"other"**.
### Importing pluralized translations
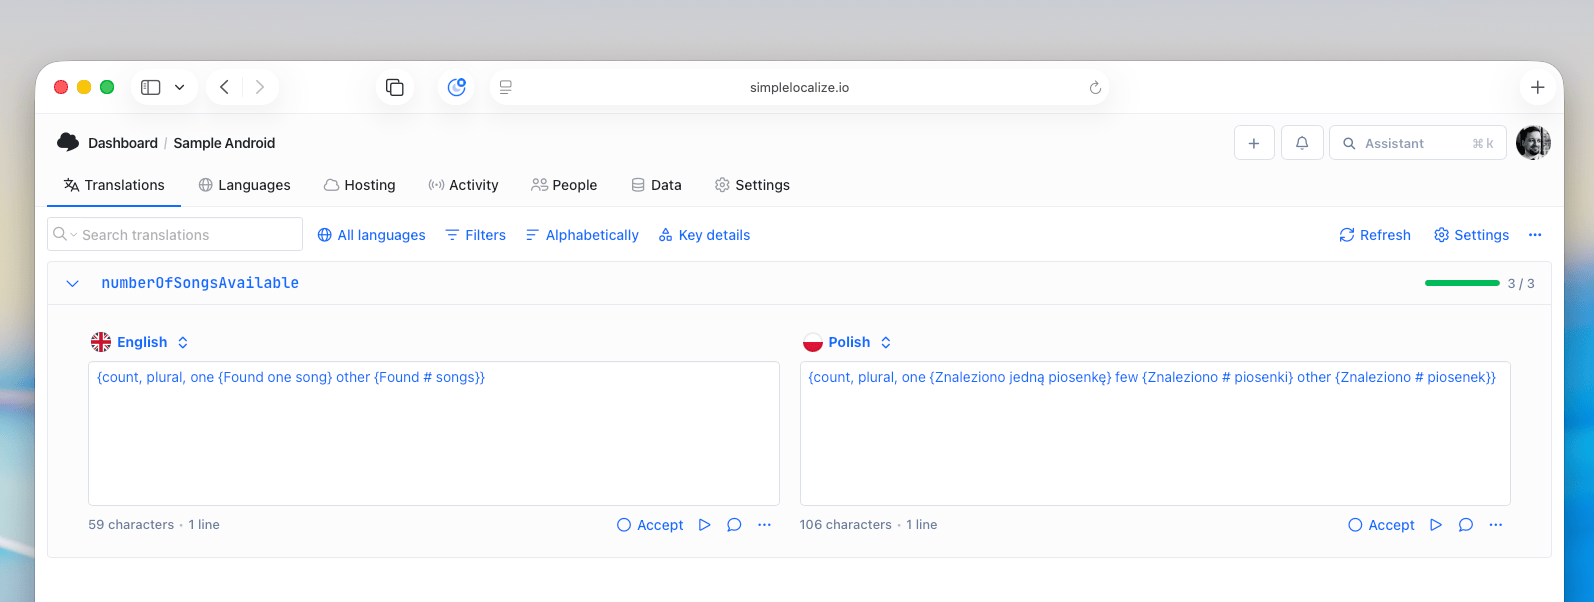
When you import these translations into SimpleLocalize, you will see a one translation key `numberOfSongsAvailable` and for each language,
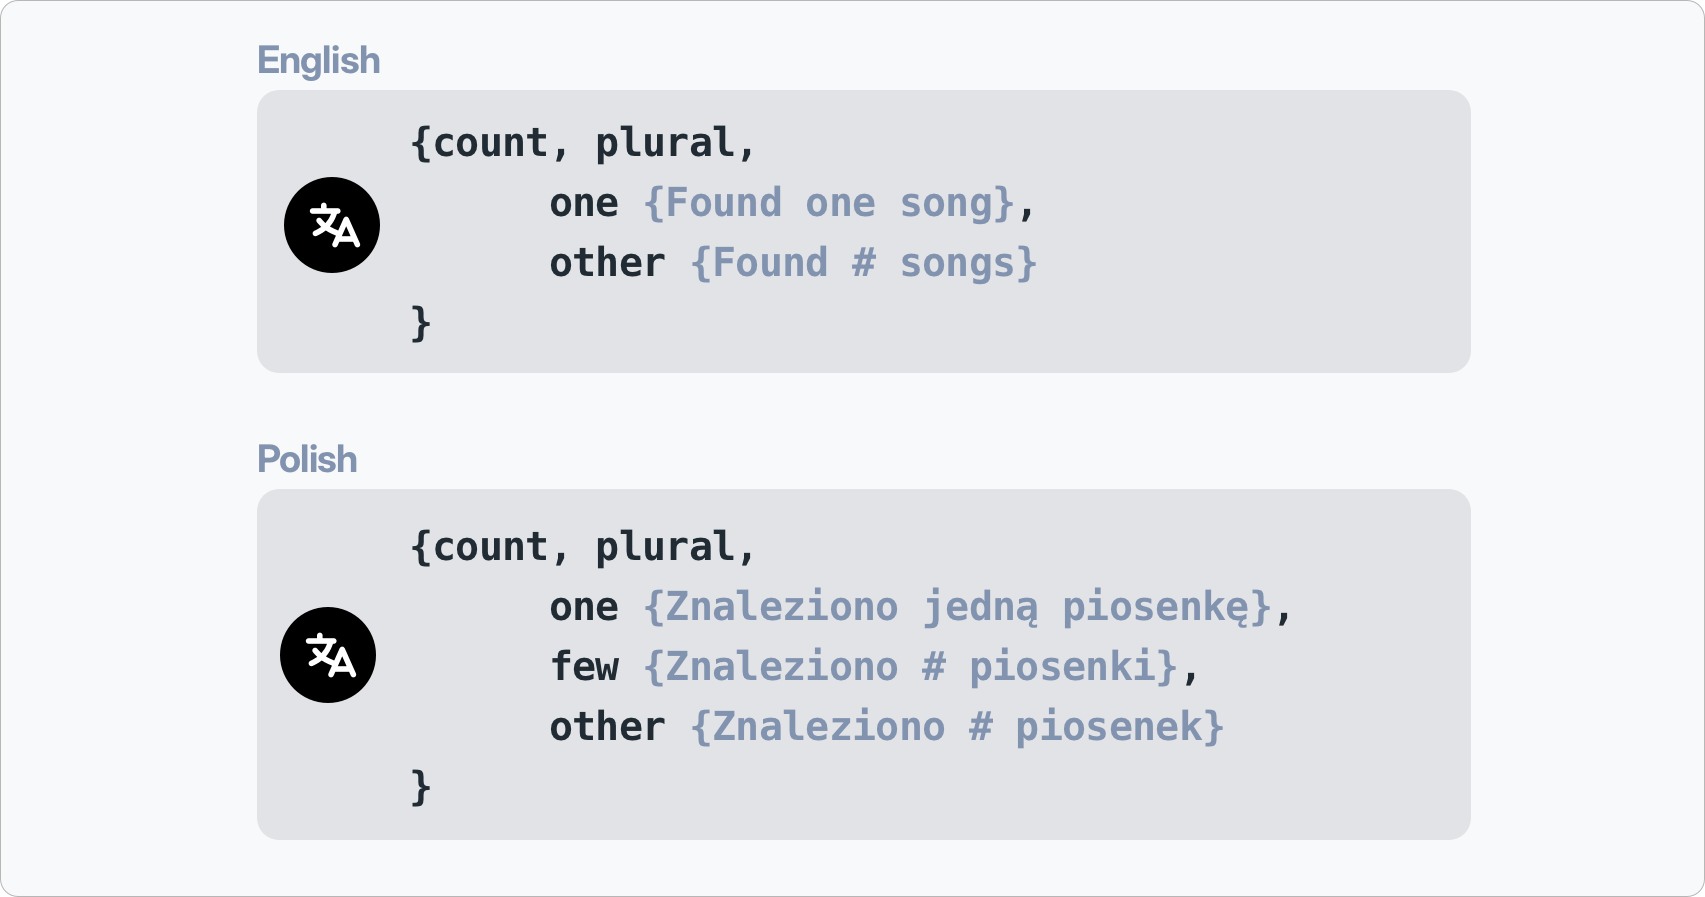
you will have the plural forms defined as per the ICU MessageFormat syntax:
```
// English
{count, plural, one {Found one song} other {Found # songs}}
```
```
// Polish
{count, plural, one {Znaleziono jedną piosenkę} few {Znaleziono # piosenki} other {Znaleziono # piosenek}}
```
### Interchangeability
When you export the translations back to the Android Strings file format, **SimpleLocalize will convert the ICU MessageFormat syntax back** to the appropriate pluralization format for Android Strings.
This ensures that your translations remain consistent and compatible with the file format requirements. Additionally, you can export the same translations to other file formats that support pluralization, such as iOS Strings or Gettext PO files, and SimpleLocalize will handle the conversion accordingly.
### Supported Plural Forms
Here are some of the common plural forms supported:
- **zero**: Used when the count is 0.
- **one**: Used when the count is 1.
- **two**: Used when the count is 2.
- **few**: Used for small numbers, typically 3-4.
- **many**: Used for larger numbers, varies by language.
- **other**: Used for all other numbers not covered by the above categories.
You can find the complete list of supported plural forms and their rules in the [CLDR documentation](http://cldr.unicode.org/index/cldr-spec/plural-rules).
## Message selection
In addition to pluralization, SimpleLocalize also supports message selection based on specific conditions. This allows you to define different messages based on variables other than just numerical counts. For example, you can define messages based on gender or other contextual information.
```text
{gender, select, male {He is logged in} female {She is logged in} other {They are logged in}}
```
This message selection syntax allows you to provide different translations based on the value of the `gender` variable.
By using pluralization and message selection in SimpleLocalize, you can ensure that your translations are accurate and contextually appropriate for different languages and scenarios.
> **Important**: "other" is a mandatory plural form, according to the ICU standard, and must always be included in your translations when using pluralization or message selection.
### Variables in message selection
You can use variables in message selection as well, for example:
#### JavaScript/TypeScript
`#` is a variable
```text
{count, plural, one {You have # item} other {You have # items}}
```
#### Android/Java
`%d` is a variable
```text
{count, plural, one {You have %d item} other {You have %d items}}
```
#### iOS/macOS
`%lld` is a variable
```text
{count, plural, one {You have %lld item} other {You have %lld items}}
```
#### Variable name
ICU also lets you use the variable name instead of `#`. Check which form your library or framework supports.
```text
{count, plural, one {You have {count} item} other {You have {count} items}}
```
#### Universal placeholders
If you use [universal placeholders](/docs/general/universal-placeholders/), the number is stored as `{%i}` and converted to the native format, like `%d` or `%lld`, when you export translations.
```text
{count, plural, one {You have {%i} item} other {You have {%i} items}}
```
## ICU Message Syntax Tester
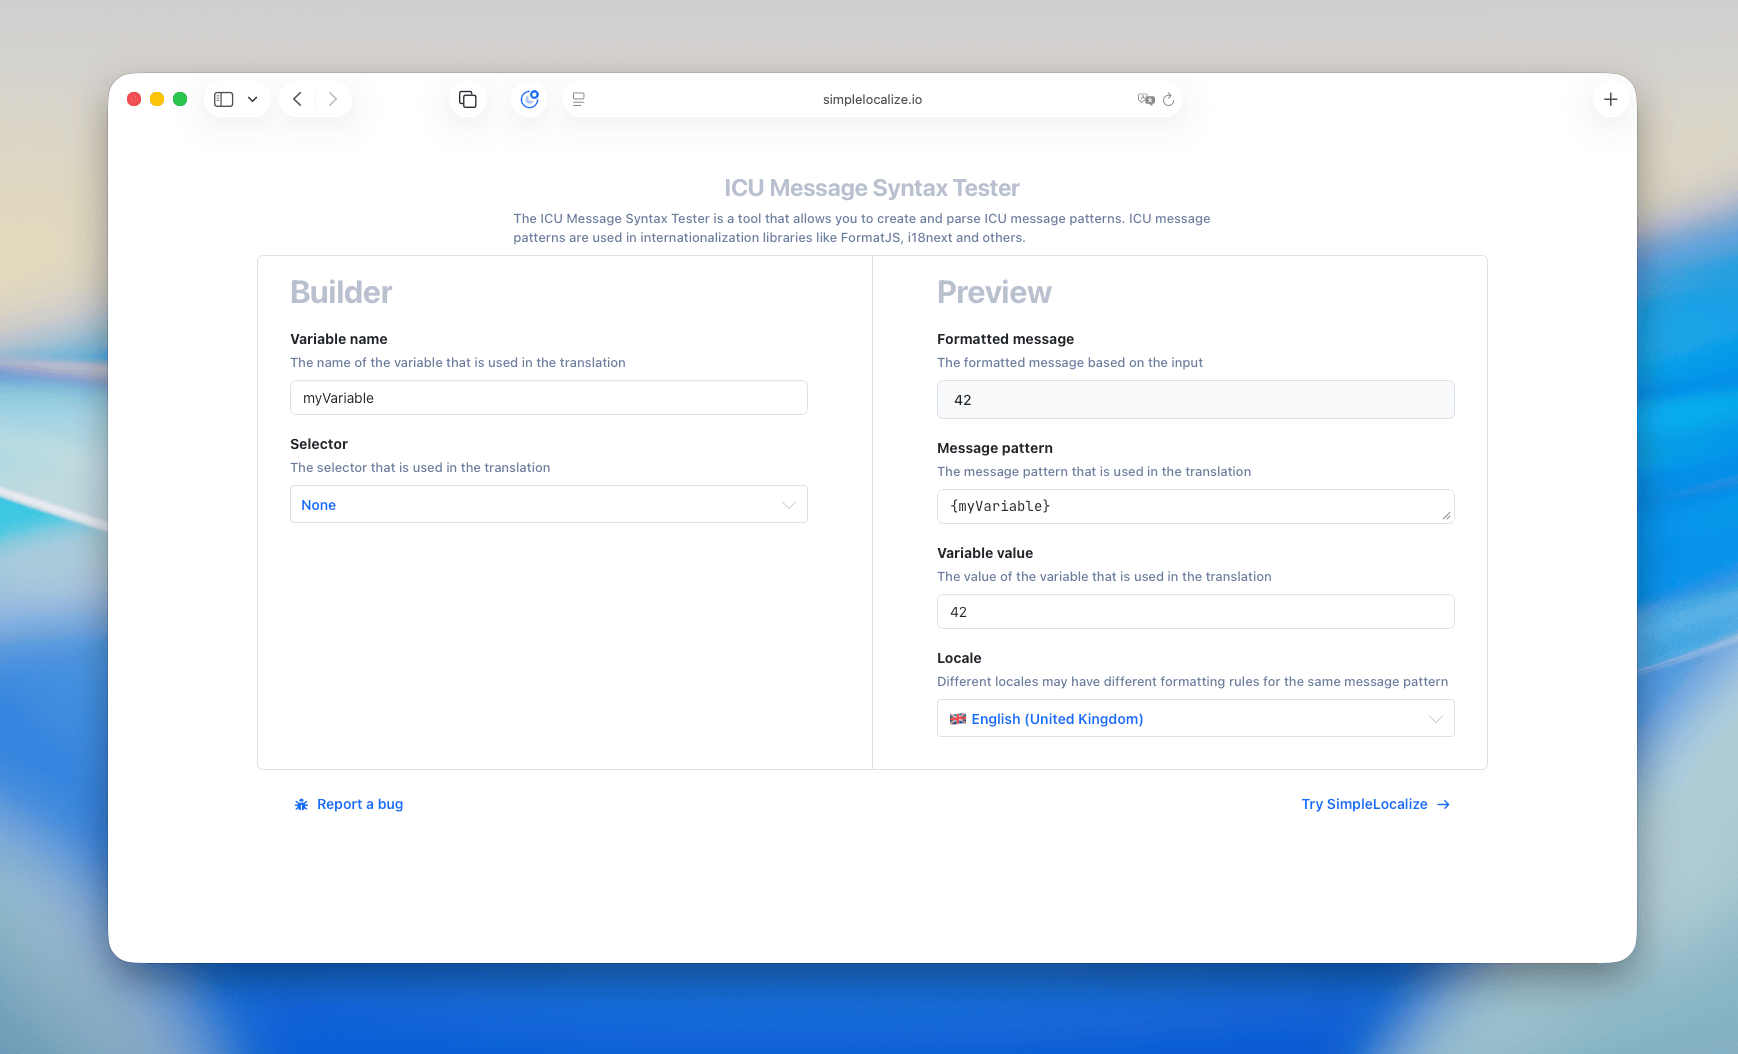
You can use the [ICU Message Syntax Tester](https://simplelocalize.io/tools/icu-message-syntax-tester/) to experiment with and validate your ICU MessageFormat strings.
## Further Reading
Every file format and i18n library has its own way of handling pluralization. For example, in JavaScript, libraries like i18next and FormatJS use ICU MessageFormat syntax for pluralization,
while Android and iOS have their own specific formats. To learn more about how different file formats and libraries handle pluralization, check our [integrations page](/integrations/)
where you can find detailed information about each supported file format and library.
If you are interested in learning more about ICU MessageFormat and its capabilities, we wrote a blog post that dives deeper into the topic: [ICU message format: Guide to plurals, dates & localization syntax](https://simplelocalize.io/blog/posts/what-is-icu/)
---
# General: Translation editor
Source: https://simplelocalize.io/docs/general/translation-editor/
> This article is deprecated. Please refer to the new [Translation Editor section](/docs/translation-editor/get-started/) instead.
---
# General: Translation hosting
Source: https://simplelocalize.io/docs/general/translation-hosting/
> Content on this page is now deprecated. Please refer to the [new documentation page](/docs/translation-hosting/get-started/).
Host your translations as JSON files on our free of charge hosting with super-fast CDN access.
It allows you to fetch translations from anywhere with lightning speed in JSON and use it without extra configuration in any project.
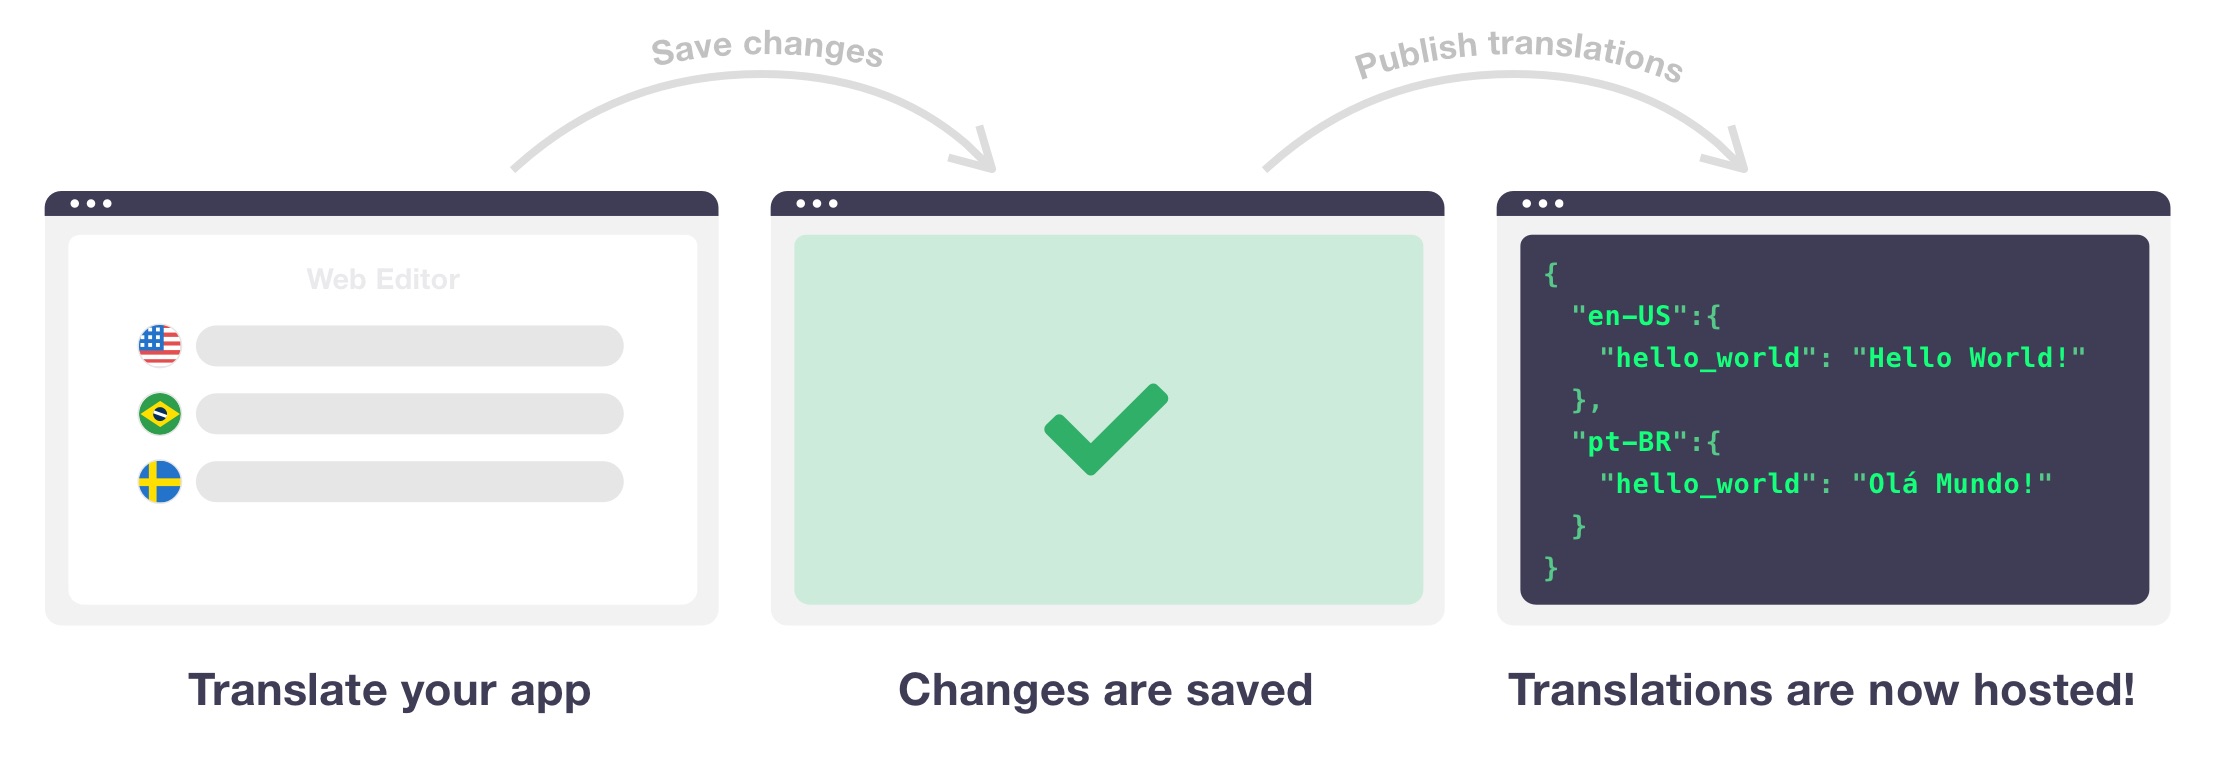
Every time you publish changes, something magical is happening. SimpleLocalize puts the newest version
of your translations from the web translation editor into our CDN with **super-fast access speed!**
Learn more about [fetching translations from Translation Hosting](/docs/translation-hosting/get-started/).
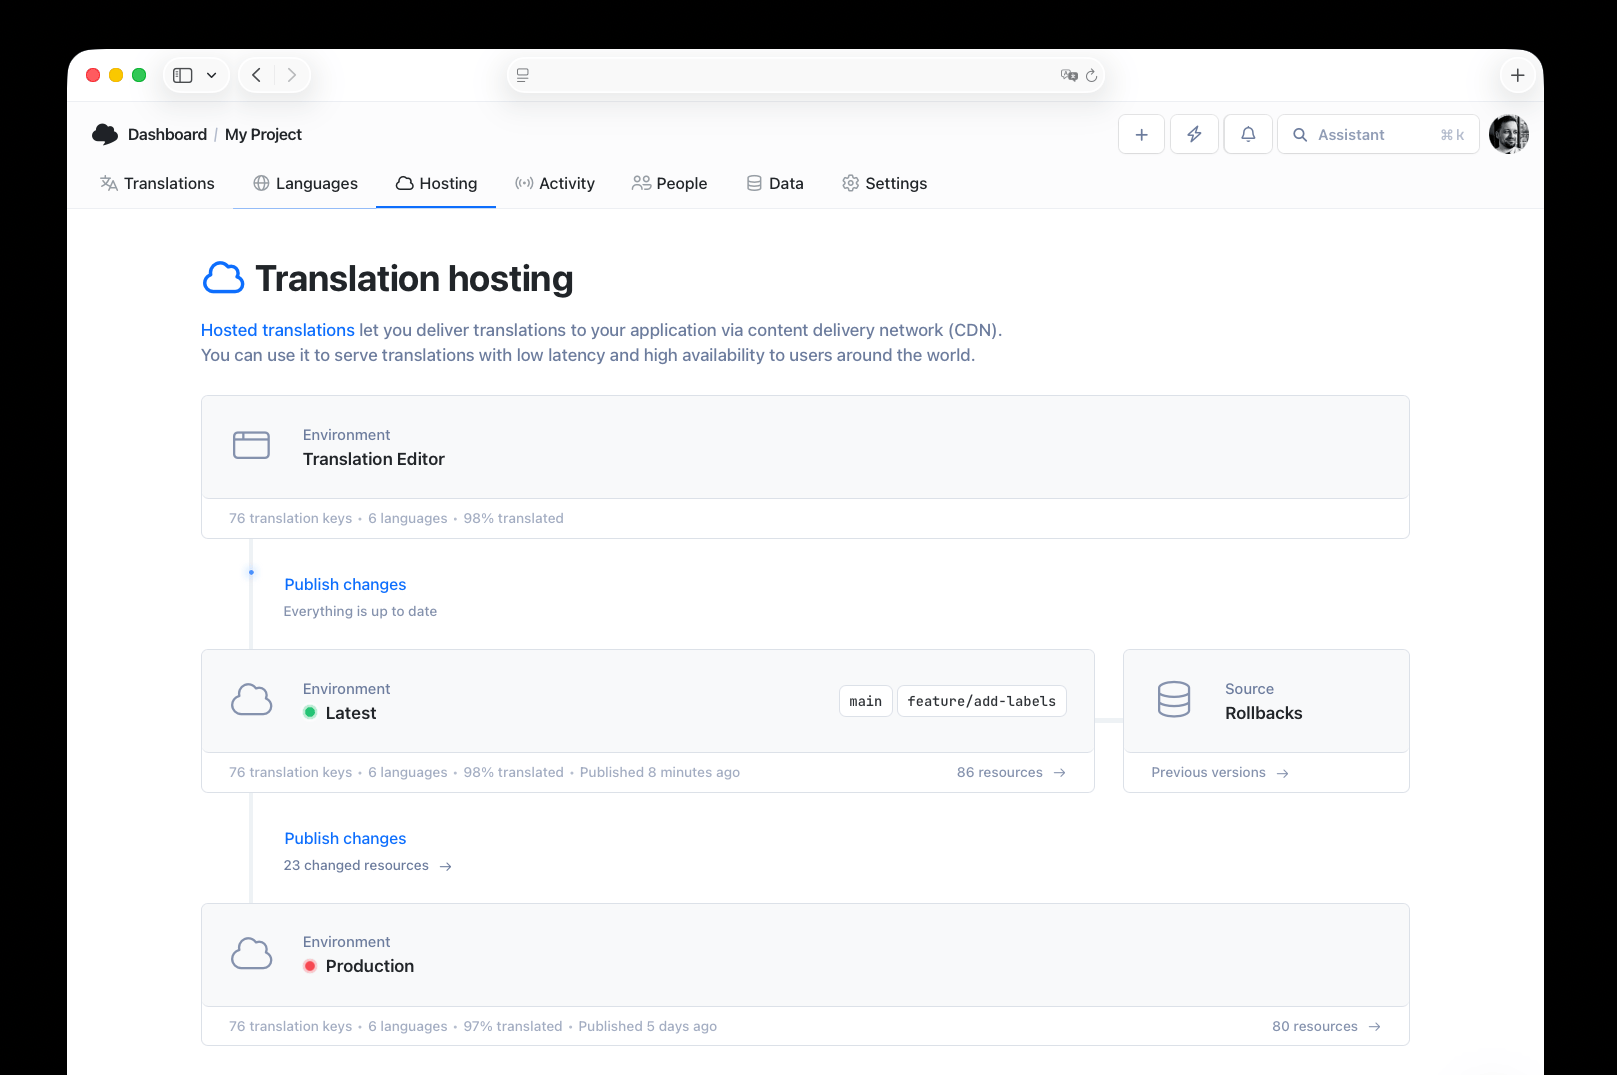
## Hosting environments
By default, each project is equipped two hosting environments, **Latest** and **Production**.
The **'Latest'** environment serves as the default destination for all changes saved and published from the Translation Editor. It provides a platform for testing and previewing translations during the development phase.
On the other hand, the **'Production'** environment is specifically designed for the live version of your product. Once you publish translations from the 'Latest' environment to 'Production', they are automatically integrated into your app, ensuring that users have access to the most up-to-date content.

To accommodate diverse project workflows, SimpleLocalize offers an option to **customize translation hosting environments**. This functionality enables you to create tailored environments and seamlessly incorporate them into the standard 'Latest' – 'Production' workflow.
For instance, you can establish environments such as **'Staging'**, **'Testing'** or **'Local'** to suit your specific requirements.

## Hosting settings
In your project settings, you can find extra options and settings for translation hosting. Go to **Settings** tab in your project and click on **Hosting** option to access hosting settings.
### Missing translations
Determine how missing translations should be handled. Here are two options you can customize:
- **Missing translations** - choose if missing translations should be included or excluded in the hosted files
- **Fallback translations** - choose if missing translations should be replaced by default language translations
### JSON Format
Choose formatting for JSON files, as nested JSON objects or flat JSON objects.
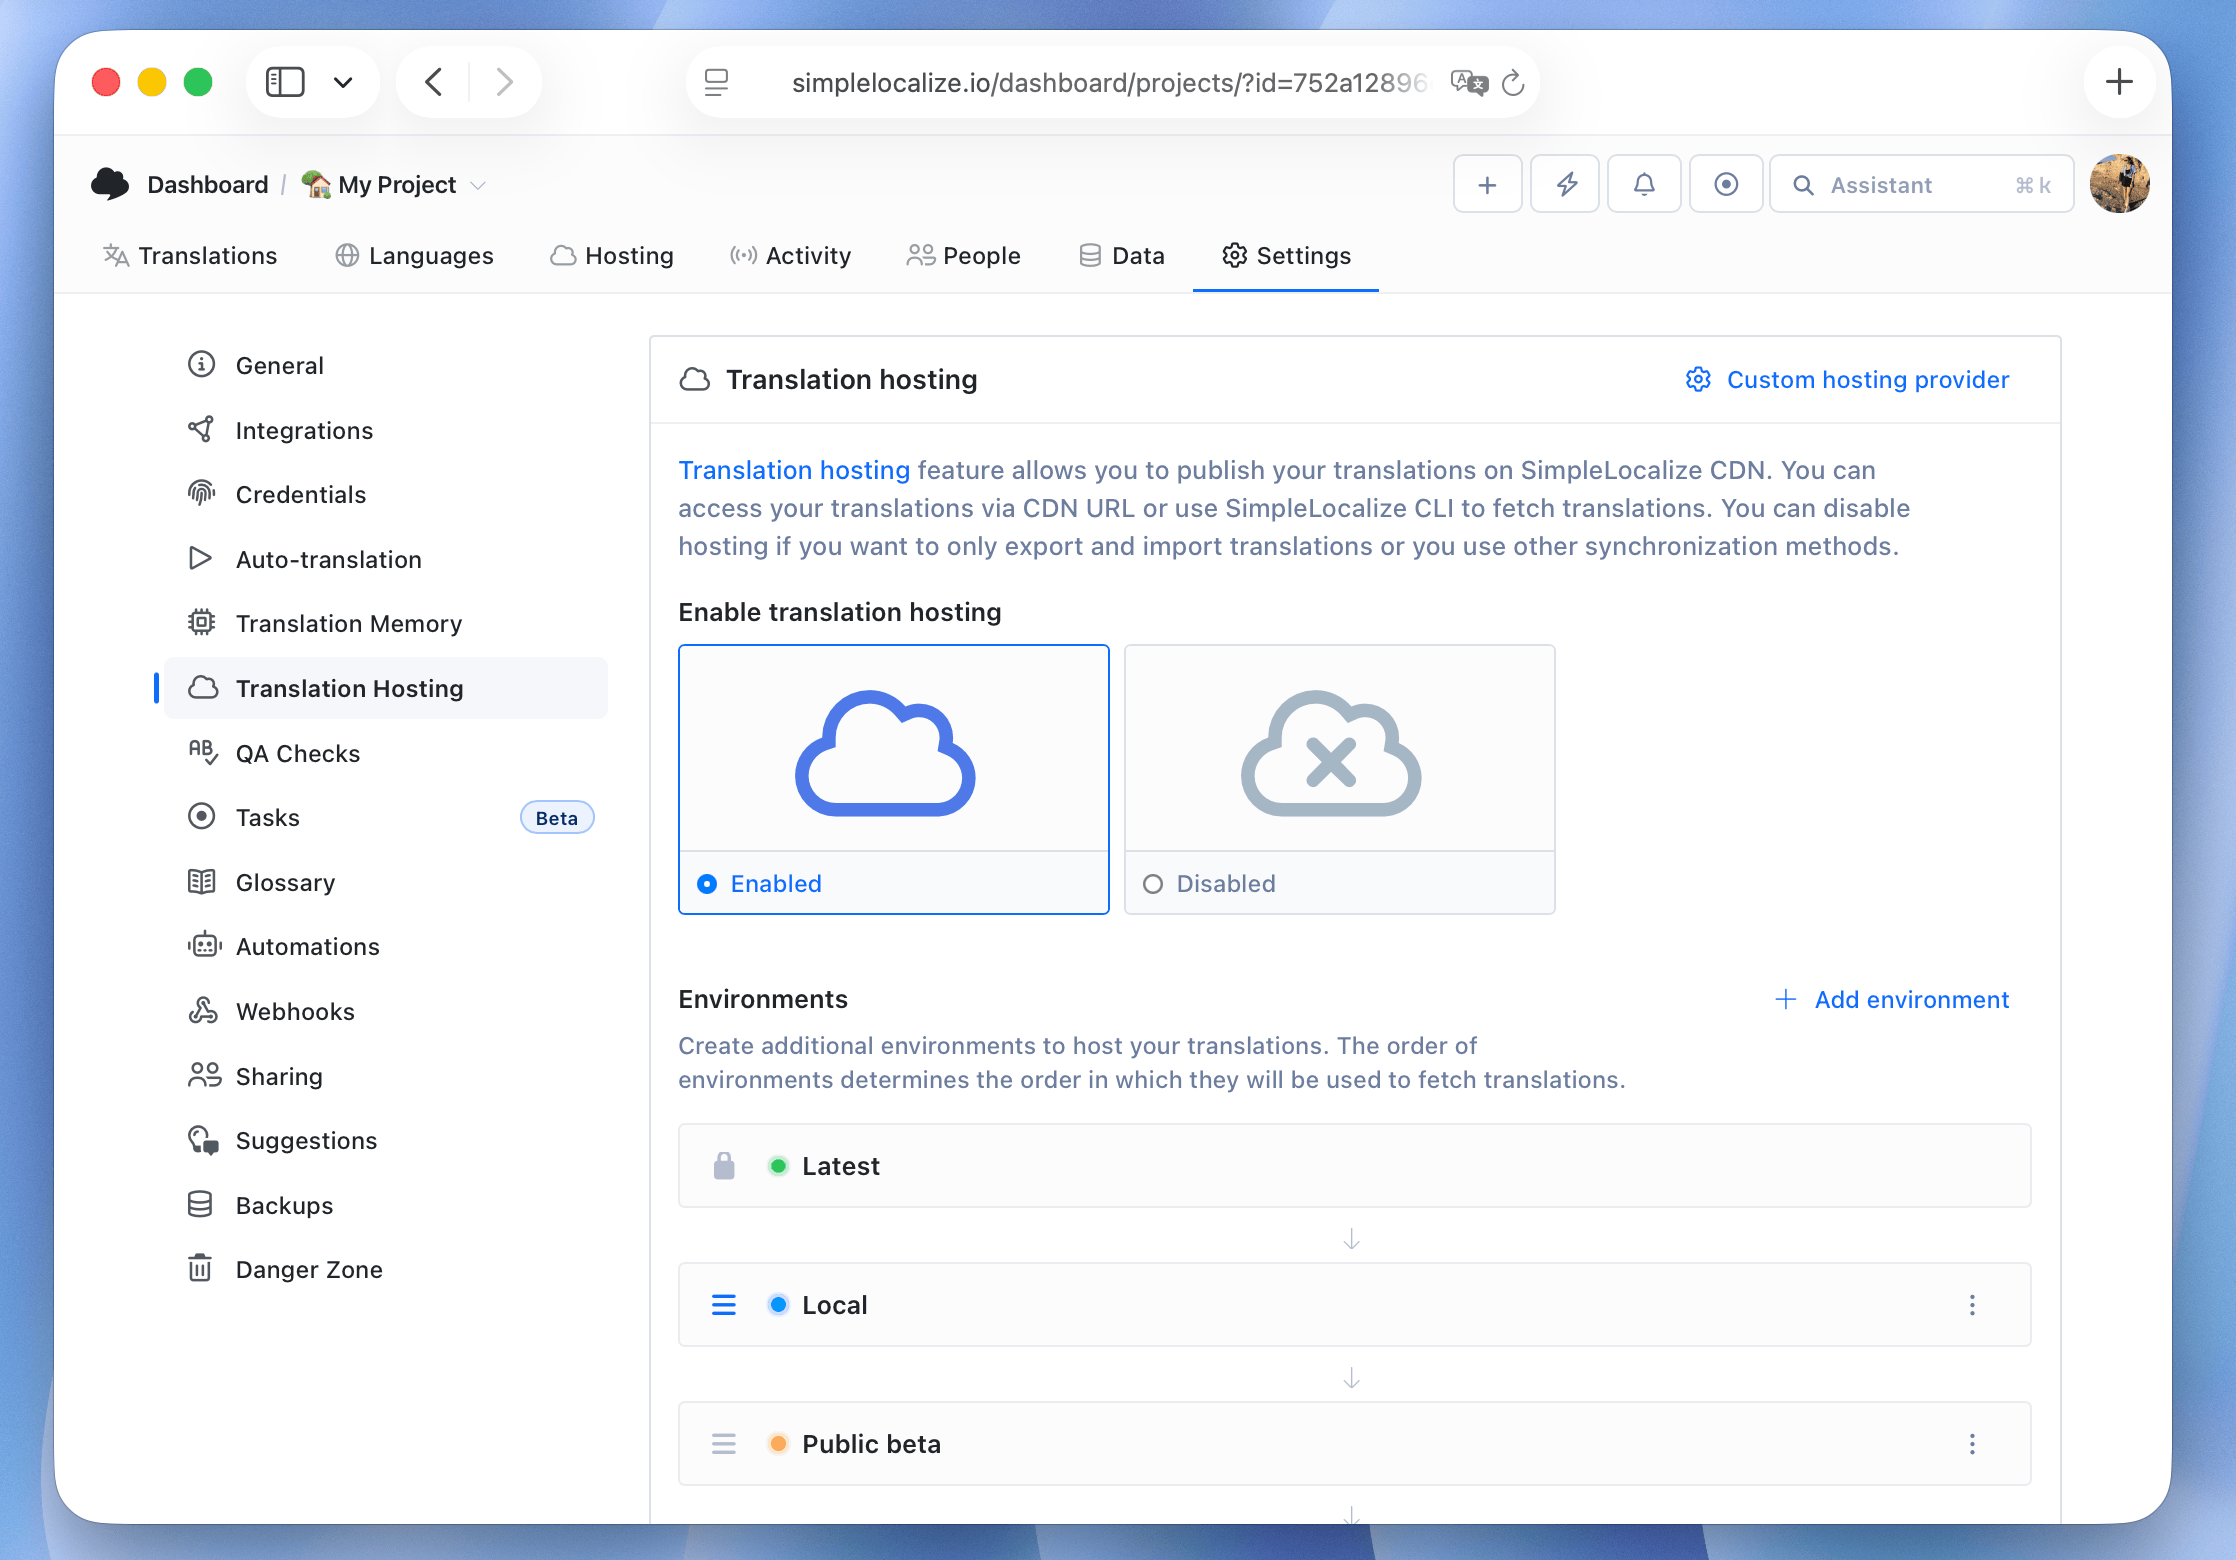
> After changing translation hosting settings, you need to publish translations again from the '**Hosting**' tab in your project.
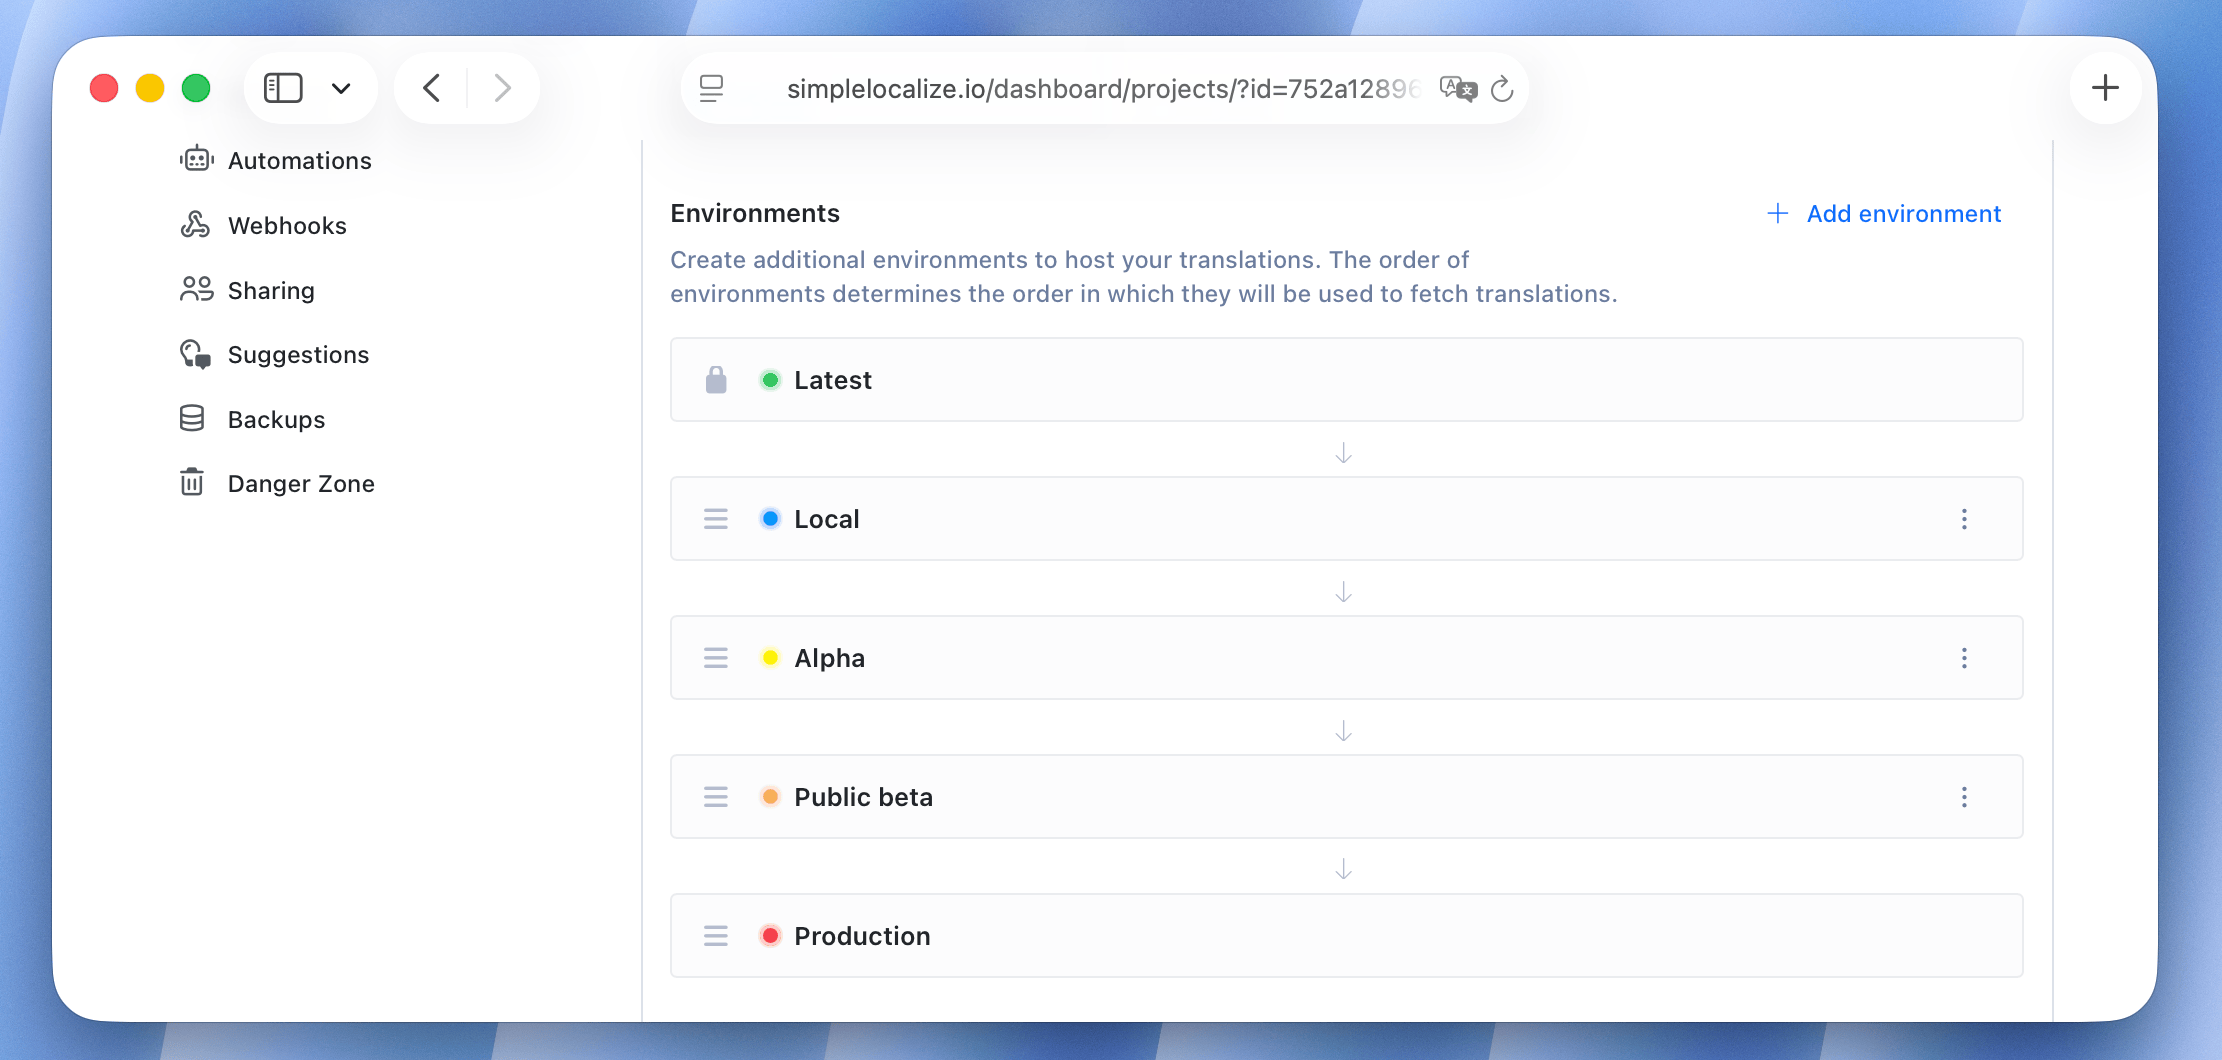
### Custom translation environments
In this section, you can review, manage and add new environments to host your translations. Besides using default 'Latest' and 'Production' environments, you can create your own enviroments and arrange them in any order you prefer.
## Default translations
If you opt to use the default language translation in place of missing translations in hosting settings, you must choose the default language first.
To configure the default language, navigate to the '**Languages**' tab and locate the language you wish to set as the default. Click on the '**Edit**' option for that language, and then enable the '**Use as a default language**' checkbox and save the changes.

To reflect the modifications, you need to redeploy your translations by clicking the '**Publish**' button in the '**Hosting**' tab. This ensures that the changes take effect and the default language translation is properly applied.
## Publish translations
Start by making a change to your translations in the translation editor. Once you're done, click on the '**Save & Publish**' button to save your changes and publish the updated translations. You can also navigate to the '**Hosting**' tab and find the '**Publish**' button there.

You can open published translation files from the translation editor directly or from the 'Hosting' tab, where you can find all translation files.
## Revert translations
Open the '**Hosting**' tab, and click **'Previous versions**' on 'Latest' environment card. Use '**Publish**' button on the version which you want to publish. You can also browse `_index` file for each version using the 'Browse' button.

Please note that the 'Publish' button reverts translations to the 'Latest' environment only.
If you want to push translations to the 'Production' environment, then please use 'Publish' button to deploy the 'Latest' environment to the 'Production'.

> Do not use URLs from the 'Previous versions' section in your code. Instead, use the URLs from the 'Latest' or 'Production' environments to ensure that you are always using the most up-to-date translations. Snapshot files might be deleted after some time, so they are not guaranteed to be available indefinitely.
## Custom hosting server
By default, SimpleLocalize provides a free hosting service for your translations.
However, you may want to host your translations on your own server, CDN, S3 Bucket,
Cloudfront Azure Blob or Google Storage. Learn more about [custom translation hosting server](/docs/integrations/custom-translation-hosting-server/).
---
# General: Universal placeholders
Source: https://simplelocalize.io/docs/general/universal-placeholders/
Universal placeholders allow you to **manage translations with a single, platform-independent placeholder format**, so you can import from one platform and export to another without worrying about format specifier differences.
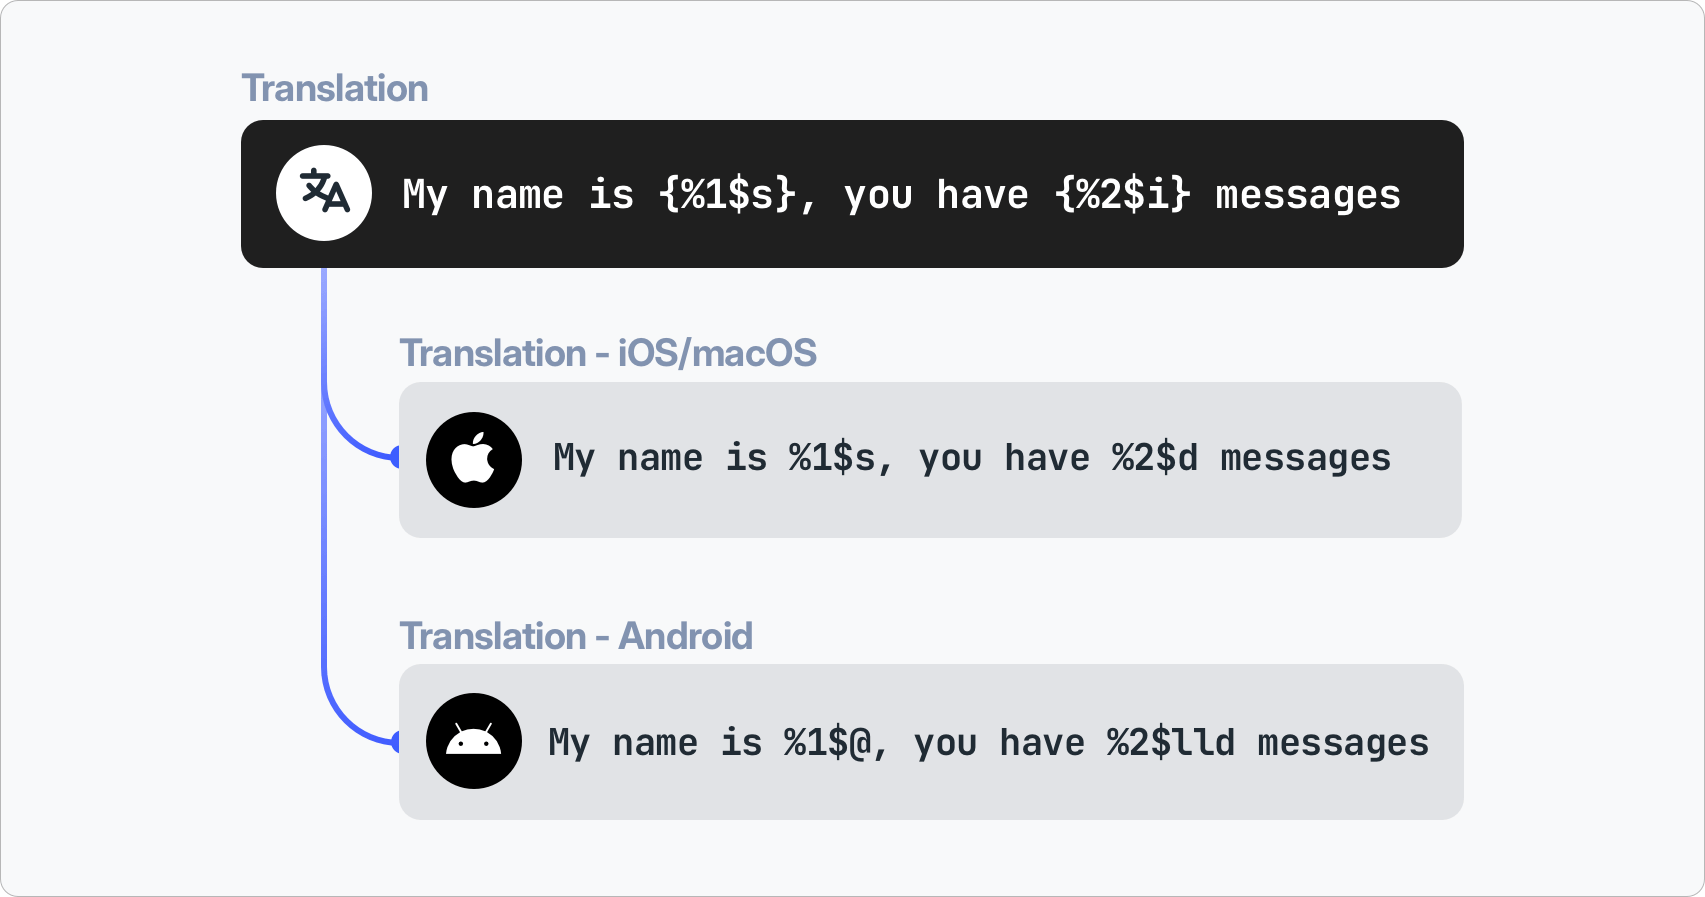
## The problem
Every platform uses its own placeholder syntax for dynamic values in translations.
For example, to insert a user's name and the number of unread messages:
| Platform | Translation |
|---------------|--------------------------------------------------|
| **Android** | `Hello %1$s, you have %2$d new messages` |
| **iOS/macOS** | `Hello %1$@, you have %2$lld new messages` |
Both strings mean the same thing, but the placeholders are different.
If you manage translations for both platforms in a single project, you would need to maintain two separate translations for the same message, or manually convert placeholders every time you import or export.
## The solution
Universal placeholders solve this by introducing a **platform-independent format** that sits between your source files and the translation editor:
```
Hello {%1$s}, you have {%2$i} new messages
```
During import, native placeholders are automatically converted to the universal format. During export, universal placeholders are automatically converted back to the native format of the target platform.
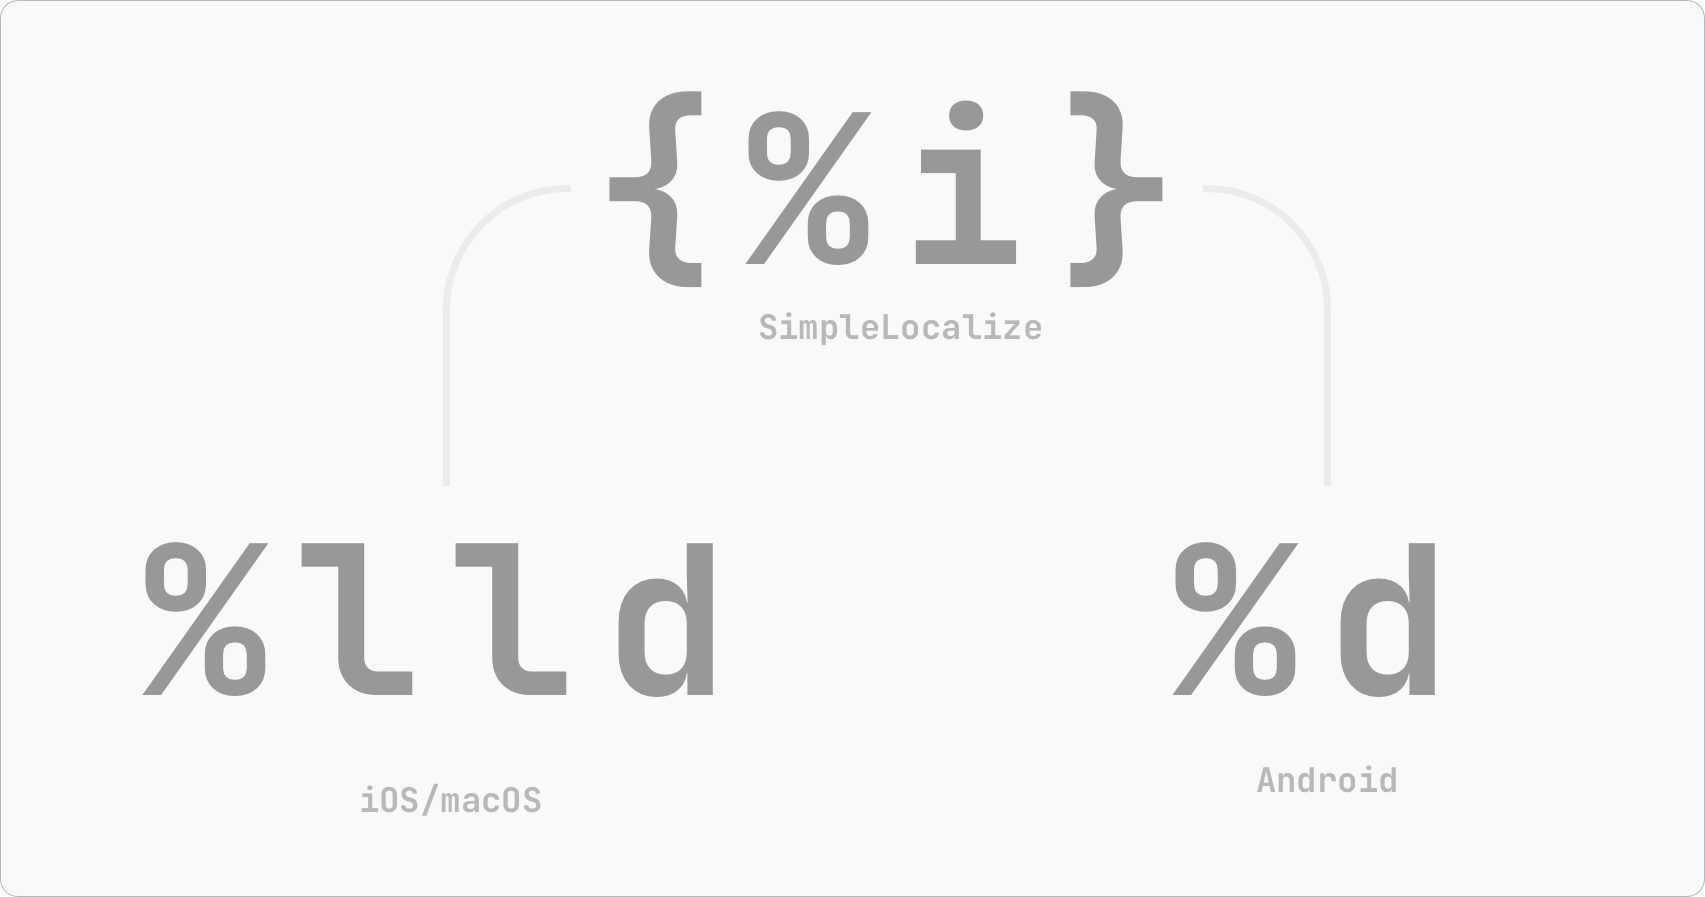
This means you maintain **one translation** that works for all platforms:
## Universal format specification
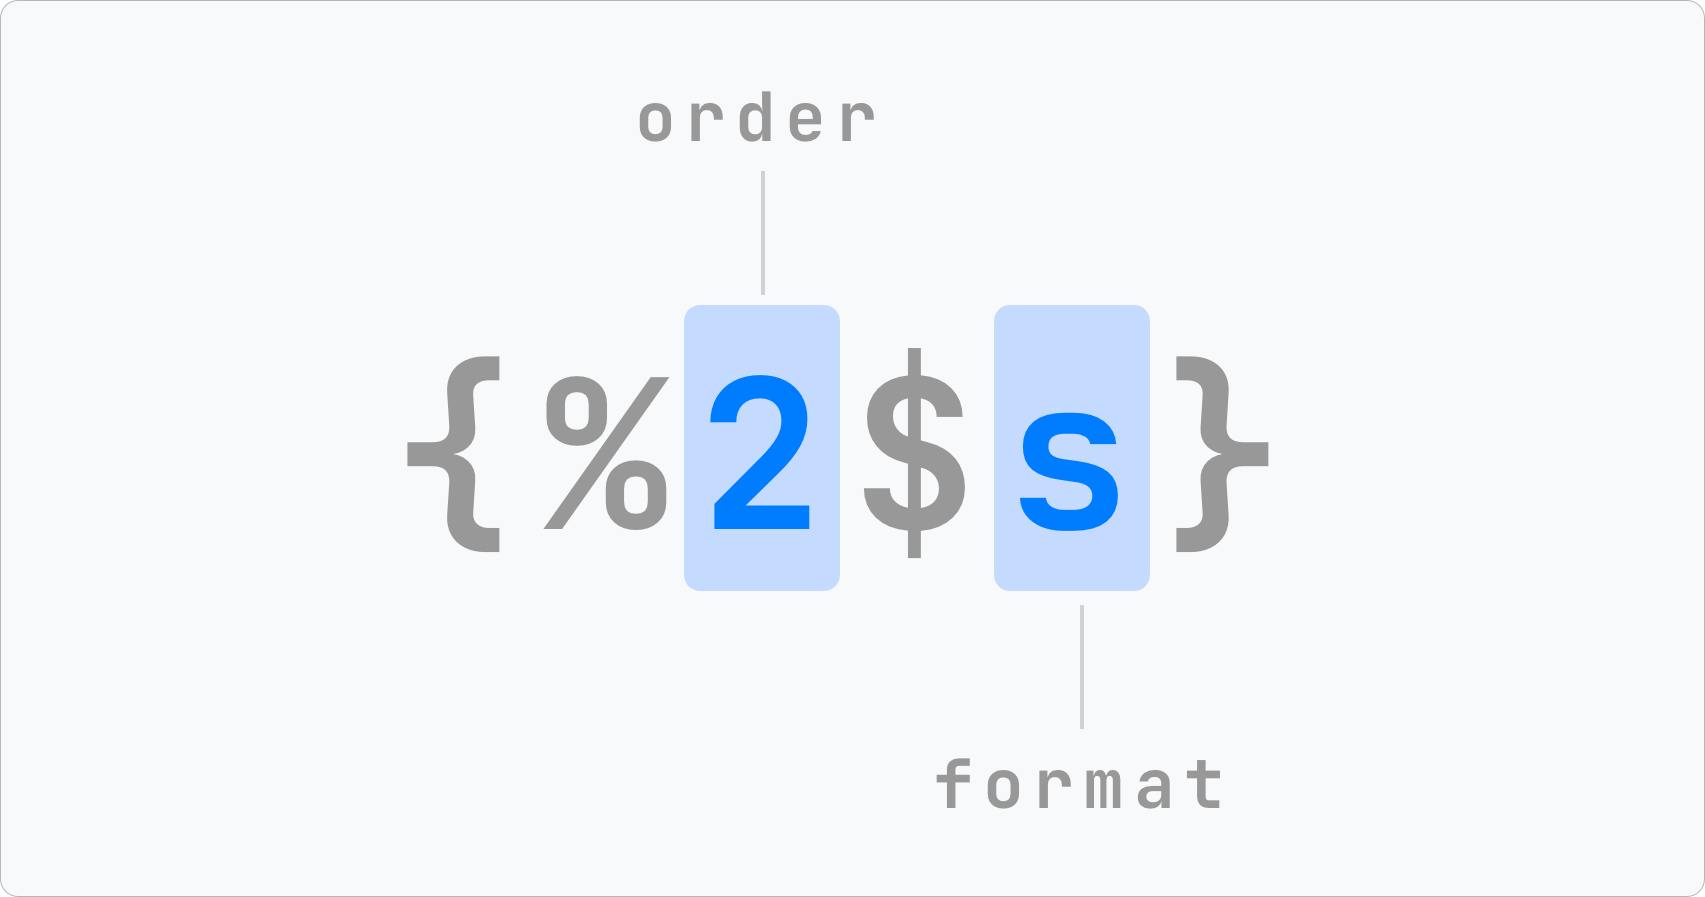
Universal placeholders use curly braces `{}` around a format specifier with three possible types:
| Type | Symbol | Description | Example |
|---------|--------|----------------|---------|
| String | `s` | Text value | `{%s}` |
| Integer | `i` | Whole number | `{%i}` |
| Float | `f` | Decimal number | `{%f}` |
Placeholders can also include:
- **Positional index** - `{%1$s}`, `{%2$i}` - to specify the order of arguments
- **Precision** - `{%.2f}` - to specify decimal places for floats
- **Flags and width** - `{%02i}`, `{%-10s}`, `{%+i}` - to pad values with zeros or spaces, align them to the left, or always show the sign. Supported flags are `0`, `-` and `+`
## Supported file formats
Universal placeholders are currently available for two file formats: Android Strings and Localizable XC Strings.
When you import files in these formats with the `UNIVERSAL_PLACEHOLDERS` option, native placeholders are converted to the universal format.
When you export to these formats with the same option, universal placeholders are converted back to the native format.
### Android Strings
| Android native | Universal placeholder | Description |
|----------------|-----------------------|---------------------------------|
| `%s` | `{%s}` | String |
| `%d` | `{%i}` | Integer |
| `%f` | `{%f}` | Float |
| `%1$s` | `{%1$s}` | Positional string |
| `%1$d` | `{%1$i}` | Positional integer |
| `%.2f` | `{%.2f}` | Float with precision |
| `%1$.2f` | `{%1$.2f}` | Positional float with precision |
| `%02d` | `{%02i}` | Zero-padded integer |
Learn more about [Android Strings format](/docs/file-formats/android-strings/).
### Localizable XC Strings
| iOS/macOS native | Universal placeholder | Description |
|------------------|-----------------------|---------------------------------|
| `%@` | `{%s}` | String (object) |
| `%lld` | `{%i}` | Integer (long long) |
| `%d` | `{%i}` | Integer |
| `%f` | `{%f}` | Float |
| `%1$@` | `{%1$s}` | Positional string |
| `%1$lld` | `{%1$i}` | Positional integer |
| `%.2f` | `{%.2f}` | Float with precision |
| `%1$.2f` | `{%1$.2f}` | Positional float with precision |
| `%02lld` | `{%02i}` | Zero-padded integer |
Learn more about [Localizable XC Strings format](/docs/file-formats/localizable-xcstrings/).
## Pluralization support
Universal placeholders work with plural forms as well, as they are by default stored in SimpleLocalize as ICU messages, which support the universal placeholder format.
When you import a file with plural forms, placeholders inside plural variants are also converted to the universal format.
For example, an Android Strings file:
```xml
%d item%d items
```
is stored in SimpleLocalize as an [ICU message](/blog/posts/what-is-icu/) with universal placeholders:
```
{value, plural, one {{%i} item} other {{%i} items}}
```
When exported to **iOS/macOS**, the same translation becomes:
```
{value, plural, one {%lld item} other {%lld items}}
```
which is then written as XCStrings plural variations with native `%lld` specifiers.
> Plural forms (`zero`, `one`, `two`, `few`, `many`, `other`) are fully preserved during cross-platform conversion.
## How to enable
Universal placeholders are enabled by adding the `UNIVERSAL_PLACEHOLDERS` option to both **import and export**.
You need to enable this option on **both sides**. During import to convert native placeholders to universal format, and during export to convert them back to the target platform's native format.
### SimpleLocalize CLI
**Import** - converts native placeholders to universal format during upload:
```properties
simplelocalize upload \
--apiKey PROJECT_API_KEY \
--uploadFormat android-strings \
--uploadLanguageKey en \
--uploadPath ./values/strings.xml \
--uploadOptions UNIVERSAL_PLACEHOLDERS
```
**Export** - converts universal placeholders to native format during download:
```properties
simplelocalize download \
--apiKey PROJECT_API_KEY \
--downloadFormat localizable-xcstrings \
--downloadPath ./Localizable.xcstrings \
--downloadOptions UNIVERSAL_PLACEHOLDERS
```
Learn more about [upload](/docs/cli/upload-translations/) and [download](/docs/cli/download-translations/) commands.
## Cross-platform workflow example
Here is a typical workflow for managing translations across Android and iOS platforms:
**1. Import Android source translations**
```properties
simplelocalize upload \
--apiKey PROJECT_API_KEY \
--uploadFormat android-strings \
--uploadLanguageKey en \
--uploadPath ./android/res/values/strings.xml \
--uploadOptions UNIVERSAL_PLACEHOLDERS
```
**2. Translate** - translations are stored with universal placeholders, so translators see `{%s}` and `{%i}` instead of platform-specific specifiers.
**3. Export to Android and iOS**
```properties
# Android
simplelocalize download \
--apiKey PROJECT_API_KEY \
--downloadFormat android-strings \
--downloadPath ./android/res/values-{lang}/strings.xml \
--downloadOptions UNIVERSAL_PLACEHOLDERS
# iOS
simplelocalize download \
--apiKey PROJECT_API_KEY \
--downloadFormat localizable-xcstrings \
--downloadPath ./ios/Localizable.xcstrings \
--downloadOptions UNIVERSAL_PLACEHOLDERS
```
## Migration from native placeholders
If you already have translations with native placeholders in your project, you can migrate them to the universal format by re-importing the source files with the `UNIVERSAL_PLACEHOLDERS` option and the "Update translations" option checked.
This will convert all native placeholders to the universal format in your existing translations.
> You can always go back to native placeholders by importing the same files without the `UNIVERSAL_PLACEHOLDERS` option.
## Resources
- [Options reference](/docs/general/options/) - see all available import and export options
- [Android Strings format](/docs/file-formats/android-strings/#universal-placeholders) - Android-specific placeholder details
- [Localizable XC Strings format](/docs/file-formats/localizable-xcstrings/#universal-placeholders) - iOS/macOS-specific placeholder details
- [Pluralization](/docs/general/pluralization/) - learn more about plural forms in SimpleLocalize
- [ICU Message Format](/blog/posts/what-is-icu/) - learn about the ICU syntax used for plurals and selectors
---
# General: Webhooks
Source: https://simplelocalize.io/docs/general/webhooks/
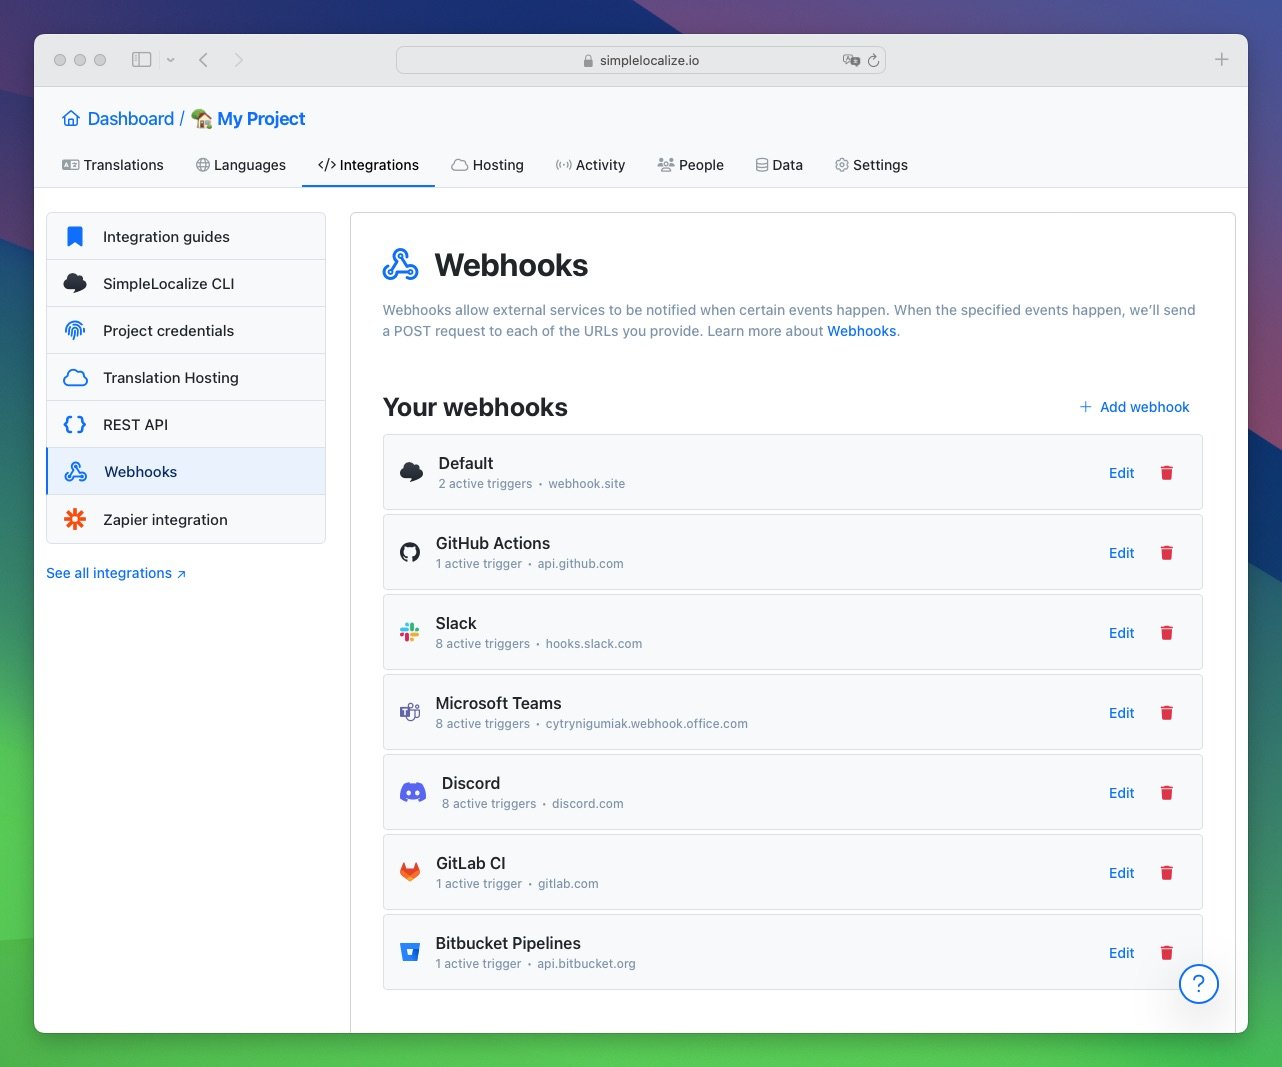
Webhooks allow external services to be notified when certain events happen. When the specified events happen, we’ll send a POST request to each of the URLs you provide.
## How to set up webhooks
Webhook integration is available in the '**Settings**' tab under '**Webhooks**' section. To set up webhooks, click 'Add webhook'. Then, fill in the form and click '**Add webhook**'.
Every webhook invocation is registered, so you can check the history of webhook invocations, execution time, execution URL, trigger, response status code and body.
## Examples
Sample webhook payload triggered by translation editor changes.
```json
{
"trigger": "CHANGE",
"projectToken": "94a08da1fecbb6e8b46990538c7b50b2",
"projectName": "My project",
"accountName": "Jakub",
"accountEmail": "jakub@simplelocalize.io",
"changes": [
{
"action": "CREATE_KEY",
"key": "hello-world"
},
{
"action": "CHANGE_TRANSLATION",
"key": "hello-world",
"languageKey": "en",
"newTranslation": "Hello World!"
},
{
"action": "CHANGE_KEY",
"oldKey": "hello-world",
"newKey": "goodbye-world"
},
{
"action": "DELETE_KEY",
"key": "goodbye-world"
}
]
}
```
Sample webhook payload triggered on auto-translation success.
```json
{
"trigger": "AUTO_TRANSLATION_SUCCESS",
"projectToken": "94a08da1fecbb6e8b46990538c7b50b2",
"projectName": "My project",
"accountName": "Jakub",
"accountEmail": "jakub@simplelocalize.io",
"jobId": "69b569c0e04e1b955c1e14c52e02665f",
"changes": [
{
"action": "CHANGE_TRANSLATION",
"key": "hello-world",
"languageKey": "en",
"newTranslation": "Hello World!"
}
]
}
```
Sample webhook payload triggered on `production` environment publication.
```json
{
"trigger": "ENVIRONMENT_PUBLICATION",
"projectToken": "94a08da1fecbb6e8b46990538c7b50b2",
"projectName": "My project",
"accountName": "Jakub",
"accountEmail": "jakub@simplelocalize.io",
"environment": "_production",
"changes": []
}
```
Sample webhook payload triggered on any custom environment publication.
```json
{
"trigger": "ENVIRONMENT_PUBLICATION",
"projectToken": "94a08da1fecbb6e8b46990538c7b50b2",
"projectName": "My project",
"accountName": "Jakub",
"accountEmail": "jakub@simplelocalize.io",
"environment": "custom-environment",
"changes": []
}
```
Sample webhook payload triggered on `latest` environment publication.
```json
{
"trigger": "PUBLICATION",
"projectToken": "94a08da1fecbb6e8b46990538c7b50b2",
"projectName": "My project",
"accountName": "Jakub",
"accountEmail": "jakub@simplelocalize.io",
"changes": []
}
```
## Payload
| Field | Description |
|----------------|-----------------------------------------------------------|
| `trigger` | subscribed trigger type |
| `projectToken` | project token |
| `projectName` | project name, it can be changed in project settings |
| `accountName` | name of the user who made a change or started a job. |
| `accountEmail` | email of the user who made a change or started a job. |
| `jobId` | job identifier, for example auto-translation job |
| `environment` | Translation Hosting environment key that has been updated |
| `exportedFile` | Link to exported file, multi-file exports are zipped |
| `changes` | list of translation modifications during the change |
| `fileFormat` | file format of exported or imported file |
| `customerKey` | customer identifier |
Please keep in mind that request body fields may be extended in the future, but they won't change.
## Triggers
| Trigger value | Event description |
|----------------------------|-------------------------------------------------------------------------------------------------------------------|
| `ENVIRONMENT_PUBLICATION` | On publication to **Production environment** or any custom environment |
| `PUBLICATION` | On publication to **Latest environment** |
| `CHANGE` | Every saved translation change via API, WEB or CLI |
| `REVERT` | On reverted translations via WEB |
| `IMPORT` | On every file import via WEB, API or CLI |
| `EXPORT` | On every file export via WEB, API or CLI |
| `AUTO_TRANSLATION_SUCCESS` | On every succeeded auto-translation job started via WEB, API or CLI. `jobId` will contain finished job identifier |
| `AUTO_TRANSLATION_FAILED` | On every failed auto-translation job started via WEB, API or CLI. `jobId` will contain failed job identifier |
Webhook URL cannot contain IP addresses, localhost domain, or SimpleLocalize API. It must be a valid URL. URL must respond to a HEAD request to be added.
## Webhook types
SimpleLocalize supports multiple webhook types that are pre-configured for certain services like Slack, Discord, and GitHub Actions to make integration easier.
### Default
Default webhook type is a simple webhook that sends a POST request to the specified URL with defined headers a JSON payload presented above.

### GitHub Actions

GitHub Actions type is a webhook prepared to send a POST request
that [dispatches a workflow event](https://docs.github.com/en/rest/actions/workflows?apiVersion=2022-11-28#create-a-workflow-dispatch-event) with the following request body:
```json
{
"event_type": "simplelocalize_environment_publication",
"client_payload": {
"trigger": "ENVIRONMENT_PUBLICATION",
"projectToken": "94a08da1fecbb6e8b46990538c7b50b2",
"projectName": "My project",
"accountName": "Jakub",
"accountEmail": "jakub@simplelocalize.io",
"environment": "_production",
"changes": []
}
}
```
Dispatch requires [GitHub Personal Access Token](https://docs.github.com/en/github/authenticating-to-github/creating-a-personal-access-token) with `repo` scope.
The `event_type` field is a combination of `simplelocalize_` and lower case trigger value.
```yaml
name: SimpleLocalize GitHub Action
on:
repository_dispatch:
types:
- simplelocalize_environment_publication
- simplelocalize_change
```
You can access fields from `client_payload` in your workflow using the following syntax:
```
${{ github.event.client_payload.projectToken }}
```
Read more about [executing GitHub Workflow via Webhooks](/docs/integrations/github-actions/) and [uploading Translation Hosting resources to S3 with GitHub Actions](/docs/integrations/custom-translation-hosting-server/#github-actions-integration).
### GitLab CI

GitLab CI type is a webhook that [triggers a GitLab CI pipeline](https://docs.gitlab.com/ee/ci/triggers/#trigger-a-pipeline) for a specified project and branch.
Trigger requires [GitLab pipeline trigger token](https://docs.gitlab.com/ee/ci/triggers/#create-a-pipeline-trigger-token) that can be generated in your GitLab project settings.
Variables available in the pipeline:
- `simplelocalize_trigger`
- `simplelocalize_project_token`
- `simplelocalize_project_name`
- `simplelocalize_account_name`
- `simplelocalize_account_email`
- `simplelocalize_environment`
- `simplelocalize_exported_file`
- `simplelocalize_job_id`
### Bitbucket Pipelines

Bitbucket Pipelines type is a webhook that [runs a Bitbucket Pipelines pipeline](https://developer.atlassian.com/cloud/bitbucket/rest/api-group-pipelines/#api-repositories-workspace-repo-slug-pipelines-post) for a specified repository and branch.
Trigger requires `Authorization` header with `Bearer {token}` to authenticate.
[Forge app token](https://developer.atlassian.com/cloud/bitbucket/rest/intro/#forge-app-scopes) can be generated in your Bitbucket account settings,
and you need to add the following scopes:
- `read:pipeline:bitbucket`
- `write:pipeline:bitbucket`
Variables available in the pipeline:
- `simplelocalize_trigger`
- `simplelocalize_project_token`
- `simplelocalize_project_name`
- `simplelocalize_account_name`
- `simplelocalize_account_email`
- `simplelocalize_environment`
- `simplelocalize_exported_file`
- `simplelocalize_job_id`
### Slack

Slack type is a webhook prepared to send a POST request to
```shell
https://hooks.slack.com/services/{webhook}
```
with a predefined message for each trigger type. Learn [how to get a Slack webhook URL](https://api.slack.com/messaging/webhooks).
### Discord

Discord webhook type is a webhook prepared to send a POST request to the
```shell
https://discord.com/api/webhooks/{webhook}
```
with a predefined message for each trigger type. Learn [how to get a Discord webhook URL](https://support.discord.com/hc/en-us/articles/228383668-Intro-to-Webhooks).
### Microsoft Teams

Microsoft Teams webhook type is a webhook that is prepared to send a POST request to
```shell
https://{team}.outlook.office.com/webhookb2/{webhook}
```
with a predefined message for each trigger type. Learn [how to get a Microsoft Teams webhook URL](https://docs.microsoft.com/en-us/microsoftteams/platform/webhooks-and-connectors/how-to/add-incoming-webhook).
> Requests sent to Microsoft Teams takes about 10–30 seconds to be processed and delivered to the channel.
---
# General: Snapshots
Source: https://simplelocalize.io/docs/general/backups/
SimpleLocalize offers a few ways to bring back previous versions of your translation data in the translation editor:
- **Automated snapshots** that are created before significant actions in your project.
- **Manual snapshots** that you can create and name whenever you need.
- **Importing files** that you have previously imported or exported.
- **Importing files from [translation hosting](/docs/translation-hosting/get-started)** if you are using that feature.
If you are looking at how to revert currently hosted translations, then please go to [Translation Hosting Rollbacks](/docs/translation-hosting/rollbacks/) section.
> Always read carefully the descriptions of the options before performing any restore action to avoid unintentional data loss. If you are unsure, contact our support team for assistance.
## Automated snapshots
Snapshots are saved states of your translation project. SimpleLocalize creates them automatically before significant changes, so you can always go back to the state from before the change.
Automated snapshots are created:
- before deleting a language or a customer context,
- before bulk actions, such as changing review statuses, changing namespaces, or clearing translations,
- before deleting more than 50 translation keys at once,
- before deleting translation keys that are not present in an uploaded file,
- before clearing project data, in project settings or with the CLI `purge` command,
- before restoring a backup,
- when you import translations, if the last snapshot is older than 7 days and the project has changed since then, or if there have been more than 1,000 changes since the last snapshot.
> Imports do not create a snapshot every time. If you are about to import a file that changes a lot of translations, [create a snapshot manually](#create-a-snapshot-manually) first.
Snapshots are kept for **90 days**.
### What is included in a snapshot
Every snapshot contains:
- languages (codes, names, flags, order, default language and auto-translation provider)
- customer contexts
- tags (names and colors)
- translation keys and namespaces
- translation key descriptions and code descriptions
- translation key tags
- translation key character limits, deprecation, locked translations and disabled auto-translation flags
- translation key options and custom attributes (for example, gettext context, XLIFF notes or Figma node IDs)
- translation texts
- translation review statuses
- translation auto-translation statuses
Snapshots **do not contain** project settings and translation key screenshots.
### Create a snapshot manually
You can create a snapshot at any time, for example, before a release or a large change in your project.
Open your project, go to **Settings** > **Snapshots**, and click **Create snapshot**. Give the snapshot a name, like "Before release 2.0", to find it easily later.
To change or remove the name of an existing snapshot, open the menu (**⋮**) next to it on the list and click **Rename**.
### Restore from a snapshot
You will find all snapshots of your project in **Settings** > **Snapshots**. Click a snapshot name, or open the menu (**⋮**) next to it and click **Revert**, to open the snapshot.
Snapshots are also available in the **Activity** tab, after you change the **Filter** and select the action type **Snapshots**.

The snapshot preview shows the number of translation keys, languages, and translations at the time it was created.
You can also compare the snapshot with the current state of your project, language by language, to see exactly what will change after restoring it.

Restoring a snapshot brings back the translations, languages, customer contexts, tags, and translation key details saved in the snapshot.
Every translation saved in the snapshot gets back its text and review status. This includes empty translations: if a translation was empty when the snapshot was created and you filled it in later, restoring the snapshot clears it again.
Restoring a snapshot runs in the background and may take a few minutes, depending on the size of your project.
Restoring a snapshot does not delete data added after the snapshot was created. If you added new translation keys or languages since then, you need to delete them manually.
Restoring a snapshot does not create a new snapshot first. If you want to be able to undo the restore, [create a snapshot manually](#create-a-snapshot-manually) before restoring.
## Legacy backups
> Backups are deprecated, and creating new backups is no longer available. We recommend using [snapshots](#create-a-snapshot-manually) instead.
Backups created in the past are still available in **Settings** > **Snapshots** under **Manual backups**. You can restore them or delete them when you no longer need them.
Backups do not contain tags, translation key custom attributes, or translation key screenshots.
### Restore backup
You have two options when restoring a backup: create a new project from the backup or restore the backup and override the existing project.
#### Create a new project from backup
This option copies the project version from the selected backup to a newly created project. It's a safe way of restoring your translations without the risk of losing any current data.

#### Restore backup and override existing project
By selecting this option, you will **overwrite the current translation data with the data from the chosen backup**. All current translations, languages, customer contexts, and settings will be replaced with the data from the backup. Tags assigned to translation keys will be removed, as backups do not contain them.
SimpleLocalize creates a snapshot of your project before restoring a backup, so you can go back to the previous state from the [snapshot](#restore-from-a-snapshot) if needed.
## Reverting changes via previous files
Another option to revert translations is by using files that you have previously imported or exported. You will find all your files in the **Activity** tab of your project.
You can download those files and re-import them to your project to revert translations. Remember to select the correct file format when importing.
## Reverting changes via translation hosting
If you are using [Translation Hosting](/docs/translation-hosting/get-started/), you can also use those files to revert translations in your translation editor.
Get the desired version of your translations from the **Hosting** tab, it could be the version from rollback or currently hosted version.
Then import those files back to your translation project in the **Data** tab.
- For `_index` files with all translations then use [`multi-language-json`](/docs/file-formats/multi-language-json/) file format.
- For language-specific files then use [`single-language-json`](/docs/file-formats/single-language-json/) file format.
## I need assistance
In case of any doubts or questions, feel free to reach out to our support team for assistance.
We are here to help you ensure the safety and integrity of your translation data.
---
# General: Options
Source: https://simplelocalize.io/docs/general/options/
To offer a wide-range compatibility with different localization tools and software, SimpleLocalize offers a
variety of auto-translations, import and export options to meet all your requirements.
## Table of contents
## Auto-translation options
Export options can be used in web interface in auto-translation popup, and [API auto-translation job](/docs/api/auto-translate/).
### `FORCE_REPLACE`
By default, only not translated strings (empty text) are translated to speed up the auto-translation process.
This option forces SimpleLocalize to auto-translate all existing translations for a given language.
Using this option consumes your auto-translation limit! Information about current auto-translation usage is available in your [account settings](/dashboard/subscription/) page.
### `AUTO_PUBLISH`
By default, after a successful auto-translation job, translations are available in the translation editor ('Translations' tab).
Enabling this option adds the additional step to the auto-translations process, which is a CDN publication.
After a successful auto-translation, translations will be published in the latest CDN environment. From there,
you can push them into a Production environment in 'Hosting' tab.
### `USE_TRANSLATION_KEYS`
By default, only translations from a language are used to translate strings into another language. In some cases,
you can use translation keys to translate them into other languages. This option tries to use a translation key as a translation source,
only if no translation is available. In uses a basic modification before translation. Underscores `_` and dashes `-`
are replaced with spaces, translations are trimmed, and texts are capitalized. See example below:
Translation key: `MY_TRANSLATION_KEY`
Translation source: `My translation key`
## Export / Download options
Export/download options can be used in a web export panel in 'Data' tab, [CLI download](/docs/cli/download-translations/) command, and [API export file endpoint](/docs/api/export-translations/).
### `INCLUDE_DESCRIPTIONS`
By default, exporting translation to Excel or CSV format, won't contain translation key descriptions. Enabling this
option adds a description column with translation key descriptions.
By default, the exported description is the [**translator description**](/docs/general/descriptions/). Combine
this option with `USE_CODE_DESCRIPTIONS` to export the code description instead.
### `USE_CODE_DESCRIPTIONS`
Used together with `INCLUDE_DESCRIPTIONS`. By default, exported descriptions are
[**translator descriptions**](/docs/general/descriptions/) — the ones written manually in the Translation Editor.
Enabling this option exports **code descriptions** instead — the ones uploaded from your codebase.
### `INCLUDE_TAGS`
Add tags metadata to the exported file. Tags are used to categorize translation keys and can be used to filter them in the translation editor.
### `INCLUDE_CHARACTERS_LIMIT`
Add a field with a character limit for each translation key.
### `INCLUDE_LOCK_STATE`
Add a field with a lock state for each translation key.
### `WRITE_NESTED`
By default, translations are exported in a flat key-value format. Enabling this option instructs SimpleLocalize to
write export translations in a multi-level format, where a key can contain a string or object. Every new level is created on a dot (`.`). See example below:
Translation keys: `navigation.title`, `navigation.logout`, `footer.about`
**Without** `WRITE_NESTED` option
```json
{
"pl": {
"navigation.title": "Tytuł",
"navigation.logout": "Wyloguj",
"footer.about": "O nas"
},
"fr": {
...
}
}
```
**With** `WRITE_NESTED` enabled
```json
{
"pl": {
"navigation": {
"title": "Tytuł",
"logout": "Wyloguj"
},
"footer": {
"about": "O nas"
}
},
"fr": {
...
}
}
```
In some cases, this option may fail, due to incorrect translation key naming. For example, having keys:
- `navigation.title = 'Title'`
- `navigation = 'Navigation'`
will result with error, because JSON file cannot contain key duplicates like below:
```json
{
"pl": {
"navigation": {
"title": "Title"
},
"navigation": "Navigation"
}
}
```
### `MULTI_LANGUAGE`
By default, translations are split into separate files based on languages. Enabling this option exports all translations
into a single file, where each language is represented as a separate column. This option is valid only for `yaml` format.
### `LANGUAGES_NESTED`
By default, translations are exported with languages as a top-level key. Enabling this option exports translations with languages as a nested key. See example below:
**Without** `LANGUAGES_NESTED` option
```yaml
pl:
navigation.title: Tytuł
navigation.logout: Wyloguj
footer.about: O nas
fr:
navigation.title: Titre
navigation.logout: Déconnexion
footer.about: À propos
```
**With** `LANGUAGES_NESTED` enabled
```yaml
navigation:
pl:
title: Tytuł
logout: Wyloguj
fr:
title: Titre
logout: Déconnexion
```
### `SPLIT_BY_NAMESPACES`
Use this options to split translations into separate files based on namespaces.
### `SHEETS_AS_NAMESPACES`
Use this option to split translations into separate sheets in Excel file based on namespaces.
### `ESCAPE_SINGLE_QUOTES`
By default, Simplelocalize is not making any modifications of translation text or files during the import unless it is crucial for
correct reading of the text. This option replaces one single quote `'` with two single quotes `''` in exported files.
### `ESCAPE_NEW_LINES`
By default, Simplelocalize is not making any modifications of translation text or files during the import unless it is crucial for
correct reading of the text. This option replaces native new lines (those from translation editor) with '\n' characters in
exported CSV files. See the example below:

In the translation input above, there are 3-line breaks that have been made by a translator by clicking 'Enter' button.
Whenever you export translation into a CSV format, those linebreaks will be held.
**Without** `ESCAPE_NEW_LINES` option
```shell
"FACEBOOK.SHARE","Share","Partager","Udział"
"FOOTER.ABOUT","It is a long-established fact that a reader will be distracted by the readable content of a
page when looking at its layout. The point of using Lorem Ipsum is that it has a
more-or-less normal distribution of letters, as opposed to using 'Content here,
content here', making it look like readable English.","",""
"FOOTER.ADVERT","Press","presse","naciskać"
```
**With** `ESCAPE_NEW_LINES` option
```shell
"FACEBOOK.SHARE","Share","Partager","Udział"
"FOOTER.ABOUT","It is a long-established fact that a reader will be distracted by the readable content of a \npage when looking at its layout. The point of using Lorem Ipsum is that it has a \nmore-or-less normal distribution of letters, as opposed to using 'Content here, \ncontent here', making it look like readable English.","",""
"FOOTER.ADVERT","Press","presse","naciskać"
```
All linebreaks have been replaced by a new line `\n` character.
### `MULTI_LANGUAGE`
By default, the system expects to have translations for a single language in a file. Enabling this option instructs SimpleLocalize that the file contains translations for multiple languages.
This option is valid only for `yaml` format.
### `LANGUAGES_NESTED`
By default, the system expects language keys to be at the top level of the file. Enabling this option instructs SimpleLocalize that the file contains language keys nested under translation keys.
**Without** `LANGUAGES_NESTED` option
```yaml
pl:
navigation.title: Tytuł
navigation.logout: Wyloguj
footer.about: O nas
fr:
navigation.title: Titre
navigation.logout: Déconnexion
footer.about: À propos
```
**With** `LANGUAGES_NESTED` enabled
```yaml
navigation:
pl:
title: Tytuł
logout: Wyloguj
fr:
title: Titre
logout: Déconnexion
```
### `ONLY_TRANSLATED`
Export translations that have non-empty translation strings only.
For multi-language file formats, it will export if any of the languages has a non-empty translation string.
### `ONLY_NOT_TRANSLATED`
Export translations that have empty translation strings only.
For multi-language file formats, it will export if any of the languages has an empty translation string.
### `ONLY_ACCEPTED`
Export translations that have been accepted in the translation editor.
For multi-language file formats, it will export if any of the languages has been accepted.
### `ONLY_NEEDS_REVIEW`
Export translations that have been marked as 'Needs review' in the translation editor.
For multi-language file formats, it will export if any of the languages has been marked as 'Needs review'.
### `ENABLE_FALLBACKS`
By default, if a translation is missing, the translation key is exported with an empty string.
Enabling this option will export translation keys with a translation from the configured [fallback translations](/docs/general/languages/#fallback-languages) if a translation is missing.
Previously this option was called `DEFAULT_IF_MISSING`.
### `UNIVERSAL_PLACEHOLDERS`
Converts [universal placeholders](/docs/general/universal-placeholders/) stored in SimpleLocalize to native platform-specific format specifiers during export.
### `MARKDOWN_TO_HTML`
Converts Markdown styling saved by the rich text editor to HTML tags supported by Android string resources during export:
`**bold**` becomes `bold`, `_italic_` becomes `italic` and `~~strikethrough~~` becomes `strikethrough`.
This way you can keep one translation key with Markdown styling for iOS (SwiftUI renders Markdown natively) and Android.
The option is available for the `android-strings` file format.
Use the [`HTML_TO_MARKDOWN`](#html_to_markdown) import option to convert the tags back to Markdown on upload.
### `WRAP_HTML_IN_CDATA`
By default, translations with [HTML tags supported by Android](/docs/file-formats/android-strings/#html-tags) (e.g. ``, ``, ``) are exported as real markup,
and only other tags are wrapped in ``.
Enabling this option wraps every translation that contains HTML tags in ``, including the supported ones,
for example `%s!]]>`.
Use it if your app reads such strings with `Html.fromHtml()` or `HtmlCompat.fromHtml()`.
The option is available for the `android-strings` file format.
### `TYPED_VALUES`
By default, all translations are exported as strings, so YAML files contain quoted values like `precision: '3'` or `significant: 'false'`.
Enabling this option exports translations that are exactly `true` or `false` as booleans and translations that are plain numbers (e.g. `3`, `-12`, `0.5`) as numbers:
```yaml
format:
delimiter: ','
precision: 3
significant: false
```
Values like `007`, `1.2.3`, `True` or `yes` stay strings.
This is useful for Ruby on Rails, where options like `number.format.precision` must be numbers, not strings.
The option is available for the `yaml` file format.
### `EXCLUDE_DEPRECATED_KEYS`
By default, all translation keys are included in the exported file, including deprecated ones.
Enabling this option excludes keys that have been marked as deprecated, ensuring only active keys are present in the output file.
This is useful when you want to export only the keys that are actively used in your codebase and skip any outdated or unused keys.
## Import / Upload options
Import/Upload options can be used in a web import panel in 'Data' tab, [CLI upload](/docs/cli/upload-translations/) command, and [API import file endpoint](/docs/api/import-translations/).
### `PUBLISH_AFTER_IMPORT`
By default, after a successful import, translations are visible in the translation editor ('Translations' tab).
Enabling this option adds the additional step to the import process, which is CDN publication.
After a successful import, translations will be published in the latest CDN environment. From there,
you can push them into a Production environment in 'Hosting' tab.
### `UPDATE_TRANSLATIONS` (or `REPLACE_TRANSLATION_IF_FOUND`)
By default, import only imports new translations (empty text) and new translation keys with translations.
Enabling this option allows SimpleLocalize to also update existing translations. Translations which are NOT present
in the imported file will stay untouched.
### `DELETE_NOT_PRESENT_KEYS`
By default, import only imports new translations (empty text) and new translation keys with translations.
Enabling this option removes all existing translation keys, and translations and imports translation keys
and translations and languages from a file.
### `DEPRECATE_NOT_PRESENT_KEYS`
By default, import does not change the deprecation status of any translation keys.
Enabling this option marks translation keys that are **not present** in the imported file as deprecated.
Deprecated keys remain in the project but are marked with a deprecation timestamp indicating they are no longer actively used.
This is a softer alternative to `DELETE_NOT_PRESENT_KEYS` — instead of permanently removing keys,
they are kept for reference and can be reactivated later.
If a namespace is specified in the import, only keys within that namespace are affected.
### `ACTIVATE_PRESENT_KEYS`
By default, import does not change the deprecation status of any translation keys.
Enabling this option marks translation keys that **are present** in the imported file as active, removing their deprecated status.
This option works well in combination with `DEPRECATE_NOT_PRESENT_KEYS` to maintain an accurate and up-to-date view
of which keys are actively used in your codebase. Previously deprecated keys will become active again if they appear in the import.
If a namespace is specified in the import, only keys within that namespace are affected.
### `TRIM_LEADING_TRAILING_SPACES`
By default, Simplelocalize is not doing modifications of translation strings during the import unless it is crucial for
correct reading of the text. Enabling this options removes additional spaces from the beginning and the end of translation text.
### `SHEETS_AS_NAMESPACES`
Option is used to import translations from separate sheets in Excel file based on namespaces.
### `UNESCAPE_SINGLE_QUOTES`
By default, Simplelocalize is not making any modifications of translation text or files during the import unless it is crucial for
correct reading of the text. This option replaces two single quotes `''` with one single quote `'`.
If the translation text contains an odd number of single quotes next to each other, the last one will be left untouched.
### `UNESCAPE_NEW_LINES`
By default, new lines in translations are detected automatically using rules default for the chosen format.
Enabling this option allows you to replace new line characters (`\n`) in translation texts into a native new-lines.
See the example below:
Fragment of CSV file with '\n' characters as new lines.
```shell
"FACEBOOK.SHARE","Share","Partager","Udział"
"FOOTER.ABOUT","It is a long-established fact that a reader will be distracted by the readable content of a \npage when looking at its layout. The point of using Lorem Ipsum is that it has a \nmore-or-less normal distribution of letters, as opposed to using 'Content here, \ncontent here', making it look like readable English.","",""
"FOOTER.ADVERT","Press","presse","naciskać"
```
File imported **with** `UNESCAPE_NEW_LINES`

File imported **without** `UNESCAPE_NEW_LINES`

### `UPDATE_ORDER`
By default, translation keys order is not updated during the import.
Enabling this option allows you to update translation keys order in the translation editor based on the order in the imported file.
Please note that this option may extend the import time for large files, and it won't work properly for multi-file imports.
### `UPDATE_DESCRIPTIONS`
By default, during the [SimpleLocalize CLI imports](/docs/cli/upload-translations/), translation key descriptions are set as code descriptions. You can change this behavior
by using this option. This option will update and replace the translator translation key descriptions if they are present in the imported file.
### `MARK_AS_ACCEPTED`
By default, during any import, translations are marked as 'Not accepted' only if they are changed.
Enabling this option marks translations as 'Accepted' after the import for all present translation keys and languages in the imported file regardless of the changes.
### `UNIVERSAL_PLACEHOLDERS`
Converts native platform-specific format specifiers to [universal placeholders](/docs/general/universal-placeholders/) during import.
### `HTML_TO_MARKDOWN`
Converts ``/``, ``/`` and ``/``/`` tags back to Markdown (`**bold**`, `_italic_`, `~~strikethrough~~`) during import.
Use it together with the [`MARKDOWN_TO_HTML`](#markdown_to_html) export option, so uploading an exported `strings.xml` does not replace Markdown styling with HTML tags.
The option is available for the `android-strings` file format.
### `MARK_AS_NEEDS_REVIEW`
By default, during any import, translations are marked as 'Not accepted' only if they are changed.
Enabling this option marks translations as 'Not accepted' after the import for all present translation keys and languages in the imported file regardless of the changes.
---
# General: Reports
Source: https://simplelocalize.io/docs/general/statistics/
Reports are a great way to track the progress of your project. You can find key information about your project in the **Overview** tab, and detailed reports for people, languages, auto-translation, community suggestions, quality checks and Translation Hosting in the **Reports** window.
## Project overview
Overview provides a summary of the translation activity in your project. You can see the number of missing translations, translations to review, with issues and the total number of translation keys.

In project overview, you can also check:
- Translation progress and recent changes
- Synclog showing recent exports and publications
- Tasks
- Recent comments
- Community suggestions
- Summary of QA checks
- Notes (e.g. style guide or other important information for translators)
- News from SimpleLocalize (e.g. new features, updates, and announcements)
> You can enable or disable the Overview tab in the project settings (**Settings** > **General**).
## Opening reports
> Reports are available for project owners and administrators.
You can open the **Reports** window from:
- the **Overview** or **Activity** tab, by clicking the **Reports** button,
- the **Languages** tab, by clicking on the **%** of translation for the selected language or the options button (**⋮**) > **Reports**,
- the **People** tab, by clicking on the user role dropdown > **Reports**,
- the **Hosting** tab, by clicking the chart icon on the environment card.
The People, Languages, Auto-translation and Community suggestions reports show the selected month, use the month switcher at the top to change it. Quality checks show the current state of the project, and Hosting shows the last 7 days.
> Missing a report? Click **Give feedback** at the bottom of the menu and let us know.
## People
The **People** report shows the translation activity of all project members side by side: the number of translation changes, reviews and the time spent in the project. Time spent is counted while the project is open. You can also see the activity over time for the whole project and export it to CSV.

> Select a member from the dropdown or click on their name to see their activity, including activity by language and time spent in the project.
Switch to the table view to see the day-by-day translation activity for the selected member. Click on the time spent on a given day to see its sessions, with the start and end time in your local time zone and in UTC. You can also export the member's activity to CSV.
## Languages
The **Languages** report shows the status of all languages in the project: missing translations, translations to review, the auto-translation percentage, and the number of words and characters. You can also see the activity over time, top contributors and the auto-translation usage by provider.

Select a language from the dropdown or click on its name to see the report for the selected language, including its activity over time and top contributors.

## Quality checks
The **Quality checks** report shows all [QA check](/docs/translation-editor/qa-checks/) issues found in the project, broken down by:
- severity (high, medium and low),
- check type, for example placeholders, HTML tags or punctuation,
- language.
Click on a severity or a check type to open the translations with these issues in the Translation Editor, or click on a language to see its report.
> The Quality checks report is available in projects with QA checks enabled.
## Hosting
The **Hosting** report shows the [Translation Hosting](/docs/translation-hosting/get-started/) traffic of the selected environment in the last 7 days: the number of CDN requests, bandwidth, requests over time and the most requested resources. Use the dropdown at the top to switch between environments.
> The Hosting report is available in projects with Translation Hosting enabled.
## Auto-translation
The **Auto-translation** report shows how many characters were used in the project in the selected month by auto-translation and AI actions, the same characters that count towards your plan limit. You can see the usage over time, by language and by member.
> Usage started by automations or the API is included in the totals, but not in the usage by member.
## Community suggestions
The **Community suggestions** report shows the [community suggestions](/docs/general/public-suggestions/) created in the selected month and their current status: accepted, pending or ignored. You can see the suggestions over time, suggestions by language and the top public contributors with the number of their suggestions, accepted suggestions and votes.
> The Community suggestions report is available in projects with Community enabled.
---
# General: Tasks
Source: https://simplelocalize.io/docs/general/tasks/
Tasks are a great way to coordinate work between team members. You can use them to assign translation-related activities to translators,
or translators can use them to communicate with developers, for example, to request additional context for selected translation keys.
## Enabling tasks
Tasks can be enabled or disabled in **Project Settings**. Only project owners and administrators can change this setting.
When disabled, the Tasks tab and all task-related features are hidden from all project members.
## Creating tasks
Every project member can create tasks, including translators. Each task consists of a **title**, an optional **description**, a **status**, an optional **assignee**, and a **scope**.
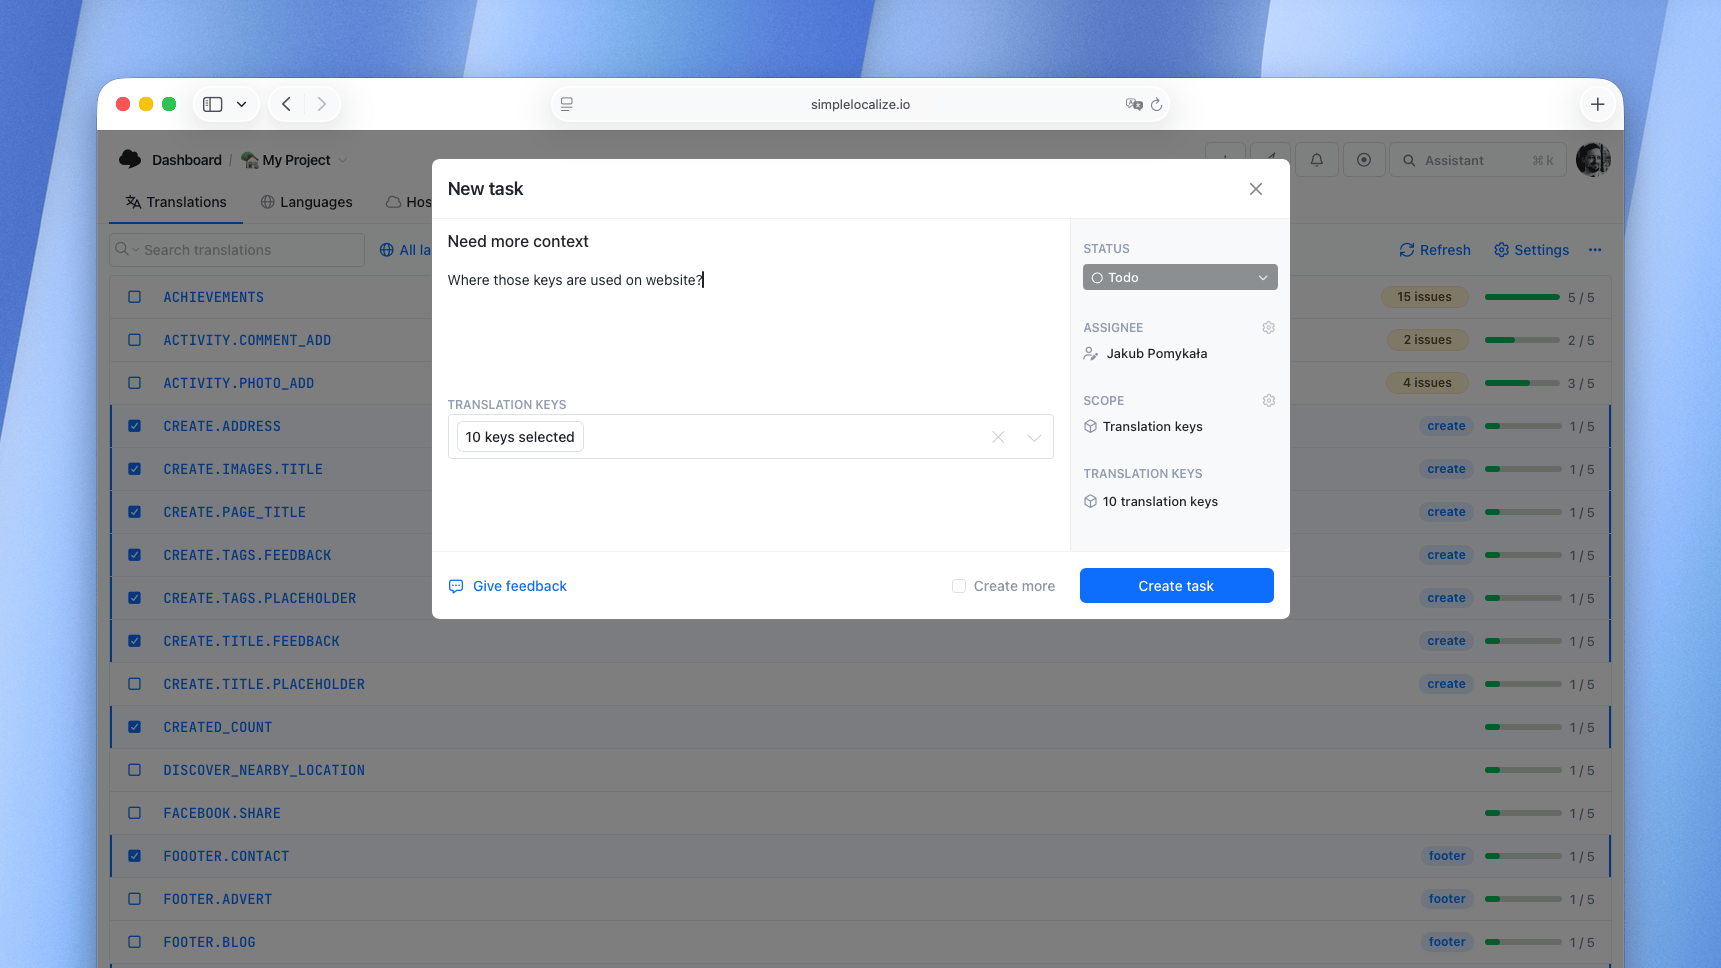
## Task scope
Every task can have a scope that defines the context in which the task should be completed. The scope makes it easy to narrow down and understand what the task is about.
There are three types of scope:
### Project
A general-purpose task that applies to the whole project. Use it for broad requests like "Review all translations before release" or "Update glossary terms".
### Translation keys
A task scoped to specific translation keys. Use it when the task is related to particular keys, for example: "Add context for these keys" or "Review naming conventions for these keys".
### Translations
A task scoped to specific translation keys **and** languages. This is the most specific scope, use it when work needs to be done on particular translations, for example: "Review French translations for these keys" or "Fix pluralization for German".
## Task statuses
Each task has a status that indicates its current state:
- **Todo** - task is created and waiting to be started.
- **In Progress** - task is currently being worked on.
- **On Hold** - task is paused or blocked.
- **Done** - task is completed.
- **Closed** - task is closed without completion.
## Assignee
Tasks can be assigned to any project member. The assignee can see their tasks in the **My Tasks** panel for quick access.
## Comments
Team members can leave comments on tasks to discuss details, ask questions, or provide updates. Comments support **@mentions** to notify other team members.
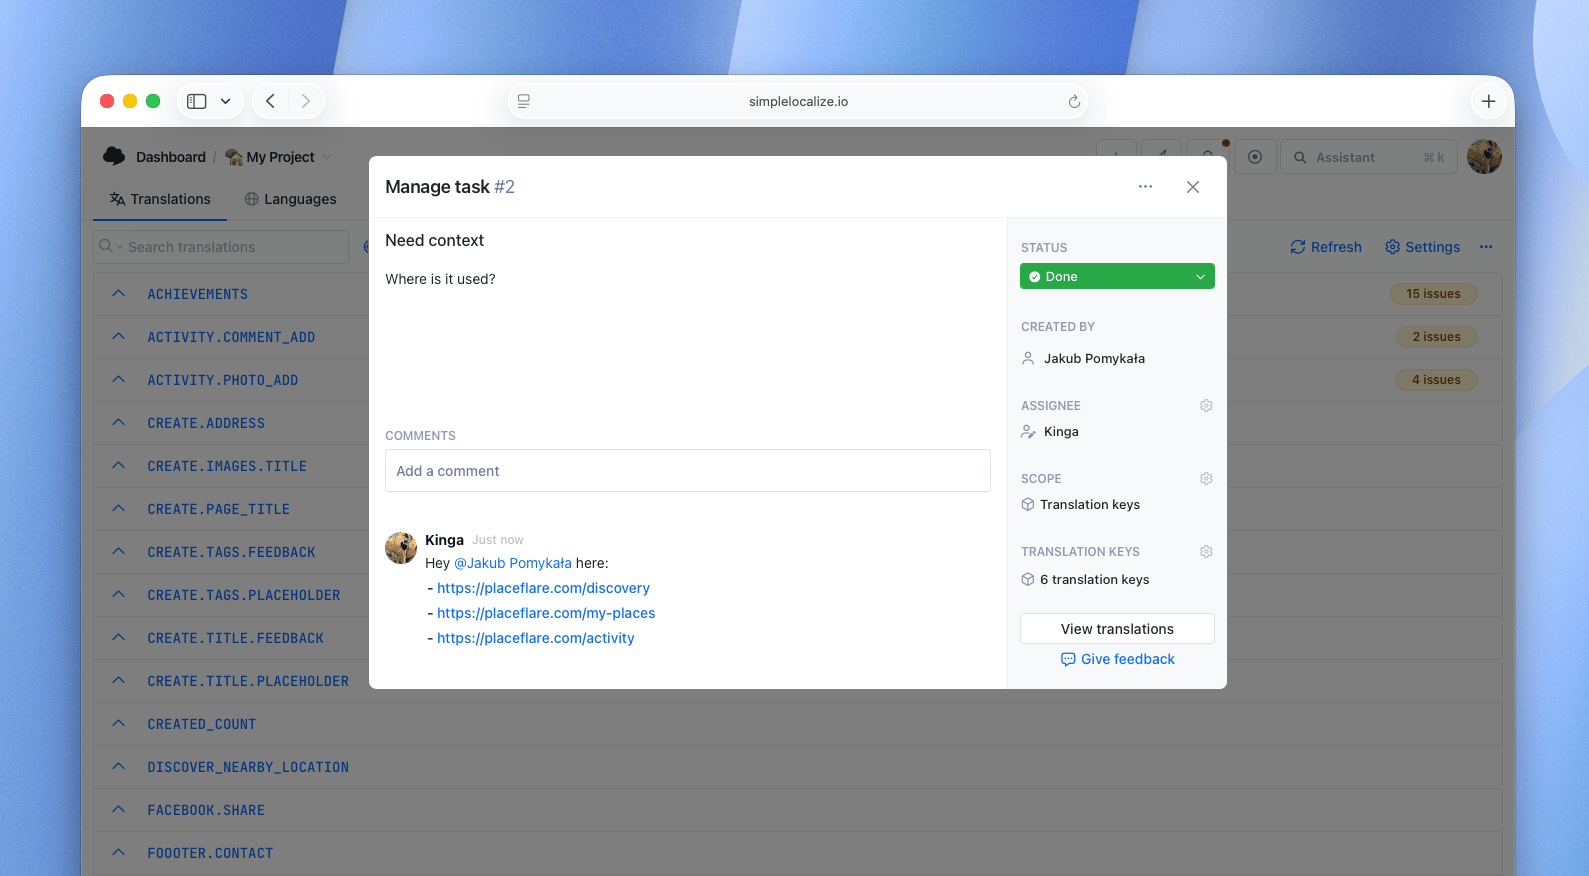
## Task list and filters
Open **All Tasks** from My Tasks to see the list of all tasks in the project. You can filter tasks by status, assignee, and scope to find the relevant tasks quickly.
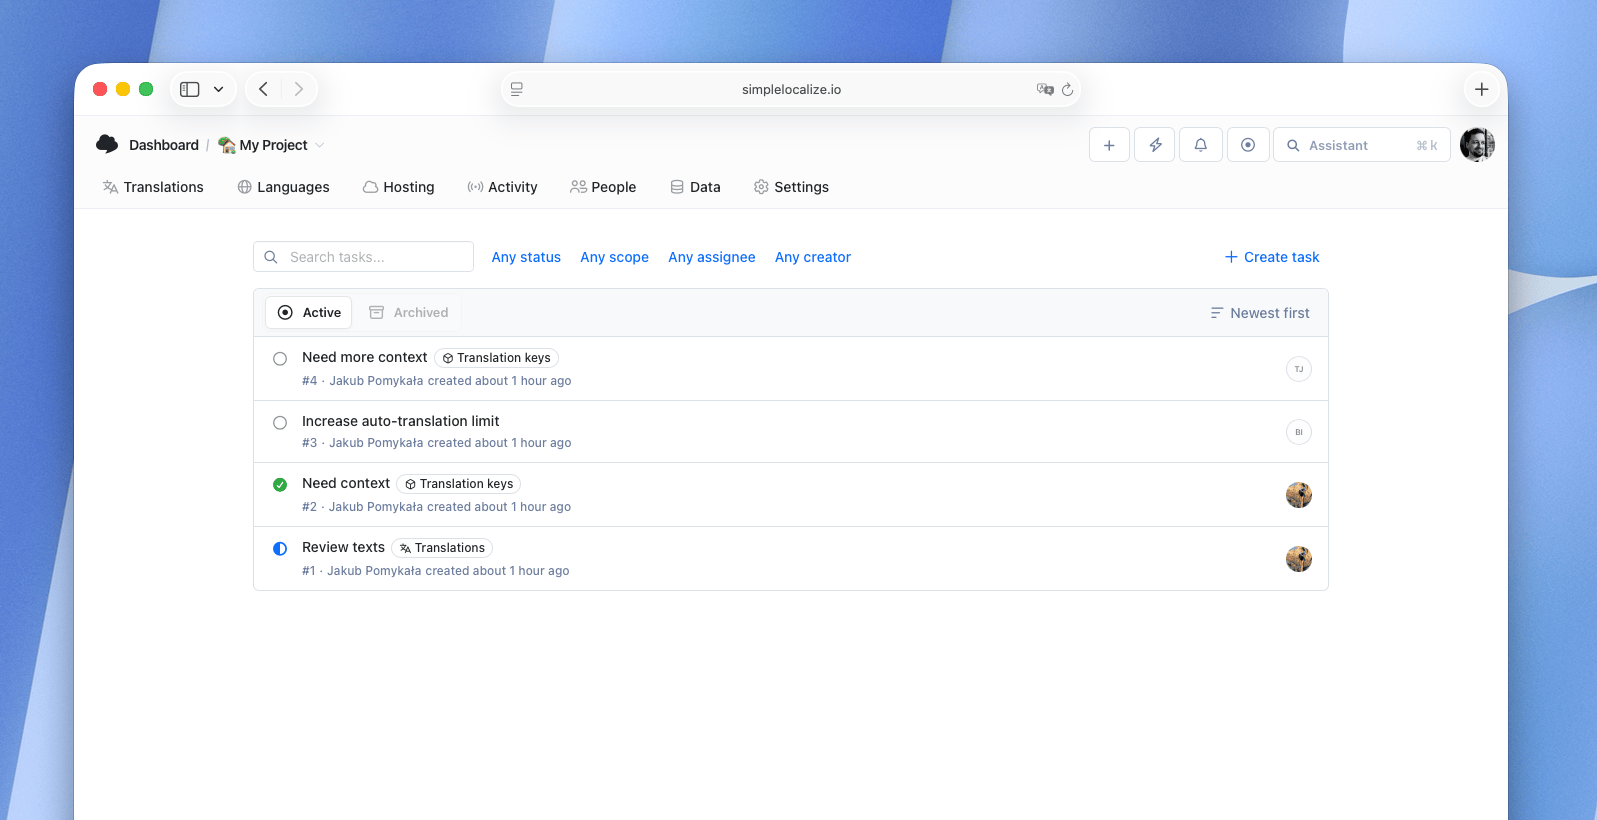
## Notifications
When you are mentioned in a comment or assigned to a task, you will receive a notification. This helps you stay up-to-date with the tasks that require your attention.
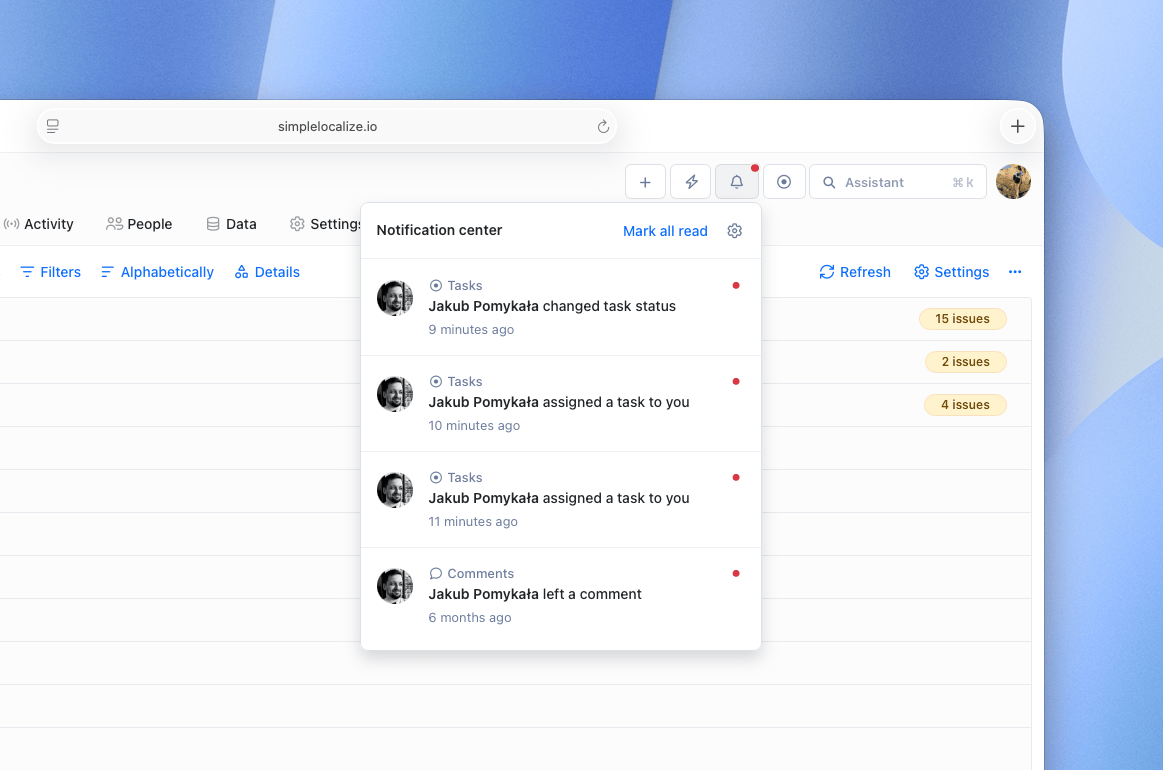
## Archiving tasks
Completed or no longer relevant tasks can be archived. Archived tasks are hidden from the default task list but can still be viewed using the "Archived" filter. Archived tasks can be restored at any time.
## Permissions
- **Project administrators** - can create, edit, assign, archive, and manage all tasks.
- **Translators** - can create tasks and change the status of tasks assigned to them. However, translators **cannot assign tasks to other translators** and **cannot mention other translators** in comments.
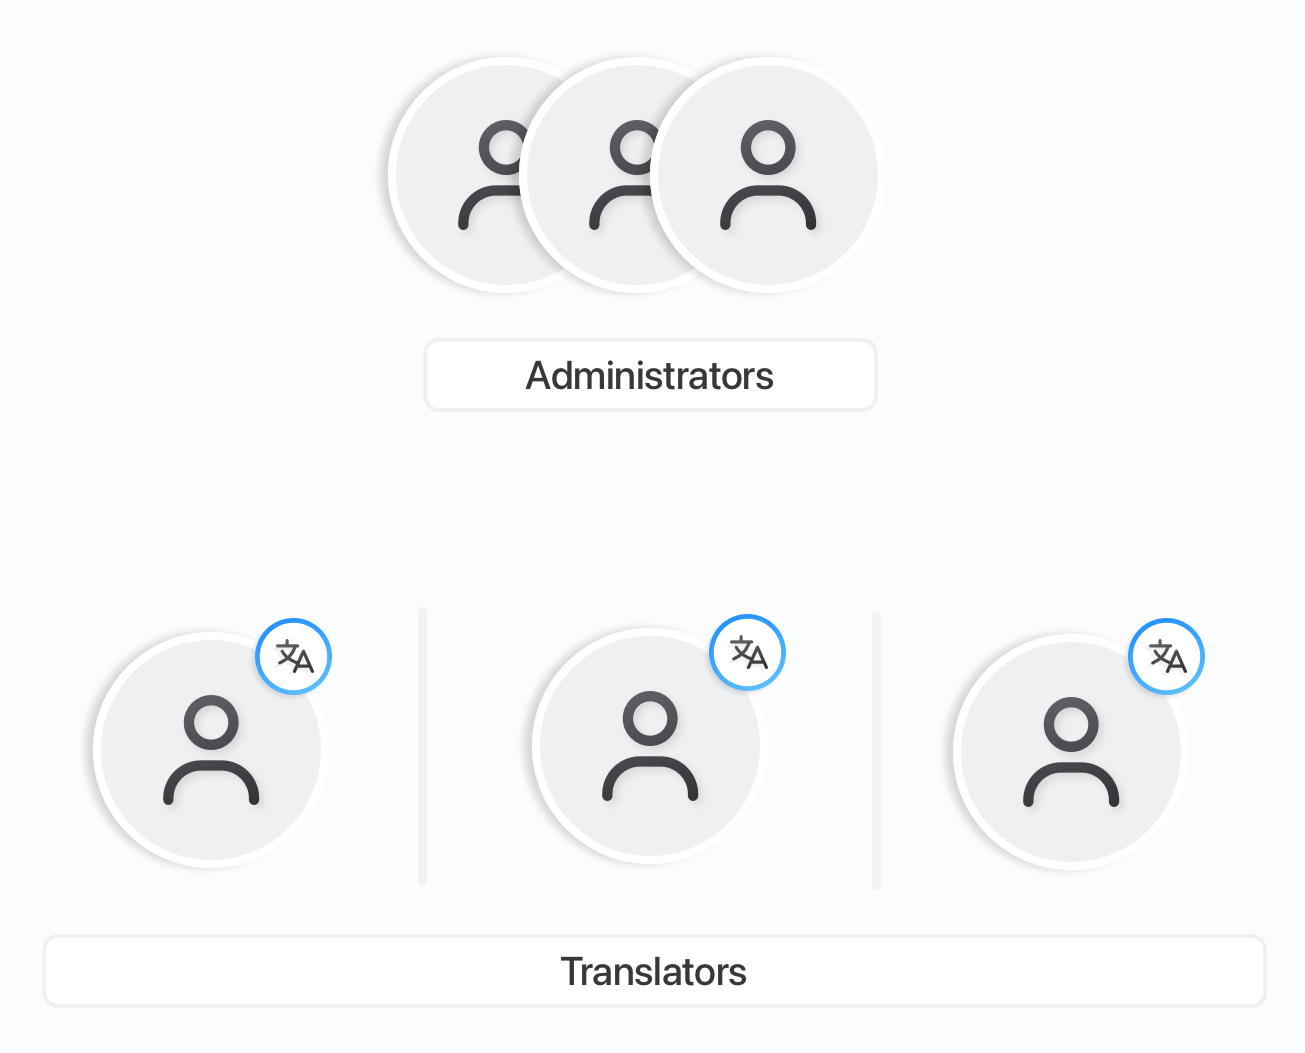
---
# General: Markdown translations
Source: https://simplelocalize.io/docs/general/markdown-files/
SimpleLocalize can translate long-form content such as product documentation, help centers, blog posts, and README files.
Each file is stored as **one translation key**, and the whole file content is its translation.
This way, every custom syntax in your files (for example, MkDocs admonitions, content tabs, Docusaurus admonitions, front matter, code blocks, or inline HTML) stays exactly as written. Translators can work with the same raw text that lives in your repository.
Markdown files are uploaded and downloaded using the [markdown](/docs/file-formats/markdown/) file format.
You can use the same workflow for other text files, such as `.mdx`, `.txt`, `.html`, or `.yml`, with the [translation as file](/docs/file-formats/translation-as-file/) format.
## How it works
1. Upload source files (for example, English) from your repository using the [SimpleLocalize CLI](/docs/cli/get-started/). Each file becomes a translation key.
2. Translate the files using [auto-translation](/docs/general/auto-translation/) (DeepL, Google Translate, OpenAI) or let your translators do it in the translation editor.
3. Review the translations in the [Text Editor](/docs/translation-editor/text-editor/) with raw Markdown and the source text side by side, and mark them as accepted using [review statuses](/docs/translation-editor/reviews/).
4. Download the translated files back to your repository using the CLI and build your site as usual.
## Translation key naming
The `{translationKey}` placeholder in the upload path matches the file path relative to the place where you put it, including subdirectories.
For example, with the upload path `./docs/en/{translationKey}.md`, the following files:
```
docs/en/index.md
docs/en/getting-started/install.md
docs/en/guides/api/authentication.md
```
will be uploaded as the translation keys:
- `index`
- `getting-started/install`
- `guides/api/authentication`
When you download the files, the CLI replaces `{translationKey}` with the same values, so the folder structure stays the same in every language.
> Renaming or moving a file changes its translation key. SimpleLocalize will create a new key for the new path, and the old key will stay in the project until you delete it.
## Upload source files
Upload only the source language files and use `--languageKey` to set their language.
Add the `UPDATE_TRANSLATIONS` option so that changes in your source files update the existing translation keys on every upload.
```shell
simplelocalize upload \
--apiKey \
--languageKey en \
--uploadFormat markdown \
--uploadPath ./docs/en/{translationKey}.md \
--uploadOptions UPDATE_TRANSLATIONS
```
If you already have translated files, you can import them once by using the `{lang}` placeholder in the upload path instead of `--languageKey`:
```shell
simplelocalize upload \
--apiKey \
--uploadFormat markdown \
--uploadPath ./docs/{lang}/{translationKey}.md
```
## Translate and review
Use [auto-translation](/docs/general/auto-translation/) to pre-translate all files into your target languages, either from the web app or from the CLI:
```shell
simplelocalize auto-translate \
--apiKey \
--languageKeys de,es,fr,it,ja
```
To review translations, open the translation key in the [Text Editor](/docs/translation-editor/text-editor/).
The editor shows the source file on the left side and the translation on the right side, so you can compare them line by line.
By default, both files are shown as raw Markdown, so you can check custom syntax like admonitions, tabs, or HTML tags.
The character and line counts below each file help you spot missing or extra content.
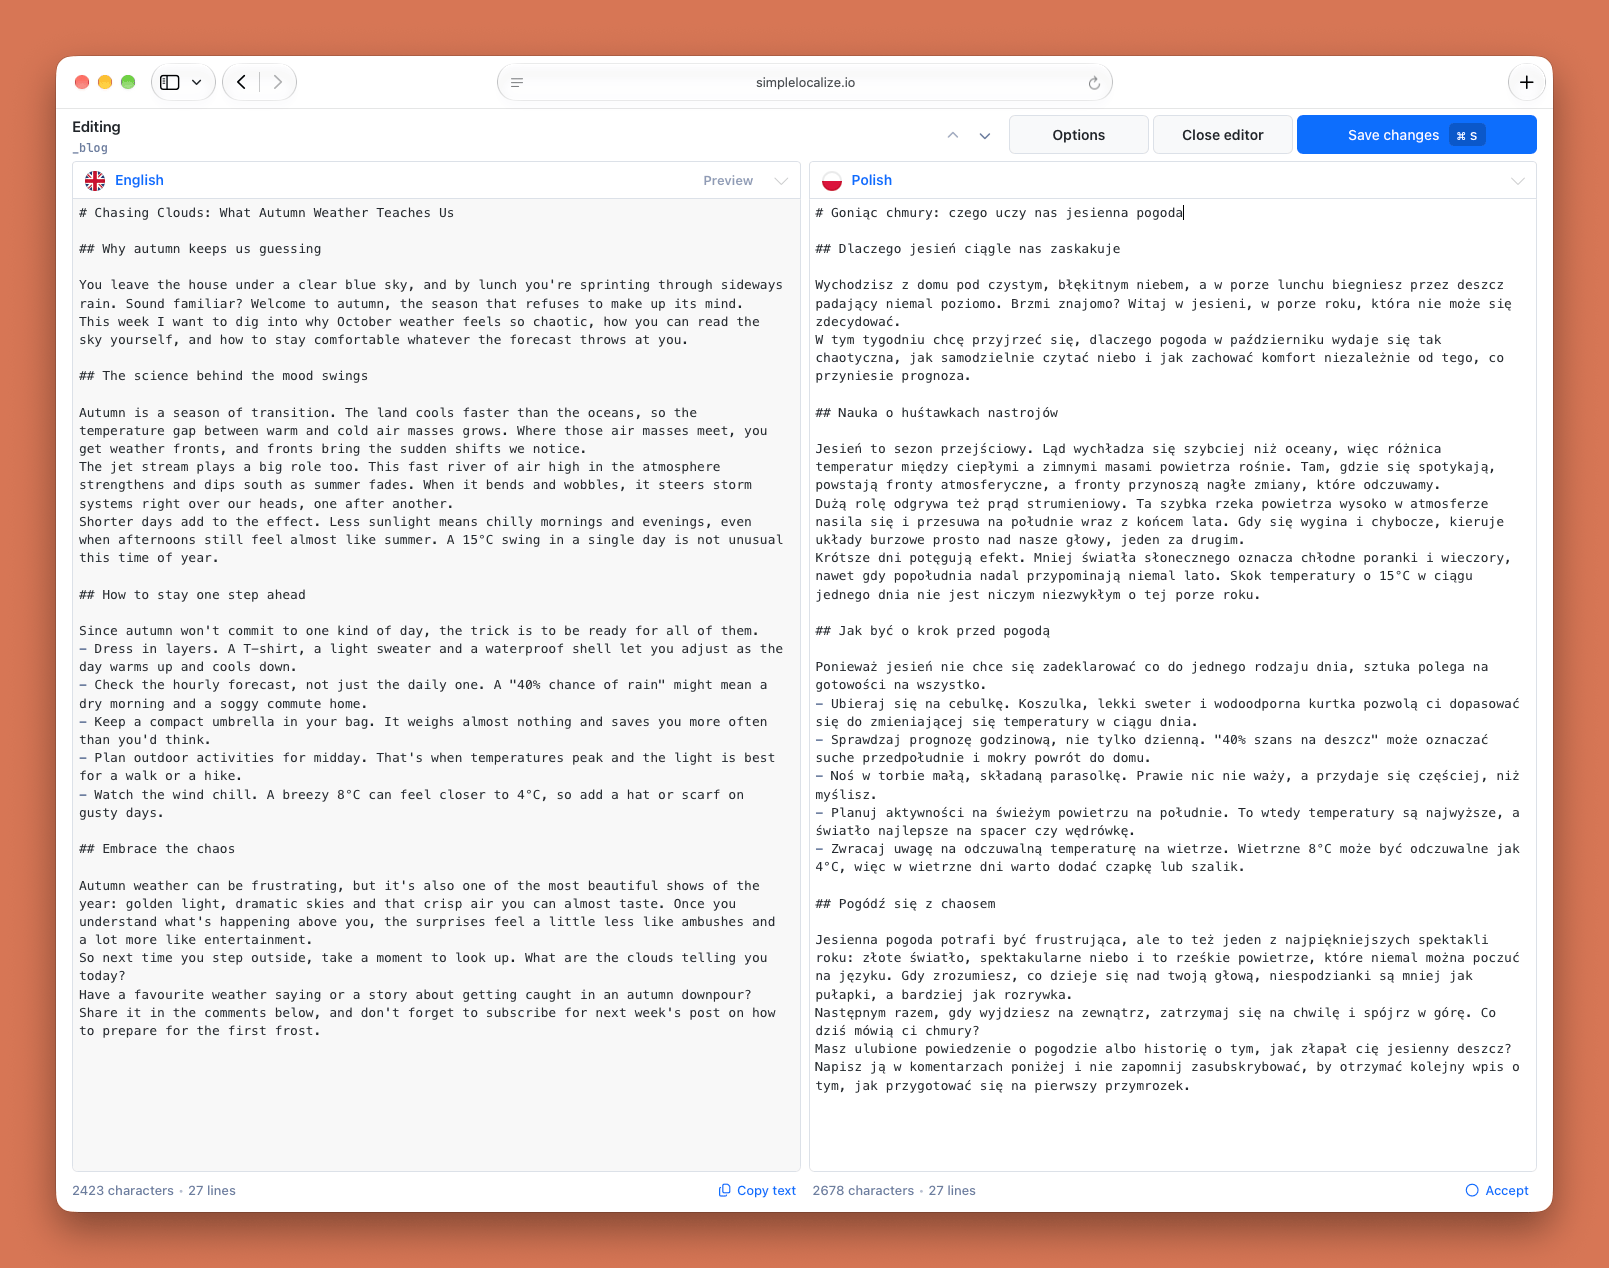
Use **Options** to switch to the WYSIWYG editor and **Preview** to render the source file.
This view is useful for translators who are not familiar with Markdown syntax.
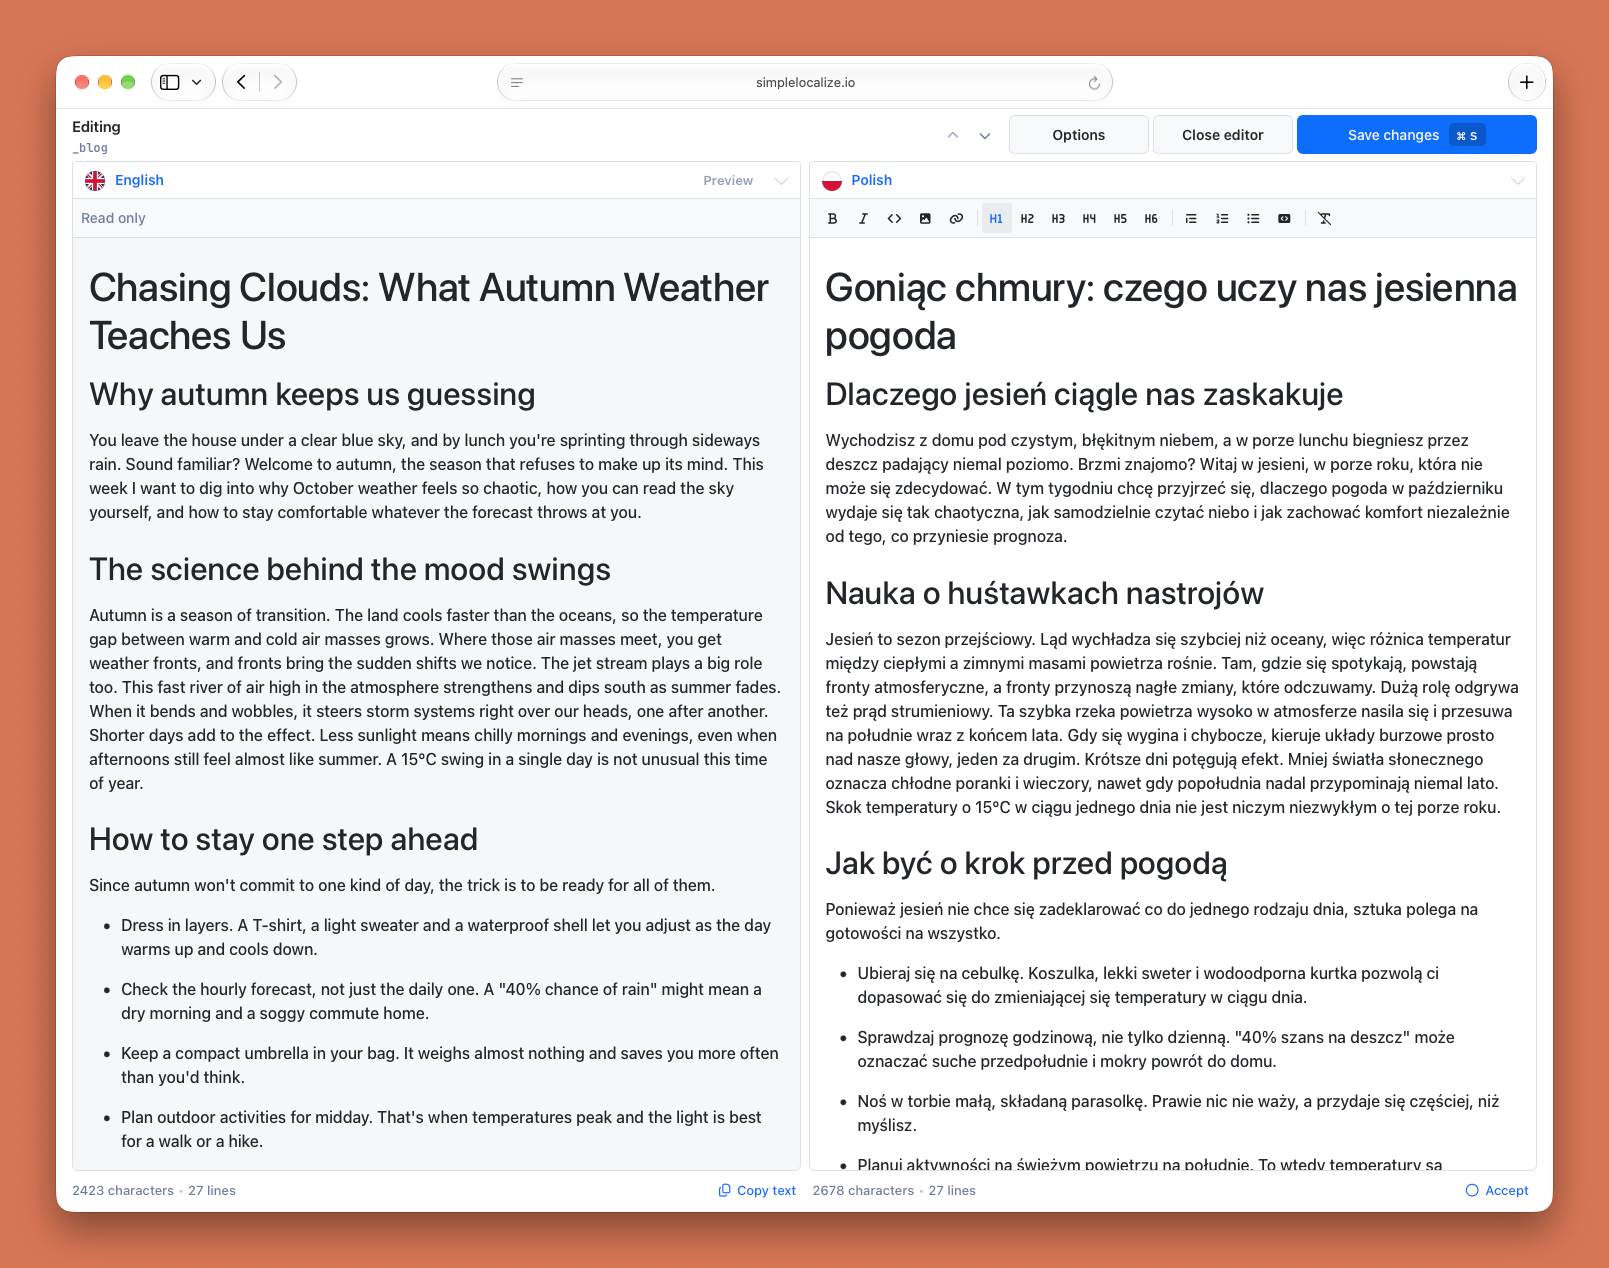
### Keep translations up to date
When a source file changes, its translations are not updated automatically.
Create an [automation](/docs/general/automations/) that runs when a source translation is updated to auto-translate the changed files and mark them as **Needs review**, so your reviewers always know which files to check again.
> By default, we block automatic auto-translation for texts longer than 25,000 characters. You can enable longer texts in **Settings > General > Auto-translation > "Allow to auto-translate longer texts"**.
## Download translated files
Download the translated files to your repository. Add the extension to the download path, because the translation key does not include it:
```shell
simplelocalize download \
--apiKey \
--languageKeys de,es,fr,it,ja \
--downloadFormat markdown \
--downloadPath ./docs/{lang}/{translationKey}.md
```
## Example
**Folder structure:**
```yaml
# simplelocalize.yml
apiKey:
uploadFormat: markdown
uploadLanguageKey: en
uploadPath: ./docs/en/{translationKey}.md
uploadOptions:
- UPDATE_TRANSLATIONS
downloadFormat: markdown
downloadLanguageKeys: ['de', 'es', 'fr', 'it', 'ja']
downloadPath: ./docs/{lang}/{translationKey}.md
```
**Suffix structure:**
```yaml
# simplelocalize.yml
apiKey:
uploadFormat: markdown
uploadLanguageKey: en
uploadPath: ./docs/{translationKey}.en.md
uploadOptions:
- UPDATE_TRANSLATIONS
downloadFormat: markdown
downloadLanguageKeys: ['de', 'es', 'fr', 'it', 'ja']
downloadPath: ./docs/{translationKey}.{lang}.md
```
---
# General: Namespaces
Source: https://simplelocalize.io/docs/general/namespaces/
Namespaces in SimpleLocalize allow you to group translations in an organized way. They are particularly useful when managing a large number of translations or when namespaces are already a part of your application structure.
## How to use namespaces
Namespaces are optional, and you can organize them in any way that suits your application. They can group translations by feature, module, page, or any other relevant criteria.
Let's say you have a web application with two pages: `Home` and `About`. You can create two namespaces: `home` and `about` and put translations for each page in the corresponding namespace.

## Assign namespaces
You can create and assign namespaces directly in the translation editor, where they appear as blue labels next to the translation keys.
### Single translation key
Right-click on a translation key and select **Manage key**. In the Namespace field, type the name of the namespace you want to assign to the translation or choose an existing namespace from the dropdown menu.

### Many translation keys
You can assign namespaces to multiple translations at once using the bulk actions feature. Enable selection mode by clicking on a translation key holding the **** key and then select translations you want to assign a namespace to. Click on the Bulk actions button and choose **Change namespace**. Type the name of the namespace you want to assign to the translations or choose an existing namespace from the dropdown.

## Import with namespaces
When you import translations to SimpleLocalize from a file, you can assign a namespace to imported translation keys by selecting the namespace during the import process.

## Export with namespaces
During the export process, you can choose to export translations with or without namespaces. **Split by namespaces** option will generate separate files for each namespace.

## Code integration
### REST API
You can use the SimpleLocalize REST API to manage translations with namespaces programmatically. The API allows you to create, update, and delete translations, as well as assign namespaces to them.
[API documentation](/docs/api/get-started/)
### SimpleLocalize CLI
The SimpleLocalize CLI allows you to manage translations, including namespaces, directly from your terminal. You can use commands to import, export, and manage translations with namespaces.
[CLI documentation](/docs/cli/get-started/)
### Translation hosting
When hosting translations via SimpleLocalize, you can fetch translations by namespace, making it easier to retrieve content for specific features, modules, or pages.
[Translation hosting documentation](/docs/translation-hosting/fetching-translations/)
## Filter by namespaces
You can filter translations by namespace in the translation editor. Click on the **'Filters'** button and select the namespace you want to filter translations by.
You can also quickly filter translations by namespace using the **Filter by namespace** option under right click on the translation key.

## Alternatives
If you prefer not to use namespaces, you can still organize translations using tags. Tags allow you to categorize translations without the need for a hierarchical structure.
You can assign multiple tags to a translation, making it flexible for various organizational needs. Learn about [translation key tags](/docs/translation-editor/tags/) in the translation editor documentation.
---
# General: File formats
Source: https://simplelocalize.io/docs/general/file-formats/
List of all supported file formats. You can use those values to upload or download translations in selected format.
---
# General: Export translations
Source: https://simplelocalize.io/docs/general/export-translations/
Export translations from SimpleLocalize translation editor into any format, including an Excel and JSON format. The export feature allows you to save translations locally or send them to translators without giving access to the translation editor.
The user can choose to export the content in a [wide variety of formats](/docs/general/file-formats/).

To export translations, open your project and switch tab to the '**Data**'. Select a file format by clicking the icon and start export by
clicking '**Start export**' button. After that, you will be able to download translations by clicking '**Download the file**'.
Resources:
- Learn how to [export translations using CLI](/docs/cli/download-translations)
- Learn how to [export translations using API](/docs/api/export-translations)
## Translation keys order
By default, exported translation keys are sorted alphabetically. We recommend keeping the alphabetical order:
it is stable and predictable, so exports always produce the same file, and it is easy to find keys or review changes in pull requests.
If you need the exported files to follow the order of your source file, you need to:
1. Upload the source file with the [`UPDATE_ORDER`](/docs/general/options/#update_order) import option, so SimpleLocalize saves the position of every key from the file.
2. Download translations with the `IMPORT_ORDER` sort option (`--downloadSort IMPORT_ORDER` in the [CLI](/docs/cli/download-translations), `sort: "IMPORT_ORDER"` in the [GitHub App](/docs/integrations/github-app) configuration, or `sort=IMPORT_ORDER` in the [API](/docs/api/export-translations)).
`IMPORT_ORDER` alone doesn't change anything when the key positions were never saved. In that case, all keys have the same position, and they are exported alphabetically.
The key order is saved automatically only on the first import into an empty project, so keys added later, or keys created in the translation editor, will be sorted alphabetically
unless you upload the source file with `UPDATE_ORDER` every time.
Example GitHub App configuration:
```yaml
upload:
files:
- path: "locales/en.yml"
format: "yaml"
language-key: "en"
options:
- UPDATE_ORDER
download:
files:
- path: "locales/{lang}.yml"
format: "yaml"
sort: "IMPORT_ORDER"
```
Read more about [keeping translation keys in order](/blog/posts/translation-keys-order/).
## Conflicting nested keys
When exporting translations to a JSON file with the `WRITE_NESTED` option, you may encounter conflicting nested keys.
This happens when a translation key is both a value holder and a parent of other keys at the same time. JSON does not allow a key to be both a string and an object simultaneously.
For example, if you have the following translation keys:
```
home.login = "Log in"
home.login.text = "Please log in to continue"
home.login.title = "Welcome back"
home.login.validation = "Invalid credentials"
```
The export would try to produce this invalid JSON:
```json
{
"home": {
"login": "Log in",
"login": {
"text": "Please log in to continue",
"title": "Welcome back",
"validation": "Invalid credentials"
}
}
}
```
This is invalid because `home.login` cannot be both a string (`"Log in"`) and an object at the same time.
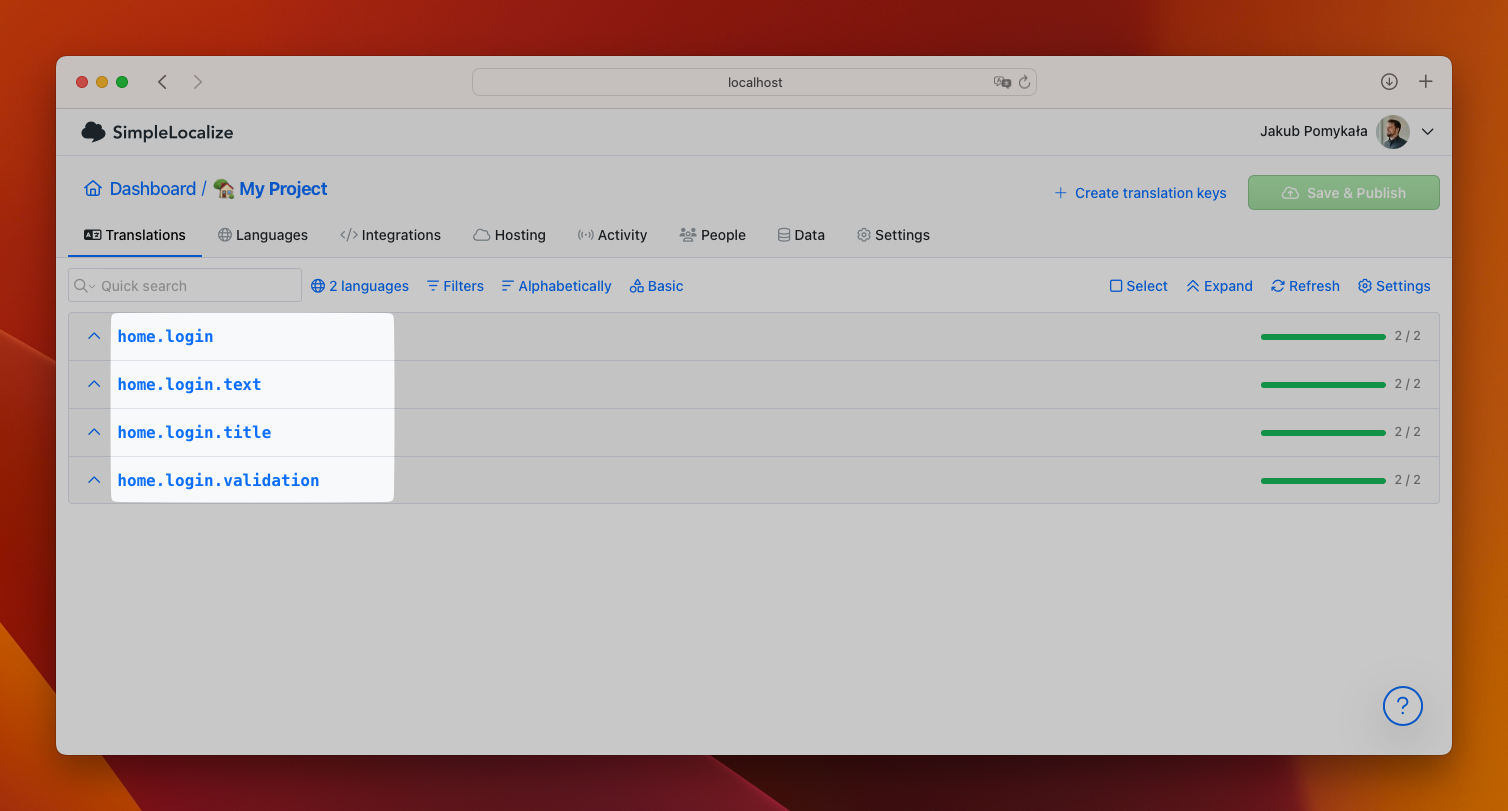
To resolve this, rename the conflicting key `home.login` to something more specific, e.g. `home.login.button`:
```
home.login.button = "Log in"
home.login.text = "Please log in to continue"
home.login.title = "Welcome back"
home.login.validation = "Invalid credentials"
```
Now the export produces valid nested JSON:
```json
{
"home": {
"login": {
"button": "Log in",
"text": "Please log in to continue",
"title": "Welcome back",
"validation": "Invalid credentials"
}
}
}
```
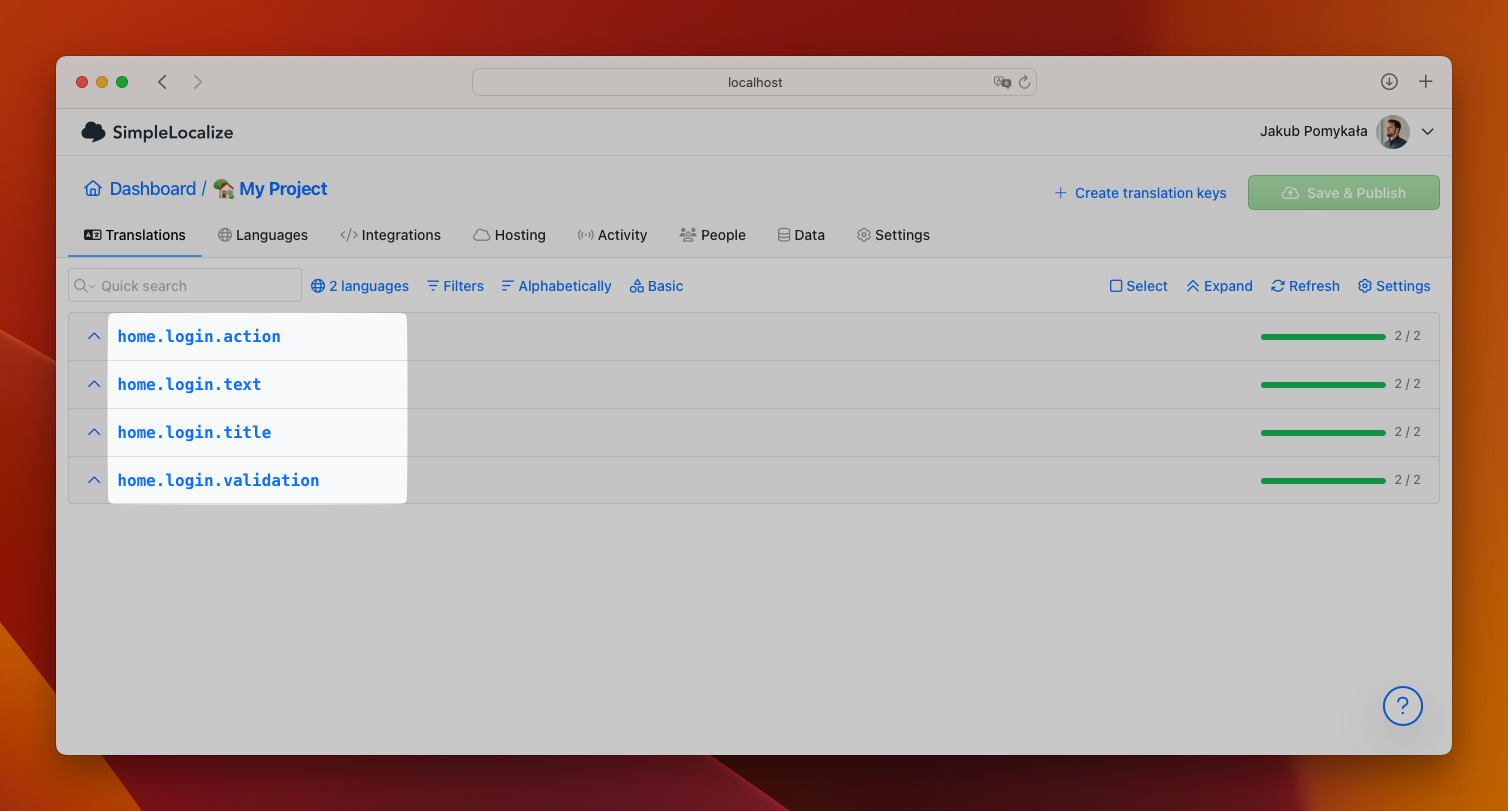
After renaming the conflicting keys, you can export translations with `WRITE_NESTED` option enabled.
### How to find conflicting keys?
The easiest way to get a list of conflicting keys is to export the translations to a JSON file with the `WRITE_NESTED` option enabled.
The export will fail, and the error message will contain a list of the problematic keys. From there, you can resolve the conflicts by renaming or deleting the conflicting keys.

---
# General: Import translations
Source: https://simplelocalize.io/docs/general/import/
Import feature allows you to add translation keys or translations to your existing data in the translation editor.
By default, the import feature will only add new translation keys and fill missing translations to your project. However, you can also use it to update existing translations
if you check the '**Update translations**' option. This option will update existing translations if the translation key and language match.
Note that the import feature will **not remove any translations** from your project.
To import translations, please go to the '**Data**' tab and scroll down to '**Import translations**' section.
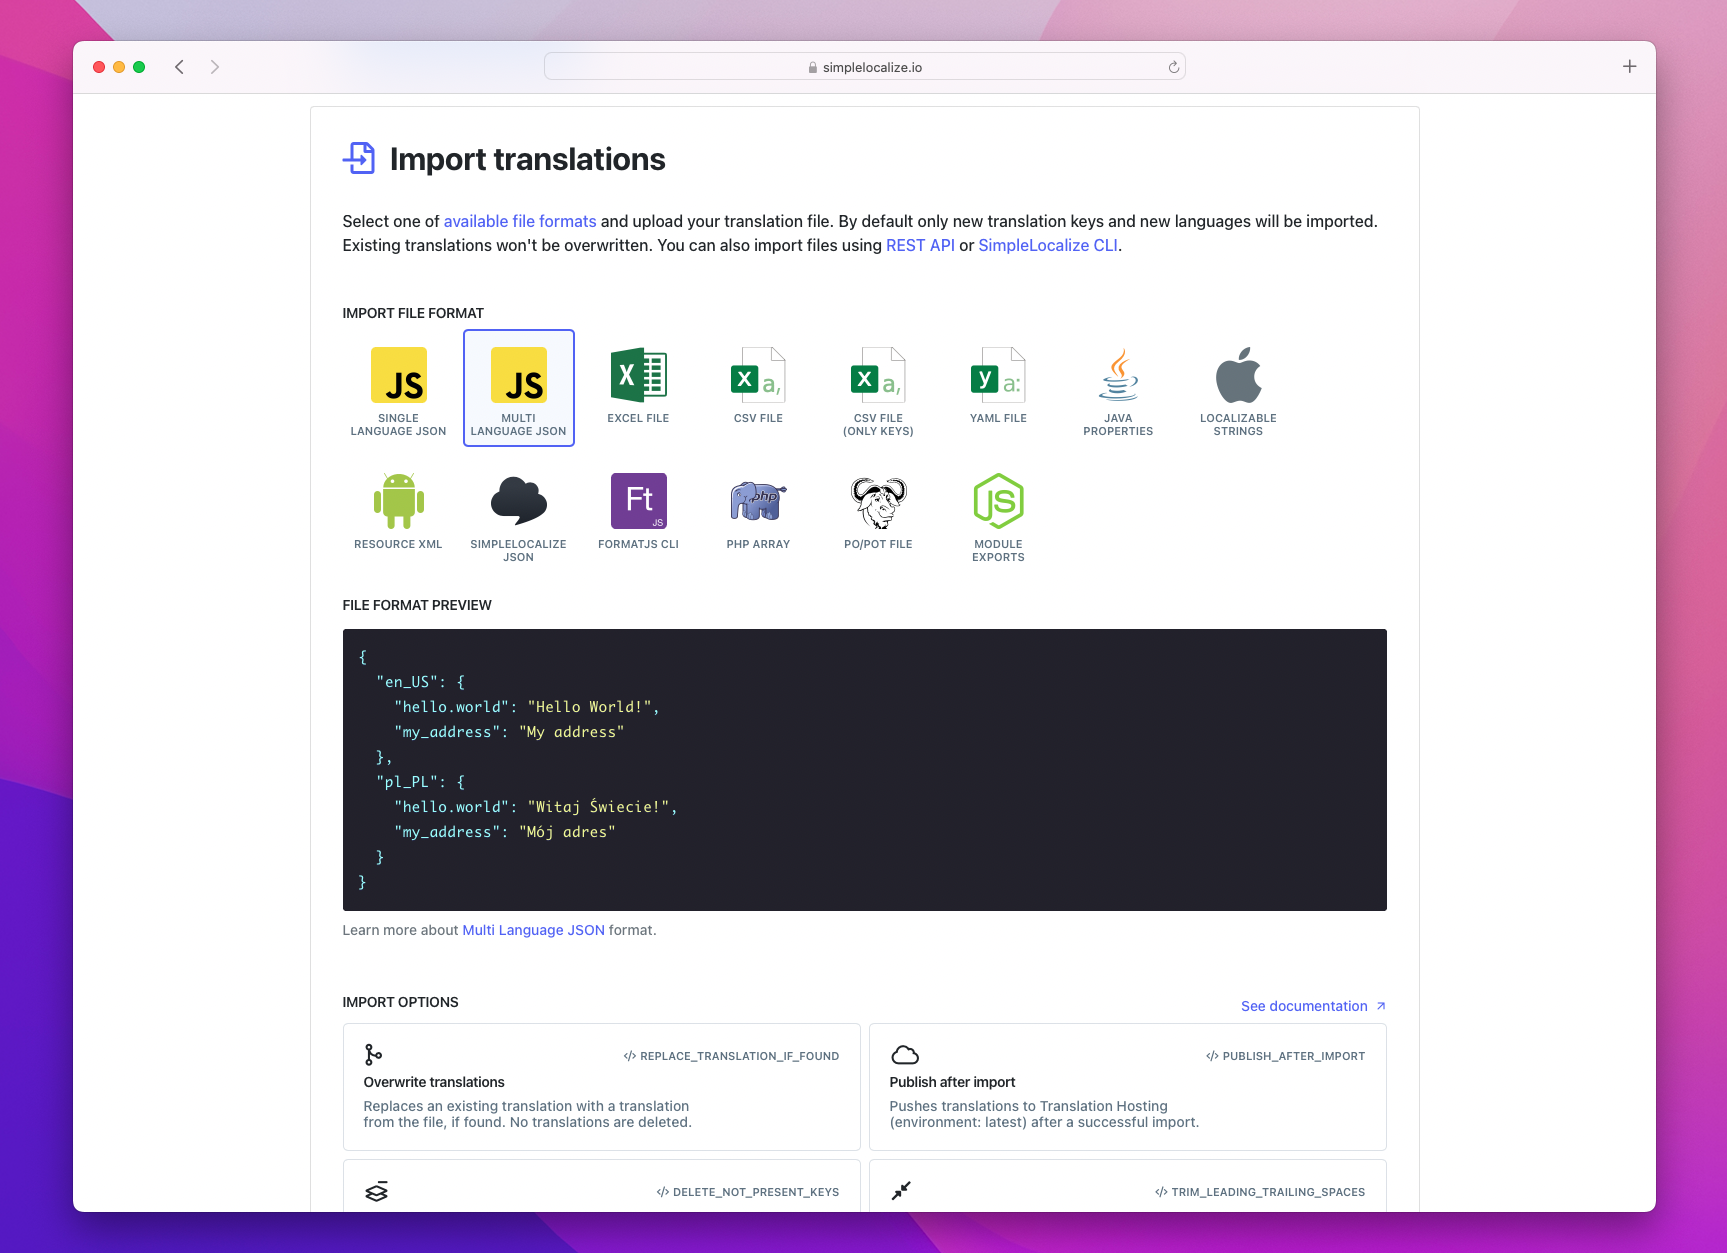
Importing translations may take a while depending on the size of your file. You can check the status of your import in the '**Activity**' tab. Usually, it takes a few minutes to import translations.
You can also automate the import process using our [REST API](/docs/api/get-started/) or [command-line tool](/docs/cli/get-started/).
Resources:
- [List of available file formats](/docs/general/file-formats/)
- Learn how to [import translations using API](/docs/api/import-translations/)
- Learn how to [import translations using CLI](/docs/cli/upload-translations/)
---
# General: Command assistant
Source: https://simplelocalize.io/docs/general/command-assistant/
Command Assistant is a productivity feature built into the system to help you work faster and smarter.
It allows you to search, manage, and navigate through all your projects from a single interface.

## Open Command Assistant
To launch the Command Assistant:
- on macOS, use the keyboard shortcut ⌘ + K
- on Windows and Linux, use Ctrl + K
Use the arrow keys to navigate and Enter to select a command. Options you will see depend on your current location in the app.
## Search for translation keys
You can search for translation keys in the current project or all your projects.

## Search for translations
Start typing your search term in the Command Assistant to find translations in the current project or all your projects.

## Open key settings
You can open the translation key settings directly from the Command Assistant.

## Add and delete keys
Create new translation keys directly from the Command Assistant. Type the key name and choose **Create `your-key-name` as translation key** option.
To delete a translation key, search for it, enter and select **Delete translation key** option.

## Copy links
You can copy **links to translation keys and translations** to share specific items with your team. You can also **copy your API key** or **project token** to use them in your code.

## View statistics
Access project, language, and user statistics directly from the Command Assistant.

## List project members
Quickly access project members and their permissions settings. You can also view recent activities of your team members filtered in the Activity tab.

## Switch projects or tabs
Use the Command Assistant to switch between tabs in your project, open settings, or access different projects with ease—without opening the Dashboard.

## Access docs and resources
Quickly access your project resources like Swagger or documentation.

## Auto-translate
With one click, you can auto-translate all missing translations in your project.

## Sort and filter translations
Filter translations by **tag** or **namespace** and **sort results** by last modified keys, last seen, most or least translated, newest and oldest keys or import order.

> Use **Reset active filters** option to clear all filters.
## Other actions
Command Assistant also allows you to perform and access other actions, such as:
- Customize editor view
- Check unpublished changes
- Refresh translations in the editor
- Create backup
- Give feedback
- Open changelog
- Open language settings
- Open file format details
---
# General: Community suggestions
Source: https://simplelocalize.io/docs/general/public-suggestions/
Community is a public page of your project where your users help you localize your product. They can:
- suggest translations and vote for the best ones,
- report missing or wrong translations, with a screenshot,
- request new languages and vote for them,
- follow the latest suggestions in the whole project.
This guide will help you get started with Community and show you how to set it up for your project.
## Get started
Enable Community for your project in the **Settings** tab. You can find this option in the **Community** section.
Click on the **Enable Community** to activate the feature.

Once you enable Community, you will see your **Public URL** and the configuration options for the feature.
## Configuration
You can configure the following options for Community:
- Project logo
- Project display name
- Intro message for users
- Available languages for suggestions

## Welcome page
Community welcome page is a place where you can see an overview of the translation project and the messages from the project maintainers.

## Adding suggestions
First, choose a language you want to add suggestions for. Click on the **Translate** button in the list of project languages. You will be redirected to the translation page that shows the list of missing translations in the chosen language and the translation in the default project language.
Click on the translation you want to suggest a translation for. Type your suggestion in the text box and add a comment if you want to provide additional context.
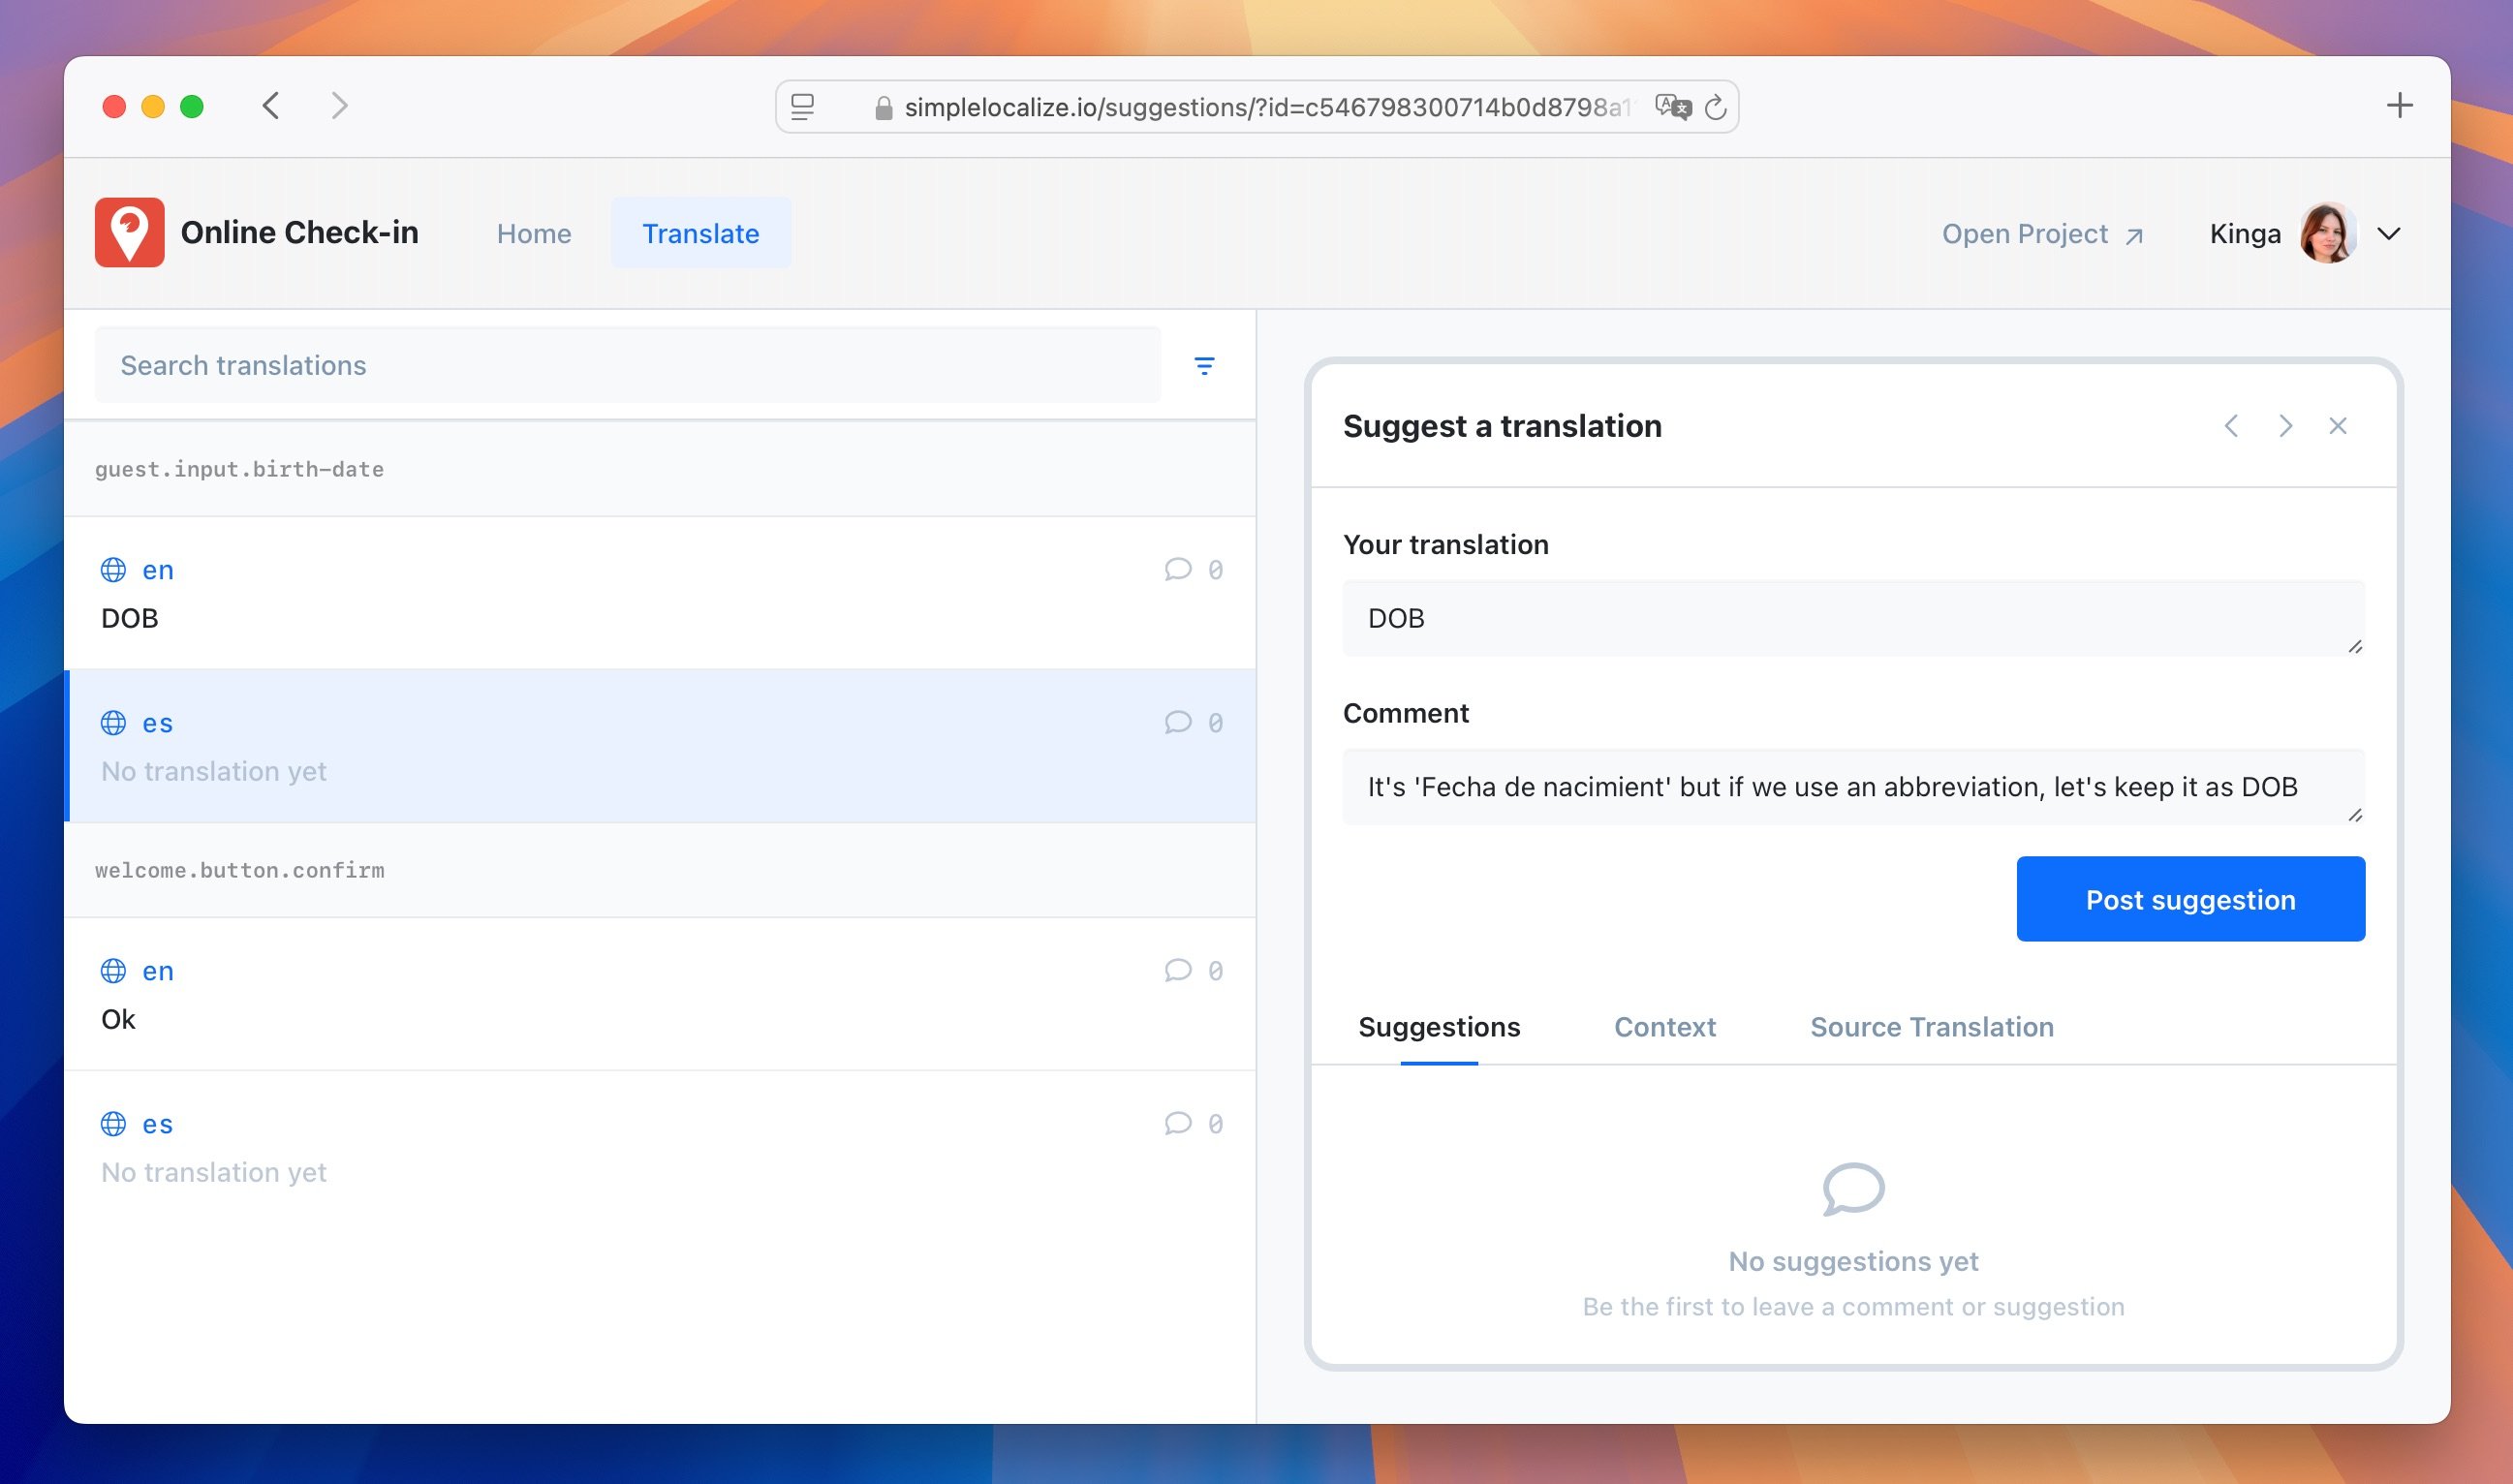
Once you are done, click on the **Post suggestion** button to send your suggestion. You will see your suggestion in the list of suggestions for the translation.

## Filter translations
Use the filter to show all translations or more languages. You can also search for specific translations by typing in the search box.

## Reporting issues
Not every problem can be fixed with a suggestion. A text may be missing from the translations at all, or a user may not know where a wrong translation comes from. In the **Report issue** tab of the Community page, users can tell you about:
- **Missing translation**: a text that is not translated,
- **Wrong translation**: a translation that is incorrect,
- **Something else**: any other problem with the translations.
Users describe the problem, e.g. copy the text and say where they saw it, and can attach a screenshot. They can drop an image, paste it from the clipboard or choose a file (up to 4 MB). Then they click **Send report**.
> When users know how a translation should read, the **Wrong translation** option points them to the **Translate** tab, where they can suggest a better version that you can accept in one click.
Reporting needs an account, so you can contact the person if you need more details. Reports and screenshots are visible only to your project team, never on the public page.
## Requesting languages
Users can tell you which languages they would like to see next. Below the list of project languages on the welcome page, they click **Request language** and search for a language by its name, its native name or its code, e.g. `pl`. Then they click the heart icon next to the language to vote for it, and click it again to take the vote back.
The list shows only the languages your Community page does not have yet. A regional variant counts as the whole language, so if your project has `de-DE`, German is not on the list. The languages with the most votes come first, followed by the languages most often used in software localization.
Voting needs an account, so every person has one vote for each language. The number of votes is shown on the Community page, so you can see which language your users want the most.
## Activity
The **Activity** tab of the Community page shows the latest suggestions from the whole project. For each suggestion, users can see the text in the default language, the suggested translation, the comment, and whether the suggestion was accepted. Filter the activity by language or by person, and click on a suggestion to open the translation.
The activity shows only the languages and translations that are available on your Community page.
## Notifications
When a user submits a suggestion, you will receive an email and in-app notification with the suggestion details. When a user reports an issue, you will receive an in-app notification that opens the report.
Enable notifications for **Community suggestions** in your user settings to stay up-to-date with the latest feedback.
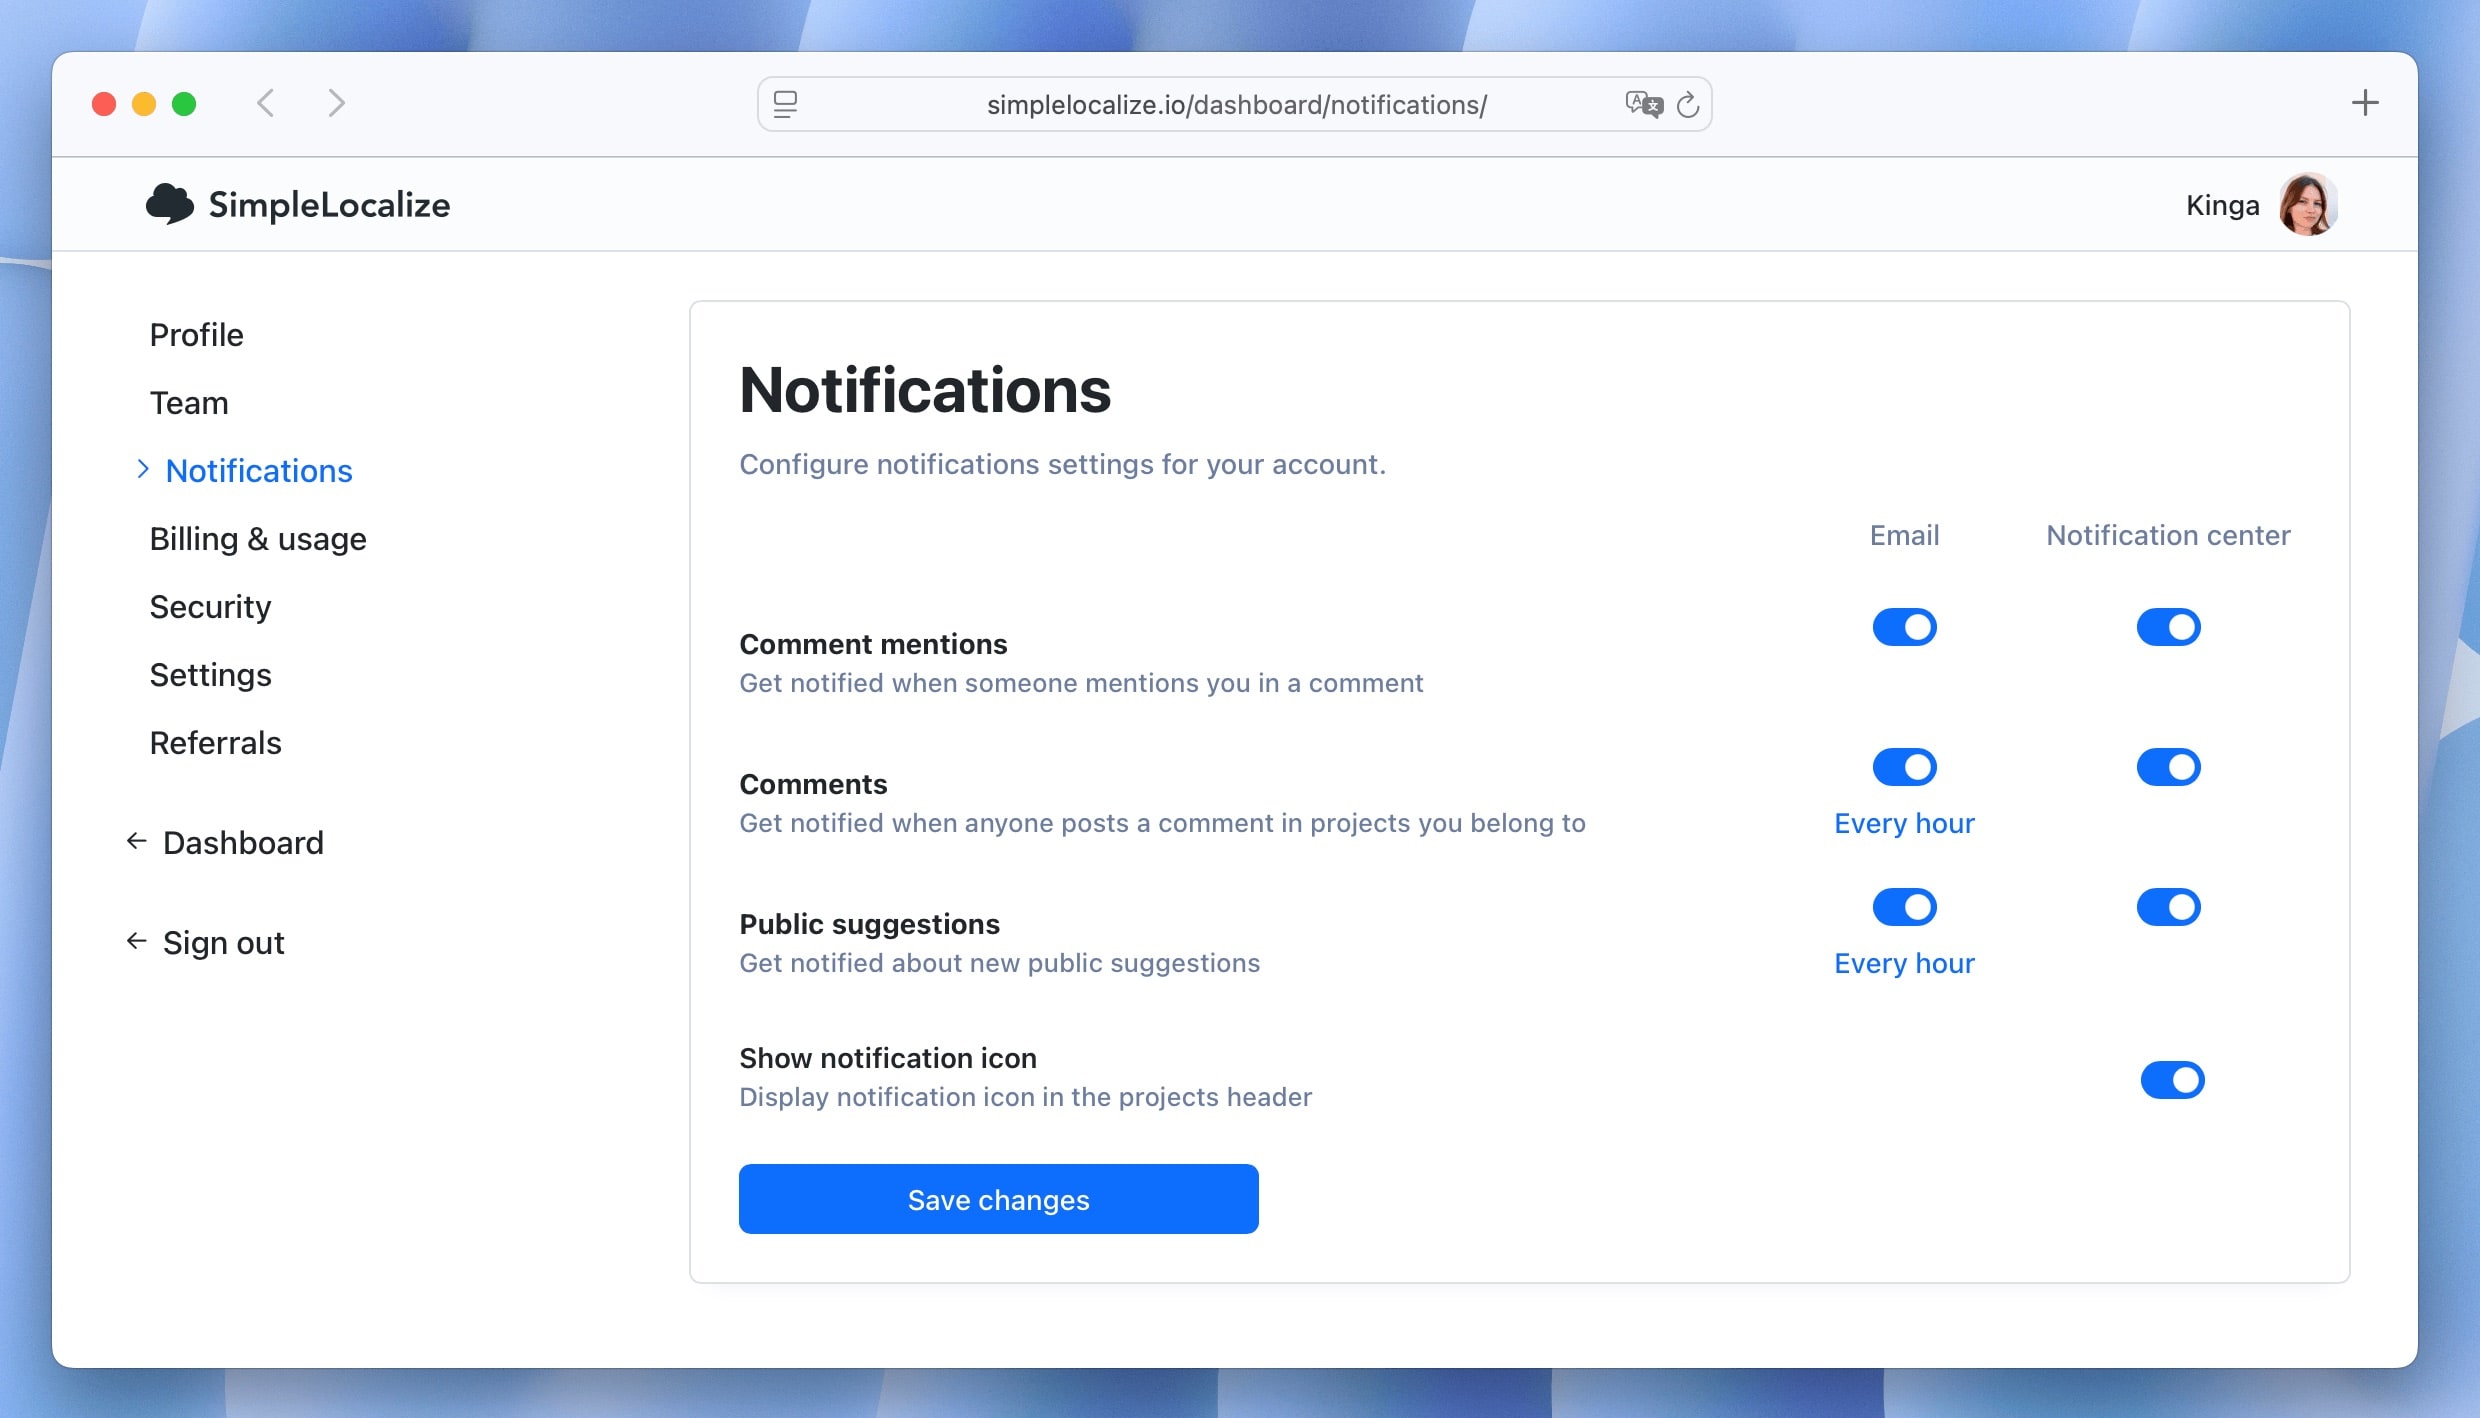
## Accepting suggestions
You can see all the suggestions in the **Community** tab of your project and in the **Comments** section of a translation. Click on the comment icon to view the suggestion details and accept it.
> Filter suggestions by **Pending** to see only the suggestions that are waiting for your review.

Once you accept a suggestion, it will automatically replace the original translation in your project.
The suggestion will also be marked as accepted on the Community page.

## Ignoring suggestions
In the Translation Editor, you can also **ignore** public suggestions that are not relevant for a given translation.
Ignored suggestions are removed from your pending suggestions workflow, helping you keep the list focused on actionable items. If needed, you can restore them later using the **Unignore** option.

## Resolving reports
Reported issues are listed in the **Community** tab of your project together with the suggestions, the newest first. Click on a report to see its details: the description, the screenshot, and the person who sent it with their email address.
Once you fix the problem, click **Resolve**. If you need to come back to it, click **Reopen**. The filters work for reports too:
- **Pending** shows the reports that are still open,
- **Accepted** shows the resolved reports,
- **Any person** and the search box find reports by the person or by the text.
Reports have no language, so they are hidden when you filter by a language.
## Project activity
You can see all the activity related to the community suggestions in the **Activity** tab of your project. This includes all the suggestions submitted by users, as well as the comments.
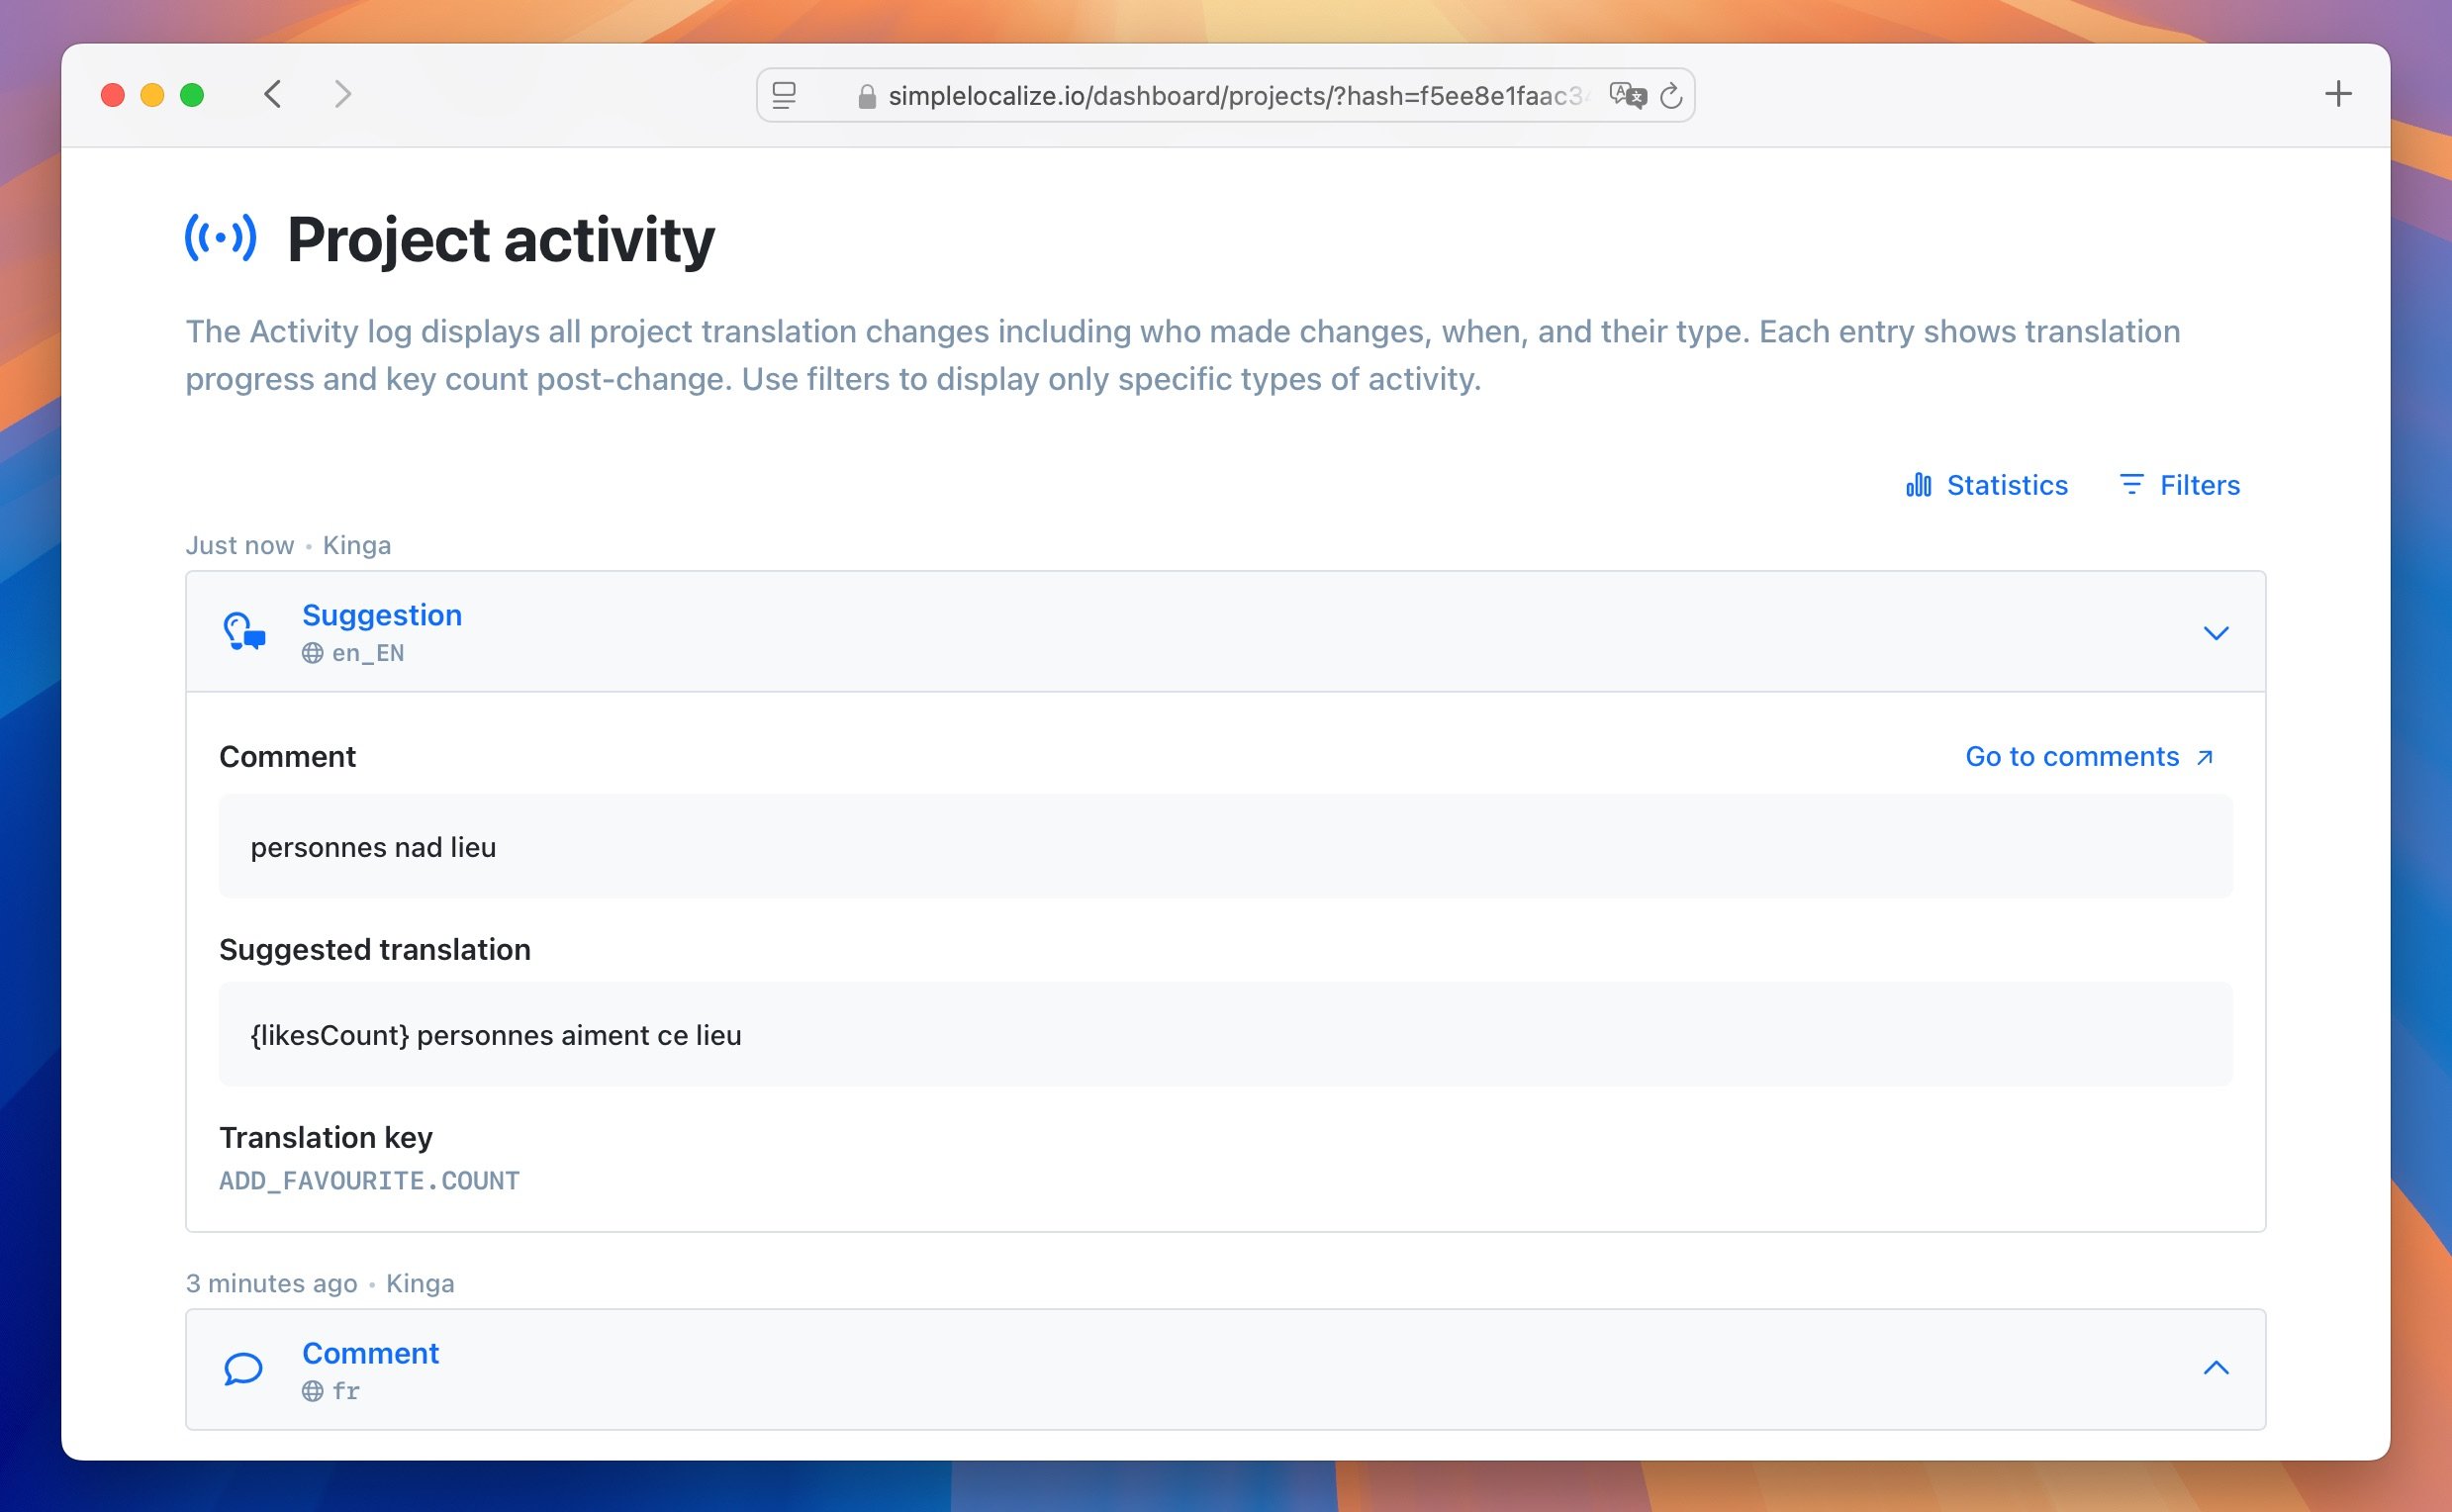
---
# General: Customer translations
Source: https://simplelocalize.io/docs/general/customer-specific-translations/
Customer translations is a great way to provide a customized experience for some of your clients,
by offering them a customized translation for the same key in the same language without affecting the base translation for other users.
Imagine you have a customer who needs a different translation for specific keys and languages.
You don't want these changes to affect all users—only this particular customer or a few selected clients.
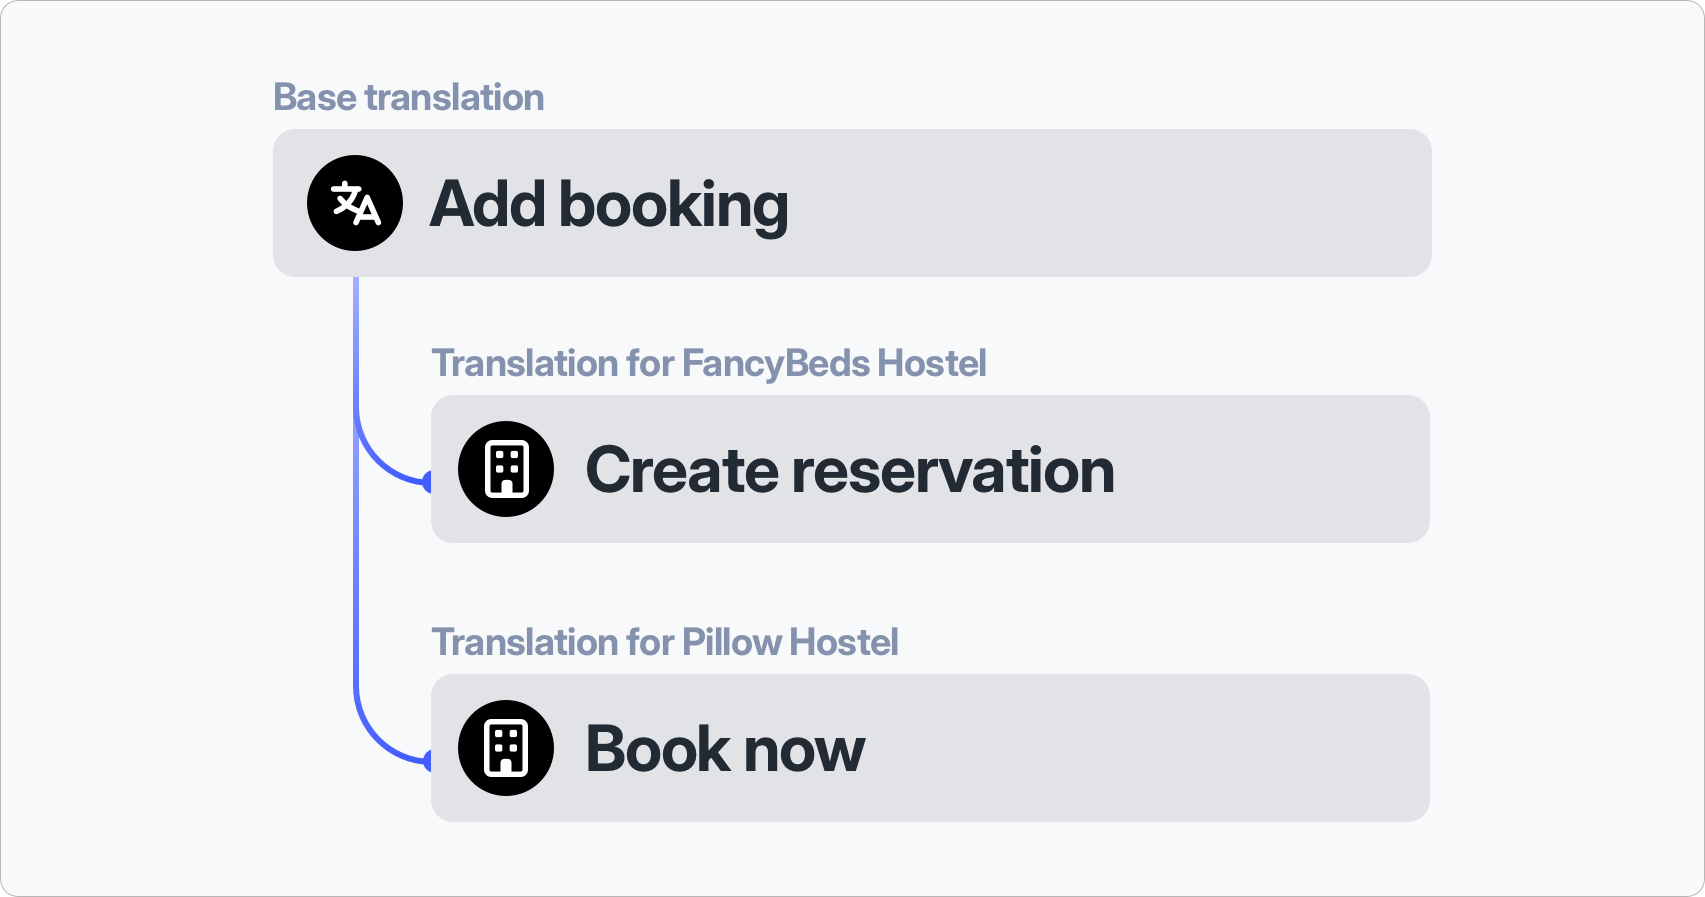
## Create customer context
Open 'Languages' tab and click 'Add customer context' button. Enter 'customer id' which should be unique for your project.
You can also add some description to recognize this customer later.

Customer ID can have a **max length of 40 characters** and contain only letters, numbers, dashes ('-'),
and underscores ('_').
## Filter customers in the translation editor
To work comfortably with customer-specific translations, you can filter translations by customer context. This way, you can focus on base translations only or translations for a specific customer.
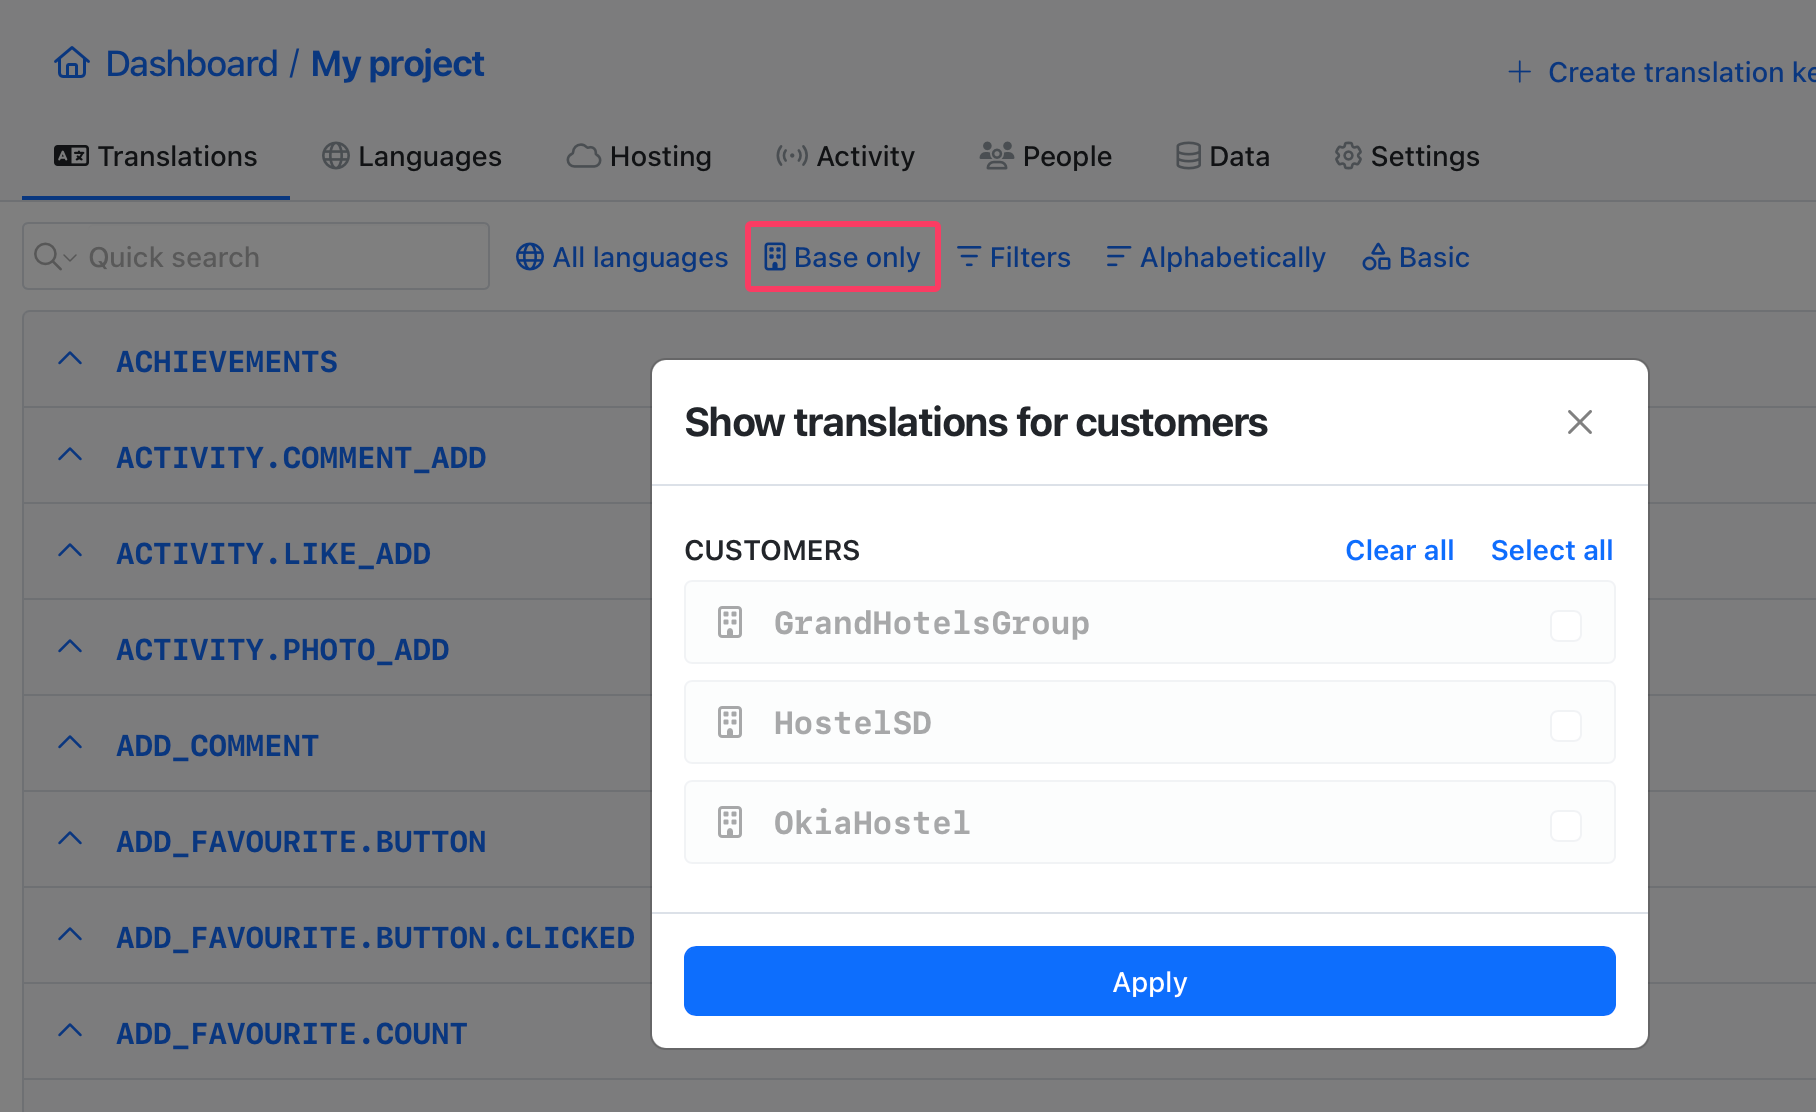
## Create translation for customer
Customer translations are created in the same way as regular translations. Open the '**Translations**' tab and make sure that your editor
is [List View with All translations](/docs/translation-editor/settings/#list-view--all-translations) selected.

## Auto-translate customer translations
Customer translations can be [auto-translated](/docs/general/auto-translation/) just like regular translations.
Auto-translation uses the customer translation from the source language as the source text, so the customer's wording
is kept in other languages instead of the base translation.

## Customer translation history and options
Every customer translation has its own [translation history](/docs/translation-editor/history/). You can check who changed
the translation and when, and revert to a previous version.
Other options available for customer translations:
- review status, to mark a customer translation as reviewed,
- Pluralization Manager, to edit customer translations with plurals,
- Text Editor, to edit longer content,
- copy customer translation.
## Customer permissions
When [inviting a new user to your project](/docs/general/project-sharing/#add-project-member), you can assign permissions to specific customer contexts. This way, you can control who can access and modify customer-specific translations.
You can use permissions to ensure that only the intended customer sees and interacts with their translations.
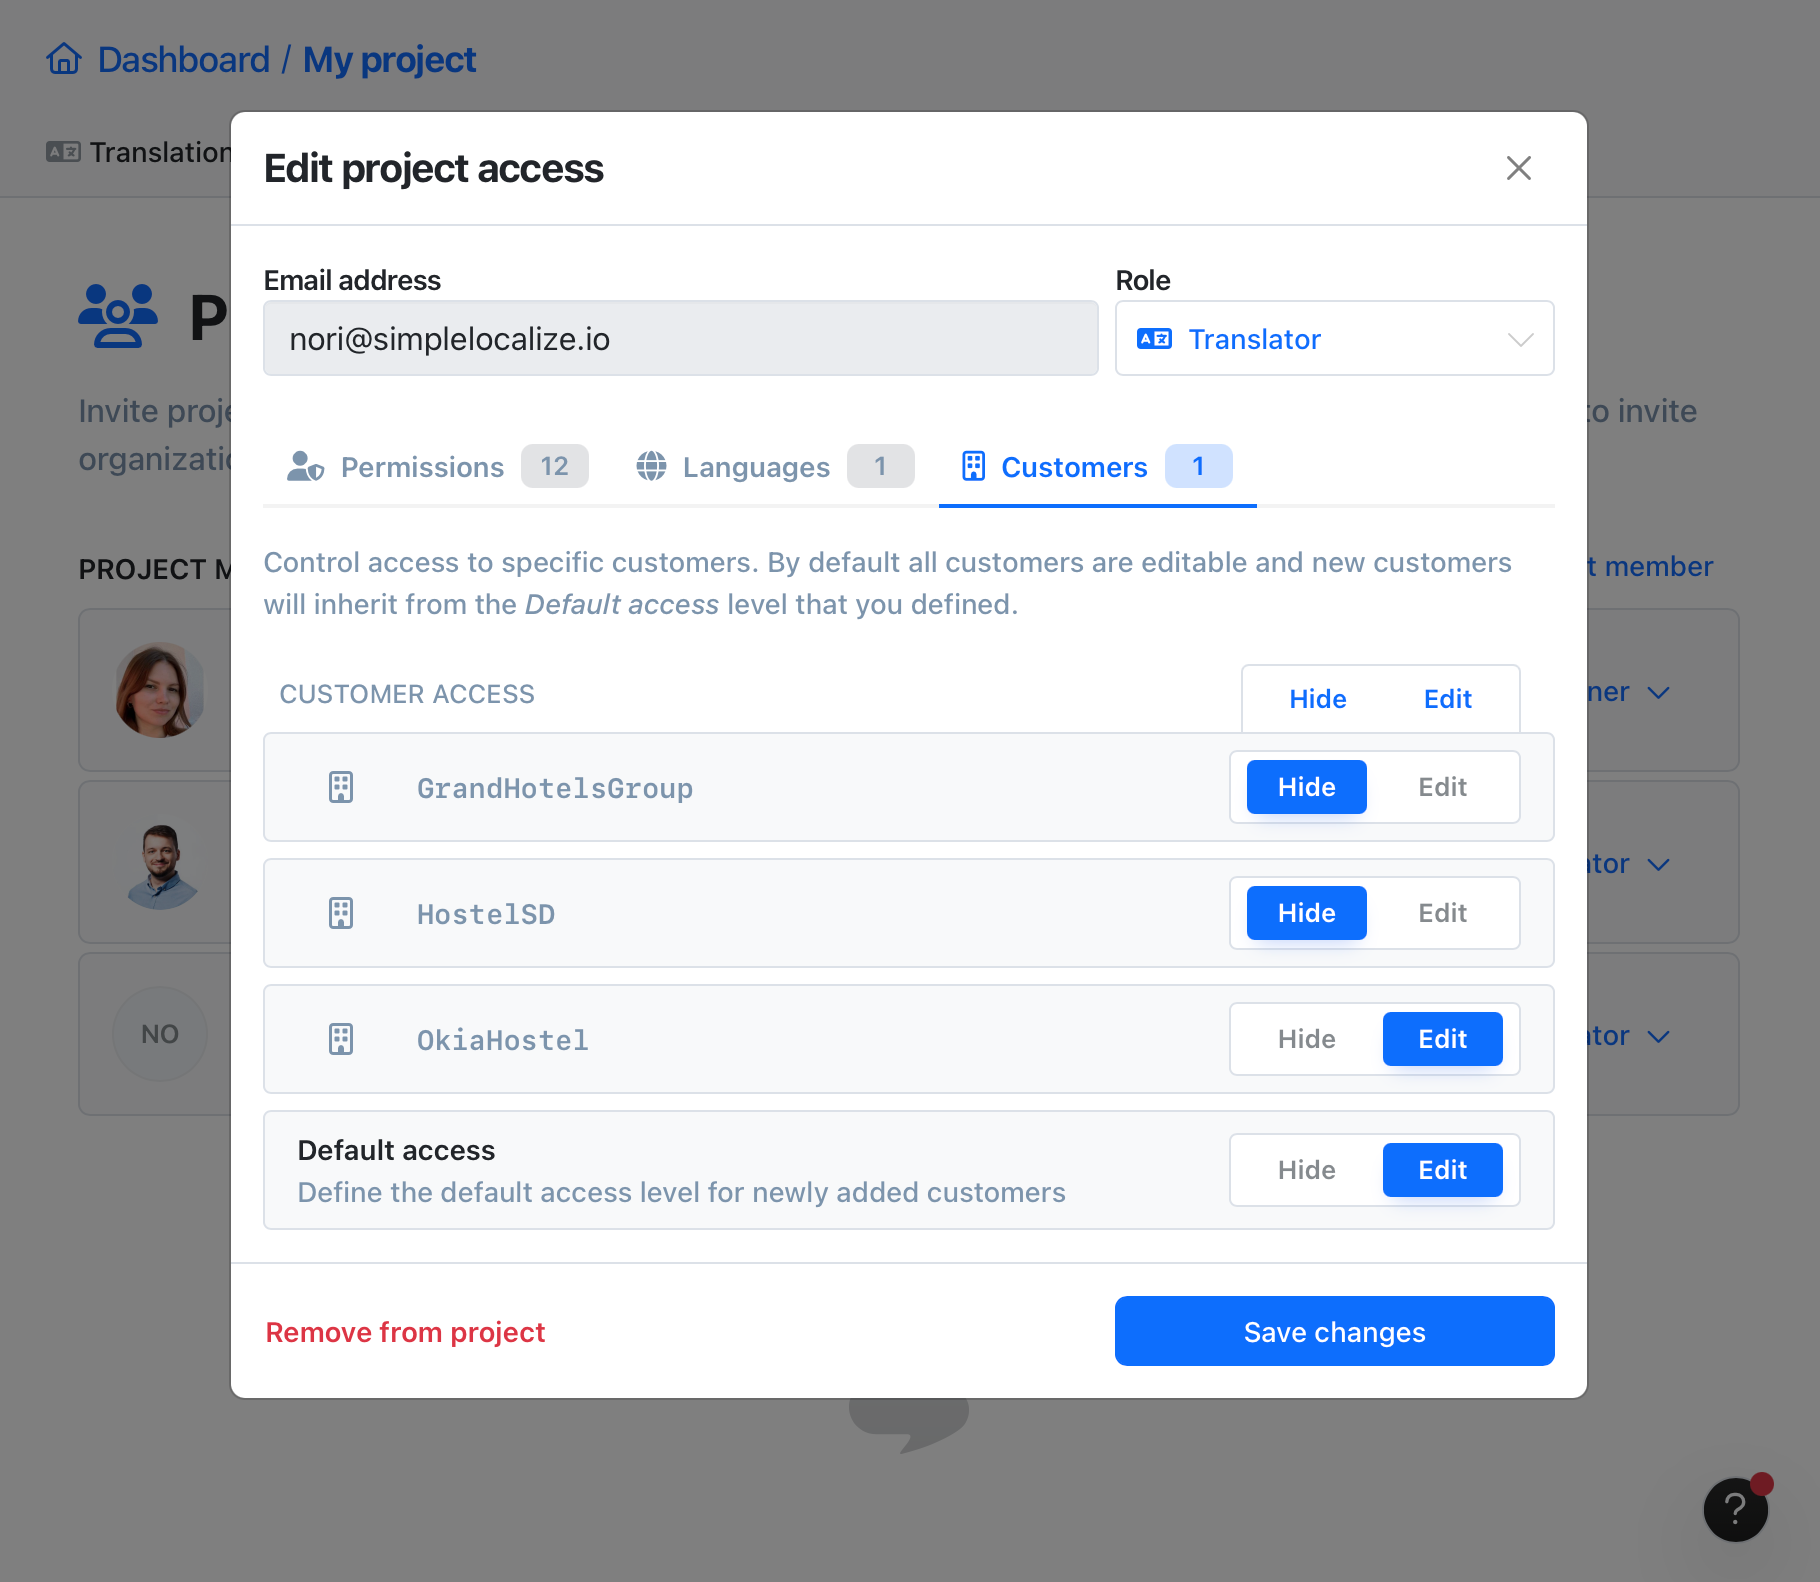
## Access via Translation Hosting
Customer translations works with [Translation Hosting](/docs/translation-hosting/get-started/) just like regular translations.
When you publish changes, the customer-specific translations are published as a separate resources for each customer context.
This way you can fetch and load translations for a specific customer by using the language key and customer id just like
it would be a separate language.
### Fetch customer-specific translations
You can access your customer-specific translations using [Translation Hosting](/docs/translation-hosting/get-started/) resources like below:
```bash
# Fetch all translations with translations for given customerId
https://cdn.simplelocalize.io/{projectToken}/_latest/_index_{customerId}
# Fetch translations for given language key with translations for given customerId
https://cdn.simplelocalize.io/{projectToken}/_latest/{languageKey}_{customerId}
```
#### Response
Fetch project translations for all languages for given `my_customer`
```json
{
"de" : {
"HELLO_WORLD" : "Hallo" // default translation for 'de' language key
},
"en" : {
"HELLO_WORLD" : "Hello My Customer!" // customized translation for 'en' and 'my_customer'
}
}
```
If there is no translation for a given `{customerId}`, then the default translation is used.
If you attempt to access translations for `{customerId}` who does not exist in SimpleLocalize, then Translation Hosting will return a response with 404 HTTP status code.
### Fetch a list of customer contexts
You can fetch a list with all customers.
```bash
https://cdn.simplelocalize.io/{projectToken}/_latest/_customers
```
#### Response
```bash
[
{
"id": "my_customer_id"
},
{
"id": "874259234_my_customer"
}
]
```
If for any reason, you would like to disable sharing the customers list publicly, you can disable it in the
**Settings** > **Hosting** > **Published resources** section by unchecking the **Customers list** option.
## Access via command-line tool
You can access your customer-specific translations using [SimpleLocalize CLI](/docs/cli/get-started/) by passing `--customerId` parameter with customer id from the '**Languages**' tab.
```shell
simplelocalize download \
--apiKey PROJECT_API_KEY \
--downloadPath ./translations_{lang}.json \
--customerId my_customer_id \
--downloadFormat single-language-json
```
---
# General: Support
Source: https://simplelocalize.io/docs/general/support/
Contact support in case of any trouble, feedback, suggestion, integration question, custom plan inquiry, or anything else. We're here to help you!
## Contact us
Email: [**contact@simplelocalize.io**](mailto:contact@simplelocalize.io)
**When contacting support, please provide the following information to help us assist you better:**
- Your account email address
- Project token (if applicable) or project name
- A detailed description of the issue or question
- Any relevant screenshots or error messages
## Community
[**Join our Discord server**](https://discord.gg/wpm5PTCxxG) and ask the community for help or advice or just hang out with others.
## Frequently Asked Questions
### Where can I find my project token?
You can find it by opening the project and going to the **Settings** tab and **Credentials** section.
### Can I change my project token?
No, project tokens are generated automatically and cannot be changed. If you need a new project token, you can create a new project.
### I have a problem with billing or my subscription
Please check the [billing FAQ page](/docs/general/subscriptions/) or contact support.
### Where can I enable beta features?
You can enable beta features in the **Settings** tab of your profile. Look for the **Advanced** section and toggle the **Enable beta features** option.
---
# General: Corporate SSO
Source: https://simplelocalize.io/docs/general/corporate-sso/
SimpleLocalize supports custom identity providers (SSO) for **Business plan** customers.
With custom identity providers, you can manage your team members using your corporate identity provider
(like Okta, OneLogin, Azure AD, Google Workspace, etc.). Users can log in to SimpleLocalize using their corporate credentials
by providing an assigned identity provider (IdP) identifier in the URL at the [SSO login page](https://simplelocalize.io/login-sso/).
```
https://simplelocalize.io/login-sso/?idp=IDENTIFIER
```
### Configuration
If you are a business customer,
and you want to use single-sign-on (SSO) to manage your team members,
please [fill the SSO configuration form](/docs/sso/configuration-form.xlsx).
In case of any questions, please contact us at [contact@simplelocalize.io](mailto:contact@simplelocalize.io).
### OpenID Connect
Please provide us with the following information:
- `client_id`
- `client_secret`
- `authorized_scopes`
- `attribute_request_method` (GET or POST)
- `issuer_url`
- preferred corporate identifier or domain name
[//]: # (Redirect URL: https://simplelocalize.auth.eu-west-1.amazoncognito.com/oauth2/idpresponse)
### SAML2 protocol
Please provide us IdP metadata XML file or metadata document endpoint URL and preferred corporate identifier or domain name.
[//]: # (- Redirect URL (SSO URL): https://simplelocalize.auth.eu-west-1.amazoncognito.com/saml2/idpresponse)
[//]: # (- Audience URI (SP Entity ID): `urn:amazon:cognito:sp:eu-west-1_7ajGRPkUK`)
### User mapping fields
We expect the following fields for user mapping:
- `email` (required) - unique work email address
- `name` (required) - first name, nickname, or display name
- `username` (required) - unique identifier for the user pool at organization
- `profile_image` (optional) - URL to image that will be displayed in the SimpleLocalize web app
Users on the first login will be automatically assigned as [Team Administrators](#team-administrator-role) to the subscription
and [Project Administrators](#administrator-role) to every project in the subscription. After that, you can change their roles
and manage their access level in the project settings.
### Enforce SSO
If you want to make sure that team administrators who signed up through your identity provider always authenticate through your
corporate SSO, you can turn on the **Enforce SSO** option. Go to the [Team](/dashboard/team/) section, click **Details** next
to the "Single Sign-On (SSO) is enabled for your organization" message, and enable **Enforce SSO** in the configuration modal.
Only the subscription owner can change this setting.
When enabled, members who signed up through your identity provider (i.e. their account provider is your corporate SSO) will
no longer be able to:
- log in with a password,
- log in with another authentication provider (e.g. Google, GitHub).
### SCIM 2.0 user provisioning (beta)
> SCIM 2.0 support is currently in beta. The endpoints described below work as documented, but the setup is
> handled by our team and the set of supported attributes may still grow.
Instead of waiting for each person to sign in for the first time, you can let your identity provider create,
update and remove SimpleLocalize users automatically through SCIM 2.0. The SCIM endpoint for your organization is:
```
https://api.simplelocalize.io/scim/v2
```
Requests are authenticated with a SCIM token issued for your organization, sent as a bearer token:
```
Authorization: Bearer YOUR_SCIM_TOKEN
```
During the beta, we issue the token for you - contact us at [contact@simplelocalize.io](mailto:contact@simplelocalize.io)
after your identity provider is configured. The token is shown once and grants access to the user list of your
organization only, so treat it like a password.
#### Supported operations
- `GET /Users` - lists the members of your organization, optionally filtered with `filter=userName eq "user@example.com"`
- `GET /Users/{id}` - returns a single member
- `POST /Users` - creates the account and joins it to your organization with the role configured in your SSO
settings, exactly like the first SSO login does
- `PUT /Users/{id}` and `PATCH /Users/{id}` - update the user's display name, or set `active` to `false` to remove
them from your organization
- `DELETE /Users/{id}` - removes the user from your organization
Removing a user - through `DELETE`, or by setting `active` to `false` - takes them out of every project owned by
your subscription and out of the team administrators. The SimpleLocalize account itself is kept, so provisioning
the same person again later restores their access without losing their history.
#### Beta limitations
- Only the `User` resource is exposed. Groups are not supported, so roles are not driven by your identity
provider - every provisioned user gets the role from your SSO settings, and you change it afterwards in the
project settings.
- `userName`, `name`, `displayName` and `active` are mapped. Other attributes are accepted and ignored, so a
provisioning cycle never fails on a field we do not store.
- Only the `userName eq "..."` filter is supported.
- An email address that already has a SimpleLocalize account cannot be provisioned and the request is rejected
with `409 Conflict`. This happens when someone signed up on their own before your organization enabled SCIM -
contact us and we will connect the existing account to your organization.
---
# General: Billing FAQ
Source: https://simplelocalize.io/docs/general/subscriptions/
## How do I get a VAT refund?
During the upgrade process, you can add your company address and VAT ID. Our payment processor Paddle
handles all the VAT and other sales taxes, so if you're eligible, no VAT will be charged on your subscription.
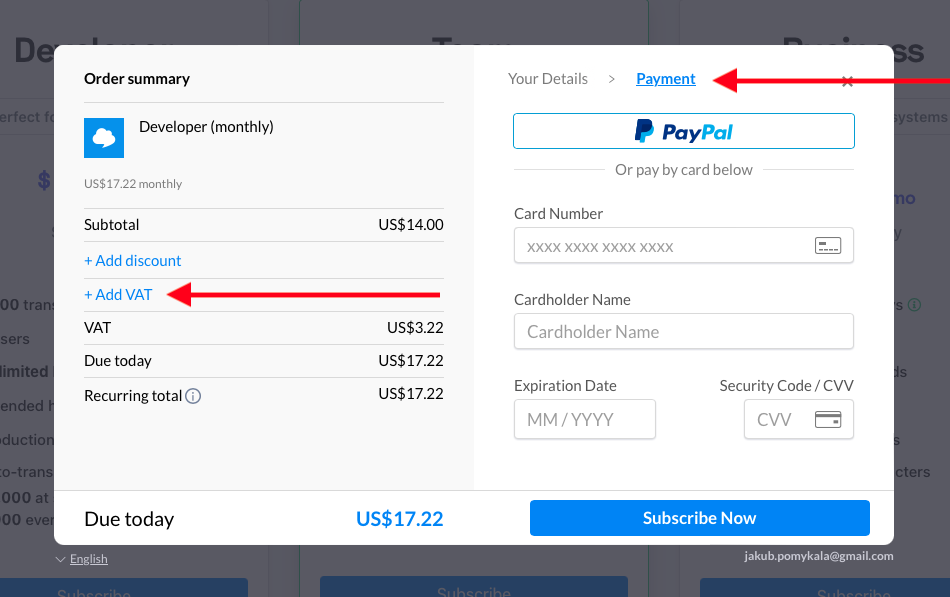
If you haven't added your company details during the subscription process, you can open the invoice that Paddle sent
you and click on the "Add address & VAT Number" link to do so.
More information about Paddle and the sales taxes or VAT can be found [here](https://www.paddle.com/help/sell/tax/which-countries-does-paddle-charge-sales-tax-or-vat-for).
## How to add company details to the invoice?
If you haven't added your company details during the subscription process, you can open the invoice that Paddle sent
you and click on the "Add address & VAT Number" link to do so. Your invoices are also available in the [Billing & usage](/dashboard/subscription/) section at the bottom of the site.
They are also sent to your email address after every transaction.
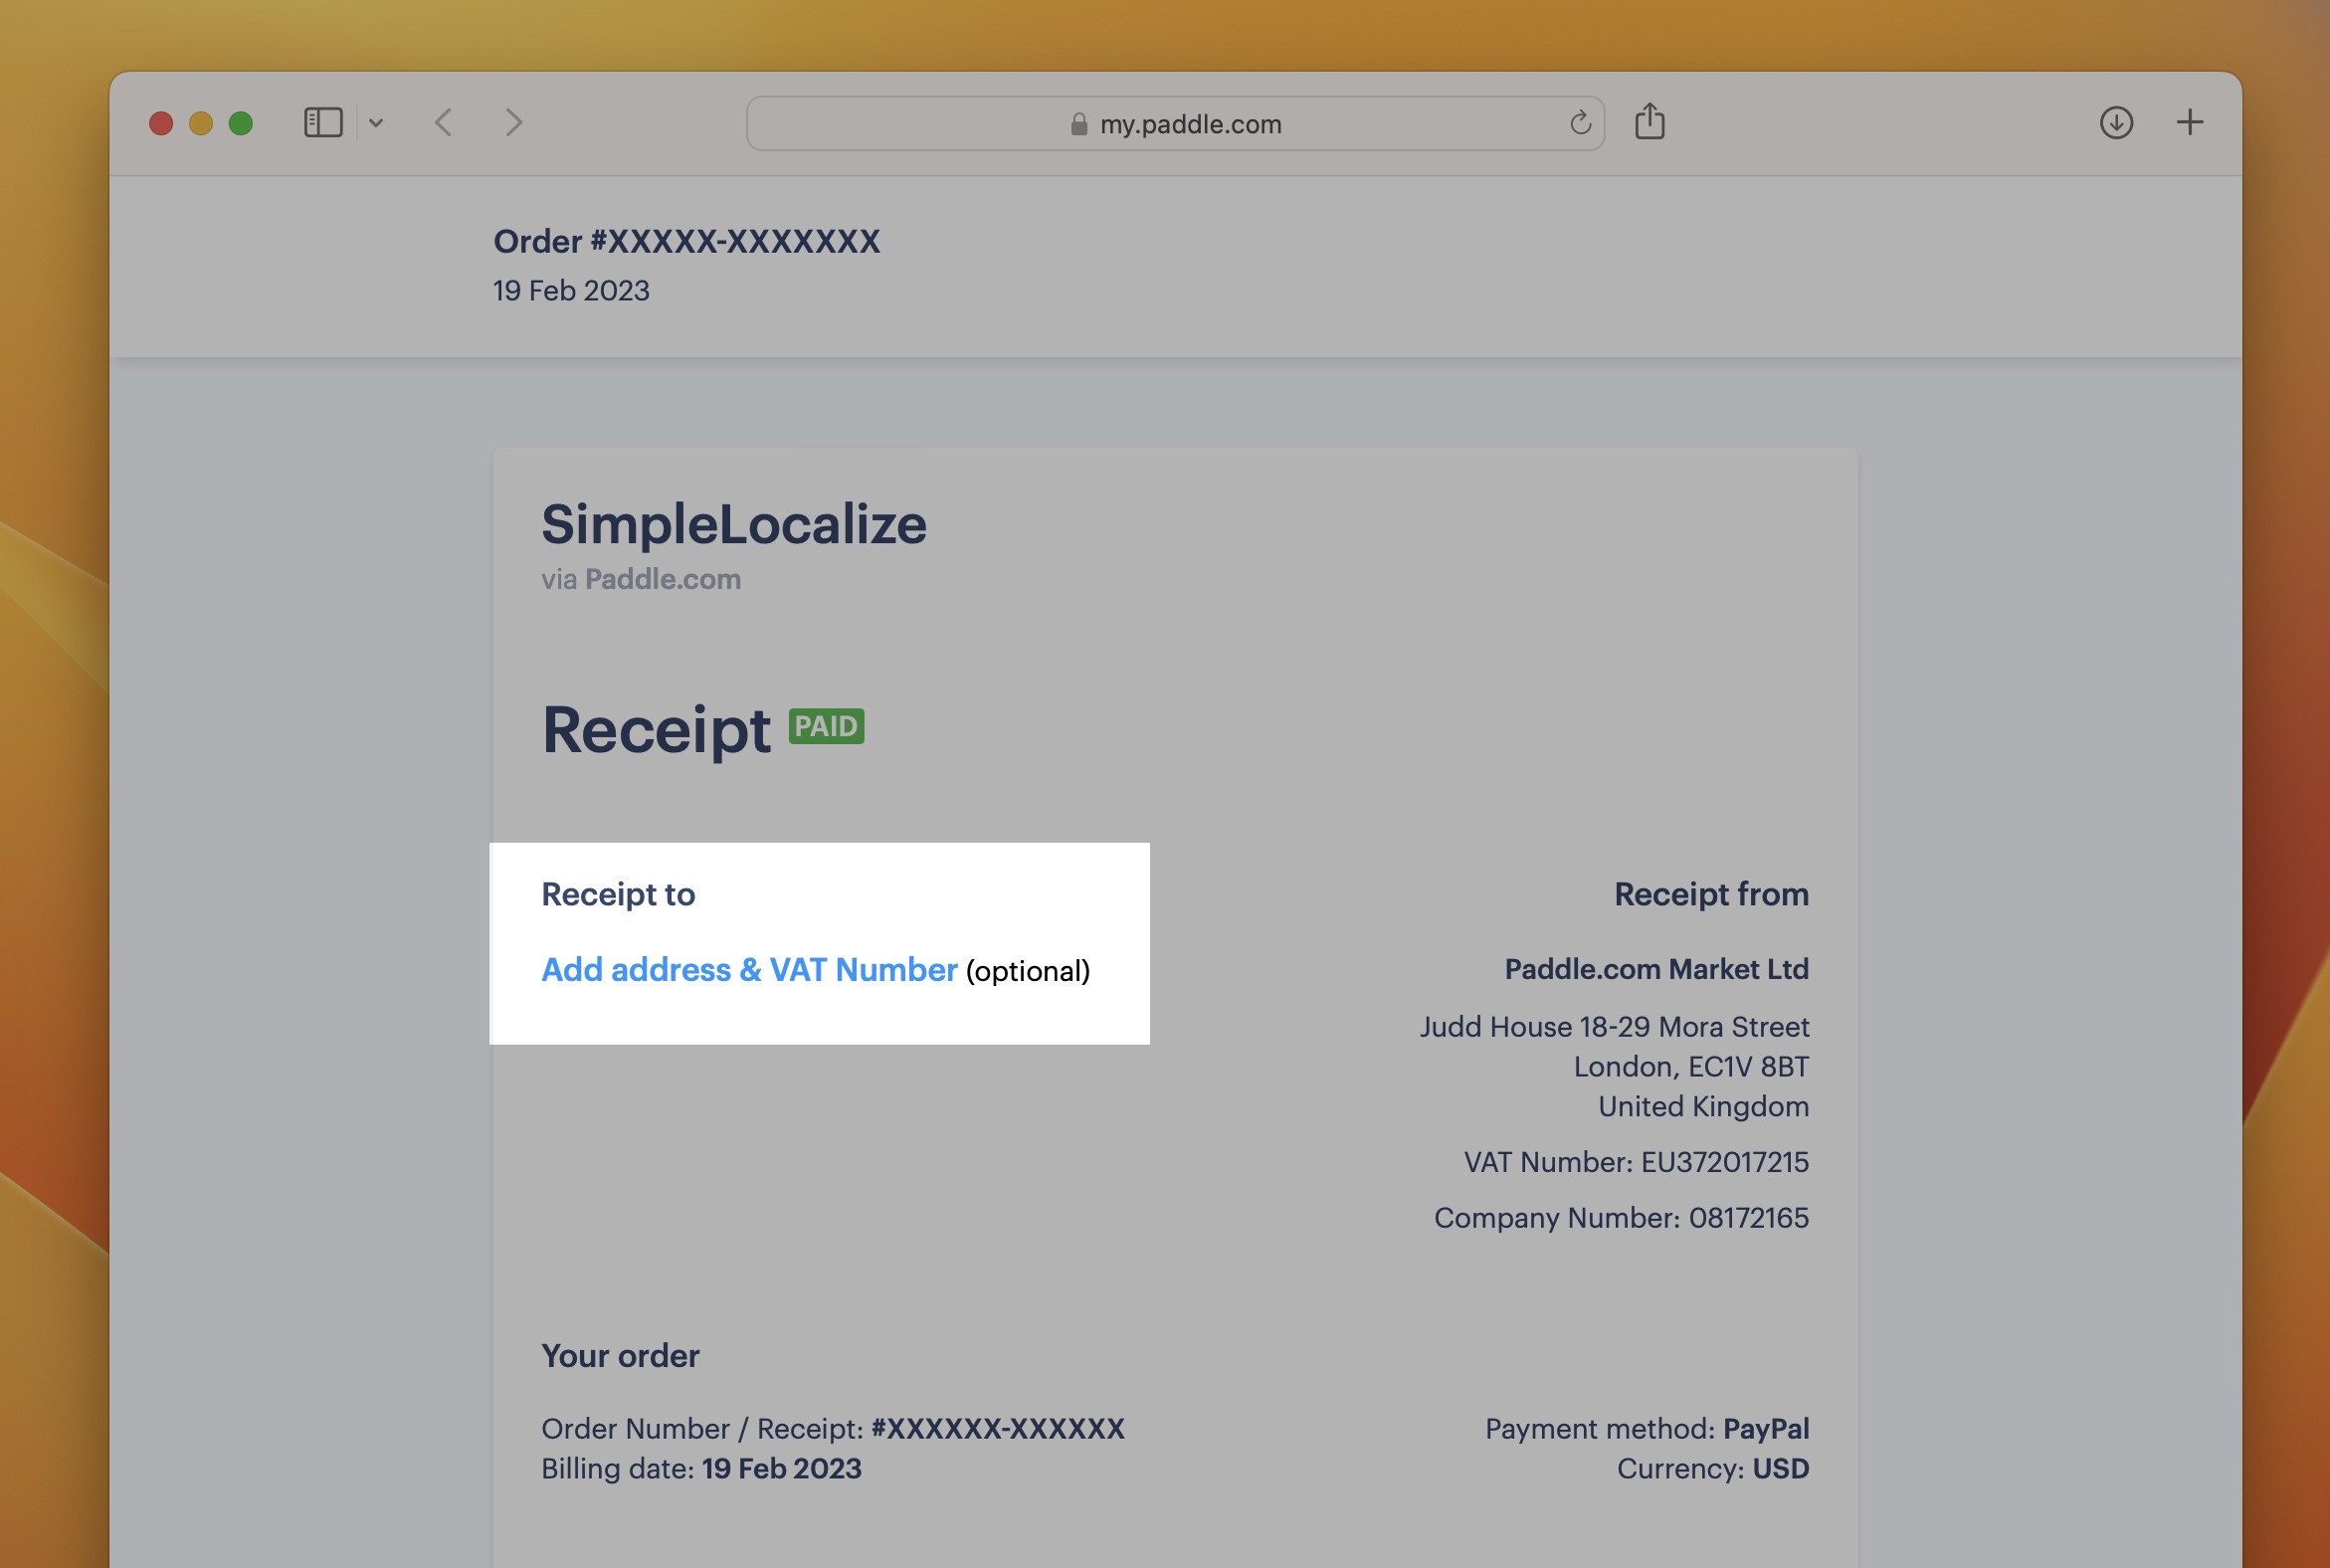
## How to change my company details or VAT number?
You can change the company address yourself by opening your invoice and clicking the "Edit business address".
Unfortunately, **changing a country associated with a subscription isn't possible due to legal and tax reasons**.
Suppose you wish to link the service to a company registered in a different country.
You can wait until the current subscription expires, then cancel the subscription and resubscribe again from
the same account with the address in the new country. You won't lose any of the data in this process.
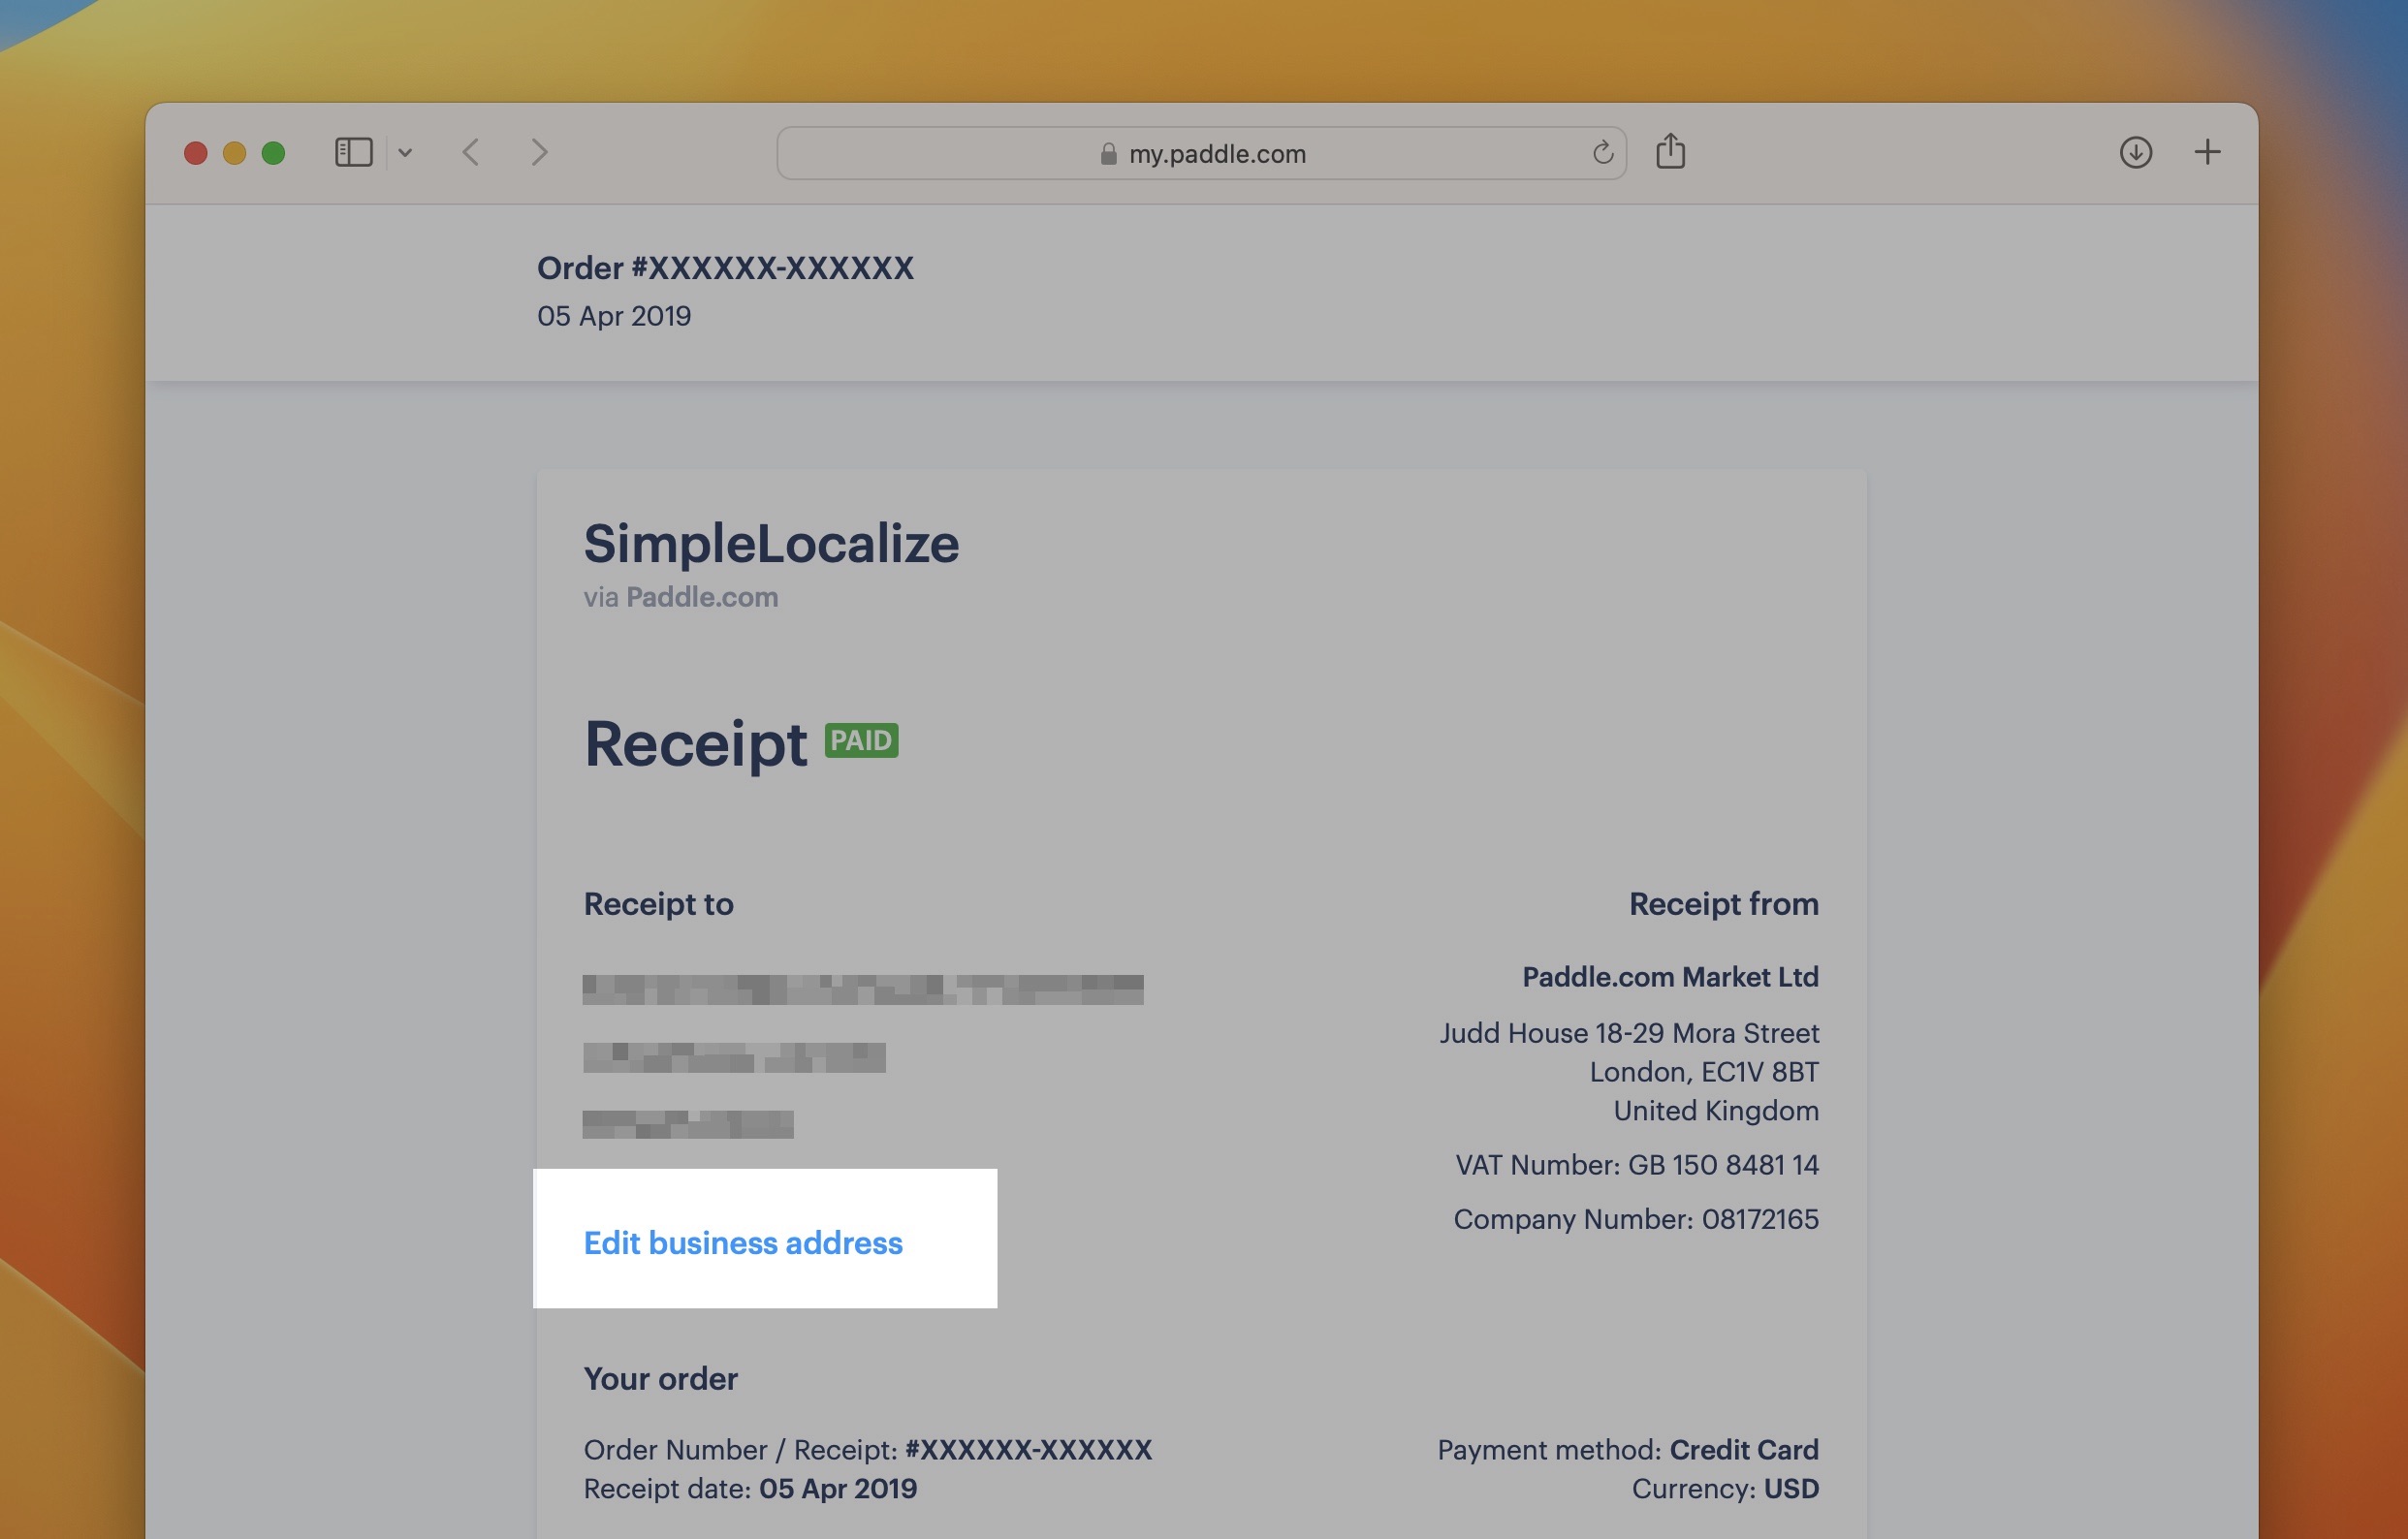
If the button is not available, or you have any troubles with changing the address, please contact the Paddle support directly at [help@paddle.com](mailto:help@paddle.com) or
use the chat widget on the [Paddle website](https://paddle.net).
## How to cancel my subscription?
You can cancel your subscription at any time by going to the [Billing & Usage](/dashboard/subscription/) section, clicking the "**Manage subscription**" button and then "**I want to cancel my plan**".
## Can I switch to yearly billing?
Yes, you can do it by yourself on the [upgrade plan page](/dashboard/subscription-plans/) or [contact support](/docs/general/support/) to do so.
In some rare cases, due to 3DS authentication made by Paddle.com (our payment provider), we won't be able to charge your card with a different amount.
In such a situation, we will need to cancel your current subscription and start a new one.
When you make a change to your plan, it goes into effect immediately and you are billed a prorated amount based on your new plan and billing cycle.
## Can I change my plan?
Yes, to do so, go to [upgrade plan page](/dashboard/subscription-plans/) and choose the plan which you would like to switch to.
When you make a change to your plan, it goes into effect immediately and you are billed a prorated amount based on your new plan and billing cycle.
In some cases, this might result with an error due to payment processing problems on your bank side.
In such cases, please contact support, and we will help.
## I want to downgrade to monthly billing and get a refund
We don't offer refunds for downgrades.
When you make a change to your plan,
it goes into effect immediately, and you are billed a prorated amount based on your new plan and billing cycle.
You can switch back to the monthly plan, but the refund won't be possible.
Your payment will be credited to the next billing cycles.
## Where can I find my invoices?
Invoices are available in the [Billing & usage](/dashboard/subscription/) ("View invoices" button)
They are also sent to your email address after every transaction.
Invoices are always sent from 'help@paddle.com' to the email provided during the initial purchase process.
Starting from April 21, 2023, invoices are be additionally sent from 'contact@simplelocalize.io'.
You can change the email address for invoices in the [Billing & usage](/dashboard/subscription/) section using the "Change address" button.
## I don't see my invoices
Invoices are attached to the account on every transaction. If you don't see them, please contact support.
Only [subscription owners](/docs/general/project-sharing/#project-owner-role) and [billing contacts](/docs/general/project-sharing/#billing-contact) have access to the invoices.
## I need an invoice
Paddle sends customizable invoices for every transaction you make. This invoice is always sent to your registered email, and you can update the information you need such as your address, company name, and VAT number.
Once you buy one of the plans, you will get an email from Paddle.com with the recipe. Open the recipe webpage to provide or adjust your company details. If you have updated your invoice with your VAT number, and you are eligible for a tax refund, Paddle will automatically process the VAT refund for the purchase.
If you have not received the funds back into your account in 5 working days, please [reach Paddle](https://help.paddle.com/hc/en-us/articles/115002266545) directly.
## How to get an invoice in PDF?
You can save the invoice as a PDF by:
- Right-click the page and click "Print..."
- Change destination to "Save as PDF"
- Click "Save" to download the invoice
Please contact us if you’d like to receive the invoice as a PDF attachment sent directly to your email.
## Why has my transaction been declined?
Typically, are issued by the bank, for a number of reasons, e.g., insufficient funds; they deem the transaction to be fraudulent, an invalid CVV input during the purchase process, etc.
Unfortunately, there are occasions when the bank in question provides us with a generic decline, giving us little information on the reason behind their decision.
If your card information appears to be accurate, we suggest contacting your bank for additional information, and for future payments to be accepted.
## Additional billing email address
If you need to add a billing email address to which invoices are sent, then [please contact us](/docs/general/support/).
## My subscription plan is not active
Subscriptions are activated always on a user account who bought the subscription,
and projects derive the subscription plan from a project owner.
You can invite users to your team
(['**Your Account**' -> '**Team**'](/dashboard/team/)) or to the specific project
(['**Project**' -> '**Settings**' -> '**People**'](/dashboard/projects/)).
To transfer the project to another user who has a subscription, you can use [transfer the project](/docs/general/project-sharing/#transfer-project) option.
## Why do invited translators have trialing accounts?
Every new user in SimpleLocalize starts with a 14-day trial account. After the 14-day, the subscription plan is downgraded to a free community account.
Translators (and all other users invited to the project) will still have access to the project and all its features after the trial period, according to the subscription owner plan.
## How to apply a coupon code?
To apply Paddle coupon code, choose a subscription plan and in the popup window click '**Add discount**' button.
---
# General: FAQ
Source: https://simplelocalize.io/docs/general/faq/
> This page has been deprecated. Please refer to the [Support](/docs/general/support/) page for the most up-to-date information.
List of the most frequently asked questions regarding SimpleLocalize. Below the FAQ part, you will also find a list of constrains.
### How to change project ownership?
To transfer a project from one user to another, need to go to '**People**' tab of your project and click on the '**Project Owner**' button.
### Auto-translation resulted with mixed results
Please compare your results with a web version of translation provider ([DeepL translator](https://www.deepl.com/translator) / [Google Translate](https://translate.google.com)).
In some very rare cases, a translation provider might add unwanted text or translate text incorrectly, in such case there is nothing what we can do with it.
### How to rollback/revert changes made in the translation editor?
Go to the '**Settings**' -> '**Snapshots**' and click the snapshot you want to restore. From there, you can compare the snapshot with the current project and restore it. See [Snapshots and backups](/docs/general/backups/) for details.
If you used at least once used the Translation Hosting publication option,
you can download the latest version of translations locally and upload them using import tool in '**Data**' tab.
## Constrains and default behaviour
Presented values below are not always a strong requirement in the service and can be changed in the future.
#### Translation Keys
- no duplicates allowed (project),
- case-insensitive,
- max 500 characters,
#### Language Keys
- no duplicates allowed (project),
- case-insensitive,
- max 20 characters,
- trailing and leading spaces are removed by default,
- allowed characters: numbers, Latin characters, underscores (`_`), dashes (`-`)
#### Customer Ids
- no duplicates allowed (project),
- case-insensitive,
- max 40 characters,
- trailing and leading spaces are removed by default,
- allowed characters: numbers, Latin characters, underscores (`_`), dashes (`-`)
#### Translations
- max 65 535 characters
#### Descriptions
- max 500 characters
#### Code Descriptions
- max 500 characters
#### General
- max 10 concurrent jobs per project,
- max API rate limit 5 req/second per IP, some endpoints might different limits due to security reasons.
- CDN access is unlimited
---
# General: Beta features
Source: https://simplelocalize.io/docs/general/beta-features/
Beta features are features that are currently in development and testing.
They are not yet ready for every day or production use. We are looking for feedback from our users to help
us improve the features before they are released.
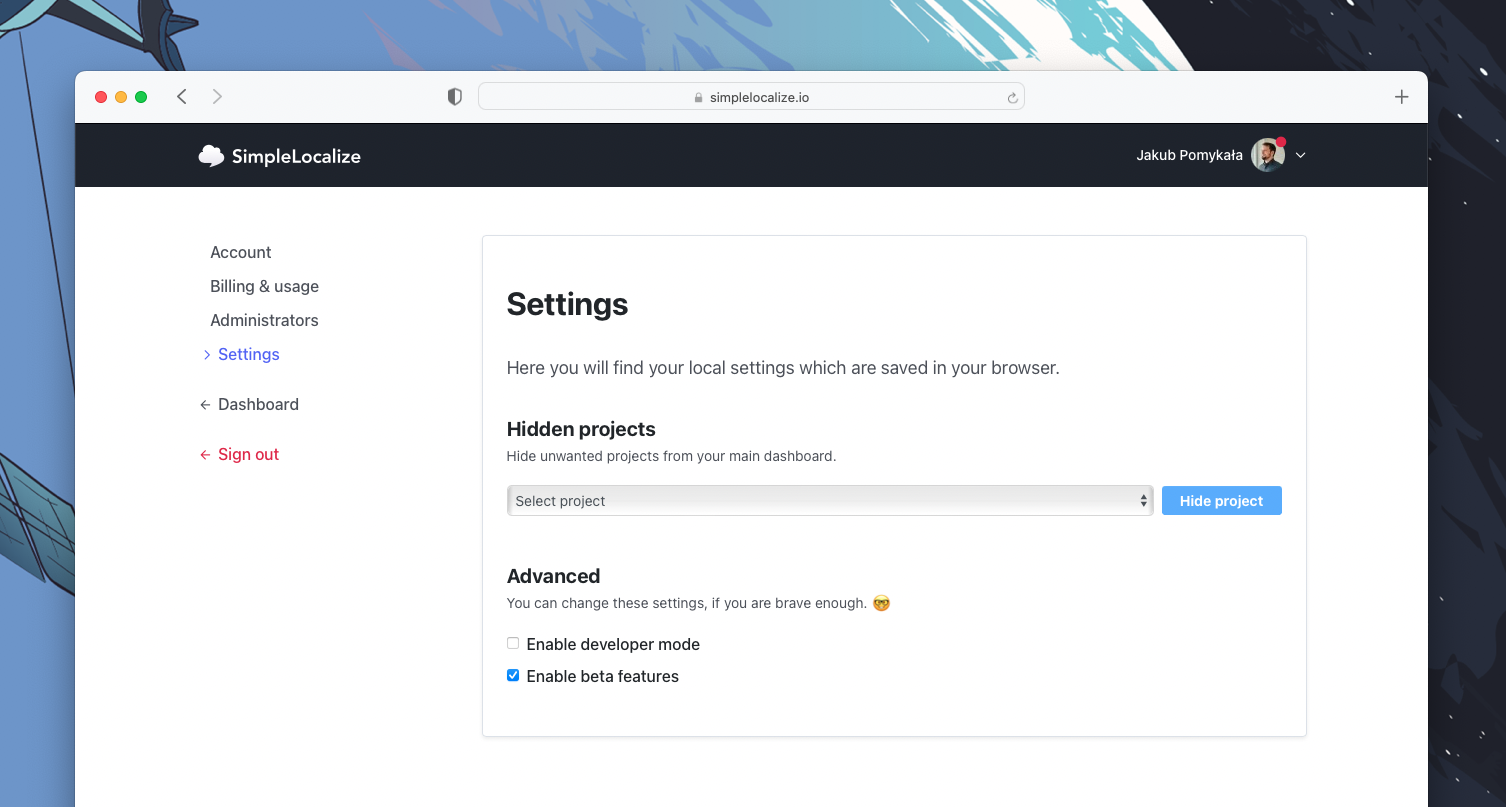
To enable beta feature, please go to your [Profile](/dashboard/profile/), check '**Enable all beta features**' below the profile form and refresh the page.
## Available Beta Features
Currently, there are no beta features available that you can enable. All publicly available beta features are marked with a "Beta" badge.
---
# Translation editor: Get started
Source: https://simplelocalize.io/docs/translation-editor/get-started/
An online translation editor can be a great help in getting started with translation management, and also it can improve the translation process experience for more advanced teams. It's easier, more intuitive and user-friendly than an Excel file, and multiple users can work on translations in one place.
In this section, you will learn how to use the SimpleLocalize translation editor and set it to your and your team needs. Adjust the views and learn all editor options to take full advantage of its features.
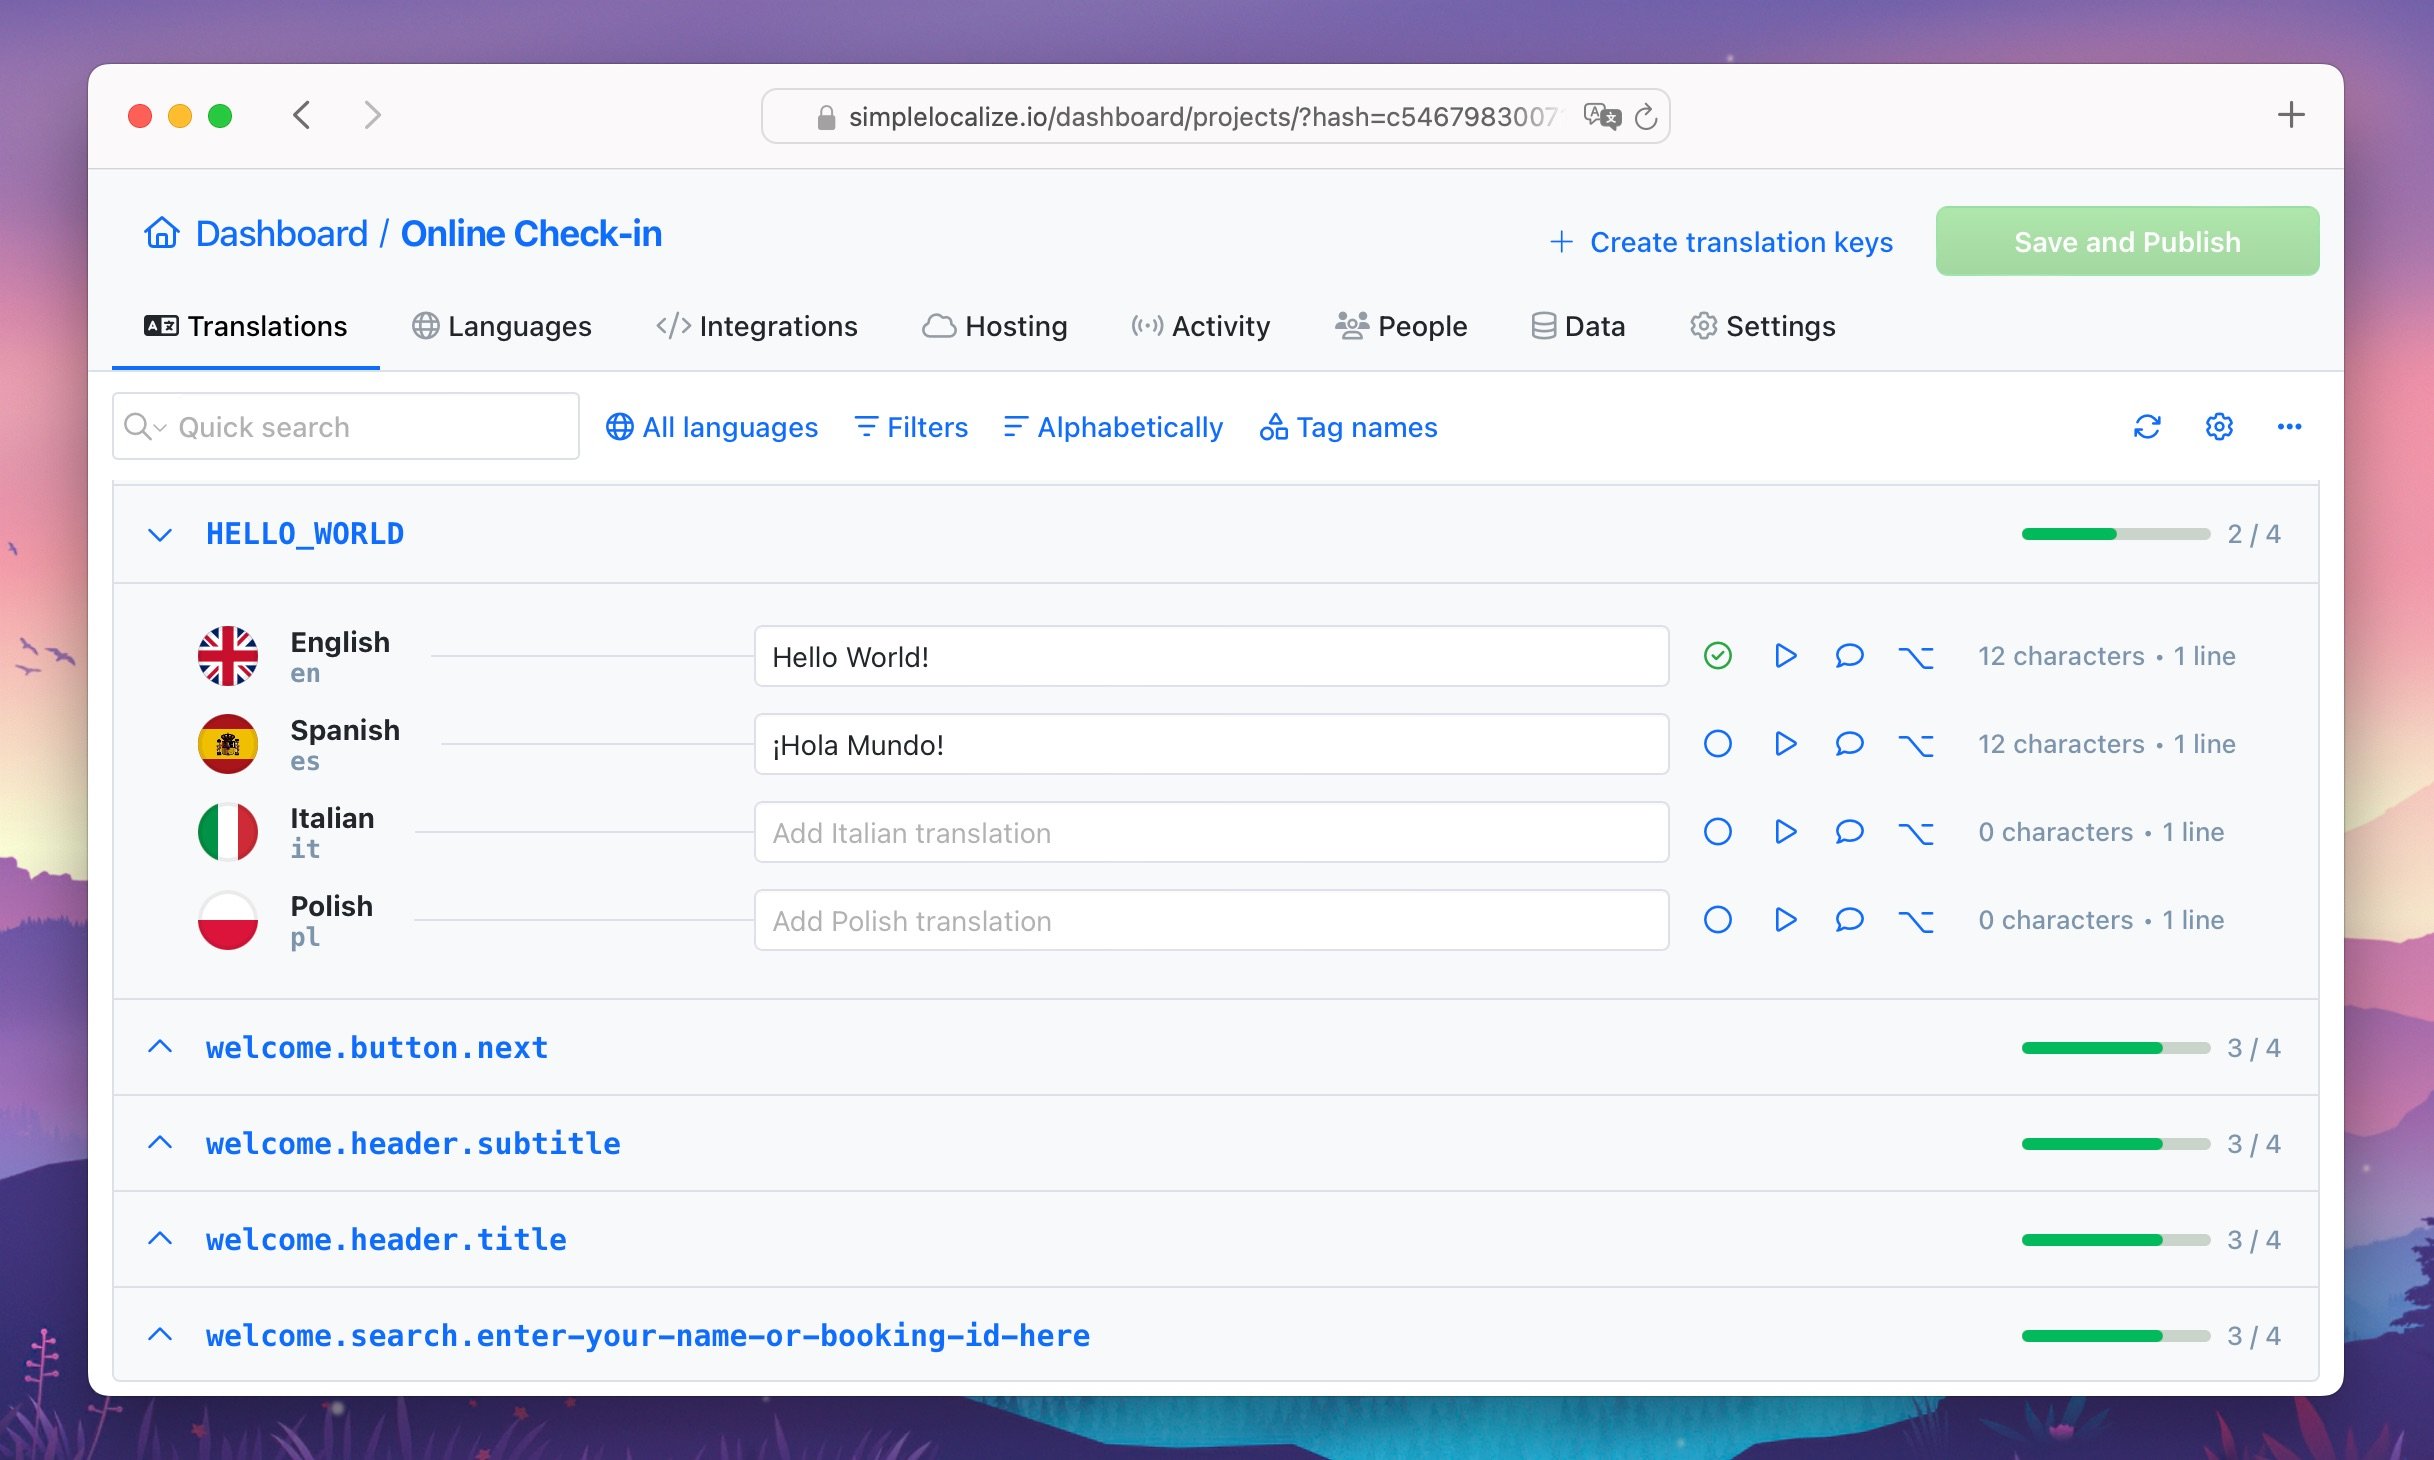
## How to start
To start using the translation editor, please make sure that you have at least one language added to your project. If you don't have any languages yet, you can add them in the **Languages** tab of your project.

Next, you can [import translations from file](/docs/general/import/). If you don't have any translations yet, you can create a few translation keys manually in the **Translations** tab,
by clicking the plus button and choosing **Create translation key**.

Later, you can automate importing new source translations using [CLI](/docs/cli/upload-translations/), [REST API](/docs/api/import-translations/), [GitHub App](/docs/integrations/github-app/)
or any of our other [integrations](/integrations/).
## Built-in translation tools
The translation editor comes with several built-in tools to help you manage and improve your translations, such as:
- [Auto-translation](/docs/general/auto-translation/) using AI and MT services
- [Translation reviews](/docs/translation-editor/reviews/) to mark translations as reviewed
- [Comments and suggestions](/docs/translation-editor/comments/) for better communication
- [Translation history](/docs/translation-editor/history/) to track changes
- [QA checks](/docs/translation-editor/qa-checks/) to find and fix common translation issues
- [AI Actions](/docs/translation-editor/ai-actions/) to enhance translation quality
- [Screenshots](/docs/translation-editor/screenshots/) to provide visual context
- [Tags](/docs/translation-editor/tags/) to organize translations
- [Bulk actions](/docs/translation-editor/bulk-actions/) to perform actions on multiple translations at once
- [Translation memory](/docs/translation-editor/translation-memory/) to reuse previous translations
## Live collaboration
The translation editor supports live collaboration,
which means that multiple users can work on translations simultaneously,
and get instant updates about changes made by others.
## View settings
The translation editor provides several view settings to customize your experience. You can choose between:
- List View with all translations
- List View with two side-by-side translations
- Table View with a spreadsheet-like interface
You can also choose which actions you want to see in the editor, such as:
- Auto-translate button
- Review status
- AI Actions to improve translations
- QA checks with translation issues
- Translation history
- Comments & Suggestions
- Copy translation text or key
- Clear translations for other languages
View settings are saved per user, so each team member can customize their own view without affecting others.
Learn more about [view settings](/docs/translation-editor/settings/).
## Context menu
Editor uses a custom right-click context menu to provide quick access to common actions.
You can right-click on a translation key or value to see the available options,
such as auto-translate missing translations,
duplicate translation key,
delete translation key,
and more.

---
# Translation editor: Filters & Sorting
Source: https://simplelocalize.io/docs/translation-editor/filters/
The filters described below will help you work on translations in the translation editor. Thanks to filters, you can
adjust the translation list and display only those translations, which you need to see.
## Search
The default search input is a fuzzy search in translation keys and translations. It will find translation keys and translations starting with or containing a specific text.
By clicking on the Search icon you can adjust the **search type** (change from fuzzy search to exact match or regex) and select the **search scope** (search in translation keys, translations, customer translations or key descriptions).
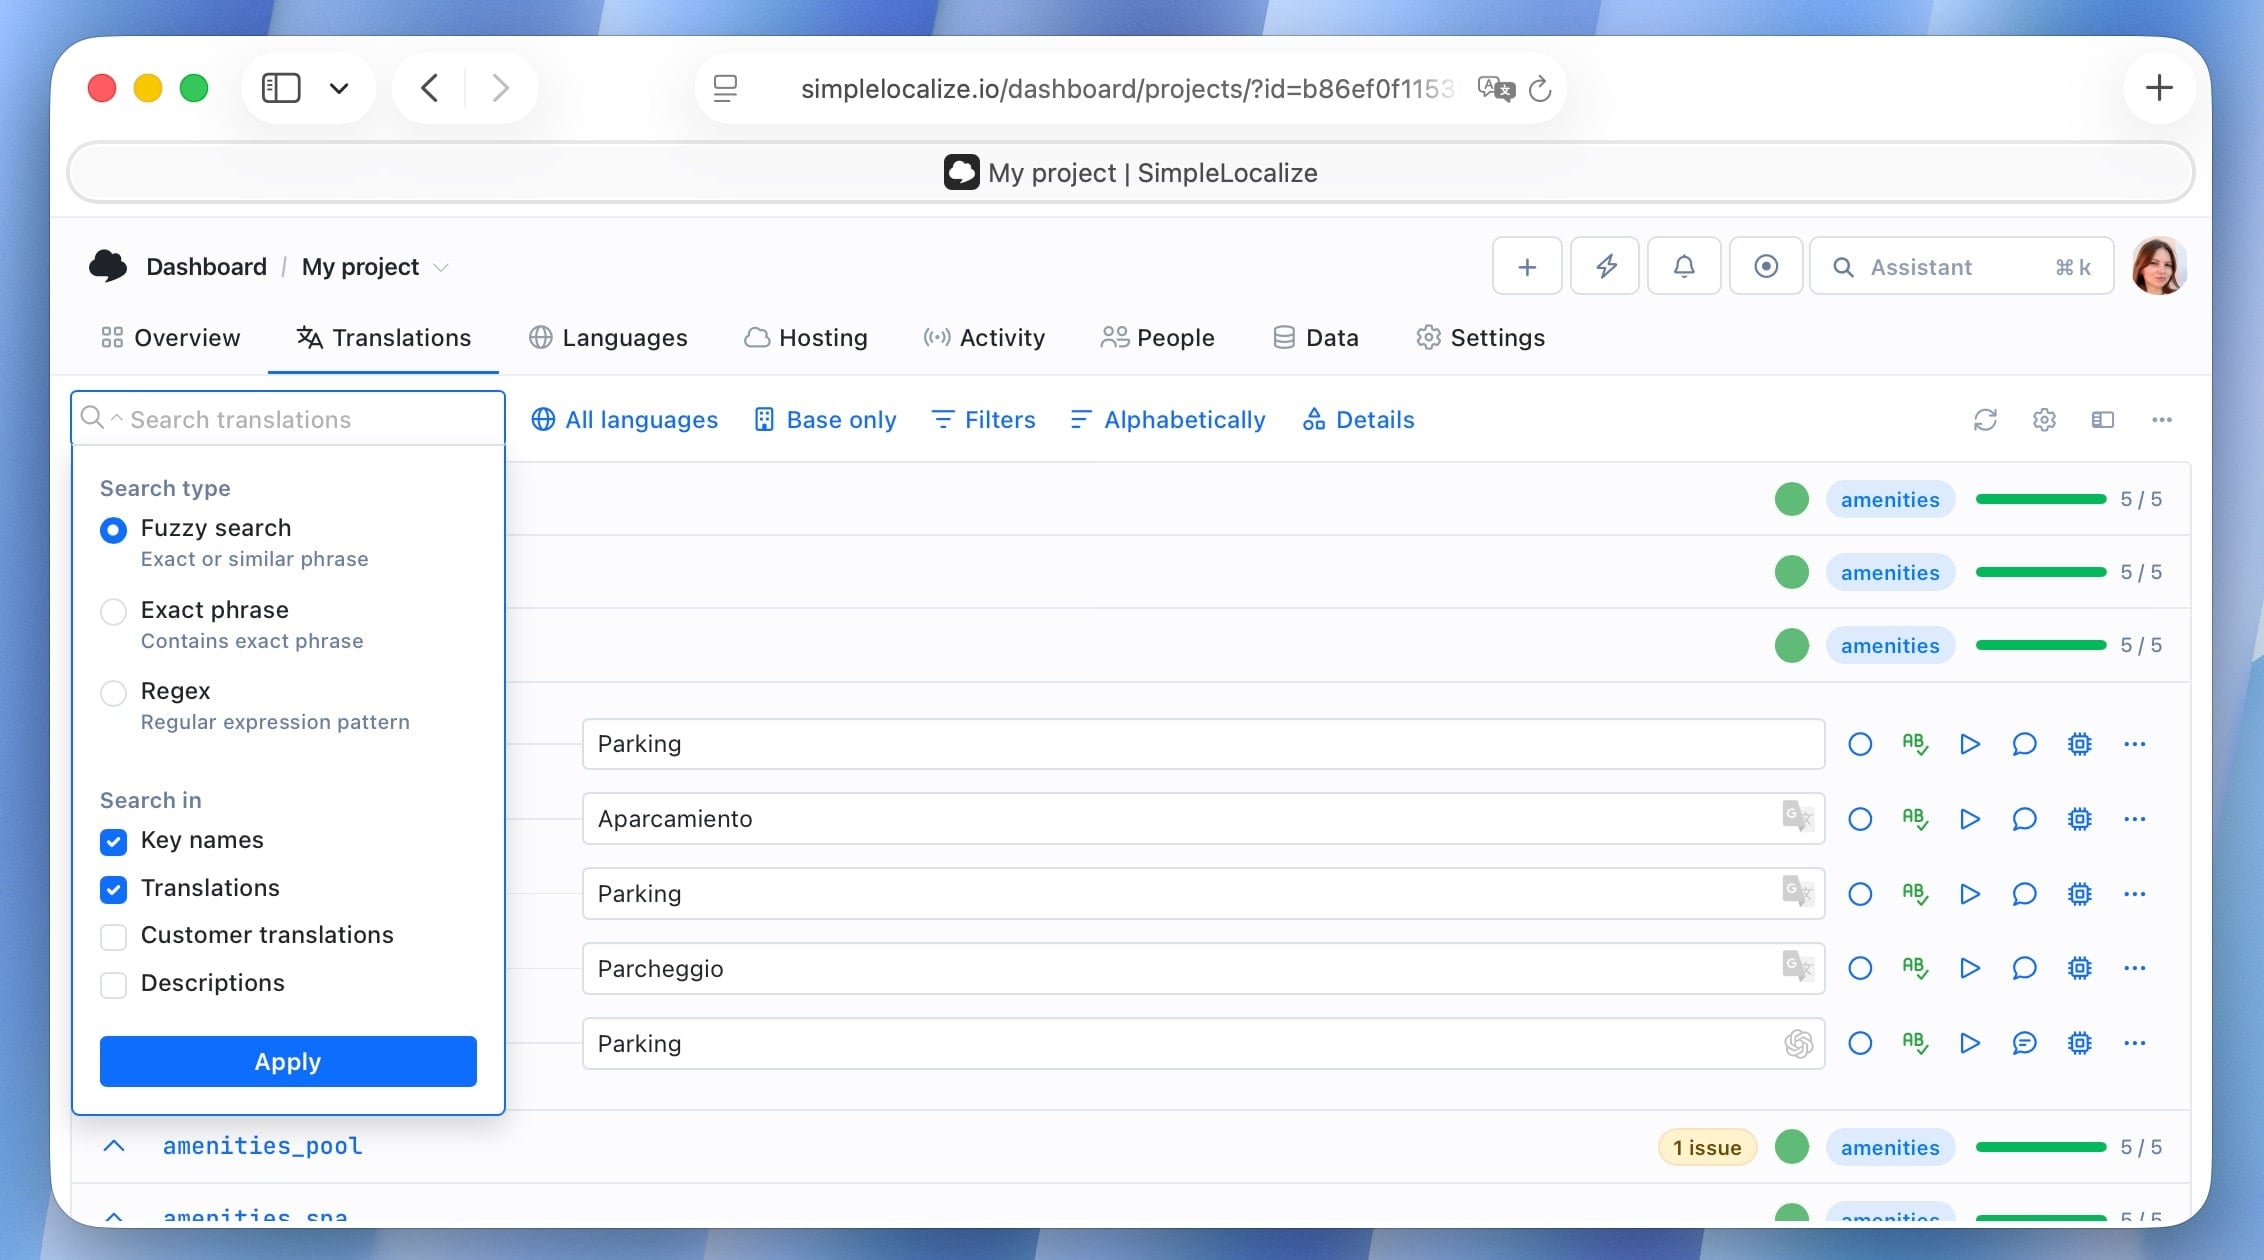
> Use the + F keyboard shortcut to focus on the search input.
## Find and replace
Open the find and replace modal by clicking on the **options** button in the search input (three dots).
Enter text you want to find and use **Find matches** button to find all matches in the translation keys and translations. You can replace selected matches or use the **Replace all** button to replace all matches from the search results.
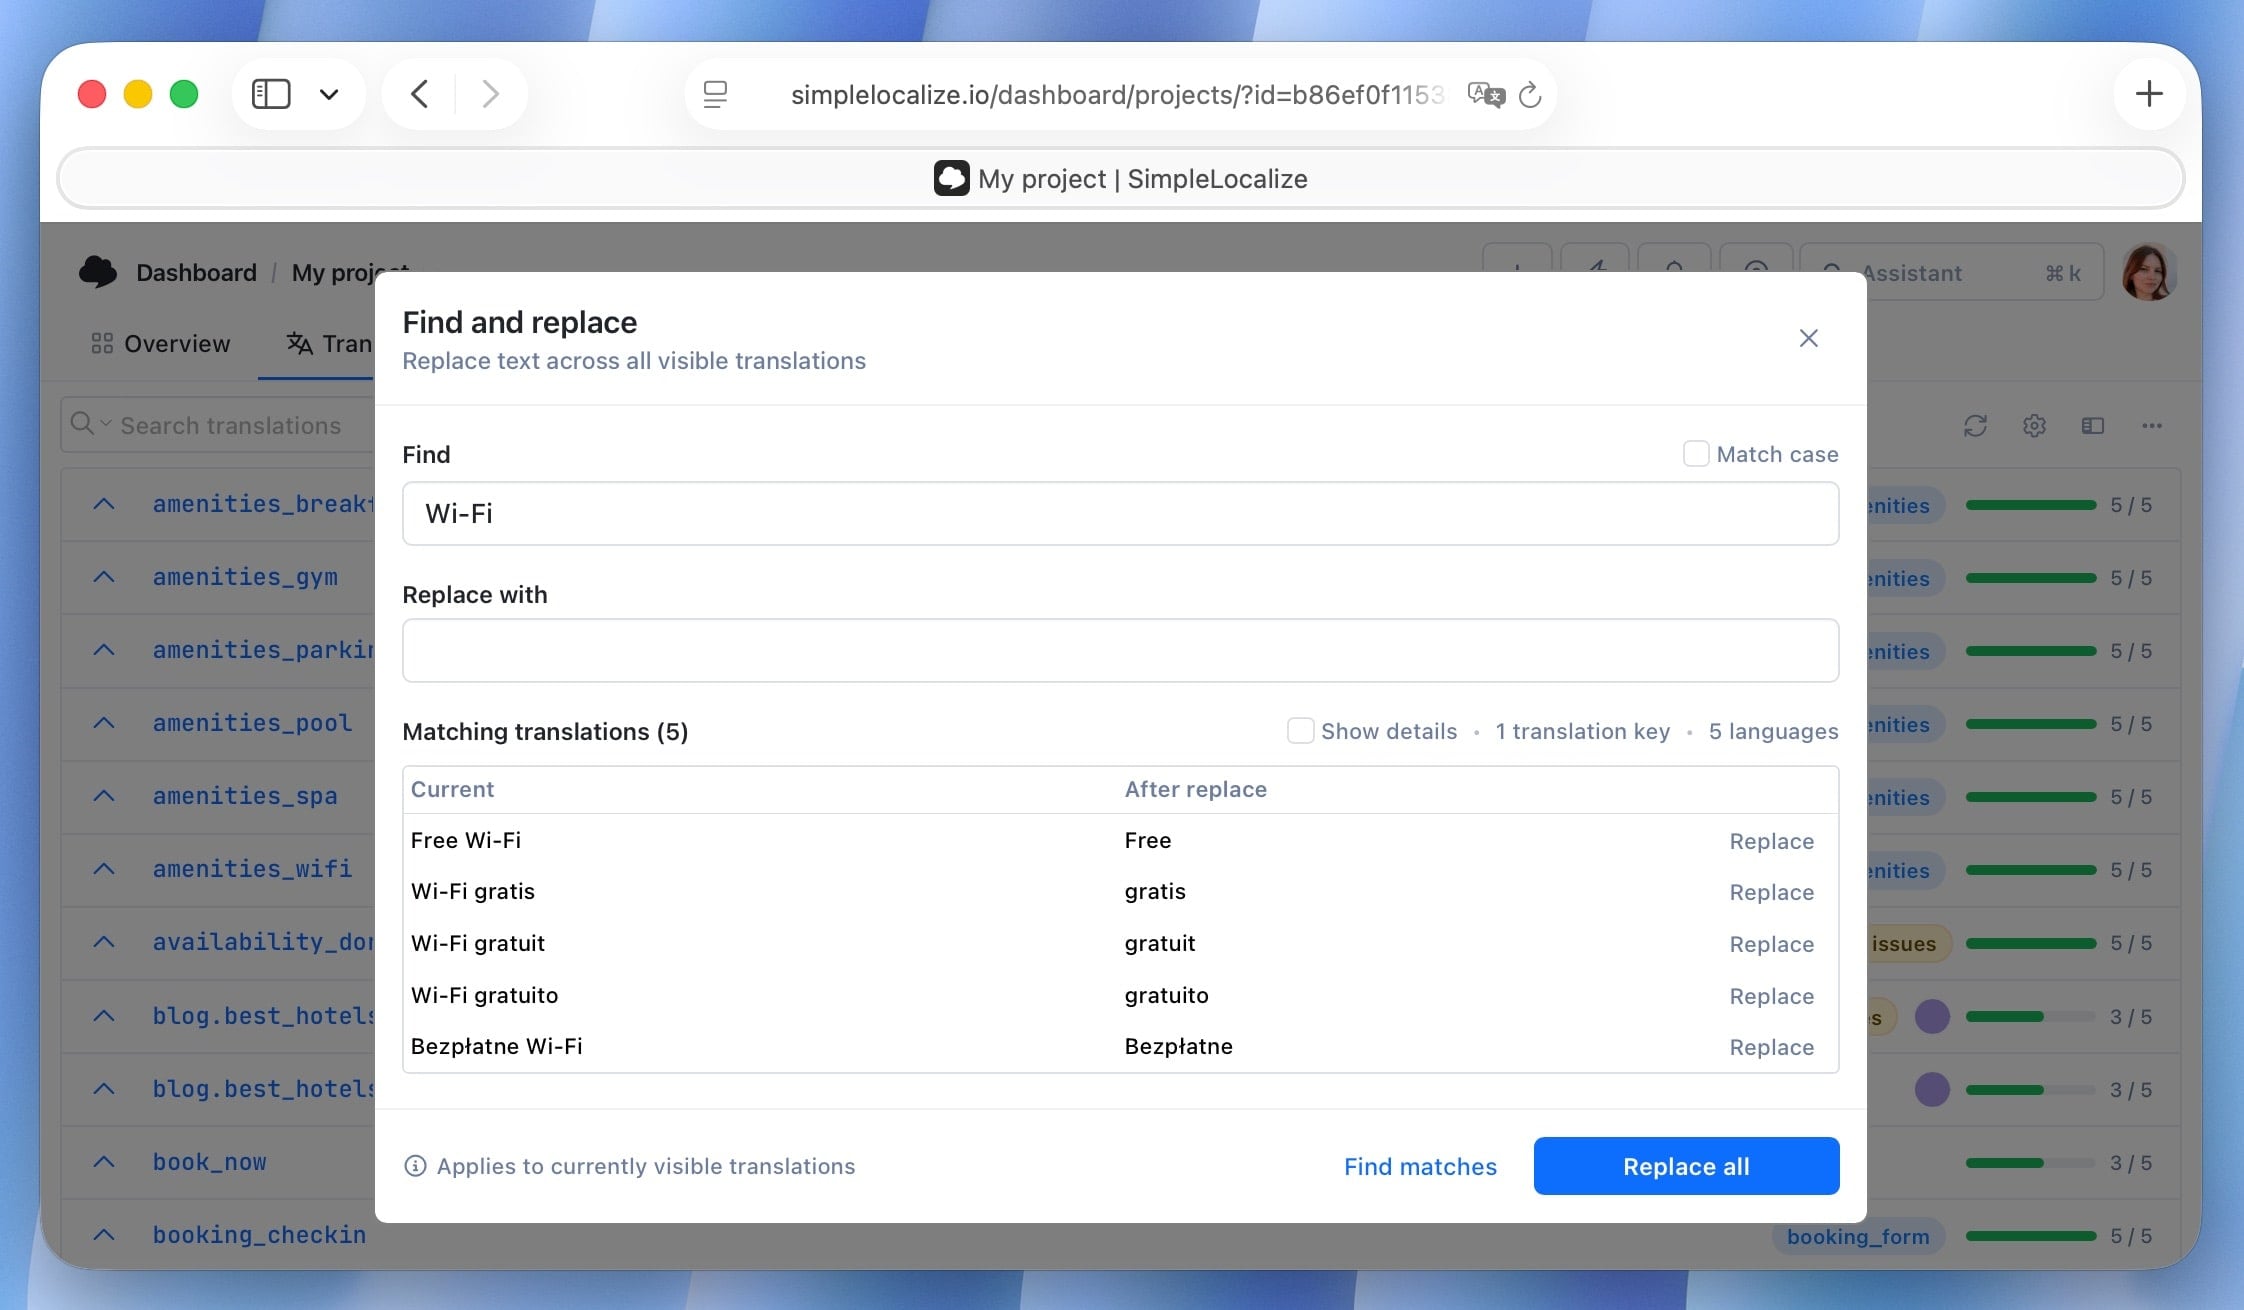
> Use the + Shift + F keyboard shortcut to open the find and replace modal.
## Languages
Use Languages filter to select which languages you want to display in the editor. Click on **Languages** to open the
list of all languages used in your project. Select languages you would like to display and click **Apply** button to go
back to the editor.
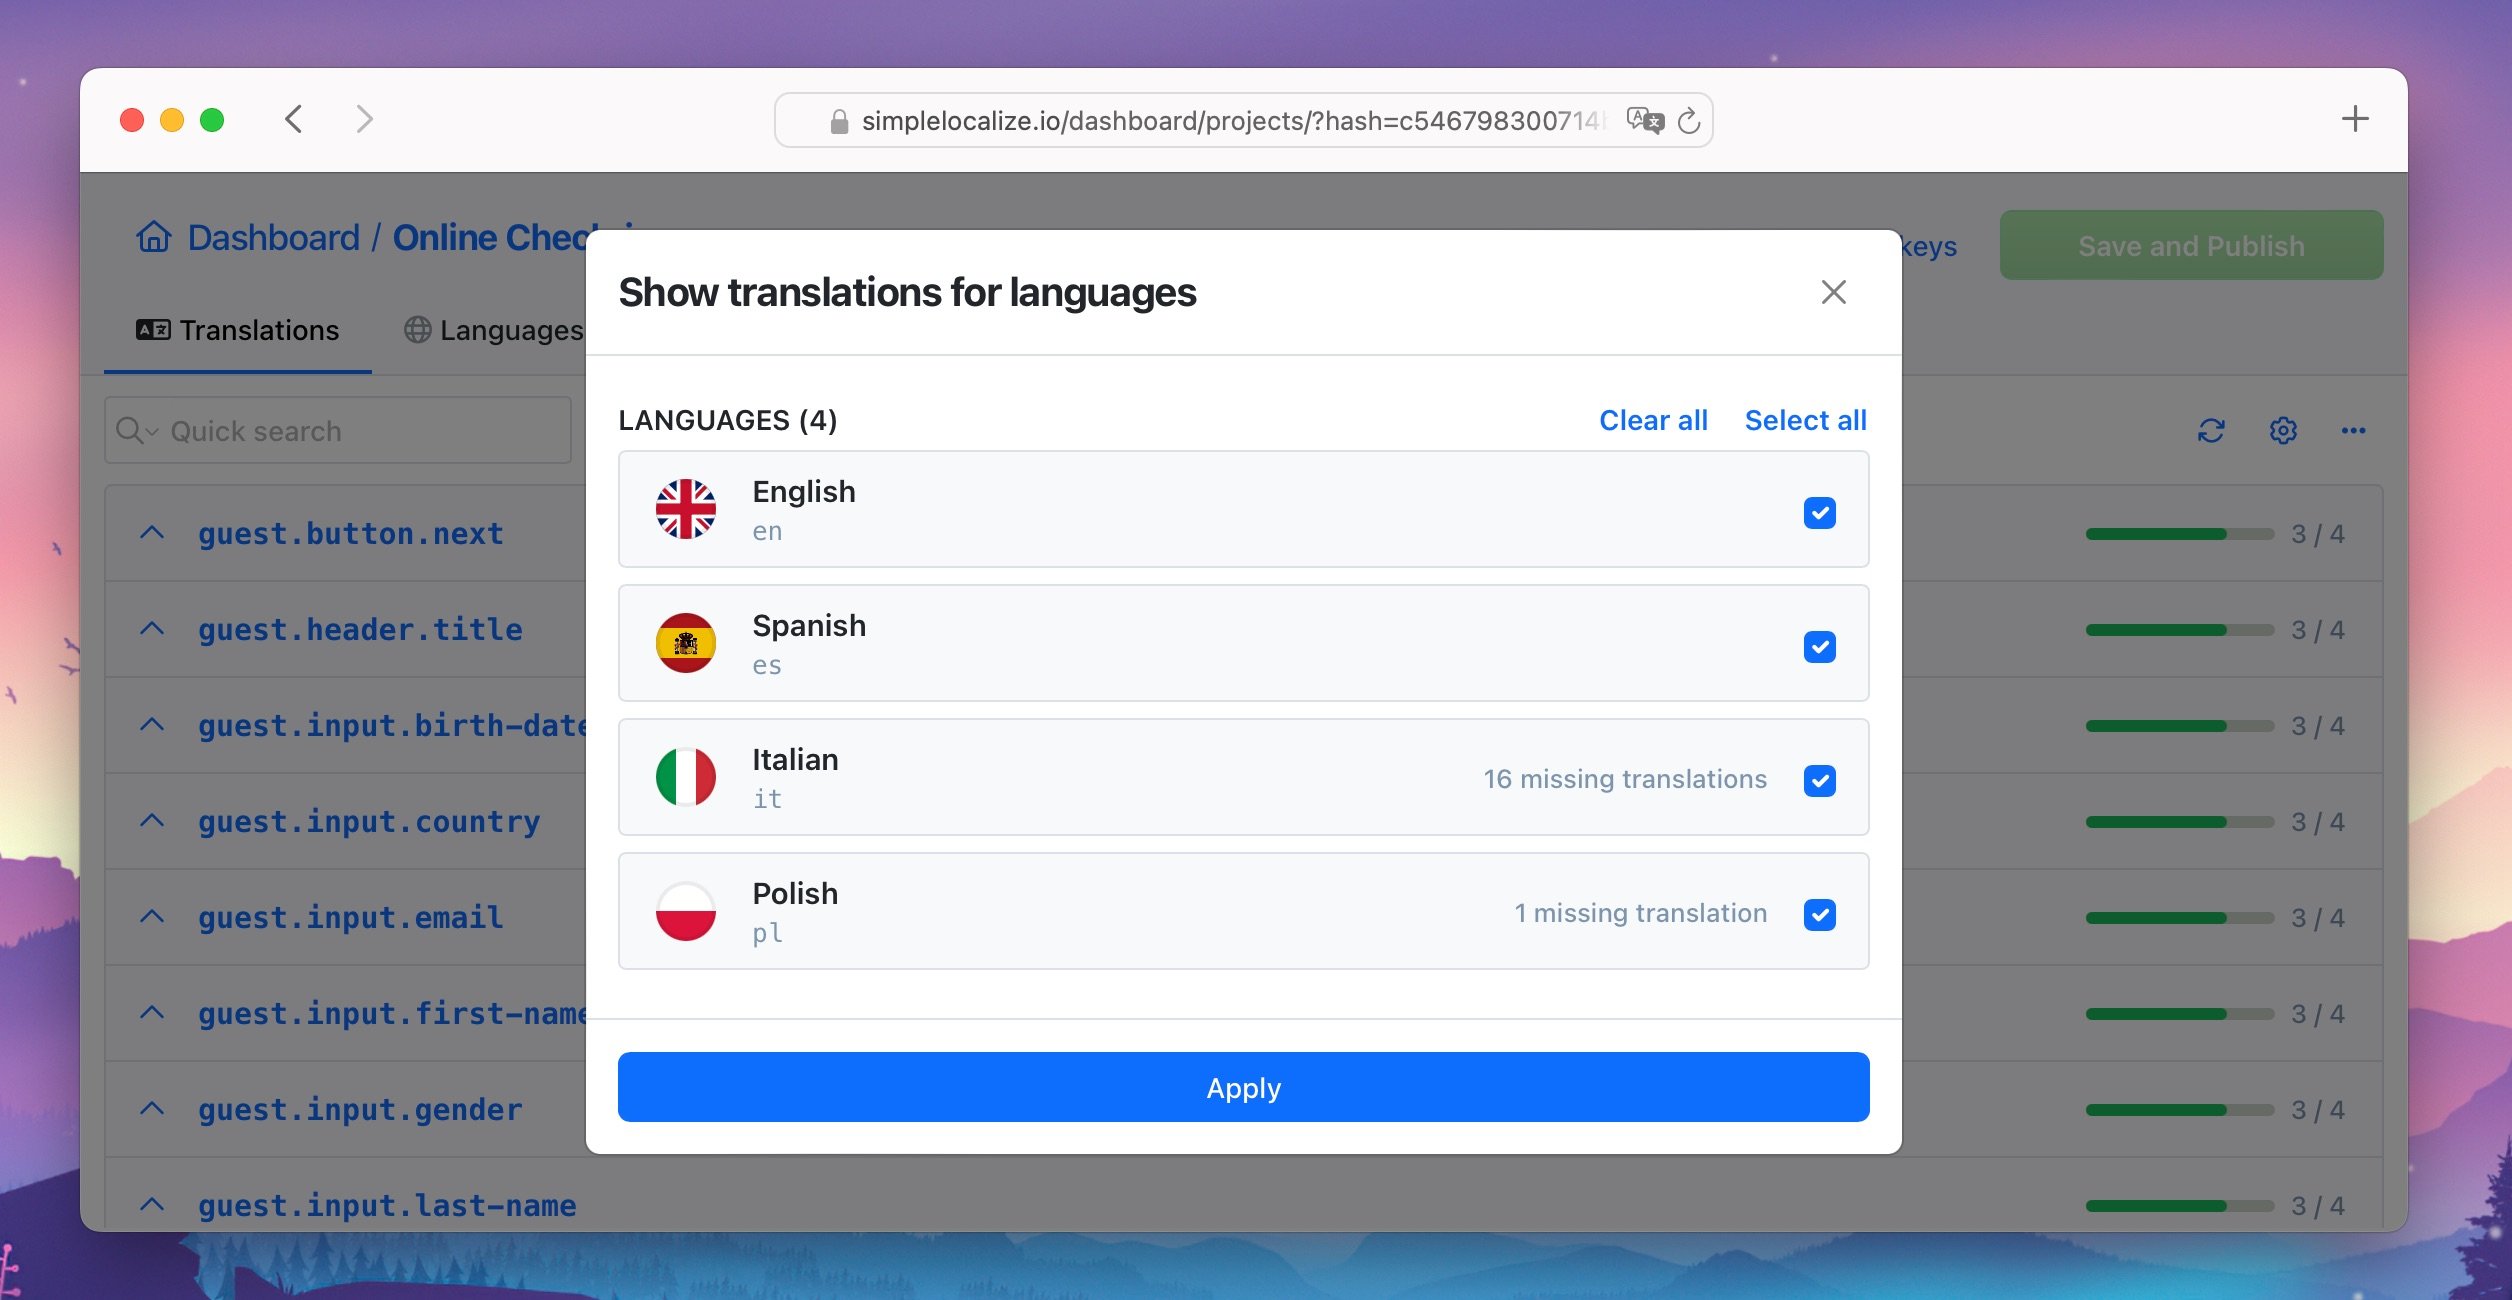
## Filters
Use Filters to apply additional filters to the list of translations. The quick filter allows you to filter translations by the most common filters, such as missing translations, deprecated translations, auto-translated, by namespace, tag, customer, and more.
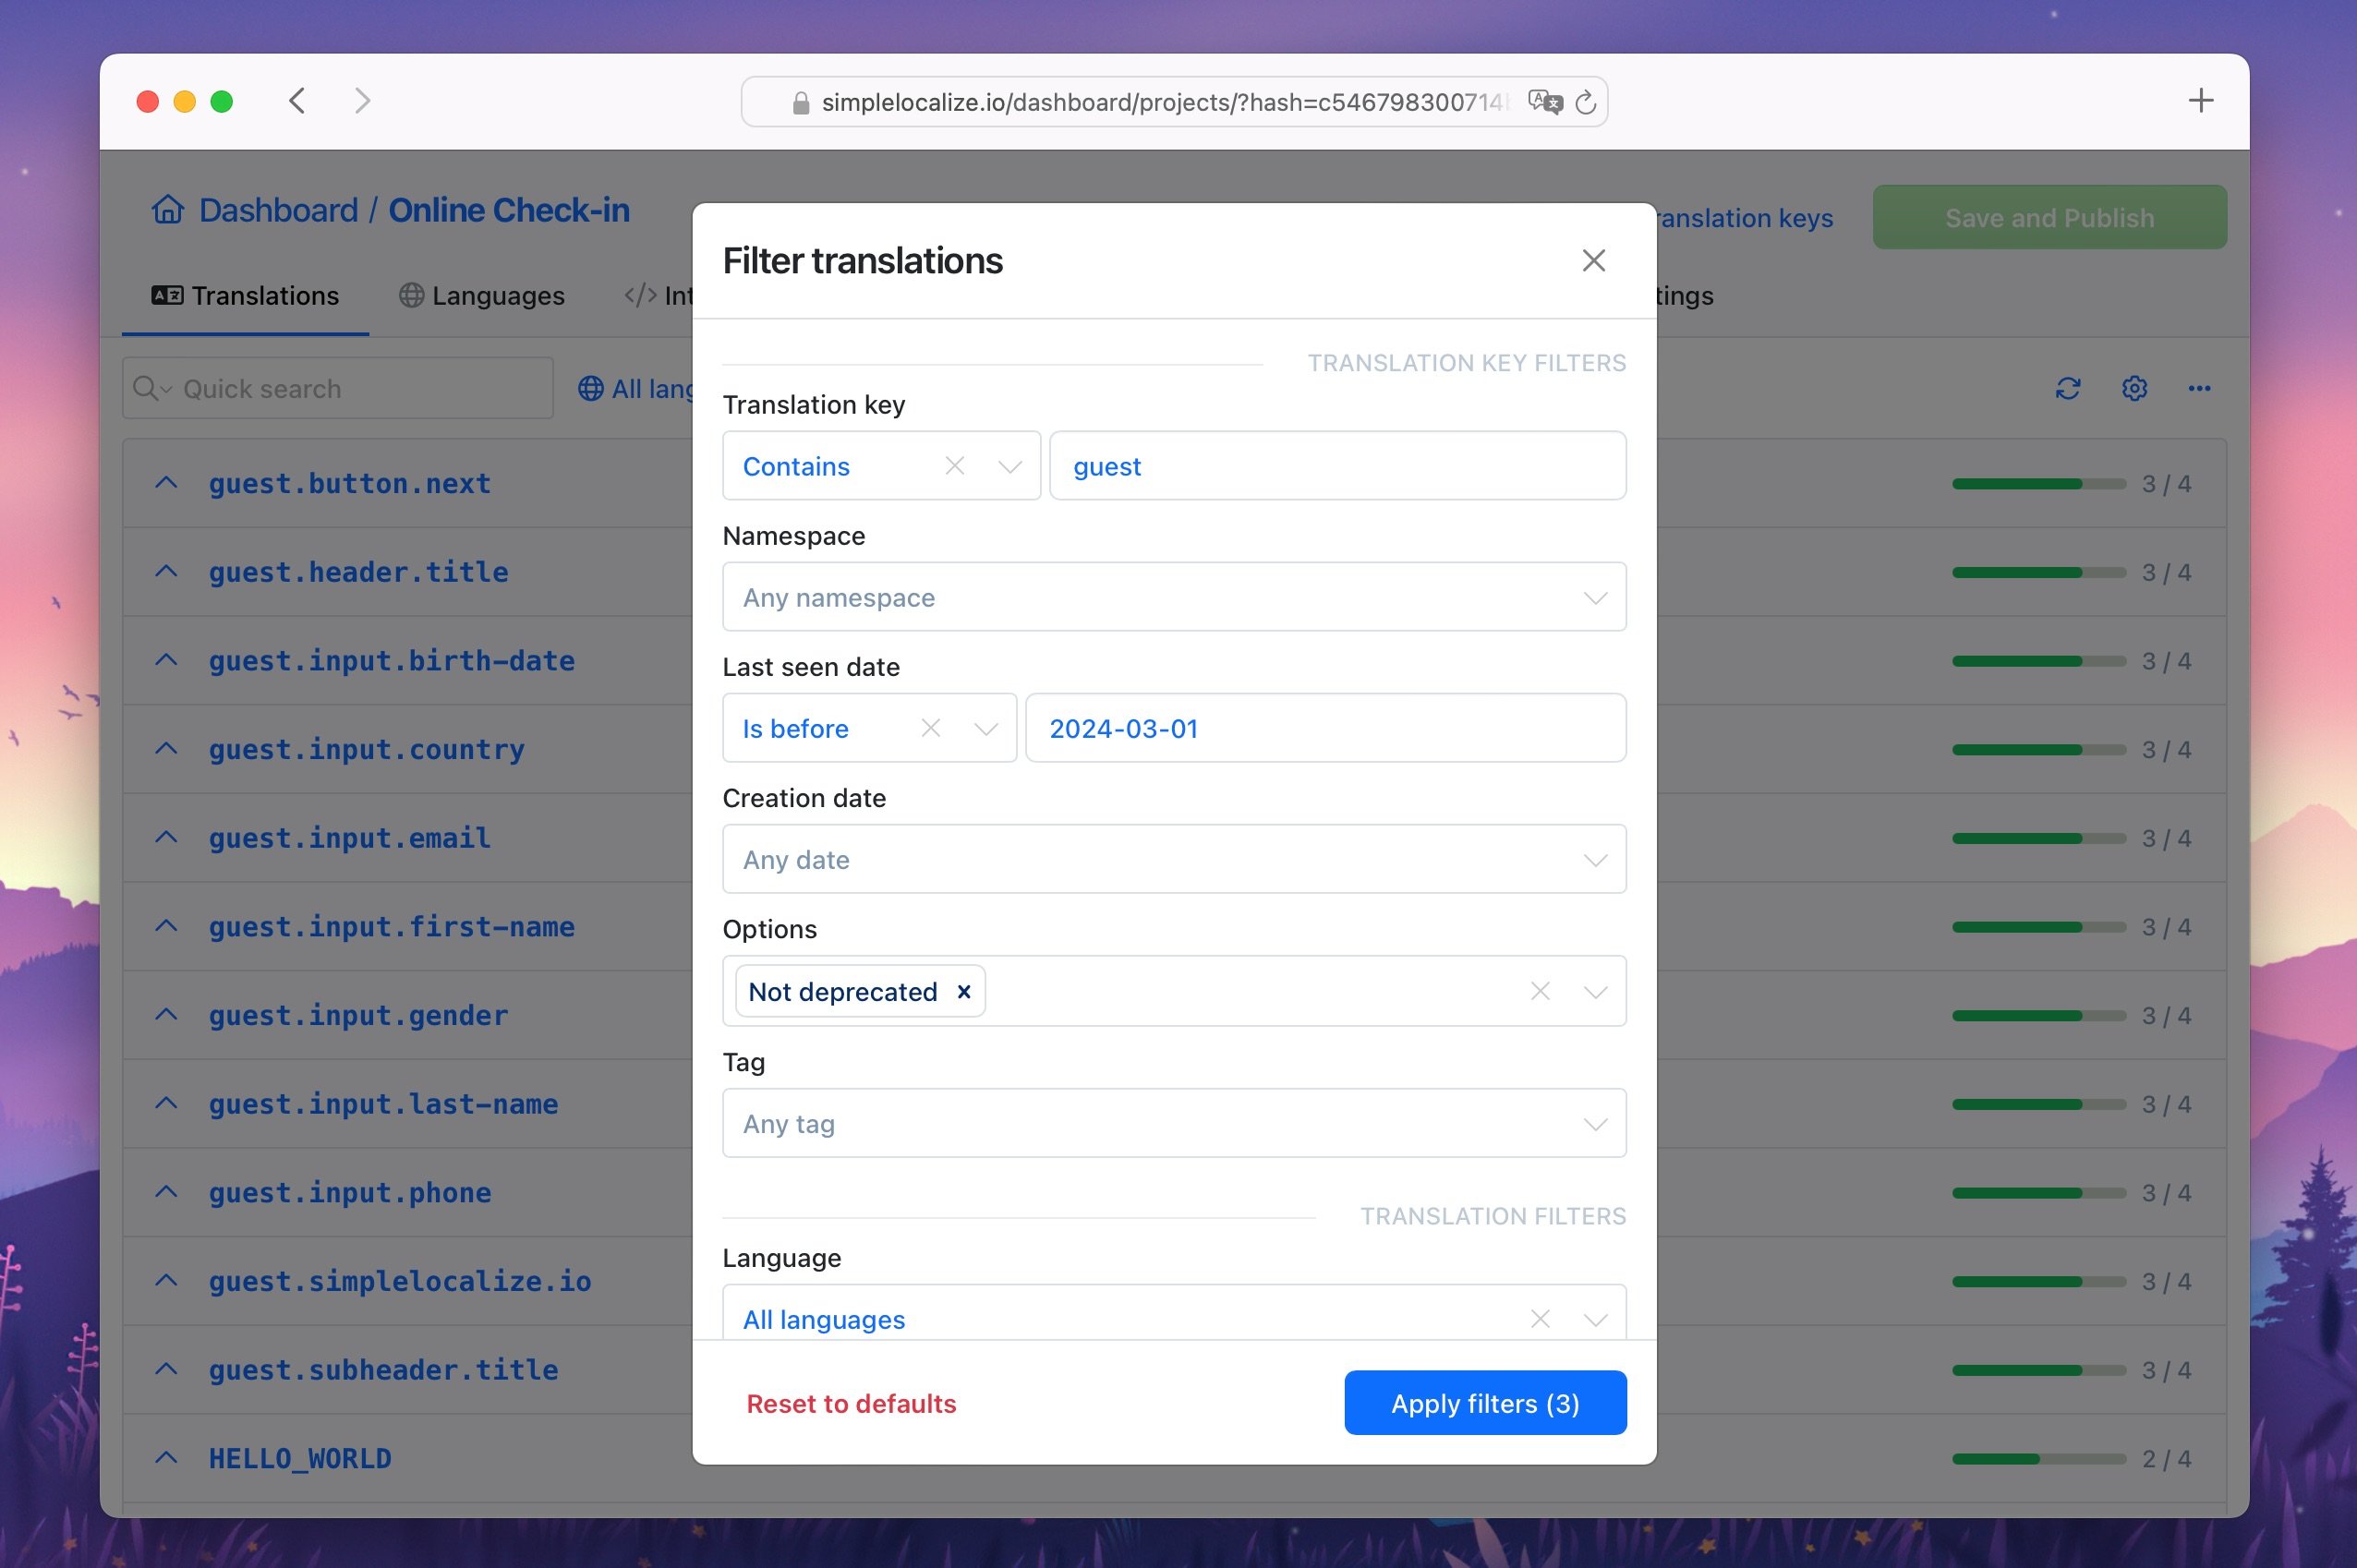
For more advanced filtering, click on **All filters** to open the filter modal (or click on the Filters button with Shift key pressed).
There, you can apply multiple filters for translation keys and translations.
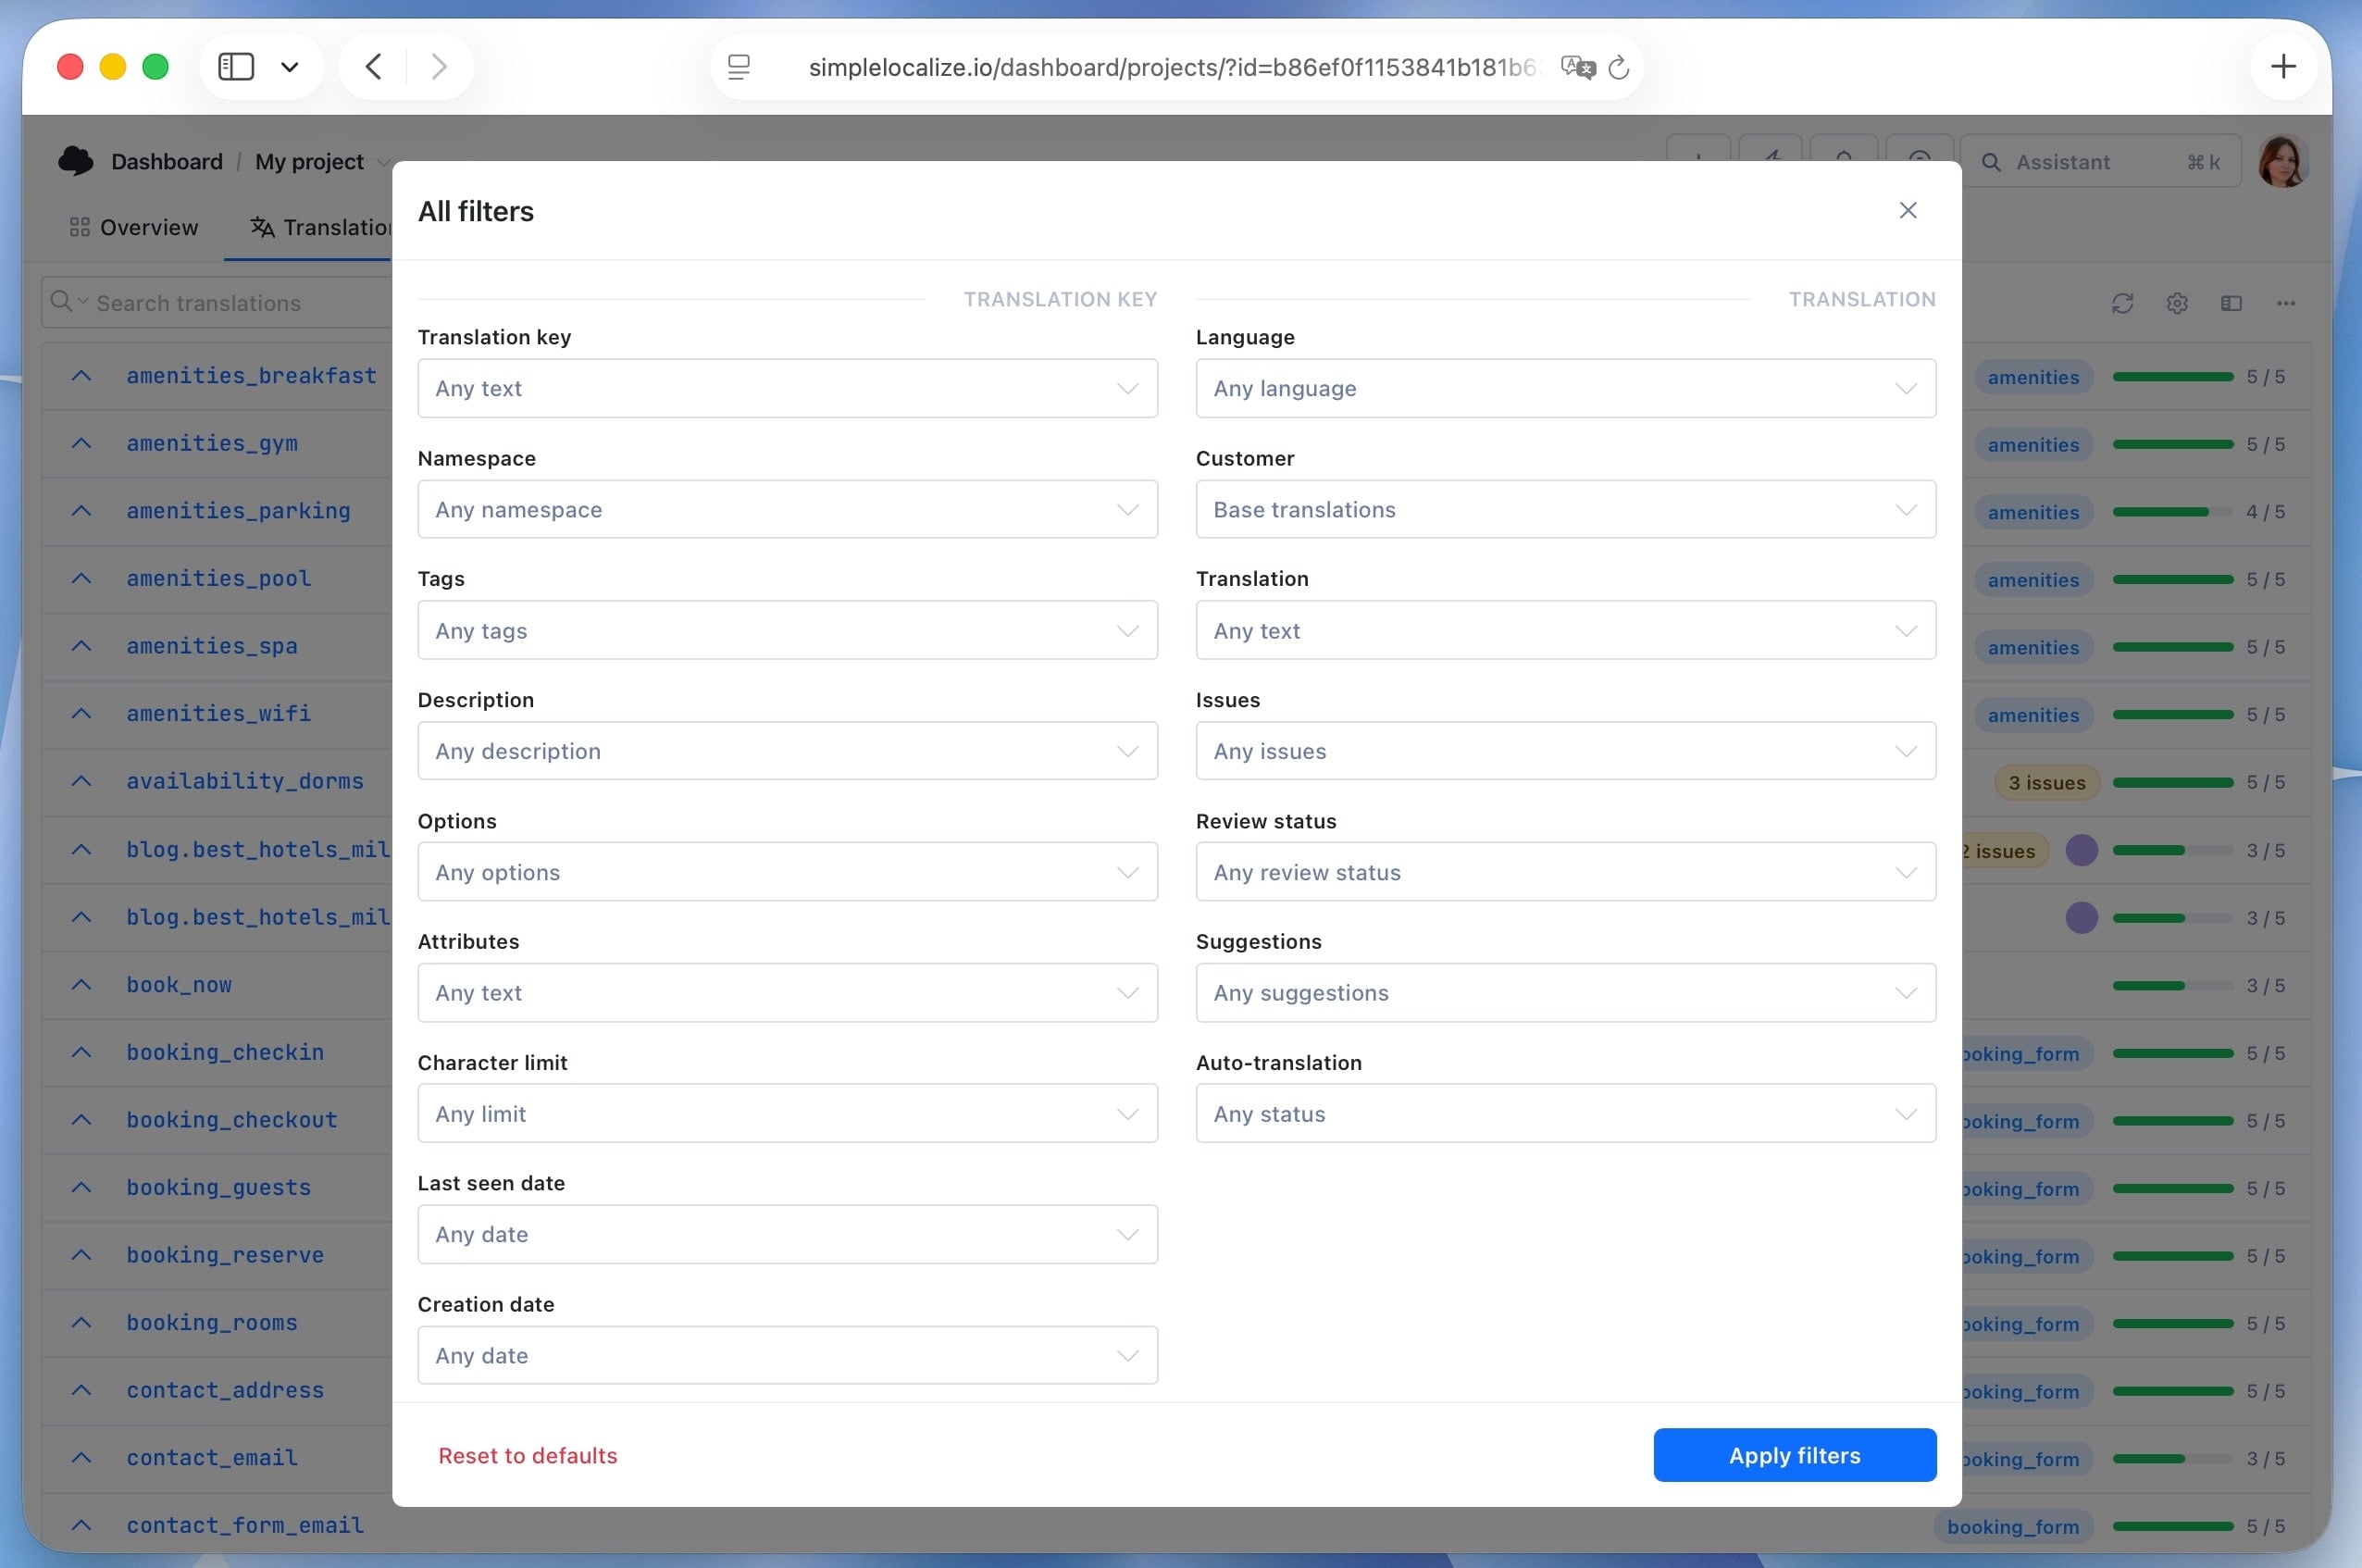
For example, you can use filters to display translation keys:
- with missing translations in a specific language
- with translations that have been auto-translated and need to be reviewed
- with translations that are the same as the source text (for selected languages or in all shown languages)
- with translations that have been modified after a specific date
- with issues in QA checks (e.g. high severity issues)
- with descriptions or attributes containing a specific text
- and many more combinations of filters.
## Sorting options
Sort the list of translation keys most or least translated, last seen or modified translations, newest or oldest keys,
or namespaces.
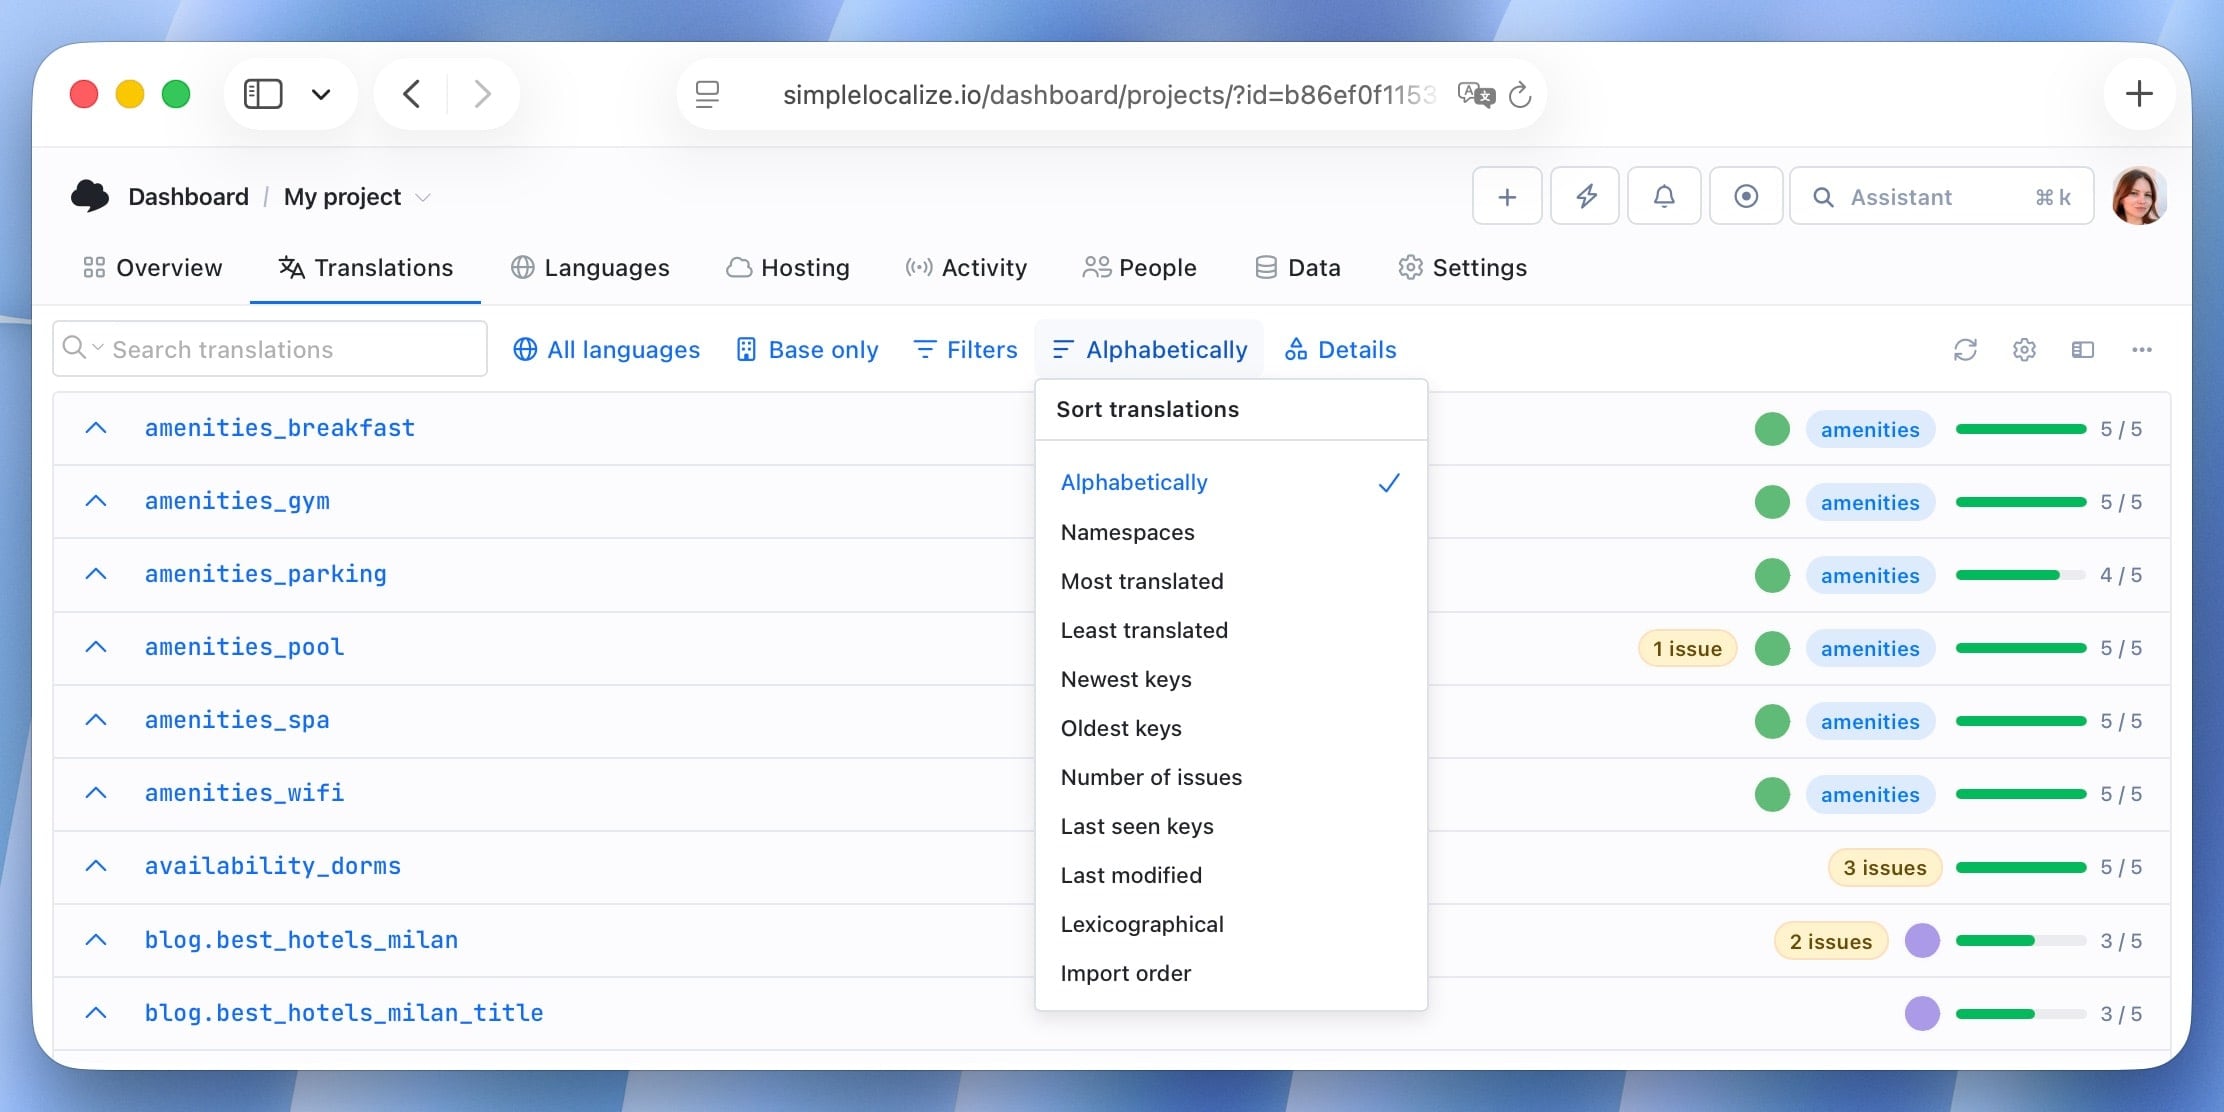
Available sorting options:
- Alphabetically - by the translation key name
- Namespace - By the namespace name alphabetically
- Most translated - by the number translated texts
- Least translated - by the number of untranslated texts
- Newest keys - by the translation key creation date
- Oldest keys - by the translation key creation date
- Number of issues - by the number of issues in QA checks for translations in the key
- Last seen keys - by the translation key last seen in imported file or API
- Last modified - by the last modification date of any translation in the key
- Lexicographically - by the translation key name, but with support for natural sorting (for example, "key1" will be before "key10")
- Import order - by the order of the translation key import
### Custom order of translation keys
The import order is a custom order of translation keys in the editor. When you import translations, they are sorted by the
order from the imported file. You can change the order of translation keys by importing the translation keys in the desired order via "Data" tab,
and selecting "Update order" in the import options.
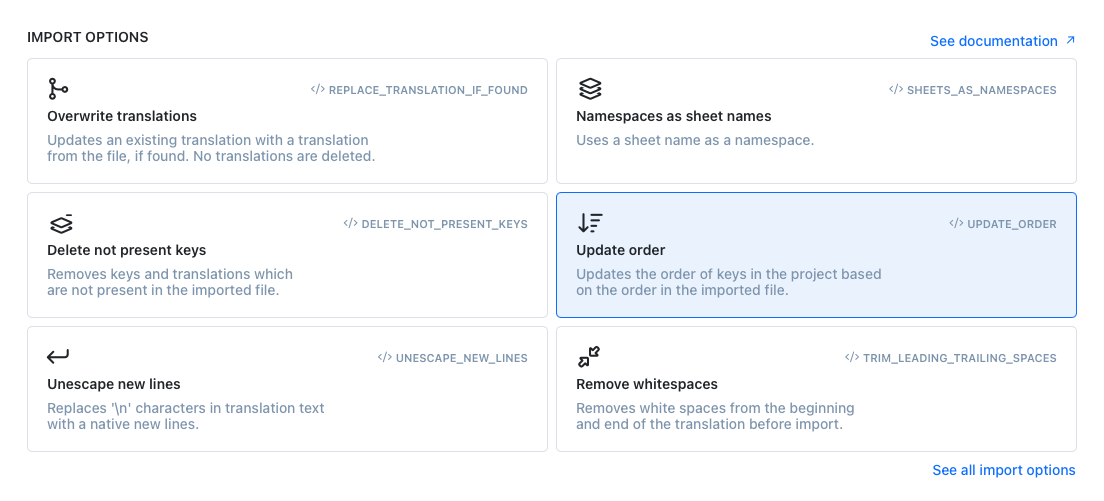
## Additional information
You can display additional information for each translation key in the List view using the **Details** option. This way, without expanding
the translation, you can see the selected language translation, creation or last modification date, and auto-translated texts.
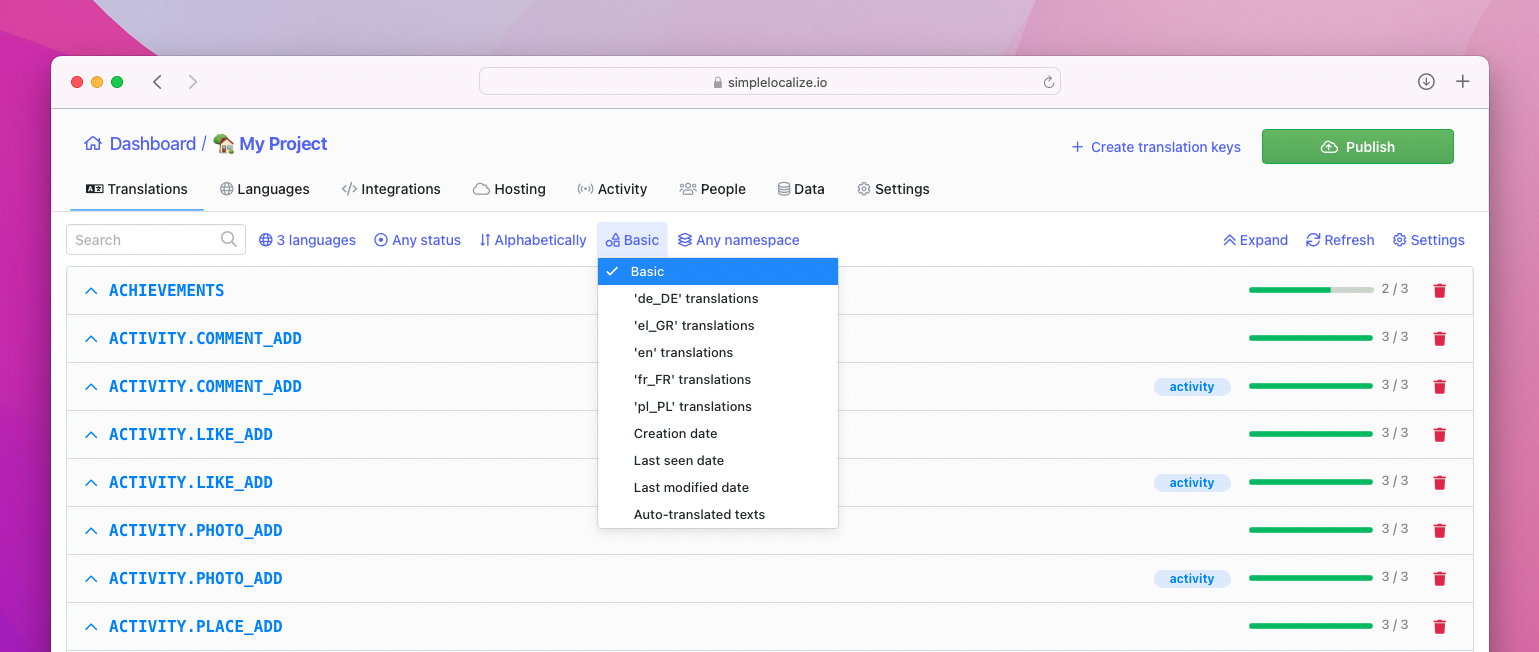
---
# Translation editor: Bulk Actions
Source: https://simplelocalize.io/docs/translation-editor/bulk-actions/
Bulk Actions allows you to perform operations on multiple translation keys simultaneously.
This feature is particularly useful when you need to apply the same action across several strings, saving you time and effort.
## How to use Bulk Actions
To start, you need to select the rows you want to modify. You can do this by holding down the key on macOS or the Ctrl key on Windows/Linux while clicking on the desired rows.
Alternatively, you can enable the selection mode from the three-dot menu in the top-right corner of the translation editor, and then click on the checkboxes next to the translation keys you want to select.
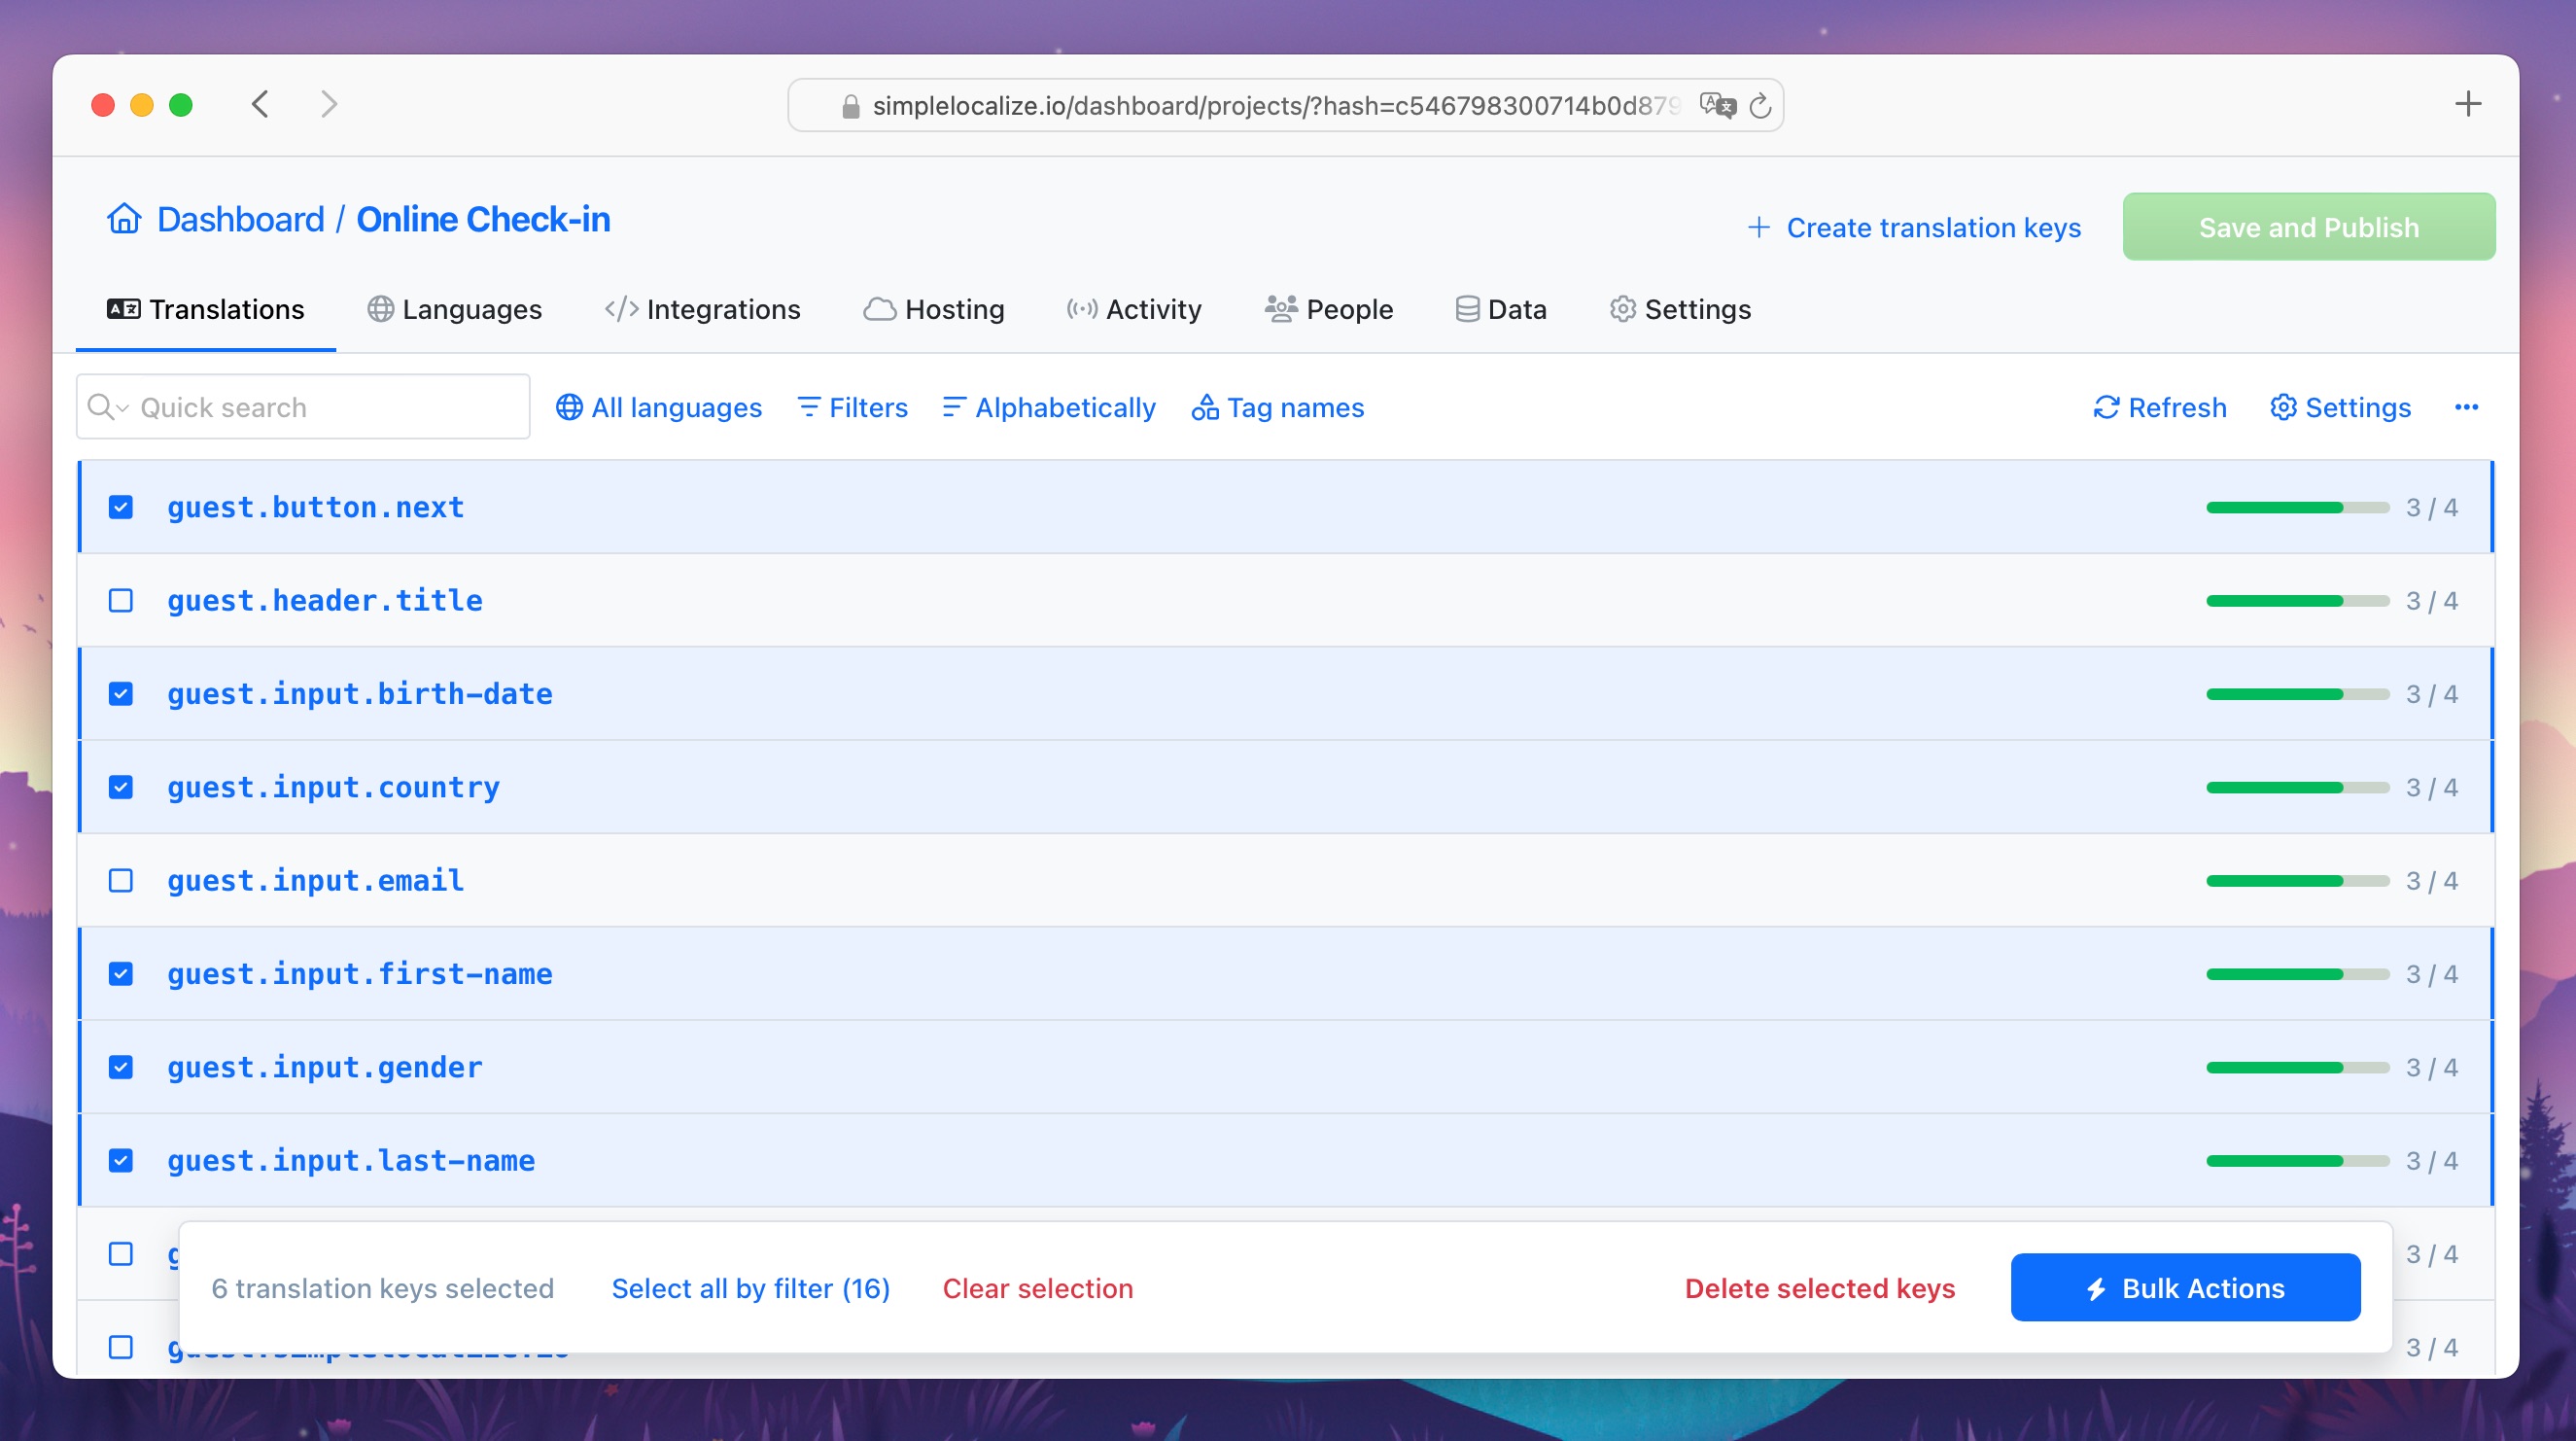
## Available actions
Bulk actions provide you with the following options:
- **Clear translations**: This option remove translations in selected languages for the chosen translation keys.
- **AI Actions**: Apply AI-generated translation modification to the selected translation keys and languages.
- **Change review status**: Apply review statuses to multiple translation keys and their corresponding translations with just a few clicks. This feature is especially useful when starting to use the review option. For instance, you can mark your default language translations as "Accepted."
- **Change key details**: Update key details for the selected translation keys.
- **Change namespace**: Assign namespaces to the selected translation keys.
- **Auto-translate**: Run a bulk auto-translation for the chosen translation keys and languages.
- **Merge translations**: Transfer selected translations easily from one project to another. In cases where translations do not exist in the target project, they will be added; existing translations will be updated based on the translations from the source project.
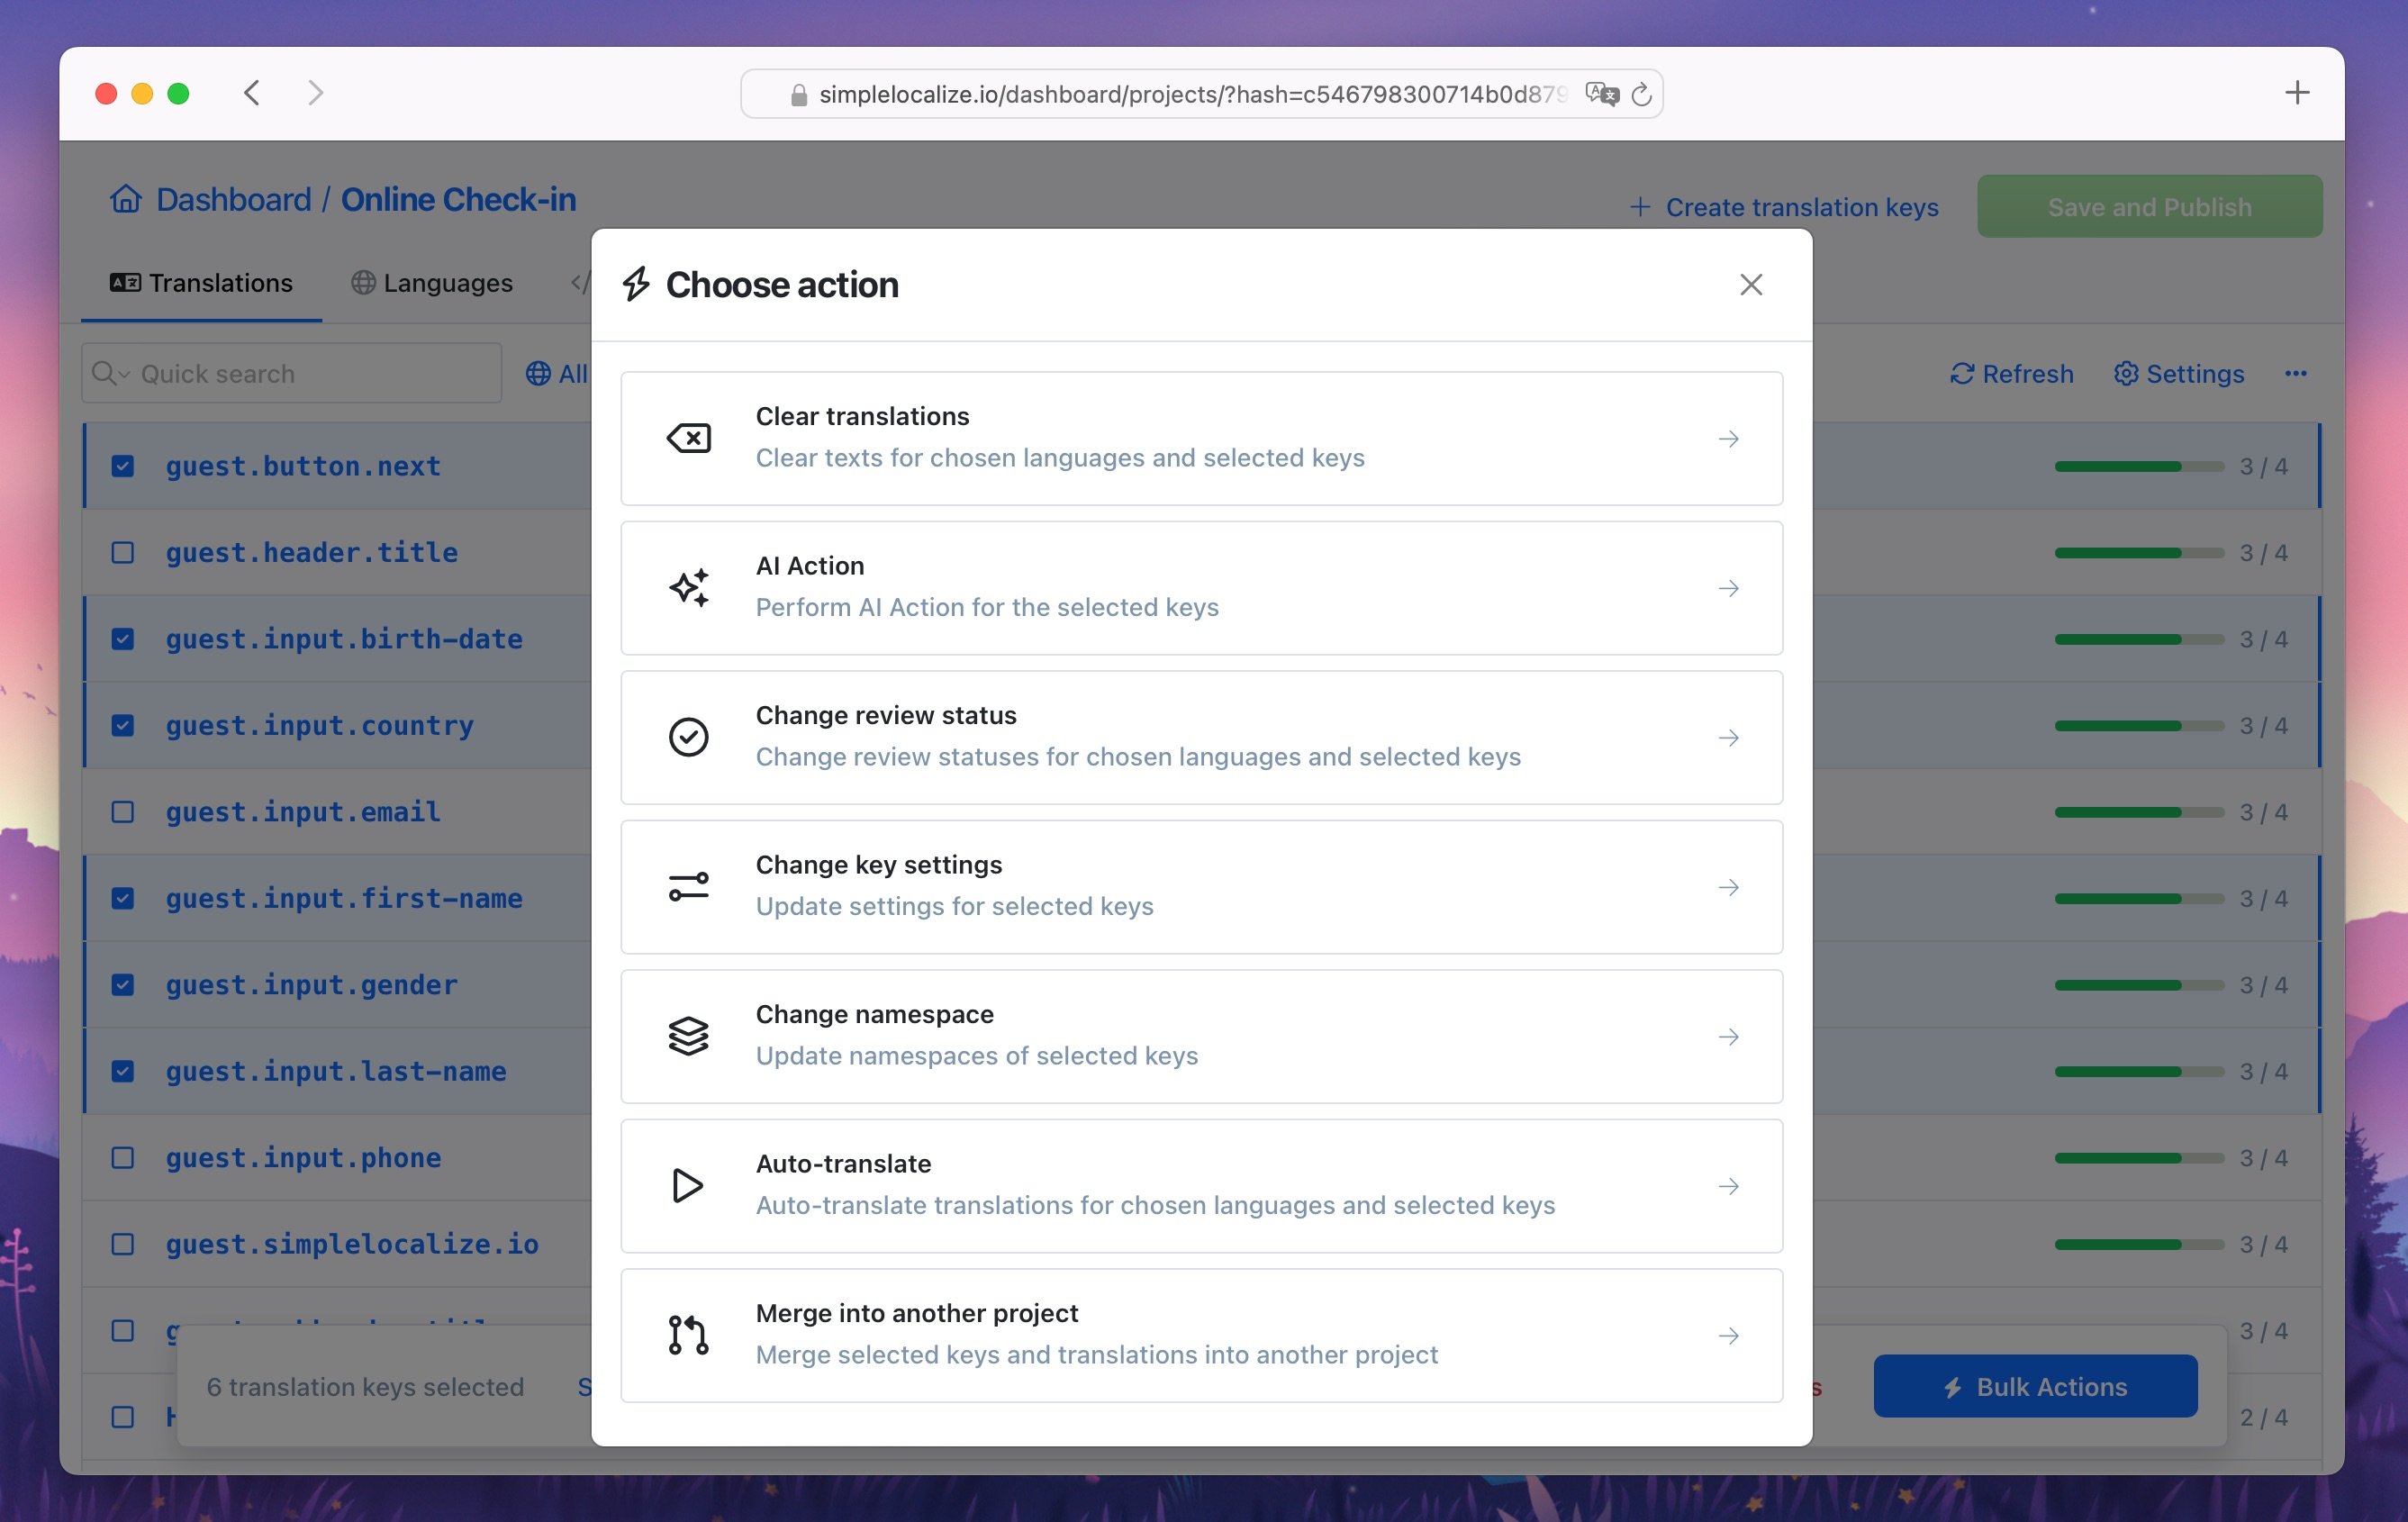
Learn more: [How to manage set of translations and keys with Bulk Actions](/blog/posts/bulk-actions-updating-multiple-translation-keys/)
---
# Translation editor: Comments
Source: https://simplelocalize.io/docs/translation-editor/comments/
Comments are a great way to communicate with your team members and discuss translations. You can use comments to ask questions, provide feedback, or suggest changes. Comments are visible to all team members who have access to the project.
## Enable comments
You can enable or disable comments in the translation editor settings. Go to Quick Actions section and click on the toggle button to enable comments.
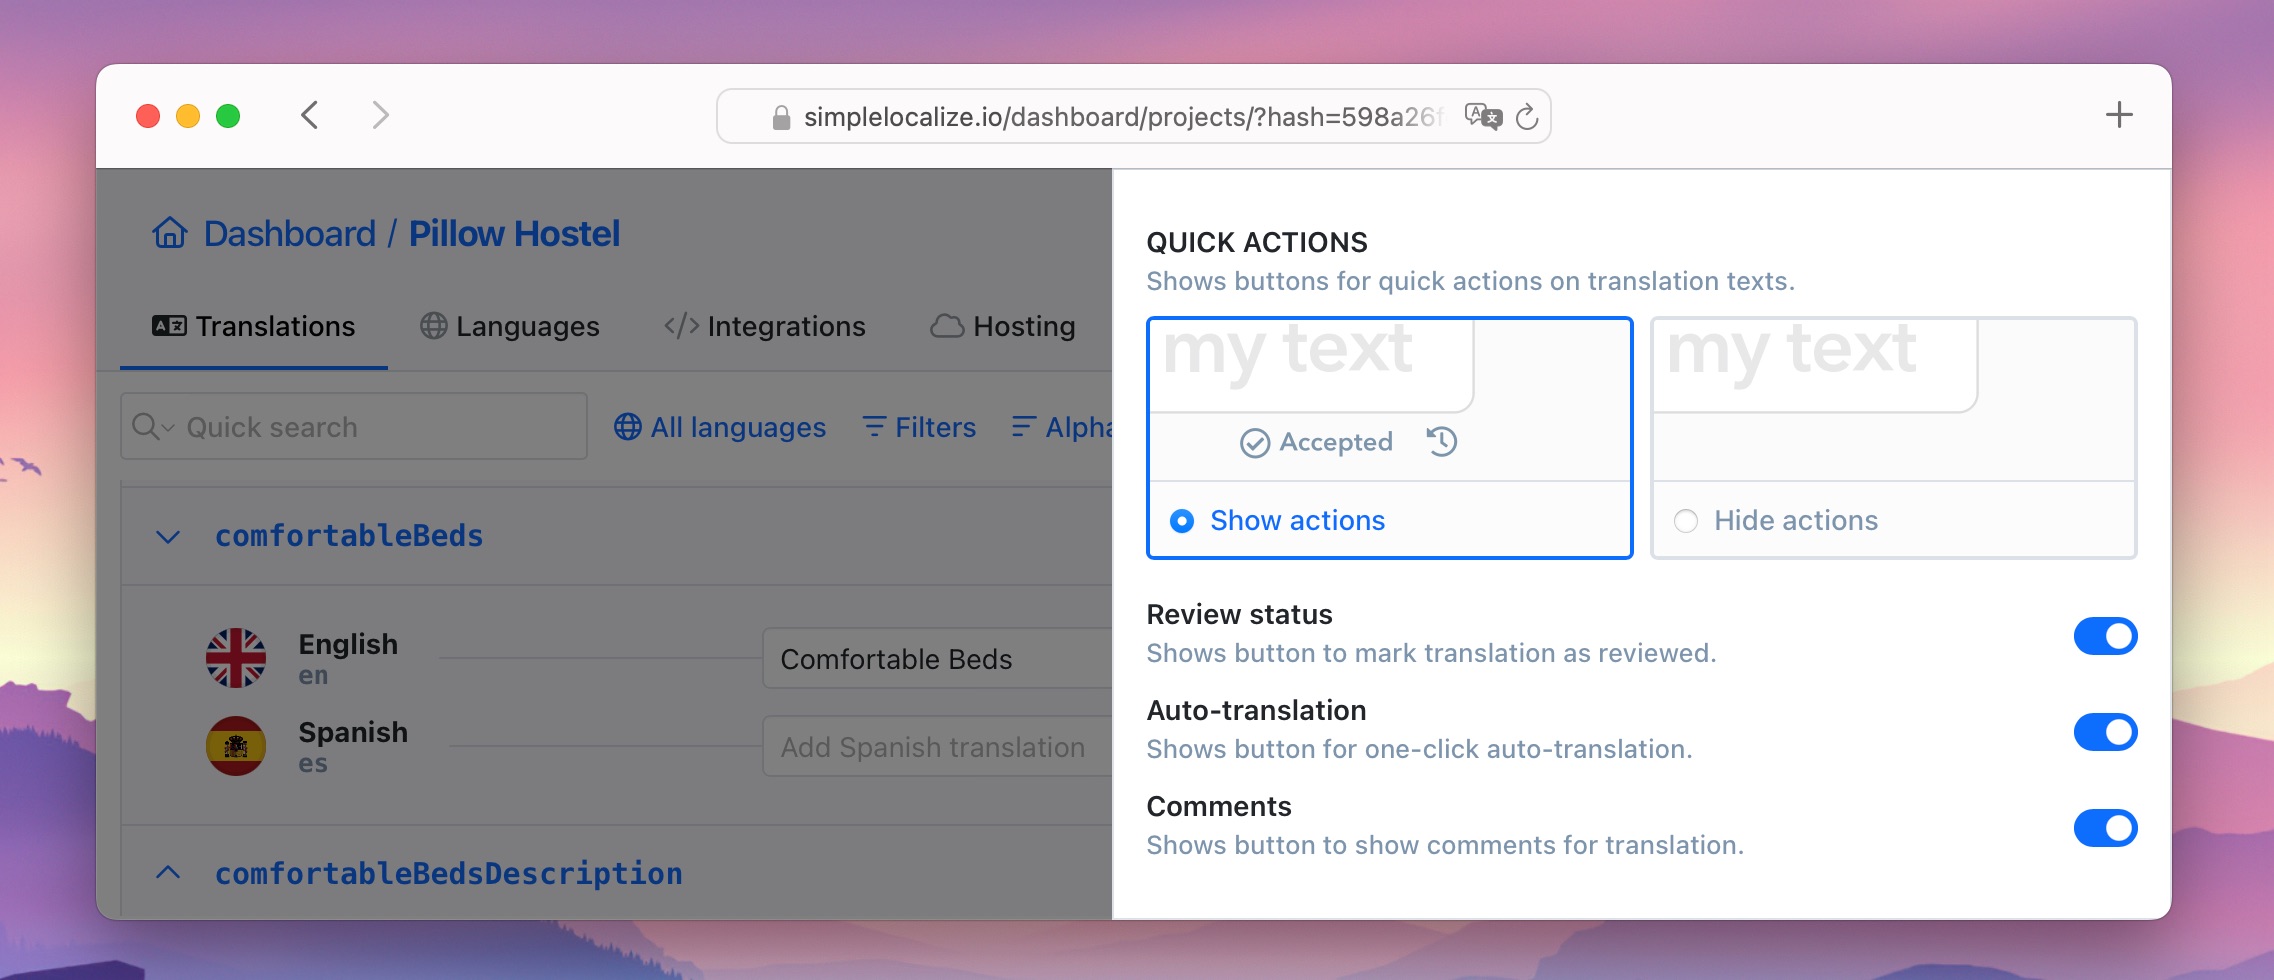
## Add comments
To add a comment, click on the comment icon next to the translation. Enter your comment in the text field and click **Send comment**.
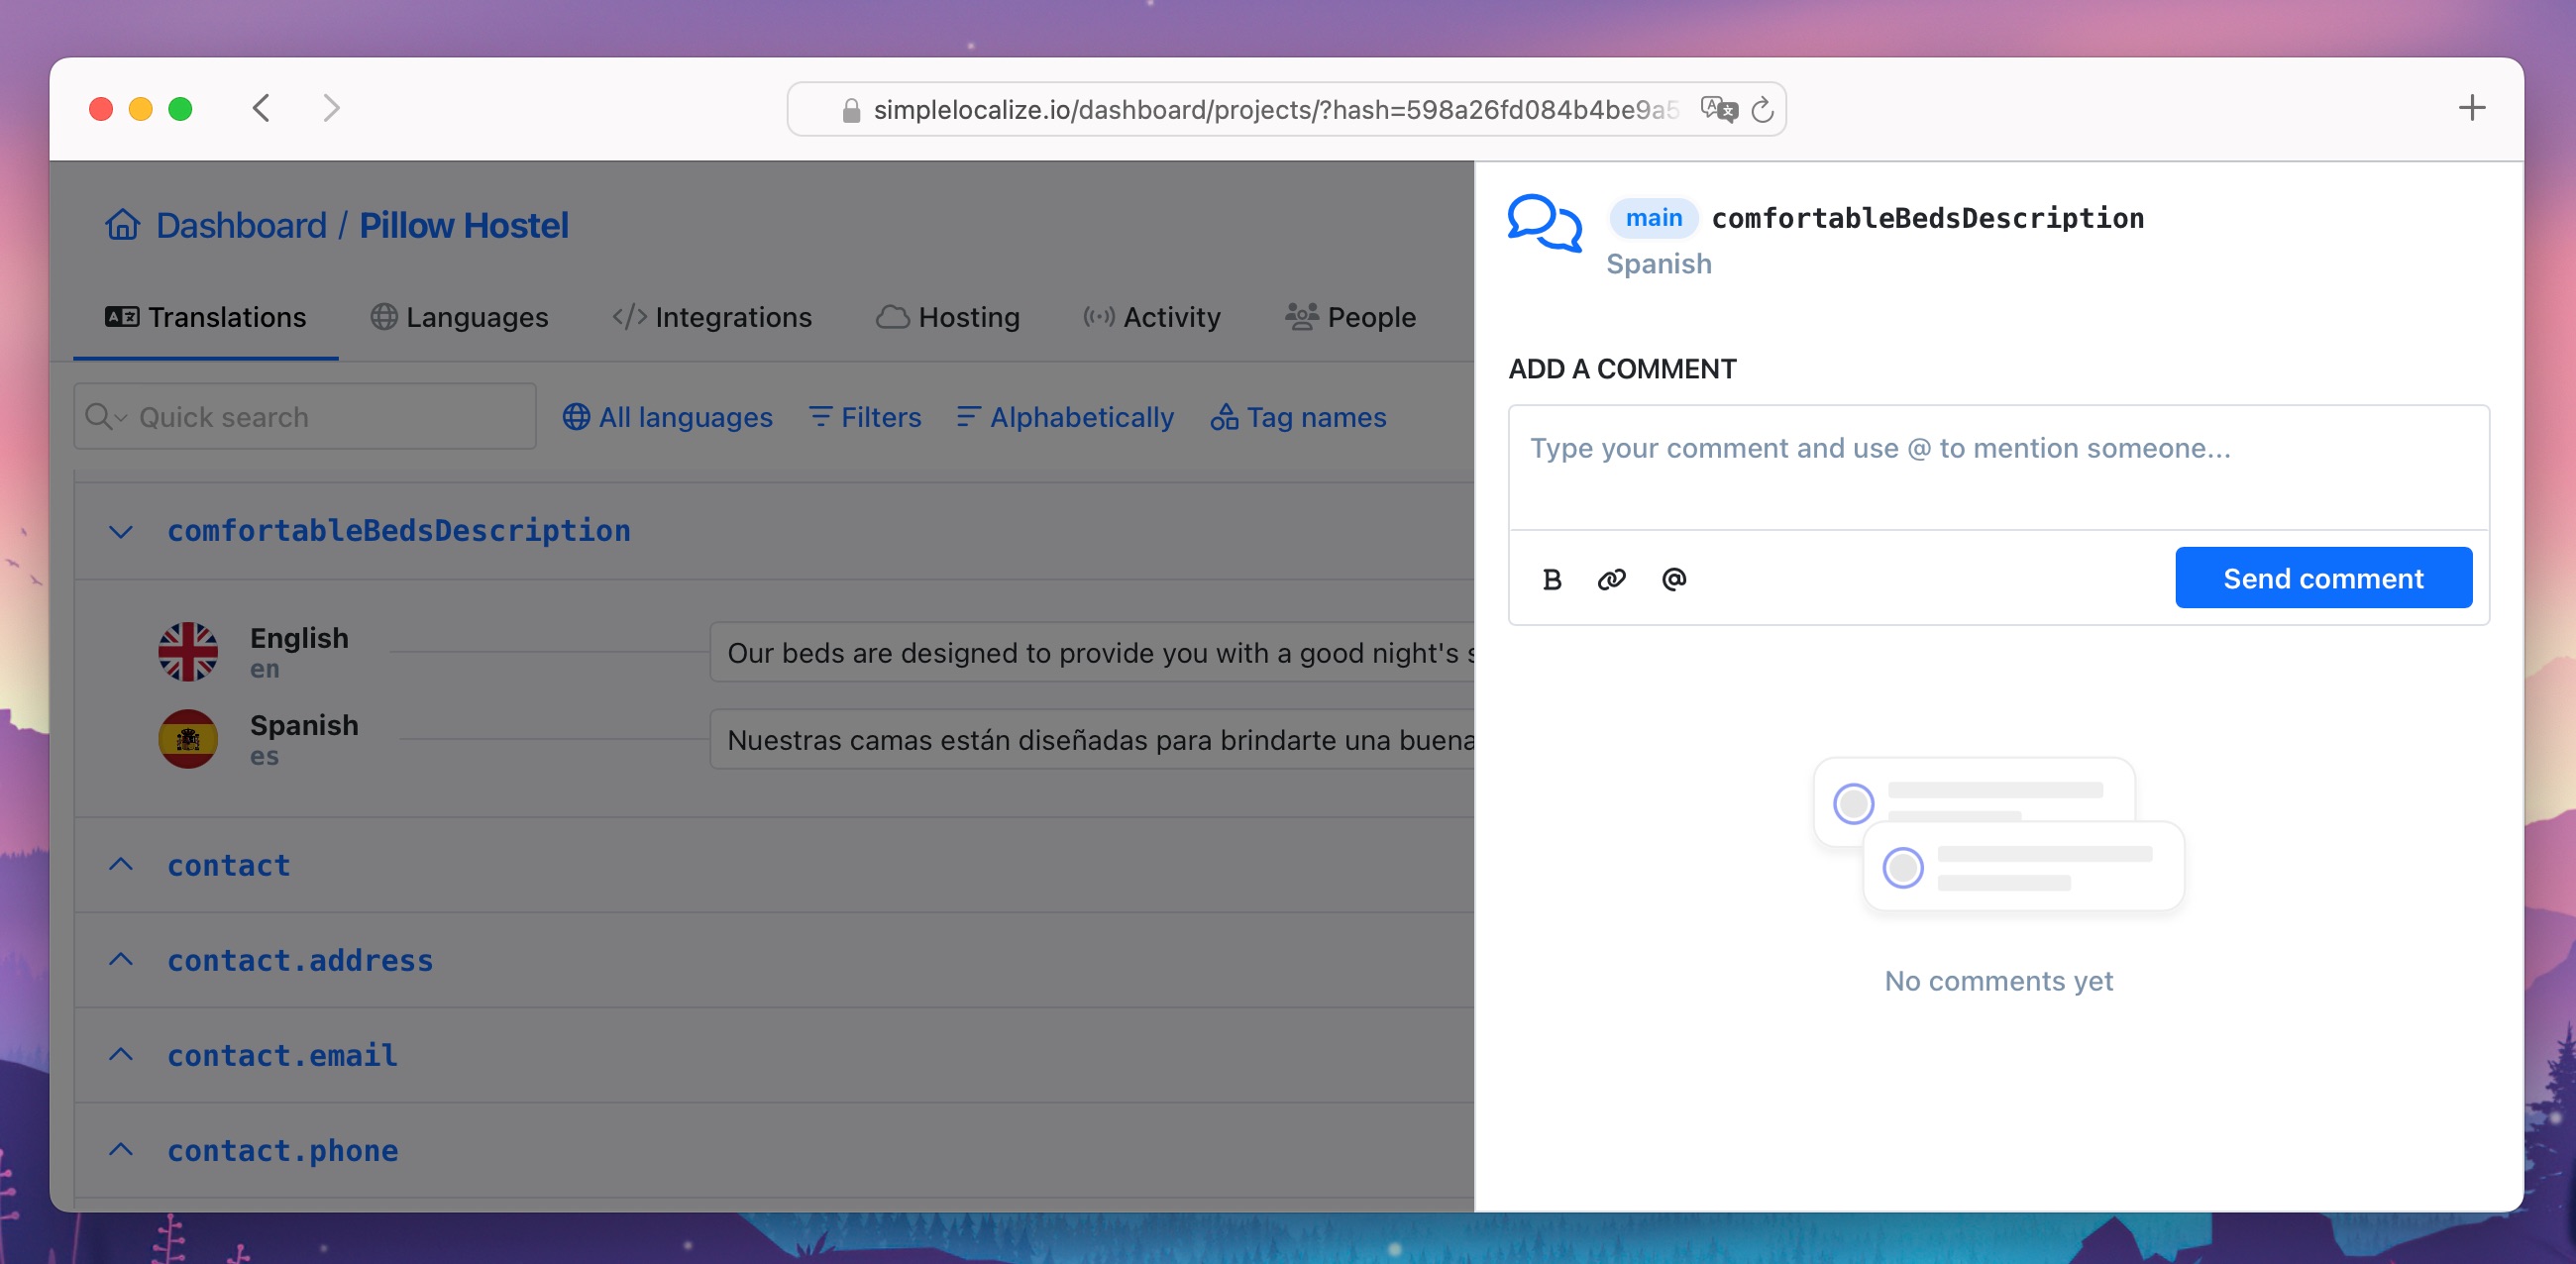
When adding a comment, you can mention a team member by typing `@` followed by their name. The team member will receive a notification about the mention.
## Notifications
You will receive an email and in-app notification when someone mentions you in a comment.
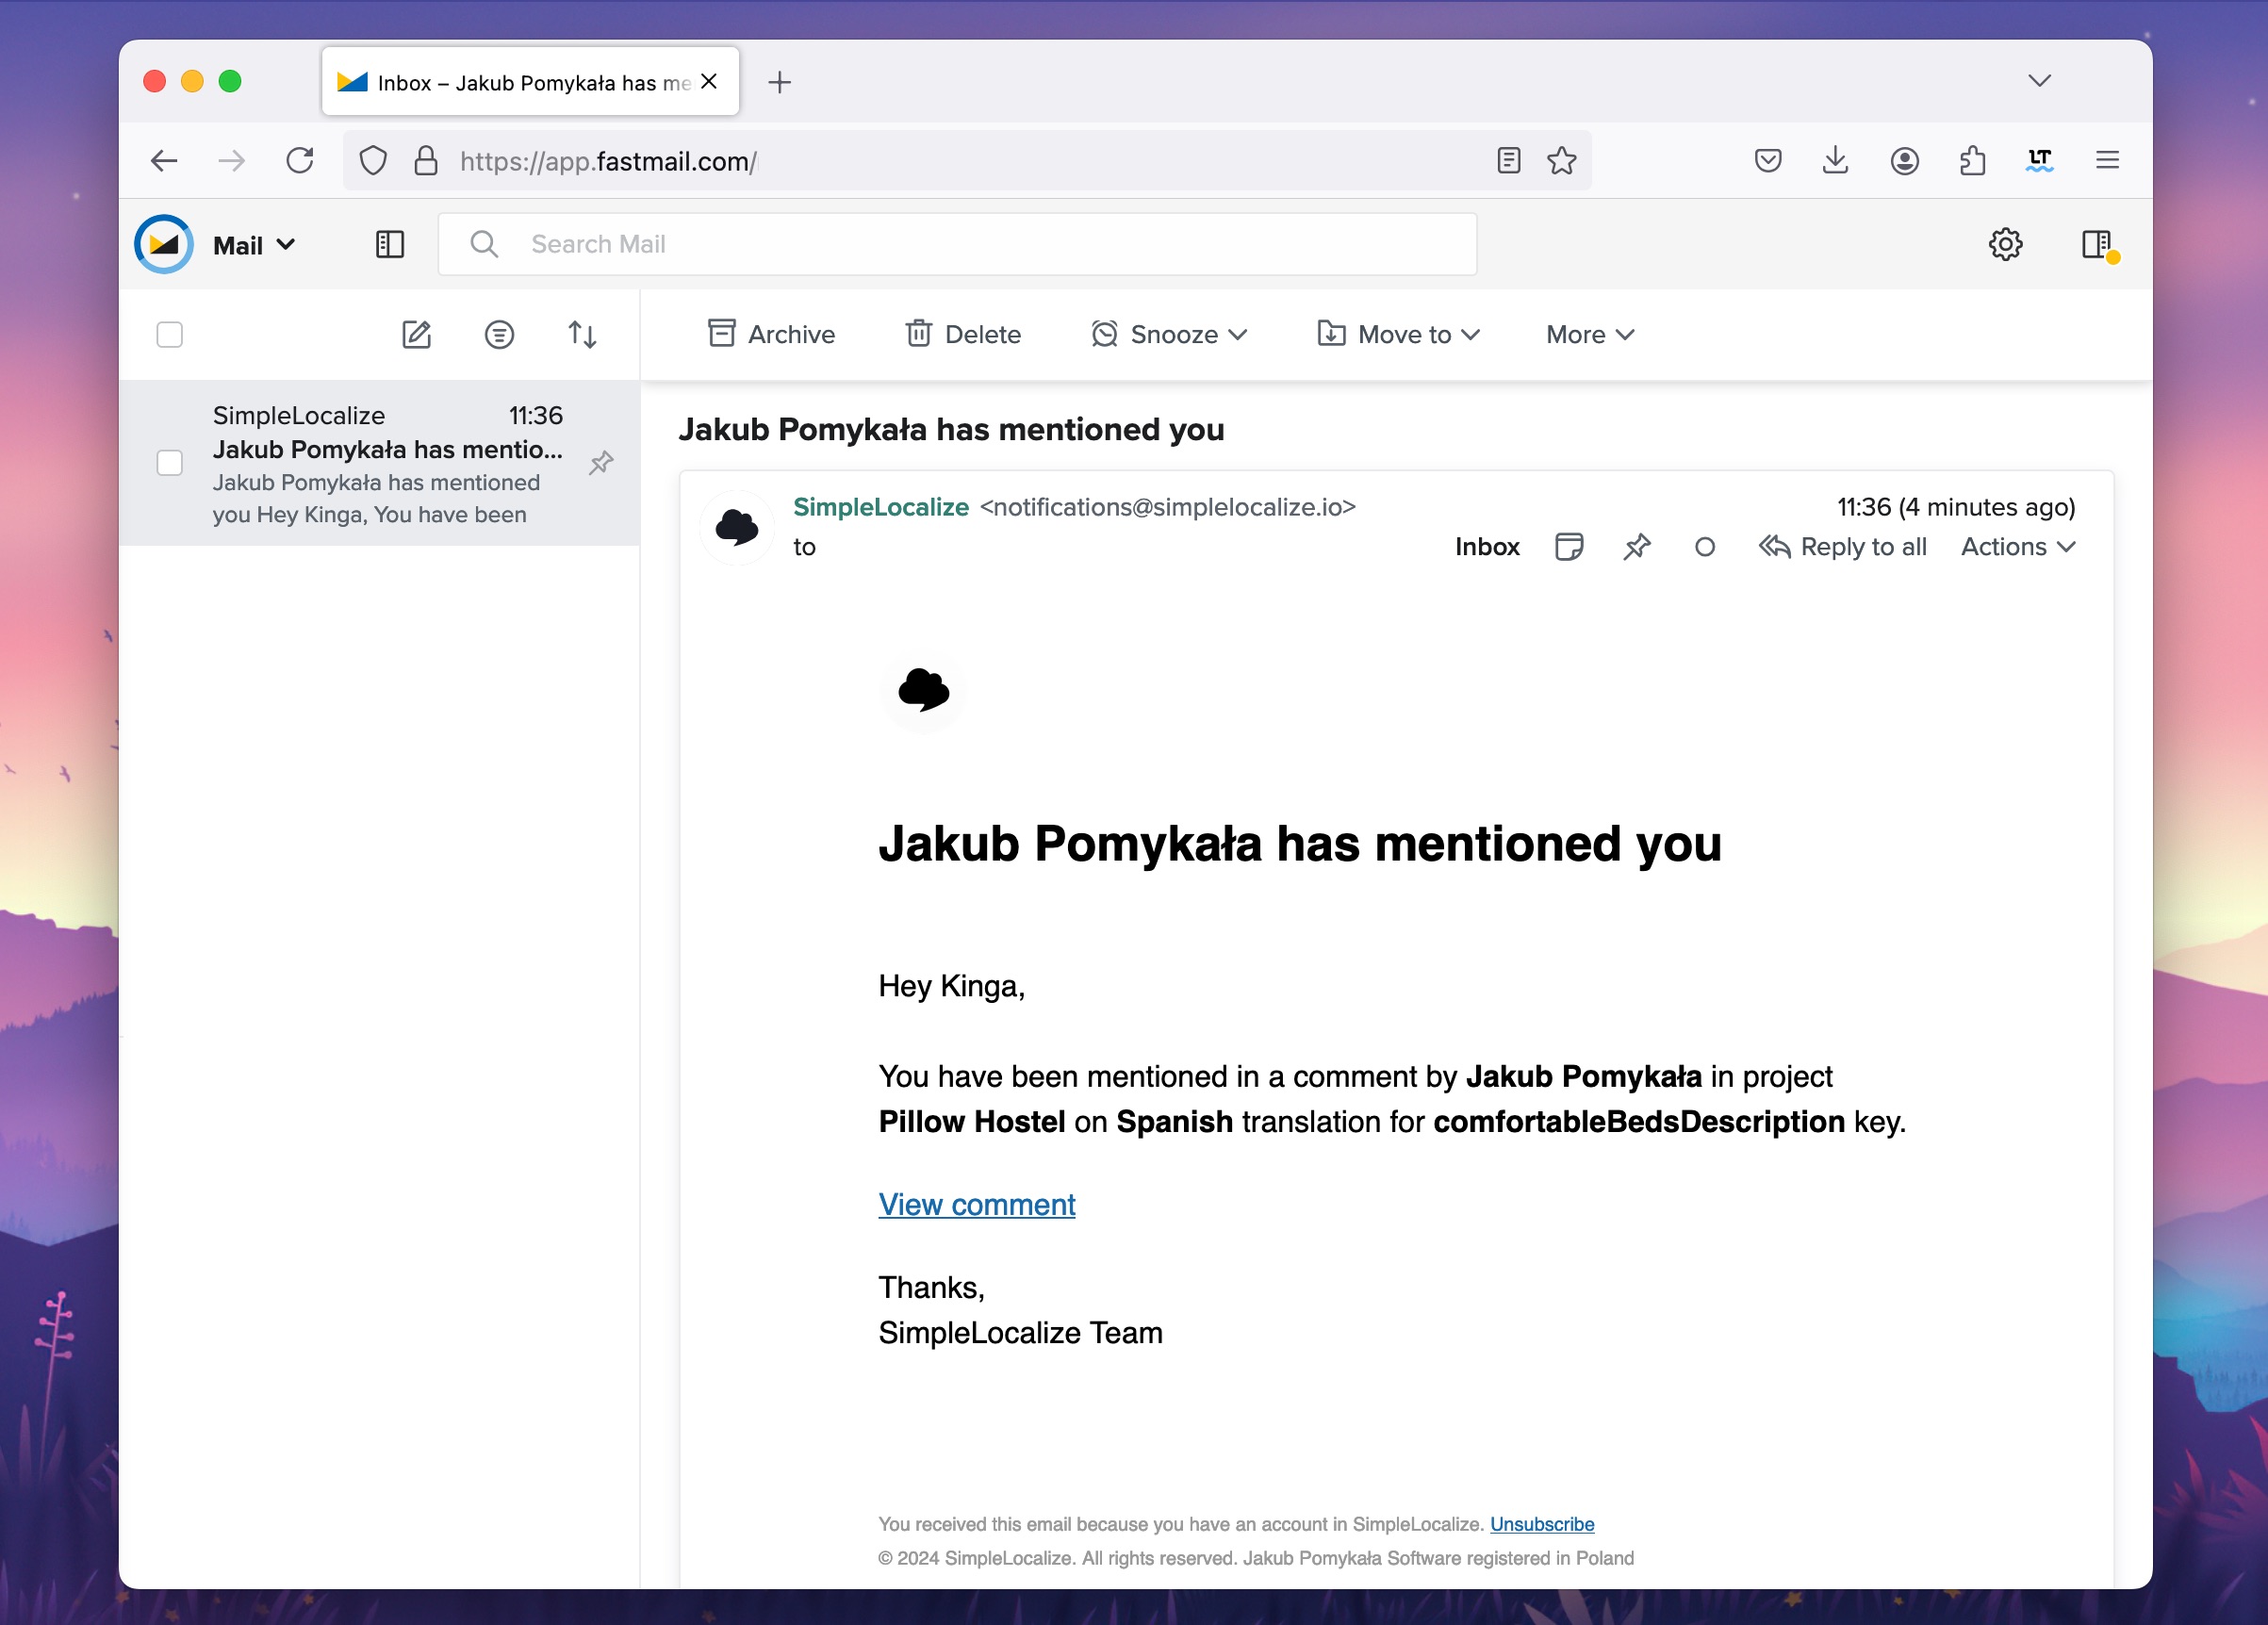
Unread comments are marked with a blue dot in the translation editor.
You can **enable or disable email and in-app notifications** for comment mentions and new comments in your profile settings.

## Activity
You can view the activity of all comments in the **Activity** tab. The activity tab shows all added comments which you can open and reply to.
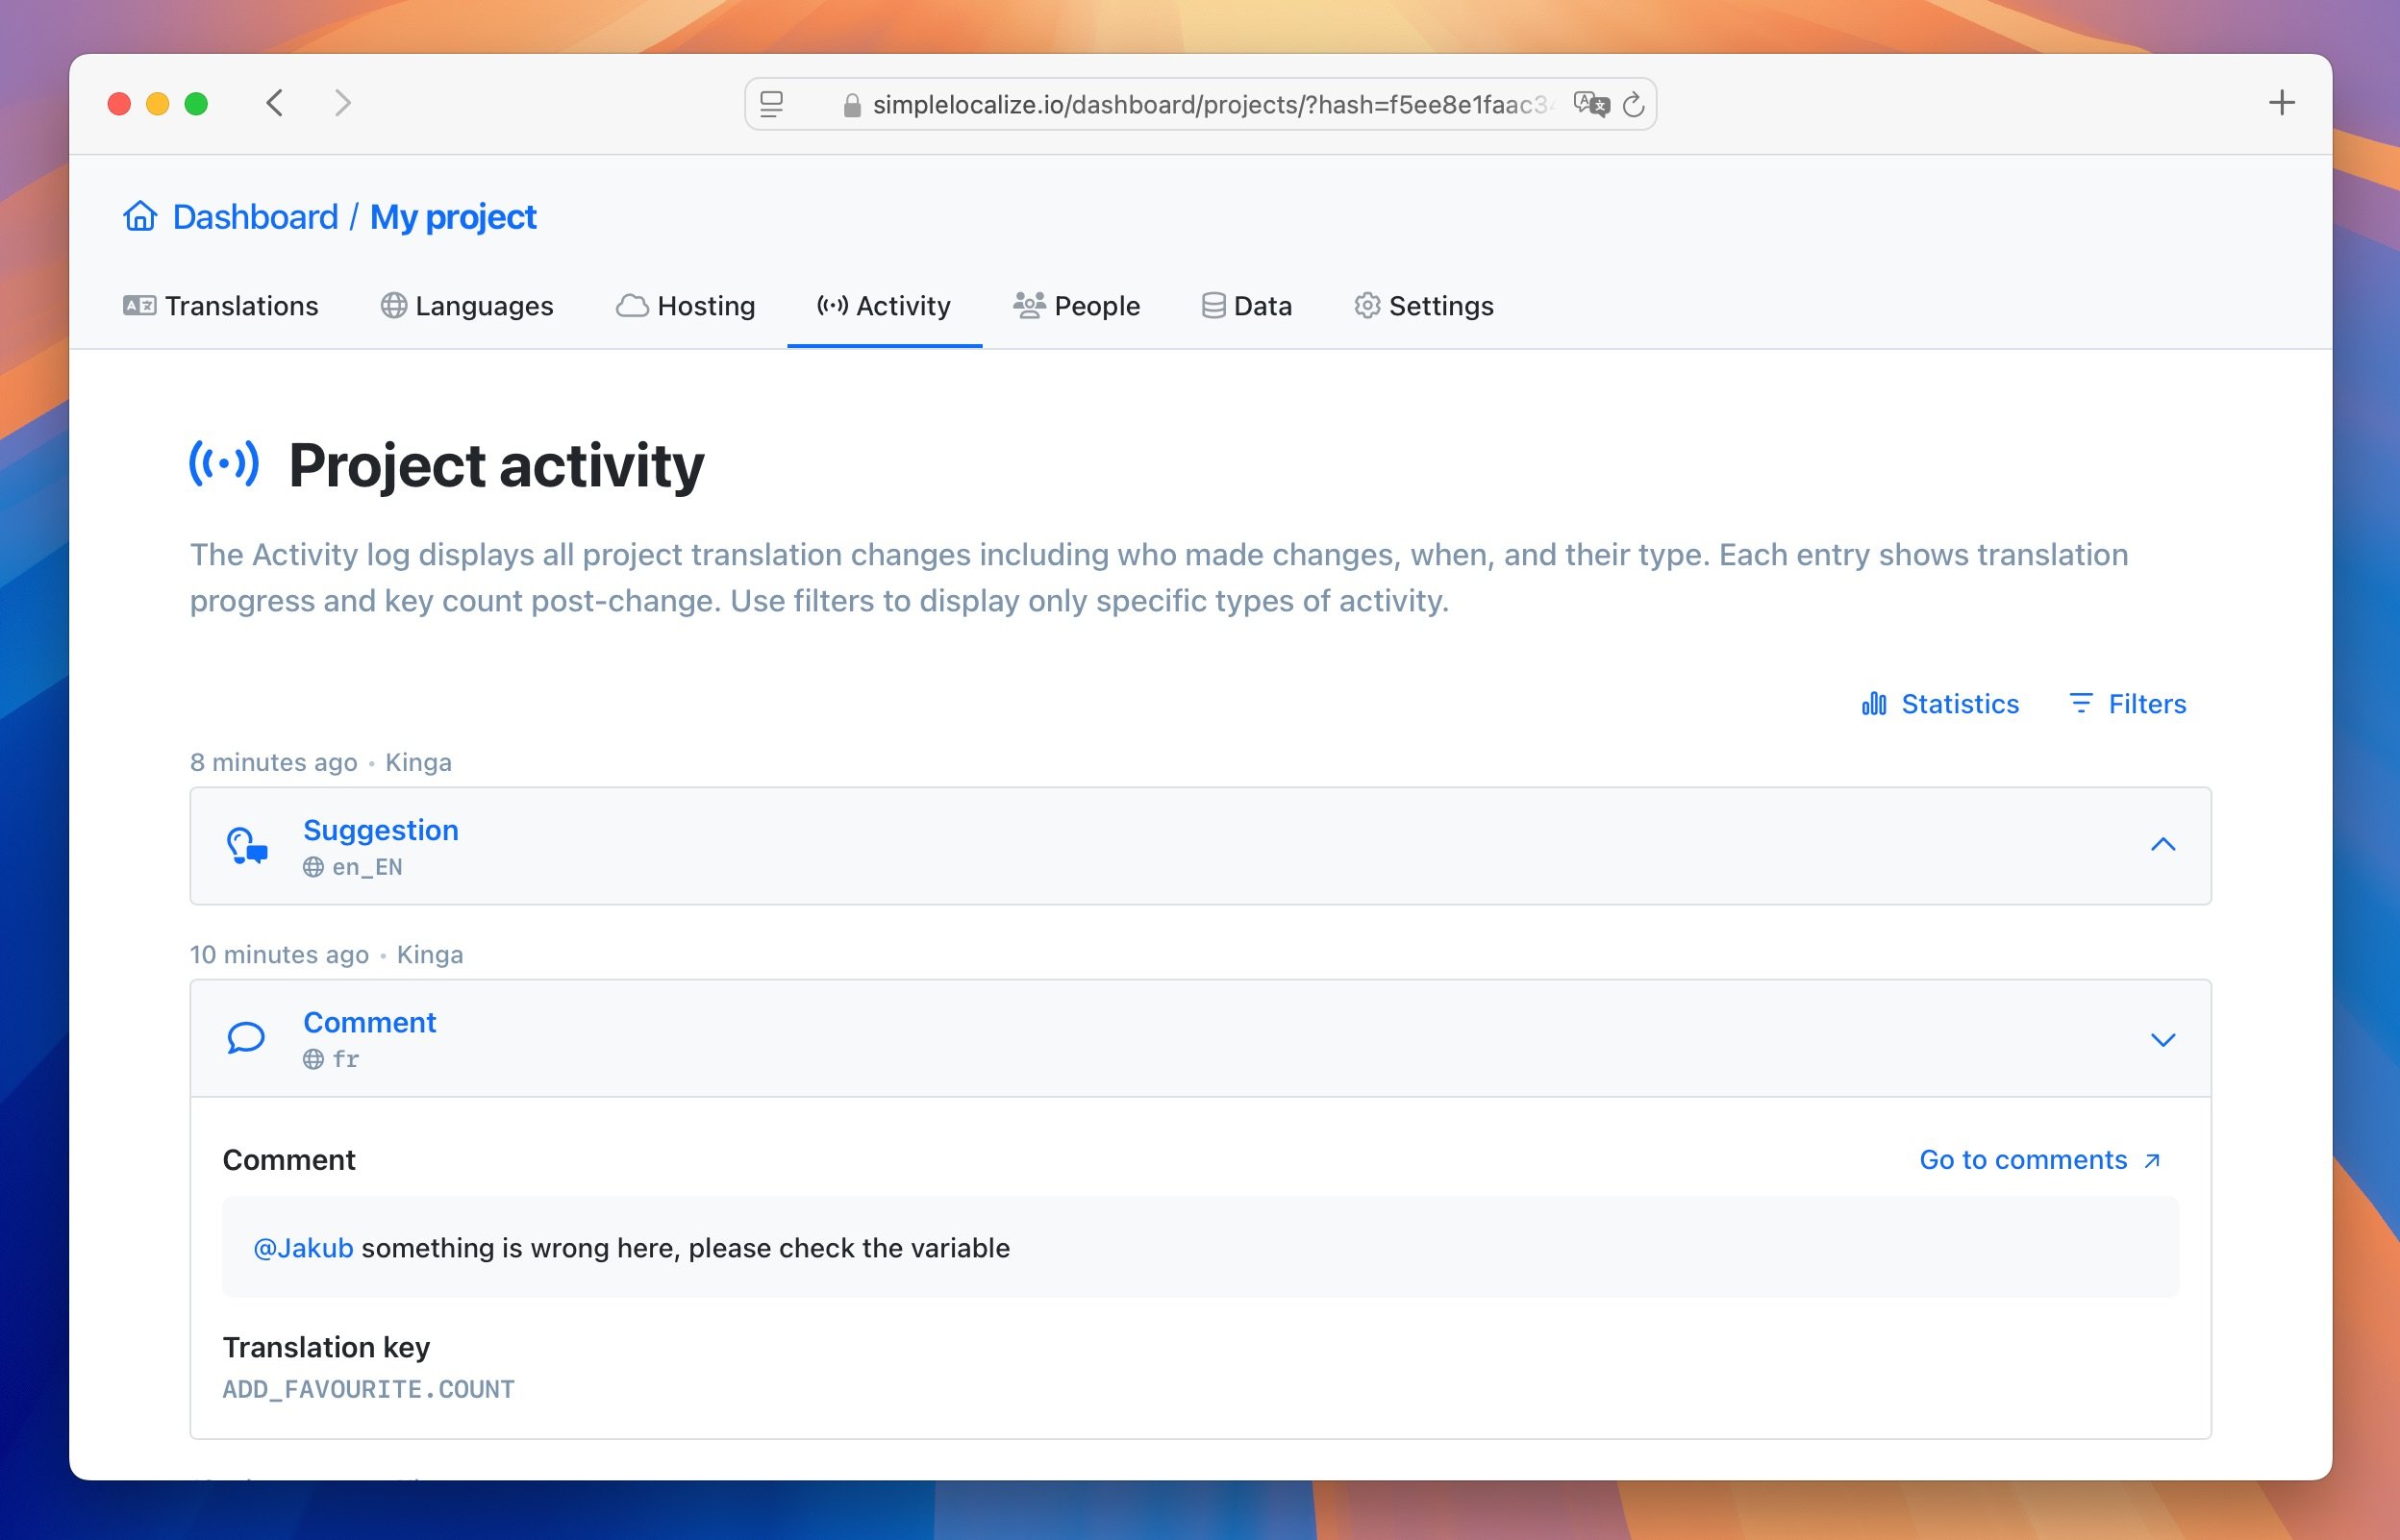
---
# Translation editor: QA Checks
Source: https://simplelocalize.io/docs/translation-editor/qa-checks/
QA checks help you identify potential issues in your translations, such as missing variables, inconsistent punctuation, or formatting errors. They run automatically as you translate, for all translation changes (in the editor, via API, CLI and integrations).
> For QA checks to work, select your [default language](/docs/general/languages/#default-language) in the **Languages** tab to compare translations against it.
## Types of QA checks
QA checks can identify over 30 types of issues in your translations, including:
- Missing variables
- Variables and placeholders
- Punctuation
- Capitalization issues
- Inconsistent spaces
- Formatting issues (e.g., HTML tags)
- Length issues including character limits
- Unicode problems
- And more...
**We do not use any third-party services for QA checks.** All checks are implemented in-house and run directly in your browser or on our servers. Your translations are not sent to any external services for analysis.
Suggestions are powered by in-house AI models and OpenAI services when in-house solution are not available.
Fixing translations with "Suggest a fix" doesn't use your auto-translation character credits.
## Enable QA checks
QA checks are active by default. You can show or hide them using the "Quality issues" toggle the Translation Editor settings.
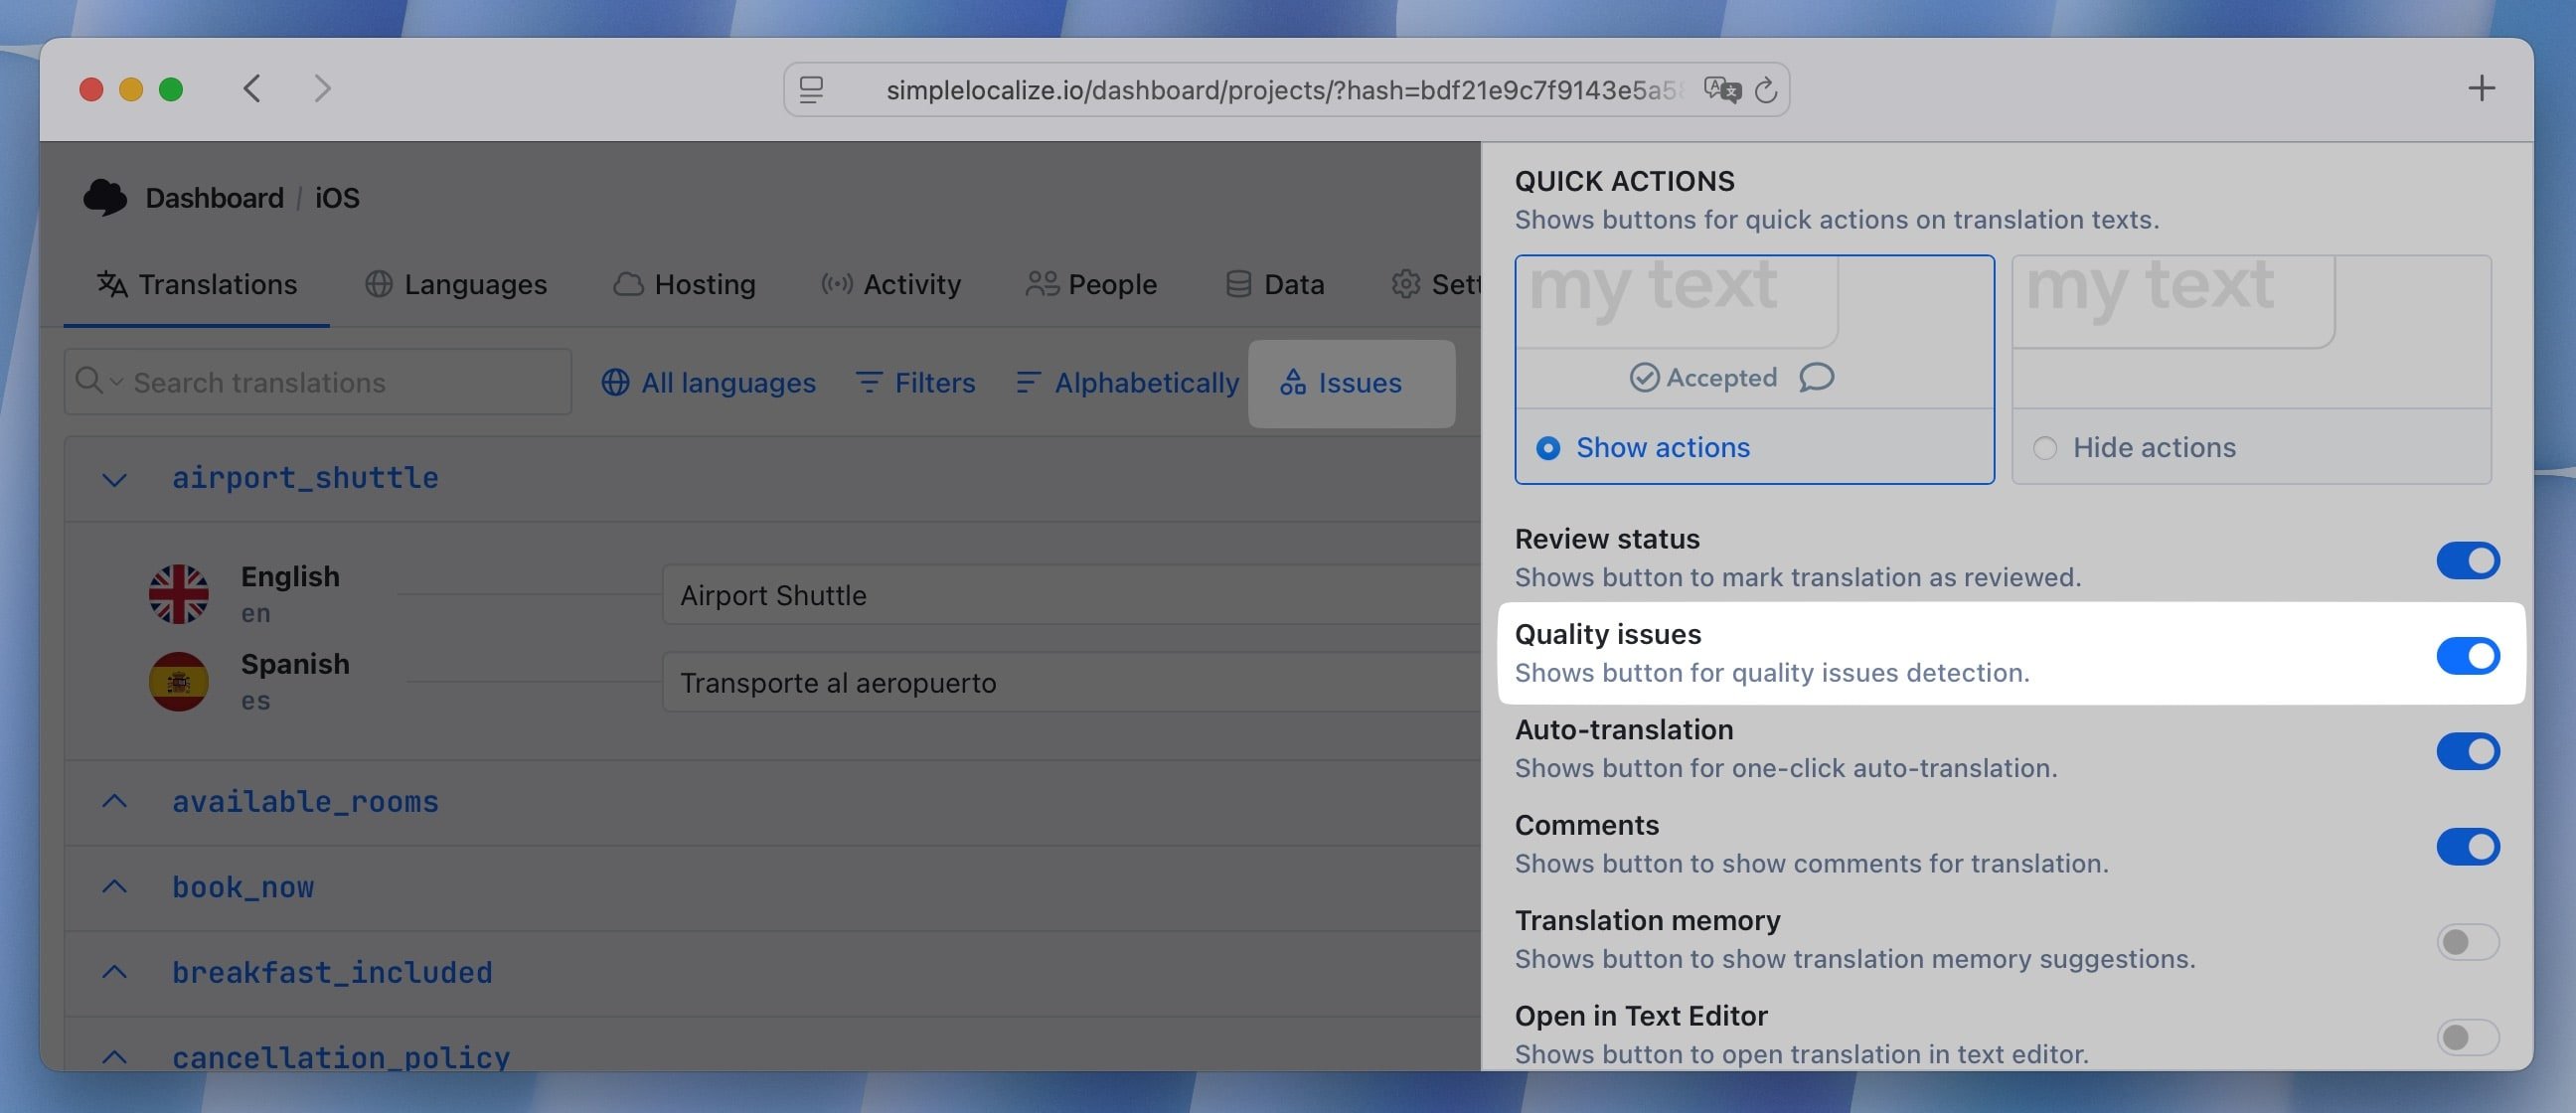
When enabled, the List View will show a **QA issues indicator** next to each translation key that has issues in its translations.
QA checks **run live as you translate**, and the issues are highlighted in the editor.

To see the details of the issues, click on the QA issues indicator or open the **Quality issues** panel.
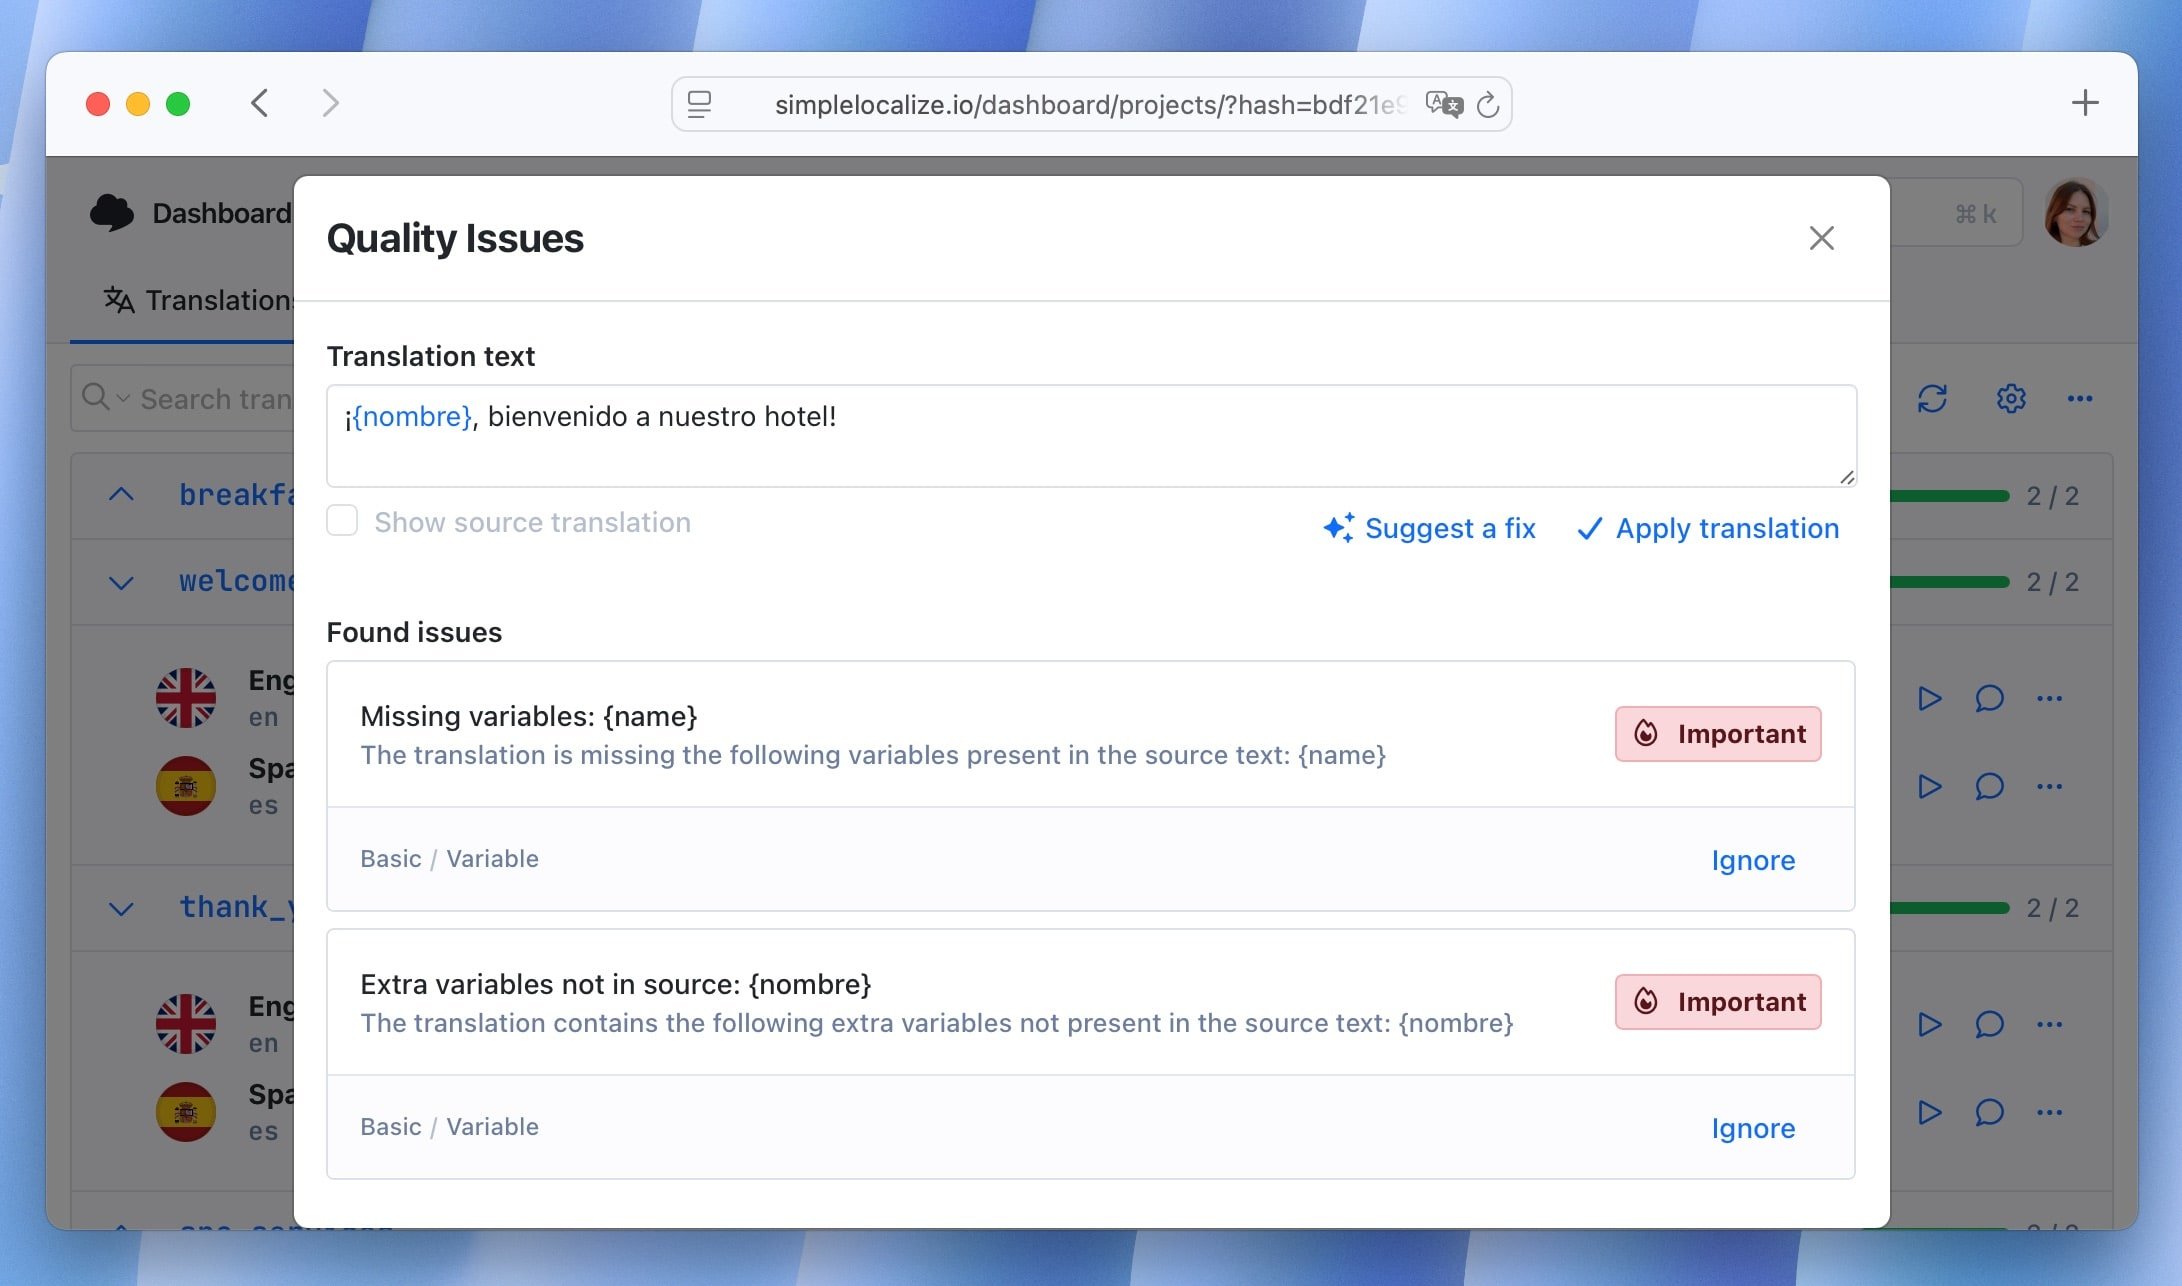
## AI-powered fixes
Edit your translation manually or use the **Quality issues** panel to fix issues directly with AI-powered suggestions. Click on the **Suggest a fix** option to get suggestions for fixing the issues.
When you are satisfied with the suggestion, click **Apply suggestion** to update your translation.

You can fix all issues at once. Click on the issues indicator in the translation key row to open the **Quality issues** panel, then click on **Suggest fixes for all issues**.
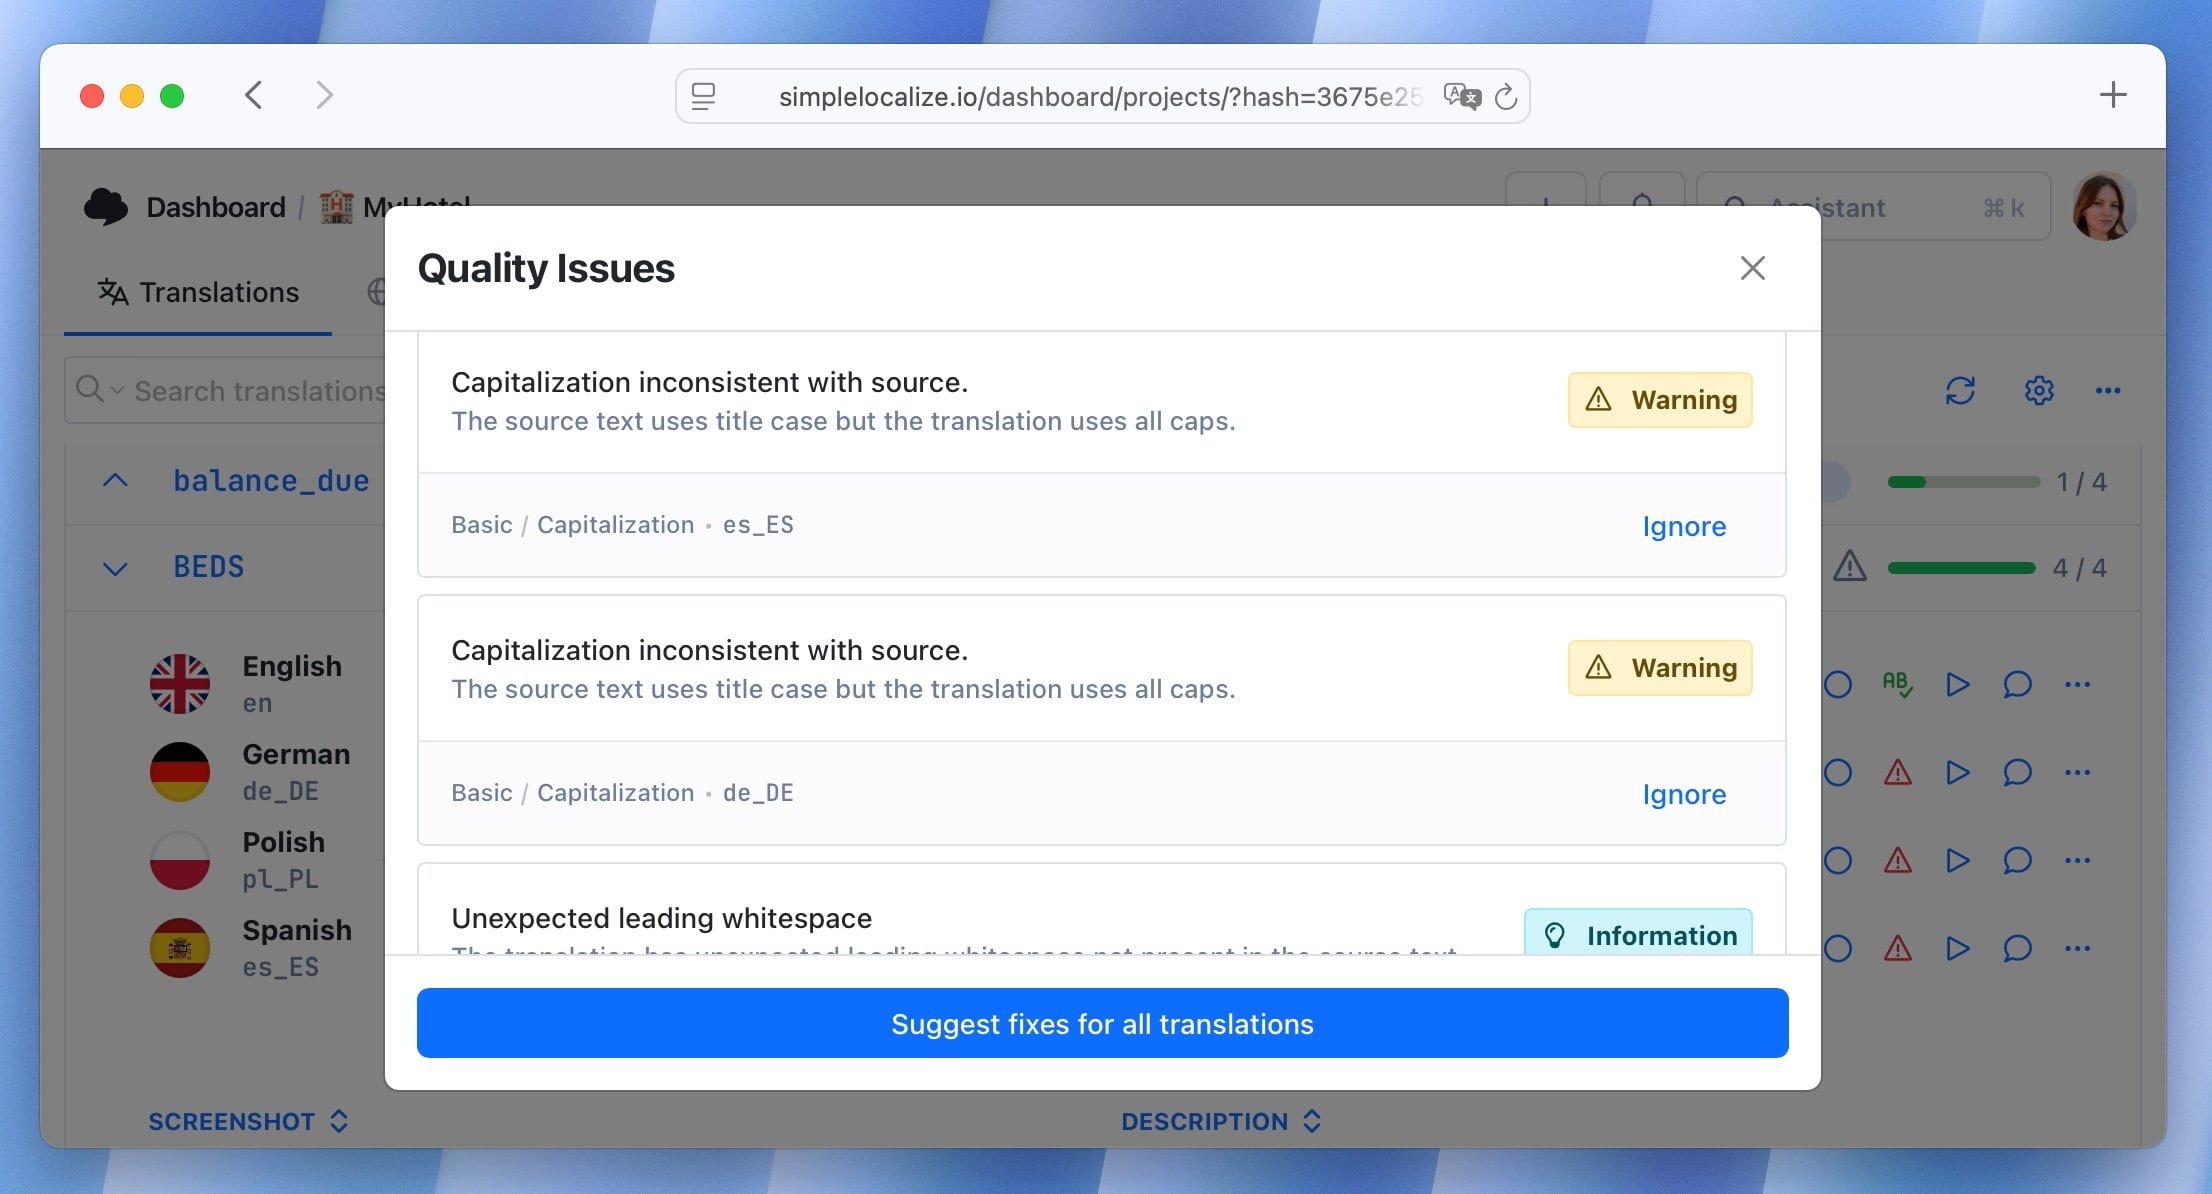
## Ignore QA issues
You can ignore specific issues or all issues for a translation. To ignore specific issues, open the **Quality issues** panel and click on the **Ignore** option next to the issue you want to ignore.
Ignored issues will appear in the **Ignored issues** list and will not be included in the QA issue count.
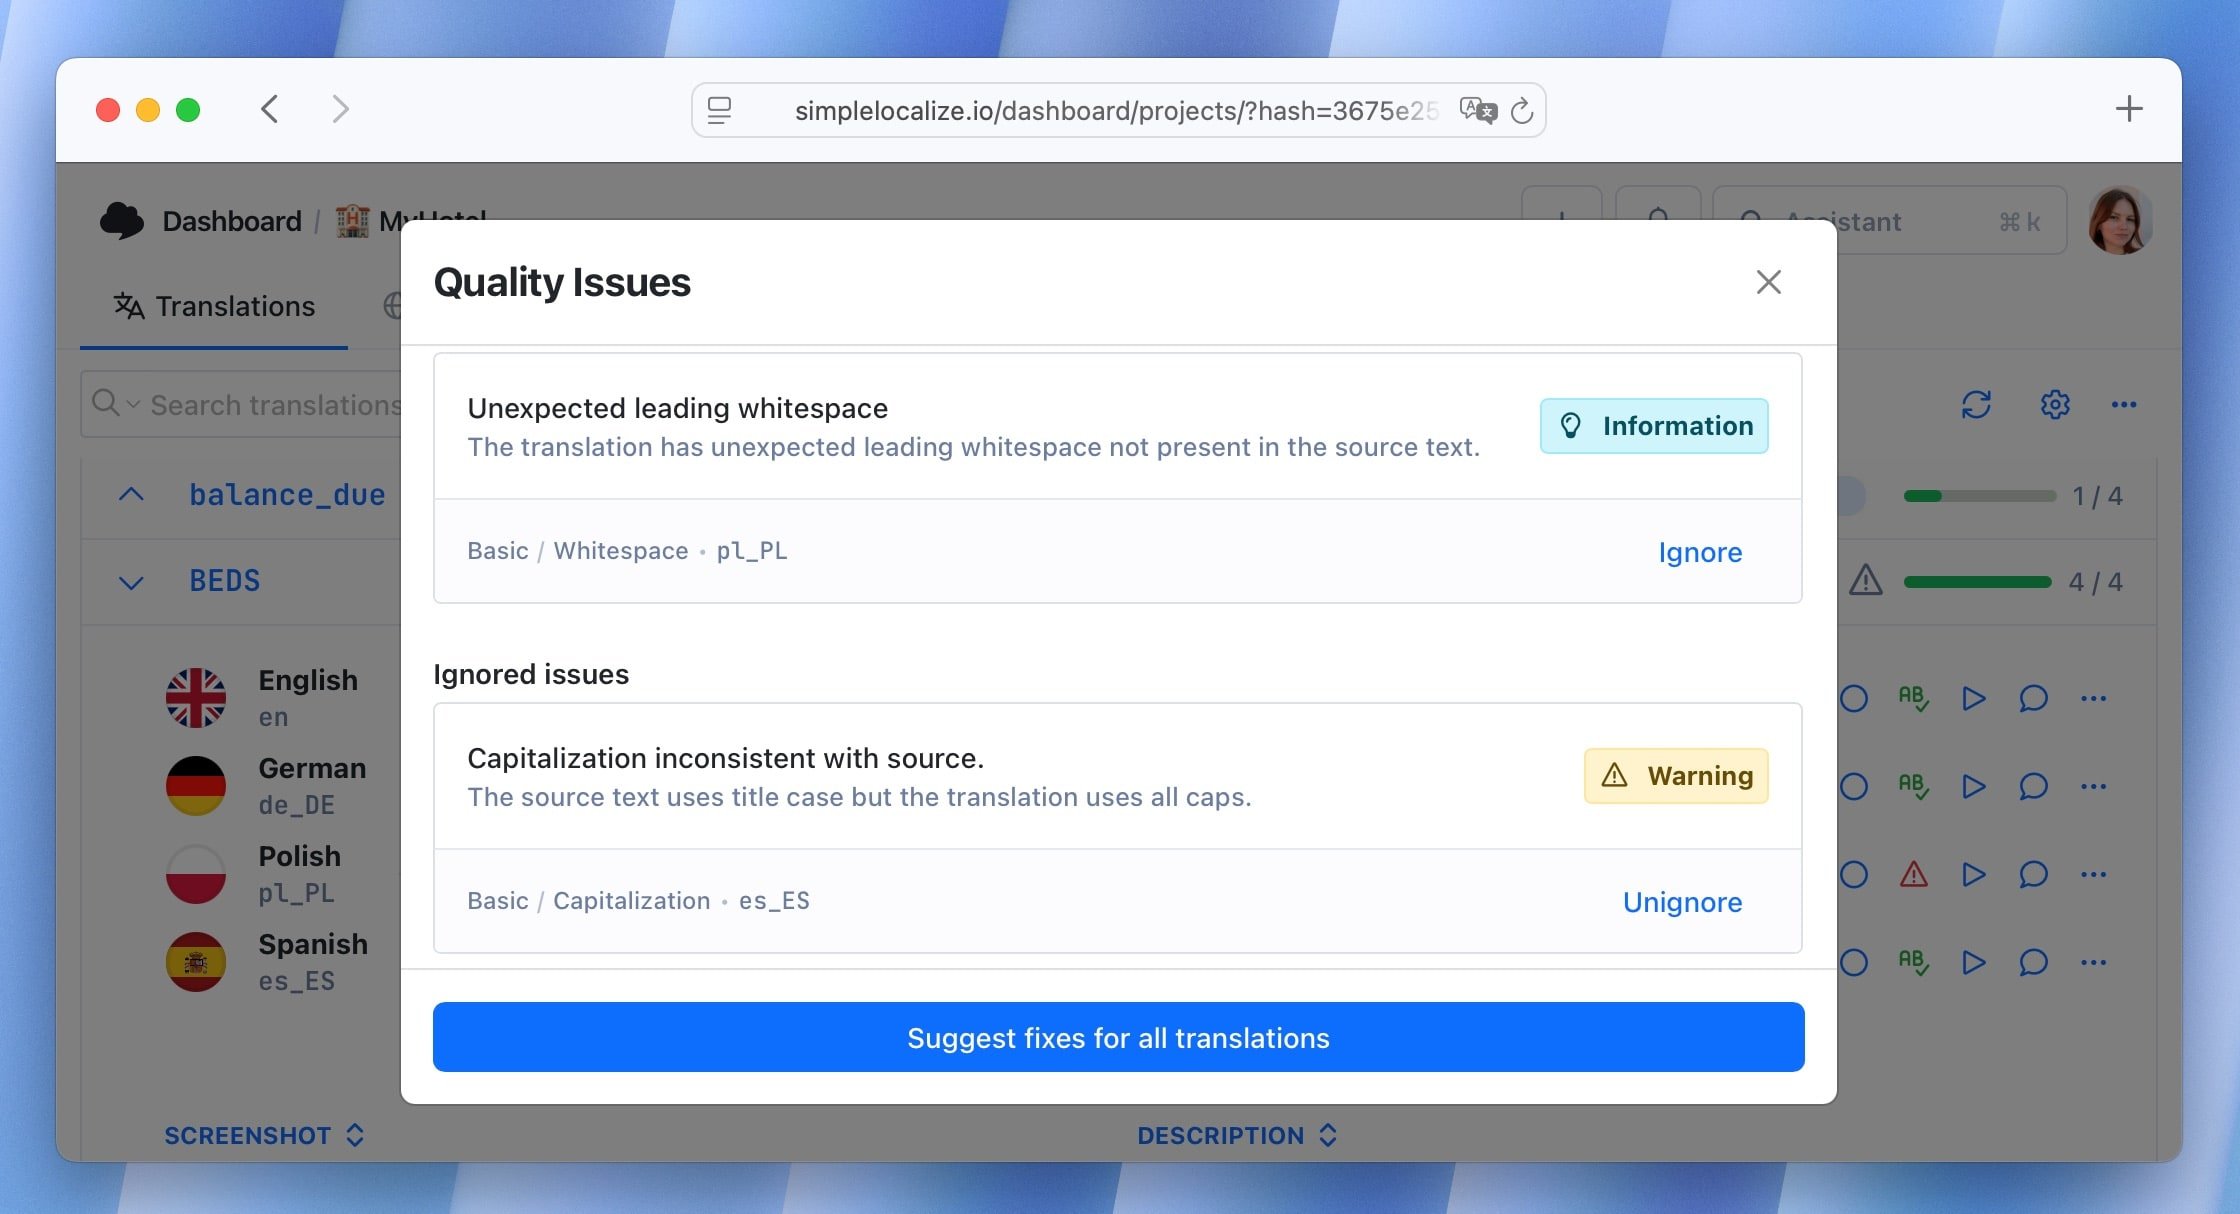
## Run QA checks manually
You can run QA checks manually for all translations in your project. To do this, click the Actions button and select **Run quality checks**.
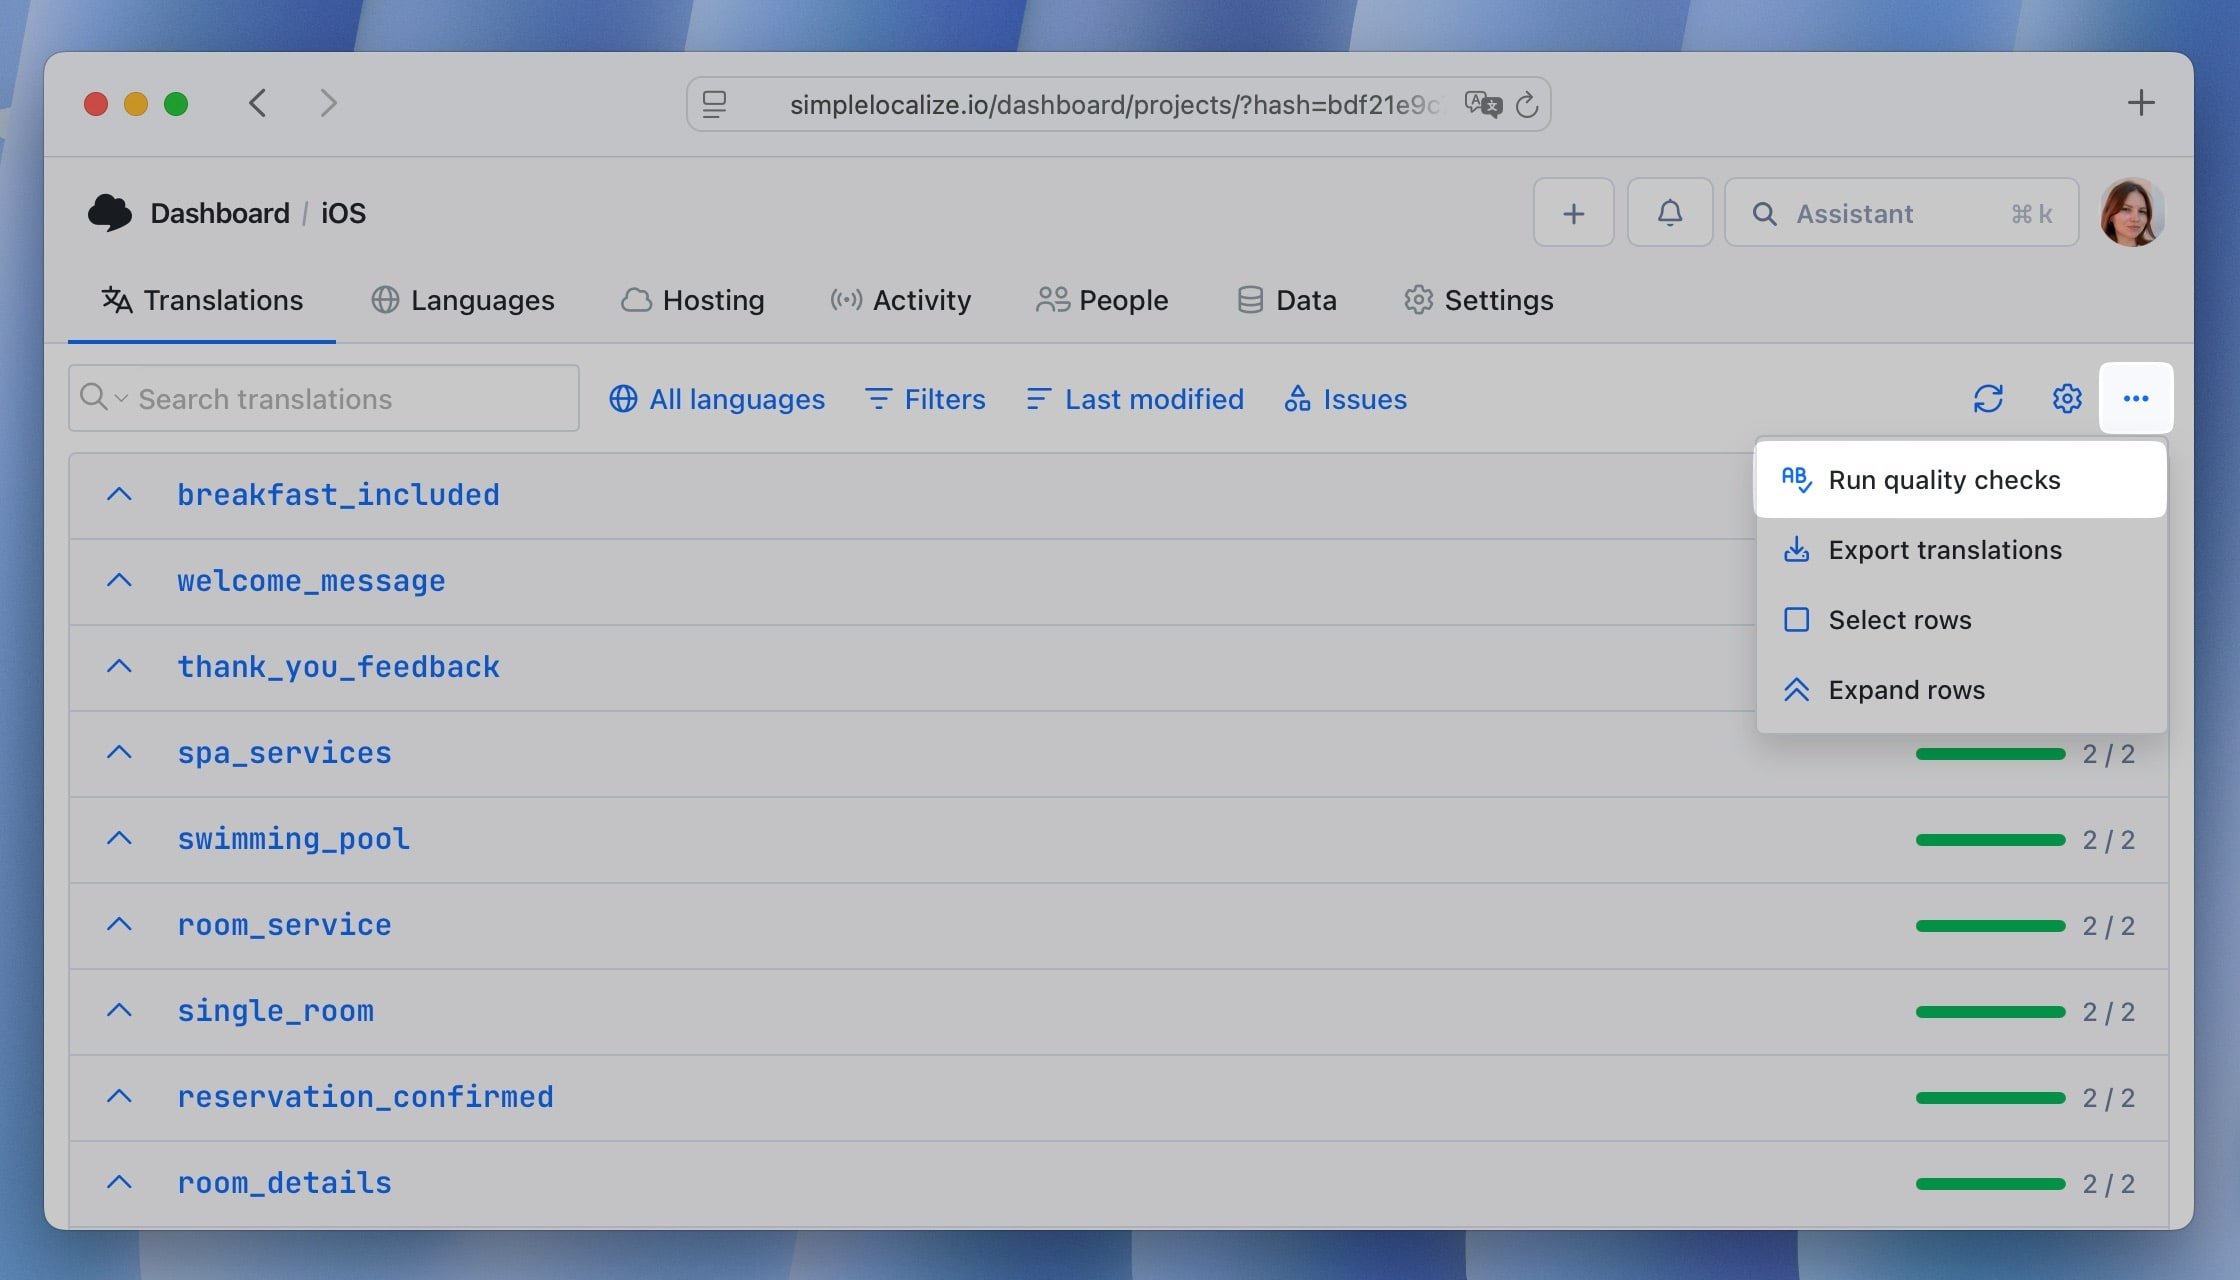
## QA checks configuration
You can configure which QA checks are enabled for your project. To do this, go to the **Settings** tab in your project and select **QA Checks**.
Some checks are grouped under one type. For example, the **Punctuation** type covers both ending punctuation and quote count mismatch checks, so disabling it turns off all of them.
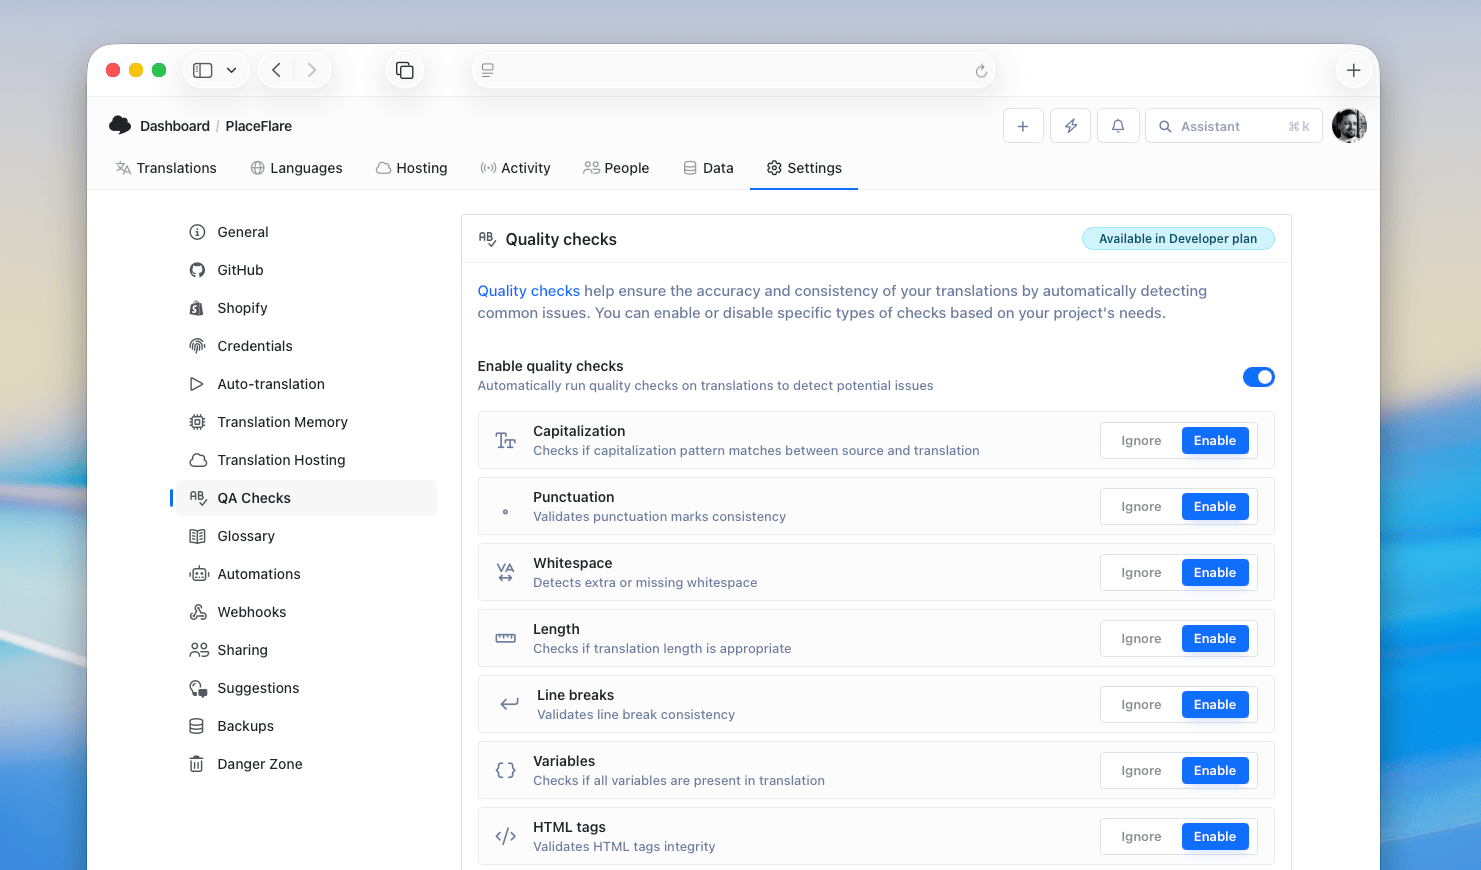
## Troubleshooting
If you notice issues in your translations but the **Quality issues** panel shows nothing,
it may be due to recent updates in the check rules. To resolve this,
manually run the QA checks to re-evaluate all translations in your project and refresh the issue statuses.
## Reporting invalid checks
If you have suggestions or encounter issues with the QA checks feature, please reach out to our support team at [contact@simplelocalize.io](mailto:contact@simplelocalize.io) or [submit a request on our feature requests page](/feature-requests/). We actively improve this feature based on user feedback and regularly add new checks.
---
# Translation editor: AI Actions
Source: https://simplelocalize.io/docs/translation-editor/ai-actions/
AI Actions are additional options in the editor to help you with adjusting existing translations.
## How it works
AI Actions are powered by OpenAI language models.
When you select an AI Action,
the system sends the current translation to OpenAI along with the selected action prompt.
The AI processes the request and returns a modified version of the translation based on the chosen action.
You can run AI Actions on individual translations, all translations of a key via context-menu,
or use them in combination with [Bulk Actions](/docs/translation-editor/bulk-actions/) to apply changes to multiple translation keys at once.
## Available actions
You can choose from the following options:
- **Correct** - to fix the translation
- **Shorten** - to make the translation shorter
- **Extend** - to make the translation longer
- **Rephrase** - to rephrase the translation
To use AI Actions, right-click on the translation key you want to adjust and select the desired action from the context menu. Note that AI Actions are applied to all translations of the selected key.

## Custom prompts
You can also create your own custom prompts for AI Actions. To do this, go to the project settings and select the "AI Actions" tab. Here, you can add, edit, or delete custom prompts.
---
# Translation editor: Tags
Source: https://simplelocalize.io/docs/translation-editor/tags/
Tags help categorize and group translation keys, making it easier to organize and filter keys by custom criteria.
Unlike [namespaces](/docs/general/namespaces/), which are part of the key structure, tags are flexible labels that can be applied to any translation key regardless of its namespace or location.
You can assign multiple tags to a single translation key to manage large monorepos, separate features, or versions.
You can also export only the translations associated with selected tags.
## Create tags
You can create tags in your project settings and assign them to translation keys in the translation editor.
Head to your project **Settings** and **General** section. There, you can create tags to use in the translation editor.

You can also create tags directly in the translation editor in [translation key settings](/docs/translation-editor/translation-keys/).
## Assign tags to keys
Right-click on a translation key and select **Manage key** to open the translation key settings. There, you can add, edit, and remove tags.

To apply tags to multiple translation keys at once, use the [bulk actions feature](/docs/translation-editor/bulk-actions/).
## Filter by tags
In the translation editor, you can filter translation keys by tags. Open the **Filters** panel and select the tags you want to display.

## Tags access permissions
You can limit access to translations assigned to specific tags by setting up [tags access permission for translator users](/docs/general/project-sharing/#translator-role).
This way, you can control which translations are visible to translators based on the tags assigned to them.
## Resources
- [How to manage translation file versioning with tags](/blog/posts/manage-translation-file-versioning-with-tags/)
- [How to organize translation keys with Tags](/blog/posts/translation-editor-tags/)
---
# Translation editor: Reviews
Source: https://simplelocalize.io/docs/translation-editor/reviews/
Translation review status is a quick way to mark translations as reviewed or needing review. Review status has two states:
- **Accepted** translation is a translation that has been checked and reviewed.
- **Needs review** translation has not been checked yet.
You can toggle between those two states by clicking on the review status icon near the translation input.
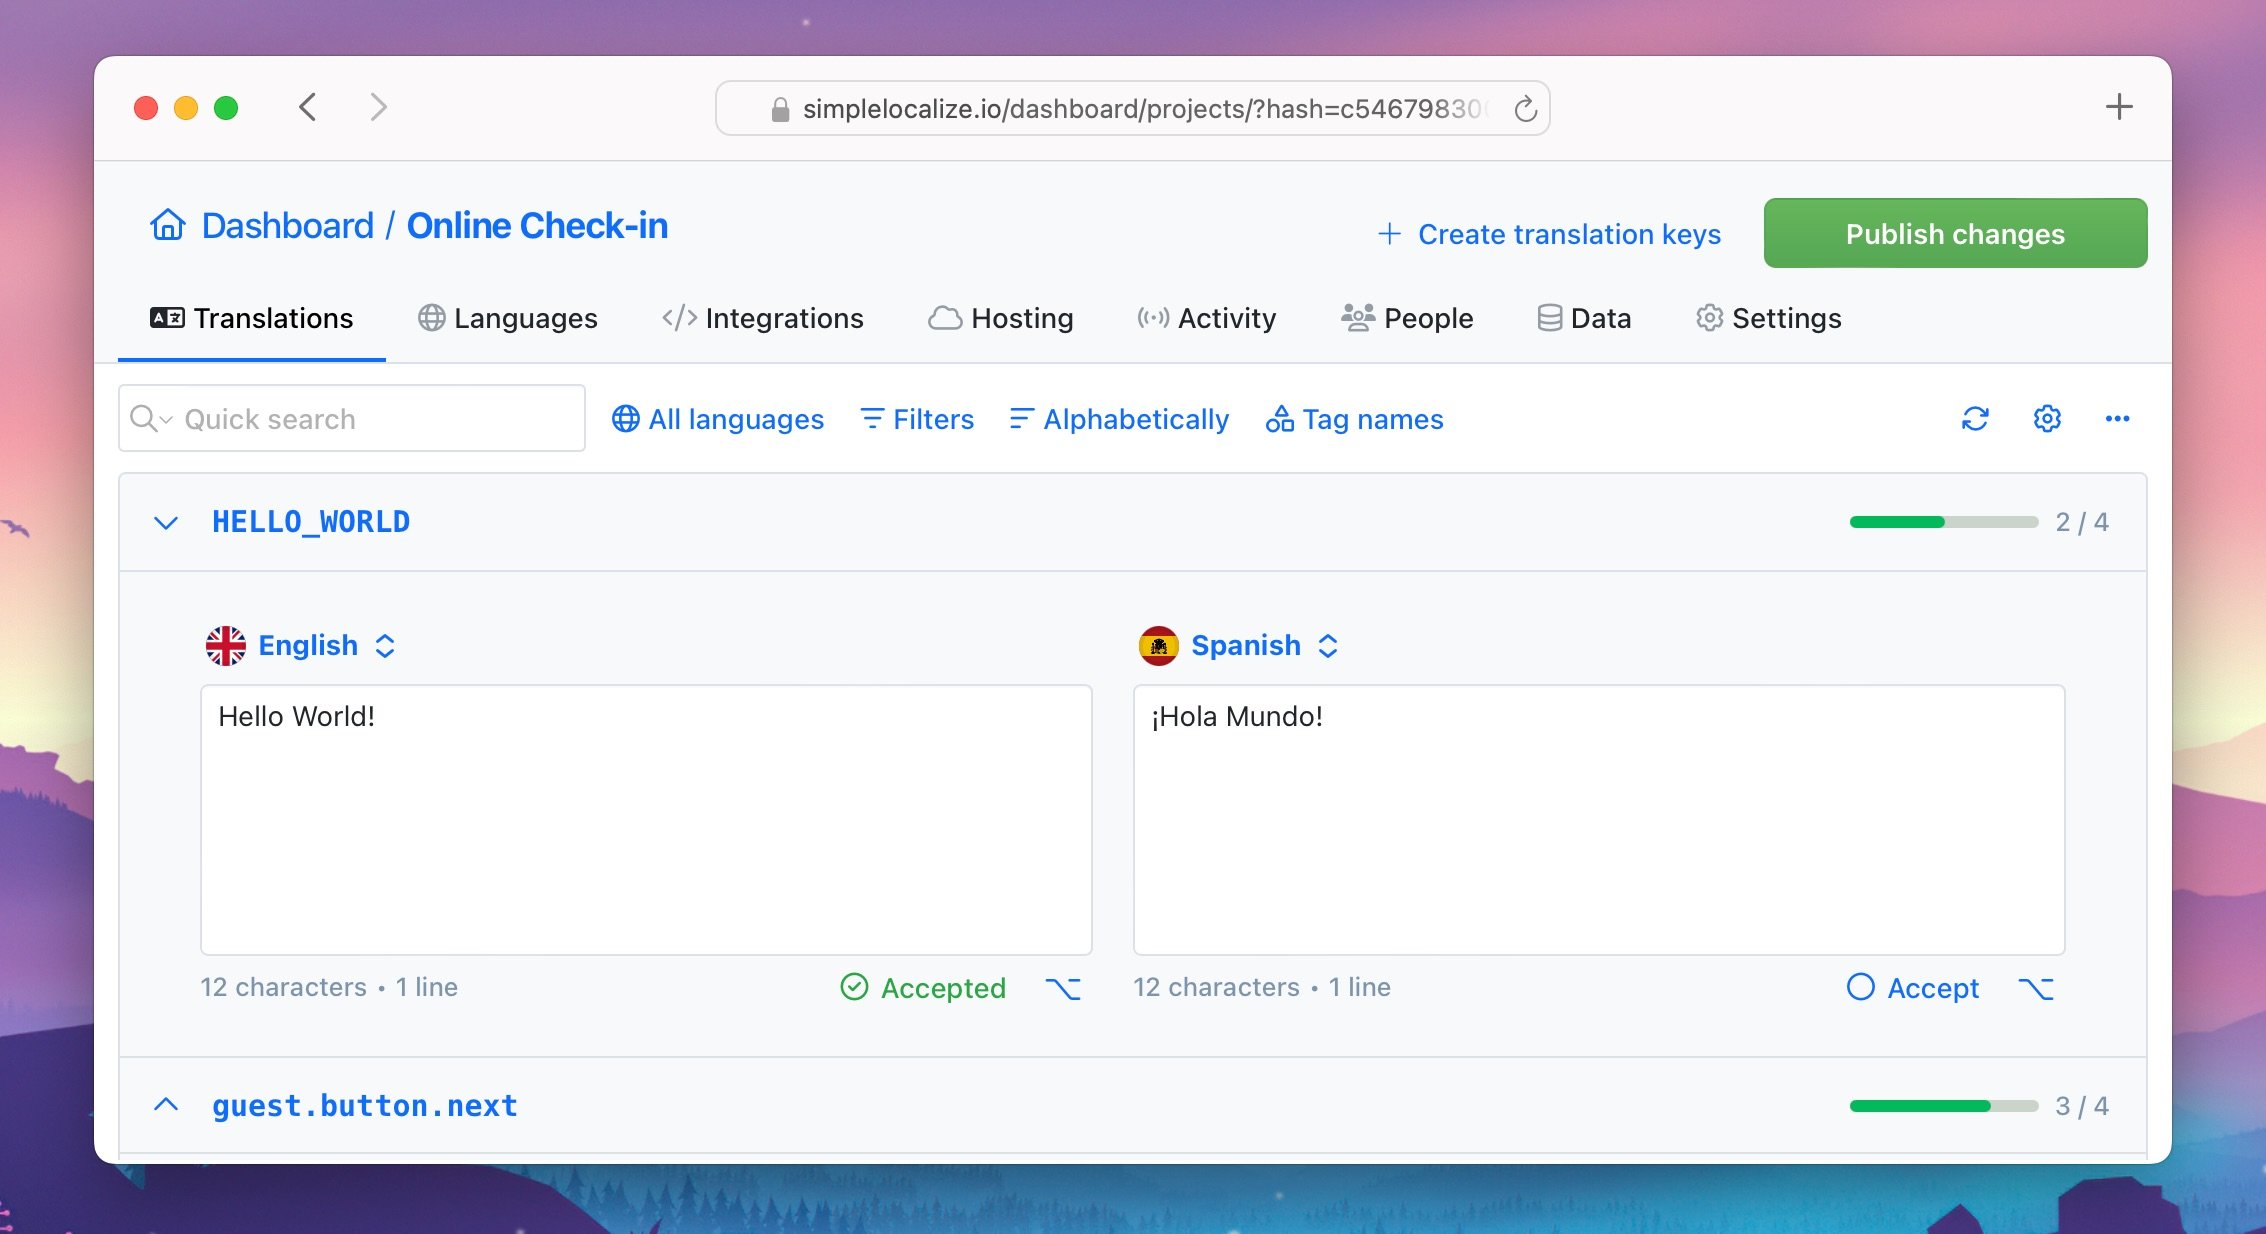
## How it works
When a translation is marked as **Accepted**, it indicates that the translation has been reviewed and approved.
This status helps translators and reviewers to keep track of which translations have been verified for accuracy and quality.
The status changes automatically to **Needs review** when the translation is modified.
This ensures that any changes made to the translation are reviewed again to maintain quality.
## Automate review statuses
A common scenario is to automatically mark translations as **Needs review** when
a source translation is updated. This helps to ensure that all translations are reviewed after changes to the source text.
To achieve this, you can create a [no-code automation workflow](/docs/general/automations/) that triggers when a source translation is updated.
You can even go further and add additional steps, for example, to pre-translate the texts using [auto-translation](/docs/general/auto-translation/) and then mark the translations as **Needs review** for human translators to verify the quality.
## Enable review statuses
To enable review statuses, go to the editor settings and enable the **Review status** option in **Quick Actions**.
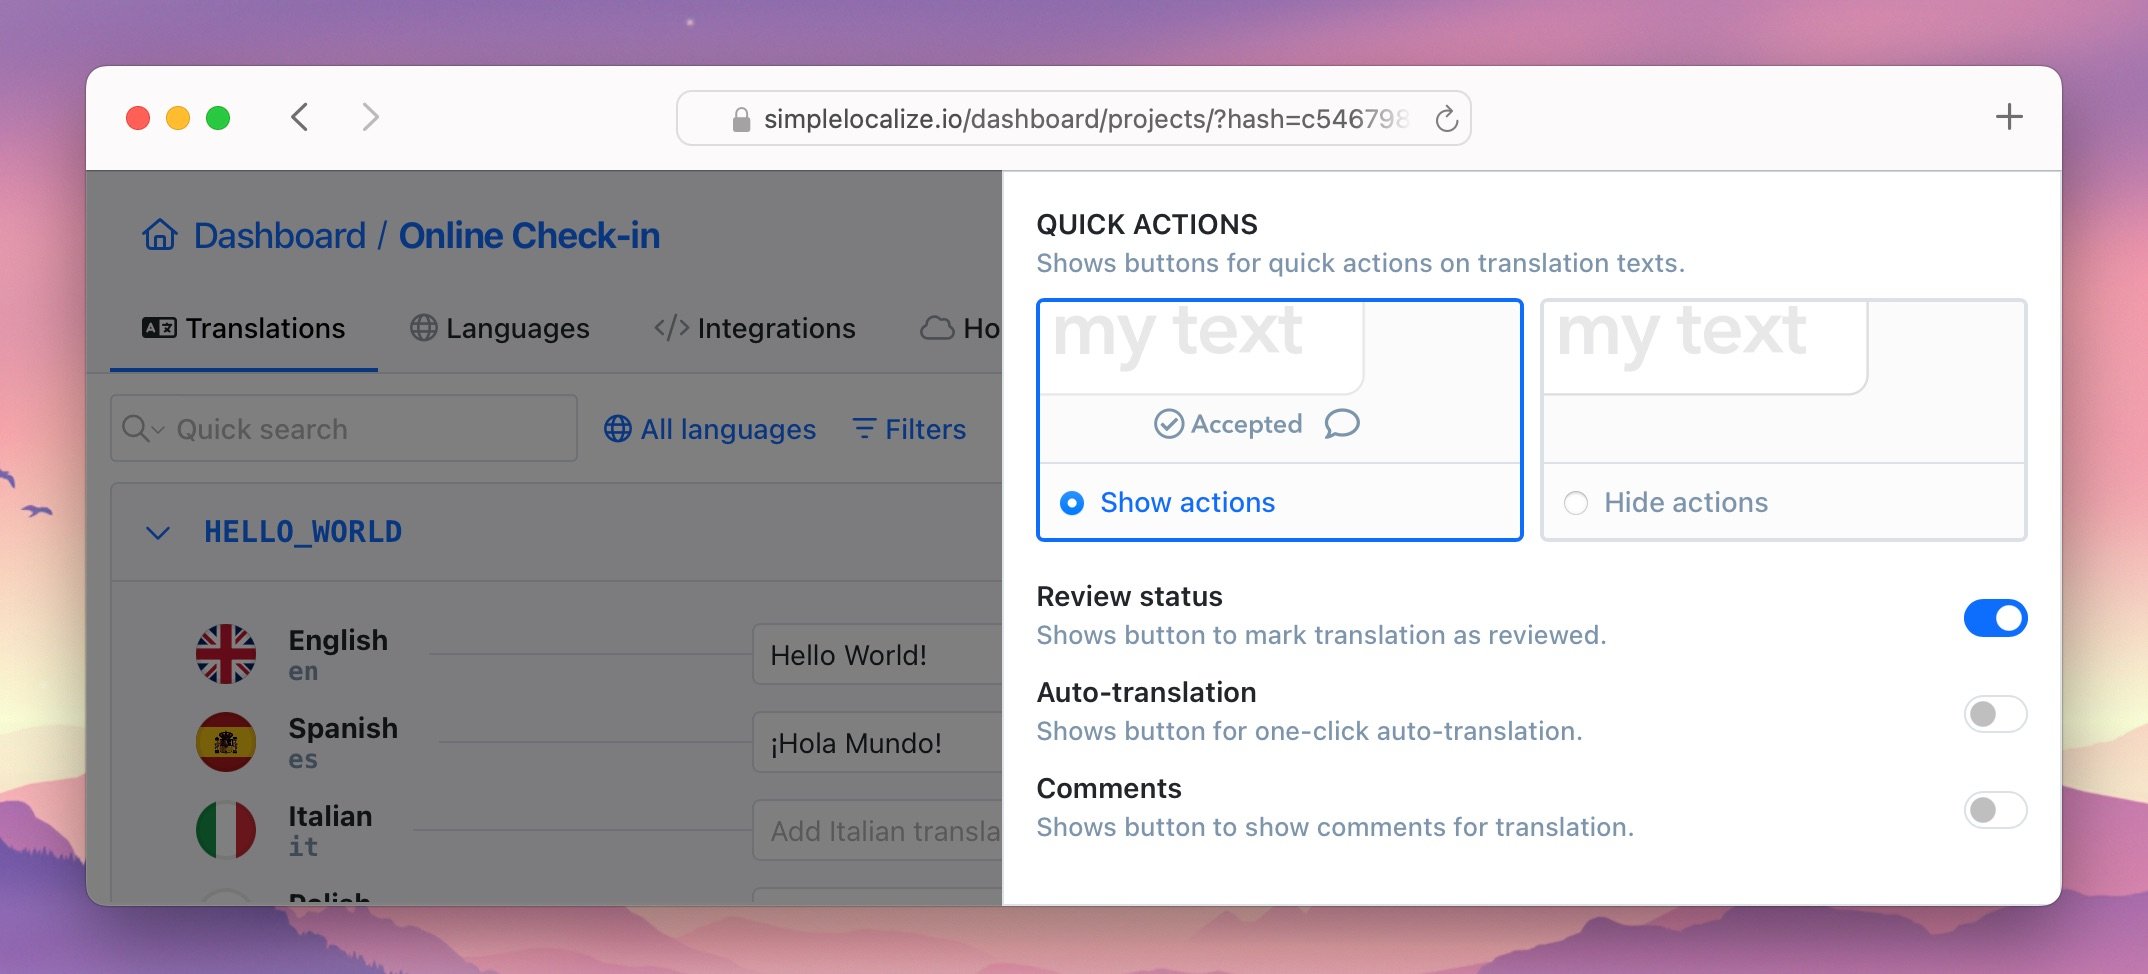
Learn more about [controlling the translation quality using review statuses](/blog/posts/translation-quality-review/).
---
# Translation editor: Text Editor
Source: https://simplelocalize.io/docs/translation-editor/text-editor/
Text Editor allows you to edit translations in a more advanced way and, more importantly, to use it in a larger window. This feature is especially useful when working on longer translations, as it provides a more comfortable environment for editing.
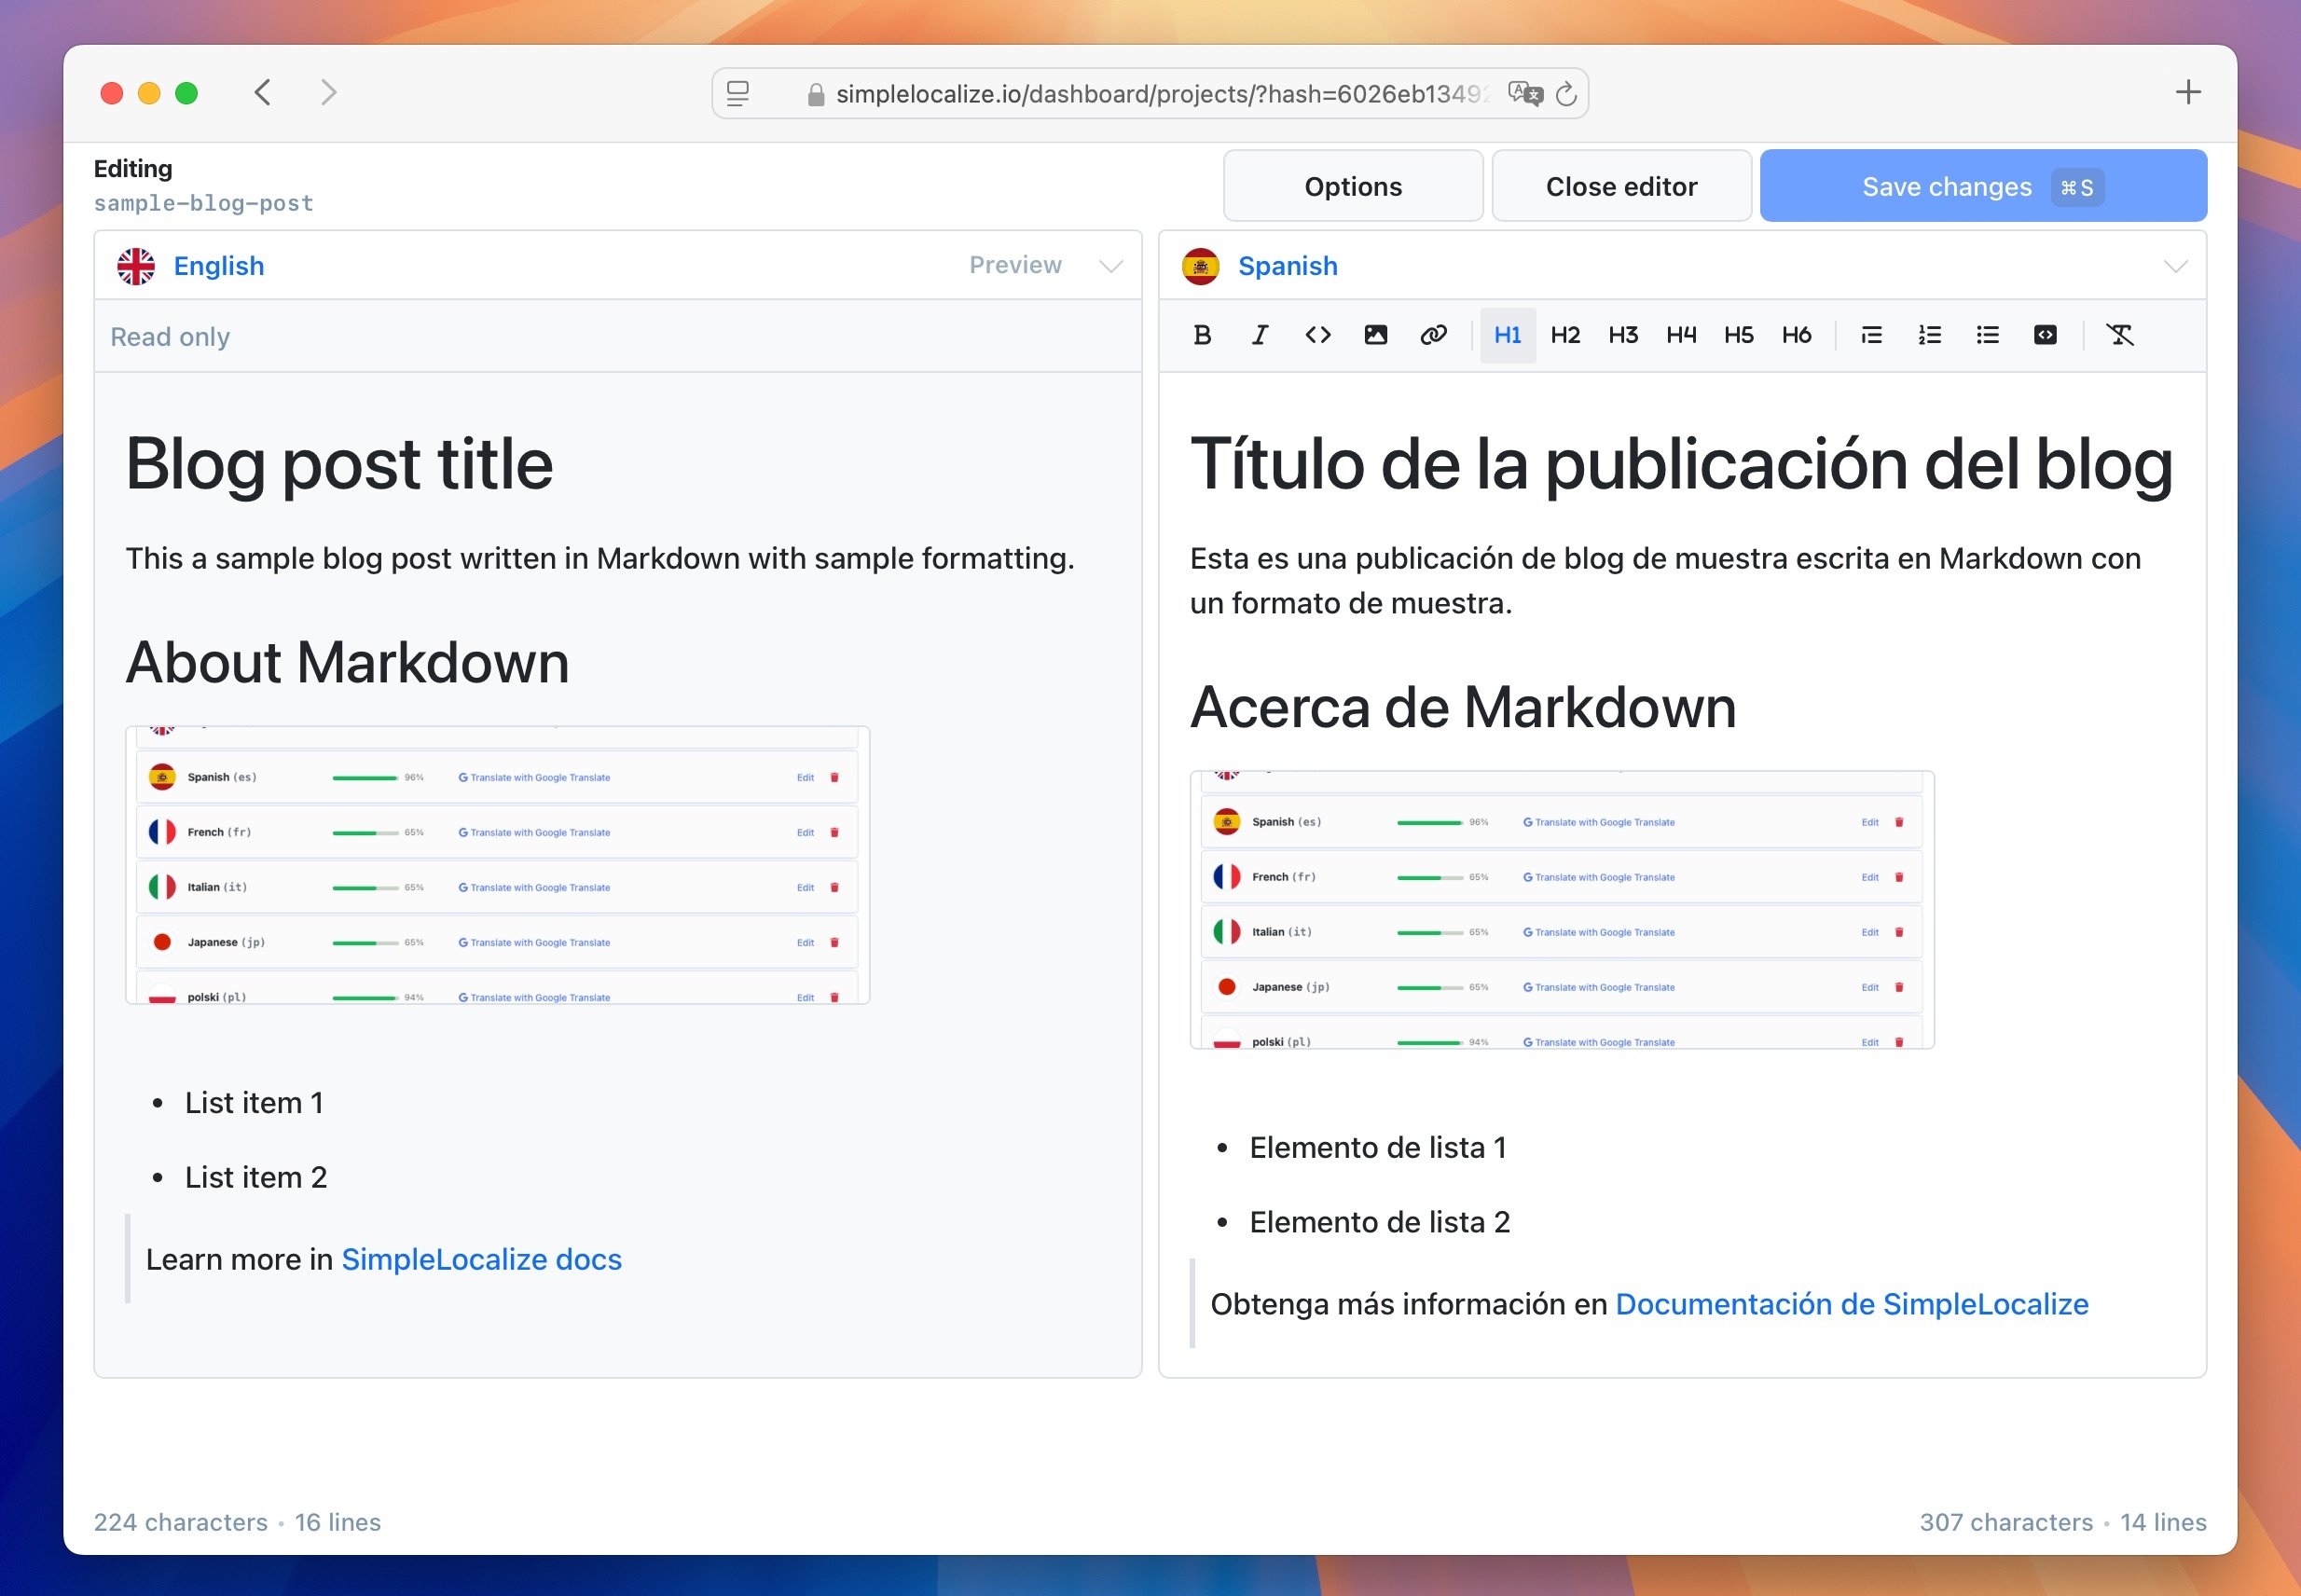
The Text Editor also includes a WYSIWYG (What You See Is What You Get) interface, making it much easier to work with Markdown texts.
Instead of editing raw Markdown, you can now format text visually, just like in a word processor, while still preserving Markdown compatibility behind the scenes.
## How to enable the Text Editor
To enable the Text Editor, you need to set the translation key type to **Markdown** in the translation key settings. This will change the default translation input to a Text Editor.
Right-click on the translation key you want to open in the Text Editor and select **Manage key** from the context menu. In the key settings, change the key type to Markdown and click **Save changes**.
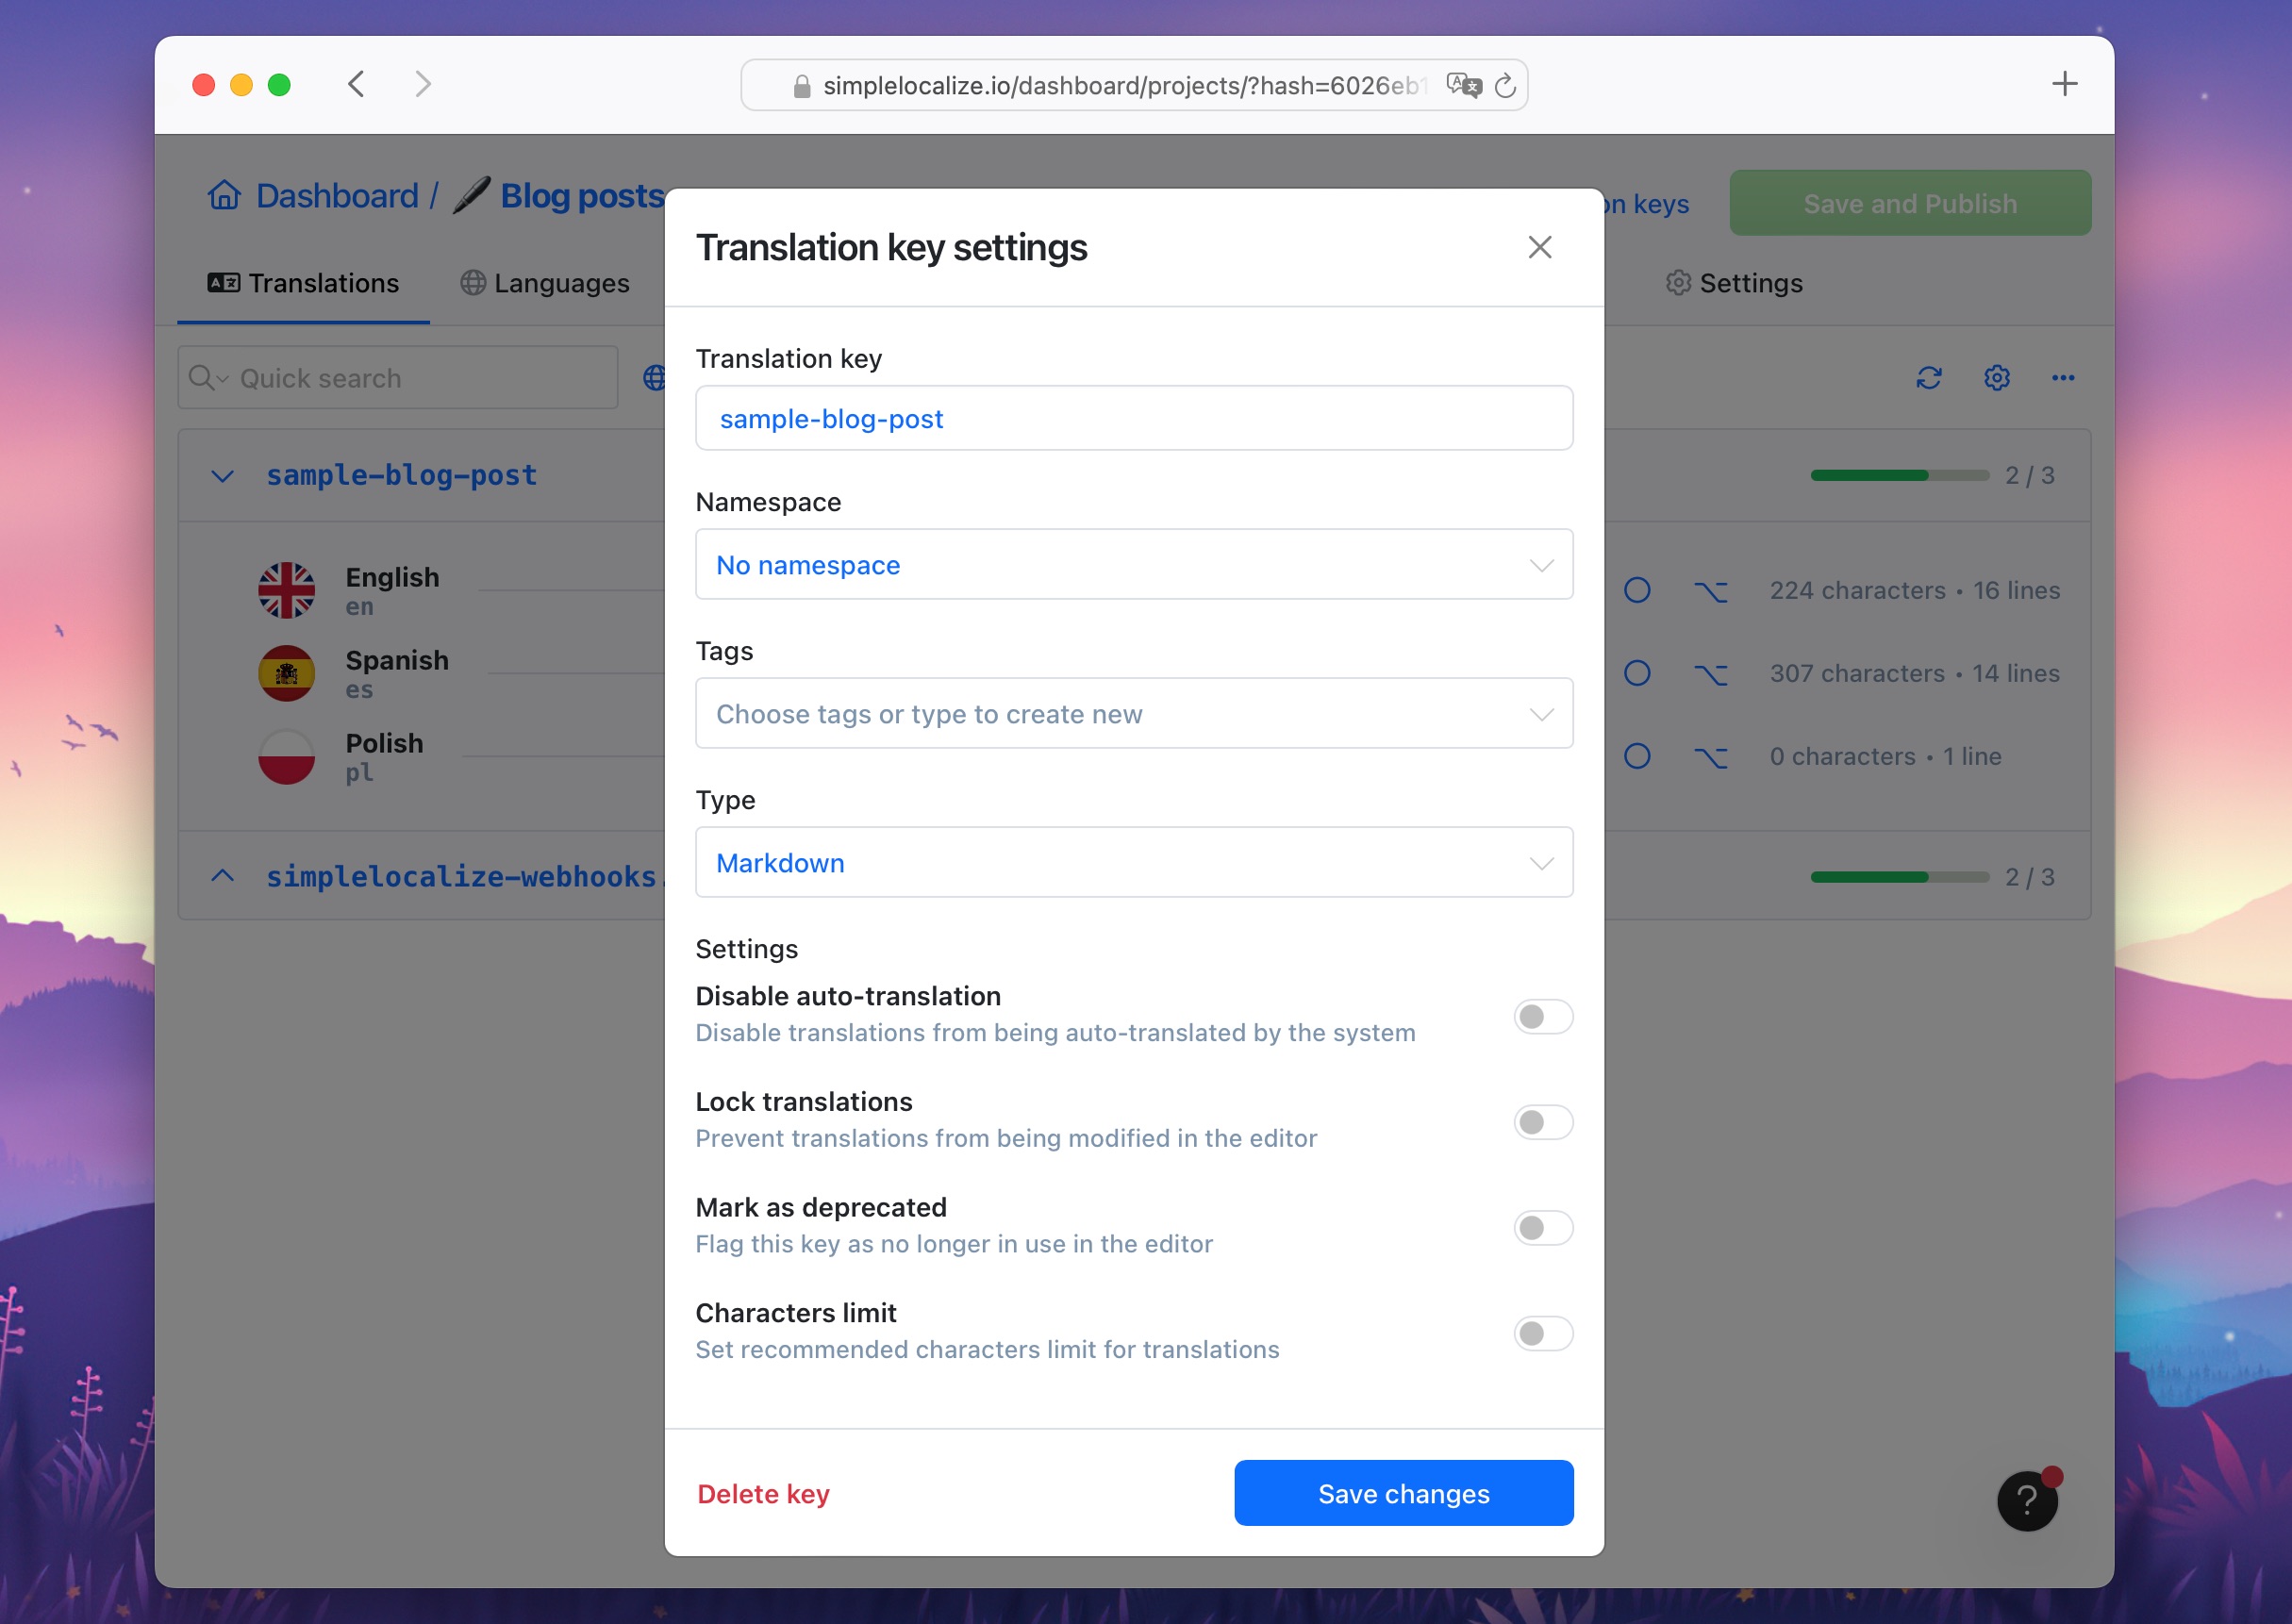
## Text Editor options
Text Editor provides several options to enhance your editing experience:
- **Markdown**: visual editing of Markdown text. If disabled, the editor will show the raw Markdown text.
- **Show source text**: displays the text in the default language on the left side of the editor.
- **Full screen**: opens the editor in full-screen mode, allowing you to focus on your translation without distractions.
- **Close on save**: automatically closes the editor after saving your changes.
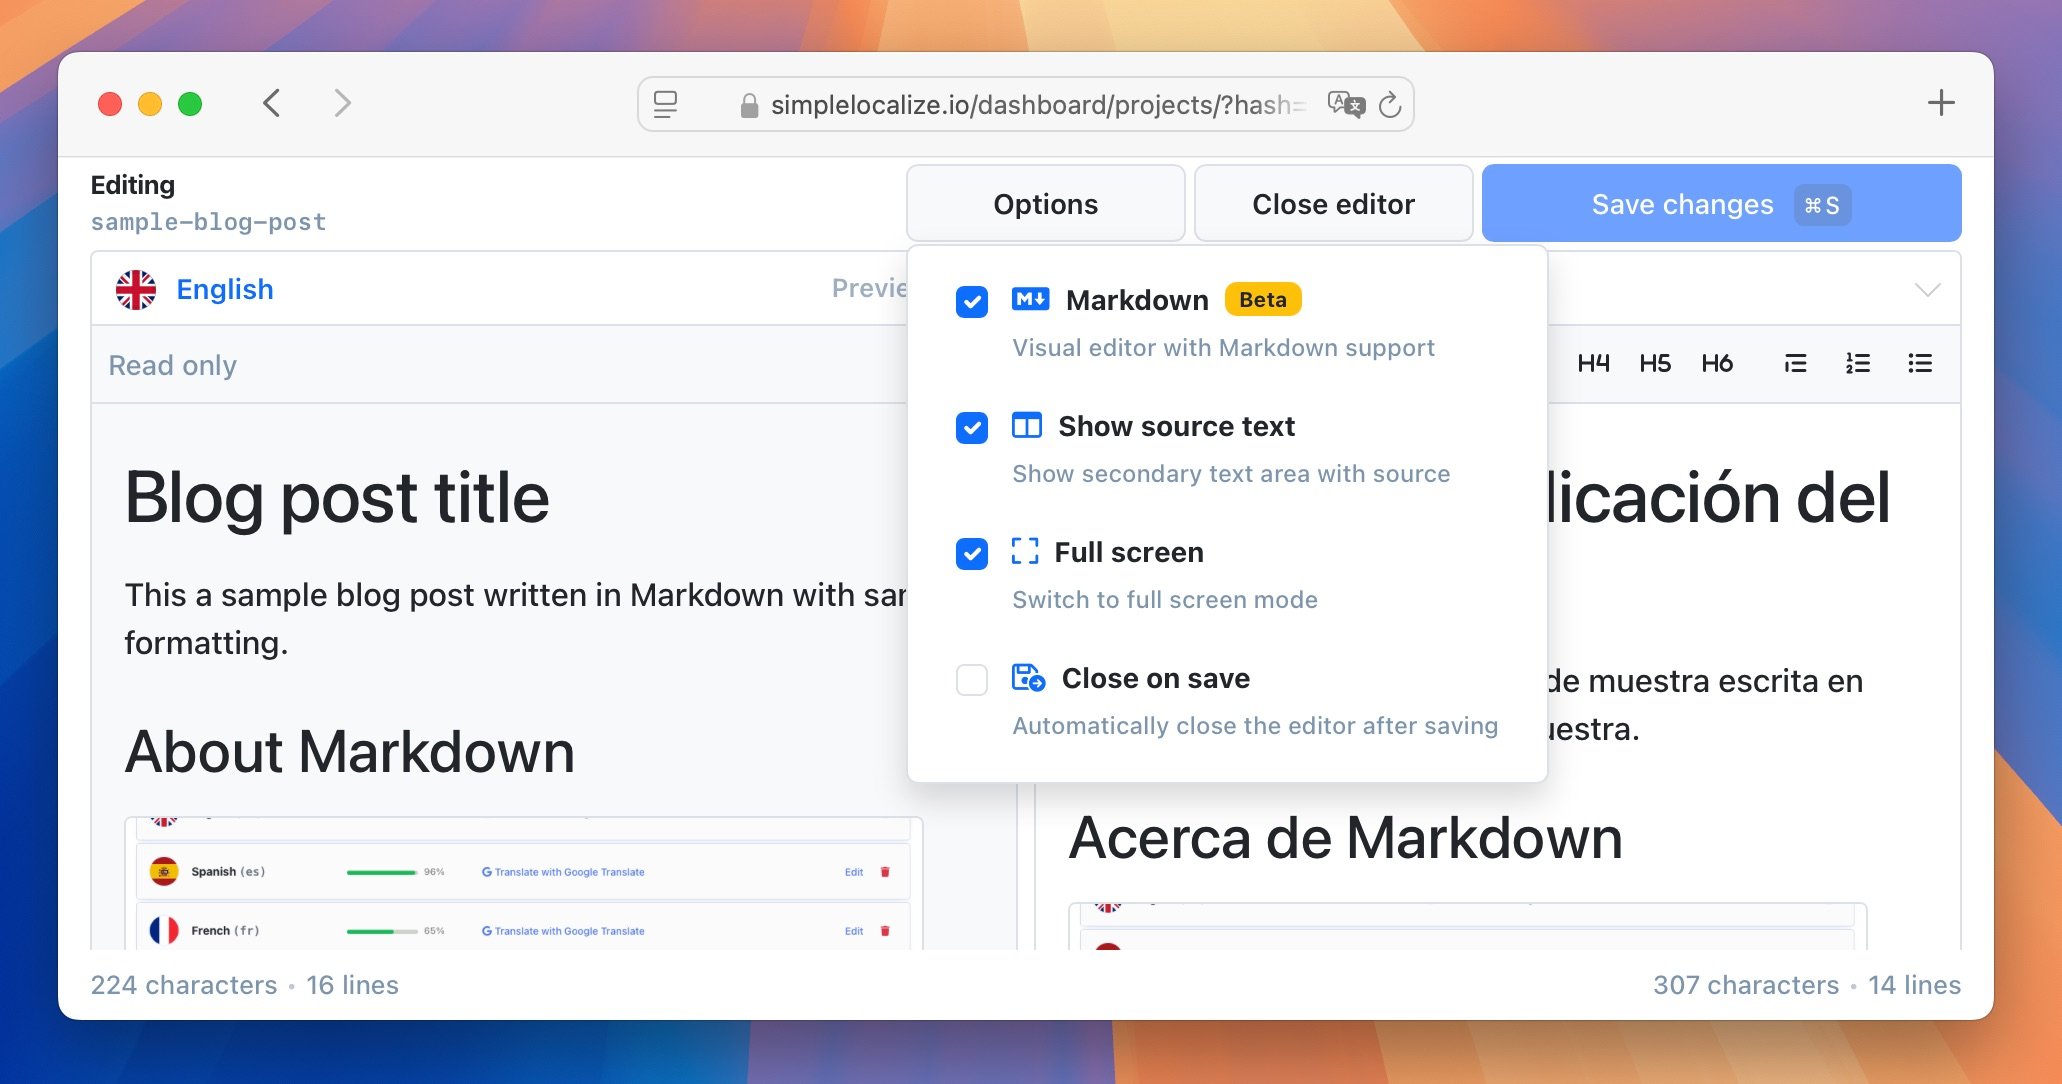
There are additional options available for the raw Markdown editor:
- **Wrap lines**: enables line wrapping, making it easier to read long lines of text.
- **Show line numbers**: displays line numbers for each line of text, which can be helpful for reference.
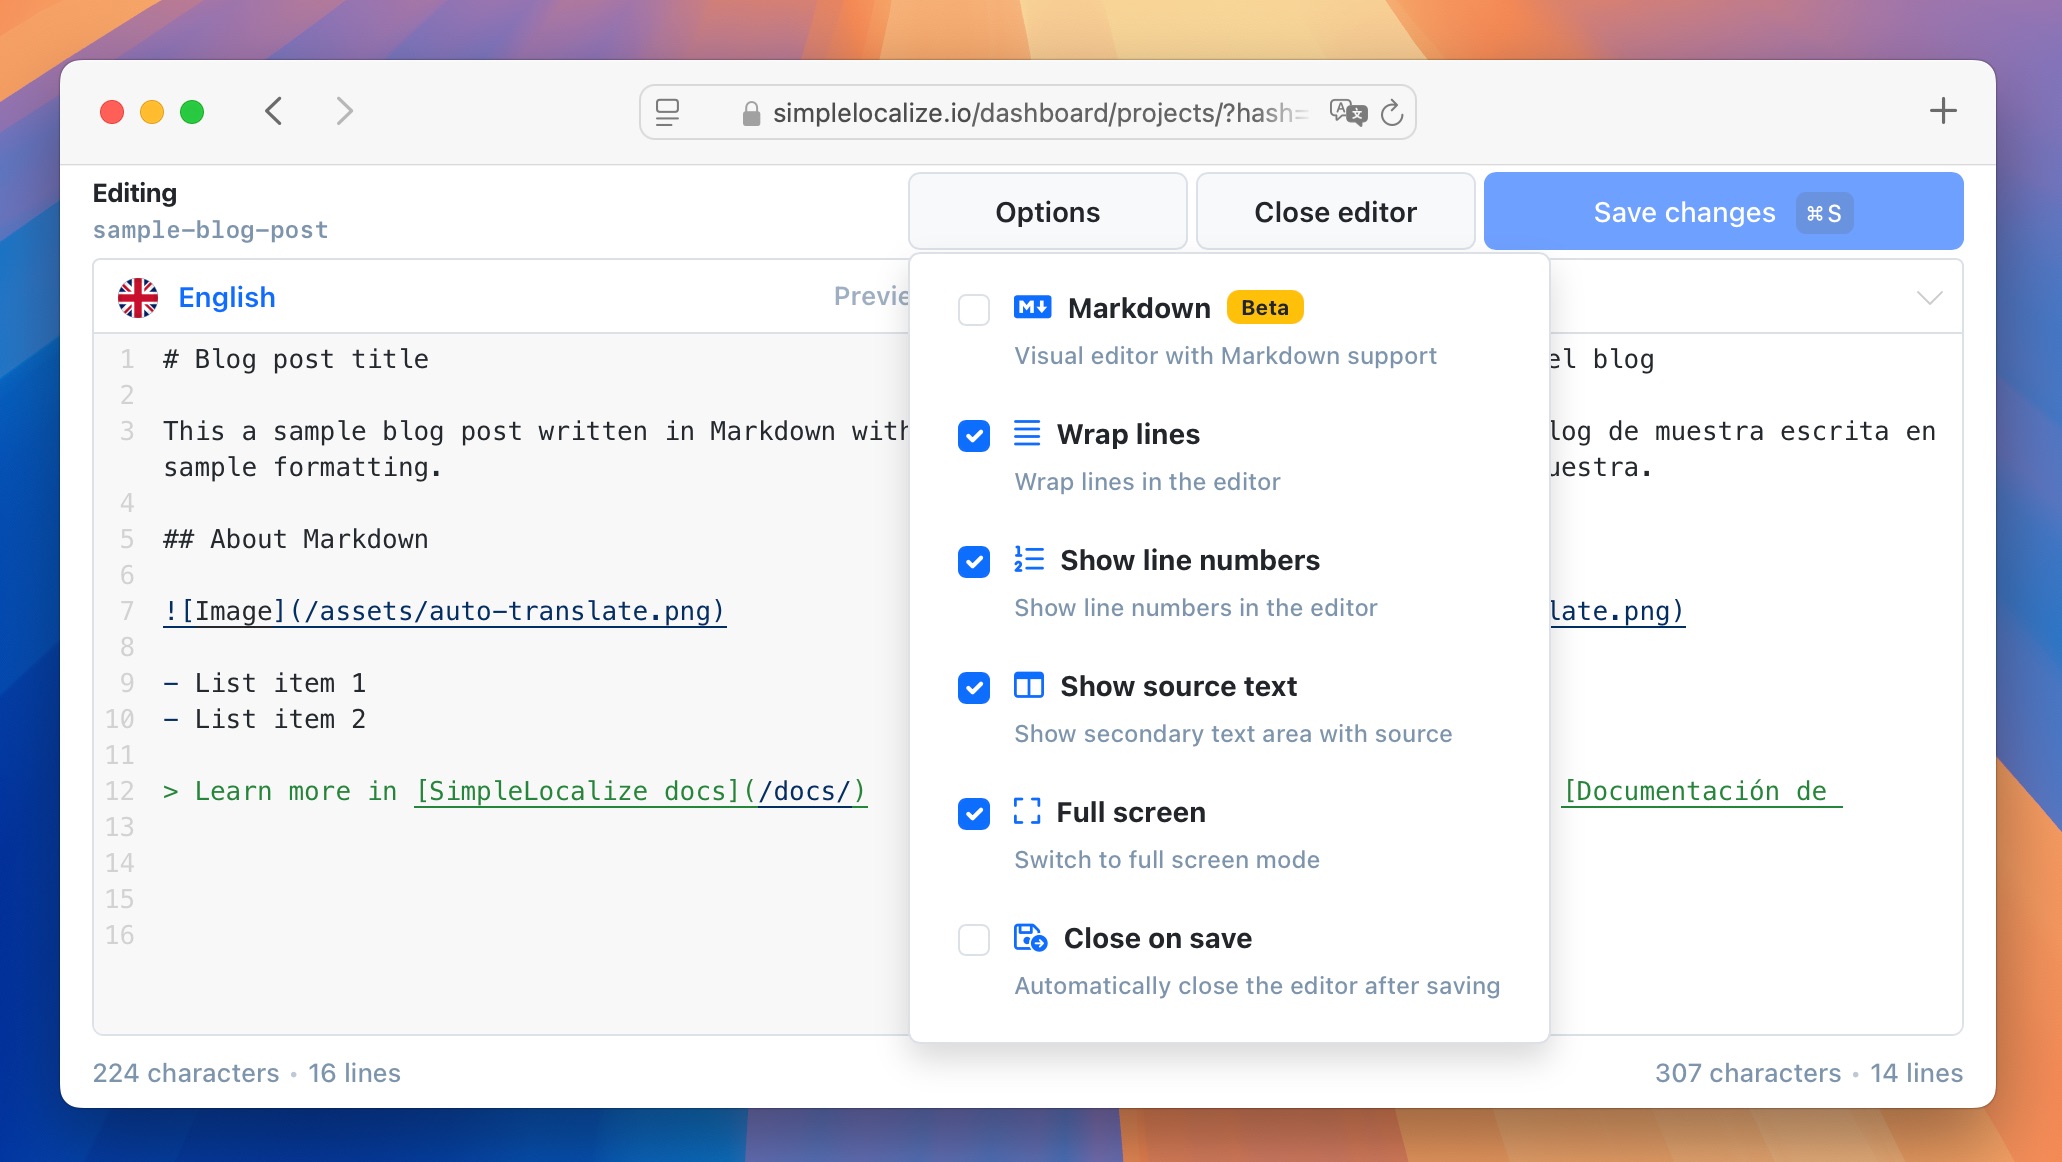
---
# Translation editor: History
Source: https://simplelocalize.io/docs/translation-editor/history/
Translation history allows you to track changes made to your translations over time. It provides a detailed log of all modifications, including who made the changes and when they were made, and a possibility to revert to previous versions if needed.
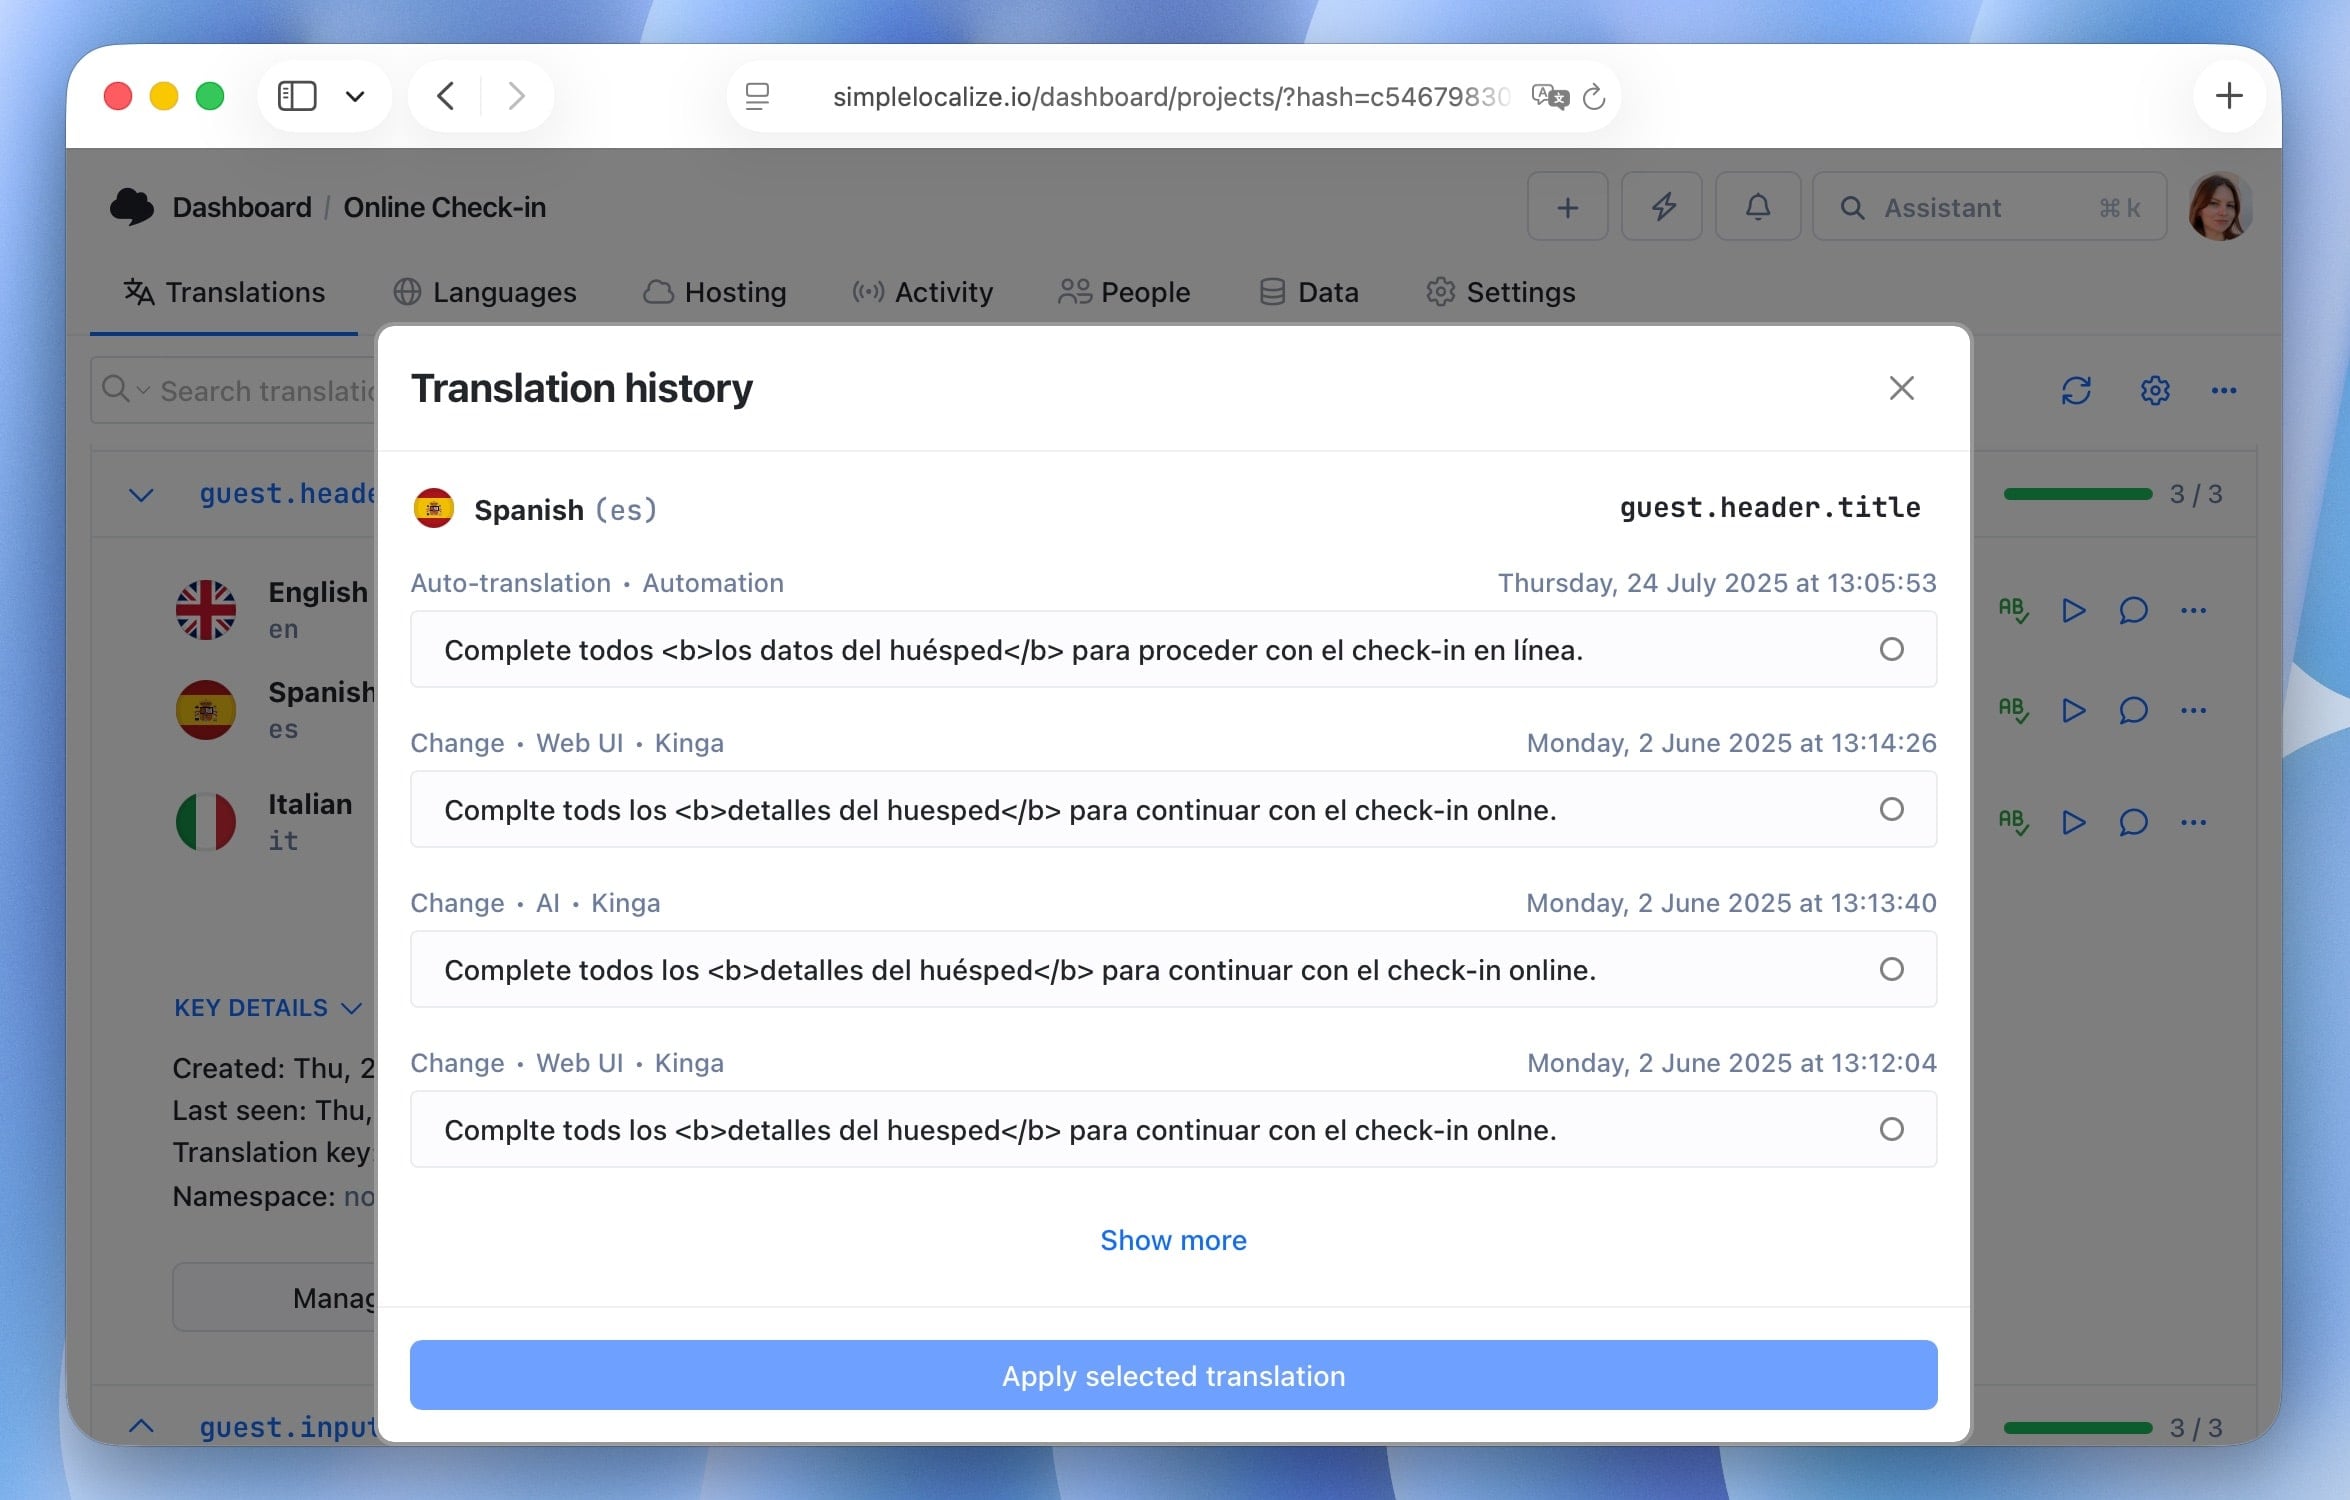
## Access translation history
You can access the translation history from Quick Actions menu in the translation editor. Pin the **Translation history** option to your Quick Actions for easier access.

Or right click on the **More** (three dots) button next to a translation and select **Translation history**.
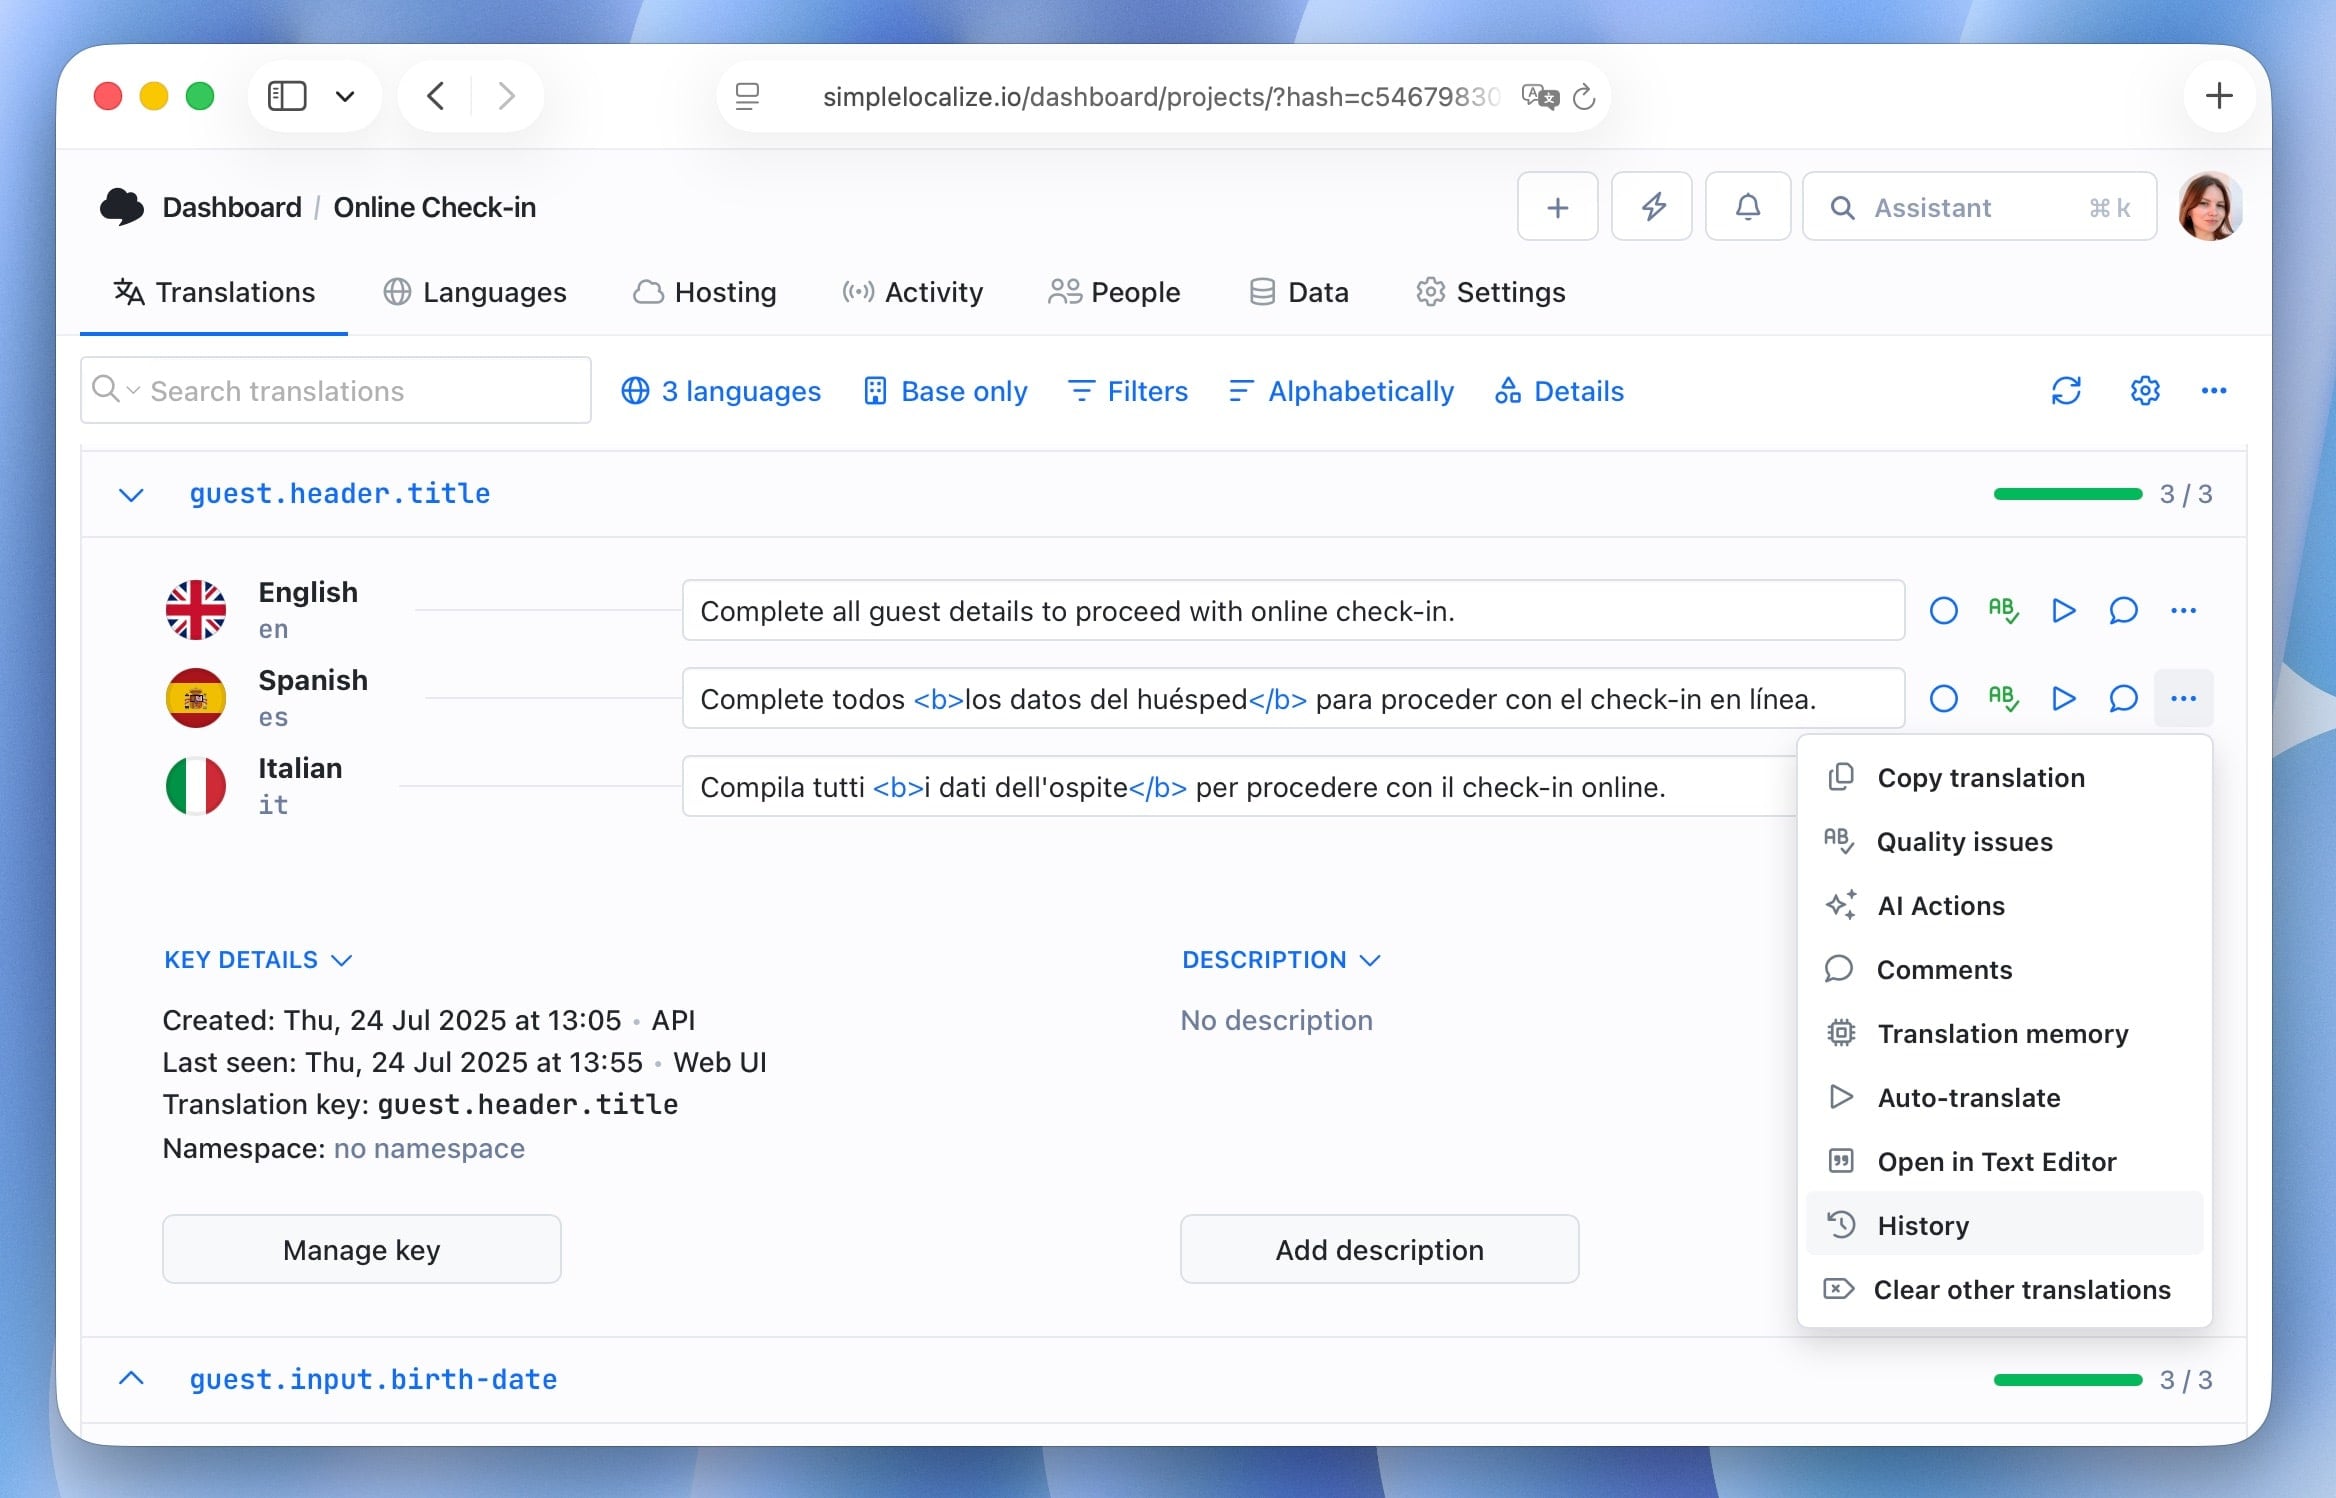
## Revert to previous version
Select the desired version from the history list and click the **Apply selected translation** button to revert to that version.
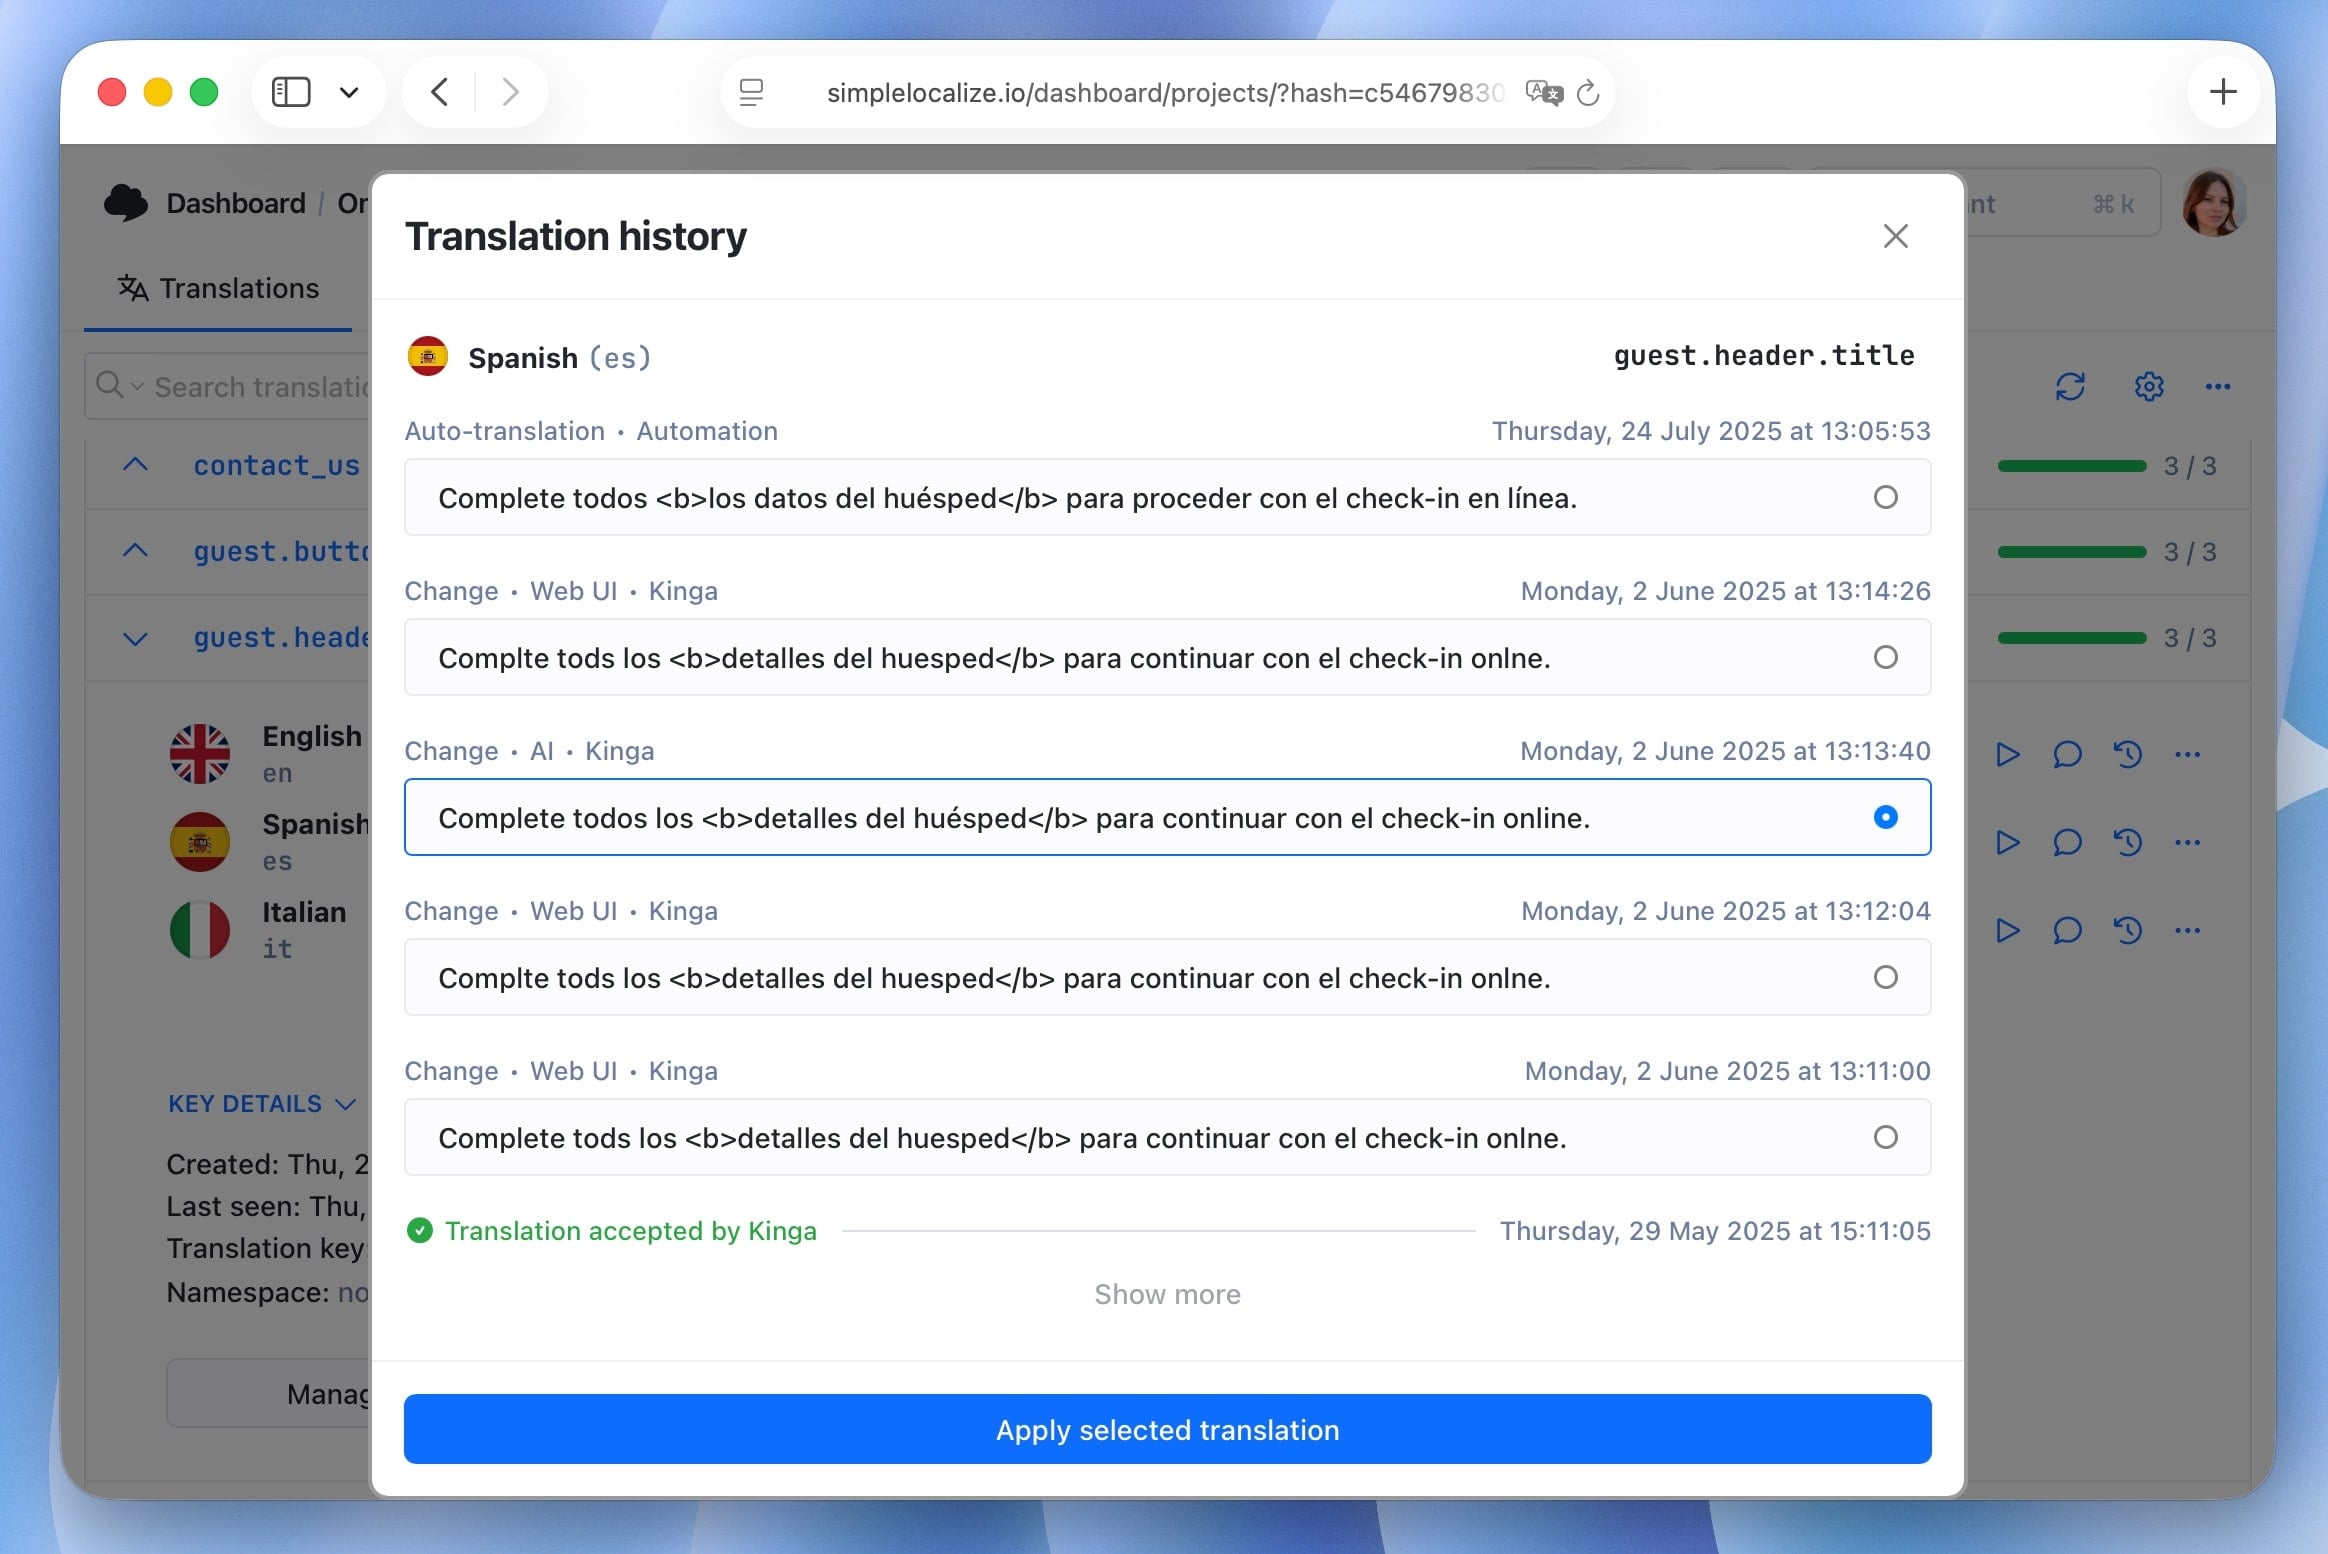
---
# Translation editor: Translation keys
Source: https://simplelocalize.io/docs/translation-editor/translation-keys/
Translation key is a unique identifier for a translation string. Translation keys are used to identify the translation string in the codebase and in the translation editor.
## Create translation keys
To add a new translation key, click on the plus button in the top right corner of the translation editor and select **Create translation key**.
There, enter key name, add translation (enable in *Options*), assign namespace, and add tags to the translation key.

## Translation key settings
Right-click on a translation key to open the context menu and choose **Manage key**. In the Table View, you will find the **Manage key** button near the translation key name.

This will open the translation key settings where you can edit the key name, key type, and other settings.

Translation key settings include:
- **Key name**: The unique identifier for the translation string. You can edit the key name here.
- **Namespace**: The namespace where the translation key is stored. You can edit the namespace here.
- **Tags**: Tags are used to categorize translation keys. You can add, edit, and remove tags here.
- **Type** (beta): The type of the translation key. You can change the default *Text* type to *Markdown*, *Boolean* or *Number*.
- **Disable auto-translation** for the translation key.
- **Lock translations** for the translation key to prevent further changes.
- **Mark as deprecated** to indicate that the translation key is no longer in use.
- **Set character limit** for the translation key ([learn more about character limit](/blog/posts/introducing-character-limit/)).
- **Exclude translations** in selected languages.
- Translations are excluded from translation exports and Translation Hosting.
- Excluded translations are hidden in the translation editor and are not visible to translators.
- Excluded translations may still be visible and included in some parts of the platform's UI, e.g. QA checks, and statistics.
- Exclude translations can be managed and configured by users with enabled beta features, but it affects all project members regardless of the beta feature setting.
- **Attributes**: Add custom metadata to the translation key. Attributes are used to store additional information about the translation key.
## Delete translation keys
To delete a translation key, click on the **Delete key** button in the translation key settings.
To delete multiple translation keys at once, hold the key and select the keys you want to delete. Then click on the **Delete selected keys** in the bulk actions panel.

---
# Translation editor: Translation memory
Source: https://simplelocalize.io/docs/translation-editor/translation-memory/
Translation Memory (TM) is a database that stores translations from your projects. It helps you reuse translations across projects by suggesting translations for similar strings. This way, you can save time and maintain consistency in your translations.
## How translation memory works
Translation Memory is built on the translations from projects you work on. When you translate a string, the Translation Memory stores the source and target text and the translation key. If you translate a similar string in another project, the Translation Memory suggests the stored translation.
Additionally, you can upload your own translation memories in the TMX format in the project settings under the **Translation memory** tab.
## Setting up translation memory
To upload your own translation memories, go to the project settings and select the **Translation memory** tab. Here, you can upload TMX files that contain your translations.
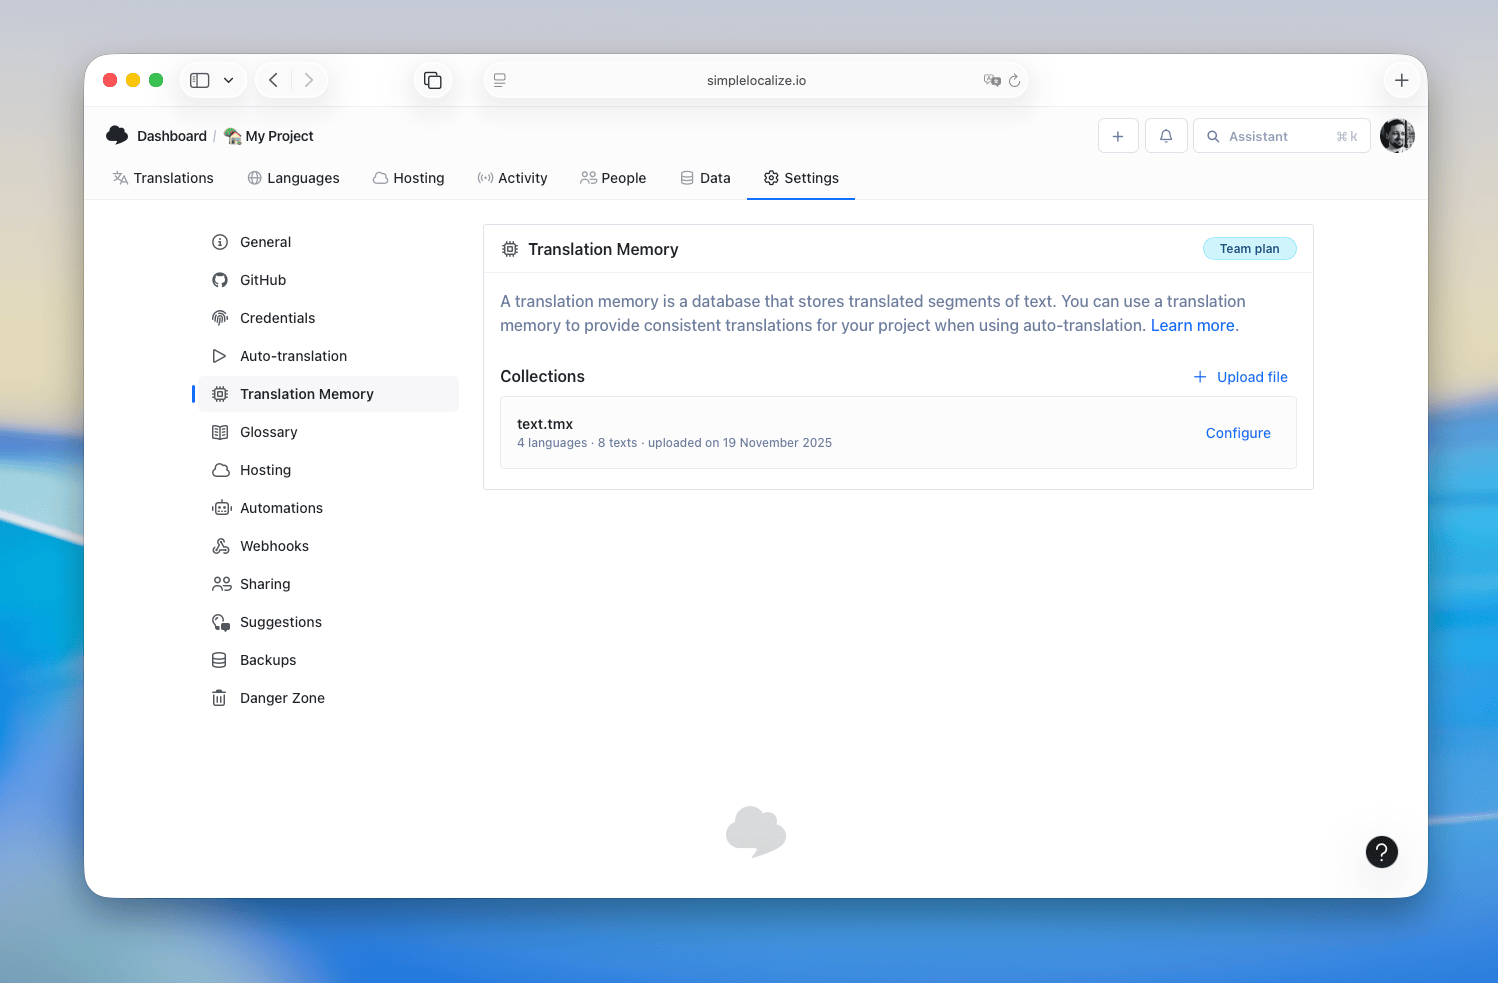
Click on **Upload TMX file** to select and upload your TMX files. Once uploaded, the translations from the TMX files will be available in the translation memory for your project.

When uploading a TMX file, you may need to map the languages in the TMX file to the languages in your project. This ensures that the translations are correctly associated with the right languages.
### Example TMX file
Here is a simple example of a TMX file structure:
```xml
Hello, world!Bonjour, le monde!Goodbye!Au revoir!
```
When you upload this TMX file, the translation memory will store the translations for "Hello, world!" and "Goodbye!" in French. When you translate similar strings in your projects, the translation memory will suggest these translations.
## Auto-translation vs Translation memory
Auto-translation uses your Translation Memory to translate strings without calling external services like Google Translate or DeepL. If a 100% match is found in the TM, that translation is applied automatically.
If there is no 100% match, the auto-translation service is used instead.
## Using Translation Memory
You can find the Translation Memory in the Translation Editor. Head to the options menu in the selected translation and choose "Translation Memory" to view the suggestions for the current translation.
To make it easier, you can enable the **Translation memory** quick access [in the editor view settings](/docs/translation-editor/settings/#translation-editor-settings).
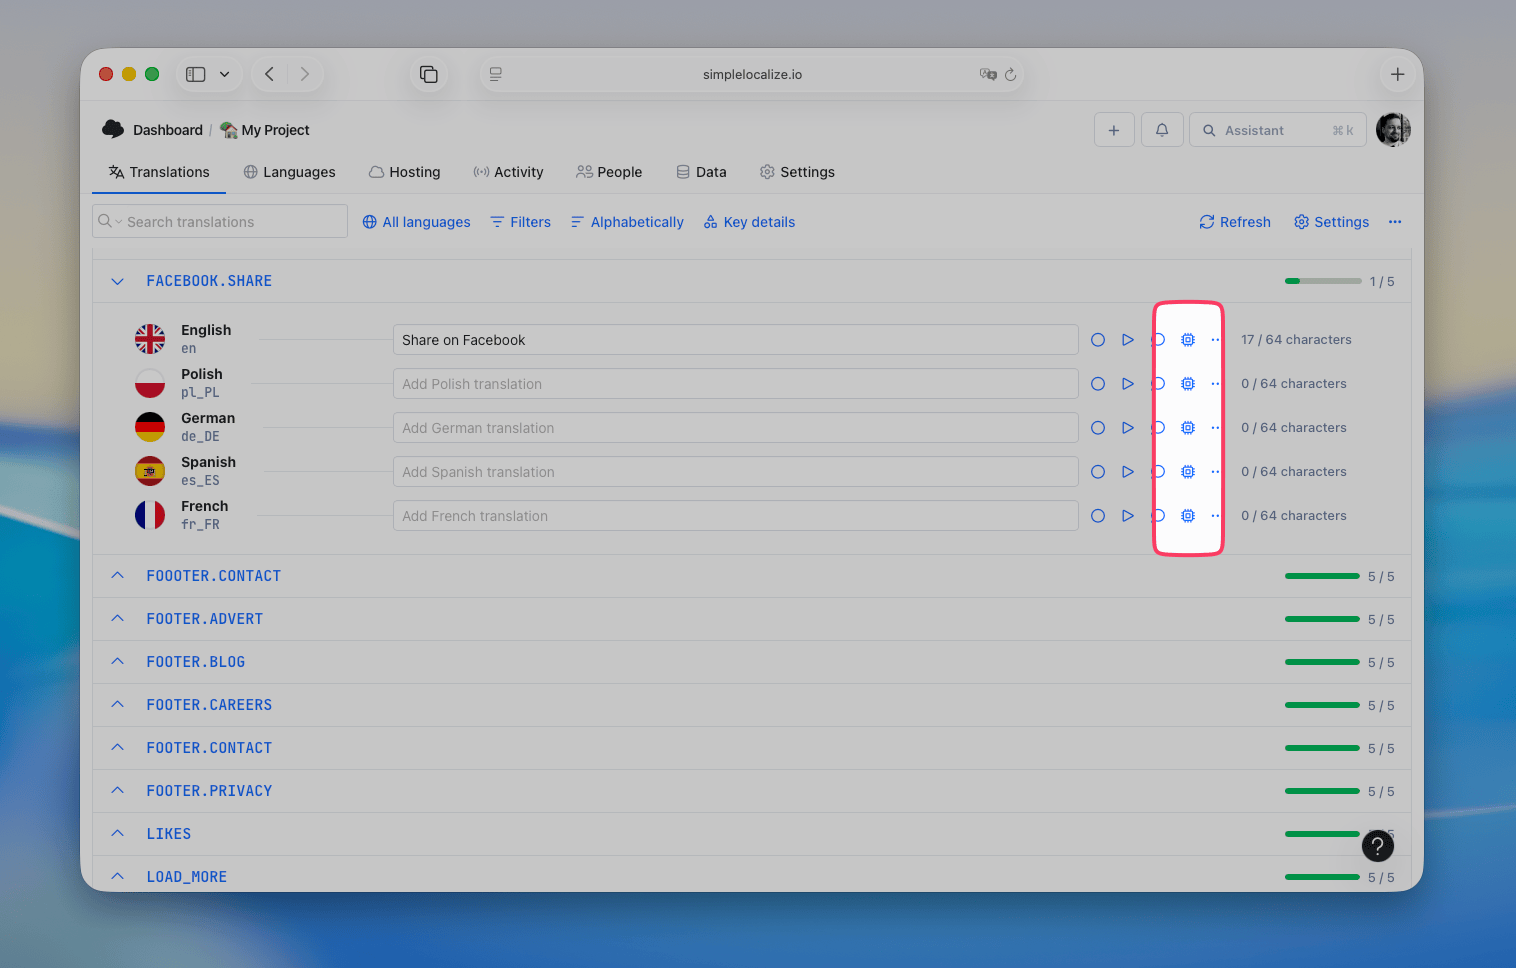
When you open the Translation Memory, you'll see a list of suggestions for the current translation with their relevance scores, source translations and projects they come from.
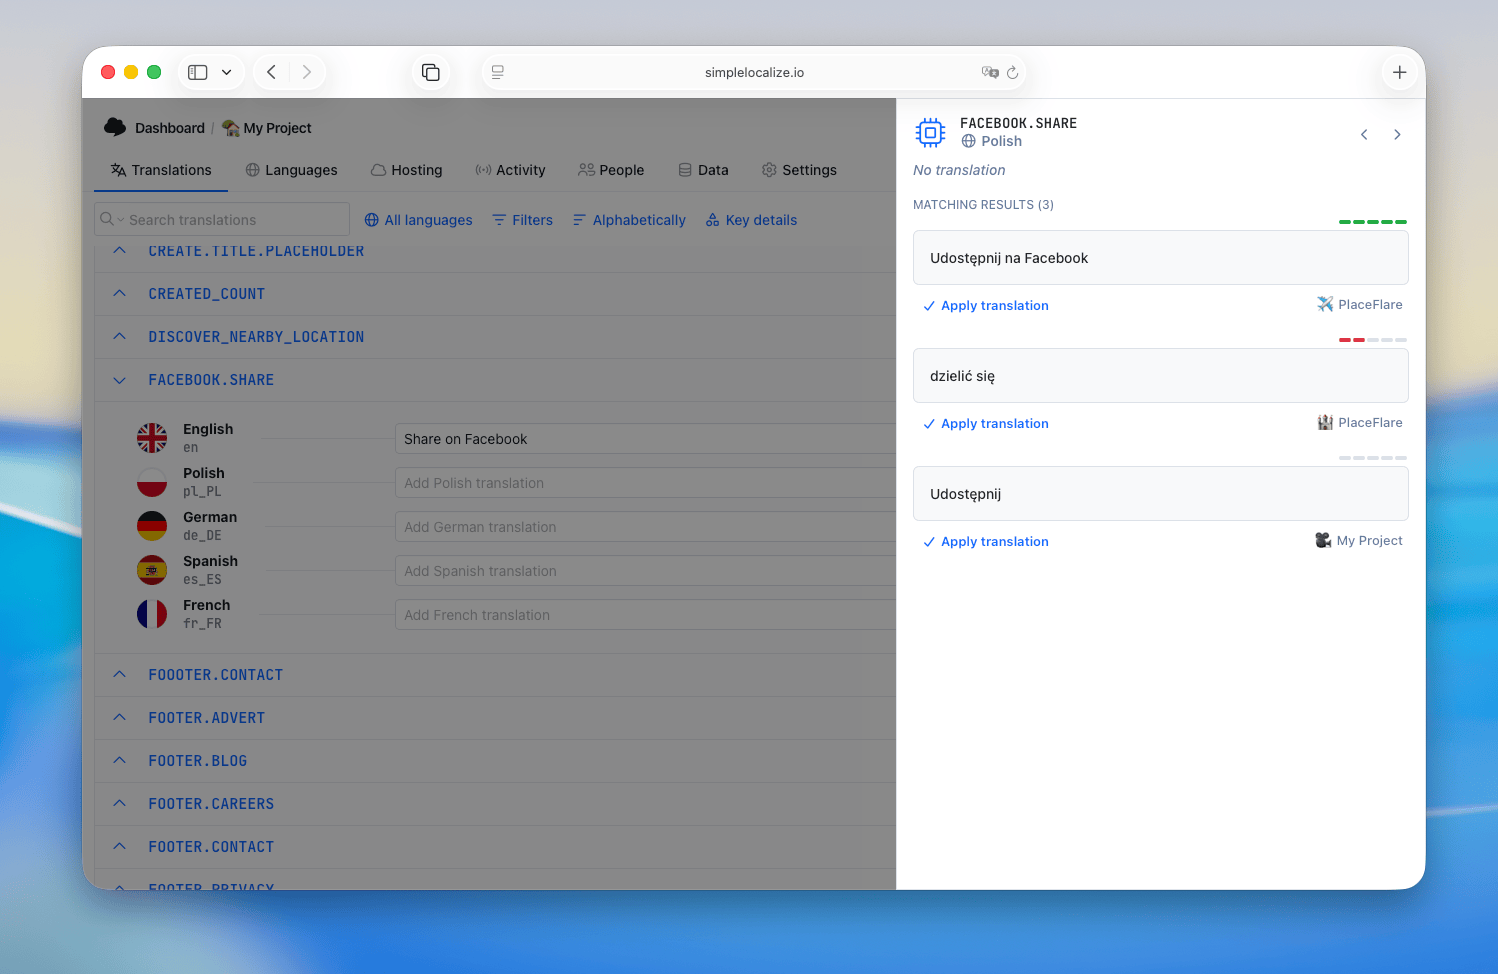
Click on **Apply translation** to use the suggested translation.
## Perfect matches
Perfect matches are 100% Translation Memory matches that can be quickly reviewed and applied.
You can:
- Filter perfect matches in the Translation Editor to find keys with a Translation Memory match
- Apply perfect matches to empty translations using **Apply perfect matches** in the Translation Editor context menu
- See the number of perfect matches in the project **Overview** tab and click it to filter matching keys

---
# Translation editor: Glossary
Source: https://simplelocalize.io/docs/translation-editor/glossary/
Glossary is a collection of terms and their translations that helps maintain consistency across your projects. It allows you to define preferred translations for specific terms, ensuring that the same terminology is used throughout your translations.

## How glossary works
Glossary integrates with your translation projects, allowing you to define terms and their translations.
The glossary terms are used:
- during AI and DeepL auto-translation
- in QA checks (you will see a warning if a term is used incorrectly)
- in the Translation Memory (TM) suggestions (perfect matches)
Glossary terms can be added and edited manually in project Settings / Glossary or directly from the translation editor by any user (according to language access rights).
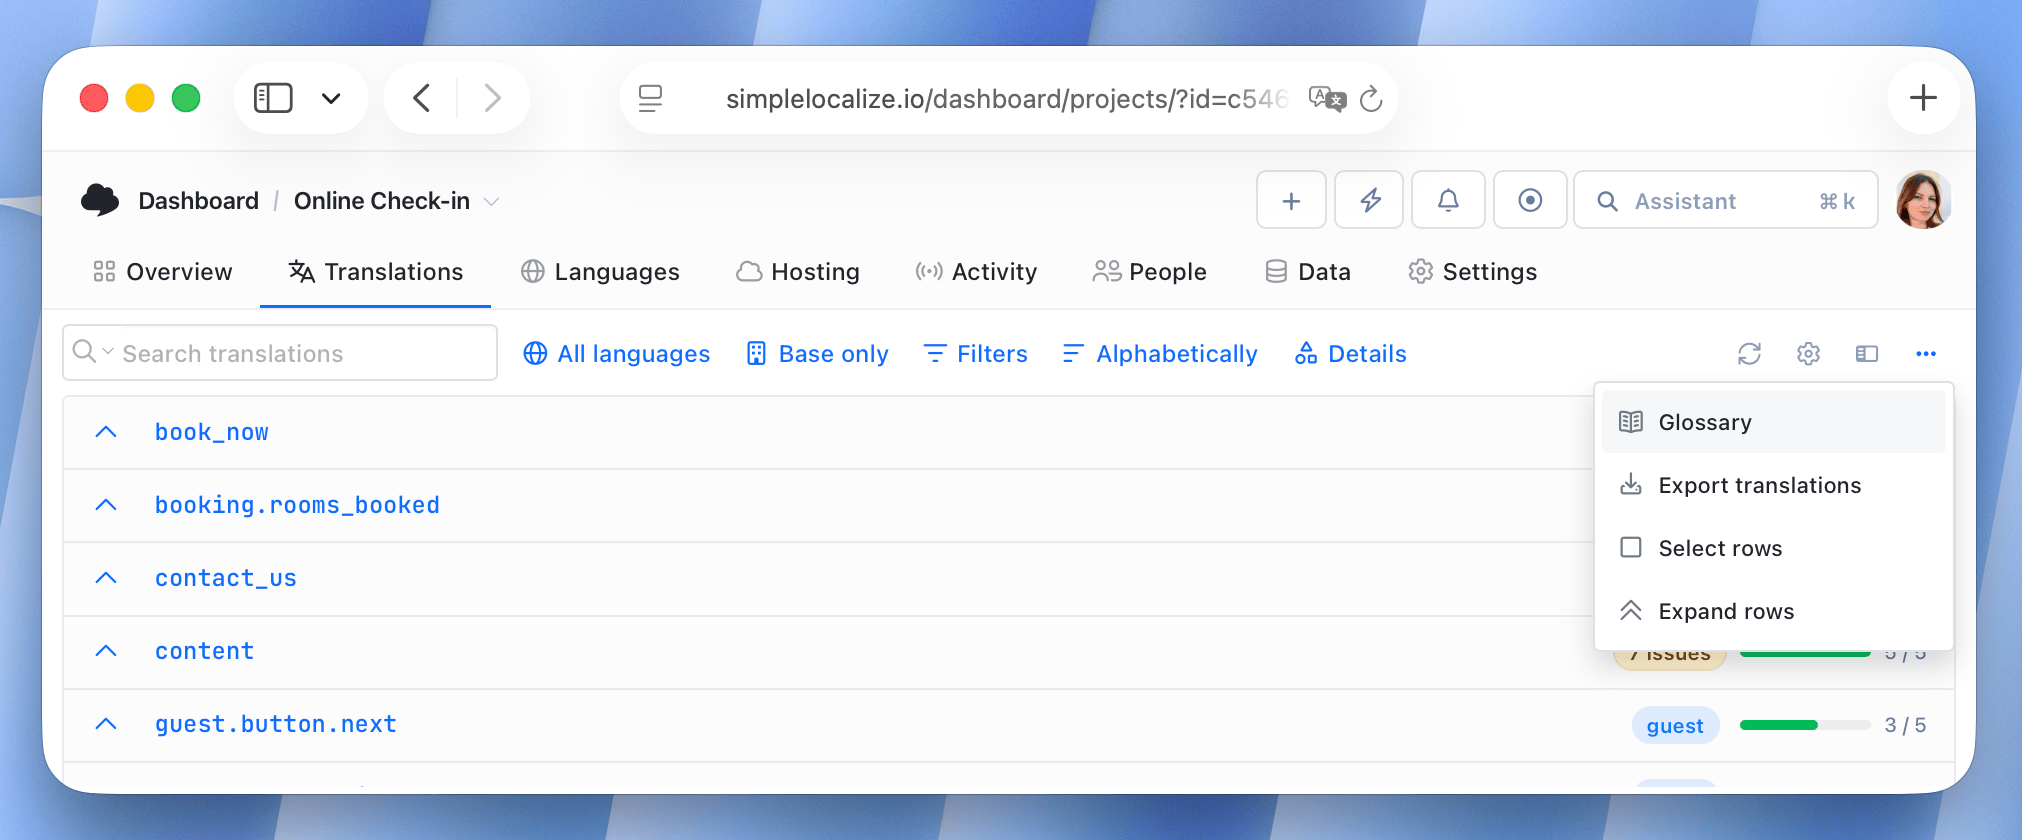
## Setting up a glossary
Open Glossary and click **Add term**. Enter the term in the source language and its translation in the target language.
You can use **Suggest missing** to let AI propose translations for the languages that are still empty. The suggestions are based on how the term is already translated in your project, so review them before saving.
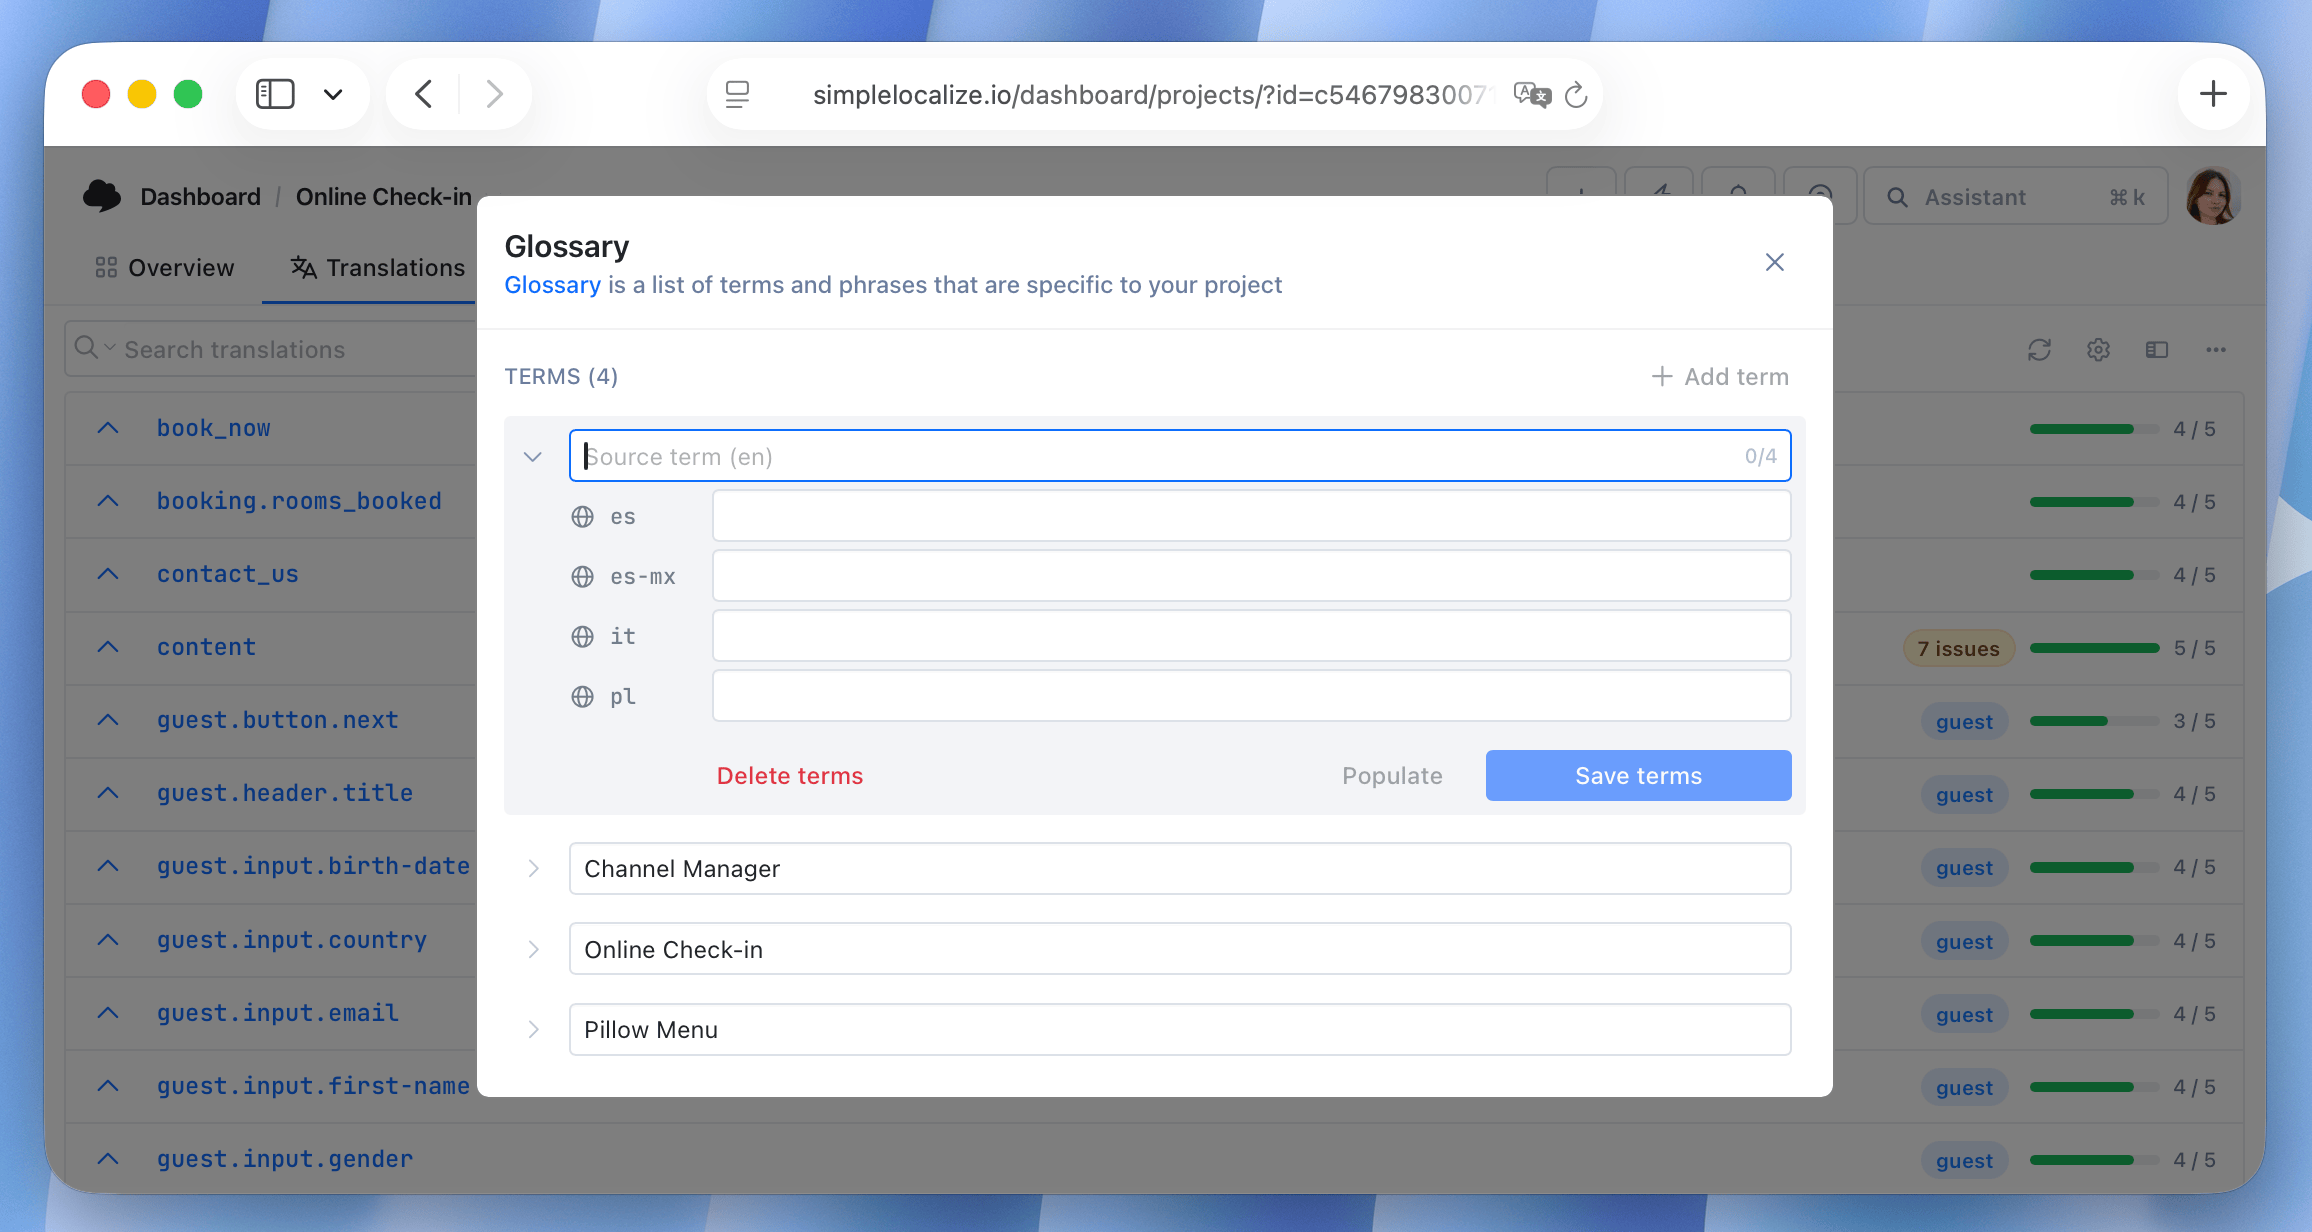
## Alternative forms
A term might be used in a different grammatical form than the one you put in the glossary: in plural, in another case, or with a different gender agreement. For example, the Polish translation of "translation key" is *klucz tłumaczeniowy*, but a sentence may contain *klucze tłumaczeniowe* or *kluczy tłumaczeniowych*.
> Alternative forms are used by [QA checks](/docs/translation-editor/qa-checks/) and [AI auto-translation](/docs/general/auto-translation/) providers.
## Case-sensitive terms
By default, glossary terms are matched regardless of capitalization, so *Spaces* and *spaces* are treated as the same term. Click the **Aa** icon next to the source term to make it **case-sensitive**.
QA checks will then require the term and its translations (including alternative forms) to be written exactly as defined in the glossary. This is useful for product names, features, and other terms whose capitalization is part of the term.
---
# Translation editor: Screenshots
Source: https://simplelocalize.io/docs/translation-editor/screenshots/
Screenshots help you to provide context for translators by showing how the translation is used in the application or website.
## Table View
For the Table View, you can enable the **Show screenshot column** option in the editor settings. This will display screenshots adjacent to the respective translation key.

## List View
In the List View, locate the **Screenshots** option under the translation keys. To add an image, simply click on the screenshot area and upload the desired image. Additionally, you can click on the image to view it in full size.

## Bulk upload
You can upload multiple screenshots at once using the bulk upload option.
To do this, drag and drop the images into the Translation Editor area.

This will open a new window where you can see all dragged screenshots with the option to assign a translation keys to each
screenshot. Additionally, the system will suggest translation keys based on the text in the screenshot using OCR.
If you configured a [default language](/docs/general/languages/#default-language) for your project, you will see a translation texts in the translation key selector.
---
# Translation editor: Settings
Source: https://simplelocalize.io/docs/translation-editor/settings/
Configure and customize the translation editor to fit your needs. Use the settings to adjust the view, text wrapping, and more. Work on your translations with ease and comfort.
## Translation editor settings
All translation editor settings you can find on the right side of the editor in the Translations tab. Click on **Settings** to
expand all view options. Below, you can see each view description and below all options available in the editor.

## List View – Side-by-side
Side-by-side view is an advanced version of list view. It splits the view into two columns, so you can see two languages
at once.
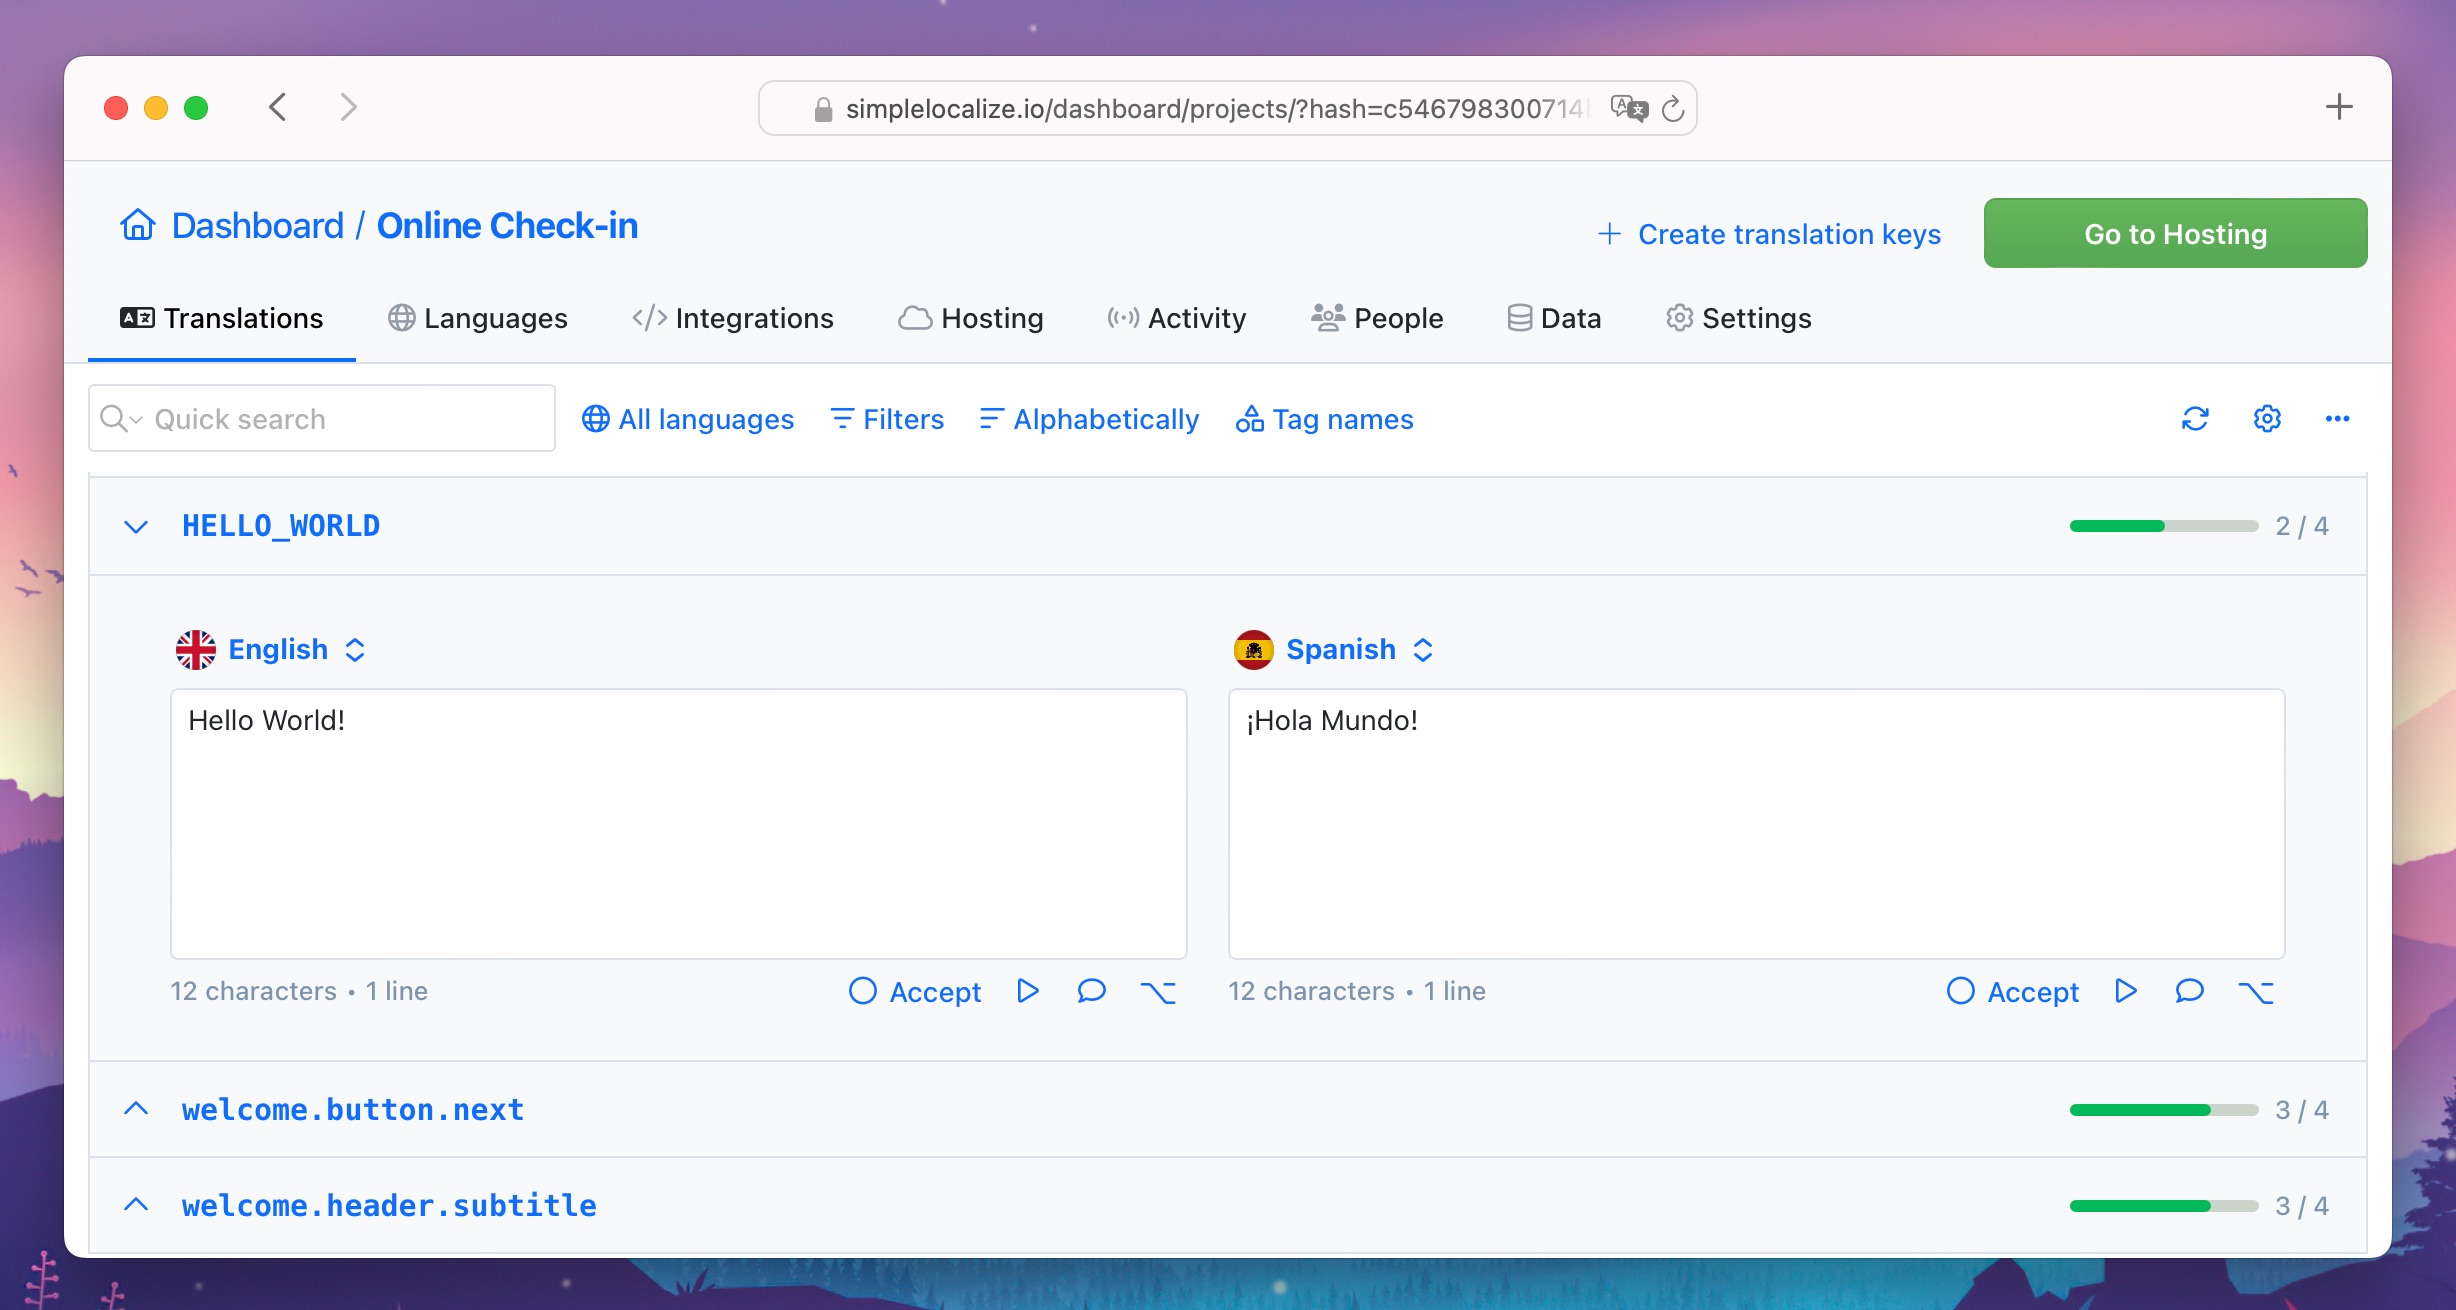
With **Show key details panel** option enabled enabled in the editor settings, you can see a configurable key details panel under the translation input.
You can decide which information to show there, like key details, key or code descriptions, or screenshot.
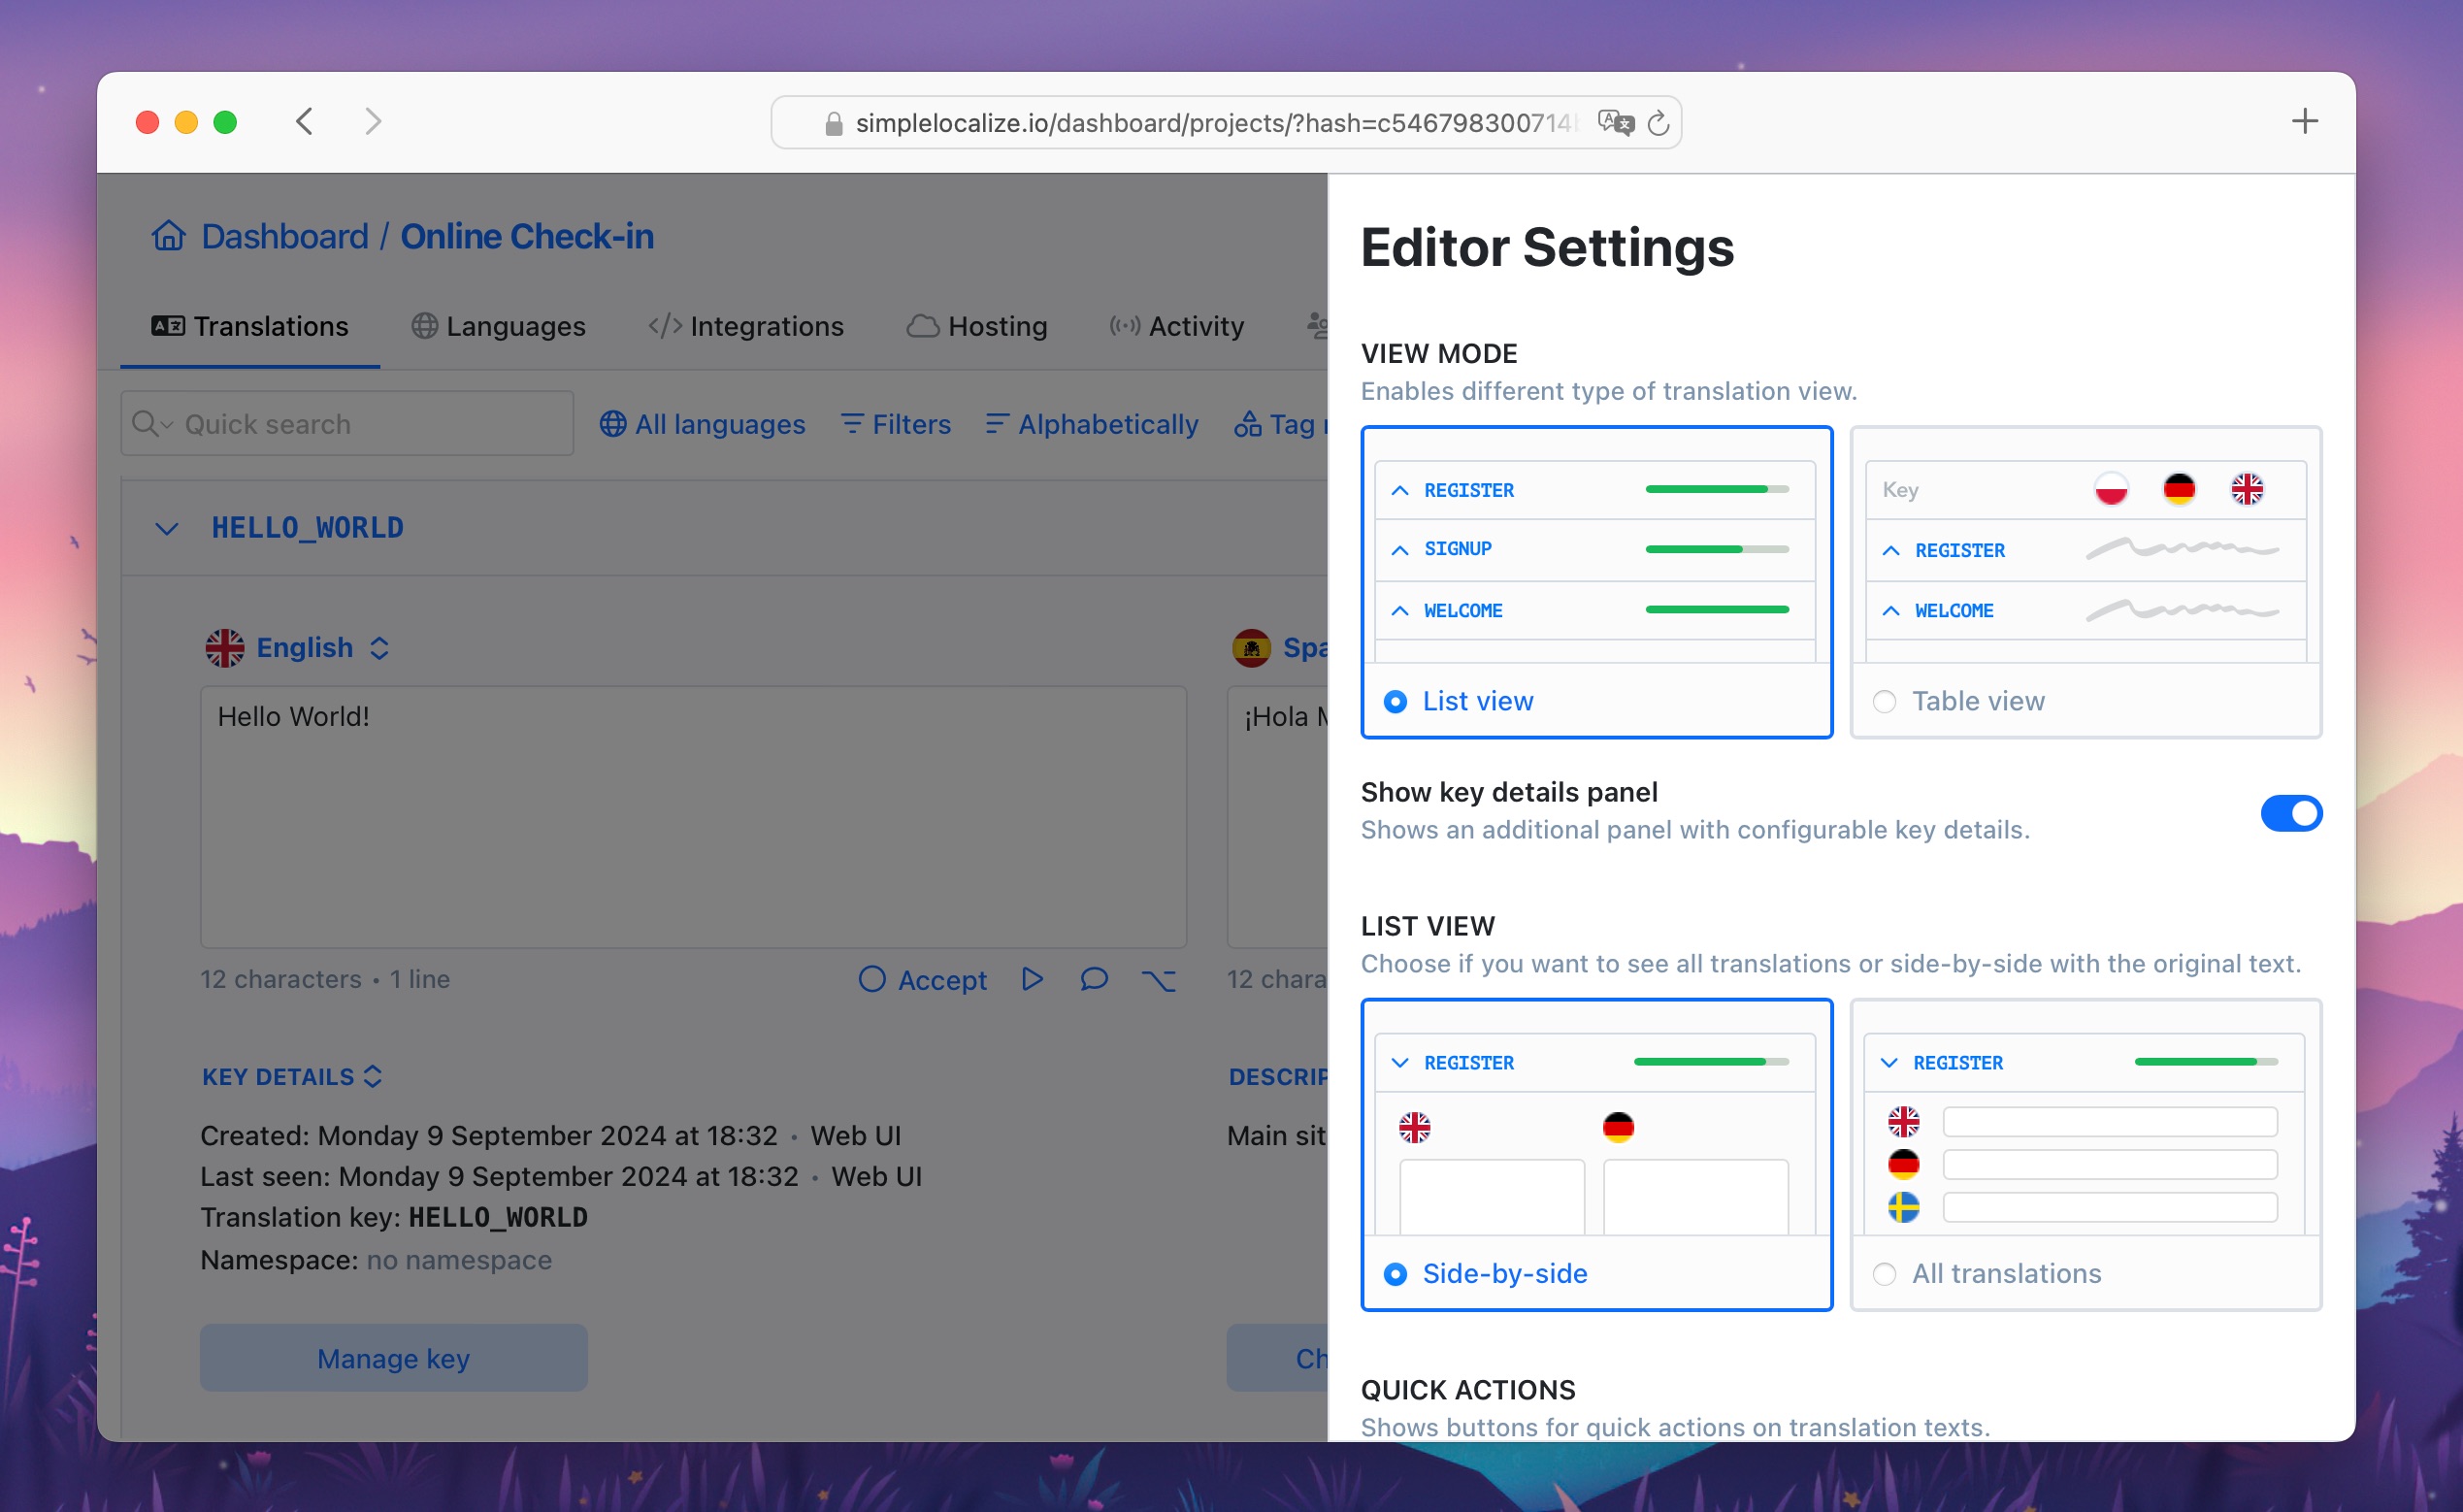
## List View – All translations
This view shows a simple list of all translation keys with their properties and translations in all languages. If you
need to check specific key
details or work on individual translation, this view will help you focus on the key.

## Table View
Table view is a simple spreadsheet-like view. It can store thousands of keys and translations in multiple languages.
To start translating, click on the translation input and type in the translation.
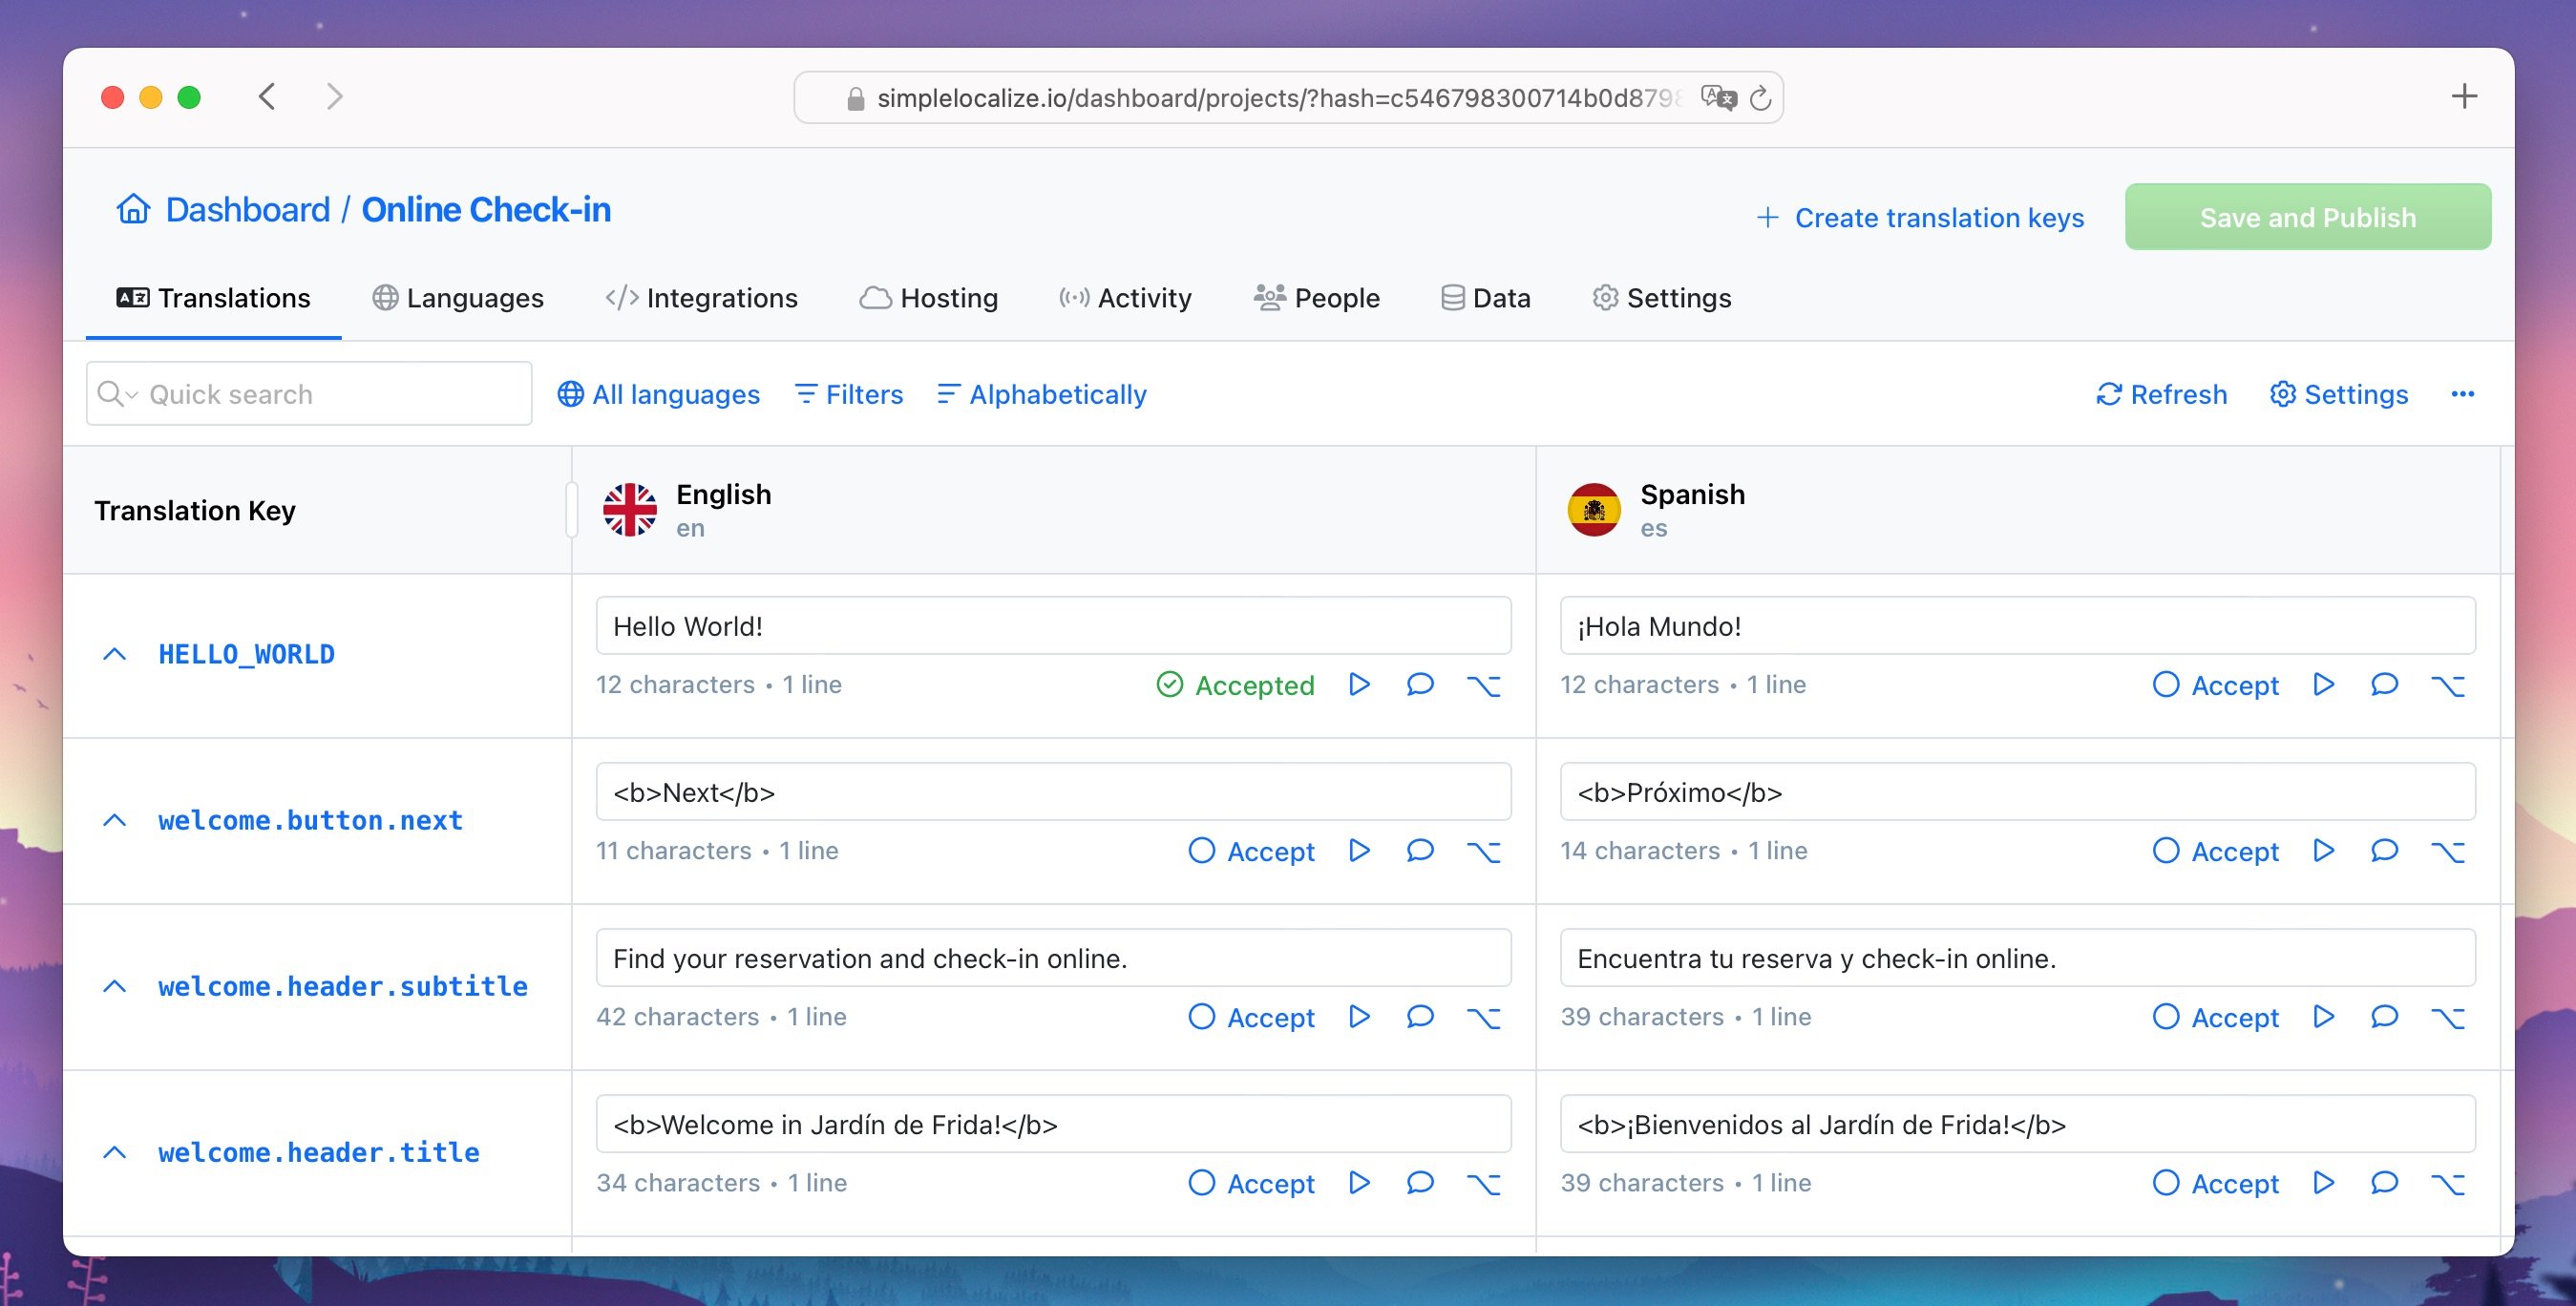
Learn more about adjusting the view settings in the [View settings](#view-settings) section.
## View settings
The options listed below are used in all editor views. SimpleLocalize will remember your preferences and on subsequent
logins the editor will open with your previously saved settings. Use the options below to customize the translation editor to
your needs and preferences.
### Quick actions
Decide which quick actions you want to see in the editor.
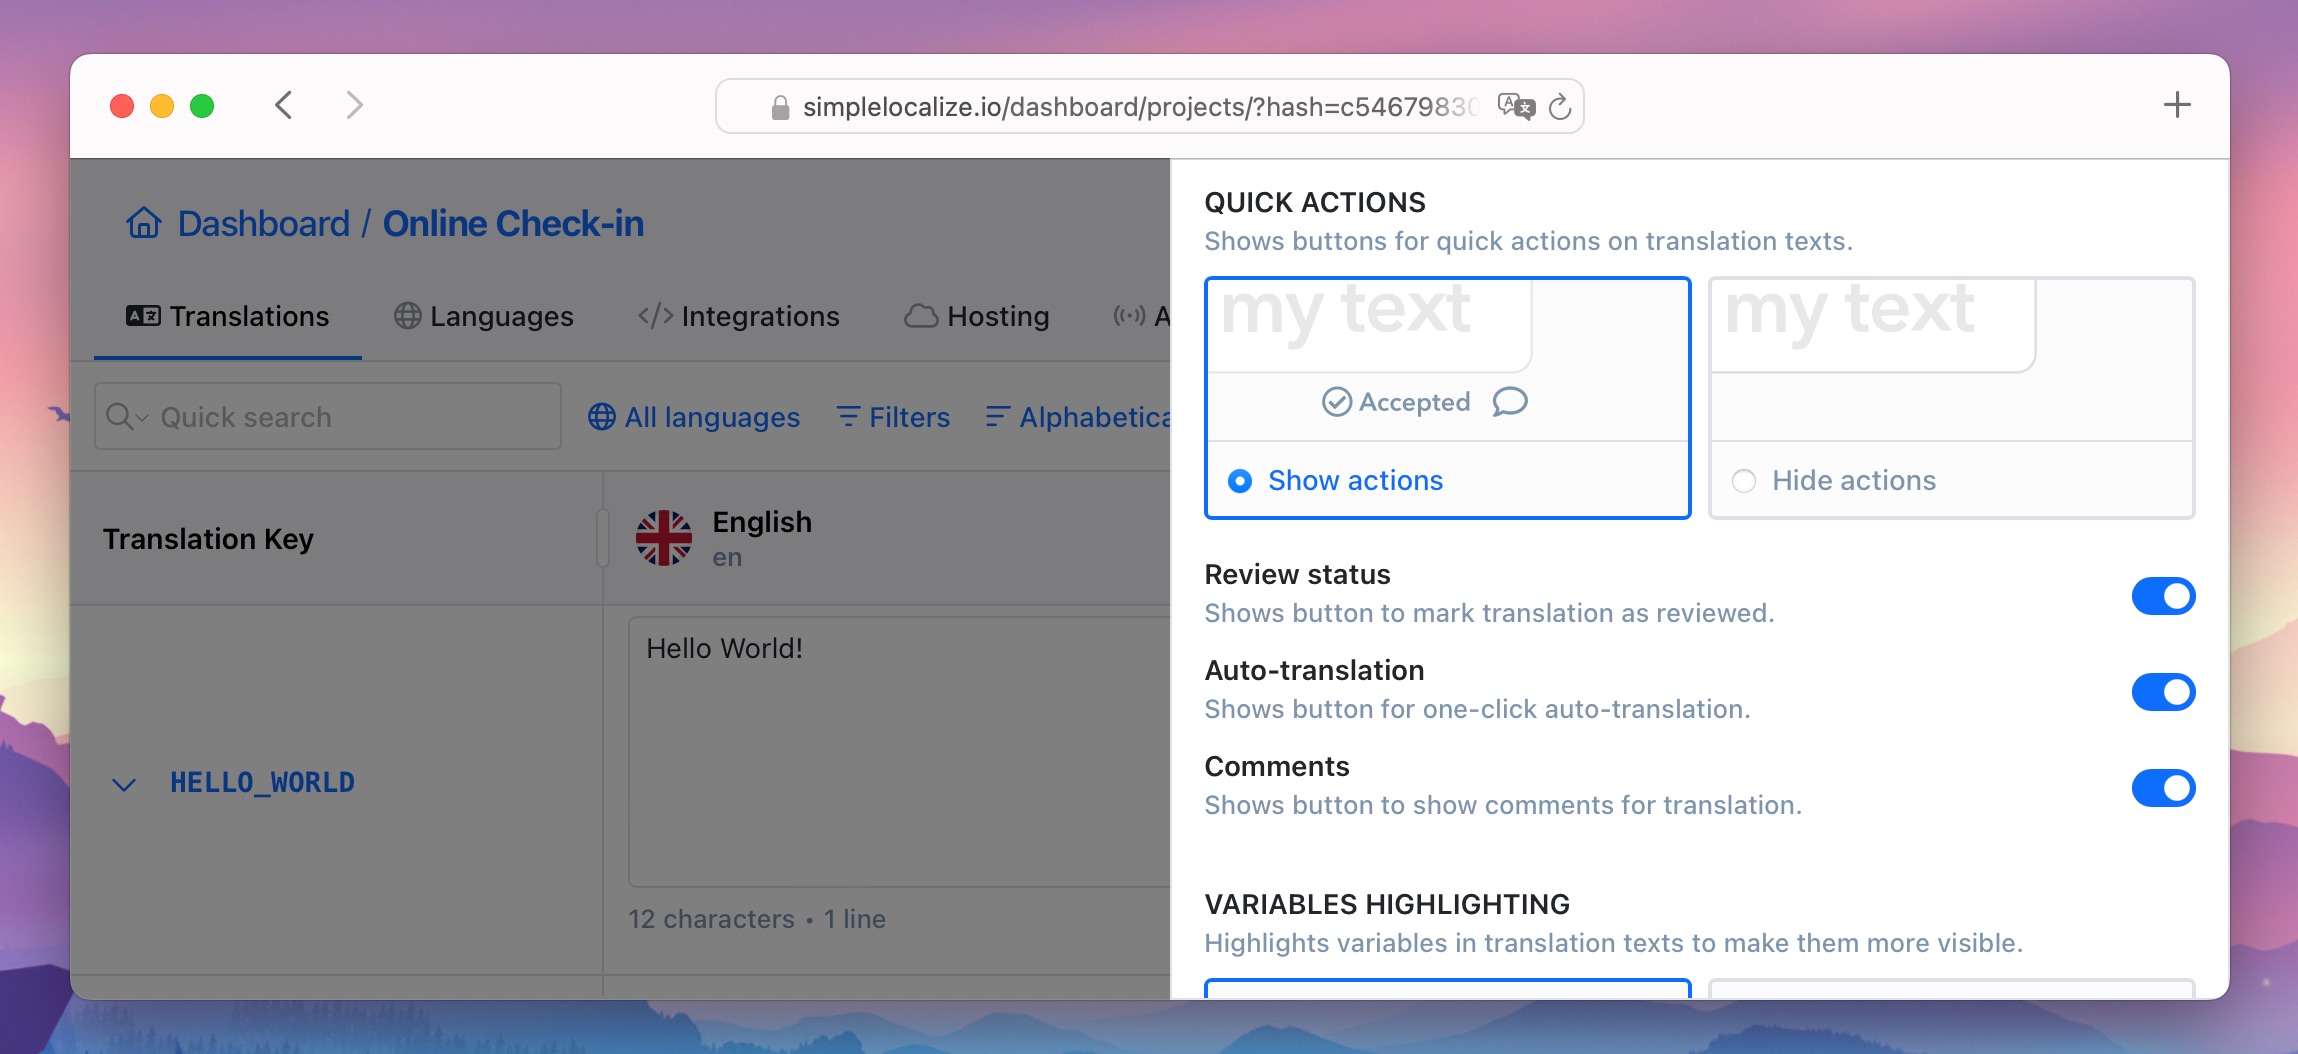
### Automatic text wrapping
This option will wrap your multi-line translations to show the whole text within the input.
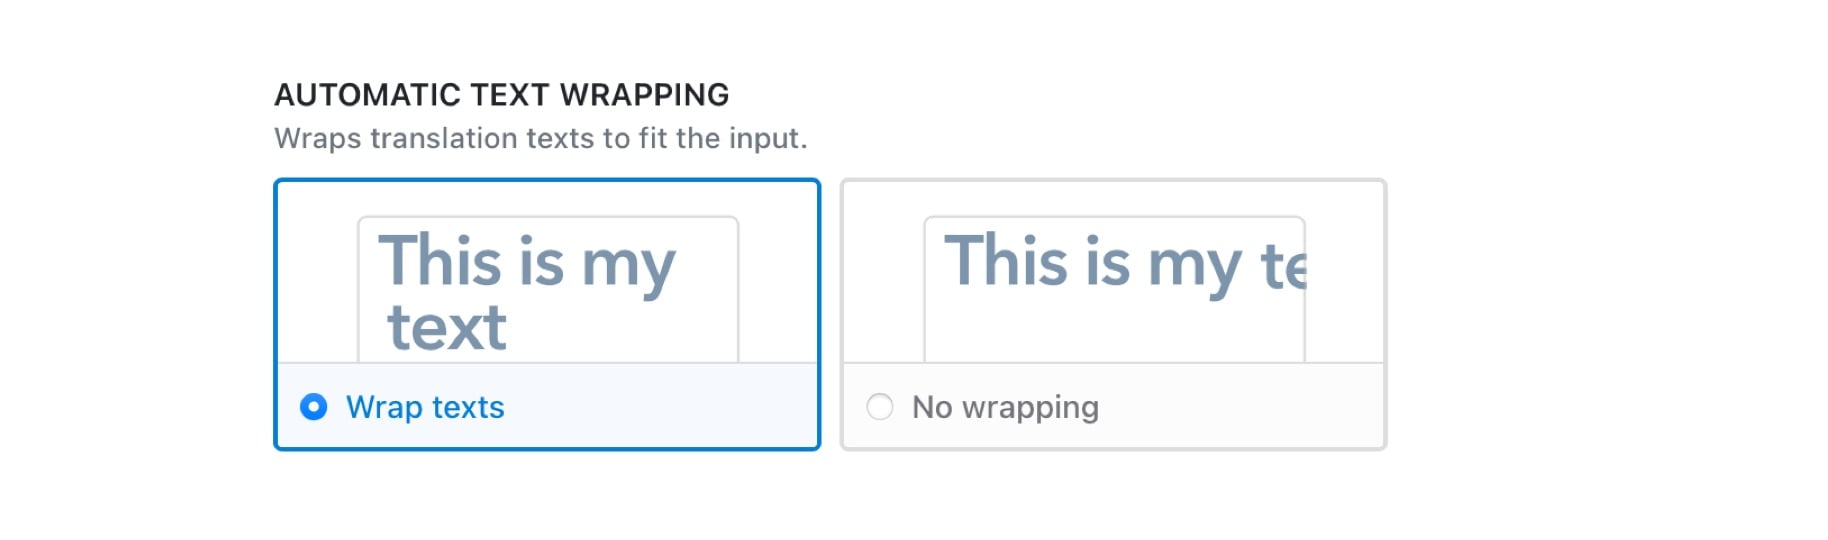
In the example below, you can see the automatic text wrapping option enabled in Side-by-Side view with expanded key
view.
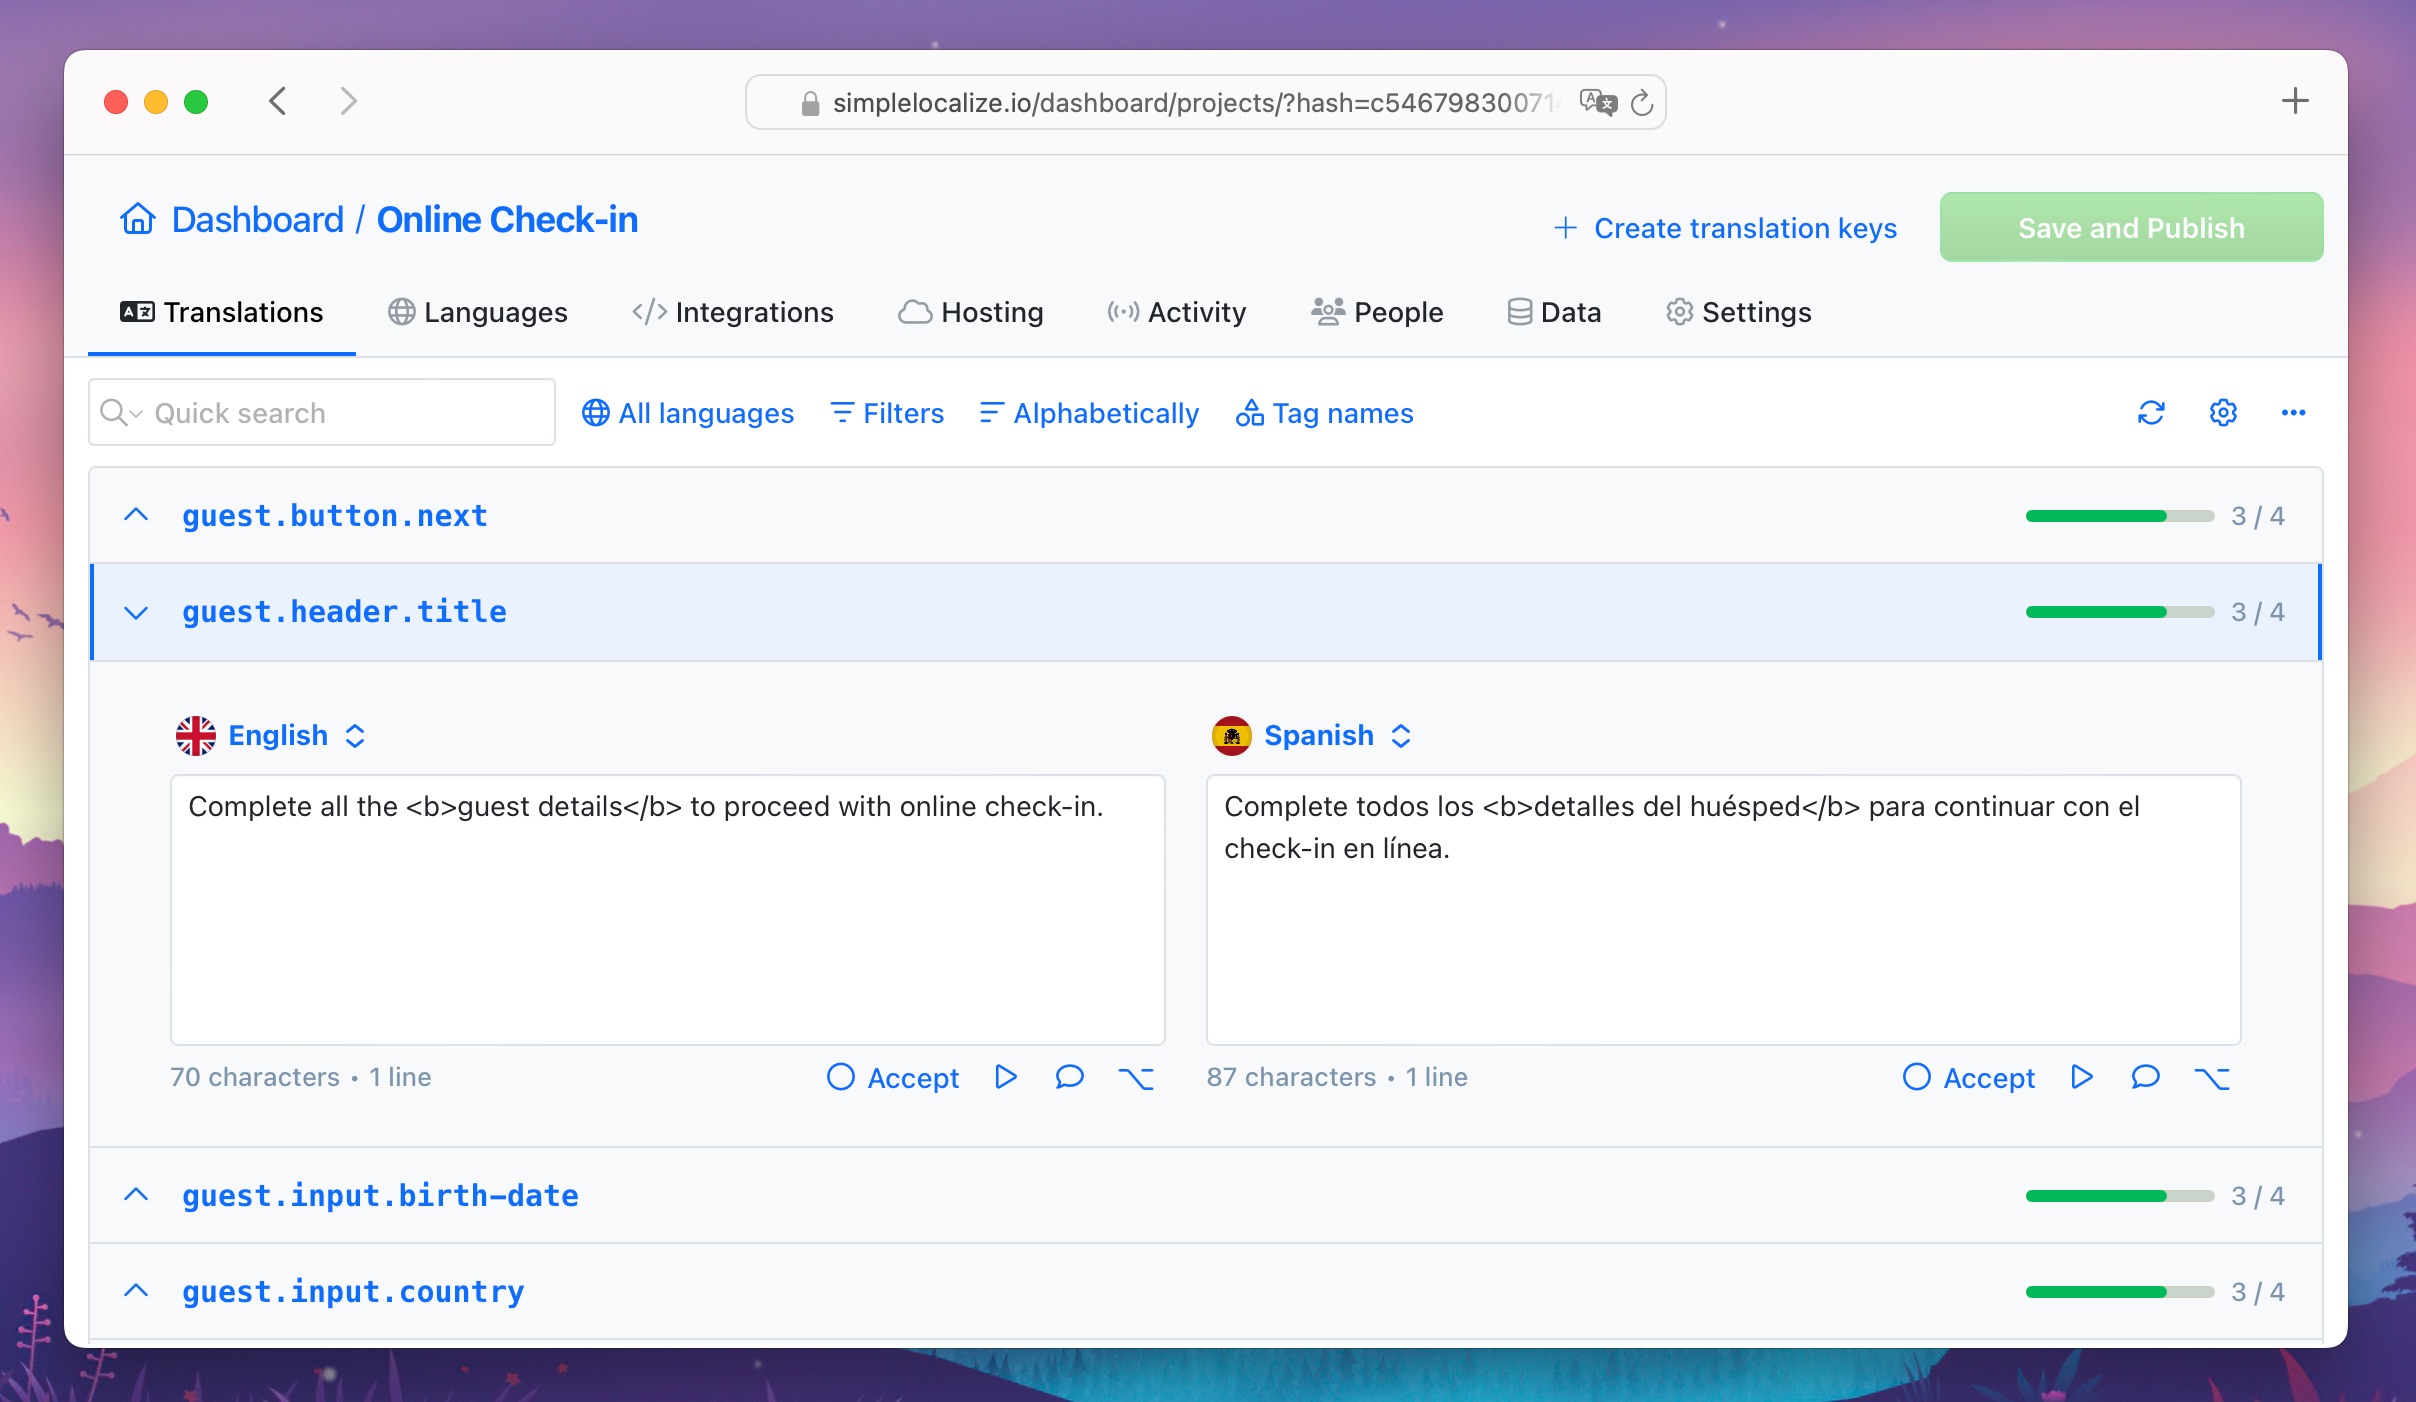
### Translation text summary
Use this option to show the number of characters, words, whitespaces and lines in your translation. It helps to keep
similar translation length and style in different languages.
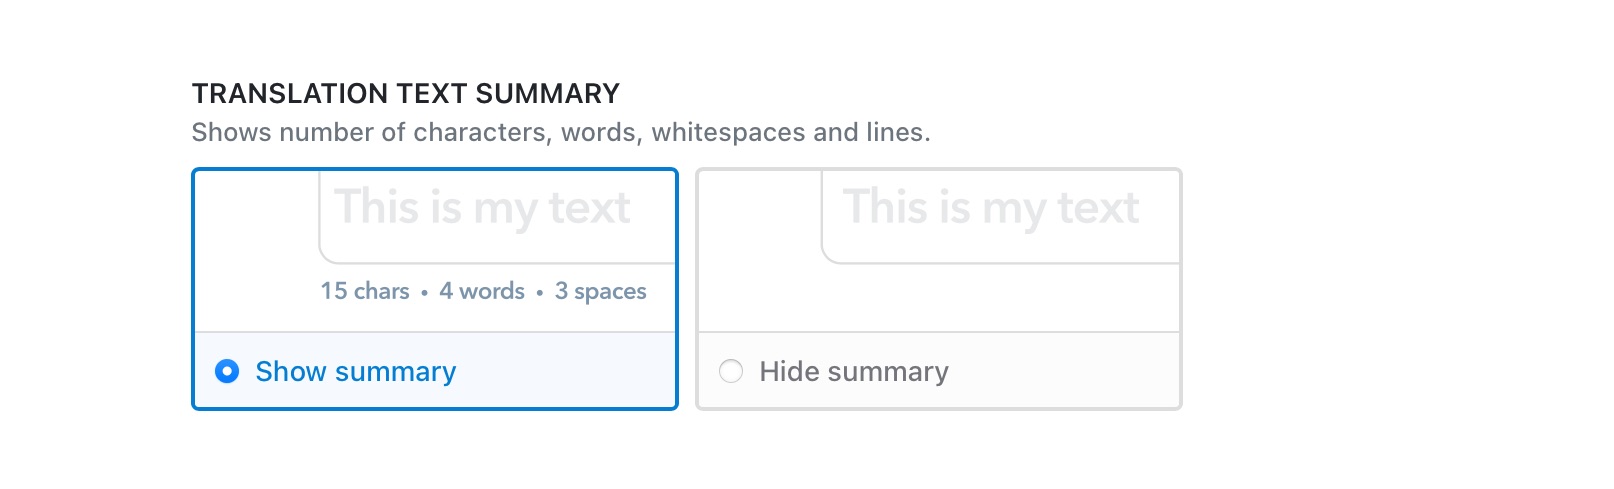
The translation text summary will show up near the translation input in each view of translation editor.
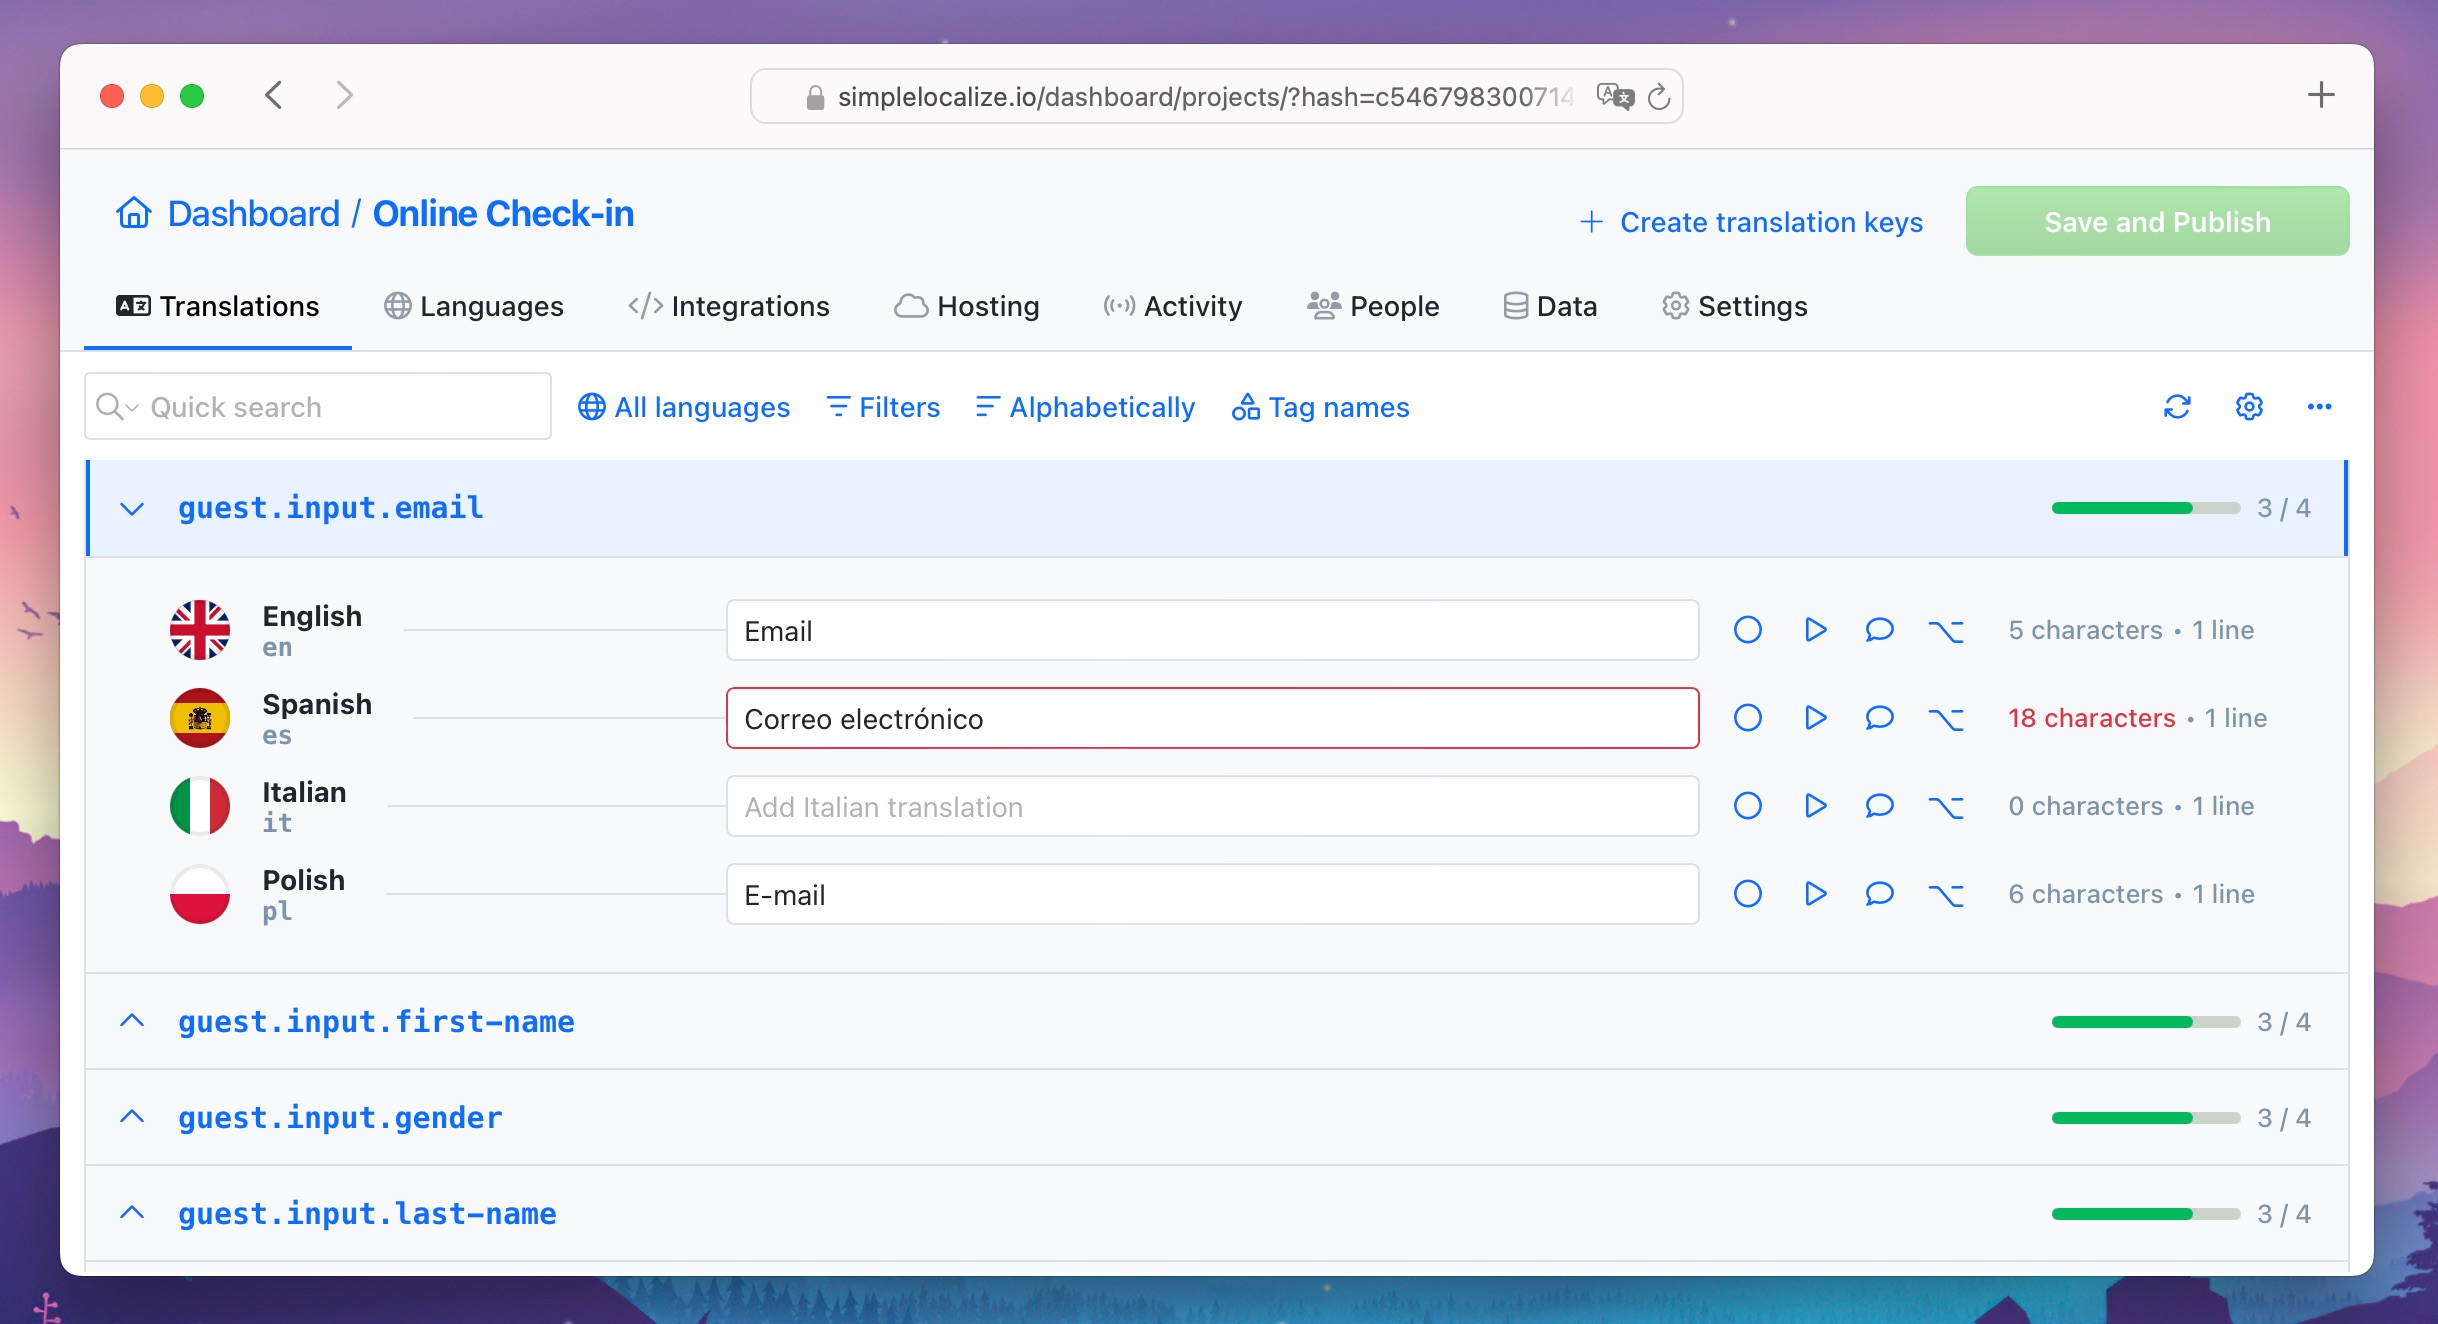
You can set the maximum number of characters in the translation input in the [translation key settings](/docs/translation-editor/translation-keys/#translation-key-settings).
### Auto-translation indicator
Use this option to see right away if the key was translated automatically and may require additional review.
The chosen translation service logo, DeepL, Google Translate or OpenAI, will appear in the translation input in all views.
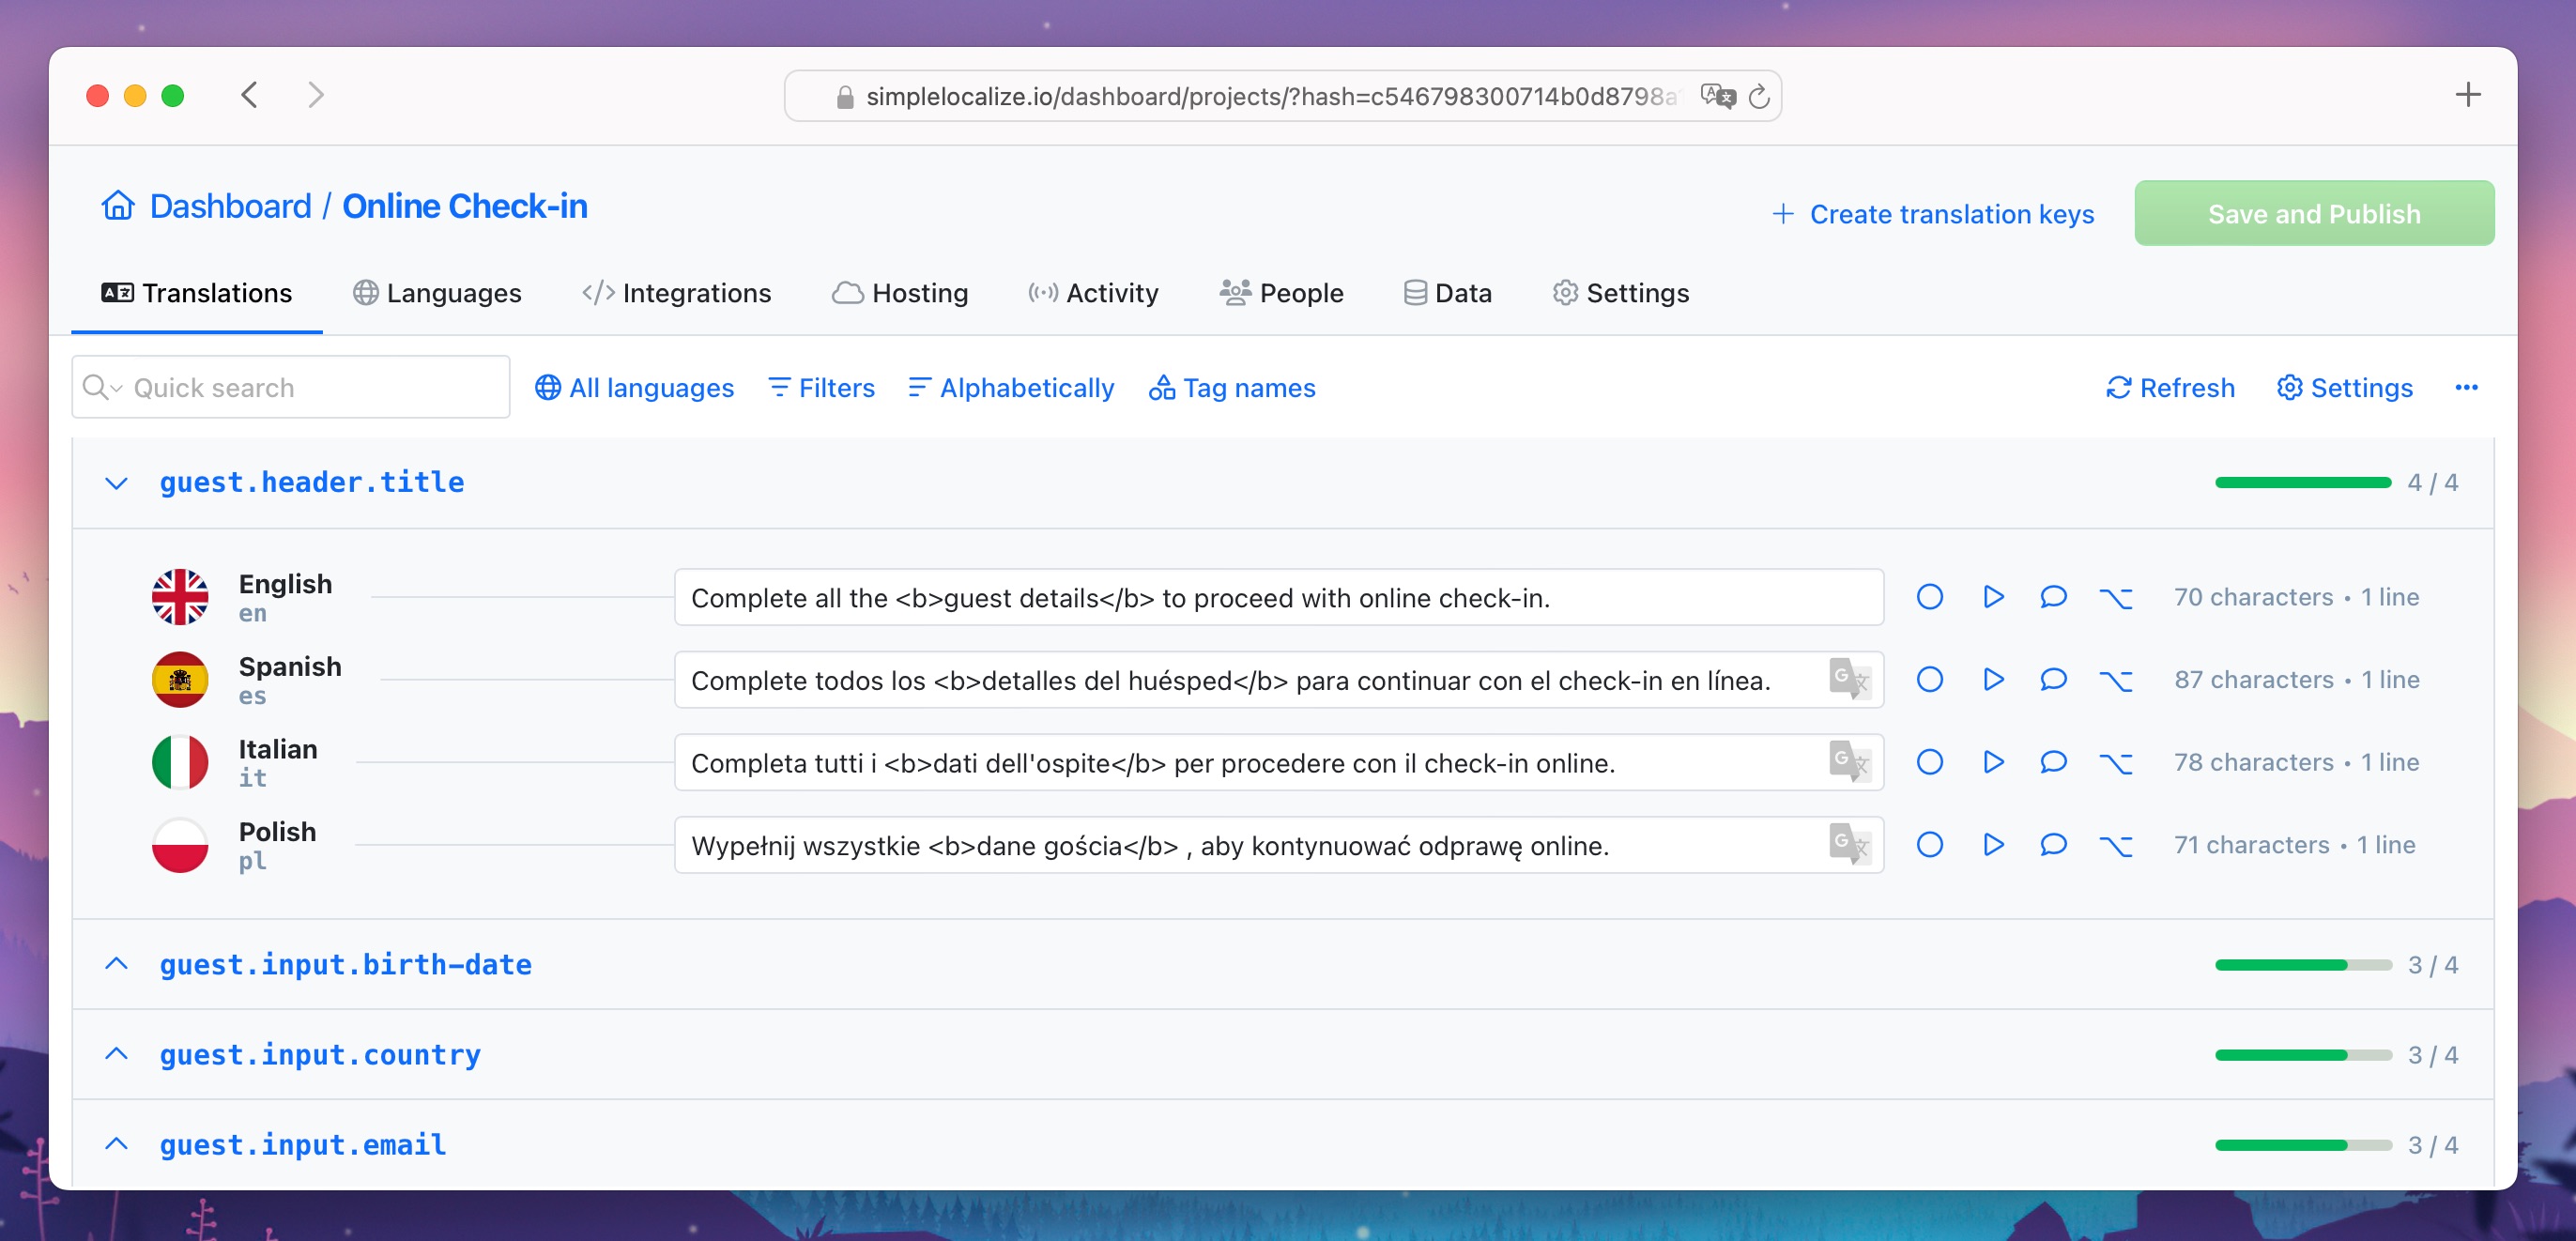
### Variable highlighting
This option will highlight variables in your translation text. It helps to keep the correct variable order and type in the translation.
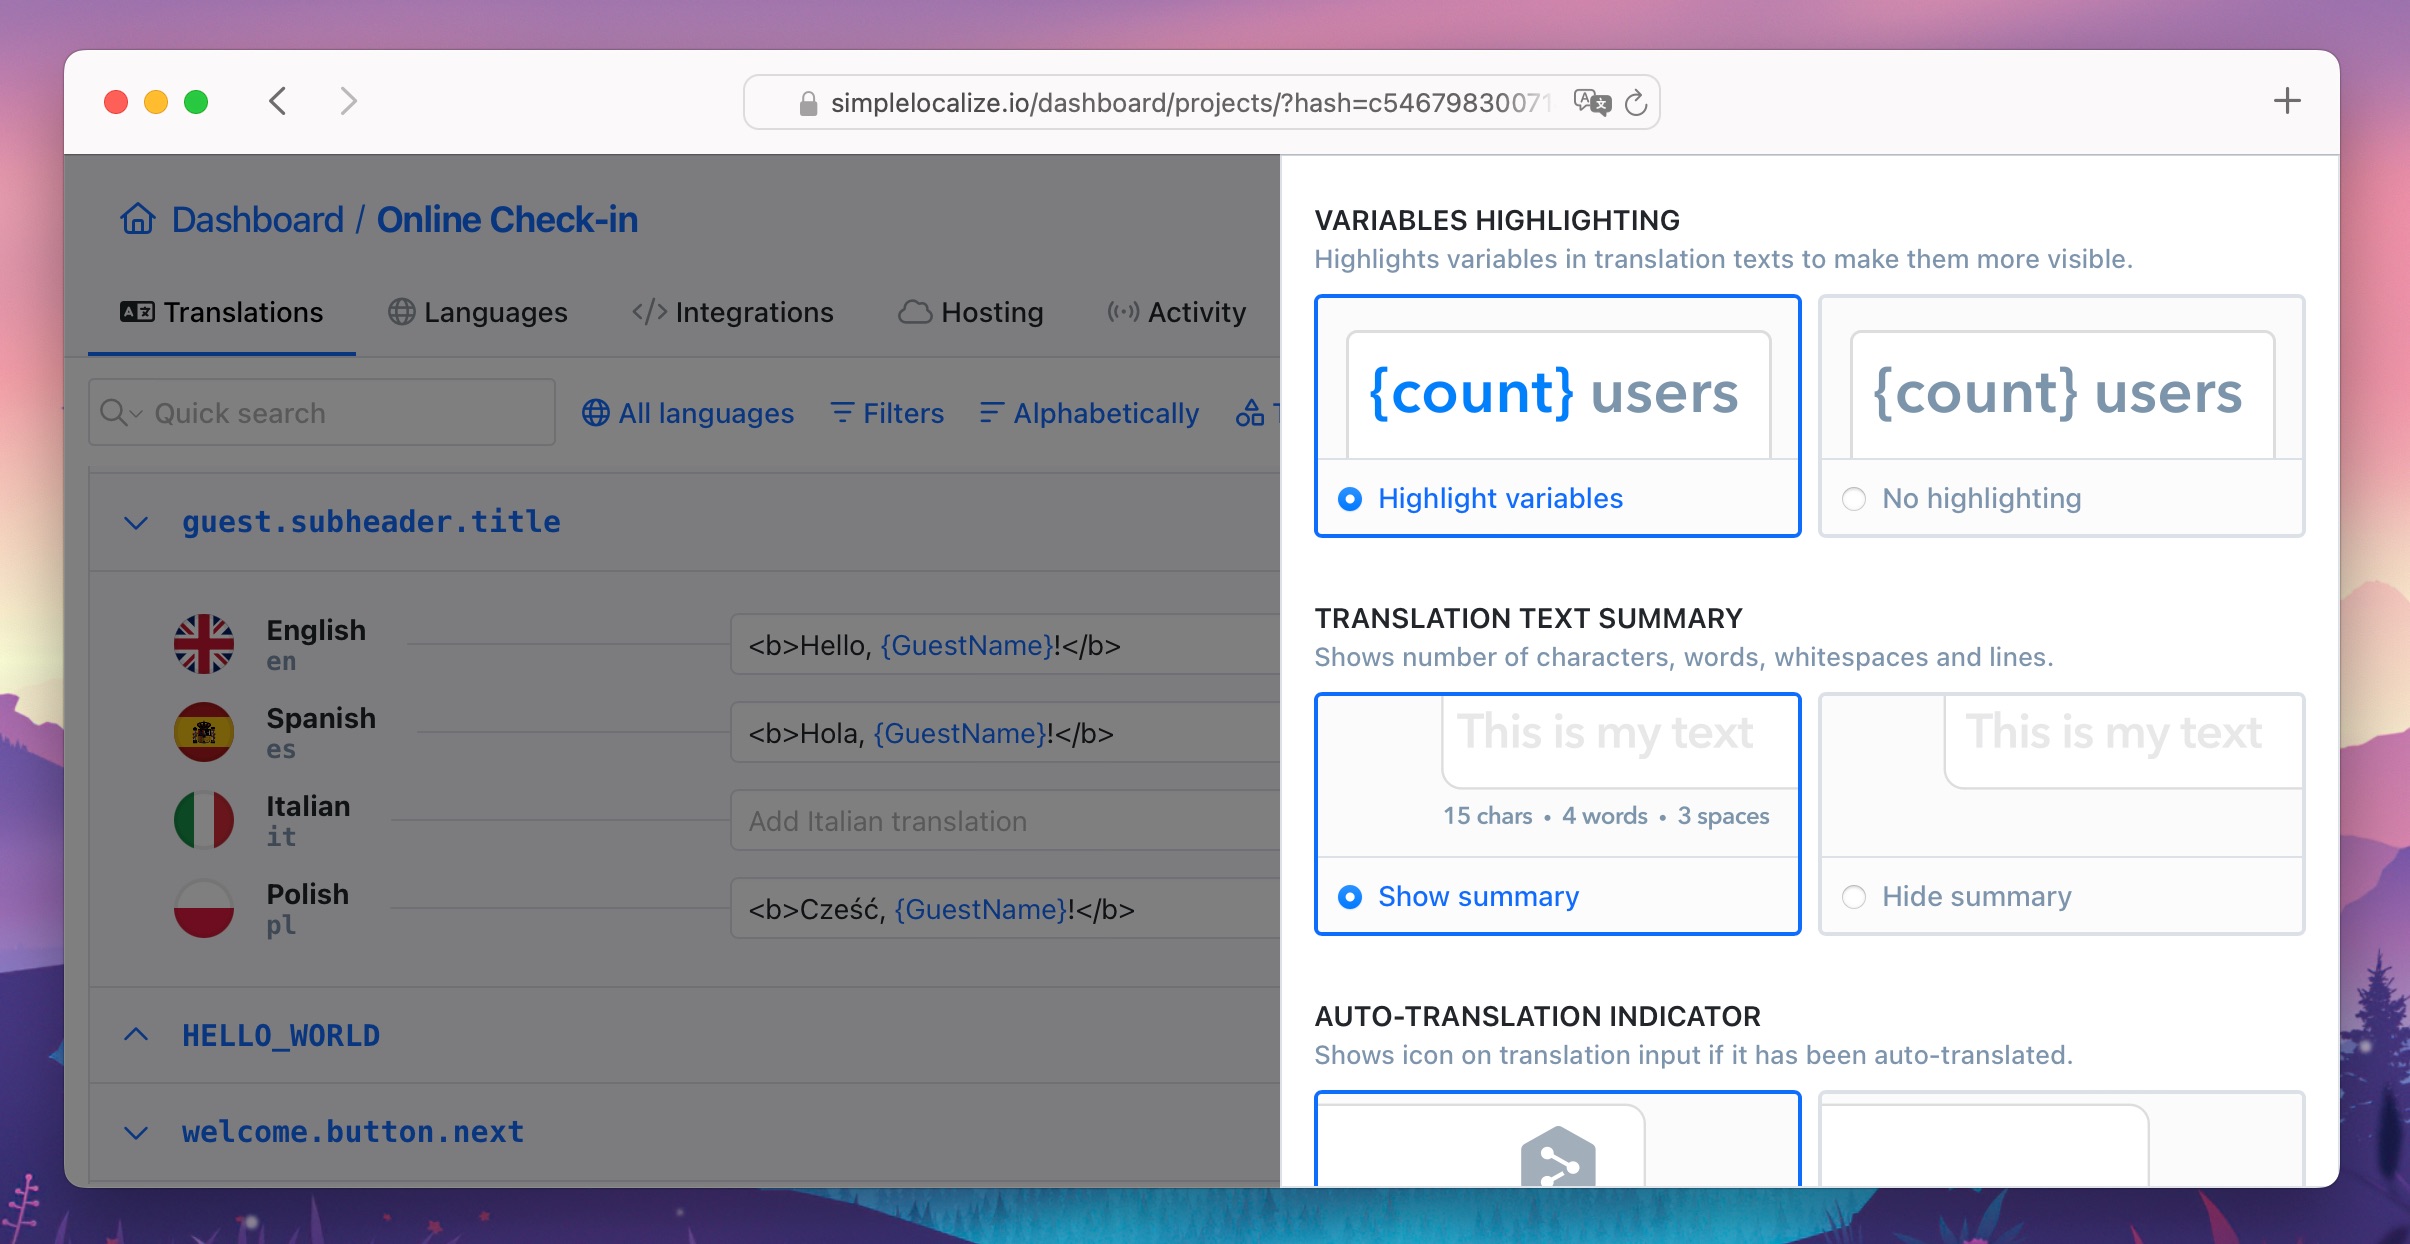
### Other settings
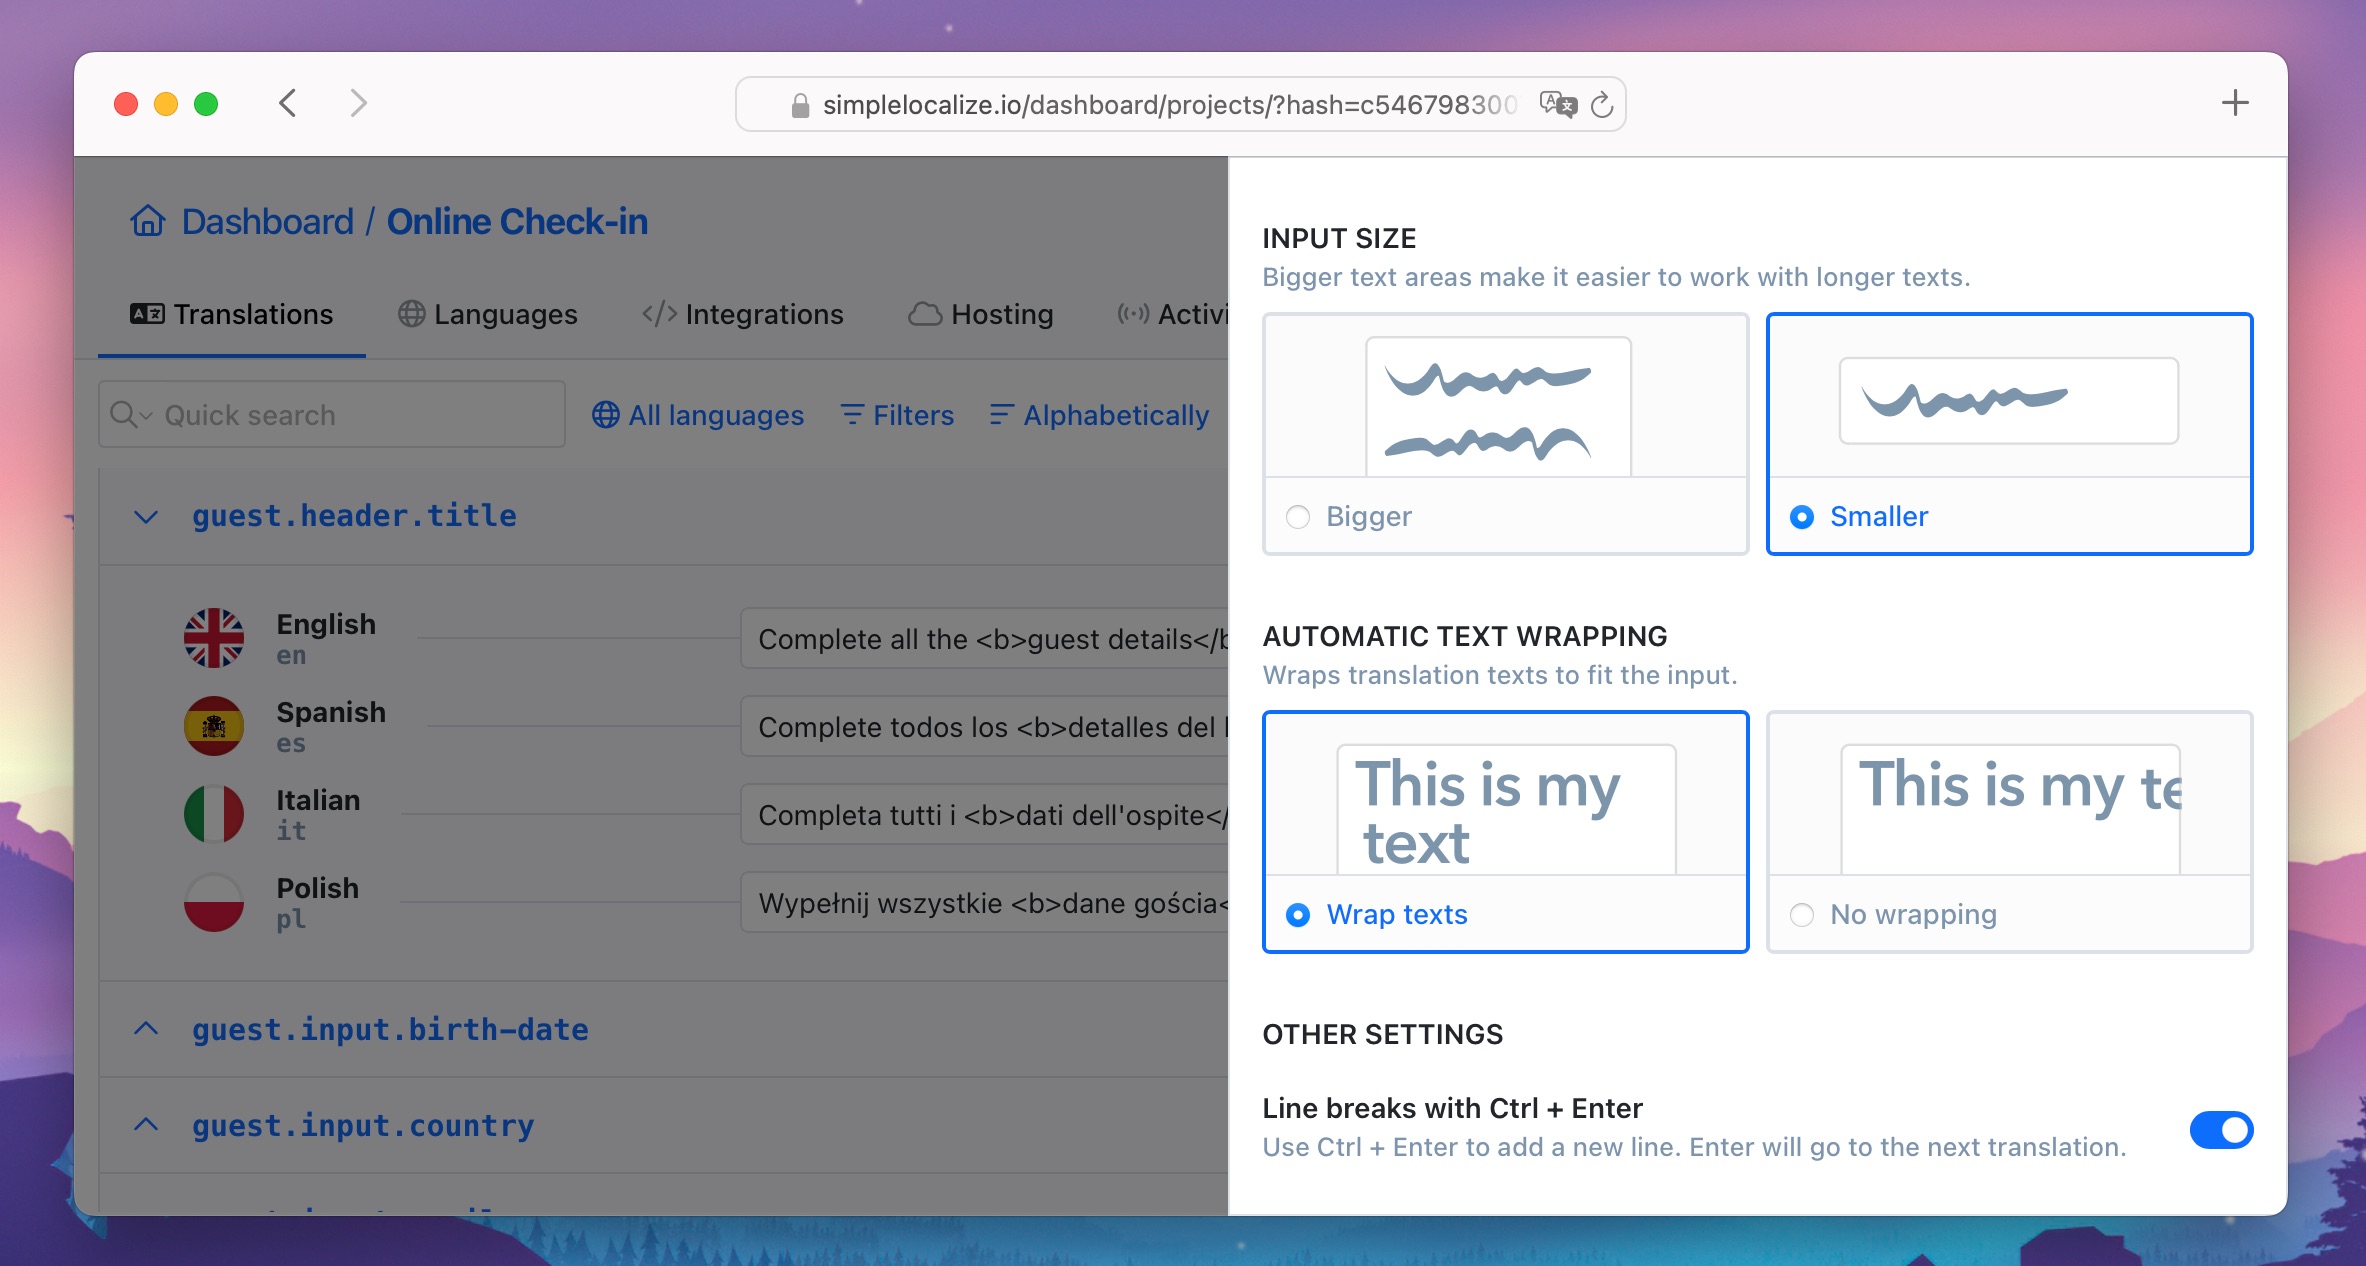
#### Add line breaks with + Enter
This is an extra option that can help translators in their work. Instead of adding a new line in your translation
with Enter, use +Enter.
## Translation key description
In translation key description, you can add any extra information you want to show to translators. Usually, it is the specific key
location. You can use it to add a link with the location screenshot to help to locate the key easily. The link will open
automatically in a new tab. This information can be shown in all editor views.
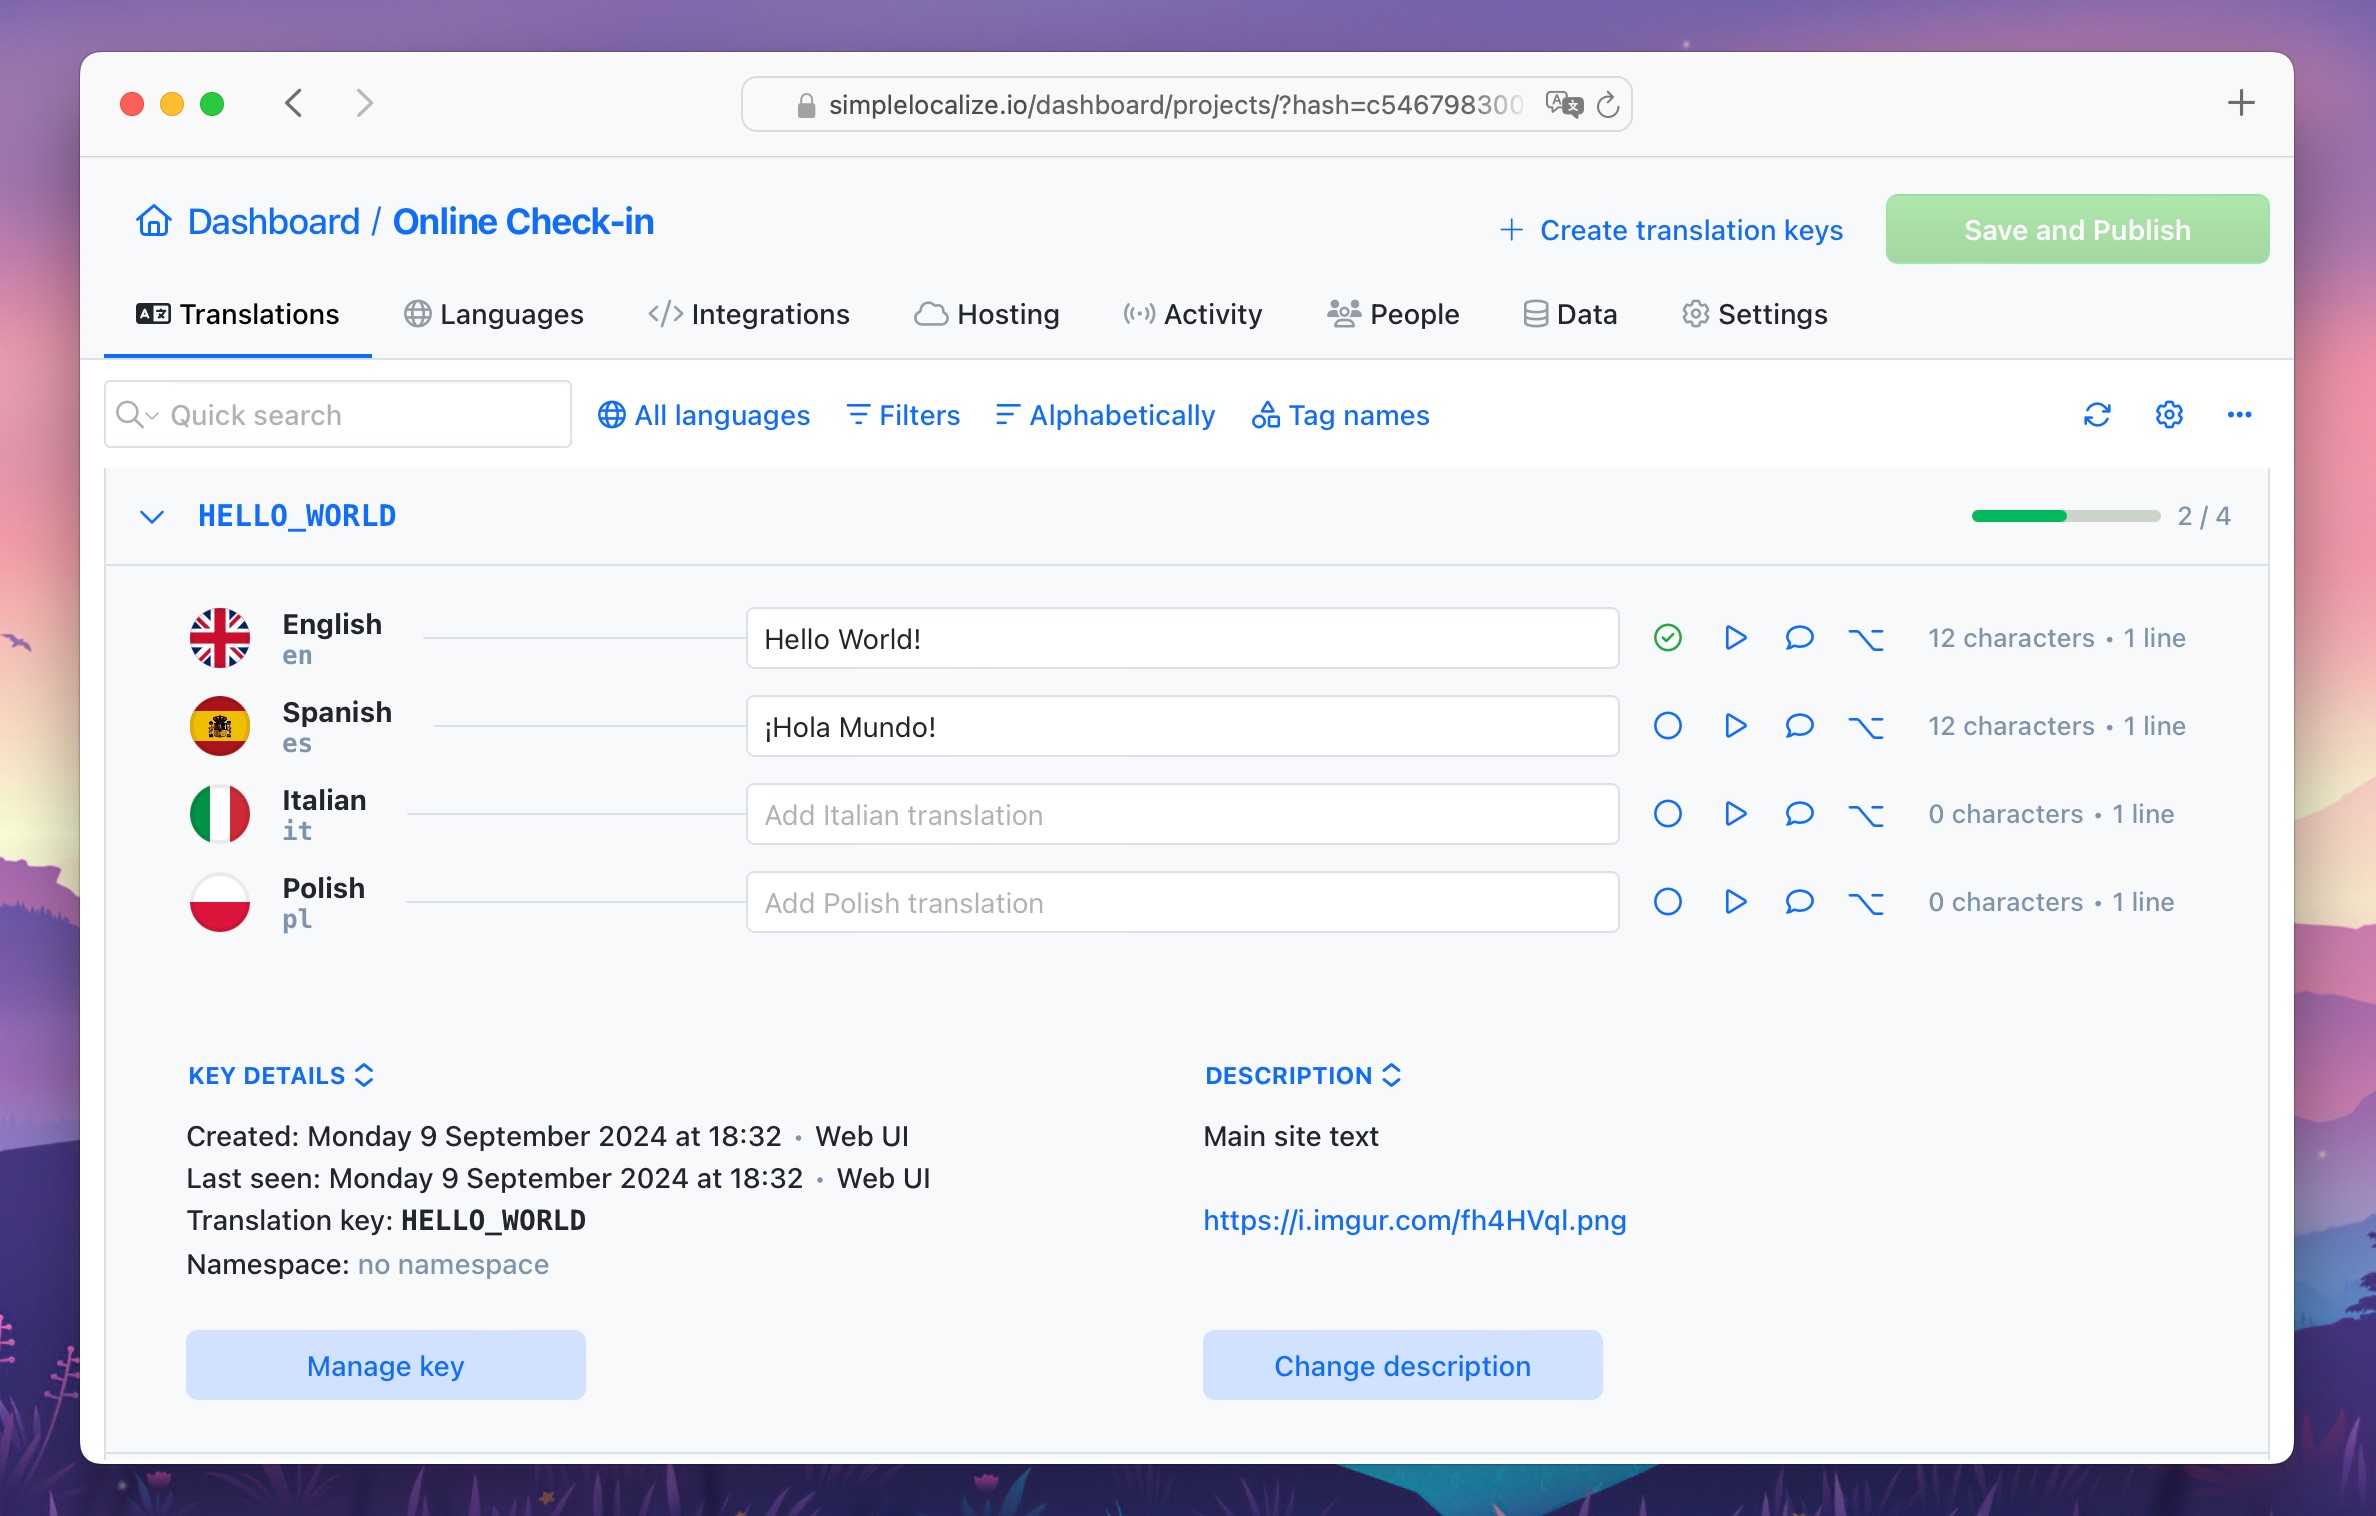
Click on **Show description column** to display key descriptions in Table View, or check key details in List View to see
the description.
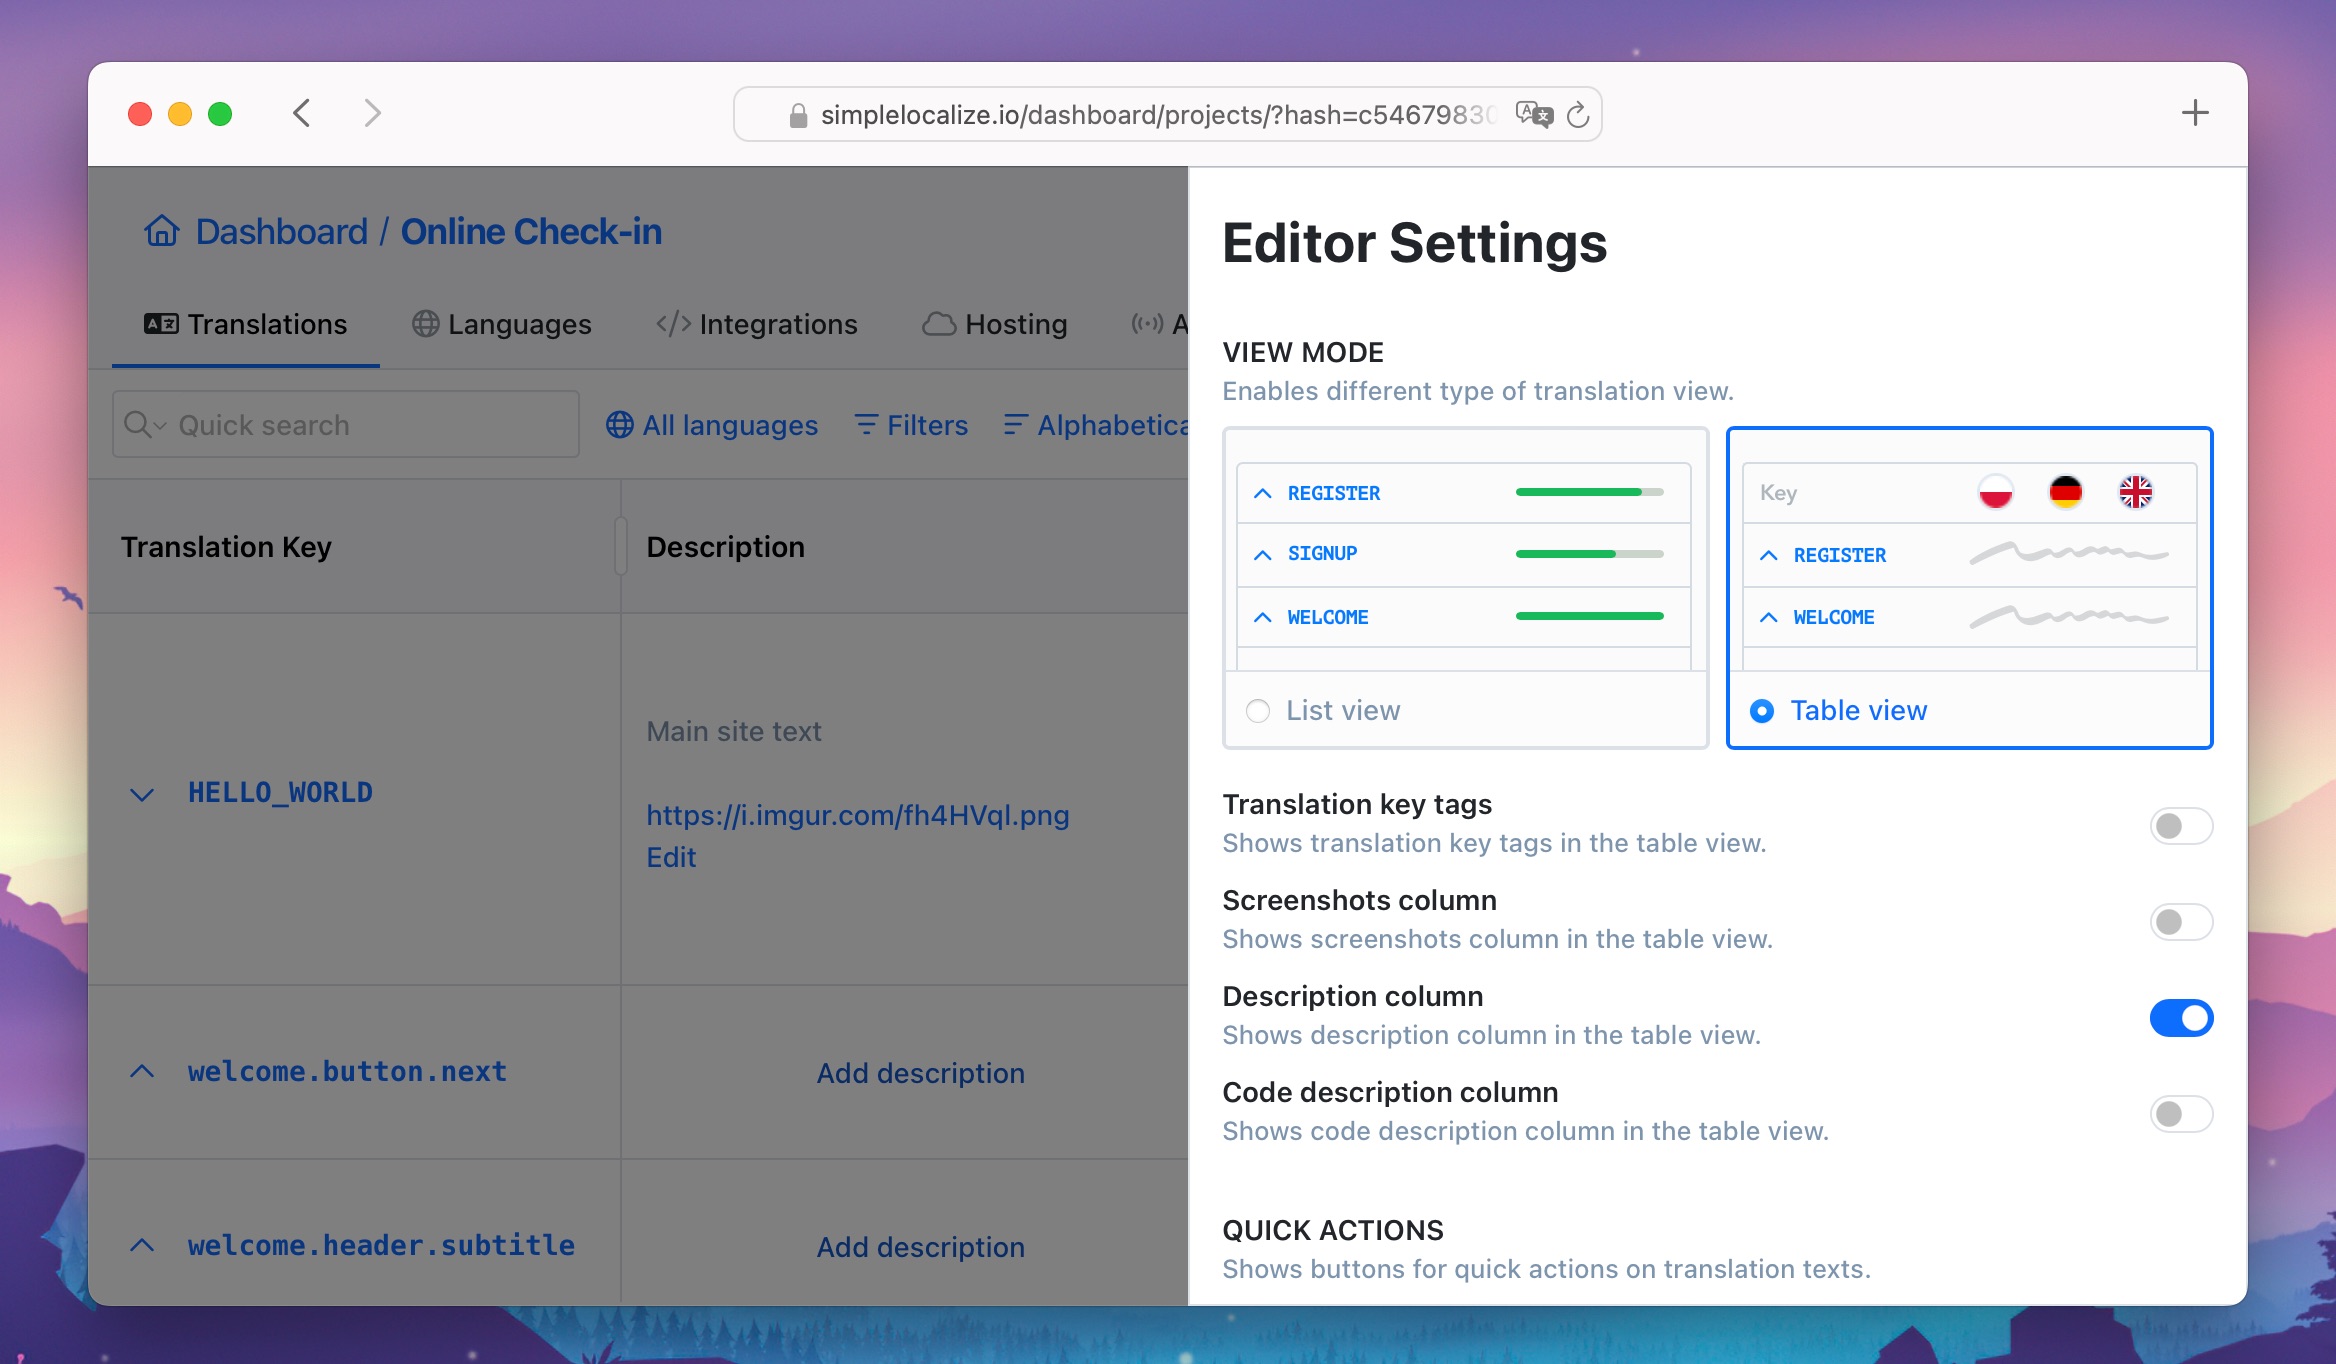
## Code description
Code description is a key description or key details set directly in your source code. It can be displayed in the Table View
with **Show code description column** option checked in editor view settings.
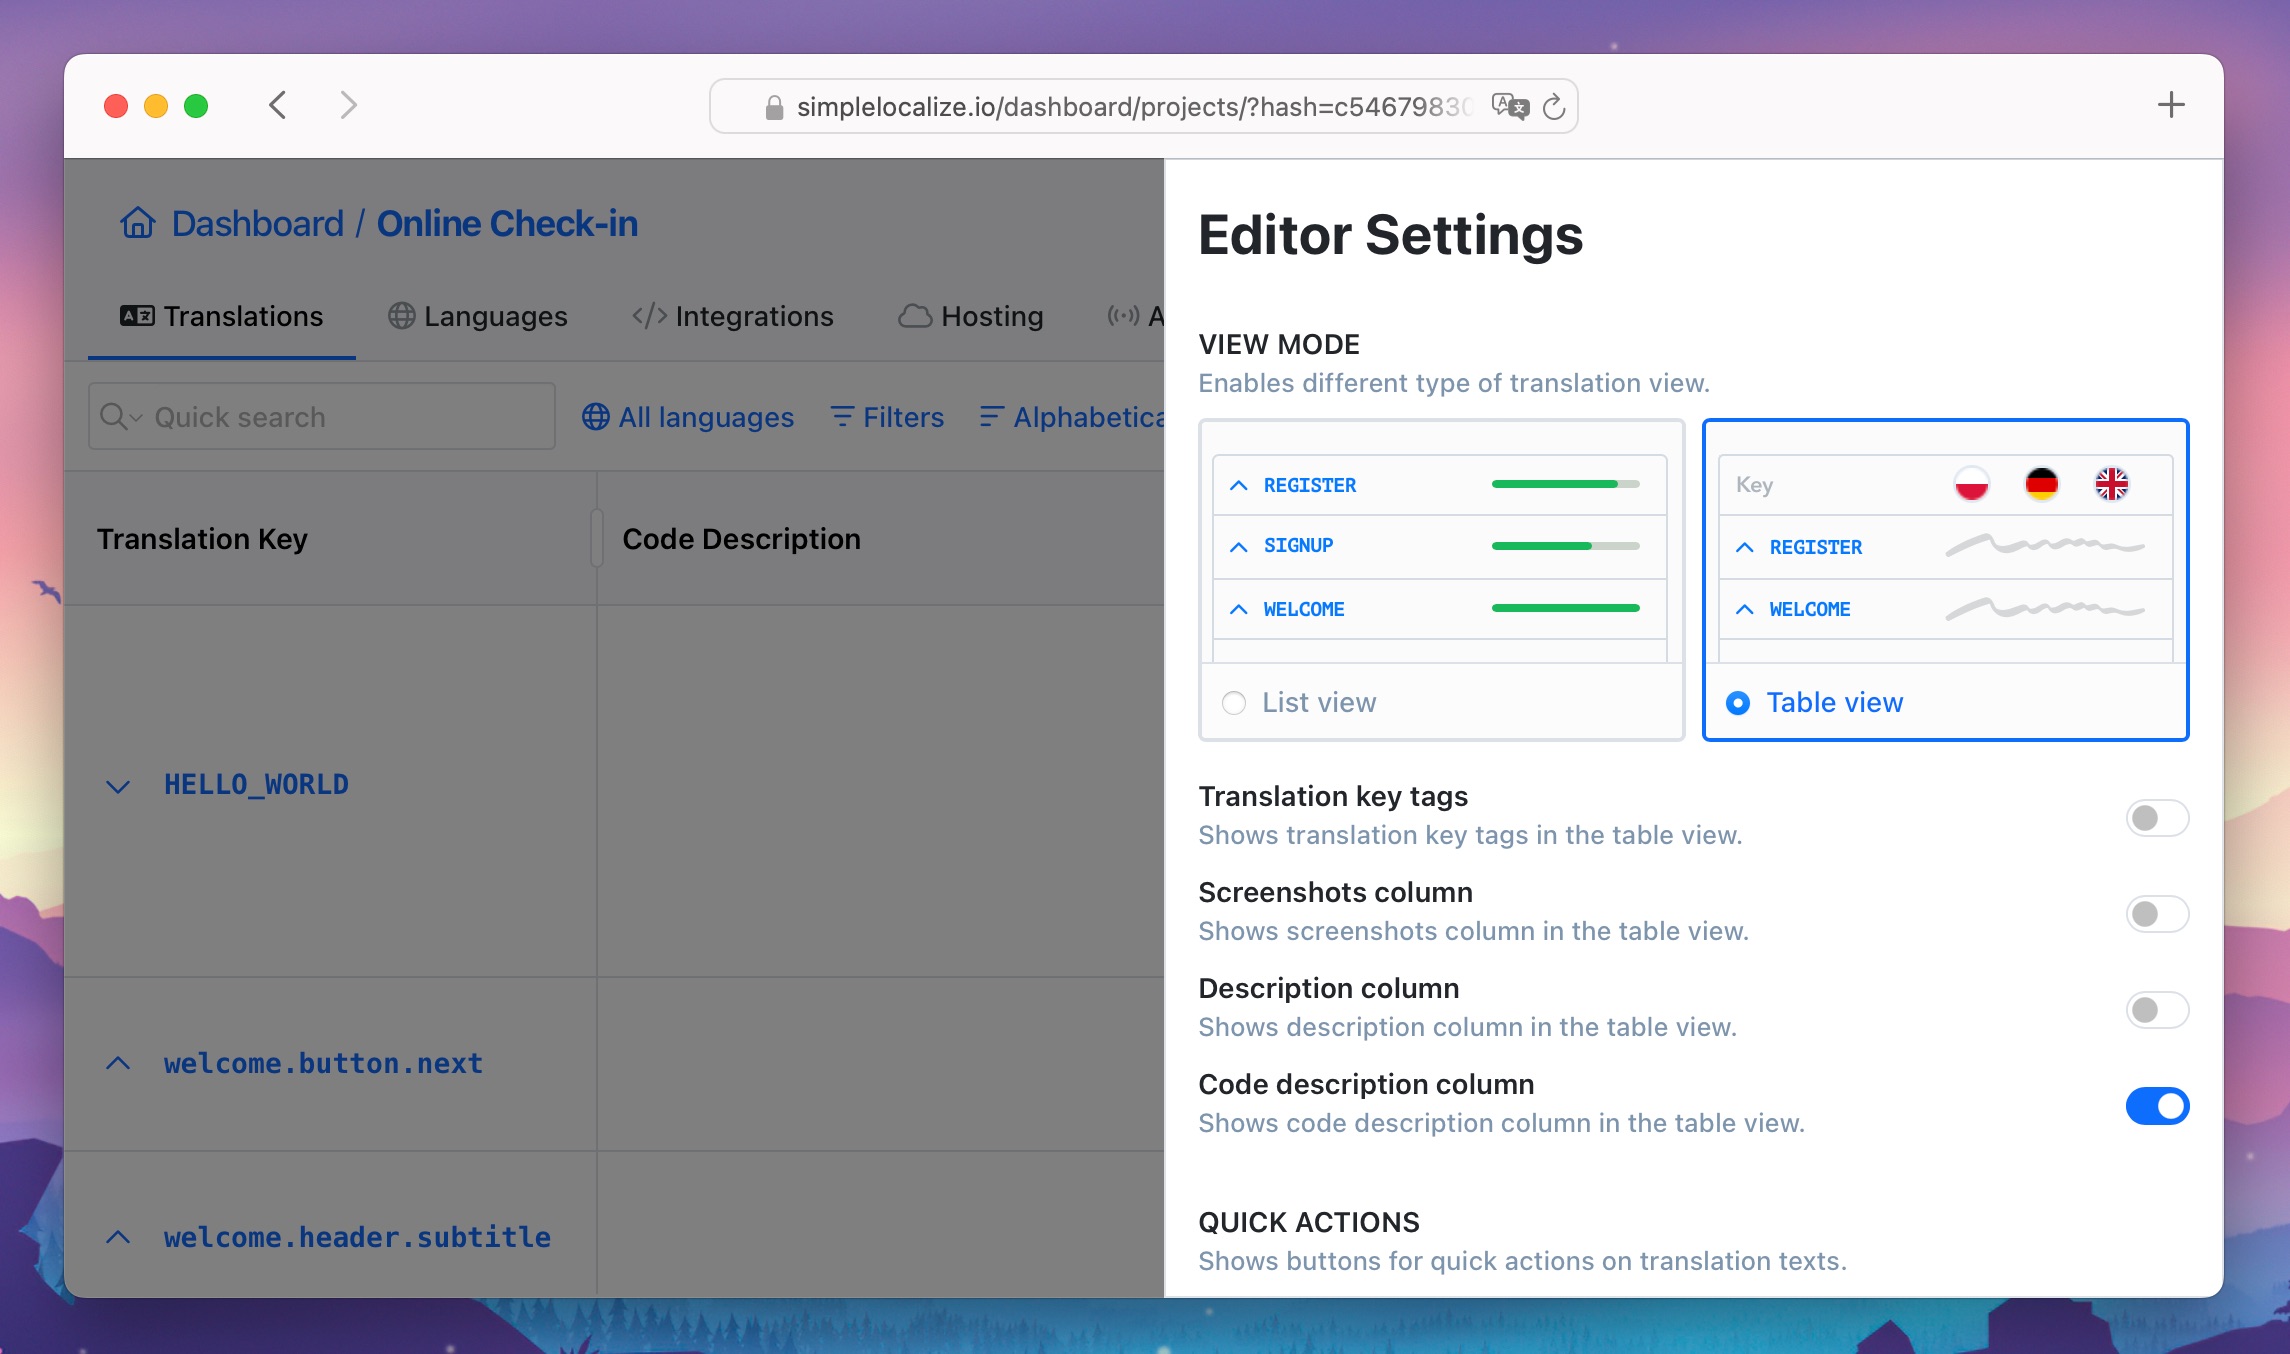
Note that code descriptions are imported from the source file, and cannot be edited in the translation editor. See an
example of code description below.
```tsx
```
---
# Translation editor: Keyboard shortcuts
Source: https://simplelocalize.io/docs/translation-editor/keyboard-shortcuts/
Keyboard shortcuts are the fastest way to speed up your workflow. To use a shortcut, press and hold one or more modifier keys and then press the last key of the shortcut.
### General shortcuts
| Shortcut | Action |
|-----------------------------|------------------------------------------------------------|
| + k | Open [Command Assistant](/docs/general/command-assistant/) |
| + . | Open create key modal |
| + Enter | Execute action (available in some modals) |
| + s | Save changes |
| + f | Focus on quick search |
| + click on key | Select translation key |
| Shift + click review status | Change review status for all translations |
### Translation navigation shortcuts
| Shortcut | Description |
|----------------------------|--------------------------------------------------------|
| Tab | Jump to the next key’s translation |
| Shift + Tab | Jump to the previous key’s translation |
| + Enter | Go to the next translation in the current language |
| + Shift + Enter | Go to the previous translation in the current language |
### List View shortcuts
Those shortcuts are available in the List View while you select one of the rows.
| Shortcut | Action |
|--------------------|-------------------------------|
| Enter | Open / close list row |
| Delete / Backspace | Delete list row |
| Right Arrow | Next list row |
| Left Arrow | Previous list row |
| + c | Copy list row translation key |
---
# Translation hosting: Get started
Source: https://simplelocalize.io/docs/translation-hosting/get-started/
Translation Hosting is a content-delivery network (CDN) for your translations. It enables you to safely deliver translations
anywhere in the world with superfast access speed. It's available in all [pricing plans](/pricing/) including the Community plan.
With Translation Hosting, you can **fetch translations in JSON format using a simple HTTP GET request**, without any additional configuration. It's not rate-limited, so you don't have to worry about the number of requests.
It doesn't require any authentication, so it's a perfect solution for client-side applications, like React, Angular, Vue or mobile applications.

## How it works
When you save and publish translations in the [Translation Editor](/docs/translation-editor/get-started/), they are automatically
processed, converted and uploaded to the Translation Hosting service.
You can access translations by [fetching one file with all translations](/docs/translation-hosting/fetching-translations/#get-all-translations), [fetch translations by language key](/docs/translation-hosting/fetching-translations/#get-translations-by-language-key) and a few other options. For more information, see the [fetching translations](/docs/translation-hosting/fetching-translations/) section.

By default, Translation Hosting has two [hosting environments](/docs/translation-hosting/environments/): Latest and Production. Those are separate spaces where translations are stored.
Translations are always published from the Translation Editor to the Latest environment.
When you are ready to deploy translations to your application, you can publish them to the Production environment.
> Publishing translations is always one-way. You can't publish translations from the Production environment back to the Latest environment.
The one exception to this is translation hosting reverts, that allow you to revert translations to Latest environment from the previous publications.
## Accessing translations
The URL structure for accessing translations on the Translation Hosting service is as follows:
```
https://cdn.simplelocalize.io/{projectToken}/{environment}/_index # all translations
https://cdn.simplelocalize.io/{projectToken}/{environment}/{languageKey} # translations by language key
```
- `{projectToken}` - your project token, available in the **'Settings' > 'Credentials'** tab.
- `{environment}` - the hosting environment, e.g. `_latest` or `_production`.
- `{languageKey}` - the language key, e.g. `en`, `de`, `fr`, etc.
For more information about accessing translations, see the [fetching translations](/docs/translation-hosting/fetching-translations/) section.
## Customizations
SimpleLocalize offers an option to create custom environments, which can be used to better suit your workflow.
For more information, see the [custom hosting environments](/docs/translation-hosting/environments/) section.
Additionally, you can configure your custom hosting provider, like AWS S3, Google Cloud Storage or Azure Blob Storage for better control over your translations.
For more information, see the [custom hosting providers](/docs/translation-hosting/custom-hosting-providers/) section.
Resources hosted on the Translation Hosting service are always in JSON format, but you can [customize the structure of the JSON file](/docs/translation-hosting/settings/) in the **'Settings' > 'Translation Hosting'** tab.
## Authentication
Translation Hosting doesn't require any authentication,
so you can fetch translations from the CDN without any additional configuration, but you have to provide the project token in the URL,
which is available in the **'Settings' > 'Credentials'** tab.
## Default translations
Translation Hosting feature uses the default language set in the **'Languages'** tab as a fallback when a translation is missing in the requested language.
This option will work only if your project is configured to use the default language translation in the [hosting settings](/docs/translation-hosting/settings/).

## Statistics
Click on the statistics icon near in the hosting environment section to see the statistics of your translation hosting usage from the last 7 days. You can see the number of requests and bandwidth usage for each locale and hosting environment.

---
# Translation hosting: Publishing translations
Source: https://simplelocalize.io/docs/translation-hosting/publishing-translations/
Translation publishing is the process of pushing translations from [Translation Editor](/docs/translation-editor/get-started/) to the Translation Hosting service,
or between [hosting environments](/docs/translation-hosting/environments/), and making them [available for fetching](/docs/translation-hosting/fetching-translations/).
## How to publish translations
To publish translations, go to the SimpleLocalize dashboard and open the project which you want to publish translations.
Go to the '**Hosting**' tab, and click **'Publish changes'** on the Latest environment card.

After clicking the **'Publish changes'** button, you will see a popup to confirm the action. Click the **'Publish'** button to proceed,
and the translations will be published to the Latest environment.
Publication process may take a few seconds, depending on the number of translations.
> Full publication always targets the **Latest** environment first, and then cascades to downstream [hosting environments](/docs/translation-hosting/environments/) in the order they were configured.
## Publishing selected keys only
Instead of a full project-wide publication, you can publish only specific keys to any hosting environment.
Select one or more keys in the Translation Editor, open the context menu (right-click), and choose **Publish translations**.

A confirmation popup will appear where you can set **Publication labels** and choose the **Target environment**, including environments other than Latest, such as Staging or Production.

This is the only way to publish directly to a non-Latest environment, and is useful for deploying a hotfix or a specific feature's strings without a full project publication.
---
# Translation hosting: Fetching translations
Source: https://simplelocalize.io/docs/translation-hosting/fetching-translations/
Translation Hosting is a content-delivery network (CDN) for your translations. It enables you to safely deliver translations
anywhere in the world with superfast access speed. It's available in all [pricing plans](/pricing/) including the Community plan.
Base URL for fetching translations:
```
https://cdn.simplelocalize.io
```
If you are looking for customizing the hosting provider, see the [custom hosting providers](/docs/translation-hosting/custom-hosting-providers/) section.
## Parameters
To fetch the basic translations, you need to provide only your [project token](/docs/translation-hosting/get-started/#authentication) and [environment key](/docs/translation-hosting/environments/) in the URL.
Other parameters are optional and can be used to get translations for a specific language, namespace or customerId.
- `projectToken` - your project token,
- `languageKey` - language key from the **'Languages'** tab, e.g.: `en`, `pl`, `de`,
- `environment` - environment key, e.g.: `_latest` or `_production`,
- `namespace` - namespace, e.g.: `common`, `home`, `auth`,
- `customerId` - customerId used for [customer-specific translations](/docs/general/customer-specific-translations/), e.g.: `ikea`,
- `tag` - tag name used for [tag-based translations](#tag-based-translations), e.g.: `mobile`, `web`.
## Get all translations
Example response
```json
{
"de": {
"SALE": "Verkauf",
"ADDRESS": "Adresse"
},
"fr": {
"SALE": "soldes",
"ADDRESS": "adresse"
}
}
```
## Get translations by language key
Example response
```json
{
"SALE": "Verkauf",
"ADDRESS": "Adresse"
}
```
## Get languages
Example response
```json
[
{
"key": "de",
"name": "Deutsch",
"isDefault": false,
"icon": "de"
},
{
"key": "en",
"name": "English",
"isDefault": false,
"icon": "gb"
},
{
"key": "es",
"name": "Español",
"isDefault": false,
"icon": "es"
}
]
```
> See blog post about [hosted country flags](/blog/posts/hosted-flag-icons/) and learn how to use `icon` values to show flags in your app.
## Get translations by language key and namespace
Example response
```json
{
"SALE": "Verkauf",
"ADDRESS": "Adresse"
}
```
## Tag-based translations
Tag-based translations allow you to publish separate resources for each tag.
One translation key can have multiple tags, and one tag can be assigned to many keys (many-to-many relationship).
If a key has multiple tags, it will appear in the resources for each of those tags.
This is useful when you want to deliver only a subset of translations to a specific part of your application, e.g., `mobile`, `web`, `email`.
To enable tag-based publishing, go to **'Settings' > 'Hosting'** and enable **'Publish translations by tags'** option.
After enabling it, [publish translations](/docs/translation-hosting/publishing-translations/) to generate the tag resources.
### Get list of tags
Example response
```json
[
{
"name": "mobile"
},
{
"name": "web"
}
]
```
### Get translations by tag and language key
Example response for `/_tag/mobile/en`
```json
{
"WELCOME": "Welcome",
"GOODBYE": "Goodbye"
}
```
### Get translations by tag, language key, and namespace
Example response for `/_tag/mobile/en/common`
```json
{
"WELCOME": "Welcome"
}
```
> Tag-based translations work together with namespaces. If your project uses namespaces, you can combine tag and namespace to fetch only the translations for a specific tag within a specific namespace.
### Get translations by tag, language key, and customerId
When both **'Publish translations by tags'** and **'Publish translations per customer'** options are enabled,
you can fetch customer-specific translations filtered by tag. Customer overrides are applied to the tag-filtered translations,
so only keys assigned to the given tag are included, with customer-specific values where available and base values as fallback.
Example response for `/_tag/mobile/en_ikea`
```json
{
"WELCOME": "Welcome to IKEA",
"GOODBYE": "Goodbye"
}
```
### Get translations by tag, language key, customerId, and namespace
Example response for `/_tag/mobile/en_ikea/common`
```json
{
"HEADER": "IKEA Navigation"
}
```
> Tag-based customer translations combine both features: the translation set is filtered by tag, and then customer-specific overrides are applied. Keys without a customer override will fall back to their base translation values.
## Customer-specific translations
Customer-specific translations allow you to deliver different translations to different customers using the same project.
It's useful when you want to provide customized translations for your clients or partners. The structure of customer-specific translations
is the same as for regular translations.
### Get customers
Example response
```json
[
{
"id": "ikea"
},
{
"id": "adidas"
}
]
```
### Get multilingual translations for customerId
### Get translations by language key and customerId
## Error responses
At the moment, the only error response you can get is `404` when requested translation is not found,
and the response body will look like this:
```json
{
"status": 404,
"msg": "Hosting resource not found"
}
```
---
# Translation hosting: Rollbacks
Source: https://simplelocalize.io/docs/translation-hosting/rollbacks/
Translation Hosting rollbacks allows you to revert translations to the 'Latest' environment from the previous publications.
This feature is useful when you want to rollback translations to the previous state for any reason. After reverting translations, you can publish them to the 'Production' environment again.
If you are looking for reverting translation data in the Translation Editor, see the [Backups](/docs/general/backups/) section.
## How to rollback translations
To rollback translations, go to the SimpleLocalize dashboard and open the project which you want to revert translations.
Go to the '**Hosting**' tab, and click **'Previous versions**' on 'Latest' environment card.

You can see a list of previous versions of translations. Each version has a list of resources that were published in that version, and the date when the version was created.
Click the '**Restore**' button to revert translations to the 'Latest' environment.

The rollback process is asynchronous, and it may take a few seconds to complete. Usually, it takes less than 2 minutes.
Please note that the 'Restore' button reverts translations to the 'Latest' environment only.
If you want to push translations to the 'Production' environment, then please use 'Publish' button to deploy the 'Latest' environment to the 'Production'.

## How many versions are stored?
The duration of storing versions depends on the project's plan and is available in the [pricing page](/pricing/) as 'Activity and history log' feature.
## Limitations
Rollbacks are atomic, so you can revert only full publication of translations, not a single key, or a group of keys, files or languages.
There is no option to revert translations from the 'Production' environment to the 'Latest' environment. If you want to do this, you need to publish translations from the 'Latest' environment to the 'Production' environment again.
---
# Translation hosting: Environments
Source: https://simplelocalize.io/docs/translation-hosting/environments/
Translation Hosting comes with two default environments: Latest and Production.
These are separate spaces where translations are stored.
Translations are always published from the Translation Editor to the Latest environment.

Every environment has its own key, which is used in the URL to fetch translations, and in the REST API and CLI commands to perform operations like publishing translations or fetching the list of resources.
## Latest environment
The Latest environment (key: `_latest`) is the default environment where translations are stored after publishing them from the Translation Editor.
It's a place where you can test translations before deploying them to your application. Thanks to the relatively short cache time, you can quickly see changes in your application.
## Production environment
The Production environment (key: `_production`) is a place where you store translations that are ready to be deployed to your application.
They have a longer cache time, and they are optimized for production use.
## Unpublished changes
When you make changes in the Translation Editor, they are not automatically published to the Latest environment.
You have to publish them manually by clicking the **'Publish'** button in the Translation Editor or in the Hosting tab.
In the '**Hosting**' tab, you can see the number of unpublished changes in the Latest environment card. It's a
sum of all changes between the latest published version and the current state of translations.
## Differences between environments
You can show differences between environments by clicking on the **'X changed resources'** button below the environment cards.

In the popup, you can see the differences between the two environments, including added, removed, and changed resources.

## Custom environments
SimpleLocalize offers an option to create custom environments, which can be used to better suit your workflow.
For example, you can create a staging environment to test translations before deploying them to the Production environment.
This feature works also with [custom hosting providers](/docs/translation-hosting/custom-hosting-providers/) option.
To create a custom environment, go to the **'Settings' > 'Hosting'** tab, and at the bottom of the page, you will find the **'Custom environments'** section.

Here you can add a new environment by providing a display name (e.g.: Staging) a unique environment key (e.g.: staging) that will be used in the URL to fetch translations,
and color that will be used to distinguish environments in the dashboard.
> Watch out for the environment key, as it must be unique across all environments in your project and can't be changed after creation.
After creating a custom environment, you can move it up or down on the list to change the order of environments in the dashboard,
as translations are always published to the first environment on the list, where the Latest environment is always the first one.
### Deleting custom environments
To delete a custom environment, click on the trash icon next to the environment you want to remove. Hosting resources associated with the environment will be removed as well
and can't be restored. Hosting files are not remove from the storage provider,
so you can always fetch them by URL if needed. They are also not removed immediately, so you can still access them after some time.
---
# Translation hosting: Hosting providers
Source: https://simplelocalize.io/docs/translation-hosting/custom-hosting-providers/
Translation Hosting feature by default stores all translations in the SimpleLocalize managed storage, but you can also use your own storage provider like **Amazon S3**, **Azure Blob Storage**, **Google Cloud Storage**.
In this section, you will learn how to publish translation files to your own storage provider.
Configuring a custom hosting provider doesn't require any additional fees, but you need to have an account with the selected provider.

Configuring a custom hosting provider is a great way to have full control over your translations and store them in your own cloud storage. It's also a good option if you want to integrate SimpleLocalize with your existing infrastructure.
**Configuring a custom hosting provider doesn't replace the SimpleLocalize managed storage**, so you can always switch back to the SimpleLocalize managed storage if you want to, without losing any data.
## How to configure a custom hosting provider
To store translation files on cloud, go to your **'Settings' > 'Hosting'**, click on "**Configure hosting provider**" button, and provide credentials of the service you’d like to use as your hosting provider.
## Amazon S3 Bucket
Amazon S3 as a translation hosting service is a popular choice among developers.
To add an Amazon S3 Bucket, you need to provide your Amazon Access Key, Secret Access Key, Region, and Bucket name in the configuration section.
Read more about [how to obtain your Amazon S3 Access Keys](https://docs.aws.amazon.com/general/latest/gr/aws-sec-cred-types.html#access-keys-and-secret-access-keys).
## Azure Blob Storage
To add an Azure Blob Storage container, you need to provide your Azure Storage Account key and the name of the container
in the Translation Hosting configuration section. You can read here about [how to obtain your Azure Storage Access Keys](https://docs.microsoft.com/en-us/azure/storage/common/storage-create-storage-account#manage-your-storage-access-keys).
## Google Cloud Storage
SimpleLocalize can connect to a GCS bucket using a [service account key](https://cloud.google.com/storage/docs/authentication#generating-a-private-key). Ensure the service account has the Storage Object Admin role. Depending on your internal GCS settings, additional permissions like Storage Admin, Storage Object Creator, and Storage Object Viewer may also be necessary. Obtain the JSON key for this account and select it in the file picker for the Credentials JSON field in the configuration popup.
## Path prefix
By default, translation files are stored in the root of your bucket or container, using the following structure:
```
//
```
If you'd like to store them in a specific folder, for example, when the bucket is shared with other files or your access policy allows writing only to a specific path,
provide a **Path prefix** in the configuration section. The path prefix works the same way for Amazon S3, Azure Blob Storage, and Google Cloud Storage.
For example, with the path prefix set to `translations/web`, files will be stored under:
```
translations/web///
```
Leading and trailing slashes are removed automatically, so `/translations/web/` and `translations/web` give the same result.
Leave the field empty to store files in the root of the bucket or container.
The `simplelocalize-sync.json` file used to verify the connection is also stored under the path prefix,
so SimpleLocalize needs write access only to that path.
Changing the path prefix doesn't move files that were already published. New files will be uploaded under the new path after the next publication,
and files stored under the previous path will remain in your bucket until you remove them.
> Please note that after configuring a custom provider, you need to publish the translations from the **Hosting** tab to make them available on the configured hosting.
---
# Translation hosting: Settings
Source: https://simplelocalize.io/docs/translation-hosting/settings/
In your project settings, you can find extra options and settings for Translation Hosting. Go to '**Settings**' > '**Hosting**' to access them.

> After changing translation hosting settings, you need to publish translations from the '**Hosting**' tab in your project to apply changes.
## Missing translations
Determine how missing translations should be handled. Here are two options you can customize:
- '**Use empty strings**' option will export empty strings.
- '**Exclude missing translations**' option will exclude missing translations from the exported JSON.
## Fallback translations
Choose the behavior for fallback translations:
- '**Use fallback translations**' option will export fallback translations configured in the '**Languages**' tab.
- '**Use empty strings**' option will export empty strings.
## JSON Format
Choose formatting for JSON files, as nested JSON objects or flat JSON objects.
### Nested JSON
```json
{
"en": {
"key": "value"
}
}
```
### Flat JSON
```json
{
"en.key": "value"
}
```
> In some cases nested JSON may cause issues due to [conflicting keys](/docs/general/export-translations/#conflicting-nested-keys). In such cases, you can use a flat JSON format or adjust key namings in the editor.
## Publication labels
You can enable "Publication labels" to add in the Publication popup when publishing translations to the hosting environments. This will help you to better identify the publication in the list of publications.
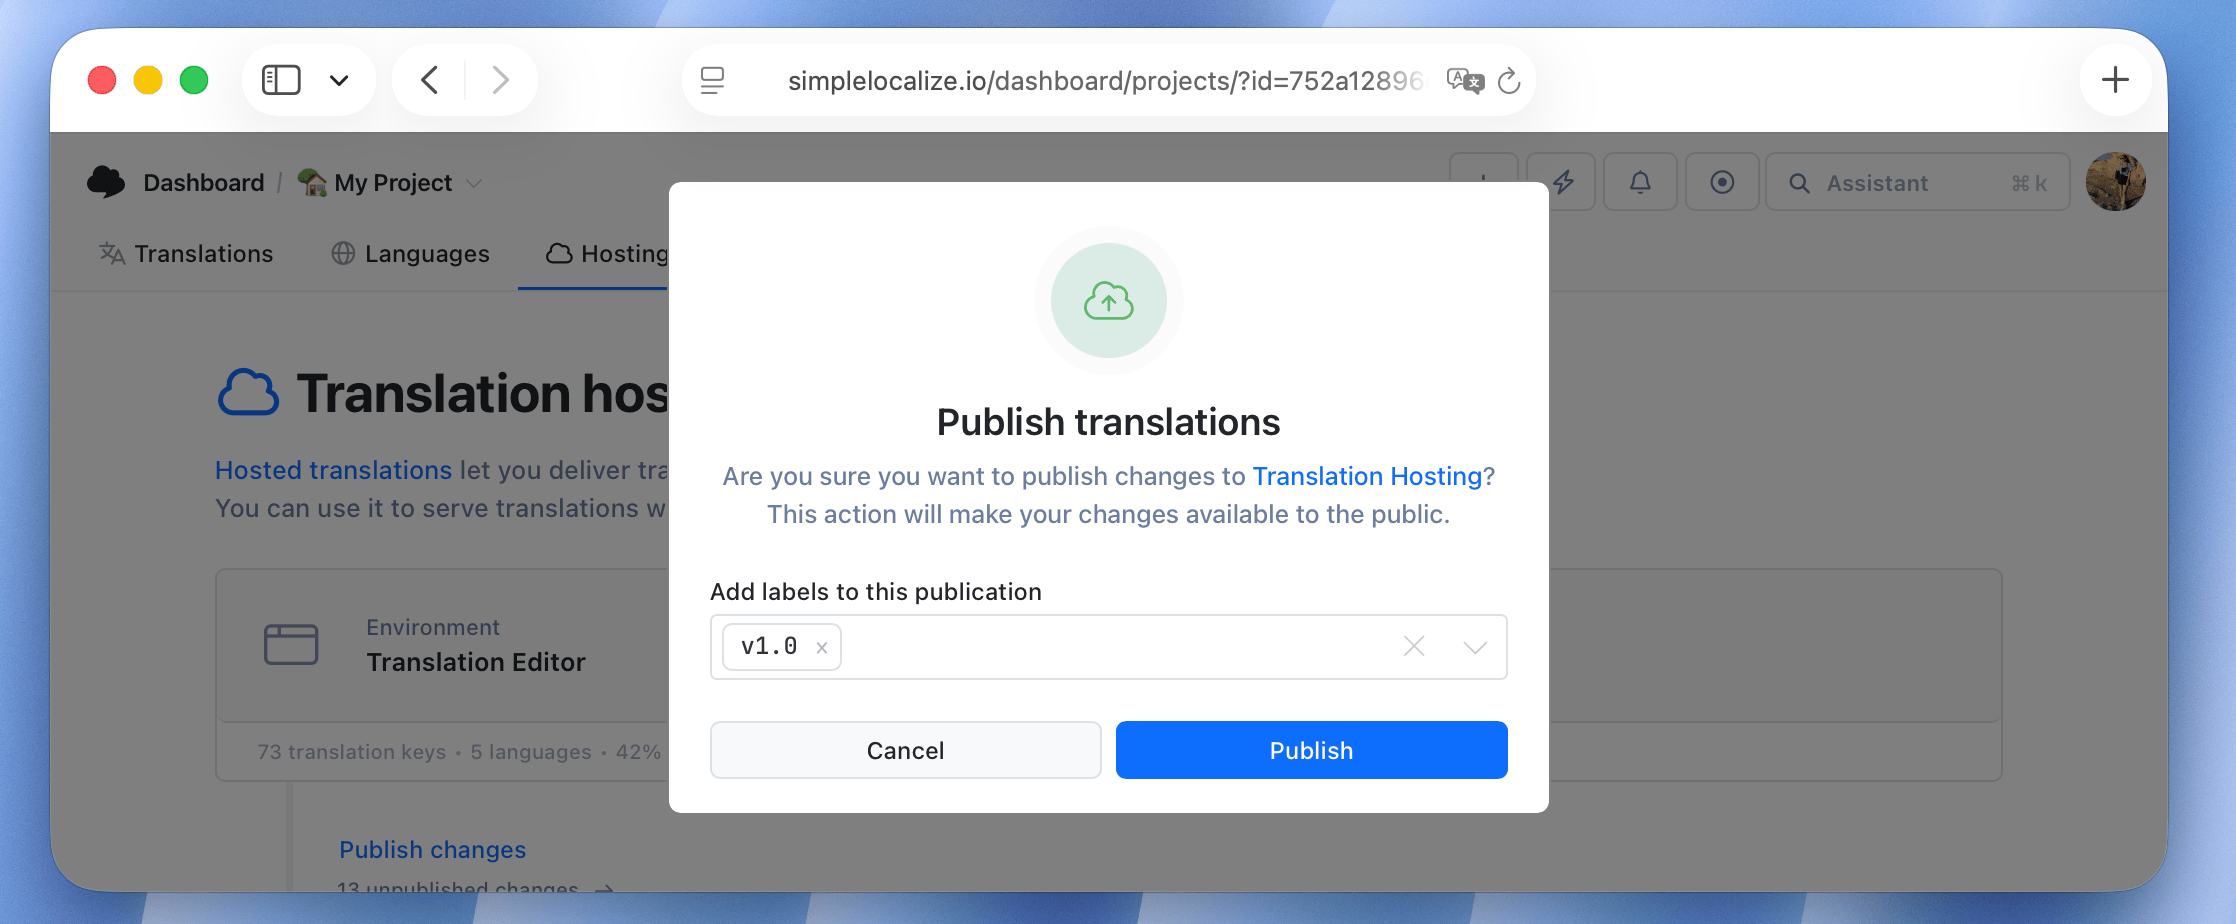
## Tag-based publishing
Enable **'Publish translations by tags'** to generate separate translation files for each tag assigned to your translation keys.
When enabled, the system will publish a list of tags at `/_tags` and per-tag files at `/_tag/{tag}/{languageKey}` and `/_tag/{tag}/{languageKey}/{namespace}`.
For more information, see the [tag-based translations](/docs/translation-hosting/fetching-translations/#tag-based-translations) section.
## Custom environments
In custom environment section you can create additional environments for your project. For more information, see the [custom hosting environments](/docs/translation-hosting/environments/) section.
---
# Translation hosting: OTA updates
Source: https://simplelocalize.io/docs/translation-hosting/ota-updates/
## Overview
Over-the-air (OTA) updates let your app download translations at runtime instead of shipping them
frozen in the build. Fixing a typo, retranslating a sentence or adding a language becomes a
**publication in SimpleLocalize**, not a new App Store or Play Store release.
OTA updates are built on [Translation Hosting](/docs/translation-hosting/get-started/):
1. **Translate** in the [Translation Editor](/docs/translation-editor/get-started/) as usual.
2. **Publish** the translations to Translation Hosting. See
[publishing translations](/docs/translation-hosting/publishing-translations/).
3. **Your app downloads** the published translations from the CDN, caches them and shows them
instead of the strings bundled in the build.
Translations you have not published keep using the strings bundled in the app, so the UI never
breaks when a key is missing.
## Mobile apps
The OTA SDKs work on top of the localization you already have. They override bundled strings key by
key, cache downloaded translations on disk so the app works offline, and never remove what was
already downloaded when a refresh fails.
| Platform | Requirements | Package |
|-------------------------------------------------------|---------------------------------------|-------------------------------------------------------------------------------------------------|
| [iOS & macOS](/docs/integrations/ios-macos-ota/) | iOS 13+, macOS 11+, tvOS 13+, watchOS 6+ | Swift Package, no dependencies |
| [Android](/docs/integrations/android-ota/) | `minSdk 21` | Gradle library, no runtime dependencies |
Both SDKs read the same published files, so one publication updates your iOS and Android apps at
the same time.
## Web apps
Web apps can load translations straight from the CDN, for example with an HTTP backend of your i18n
library. See [fetching translations](/docs/translation-hosting/fetching-translations/) for the URLs
and the available files per language, namespace and customer.
## Environments and rollbacks
- Point development builds at the `_latest` environment and release builds at `_production`, so you
can check translations before your users see them. See
[environments](/docs/translation-hosting/environments/).
- `_production` is served with `Cache-Control: max-age=3600`, so a publication reaches users within
about an hour.
- If a publication goes wrong, [roll back](/docs/translation-hosting/rollbacks/) to a previous one.
Apps pick up the restored translations on their next refresh.
---
# Translation hosting: Custom provider
Source: https://simplelocalize.io/docs/integrations/custom-translation-hosting-server/
> The article describes how to configure a custom hosting server to store translations. If you are looking for a managed solution, please refer to the [custom hosting providers for translation hosting](/docs/translation-hosting/custom-hosting-providers/)
> section, where you can find a list of hosting providers that are natively supported by SimpleLocalize.
## Custom storage server via GitHub Actions
Using a GitHub Actions workflow, you can automate the process of pulling translations from SimpleLocalize and uploading them to
any other hosting server that's not natively supported by SimpleLocalize.
### Generate GitHub personal access token
[Create a new GitHub Personal Access Token (classic)](https://github.com/settings/personal-access-tokens/new) with `repo` scope.
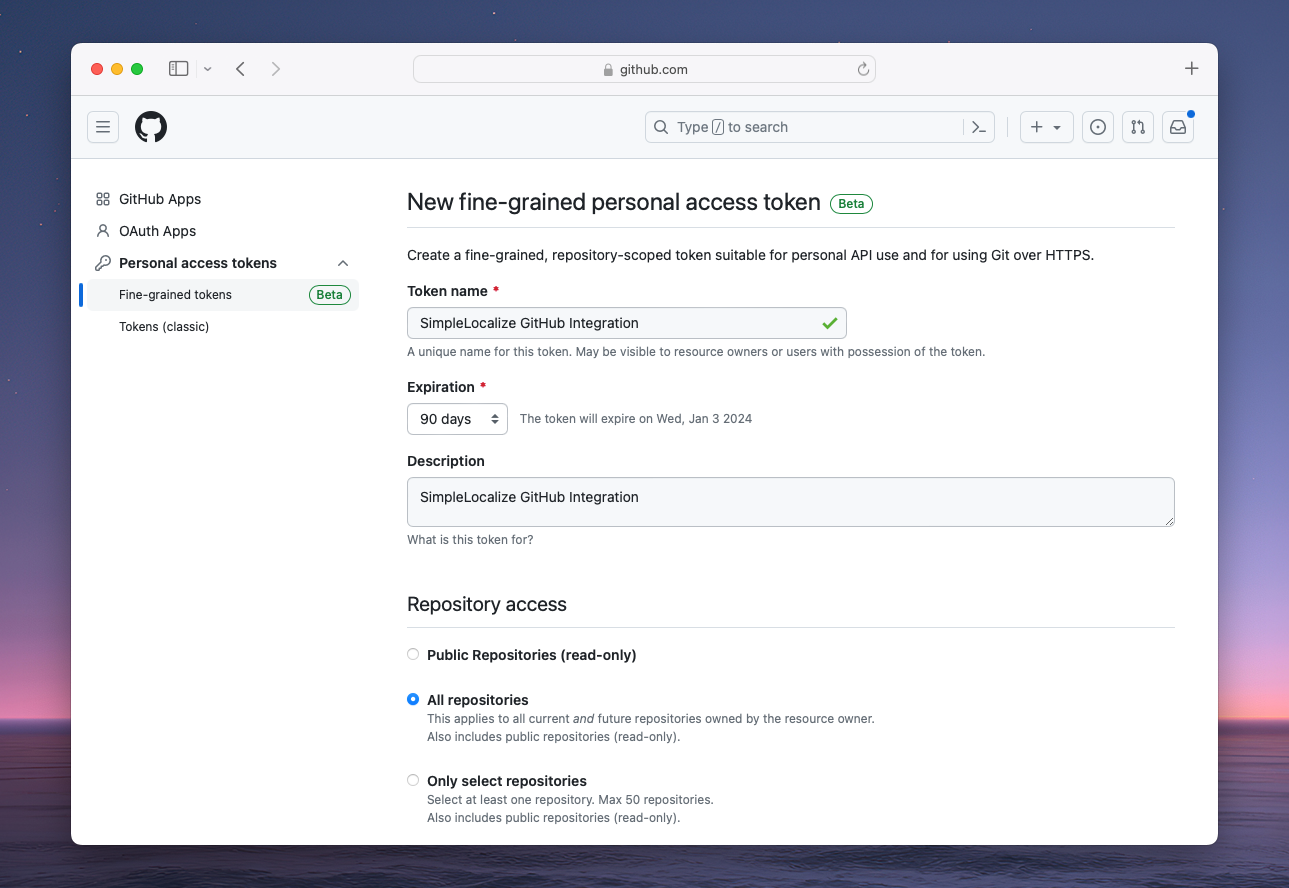
Learn more about [GitHub Personal Access Tokens](https://docs.github.com/en/authentication/keeping-your-account-and-data-secure/managing-your-personal-access-tokens)
### Set up a webhook
In SimpleLocalize project, go to '**Settings > Webhooks**' and set a new webhook.
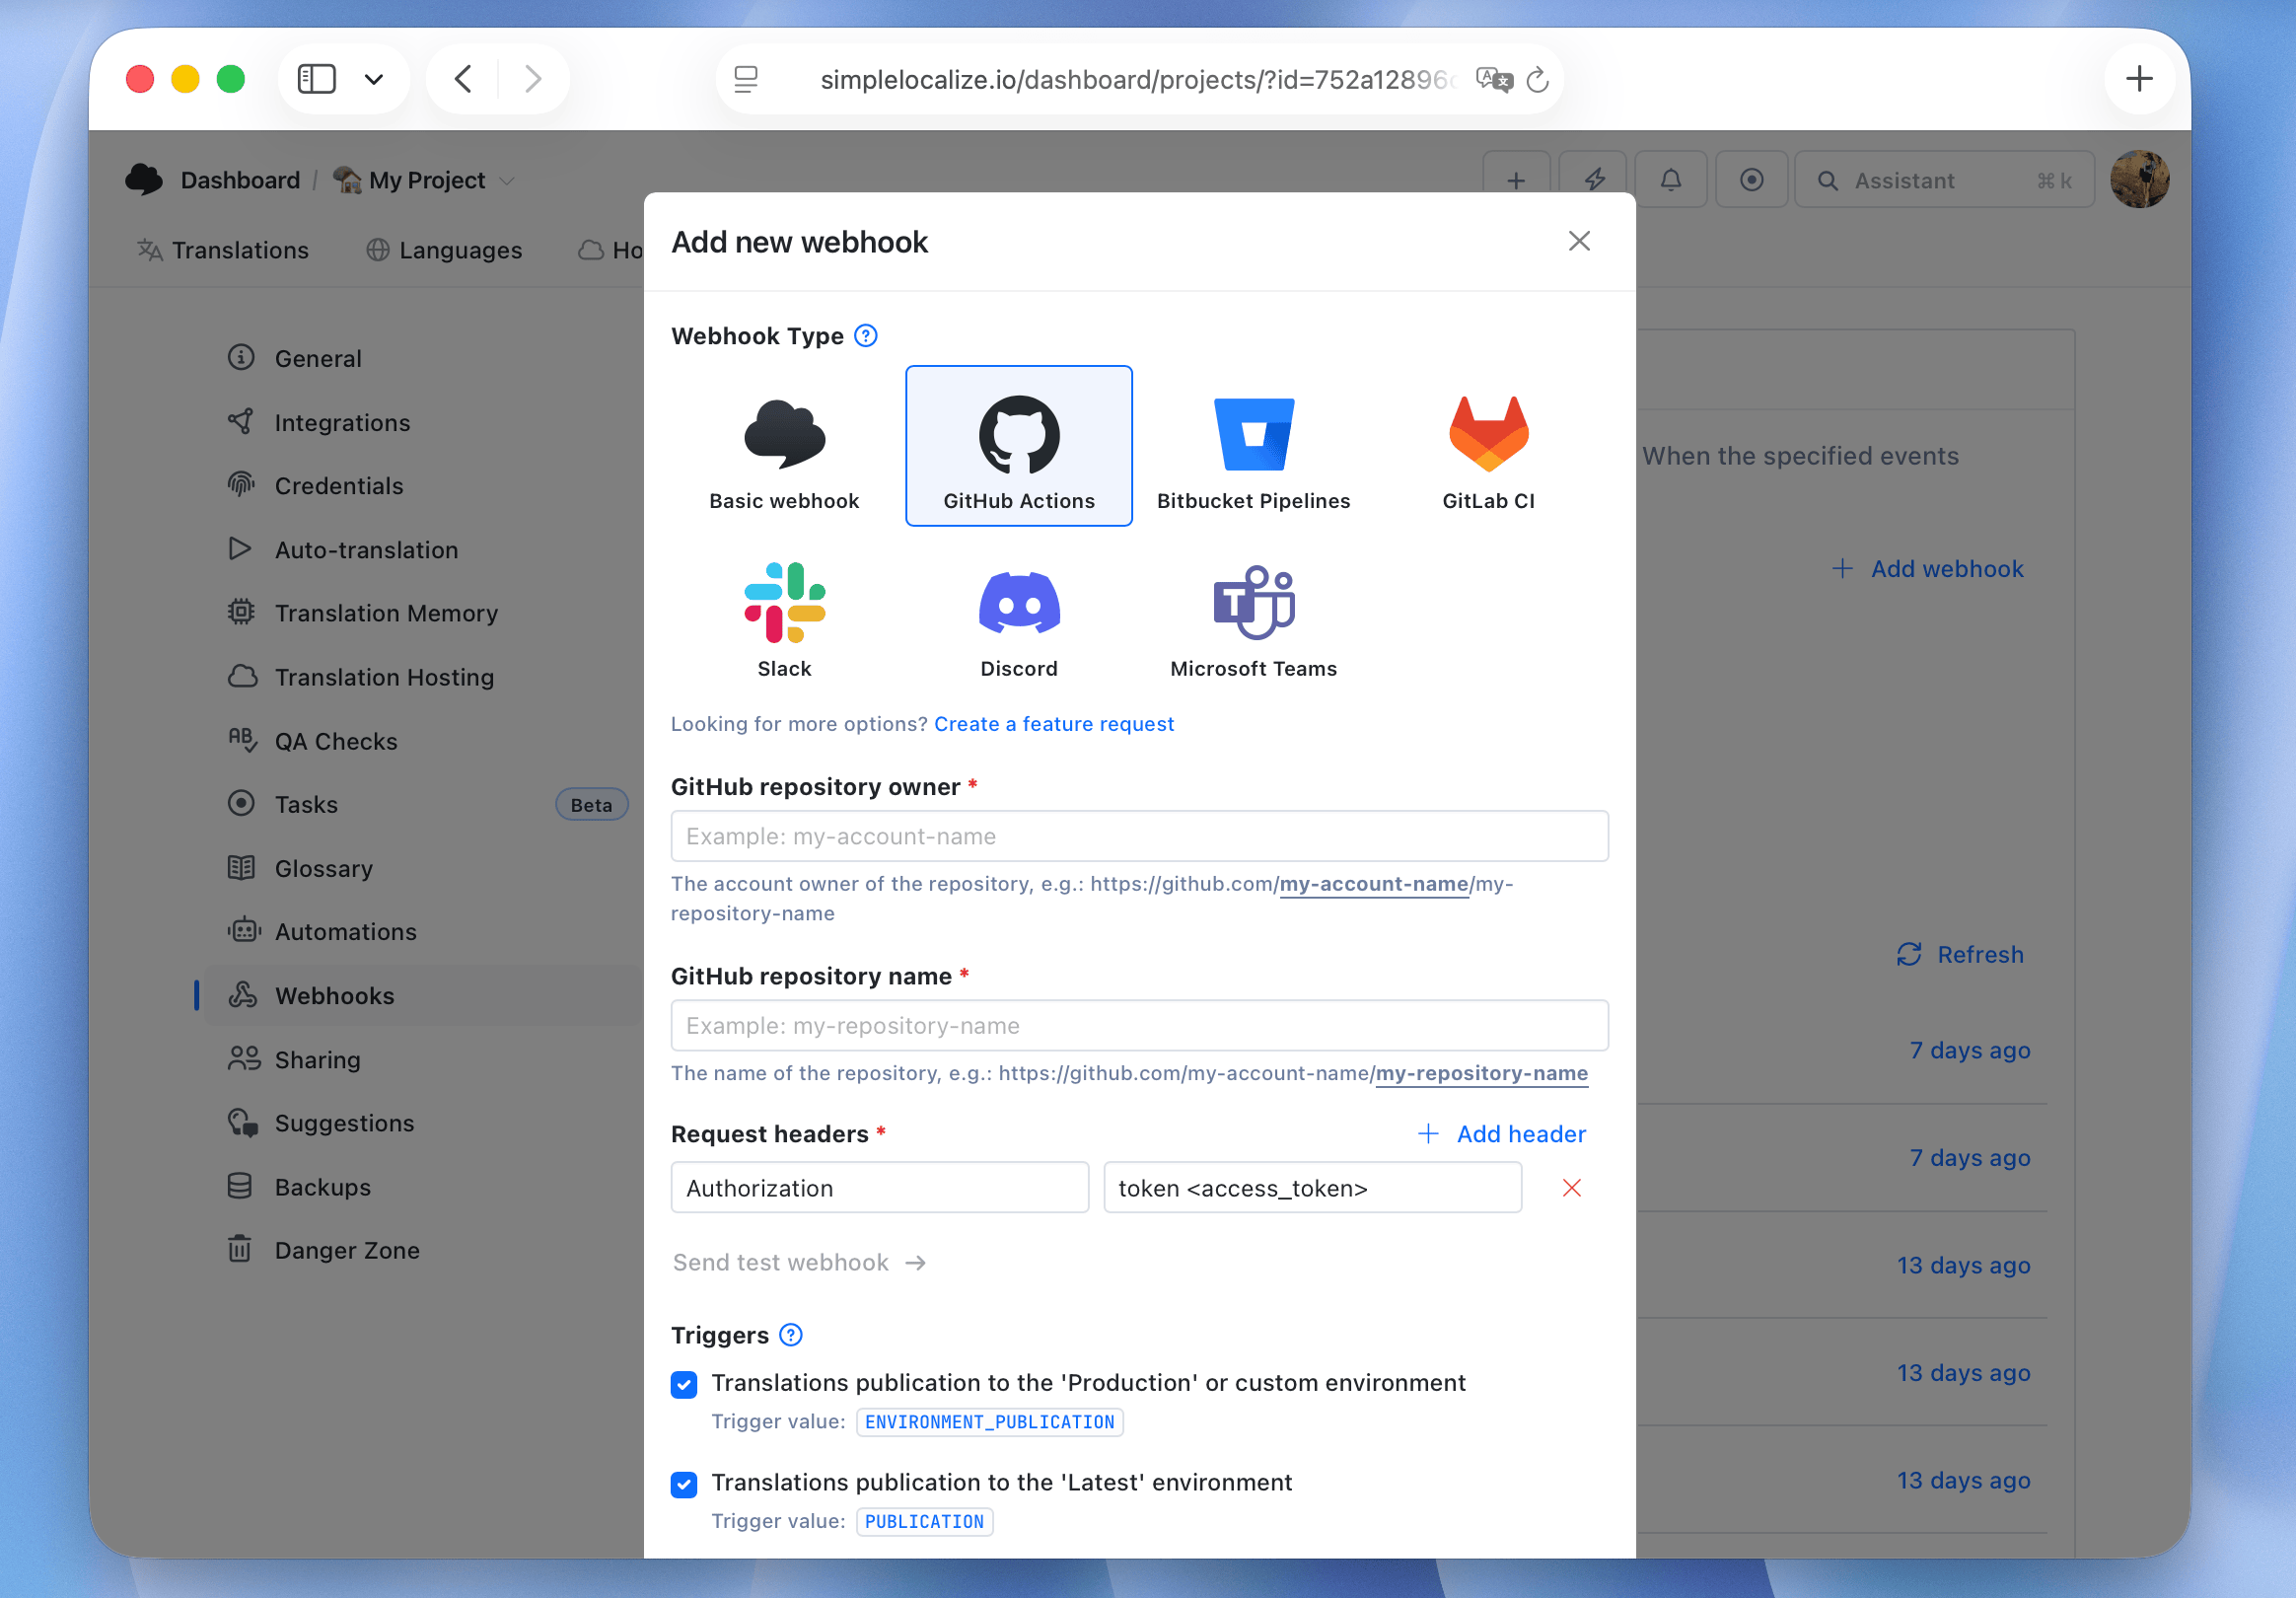
Choose a '**GitHub Actions**' request type,
set your repository owner name, repository name and Authorization header with token generated in previous step:
```bash
Authorization: token {your_token}
```
Check triggers you want to use, for example:
- `PUBLICATION` to get resources from the `_latest` environment
- `ENVIRONMENT_PUBLICATION` to get resources from `_production` or any other custom environment
in this example, we will use `ENVIRONMENT_PUBLICATION` to get resources from the `_production` environment, because we want to publish translations to our server only when they are ready to be published.
### Create GitHub Actions workflow
Create a new workflow in your GitHub repository. Go to '**Actions**' tab and click '**New workflow**' or just create a workflow file in `.github/workflows` directory.
```yaml
# .github/workflows/simplelocalize-production-translations.yml
name: SimpleLocalize GitHub Action
on:
# Allows external webhook trigger: https://api.github.com/repos/{owner}/{repo}/dispatches
repository_dispatch:
types:
- simplelocalize_environment_publication # ENVIRONMENT_PUBLICATION
env:
cli-version: '2.5.1'
jobs:
build:
runs-on: ubuntu-latest
steps:
# Pull translations for the environment that was published
- name: Pull '_production' or custom environment translations
uses: simplelocalize/github-action-cli@v3
with:
api-key: ${{ secrets.SIMPLELOCALIZE_API_KEY }}
command: 'pull'
cli-version: ${{ env.cli-version }}
args: "--pullPath ./hosting-resources/ --environment ${{ github.event.client_payload.environment }}"
# upload translations to S3 Bucket
- uses: shallwefootball/s3-upload-action@master
with:
aws_key_id: ${{ secrets.AWS_KEY_ID }}
aws_secret_access_key: ${{ secrets.AWS_SECRET_ACCESS_KEY}}
aws_bucket: ${{ secrets.AWS_BUCKET }}
source_dir: './hosting-resources/'
```
In this example, we used a custom [GitHub Action to upload files to S3 Bucket](https://github.com/marketplace/actions/upload-s3),
but you can use any other GitHub Action to upload files to your hosting server.
Now, once we publish translations to the `_production` environment, SimpleLocalize will trigger the GitHub Action pipeline, and it will pull translations from SimpleLocalize and upload them to S3 Bucket.
You can use any other hosting server to store translation resources, for example:
- [Azure Blob](https://github.com/marketplace/actions/azure-blob-storage-upload),
- [Google Storage](https://github.com/google-github-actions/upload-cloud-storage)
### (optional) Pull latest translations
We can use the same workflow to pull translations from the `_latest` environment, but we need to change the `on.repository_dispatch` section, and
we can simplify the pull translations step and set the environment key.
```yaml
# .github/workflows/simplelocalize-latest-translations.yml
name: SimpleLocalize GitHub Action
on:
# Allows external webhook trigger: https://api.github.com/repos/{owner}/{repo}/dispatches
repository_dispatch:
types:
- simplelocalize_publication # PUBLICATION
env:
cli-version: '2.5.1'
jobs:
build:
runs-on: ubuntu-latest
steps:
# Pull translations for the environment that was published
- name: Pull '_latest' translations
uses: simplelocalize/github-action-cli@v3
with:
api-key: ${{ secrets.SIMPLELOCALIZE_API_KEY }}
command: 'pull'
cli-version: ${{ env.cli-version }}
args: "--pullPath ./hosting-resources/ --environment _latest"
# upload translations to S3 Bucket
- uses: shallwefootball/s3-upload-action@master
with:
aws_key_id: ${{ secrets.AWS_KEY_ID }}
aws_secret_access_key: ${{ secrets.AWS_SECRET_ACCESS_KEY}}
aws_bucket: ${{ secrets.AWS_BUCKET }}
source_dir: './hosting-resources/'
```
> Note: Trigger 'PUBLICATION' does not contain information about the environment, so we need to set the environment key manually.
### (optional) Cancel previous workflow to avoid stacking
```yaml
pre-job:
name: Pre-job
runs-on: ubuntu-latest
steps:
- uses: technote-space/auto-cancel-redundant-workflow@v1
- name: Cancel redundant workflows
run: echo "Cancel redundant workflows finished"
```
In this example, we used a custom [GitHub Action to cancel previous workflow](https://github.com/marketplace/actions/auto-cancel-redundant-workflow).
## Custom storage server via webhooks
Another way of integrating SimpleLocalize with your custom hosting server that is not natively supported by SimpleLocalize is to use webhooks.
### Set up a webhook
SimpleLocalize provides a webhook mechanism to notify your server about changes in Translation Hosting resources. Go to '**Settings > Webhooks**' and set a new webhook.
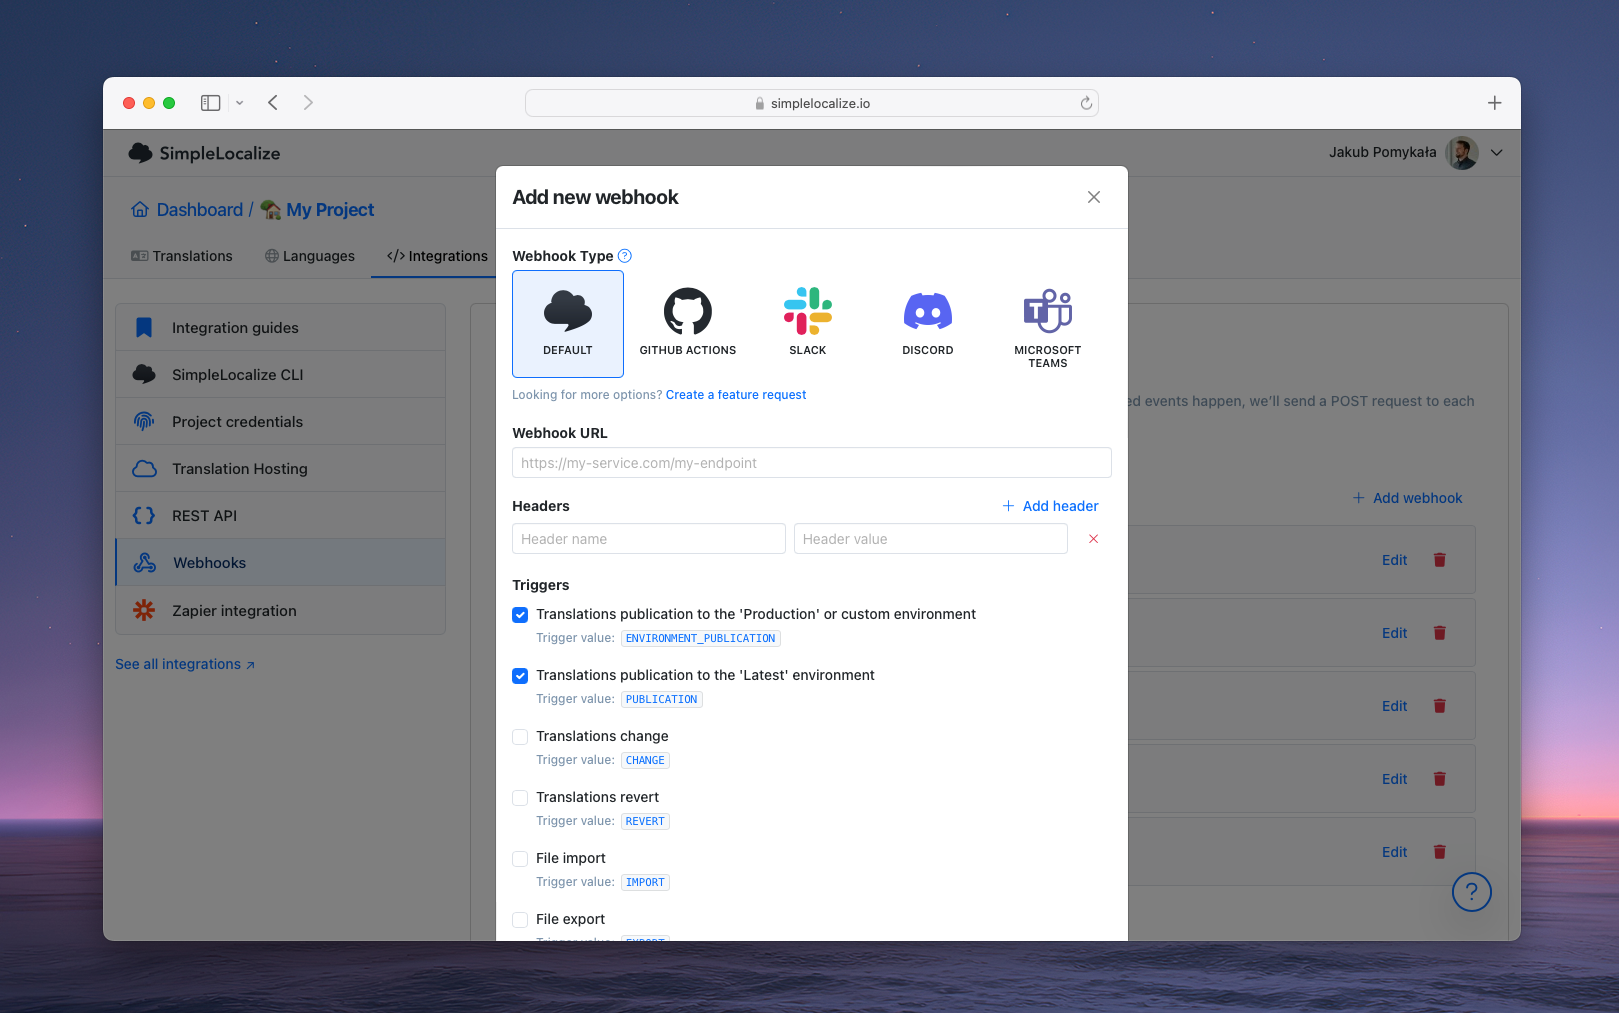
Once you set a new webhook, SimpleLocalize will send a POST request to your server with a payload containing information about the change.
You can use that information to fetch translations from SimpleLocalize API and deploy them to your server.
### Fetch translation resources
To do that, you need to use SimpleLocalize API to get a list of downloadable environment resources. You can do it by calling `GET /projects/{project_id}/translations/hosting/{environment_id}/resources` endpoint.
The endpoint will respond with an environment summery and a list of downloadable resources. Each resource contains a URL to download the resource.
### Sample response
```json
{
"msg": "OK",
"status": 200,
"data": {
"numberOfKeys": 81,
"numberOfLanguages": 6,
"numberOfNonEmptyTranslations": 471,
"createdAt": "2023-10-05T12:55:20.987Z",
"resources": [
{
"link": "752a12896c194846aac2bac83efc6c79/_latest/_index",
"size": 9333
},
{
"link": "752a12896c194846aac2bac83efc6c79/_latest/pl_PL/login",
"language": "pl_PL",
"namespace": "login",
"size": 385
}
// cut for brevity...
]
}
}
```
Use the `link` property,
append a `https://cdn.simplelocalize.io/{link}` prefix to it
and iterate over resources to download them or upload them directly to your server.
You can also filter resources by language, namespace, or customer.
### Upload translation resources to S3 Bucket
In this example, we will use AWS S3 Bucket to store translation resources. You can use any other hosting server.
```javascript
const axios = require('axios');
const AWS = require('aws-sdk');
const s3 = new AWS.S3();
async function uploadResourcesToS3() {
const environmentKey = '_latest';
const response = await axios.get(`https://api.simplelocalize.io/api/v2/environments/${environmentKey}`, {
headers: {
"x-simplelocalize-token": "project-api-key"
}
});
const resources = response.data.resources;
await Promise.all(
resources.map(async (resource) => {
const fullLink = `https://cdn.simplelocalize.io/${resource.link}`;
const key = resource.link;
const params = {
Bucket: 'your-s3-bucket-name',
Key: key,
Body: await axios.get(fullLink, { responseType: 'stream' }),
};
await s3.upload(params).promise();
console.log(`Uploaded ${key} to S3`);
})
);
console.log('All resources uploaded to S3 successfully');
}
uploadResourcesToS3();
```
The code above is just a template to show you how to download resources and upload files to S3 Bucket,
and you should adjust it to your needs.
---
# Command-line tool: Get started
Source: https://simplelocalize.io/docs/cli/get-started/
SimpleLocalize CLI is a command-line tool that allows you to manage translations in your software project, and it's a great tool for CI/CD pipelines and localization automation.
For more details see [GitHub repository](https://github.com/simplelocalize/simplelocalize-cli).
## Installation
Install the CLI with one command for your system:
Supported systems:
- macOS (Apple Silicon, and Intel)
- Linux (x86 and ARM64)
- Windows (x86)
Issues with the installation? See the [troubleshooting section](/docs/cli/troubleshooting/).
## Usage
```properties
simplelocalize [COMMAND] --apiKey rest of parameters...
```
Read a step-by-step guide on [how to configure localization workflow](/blog/posts/step-by-step-localization-workflow-for-developers/) with CLI on our blog.
### Available commands:
- `upload` - [upload translation files](/docs/cli/upload-translations/) to the translation editor
- `download` - [download translation files](/docs/cli/download-translations/) from the translation editor
- `auto-translate` - [auto-translate texts](/docs/cli/other-commands/) using machine translation
- `init` - [create a sample configuration file](/docs/cli/other-commands/)
- `status` - [get project details](/docs/cli/other-commands/)
- `purge` - [clear project data](/docs/cli/other-commands/)
- `extract` - [extract translation keys from source code](/docs/cli/i18n-keys-extraction/)
Translation Hosting commands:
- `publish` - publish translations to translation hosting environment
- `pull` - download translation files from translation hosting
Learn more about [translation hosting commands](https://github.com/simplelocalize/simplelocalize-cli/wiki/Translation-Hosting)
## Configuration file
All CLI commands can be also configured using a [YAML configuration file](/docs/cli/configuration/).
## Get integration code
To make the CLI configuration easier, you can get the integration snippet for importing or exporting translations in the '**Data**' tab.

## Authorization
Most of the CLI command needs to be authorized with `--apiKey`.
The API Key can be found in the '**Settings > Credentials > API Key**'.
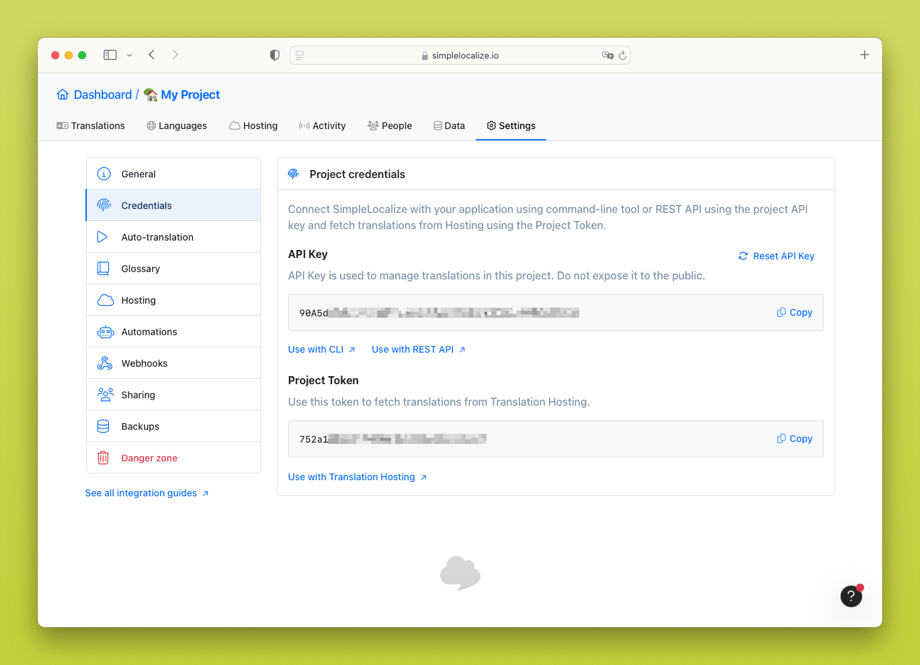
---
# Command-line tool: Upload translations
Source: https://simplelocalize.io/docs/cli/upload-translations/
Upload command takes your local files and uploads them to SimpleLocalize. See also how to use [configuration file] (/docs/cli/configuration/) for easier deployments and more options.
## Usage
```shell
simplelocalize upload
--apiKey PROJECT_API_KEY
--uploadPath INPUT_FILE
--uploadFormat FILE_FORMAT
```
The command uploads the file with English translations.
```shell
simplelocalize upload
--apiKey PROJECT_API_KEY
--uploadPath ./locales/messages_en.json
--uploadFormat single-language-json
--uploadLanguageKey en
```
## Configuration
### Upload path
Choose which file(s) should be uploaded using `--uploadPath`, for example:
```
# one file
--uploadPath ./locales/messages.json
# translations with namespaces
--uploadPath ./locales/{ns}/messages_en.json
# all translations with namespaces (not recommended)
--uploadPath ./locales/{ns}/messages_{lang}.json
```
Available placeholders for an upload path:
- `{lang}` - language key
- `{ns}` - namespace
You can use the placeholders as a part of a directory name, or a file name.
> **It's not recommended** to push translations for every language on upload, as it's unnecessary extends the upload process. [Read a step-by-step localization workflow for tips and recommendations](https://simplelocalize.io/blog/posts/step-by-step-localization-workflow-for-developers/)
If the language names in your file system differ from the SimpleLocalize language keys (for example a file
without any language suffix for the default language), use [language mapping](/docs/cli/download-translations/#language-mapping)
in the configuration file. The same `mappings.lang` entries are applied in reverse on upload.
### File format
Change the exported translations format using `--uploadFormat` parameter, for example:
```
--uploadFormat java-properties
```
[See list of available file formats](https://simplelocalize.io/docs/general/file-formats/)
### Language
Determine into which language the translations should be assigned using `--uploadLanguageKey` parameter, for example:
```
--uploadLanguageKey en
```
Whenever you upload translations please make sure you set the language key using `--uploadLanguageKey`, otherwise the system will import only translation keys without the actual content.
### Dry run
You can test the upload command using `--dryRun` parameter that will list files to upload without uploading them, for example:
```shell
simplelocalize upload
--uploadPath ./locales/{ns}/messages_{lang}.json
--uploadFormat single-language-json
--dryRun # <-- add this
```
### Update translations
By default, only empty translations are updated with the values from the upload; you can update existing values using `--update` parameter, for example:
```shell
simplelocalize upload
--uploadPath ./locales/messages.json
--uploadFormat multi-language-json
--update # <-- add this
```
> **Note**: `--update` is a shorthand for `--uploadOptions UPDATE_TRANSLATIONS` and it will update all existing translations with the values from the upload.
### Preview changes
You can preview changes before the upload command using `--preview` parameter that will list files to upload without importing them, for example:
```shell
simplelocalize upload
--uploadPath ./locales/{ns}/messages_{lang}.json
--uploadFormat single-language-json
--preview # <-- add this
```
### Tags
You can assign tags during the upload using `--uploadTags` (or simply `--tags`)
```shell
simplelocalize upload
--uploadPath ./messages_{lang}.json
--uploadFormat single-language-json
--uploadTags Premium,Development
```
Use `_none` to clear tags.
### Options
Customize import using options using `--uploadOptions`, for example:
```
--uploadOptions UPDATE_ORDER,MARK_AS_ACCEPTED
```
[See upload options](https://simplelocalize.io/docs/general/options/#importupload-options)
## Examples
### One file with multiple languages
```shell
.
└── locales
└── messages.json
```
Command:
```shell
simplelocalize upload
--apiKey
--uploadPath ./locales/messages.json
--uploadFormat multi-language-json
```
### One file per language
In this example we upload only source translations from `./en/messages.json` and uses `--uploadLanguageKey en-GB` to specify the [language key](/docs/general/languages/) for the uploaded file for translation editor.
It's a recommended way to upload source translations.
```shell
.
├── ca
│ └── messages.json
├── en
│ └── messages.json
└── es
└── messages.json
```
Command:
```shell
simplelocalize upload
--apiKey
--uploadPath ./en/messages.json
--uploadLanguageKey en-GB
--uploadFormat single-language-json
```
### One file per language using placeholders
In this example we use `{lang}` placeholder to upload **many files** at once and specify language key for each file.
It's not a recommended way to upload source translations, as it uploads more files than necessary.
```shell
.
├── ca
│ └── index.json
├── en
│ └── index.json
└── es
└── index.json
```
Command:
```shell
simplelocalize upload
--apiKey
--uploadPath ./{lang}/index.json
--uploadFormat single-language-json
```
### One file per language and namespace
In this example we use `{ns}` placeholder to upload **many files** at once for the English language. We used `--uploadLanguageKey en-GB` to specify language key for the uploaded file for the Translation Editor.
```shell
.
├── italian
│ ├── common.json
│ └── home.json
├── english
│ ├── common.json
│ └── home.json
└── spanish
├── common.json
└── home.json
```
Command:
```shell
simplelocalize upload
--apiKey
--uploadPath ./english/{ns}.json
--uploadLanguageKey en-GB
--uploadFormat single-language-json
```
### Upload customer translations
This option is only available with a [Business plan](/pricing/).
```shell
.
└── locales
└── ikea-translations.json
```
```shell
simplelocalize upload \
--apiKey MY_API_KEY \
--uploadPath ./locales/ikea-translations.json \
--uploadCustomerId ikea \
--uploadFormat multi-language-json
```
---
# Command-line tool: Download translations
Source: https://simplelocalize.io/docs/cli/download-translations/
Download command takes translation from SimpleLocalize and saves them to your local files. See also how to use [configuration file] (/docs/cli/configuration/) for easier deployments and more options.
## Usage
```shell
simplelocalize download
--apiKey PROJECT_API_KEY
--downloadPath DOWNLOAD_PATH
--downloadFormat FILE_FORMAT
```
#### Example
The command downloads translation files for 3 languages, as `single-language-json`, to `./locales` directory as `messages_en.json`, `messages_de.json`, `messages_fr.json`
```shell
simplelocalize download
--apiKey
--downloadPath ./src/messages_{lang}.json
--downloadFormat single-language-json
--downloadLanguageKey en,de,fr
```
## Configuration
### Download path
Change where the exported translations should be stored using `--downloadPath` parameter, for example:
```
# one file
--downloadPath ./src/messages.json
# split by language
--downloadPath ./src/{lang}messages.json
# split by language and namespace
--downloadPath ./src/{lang}/{ns}/messages.json
```
Available placeholders for a download path:
- `{lang}` - language key
- `{ns}` - namespace
- `{customer}` - customer key (if you are using [customer translations](https://simplelocalize.io/docs/general/customer-specific-translations/))
You can use the placeholders as a part of a directory name, or a file name.
### Language mapping
By default `{lang}` is replaced with the SimpleLocalize language key, so `./Strings.{lang}.resx` becomes
`./Strings.en.resx`. When your project names languages differently than SimpleLocalize does, or when one language
should have no suffix at all, map the language keys to the names used in your file system with `mappings.lang`.
The option is available only in the [configuration file](/docs/cli/configuration/), not as a command-line argument.
```yaml
# simplelocalize.yml
downloadPath: ./res/values{lang}/strings.xml
mappings:
lang:
- languageKey: "en" # SimpleLocalize language key
placeholder: "" # what {lang} becomes in the file system
- languageKey: "de"
placeholder: "-de"
```
With this configuration `en` is downloaded to `./res/values/strings.xml` and `de` to `./res/values-de/strings.xml`.
Note that the separator (`-`) is part of the placeholder and not of the path — that is what lets one language end up
with no suffix. Because of that, every language you download needs its own entry: a language without a mapping keeps
its SimpleLocalize key, which would produce `./res/valuesfr/strings.xml` for `fr`.
The mapping works in both directions. On `upload` the same entries are applied in reverse, so a file found at
`./res/values/strings.xml` is uploaded as `en`. See [.NET RESX](/docs/file-formats/resx/#culture-neutral-resx-file)
and [Android Strings](/docs/file-formats/android-strings/#mapping-language-keys) for complete examples.
### File format
Change the exported translations format using `--downloadFormat` parameter, for example:
```
--downloadFormat java-properties
```
[See the list of available file formats](/docs/general/file-formats/)
### Filter languages
Choose which languages you want to export using `--downloadLanguageKey` parameter, for example:
```
--downloadLanguageKey en,pl,fr
```
Use language keys that you configured in the 'Languages' tab.
### Sort translations
You can change the default sort order using `--downloadSort` parameter with one of those values:
- `LEXICOGRAPHICAL` - sort alphabetically using the lexicographical algorithm
- `NEWEST_KEYS_FIRST` - sort by translation key creation date, newest first
- `NEWEST_KEYS_LAST` - sort by translation key creation date, oldest first
- `NAMESPACES` - sort by namespaces alphabetically
- `IMPORT_ORDER` - sort by the import order (requires uploading the source file with the `UPDATE_ORDER` option, see [translation keys order](/docs/general/export-translations/#translation-keys-order))
### Tags
You can download translations with specific tags using `--downloadTags` parameter (or simply `--tags`), for example:
```
simplelocalize download
--downloadPath ./messages_{lang}.json
--downloadFormat single-language-json
--downloadTags Premium,Development,_none
```
Use `_none` to include translations without any tags.
### Options
Customize exported translations using options using `--downloadOptions`, for example:
```
--downloadOptions WRITE_NESTED,ENABLE_FALLBACKS
```
[See download options](https://simplelocalize.io/docs/general/options/#exportdownload-options)
## Examples
### One file with multiple languages
Command:
```
simplelocalize download
--apiKey
--downloadPath ./locales/messages.json
--downloadFormat multi-language-json
```
Expected output:
```bash
.
└── locales
└── messages.json
```
### One file per language
Command:
```
simplelocalize download
--apiKey
--downloadPath ./{lang}/messages.json
--downloadFormat single-language-json
```
Expected output:
```bash
.
├── ca
│ └── messages.json
├── en
│ └── messages.json
└── es
└── messages.json
```
### One file per language and namespace
Command:
```
simplelocalize download
--apiKey
--downloadPath /{lang}/{ns}.json
--downloadFormat single-language-json
```
Expected output:
```bash
.
├── it
│ ├── common.json
│ └── home.json
├── en
│ ├── common.json
│ └── home.json
└── es
├── common.json
└── home.json
```
### Download customer translations for one customer
This option is only available with a [Business plan](/pricing/).
```properties
simplelocalize download \
--apiKey PROJECT_API_KEY \
--downloadPath ./locales/translations_ikea.json \
--downloadCustomerId ikea \
--downloadFormat multi-language-json
```
Expected output:
```bash
.
└── locales
└── translations_ikea.json
```
### Download all customer translations
This option is only available with a [Business plan](/pricing/).
```properties
simplelocalize download \
--apiKey PROJECT_API_KEY \
--downloadPath ./locales/translations_{customer}.json \
--downloadFormat multi-language-json
```
Expected output:
```bash
.
└── locales
└── translations_ikea.json
```
---
# Command-line tool: Extract translations
Source: https://simplelocalize.io/docs/cli/i18n-keys-extraction/
SimpleLocalize CLI offers `extract` command
to extract translation keys and translations from your local project files and export them to a JSON file.
The CLI will process your local files at path specified by `searchDir` parameter
and search for translation keys and translations based on the `projectType` you provide.
## Usage
Before you start, you need to install the CLI. Follow the [installation guide](/docs/cli/get-started/).
```properties
simplelocalize extract \
--projectType yahoo/react-intl \
--searchDir ./src
```
After running the command above, the CLI will store found translation keys and translations in a JSON file named `extraction.json`.
You can upload this file to SimpleLocalize using the [`upload` command](/docs/cli/upload-translations/) and [`simplelocalize-json` file format](/docs/file-formats/simplelocalize-json/).
## Supported libraries
Libraries from which you can extract translation keys
| Library | `projectType` value |
|----------------------------------------------------------------------------------------|-----------------------------:|
| [react-intl](https://github.com/yahoo/react-intl) | yahoo/react-intl |
| Standard Android internationalization | google/android |
| Standard iOS internationalization | apple/ios-macos |
| [react-i18next](https://github.com/i18next/react-i18next) | i18next/i18next |
| [mde/ejs](https://github.com/mde/ejs) | mde/ejs |
| [data-i18n-key](https://simplelocalize.io/blog/posts/cloudflare-website-localization/) | simplelocalize/data-i18n-key |
---
# Command-line tool: Other commands
Source: https://simplelocalize.io/docs/cli/other-commands/
## Auto-translate
```properties
simplelocalize auto-translate --apiKey PROJECT_API_KEY
```
### Specified languages
Pass one or more language keys in `--languageKeys` parameter, to auto-translate selected texts.
```properties
simplelocalize auto-translate --apiKey PROJECT_API_KEY --languageKeys en,fr,de,pl
```
### Force translation
Use `--force` parameter to auto-translate all texts, even if they are already translated.
```properties
simplelocalize auto-translate \
--apiKey PROJECT_API_KEY \
--languageKeys fr,pl \
--force
```
> **Note**: This will overwrite existing translations, so use it with caution. This options is a shortcut for `--autoTranslateOptions FORCE_REPLACE`.
### Custom options
Use `--autoTranslateOptions` parameter to pass custom options to the auto-translate command, for example: `USE_TRANSLATION_KEYS`.
```properties
simplelocalize auto-translate \
--apiKey PROJECT_API_KEY \
--languageKeys fr,pl \
--autoTranslateOptions USE_TRANSLATION_KEYS
```
## Initialize configuration file
Command creates a sample [configuration file](https://github.com/simplelocalize/simplelocalize-cli/wiki/Configuration-file) in the current directory.
```shell
simplelocalize init
```
## Get project details
Command gets project details and prints them to the console.
```properties
simplelocalize status --apiKey PROJECT_API_KEY
```
## Purge translations
Command removes all translations, translation keys and languages from the project
```bash
simplelocalize purge --apiKey PROJECT_API_KEY
# skip confirmation
simplelocalize purge --apiKey PROJECT_API_KEY --force
```
---
# Command-line tool: Configuration file
Source: https://simplelocalize.io/docs/cli/configuration/
## Configuration file
Use a configuration file to simplify your bash command.
Arguments used in command always override properties set in the configuration file.
By default, SimpleLocalize will load configuration from file named `simplelocalize.yml`.
You can load configuration from different location by using a `-c` parameters.
```properties
# Load default simplelocalize.yml file
simplelocalize upload
# Use configuration file at custom location
simplelocalize -c my-configuration.yml upload
```
## Sample configuration file
Filename: `simplelocalize.yml`
```yaml
# Get started with CLI: https://simplelocalize.io/docs/cli/get-started/
# Available formats: https://simplelocalize.io/docs/general/file-formats/
# Available import/export options: https://simplelocalize.io/docs/general/options/
# Support: contact@simplelocalize.io
# Project API Key
apiKey: API_KEY
# Properties used by 'upload' command
uploadPath: ./source-translations/messages_en.json
uploadLanguageKey: en-GB
uploadFormat: single-language-json
uploadTags:
- 'development'
- 'staging'
uploadOptions:
# by default, the 'upload' command adds new keys and fills empty translations,
# add this option to update existing translations with values from the uploaded file
- UPDATE_TRANSLATIONS
# Properties used by 'download' command
downloadPath: ./output-translations/messages_{lang}.json
downloadLanguageKeys: ['de-DE', 'fr-FR', 'pl-PL']
downloadFormat: single-language-json
downloadTags:
- 'development'
- 'staging'
downloadOptions:
- WRITE_NESTED
# Mapping between SimpleLocalize language key and {lang} placeholder.
# On download the SimpleLocalize language key is mapped to the {lang} placeholder,
# On upload the {lang} placeholder is mapped back to the SimpleLocalize language key.
# This can be used to customize where files are downloaded,
# e.g., to download 'en' to '/values/' instead of '/values-en/'.
# Available since SimpleLocalize CLI 2.11+
mappings:
lang:
- languageKey: "en"
placeholder: "" # SimpleLocalize 'en' is downloaded to '{lang}' = ''
- languageKey: "de"
placeholder: "-de" # SimpleLocalize 'de' is downloaded to '{lang}' = '-de'
# Properties used by 'extract' command
searchDir: ./src
projectType: yahoo/react-intl
ignoreKeys:
- 'WELCOME'
- 'ABOUT-US'
# Properties used by 'pull' and 'publish' command
pullPath: ./src/hosting/
environment: '_production' # or '_latest', or 'my_custom'
```
---
# Command-line tool: CI/CD integration
Source: https://simplelocalize.io/docs/cli/ci-cd-integration/
Continuous integration and continuous deployment (CI/CD) is a practice that enables you to release new versions of your product quickly and frequently.
Include SimpleLocalize CLI in your CI/CD pipeline to automate the process of uploading and downloading translations, ensuring that your translation files are always up-to-date with the latest changes in your codebase.
## Workflow automation
SimpleLocalize can be integrated with any CI/CD service, such as GitHub Actions, GitLab CI/CD, CircleCI, Travis CI, or AWS CodeBuild.
```shell
$ curl -s https://get.simplelocalize.io/2.12/install | bash
$ simplelocalize [command] --apiKey YOUR_API_KEY
```
## GitHub Actions
[SimpleLocalize GitHub Action](https://github.com/simplelocalize/github-action-cli) is the easiest way to integrate SimpleLocalize with your GitHub repository.
It's a ready-to-use GitHub Action that can be configured in a few minutes. The only thing you need to do is to create a new workflow file in your repository.
Sample `.github/workflows/deploy.yml` workflow file:
```yaml
name: 'My project'
on:
push:
branches: [ main ]
env:
cli-version: '2.12.0'
jobs:
build:
runs-on: ubuntu-latest
steps:
- uses: actions/checkout@v3
- name: Upload translations
uses: simplelocalize/github-action-cli@v5
with:
api-key: ${{ secrets.SIMPLELOCALIZE_API_KEY }}
command: 'upload'
cli-version: ${{ env.cli-version }}
args: '--uploadPath ./translations/{lang}.json --uploadFormat single-language-json'
- name: Auto-translate project
uses: simplelocalize/github-action-cli@v5
with:
api-key: ${{ secrets.SIMPLELOCALIZE_API_KEY }}
command: 'auto-translate'
cli-version: ${{ env.cli-version }}
- name: Download translations
uses: simplelocalize/github-action-cli@v5
with:
api-key: ${{ secrets.SIMPLELOCALIZE_API_KEY }}
command: 'download'
cli-version: ${{ env.cli-version }}
args: '--downloadPath ./translations/{lang}.json --downloadFormat single-language-json'
- name: Publish translations
uses: simplelocalize/github-action-cli@v5
with:
api-key: ${{ secrets.SIMPLELOCALIZE_API_KEY }}
command: 'publish'
cli-version: ${{ env.cli-version }}
args: '--environment _latest'
- name: Pull translations
uses: simplelocalize/github-action-cli@v5
with:
api-key: ${{ secrets.SIMPLELOCALIZE_API_KEY }}
command: 'pull'
cli-version: ${{ env.cli-version }}
args: "--pullPath ./translation-hosting-resources/ --environment _latest --filterRegex '_index.json'"
```
## AWS CodeBuild
Sample `buildspec.yml`
```yaml
version: 0.1
phases:
pre_build:
commands:
- yarn install
build:
commands:
- yarn run test
- yarn run build
# Run SimpleLocalize
- curl -s https://get.simplelocalize.io/2.12/install | bash
- simplelocalize upload
```
---
# Command-line tool: Troubleshooting
Source: https://simplelocalize.io/docs/cli/troubleshooting/
Please report any issues you encounter with the SimpleLocalize CLI as a [GitHub issue](https://github.com/simplelocalize/simplelocalize-cli/issues).
## simplelocalize: No such file or directory
Please make sure that you installed the CLI properly. See our [getting started with CLI page](/docs/cli/get-started/)
for more information about the installation process.
If you still see `simplelocalize: command not found` error after executing the installation script,
then you can install the CLI manually.
Download the latest CLI version from [GitHub releases page](https://github.com/simplelocalize/simplelocalize-cli/releases)
and add a path to the binary to your `PATH` or just run the binary. Remember to make the binary executable.
```bash
# add to PATH
export PATH=$PATH:/path/to/simplelocalize-cli
# run the binary
./simplelocalize-cli [command] parameters
# make the binary executable
chmod +x simplelocalize-cli
```
## Installation script keeps asking for a password
On managed (MDM) computers without administrator rights, the installation script may keep asking for the `sudo`
password or fail with a permissions error. Since version 2.12, `sudo` is not required. Install the CLI into
your home directory instead by setting `SIMPLELOCALIZE_INSTALL_DIR`:
```bash
curl -s https://get.simplelocalize.io/2.12/install | SIMPLELOCALIZE_INSTALL_DIR="$HOME/.local/bin" bash
```
If `simplelocalize` is not found afterwards, add the directory to your `PATH`:
```bash
export PATH="$HOME/.local/bin:$PATH"
```
## version `GLIBC_2.33' not found
This error might occur on Linux systems with older GLIBC version.
```
simplelocalize: /lib/x86_64-linux-gnu/libc.so.6: version `GLIBC_2.33' not found (required by simplelocalize)
simplelocalize: /lib/x86_64-linux-gnu/libc.so.6: version `GLIBC_2.32' not found (required by simplelocalize)
simplelocalize: /lib/x86_64-linux-gnu/libc.so.6: version `GLIBC_2.34' not found (required by simplelocalize)
Error: Process completed with exit code 1.
```
You can try to run the CLI via Java launcher. Install Java 11 or newer, you can use [SDKMAN](https://sdkman.io/) for this purpose.
```bash
# install sdkman
curl -s "https://get.sdkman.io" | bash
# install java
sdk install java
```
Download the latest CLI version from [GitHub releases](https://github.com/simplelocalize/simplelocalize-cli/releases) page. Run the CLI via Java launcher:
```bash
java -jar simplelocalize-cli.jar [command] parameters
```
The other solution is to update your GLIBC version or upgrade your Linux distribution.
## Segmentation fault
This error might occur on internal error of the CLI or your system configuration.
Please report this problem as [GitHub issue](https://github.com/simplelocalize/simplelocalize-cli/issues),
and we will try to fix it as soon as possible.
Meanwhile, you can try to run the CLI via Java launcher.
Install Java 11 or newer, you can use [SDKMAN](https://sdkman.io/) for this purpose.
```bash
# install sdkman
curl -s "https://get.sdkman.io" | bash
# install java
sdk install java
```
Download the latest CLI version from [GitHub releases](https://github.com/simplelocalize/simplelocalize-cli/releases) page. Run the CLI via Java launcher:
```bash
java -jar simplelocalize-cli.jar [command] parameters
```
---
# REST API: Get started
Source: https://simplelocalize.io/docs/api/get-started/
SimpleLocalize API gives you an ability to create your own integrations.
API provides an endpoint to [create](/docs/api/add-translations/), [update](/docs/api/update-translations/), [read](/docs/api/read-translations/), and [delete](/docs/api/delete-translations/) translations.
Optionally, you can [import translations](/docs/api/import-translations/) and [export translations](/docs/api/export-translations/).
## OpenAPI Specification
SimpleLocalize API is described with OpenAPI 3.x Specification
and can be used to generate client libraries for your favorite programming language or import to REST Client, e.g.: Postman or Insomnia.
We also provide a Swagger UI to test the API.
- [Download OpenAPI Specification file](https://api.simplelocalize.io/openapi/docs)
- [Go to Swagger UI](https://api.simplelocalize.io/openapi/ui)
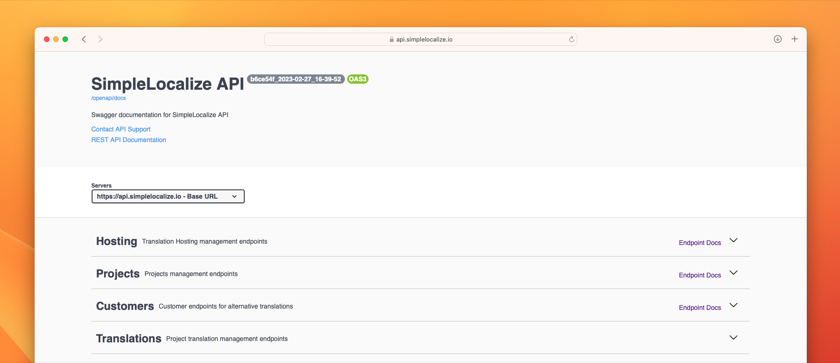
## API authorization
Each request which adds or updates the translation data needs to be authorized.
Every request sent to such endpoint needs to have `X-SimpleLocalize-Token` header with `API Key` value.
The API Key can be found in the '**Settings > Credentials > API Key**'.

**Please note that the API Access is rate-limited, and you should not use it to fetch translations for every end-user. [Use Translation Hosting](/docs/translation-hosting/get-started/) instead.**
## Personal Tokens
Personal tokens are used to authorize requests to the [Projects API](/docs/api/translation-project-management/) and you
can generate them in [account settings](/dashboard/security/) section. Each user can have up to 5 personal tokens. Requests sent to endpoint that requires Personal Tokens need to have `Authorization` header with the token as a value.
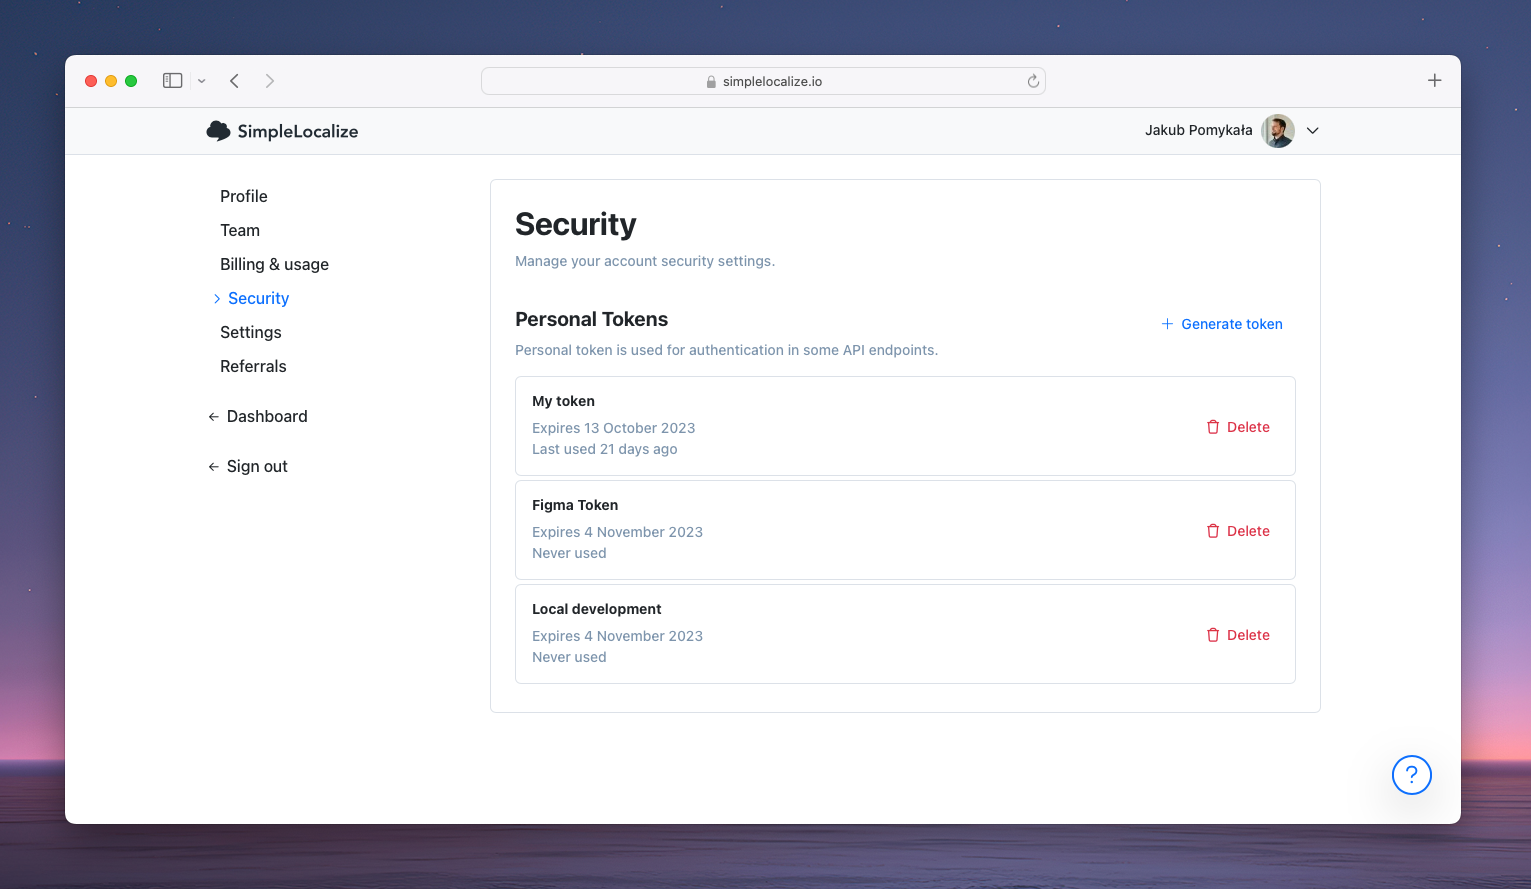
## Rate limits
All API endpoints are rate-limited to 60 req/minute (per IP address) and 300 req/minute (per project). Some endpoints have additional limits:
- Export and import endpoints are limited to 60 req/minute (per project),
- Publication endpoint is limited to 10 req/minute (per project),
- `POST /api/v1/translations` endpoint is limited to 60 req/minute (per project).
If you exceed this limit, you will get a response with `429` HTTP code.
When you receive this response, wait some time and try again.
If you get the same error again, please wait longer between retries (e.g., double the wait time).
Repeat this until the request succeeds.
In some cases, you might get a CORS error if the request is sent from the browser,
because OPTIONS requests are also rate-limited.
## Cross-Origin Resource Sharing (CORS)
SimpleLocalize API supports CORS for all API endpoints, so you can integrate the API with tools like Figma or other web applications
that make requests from the browser.
## Request blocked
We may block requests that are considered harmful, e.g., requests that are too frequent, too large,
or they come from the publicly available environments that exposes your API Key, and it shouldn't be there.
## API access logs
You can export the last 1,000 requests made to the API from the project settings section. Please note that it may take up to 5 minutes for your request to appear in the exported file.
Exporting API logs is available only to the project owner.
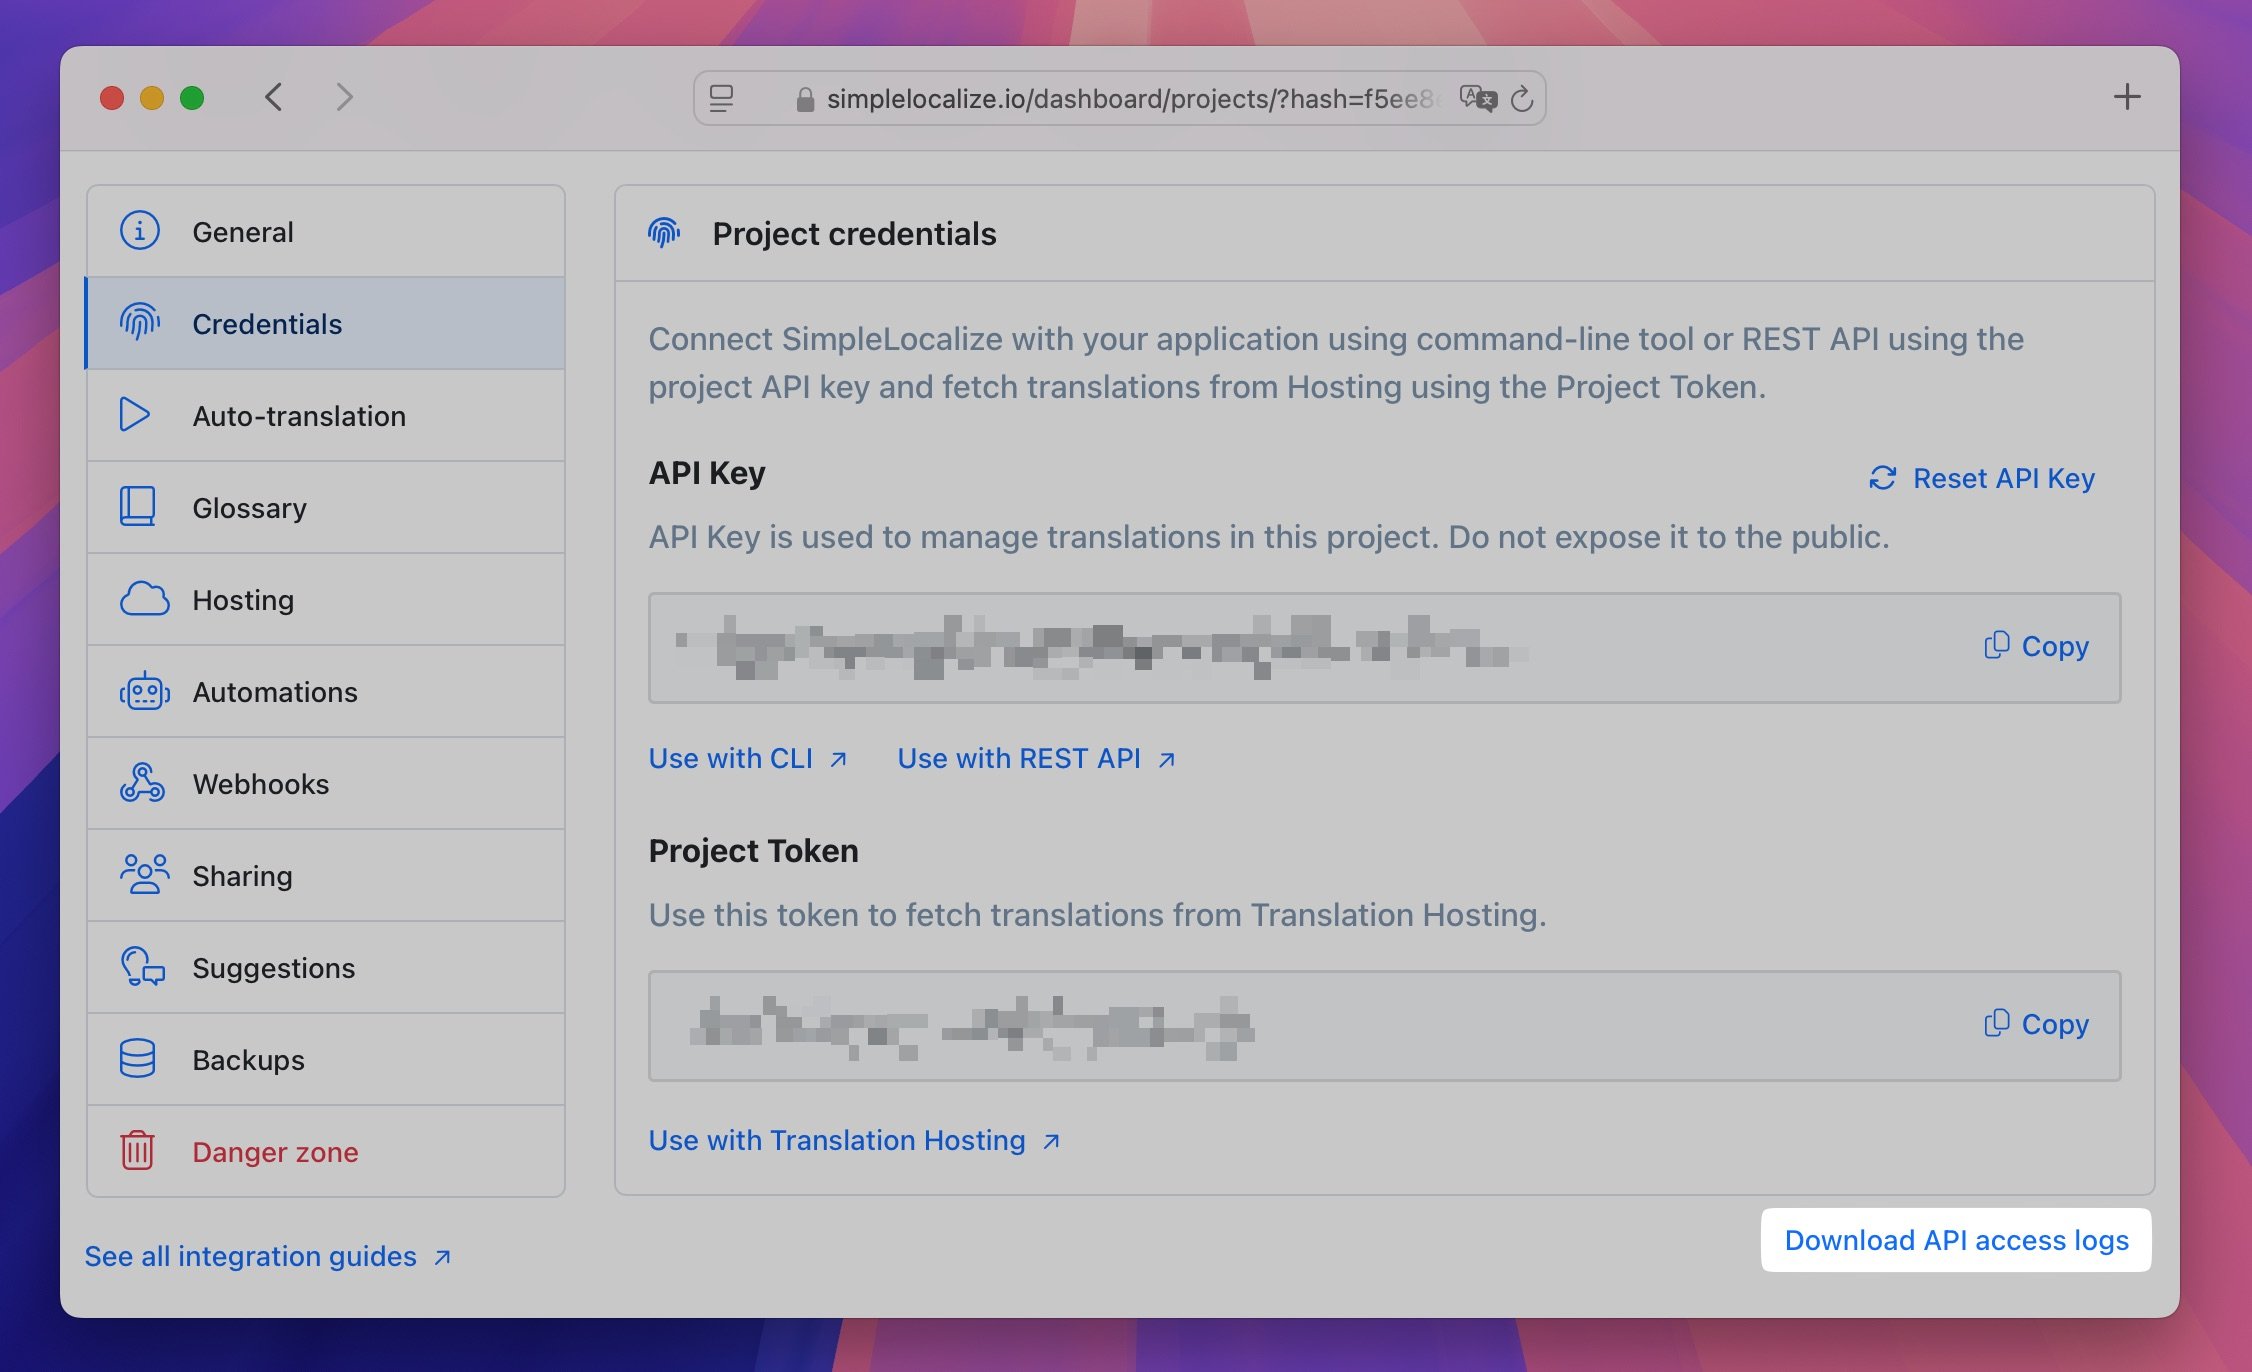
---
# REST API: Add translations
Source: https://simplelocalize.io/docs/api/add-translations-v1/
In this section, you will learn how to add translations using API access. You can use this endpoint to add new translation keys and translations or update existing translations.
Requests with less than 50 elements are buffered, and they will be added to the translation editor after a few minutes (up to 15 minutes).
> Deprecation notice: This endpoint will be deprecated in the future. [Check the updated documentation](/docs/api/add-translations/) instead.
## Endpoint
### Description
This endpoint allows you to:
- create new translation keys and translations
- add new languages/locales
- modify existing translations (`importOptions=REPLACE_TRANSLATION_IF_FOUND`)
Check `importOptions` section to learn more. If you use this endpoint, note that it requires [authorization](/docs/api/get-started/).
### Endpoint behaviour
- Endpoint will add translation for the translation key and language if not found.
- Endpoint will automatically update the last seen value in the translation editor.
- Endpoint will automatically add language if not found.
- Endpoint won't replace existing translations by default. Use [update translations endpoint](/docs/api/update-translations/) or `importOptions=REPLACE_TRANSLATION_IF_FOUND`.
- Endpoint won't create customerId automatically if not found.
- Endpoint won't update a translation, if `key` and/or `language` is missing.
### Sample request
```shell
curl
--location
--request POST 'https://api.simplelocalize.io/api/v1/translations' \
--header 'X-SimpleLocalize-Token: ' \
--header 'Content-Type: application/json' \
--data-raw '{
"content": [
{
"key": "HELLO_WORLD",
"language": "en",
"text": "Hello world!"
},
{
"key": "HELLLO_WORLD",
"language": "pl",
"text": "Witaj świecie!"
}
]
}'
```
### Request fields
- `content` - array of objects with translations,
- `key` - unique translation key for a project,
- `language` - project language key,
- `text` - translation text,
- `namespace` - namespace for a translation key,
- `description` - description for a translation key,
- `customerId` - customer id for a translation key.
### Import options
Use query param `importOptions` to invoke custom logic after or during the import. You can pass more than one import
option.
| Option value | Description |
|:-------------------------------|------------------------------------------------------------------------------------------------------------------------------------------------------------------------------------------------------------------------|
| `REPLACE_TRANSLATION_IF_FOUND` | Updates translations, without this option SimpleLocalize will only add new translations. |
| `PUBLISH_AFTER_IMPORT` | Translations will be published automatically to the CDN after successful import. **Option available only in paid plans.** Check also how to [publish translations using API endpoint](/docs/api/publish-translations/) |
### Example response
```json
{
"msg": "OK",
"status": 200,
"data": {
"uniqueKeysProcessed": 2,
"processedWithWarnings": false,
"message": "OK"
}
}
```
### Response fields
- `uniqueKeysProcessed` - informs about number of processed translation keys which was sent by a client,
- `processedWithWarnings` - informs about encountered warnings during import,
- `message` - informs about warning details.
---
# REST API: Add translations
Source: https://simplelocalize.io/docs/api/add-translations/
In this section, you will learn how to add translations to your project using the API.
You can use the API to add translations to your project from your CI/CD pipeline or from your application.
Looking for a previous version of the API? Check out [v1](/docs/api/add-translations-v1/).
## Create translation key endpoint
### Description
This endpoint allows you to add new translation keys to your project.
### Sample request
```shell
curl
--location
--request POST 'https://api.simplelocalize.io/api/v1/translation-keys' \
--header 'X-SimpleLocalize-Token: ' \
--header 'Content-Type: application/json' \
--data-raw '{
"key": "HELLO_WORLD"
}'
```
### Request body fields
- `key` - unique translation key for a project,
- `namespace` - namespace for a translation key,
- `description` - description for a translation key,
- `tags` - tags for a translation key,
- `codeDescription` - code description for a translation key,
- `charactersLimit` - limit of characters for a translation key.
> Code description is a description that is visible in the translation editor but cannot be changed by translators. It is useful when you want to provide additional information about the translation key from the code level.
## Add translation endpoint
### Description
This endpoint allows you to set or update translations for a given translation key.
### Sample request
```shell
curl
--location
--request PATCH 'https://api.simplelocalize.io/api/v2/translations' \
--header 'X-SimpleLocalize-Token: ' \
--header 'Content-Type: application/json' \
--data-raw '{
"key": "HELLO_WORLD",
"language": "pl_PL",
"text": "Witaj świecie""
}'
```
### Request body fields
- `key` - translation key,
- `namespace` - namespace for a translation key,
- `language` - language key,
- `text` - translation text,
- `customerId` - customer id,
- `reviewStatus` - review status, possible values: `REVIEWED`, `NOT_REVIEWED`.
---
# REST API: Fetch translations
Source: https://simplelocalize.io/docs/api/read-translations/
SimpleLocalize REST API offers filter and query options, and uses your [API Key](/docs/api/get-started/#api-authorization) which can be used also for [modifying translations](/docs/api/update-translations/), so it should be used only in server-side applications and integrations.
If you are looking for a way to fetch translations for client-side applications, use [Translation Hosting](/docs/translation-hosting/get-started/).
This section is about using REST API to fetch translations. It's possible to use it in server-side applications and integrations.
If you are using this endpoint, the [authorization](/docs/api/get-started/#api-authorization) is required.
Add API Key for your project as a `X-SimpleLocalize-Token` request header.
## Querying translations
Available query parameters
| Query parameter | Description |
|-----------------|---------------------------------------------------------------------------------------------------------------------------------|
| `text` | query for translated text, uses 'contains with ignore case' |
| `textStatus` | search for empty or not empty translations, allowed values: `EMPTY`, `NOT_EMPTY` |
| `reviewsStatus` | filter by review status, allowed values: `REVIEWED`, `NOT_REVIEWED` |
| `key` | filter by given translation key, uses 'equals' |
| `namespace` | filter by given translation namespace, uses 'equals' |
| `language` | filter by given language key, uses 'equals' |
| `customerId` | filter by given customer id, uses 'equals'; [see customer-specific translations](/docs/general/customer-specific-translations/) |
| `page` | page for pagination |
| `size` | size for pagination, max size: 500 |
### Sample request
Response
```json
{
"msg": "OK",
"status": 200,
"data": [
{
"key": "HELLO_WORLD",
"namespace": "common",
"language": "en",
"text": "Hello world!",
"reviewStatus": "REVIEWED",
"lastModifiedAt": "2021-01-01T00:00:00.000Z"
}
]
}
```
---
# REST API: Update translations
Source: https://simplelocalize.io/docs/api/update-translations-v1/
This endpoint allows you to operate only on existing translations.
Use this endpoint to update translation for given translation key and language or translation key, language and customer id.
Using this endpoint requires [authorization](/docs/api/get-started/).
> Deprecation notice: This endpoint will be deprecated in the future. [Check the updated documentation](/docs/api/update-translations/) instead.
## Endpoint
### Sample request
```shell
curl
--location
--request PATCH 'https://api.simplelocalize.io/api/v1/translations' \
--header 'X-SimpleLocalize-Token: ' \
--header 'Content-Type: application/json' \
--data-raw '{
"content": [
{
"key": "HELLO_WORLD",
"language": "en",
"text": "Hello world!"
},
{
"key": "HELLO_WORLD",
"language": "pl",
"text": "Witaj świecie!"
}
]
}'
```
### Request fields
- `content` - array of objects with translation updates,
- `key` - unique translation key for a project,
- `language` - project language key,
- `text` - translation text,
- `namespace` - namespace for a translation key,
- `customerId` - customer id for a translation key.
### Response
```json
{
"msg": "OK",
"status": 200,
"data": {
"numberOfUpdates": 2,
"numberOfFailures": 4,
"numberOfInserts": 1,
"failures": [
"Cannot update translation. Translation key value is empty.",
"Cannot update translation. Language value is empty for key 'MY_TRANSLATION_KEY'.",
"Cannot update translation. Language 'wrong-lang-key' does not exist in the project.",
"Cannot update translation. Translation key 'MY_TRANSLATION_KEY' does not exist in the project."
]
}
}
```
### Response fields
- `numberOfUpdates` - informs about number of processed translation updates,
- `numberOfFailures` - informs about number of processed translation update failures,
- `numberOfInserts` - informs about number of newly added translations,
- `failures` - informs about failed updates.
### Available update options
Use query param 'updateOptions' to do invoke custom logic after or during the import. You can pass more than one update
option.
| updateOptions | Description |
|---------------------------|---------------------------------------------------------------|
| `CREATE_KEY_IF_NOT_FOUND` | Creates translation key which are not present in the project. |
---
# REST API: Update translations
Source: https://simplelocalize.io/docs/api/update-translations/
This endpoint allows you to operate only on existing translations.
Use this endpoint to update translation for given translation key and language or translation key, language and customer id.
Using this endpoint requires [authorization](/docs/api/get-started/).
Looking for a previous version of the API? Check out [v1](/docs/api/update-translations-v1/).
## Endpoint
### Description
This endpoint allows you to set or update translations for a given translation key.
### Sample request
```shell
curl
--location
--request PATCH 'https://api.simplelocalize.io/api/v2/translations' \
--header 'X-SimpleLocalize-Token: ' \
--header 'Content-Type: application/json' \
--data-raw '{
"key": "HELLO_WORLD",
"language": "pl_PL",
"text": "Witaj świecie""
}'
```
### Request body fields
- `key` - translation key,
- `namespace` - namespace for a translation key,
- `language` - language key,
- `text` - translation text,
- `customerId` - customer id,
- `reviewStatus` - review status, possible values: `REVIEWED`, `NOT_REVIEWED`.
---
# REST API: Delete translation keys
Source: https://simplelocalize.io/docs/api/delete-translations/
This endpoint allows you to delete translation keys with its translations.
The usage of this endpoint requires [authorization](/docs/api/get-started/).
## Endpoint
### Sample request
```shell
curl
--location
--request DELETE 'https://api.simplelocalize.io/api/v1/translation-keys?key={key}&namespace={namespace}' \
--header 'X-SimpleLocalize-Token: '
```
### Request fields
- `key` - translation key,
- `namespace` - translation namespace, if not provided, the empty string will be used.
## Bulk delete
You can also delete multiple translation keys at once by providing an array of keys as a request body.
Request body example:
```json
{
"translationKeys": [
{
"key": "HELLO_WORLD",
"namespace": "common"
},
{
"key": "SIGN_IN",
"namespace": ""
}
]
}
```
---
# REST API: Publish translations
Source: https://simplelocalize.io/docs/api/publish-translations/
This endpoint allows you to publish translations in the [translation editor](/docs/translation-editor/get-started/) to the [translation hosting](/docs/translation-hosting/get-started/)
or to publish them from one hosting environment to another.
You can see your project environments in '**Hosting**' tab of your project.
Please note that this endpoint requires [authorization](/docs/api/get-started/) and it's only available for [paid plans](/pricing/).
## Publish translations
### Description
A request to this endpoint may require some time to complete.
Please do not send another request until the previous one is completed, otherwise endpoint will return error response.
Please try to avoid sending too many requests in a short period of time,
otherwise rate-limiter service may block your next requests a while.
Our recommendation is to send a request to this endpoint only when you are ready to publish translations and not more often than once per minute.
### Publish translations from Translation Editor
To publish translations from translation editor, you need to specify `_latest` environment in `environment` query parameter.
```shell
curl
--location
--request POST 'https://api.simplelocalize.io/api/v2/environments/_latest/publish' \
--header 'X-SimpleLocalize-Token: ' \
--header 'Content-Type: application/json'
```
### Publish translations to the production environment
To publish translations to production environment, you need to specify `_production` environment in `environment` query parameter.
Translations will be taken from the `_latest` environment by default.
```shell
curl
--location
--request POST 'https://api.simplelocalize.io/api/v2/environments/_production/publish' \
--header 'X-SimpleLocalize-Token: ' \
--header 'Content-Type: application/json'
```
### Publish translations to the custom environment
To publish translations to the custom environment, you need to specify your custom environment key in `environment` query parameter.
The source environment is always taken from the configured order (from top to bottom) in the project settings page.
You can change the order of hosting environments in the '**Settings**' -> '**Hosting**' tab.
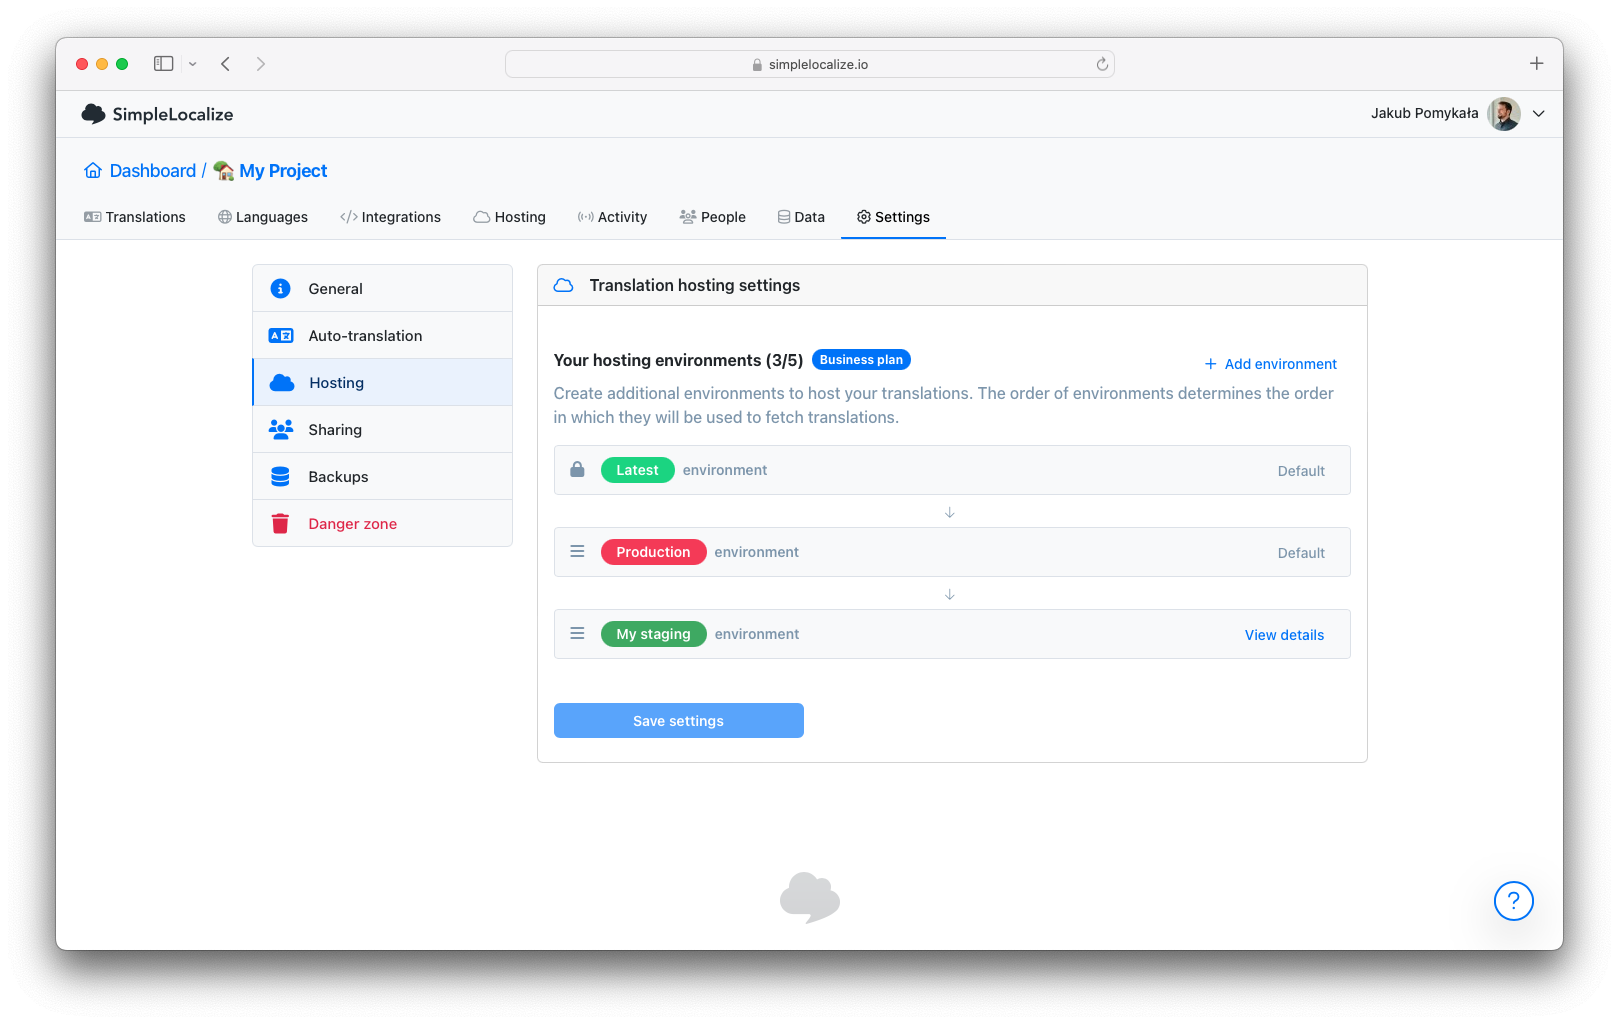
The environment key can be found in the '**Settings**' -> '**Hosting**' tab. The key has been set during the environment creation, and it cannot be changed after creation.
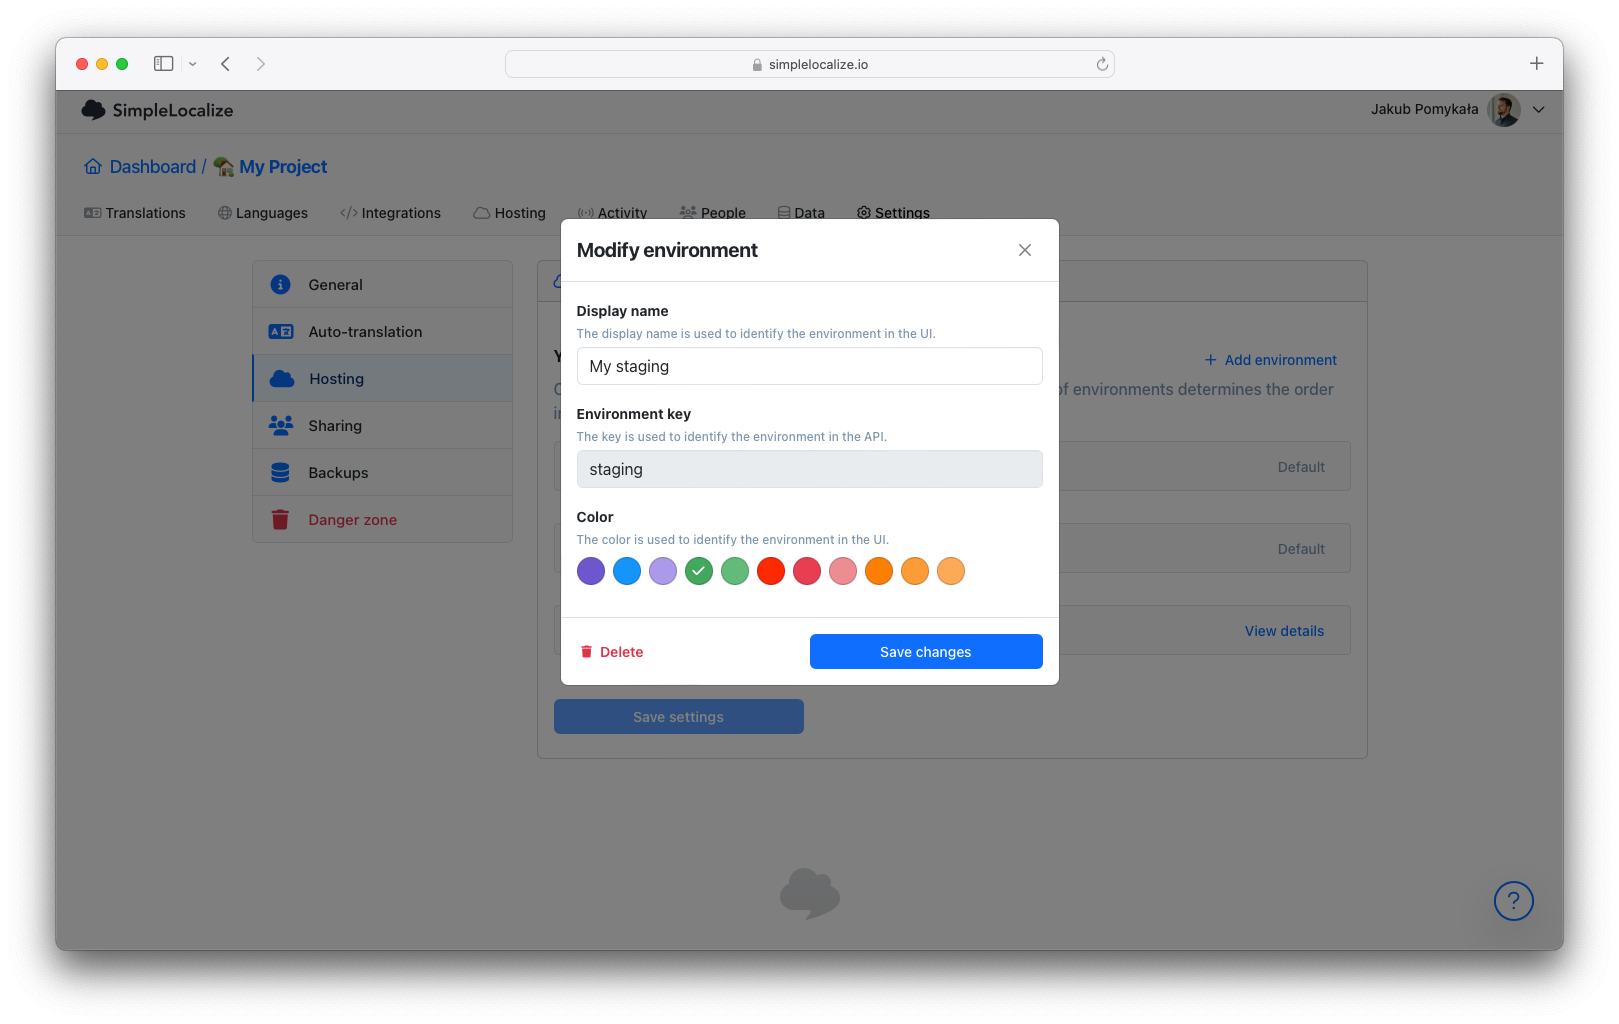
#### Sample request
According to the above example, the environment key is `staging`, and the source environment is `_production`.
```shell
curl
--location
--request POST 'https://api.simplelocalize.io/api/v2/environments/staging/publish' \
--header 'X-SimpleLocalize-Token: ' \
--header 'Content-Type: application/json'
```
## Get environment status
### Description
This endpoint allows you to check the current status of the environment, with the number of keys,
languages, and non-empty translations and list of resources to download or use in your application.
#### Sample request
```shell
curl -X 'GET' \
'https://api.simplelocalize.io/api/v2/environments/{environmentKey}' \
-H 'accept: application/json' \
-H 'X-SimpleLocalize-Token: '
```
The response will look like this:
```json
{
"msg": "OK",
"status": 200,
"data": {
"numberOfKeys": 81,
"numberOfLanguages": 6,
"numberOfNonEmptyTranslations": 471,
"createdAt": "2023-10-05T12:55:20.987Z",
"resources": [
{
"link": "752a12896c194846aac2bac83efc6c79/_latest/_index",
"size": 9333
},
{
"link": "752a12896c194846aac2bac83efc6c79/_latest/pl_PL/login",
"language": "pl_PL",
"namespace": "login",
"size": 385
}
// cut for brevity...
]
}
}
```
| Field | Description |
|--------------------------------|----------------------------------------------------------|
| `numberOfKeys` | The number of keys in the environment. |
| `numberOfLanguages` | The number of languages in the environment. |
| `numberOfNonEmptyTranslations` | The number of non-empty translations in the environment. |
| `createdAt` | The date when the environment was published. |
| `resources` | The list of resources in the environment. |
| `resources.link` | The path to the resource |
| `resources.size` | The size of the resource in bytes |
| `resources.language` | The language of the resource (if applies) |
| `resources.namespace` | The namespace of the resource (if applies) |
| `resources.customer` | The customer of the resource (if applies) |
The `link` field is a path to the resource. By default, you should append the `https://cdn.simplelocalize.io/` prefix to the link to get the full URL to the resource.
---
# REST API: Import translations
Source: https://simplelocalize.io/docs/api/import-translations/
Import translations from a file to the translation editor. This endpoint requires [authorization](/docs/api/get-started/).
## Endpoint
> **Note:** By default, the API will import only new translations, and it will not update existing ones. If you want to update existing translations, you need to use the `UPDATE_TRANSLATIONS` as import option.
## Sample requests
### Import all translations from one file
This example shows how to import all translations from [multi-language-json](/docs/file-formats/multi-language-json/) file and
update existing translations if found.
```shell
curl
--request POST \
--url 'https://api.simplelocalize.io/api/v2/import?uploadFormat=multi-language-json&importOptions=UPDATE_TRANSLATIONS' \
--header 'x-simplelocalize-token: ' \
--form file=@/path/to/your/all-translations.json
```
### Import translations for one language
This example shows how to import translations for one language from [single-language-json](/docs/file-formats/single-language-json/) file.
```shell
curl
--request POST \
--url 'https://api.simplelocalize.io/api/v2/import?uploadFormat=single-language-json&languageKey=en' \
--header 'x-simplelocalize-token: ' \
--form file=@/path/to/your/english-translations.json
```
### Query parameters
| Parameter | Description |
|-----------------|---------------------------------------------------------------------------|
| `uploadFormat` | See all available [upload formats](/docs/general/file-formats/) |
| `languageKey` | Language key for the file |
| `importOptions` | See all available [import options](/docs/general/options/#import-options) |
### Successful response
```json
{
"numberOfKeysFound": 2137,
"numberOfUniqueKeysFound": 1004,
"foundLanguages": [
{
"key": "pl",
"name": "Polish"
}
]
}
```
---
# REST API: Export translations (v3)
Source: https://simplelocalize.io/docs/api/export-translations-v3/
Export translations to downloadable file. Using this endpoint requires [authorization](/docs/api/get-started/).
## Deprecated
This endpoint has been replaced by a version 4 that supports more options. Please use [v4 export endpoint](/docs/api/export-translations) instead.
At the moment, the v3 endpoint is still available, and there is no plan to remove it. However, it is **recommended** to use the v4 endpoint.
## Endpoint
## Sample requests
### Download all translations into one file
```shell
curl
--request GET \
--url https://api.simplelocalize.io/api/v3/export?downloadFormat=multi-language-json \
--header 'x-simplelocalize-token: '
```
Learn more about [multi-language-json](/docs/file-formats/multi-language-json/).
### Download translations for one language
```shell
curl
--request GET \
--url https://api.simplelocalize.io/api/v3/export?downloadFormat=single-language-json&languageKey=en \
--header 'x-simplelocalize-token: '
```
Learn more about [single-language-json](/docs/file-formats/single-language-json/).
### Query parameters
| Parameter | Description |
|------------------|------------------------------------------------------------------------------------------|
| `downloadFormat` | (required) See all available [download formats](/docs/general/file-formats/) |
| `exportOptions` | (optional) See all available [export options](/docs/general/options/#export-options) |
| `languageKey` | (optional) Set the language key if you want to export translations just for one language |
| `customerId` | (optional) Set the customer id if you would like to export just customer translations |
### Successful response
```json
{
"msg": "OK",
"status": 200,
"data": {
"url": "https://cdn.simplelocalize.io/29fdc3462/snapshot_2021-10-12_13-01-25_063/translations.json"
}
}
```
---
# REST API: Export translations
Source: https://simplelocalize.io/docs/api/export-translations/
Export translations to downloadable file. Using this endpoint requires [authorization](/docs/api/get-started/).
## Endpoint
Looking for a v3 endpoint? [See here](/docs/api/export-translations-v3/).
### Query parameters
| Parameter | Description |
|-------------------|--------------------------------------------------------------------------------------------------------------------------------------------|
| `downloadFormat` | (required) See all available [download formats](/docs/general/file-formats/) |
| `downloadOptions` | (optional) See all available [download options](/docs/general/options/#export-options) |
| `languageKeys` | (optional) Export only selected languages |
| `customerId` | (optional) Export translations for given customer |
| `sort` | (optional) Change the default sorting option, available values: `NEWEST_KEYS_FIRST`, `NEWEST_KEYS_LAST`, `NAMESPACES`, `IMPORT_ORDER` |
## Sample requests
#### Export all translations into one file
Export all translations into one file using `multi-language-json` format.
```shell
curl
--request GET \
--url 'https://api.simplelocalize.io/api/v4/export?downloadFormat=multi-language-json' \
--header 'x-simplelocalize-token: '
```
Learn more about [multi-language-json](/docs/file-formats/multi-language-json/).
```json
{
"msg": "OK",
"status": 200,
"data": {
"files": [
{
"url": "https://cdn.simplelocalize.io/project-token/snapshot_ae60e1/translations.json"
}
]
}
}
```
#### Export all translations into multiple files
Export all translations into one file using `single-language-json` format and `SPLIT_BY_NAMESPACES` option.
```shell
curl
--request GET \
--url 'https://api.simplelocalize.io/api/v4/export?downloadFormat=single-language-json&downloadOptions=SPLIT_BY_NAMESPACES' \
--header 'x-simplelocalize-token: '
```
Learn more about [single-language-json](/docs/file-formats/single-language-json/).
```json
{
"msg": "OK",
"status": 200,
"data": {
"files": [
{
"url": "https://cdn.simplelocalize.io/project-token/snapshot_cc123/it_IT.json",
"namespace": "",
"language": "it_IT"
},
{
"url": "https://cdn.simplelocalize.io/project-token/snapshot_cc123/login_it_IT.json",
"namespace": "login",
"language": "it_IT"
},
{
"url": "https://cdn.simplelocalize.io/project-token/snapshot_cc123/pl_PL.json",
"namespace": "",
"language": "pl_PL"
},
{
"url": "https://cdn.simplelocalize.io/project-token/snapshot_cc123/login_pl_PL.json",
"namespace": "login",
"language": "pl_PL"
} // ...
]
}
}
```
#### Export translations for selected languages
Add `SELECTED_LANGUAGES` option and `languageKeys` query parameter to set the language keys.
```shell
curl
--request GET \
--url 'https://api.simplelocalize.io/api/v4/export?downloadFormat=single-language-json&downloadOptions=SPLIT_BY_NAMESPACES,SELECTED_LANGUAGES&languageKeys=pl,it_IT' \
--header 'x-simplelocalize-token: '
```
Learn more about [single-language-json](/docs/file-formats/single-language-json/).
```json
{
"msg": "OK",
"status": 200,
"data": {
"files": [
{
"url": "https://cdn.simplelocalize.io/project-token/snapshot_cc123/it_IT.json",
"namespace": "",
"language": "it_IT"
},
{
"url": "https://cdn.simplelocalize.io/project-token/snapshot_cc123/login_it_IT.json",
"namespace": "login",
"language": "it_IT"
},
{
"url": "https://cdn.simplelocalize.io/project-token/snapshot_cc123/pl_PL.json",
"namespace": "",
"language": "pl_PL"
},
{
"url": "https://cdn.simplelocalize.io/project-token/snapshot_cc123/login_pl_PL.json",
"namespace": "login",
"language": "pl_PL"
} // ...
]
}
}
```
### Error response
```json
{
"status": 400,
"msg": "Cannot find proper format for: multi-language-incorrect-value Visit https://simplelocalize.io/docs/general/file-formats/ to learn more."
}
```
---
# REST API: Auto-translate
Source: https://simplelocalize.io/docs/api/auto-translate/
Learn how to start an auto-translation job to translate text in your project to another language using automated translation services
like DeepL or Google Translate. In the second section, you will learn how to track progress of started auto-translation jobs.
## Endpoint
### Sample request
```shell
curl
--location
--request POST 'https://api.simplelocalize.io/api/v1/jobs/auto-translate' \
--header 'X-SimpleLocalize-Token: ' \
--header 'Content-Type: application/json' \
--data-raw '{
"translationProvider": "DEEPL",
"options": ["FORCE_REPLACE"],
"targetProjectLanguage": "en",
"targetLanguage": "EN-GB",
"sourceProjectLanguage": "pl",
"sourceLanguage": "PL",
}'
```
### Request fields
- `translationProvider` (required) - translation provider (`GOOGLE_TRANSLATE` or `DEEPL`),
- `targetProjectLanguage` (required) - target language key from your project,
- `targetLanguage` (required) - target provider language key,
- `sourceProjectLanguage` - source language key from your project,
- `sourceLanguage` - source language key,
- `options` - auto-translate options array.
### Available `options` field values
Options field must be always provided as string array.
| Option Value | Description |
|------------------------|-----------------------------------------------------------------------------------------------------------|
| `USE_TRANSLATION_KEYS` | Use translation keys as source, if no translation available |
| `FORCE_REPLACE` | Translate all and replace existing translations |
| `AUTO_PUBLISH` | Publish translations to CDN after successful translation (changes are pushed to the "Latest Environment") |
### Additional request fields for DeepL provider
- `deeplGlossaryId` - specify the glossary to use. This requires a custom DeepL API Key in your project settings and proper `sourceLanguage` field to be set and
the language pair of the glossary has to match the language pair of the request,
- `deeplFormality` - sets whether the translated text should lean towards formal or informal language. This feature currently only works for only [a few target languages](https://www.deepl.com/docs-api/translating-text/request/). Possible options are: `default`, `more` - for a more formal language, `less` for a more informal language.
See [DeepL API documentation](https://www.deepl.com/docs-api/translating-text/request/).
### Target Language and Source Language
- `targetLanguage` and `sourceLanguage` are different for each translation provider.
- `targetProjectLanguage` and `sourceProjectLanguage` comes from your project
#### Where to find project language keys?
Values for `targetProjectLanguage` and `sourceProjectLanguage` must be provided as language keys. Language keys can be
found in the Languages tab in your project.
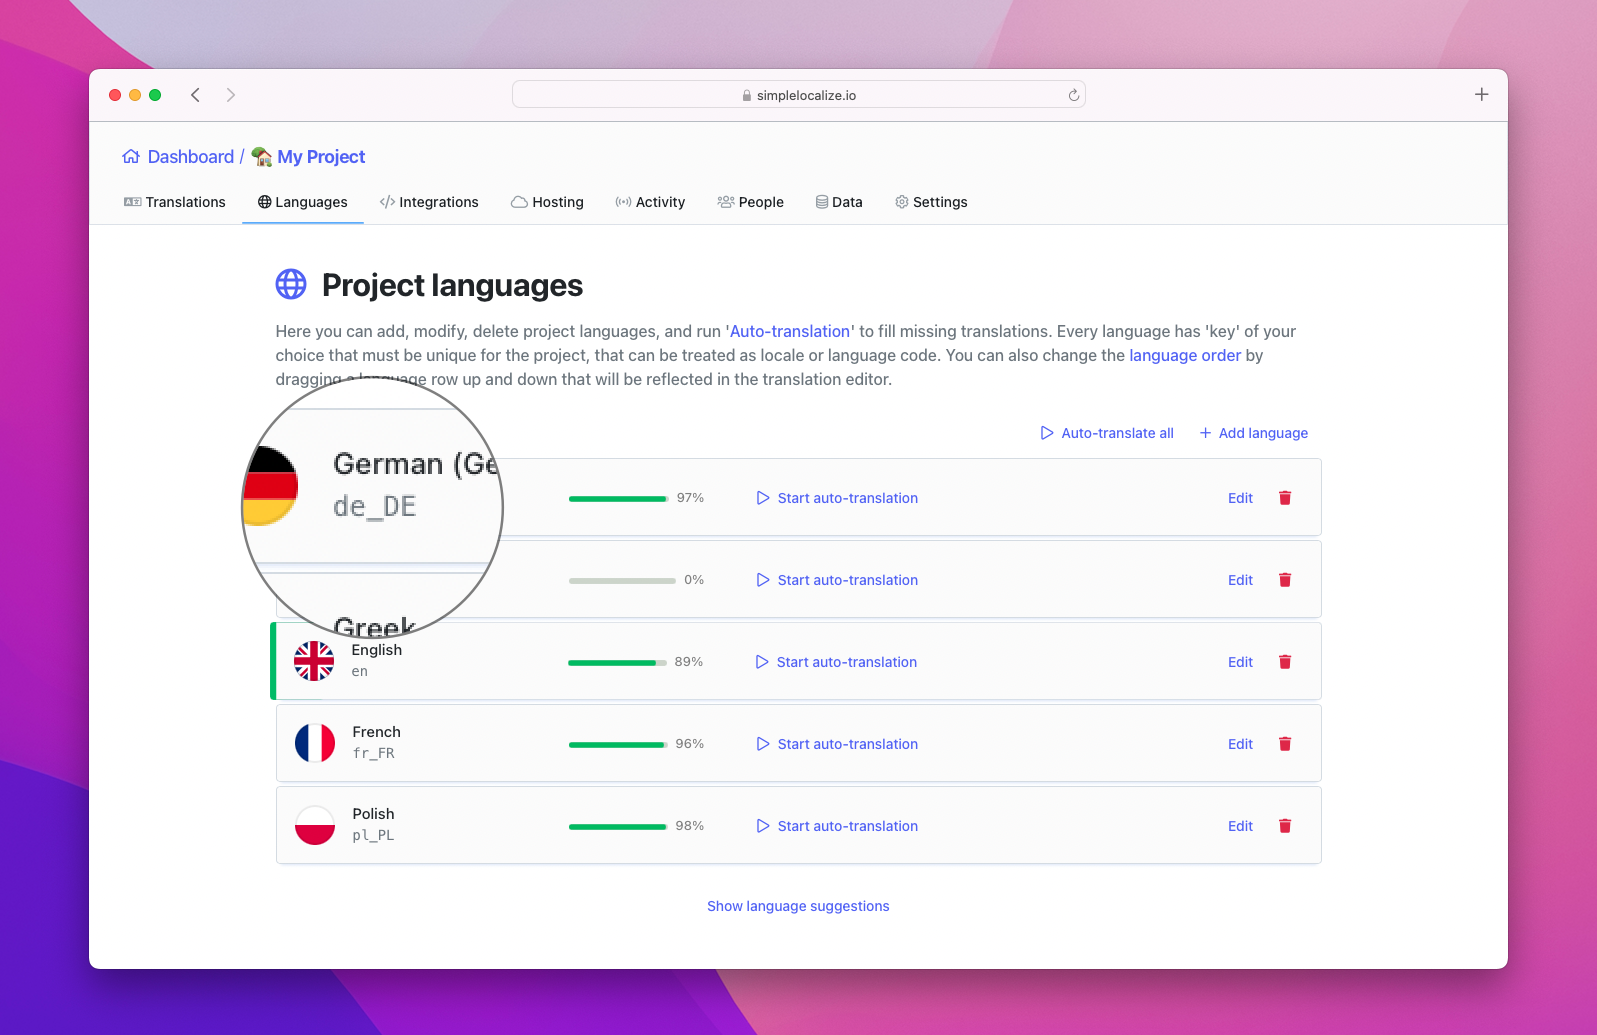
#### Language keys for Google Translate
Here is a list of example language keys supported by Google Translate as target or source language key.
- `en` for English
- `pl` for Polish
- `pt` for Portuguese
- `sv` for Swedish
[See the full list of supported language keys](https://cloud.google.com/translate/docs/languages)
#### Language keys for DeepL
Here is a list of example language keys supported by DeepL as target or source language key.
- `EN-GB` for English (British)
- `PL` for Polish
- `PT-BR` for Portuguese (Brazilian)
- `SV` for Swedish
[See the full list of supported language keys](https://www.deepl.com/docs-api/other-functions/listing-supported-languages/)
### Example response
```json
{
"msg": "OK",
"status": 200,
"data": {
"jobId": "",
"progress": 0.01,
"state": "STARTED",
"started": "2021-09-01T11:09:52.919Z",
"message": "OK",
"metadata": {}
}
}
```
## List jobs
### Sample request
```shell
curl
--location
--request POST 'https://api.simplelocalize.io/api/v1/jobs' \
--header 'X-SimpleLocalize-Token: ' \
--header 'Content-Type: application/json'
```
### Example response
```json
{
"msg": "OK",
"status": 200,
"data": [
{
"jobId": "42bc498cc33c4ac4866b18f33ce4ed65",
"progress": 1.0,
"state": "SUCCESS",
"message": "Translated 99 texts (chars: 1823)",
"started": "2021-09-01T11:09:52.919Z",
"metadata": {
"targetProjectLanguage": "fr",
"targetLanguage": "FR",
"sourceType": "API",
"options": "FORCE_REPLACE",
"translationProvider": "DEEPL",
"sourceProjectLanguage": "en",
"sourceLanguage": "en"
}
},
...
}
```
## Get job status
### Sample request
```shell
curl
--location
--request POST 'https://api.simplelocalize.io/api/v1/jobs/42bc498cc33c4ac4866b18f33ce4ed65' \
--header 'X-SimpleLocalize-Token: ' \
--header 'Content-Type: application/json'
```
### Example response
```json
{
"msg": "OK",
"status": 200,
"data": {
"jobId": "42bc498cc33c4ac4866b18f33ce4ed65",
"progress": 1.0,
"state": "SUCCESS",
"message": "Translated 99 texts (chars: 1823)",
"started": "2021-09-01T11:09:52.919Z",
"metadata": {
"targetProjectLanguage": "fr",
"targetLanguage": "FR",
"sourceType": "API",
"options": "FORCE_REPLACE",
"translationProvider": "DEEPL",
"sourceProjectLanguage": "en",
"sourceLanguage": "en"
}
}
}
```
---
# REST API: Customer API
Source: https://simplelocalize.io/docs/api/customer-specific-api/
In this section, you will learn how to create, query, update and delete customers.
You can use the Customers feature to change translations for one company or user without altering your base translations.
Every Business plan has a limit of 25 customers per project, and it can be increased by contacting our support for a custom plan.
## Resources
- What are [customer-specific translations?](/docs/general/customer-specific-translations/)
- [Add translation for customer](/docs/api/add-translations/) by passing customer key in `customerKey` field
- [Update customer translations](/docs/api/update-translations/) by passing customer key in `customerKey` field
- [Get customer translations from CDN (recommended)](/docs/general/customer-specific-translations/) by passing customer key in URL
- [Get customer translations from API](/docs/api/add-translations/) by passing customer key in `customerKey` field
## Create a customer
### Sample request
```shell
curl
--location
--request POST 'https://api.simplelocalize.io/api/v1/customers' \
--header 'X-SimpleLocalize-Token: ' \
--header 'Content-Type: application/json' \
--data-raw '{
"key": "my-customer-2137",
"description": "My favourite customer is just reading this text ☺️"
}'
```
### Request fields
- `key` (required) - customer identifier, must be unique for a project (max 40 characters),
- `description` (optional) - more details about the customer (max 255 characters),
### Example response
```json
{
"msg": "OK",
"status": 200,
"data": {
"key": "my-customer-2137",
"description": "My favourite customer is just reading this text ☺️"
}
}
```
## Get customer
### Sample request
```shell
curl
--location
--request GET 'https://api.simplelocalize.io/api/v1/customers/{customerKey}' \
--header 'X-SimpleLocalize-Token: ' \
--header 'Content-Type: application/json'
```
### Example response
```json
{
"msg": "OK",
"status": 200,
"data": {
"key": "my-customer-2137",
"description": "My favourite customer is just reading this text :)"
}
}
```
## Get all customers
Endpoint returns all available customers in the project.
### Sample request
```shell
curl
--location
--request GET 'https://api.simplelocalize.io/api/v1/customers' \
--header 'X-SimpleLocalize-Token: ' \
--header 'Content-Type: application/json'
```
### Example response
```json
{
"msg": "OK",
"status": 200,
"data": [
{
"key": "my-customer-2137",
"description": "My favourite customer is just reading this text :)"
},
{
"key": "my-customer-1004",
"description": "Some description for my-customer-1004"
}
]
}
```
## Update customer
### Sample request
```shell
curl
--location
--request PATCH 'https://api.simplelocalize.io/api/v1/customers/my-customer-2137' \
--header 'X-SimpleLocalize-Token: ' \
--header 'Content-Type: application/json' \
--data-raw '{
"key": "my-customer-2137-modified",
"description": "My favourite customer is just reading this text ☺️"
}'
```
### Example response
```json
{
"msg": "OK",
"status": 200,
"data": {
"key": "my-customer-2137-modified",
"description": "My favourite customer is just reading this text :)"
}
}
```
## Delete customer
### Sample request
```shell
curl
--location
--request DELETE 'https://api.simplelocalize.io/api/v1/customers/my-customer-2137' \
--header 'X-SimpleLocalize-Token: ' \
--header 'Content-Type: application/json'
```
### Example response
```json
{
"msg": "OK",
"status": 200
}
```
---
# REST API: Language API
Source: https://simplelocalize.io/docs/api/language-api/
In this section, you will learn how to create, query, update and delete languages.
All endpoints here require [authorization](/docs/api/get-started/).
## Create language
### Sample request
```shell
curl
--location
--request POST 'https://api.simplelocalize.io/api/v1/languages' \
--header 'X-SimpleLocalize-Token: ' \
--header 'Content-Type: application/json' \
--data-raw '{
"key": "pl-PL",
"name": "Polish"
}'
```
### Request fields
- `key` (required) - language key, must be unique for the project (max 20 characters),
- `name` (optional) - language name (max 200 characters),
### Example response
```json
{
"msg": "OK",
"status": 200,
"data": {
"key": "pl-PL",
"name": "Polish"
}
}
```
## Get languages
### Sample request
```shell
curl
--location
--request GET 'https://api.simplelocalize.io/api/v1/languages' \
--header 'X-SimpleLocalize-Token: ' \
--header 'Content-Type: application/json'
```
### Example response
```json
{
"msg": "OK",
"status": 200,
"data": [
{
"key": "pl",
"description": "Polski"
},
{
"key": "fr",
"description": "French"
}
]
}
```
## Update language
### Sample request
```shell
curl
--location
--request PATCH 'https://api.simplelocalize.io/api/v1/languages/pl' \
--header 'X-SimpleLocalize-Token: ' \
--header 'Content-Type: application/json' \
--data-raw '{
"key": "pl-PL",
"name": "Polish Locale"
}'
```
### Example response
```json
{
"msg": "OK",
"status": 200,
"data": {
"key": "pl-PL",
"name": "Polish Locale"
}
}
```
## Delete language
### Sample request
```shell
curl
--location
--request DELETE 'https://api.simplelocalize.io/api/v1/languages/pl' \
--header 'X-SimpleLocalize-Token: ' \
--header 'Content-Type: application/json'
```
### Example response
```json
{
"msg": "OK",
"status": 200
}
```
> Important: by removing language, you also remove all translations for the given language!
---
# REST API: Project management
Source: https://simplelocalize.io/docs/api/translation-project-management-v1/
Project management API contains two endpoints for creating new projects and listing existing projects.
Using this endpoint requires [HTTP Basic authentication](https://en.wikipedia.org/wiki/Basic_access_authentication) with your login credentials (email and password).
> If you used GitHub or Google Account to create your account, then you need to set up a password for your account in [account settings](/dashboard/profile/).
## Table of contents
## Create project
### Sample request
```shell
curl
--location
--request POST 'https://api.simplelocalize.io/api/v1/projects' \
--header 'Authorization: Basic ' \
--header 'Content-Type: application/json' \
--data-raw '{
"name": "My new project"
}'
```
### Request fields
- `name` (required) - project name
### Example successful response
```json
{
"msg": "OK",
"status": 200,
"data": {
"name": "My new project",
"languages": [
{
"key": "en",
"name": "English",
"isDefault": false,
"order": 0
}
],
"projectToken": "",
"apiKey": "",
"keys": 0,
"unpublishedChanges": 0,
"translatedPercentage": 0.0,
"translatedKeysByLanguage": {}
}
}
```
## List projects
### Sample request
```shell
curl
--location
--request GET 'https://api.simplelocalize.io/api/v1/projects' \
--header 'Authorization: Basic '
```
### Example successful response
```json
{
"msg": "OK",
"status": 200,
"data": [
{
"name": "My Project Name",
"languages": [
{
"key": "en",
"name": "english",
"isDefault": true,
"order": 0
}
],
"customers": [
{
"key": "my-customer",
"description": "My customer description"
}
],
"projectToken": "",
"apiKey": "",
"keys": 357,
"unpublishedChanges": 5,
"translatedPercentage": 0.74,
"translatedKeysByLanguage": {
"en": 264
}
}
]
}
```
---
# REST API: Projects API
Source: https://simplelocalize.io/docs/api/translation-project-management/
Project management API allows you to create new projects and list existing projects using REST API.
Using this endpoint requires [**Personal Tokens**](/docs/api/get-started/#personal-tokens) that can be generated in [account settings](/dashboard/security/).
## Create project
### Sample request
```shell
curl
--location
--request POST 'https://api.simplelocalize.io/api/v2/projects' \
--header 'Authorization: ' \
--header 'Content-Type: application/json' \
--data-raw '{
"name": "My new project"
}'
```
### Request fields
- `name` (required) - project name
### Example successful response
```json
{
"msg": "OK",
"status": 200,
"data": {
"name": "My new project",
"languages": [
{
"key": "en",
"name": "English",
"isDefault": false,
"order": 0
}
],
"projectToken": "",
"apiKey": "",
"keys": 0,
"unpublishedChanges": 0,
"translatedPercentage": 0.0,
"translatedKeysByLanguage": {}
}
}
```
## List projects
### Sample request
```shell
curl
--location
--request GET 'https://api.simplelocalize.io/api/v2/projects' \
--header 'Authorization: '
```
### Example successful response
```json
{
"msg": "OK",
"status": 200,
"data": [
{
"name": "My Project Name",
"languages": [
{
"key": "en",
"name": "english",
"isDefault": true,
"order": 0
}
],
"customers": [
{
"key": "my-customer",
"description": "My customer description"
}
],
"projectToken": "",
"apiKey": "",
"keys": 357,
"unpublishedChanges": 5,
"translatedPercentage": 0.74,
"translatedKeysByLanguage": {
"en": 264
}
}
]
}
```
---
# Integrations: react-intl
Source: https://simplelocalize.io/docs/integrations/format-js/
In this article, you will learn how to configure **FormatJS (react-intl)** library with hosted translations via [Translation Hosting](/docs/translation-hosting/get-started/)
or locally loaded files.
Translation hosting allows you to change translations without re-deploying application as all messages are loaded directly from the cloud.
Locally loaded files are useful when you want to keep translations in your repository or load them from a different source.
## Installation
Add `react-intl` library and `@formatjs/cli` as development package.
```bash
npm install react-intl
npm install --save-dev @formatjs/cli
```
Add `extract` script to your `package.json` file.
```json
{
"scripts": {
"extract": "formatjs extract 'src/**/*.ts*' --ignore='**/*.d.ts' --out-file extracted.json --id-interpolation-pattern '[sha512:contenthash:base64:6]'"
}
}
```
The `extract` script will extract all translation keys from your source code and save them to **extracted.json** file.
```bash
npm run extract
```
Read more about [FormatJS CLI integration](/docs/integrations/format-js-cli/).
## Configuration
To start using **react-intl** library,
you need to create some place to keep current language and provide it to application.
We will use [React Context](https://react.dev/reference/react/useContext) to create `LanguageContext` and `LanguageProvider` component to provide language to the application.
```tsx
interface LanguageContextInterface {
changeLanguage: (language: string) => void;
language: string;
}
const LanguageContext = React.createContext({
language: '',
changeLanguage: () => {
console.warn('LanguageContext.changeLanguage not implemented');
},
});
export default LanguageContext;
```
## Load translations
The next step is
to create a component which will load translations and pass the internationalization provider down to the application.
### Option 1: Hosted translations
If you want to use hosted translations, you need to fetch translations from the SimpleLocalize CDN, based on the language provided by `LanguageProvider`.
```tsx
// Translation Hosting option
import React from "react";
import {IntlProvider, MessageFormatElement} from 'react-intl'
import LanguageContext from "./LanguageContext";
const PROJECT_TOKEN = "";
const BASE_URL = "https://cdn.simplelocalize.io";
const ENVIRONMENT = "_latest"; // or "_production"
const DEFAULT_LANGUAGE = "en"; // default language
const SimpleLocalize = ({children}: { children: React.ReactNode }) => {
const [messages, setMessages] = React.useState | Record | undefined>({});
const [language, setLanguage] = React.useState(DEFAULT_LANGUAGE);
const fetchTranslationMessages = (language: string): void => {
const messages = `${BASE_URL}/${PROJECT_TOKEN}/${ENVIRONMENT}/${language}`;
fetch(messages)
.then((data) => data.json())
.then((messages) => setMessages(messages));
};
React.useEffect(() => fetchTranslationMessages(language), [language]);
return (
setLanguage(language),
language
}}>
{children}
)
}
export default SimpleLocalize;
```
### Option 2: Locally loaded files
If you want to load translations from local files, you need to import translations from the file system.
```tsx
// Translation Hosting option
import React from "react";
import { IntlProvider, MessageFormatElement } from 'react-intl';
import LanguageContext from "./LanguageContext";
// Import translation files directly, you can use any method to load translations
import enMessages from './translations/en.json';
import esMessages from './translations/es.json';
import frMessages from './translations/fr.json';
const DEFAULT_LANGUAGE = "en"; // Default language
const TRANSLATIONS: Record> = {
en: enMessages,
es: esMessages,
fr: frMessages,
// Add more languages as needed
};
const SimpleLocalize = ({ children }: { children: React.ReactNode }) => {
const [language, setLanguage] = React.useState(DEFAULT_LANGUAGE);
const messages = TRANSLATIONS[language] || TRANSLATIONS[DEFAULT_LANGUAGE];
return (
setLanguage(language),
language
}}>
{children}
);
};
export default SimpleLocalize;
```
**Both options are valid, and you can choose the one that fits your needs.**
### Wrap your application
The last step is to wrap your application with `SimpleLocalize` component we just created.
```tsx
import React from 'react';
import ReactDOM from 'react-dom';
import './index.css';
import App from './App';
import SimpleLocalize from "./SimpleLocalize";
ReactDOM.render(
,
document.getElementById('root')
);
```
## Usage
`useIntl` hook returns `intl` object that has `formatMessage` method to get translations by given `id` (translation key).
```tsx
import React from 'react';
import {useIntl} from 'react-intl';
const App = () => {
const intl = useIntl();
return (
{intl.formatMessage({
id: 'hello',
defaultMessage: "My default message",
description: "My code description"
})}
);
};
export default App;
```
Alternately, you can use `FormattedMessage` component, that is a wrapper for `formatMessage` method from `intl` object.
You can use it in the same way as `formatMessage` method but as a component.
```tsx
```
By default, `FormattedMessage` component renders a `span` element. You can change it by passing `tagName` prop to the component.
```tsx
```
To use variables in translation messages, you can use `values` property.
```tsx
```
Custom components in translation messages are supported as well.
Use `values` property to pass React components to the translation message.
```tsx
{chunks}
}}
/>
```
## Switching languages
To switch between languages, you have to use `changeLanguage` method from `LanguageContext` that we implemented earlier.
```jsx
import LanguageContext from "./LanguageContext";
{context => (
)}
```
## Managing translations
Handling many translations and localization files manually can be challenging, especially when you have multiple languages.
SimpleLocalize provides a [web-based translation editor](/translation-editor/) that allows you to manage translations in one place.
Let's configure [SimpleLocalize CLI](/docs/cli/get-started/) to upload and download translations.
Create a `simplelocalize.yml` file in the root of your project with the following content:
```yaml
apiKey: YOUR_PROJECT_API_KEY
uploadFormat: simplelocalize-json
uploadPath: ./extracted.json
uploadLanguageKey: en
uploadOptions:
- UPDATE_TRANSLATIONS
downloadPath: ./translations/{lang}.json
downloadLanguageKeys: ['en', 'pl', 'es']
downloadFormat: single-language-json
```
We will use the exported (**extracted.json**) file from FormatJS CLI to upload translations to the translation editor.
The `downloadPath` option will download translations for `pl` and `es` languages.
Run the following command to upload source translations:
```properties
simplelocalize upload
```
Now, you can manage and auto-translate translation messages in the translation editor.
If you decide to use locally loaded files, you can download translations and replace them with the new ones. Use the following command to download translations:
```properties
simplelocalize download
```
Now, your application will use translations from the SimpleLocalize translation editor.
## Resources
- [In-depth guide on FormatJS CLI](/docs/integrations/format-js-cli/)
- [Full code on GitHub](https://github.com/simplelocalize/simplelocalize-react-intl)
- [Official documentation: FormatJS](https://formatjs.github.io/docs/getting-started/installation)
- [JavaScript number formatting](https://simplelocalize.io/blog/posts/number-formatting-in-javascript/)
---
# Integrations: Android
Source: https://simplelocalize.io/docs/integrations/android/
Learn how to localize your Android app with SimpleLocalize
using translations in [`strings.xml` files](/docs/file-formats/android-strings/).
This guide will help you to get started with SimpleLocalize and translation editor in a few minutes.
## Installation
SimpleLocalize CLI is a command line tool that helps you to integrate localization into your development workflow.
It can be used to upload and download translations from SimpleLocalize.
## Upload source translations
In this step, you will upload your `strings.xml` files to SimpleLocalize.
Thanks to the command-line tool, you can upload multiple files at once from any directory.
You may also want to upload only one file for a specific language. To do that, you can use the `--languageKey` option with
the language key from the **Languages** tab.
```shell
$ simplelocalize upload \
--apiKey YOUR_API_KEY \
--languageKey en \
--uploadFormat android-strings \
--uploadPath ./values/strings.xml
```
### Extract translation keys (optional)
If you don't have translation keys in your `strings.xml` files,
you can use the `extract` command to generate them automatically.
CLI can find translation key usages in `.java` and `.kt` files.
Translation keys will
be automatically uploaded to the translation editor.
## Translate your Android app
Now you can translate your Android application strings using the [translation editor](/docs/translation-editor/get-started/)
and save changes.

If you want to translate your app in multiple languages fast, you can add new languages in the **Languages** tab
and use the [auto-translation](/docs/general/auto-translation/) feature to speed up the process.

## Download translations
Once you finish the translation, you can download the translated `strings.xml` files using the `download` command.
CLI will download the files to the `resources/values-{lang}/strings.xml` files,
where `{lang}` is the language code set in **Languages** tab.
### Mapping for default values directory
If you would like to support the `strings.xml` translations in default `./resources/values/strings.xml` directory, you can use the `mappings.lang` field in the configuration file:
```yaml
# simplelocalize.yaml
mappings:
lang:
- languageKey: "en"
placeholder: ""
- languageKey: "fr"
placeholder: "-fr"
- languageKey: "de"
placeholder: "-de"
- languageKey: "pl"
placeholder: "-pl"
```
and adjust the `downloadPath` and `uploadPath` with:
```properties
./resources/values{lang}/strings.xml # removed '-'
```
Now, the default translations will be placed in `resources/values/strings.xml` file, and the other translations will be placed in `resources/values-{lang}/strings.xml`.
```properties
./res/values/strings.xml
./res/values-fr/strings.xml
./res/values-de/strings.xml
./res/values-pl/strings.xml
```
## Sync translations with GitHub App
Instead of running the CLI, you can connect your repository with [SimpleLocalize GitHub App](/docs/integrations/github-app/)
to upload `strings.xml` files on every push and get translated files back in a pull request.
Add `simplelocalize-github.yml` to the root of your repository and use `language-paths` for the default `values` directory:
```yaml
# simplelocalize-github.yml
upload:
files:
- path: "app/src/main/res/values-{lang}/strings.xml"
format: "android-strings"
options:
- "UPDATE_TRANSLATIONS"
language-paths:
en: "app/src/main/res/values/strings.xml"
download:
files:
- path: "app/src/main/res/values-{lang}/strings.xml"
format: "android-strings"
language-paths:
en: "app/src/main/res/values/strings.xml"
```
Add a `language-paths` entry for every language whose directory name differs from its language key in SimpleLocalize,
e.g., `pt-BR: "app/src/main/res/values-pt-rBR/strings.xml"`. Learn more about [language-specific paths](/docs/integrations/github-app/#language-specific-paths).
## Resources
- [Android String Resource](https://developer.android.com/guide/topics/resources/string-resource)
- [Android Localization](https://developer.android.com/guide/topics/resources/localization)
- [Java internationalization](https://simplelocalize.io/blog/posts/java-internationalization/)
---
# Integrations: FormatJS CLI
Source: https://simplelocalize.io/docs/integrations/format-js-cli/
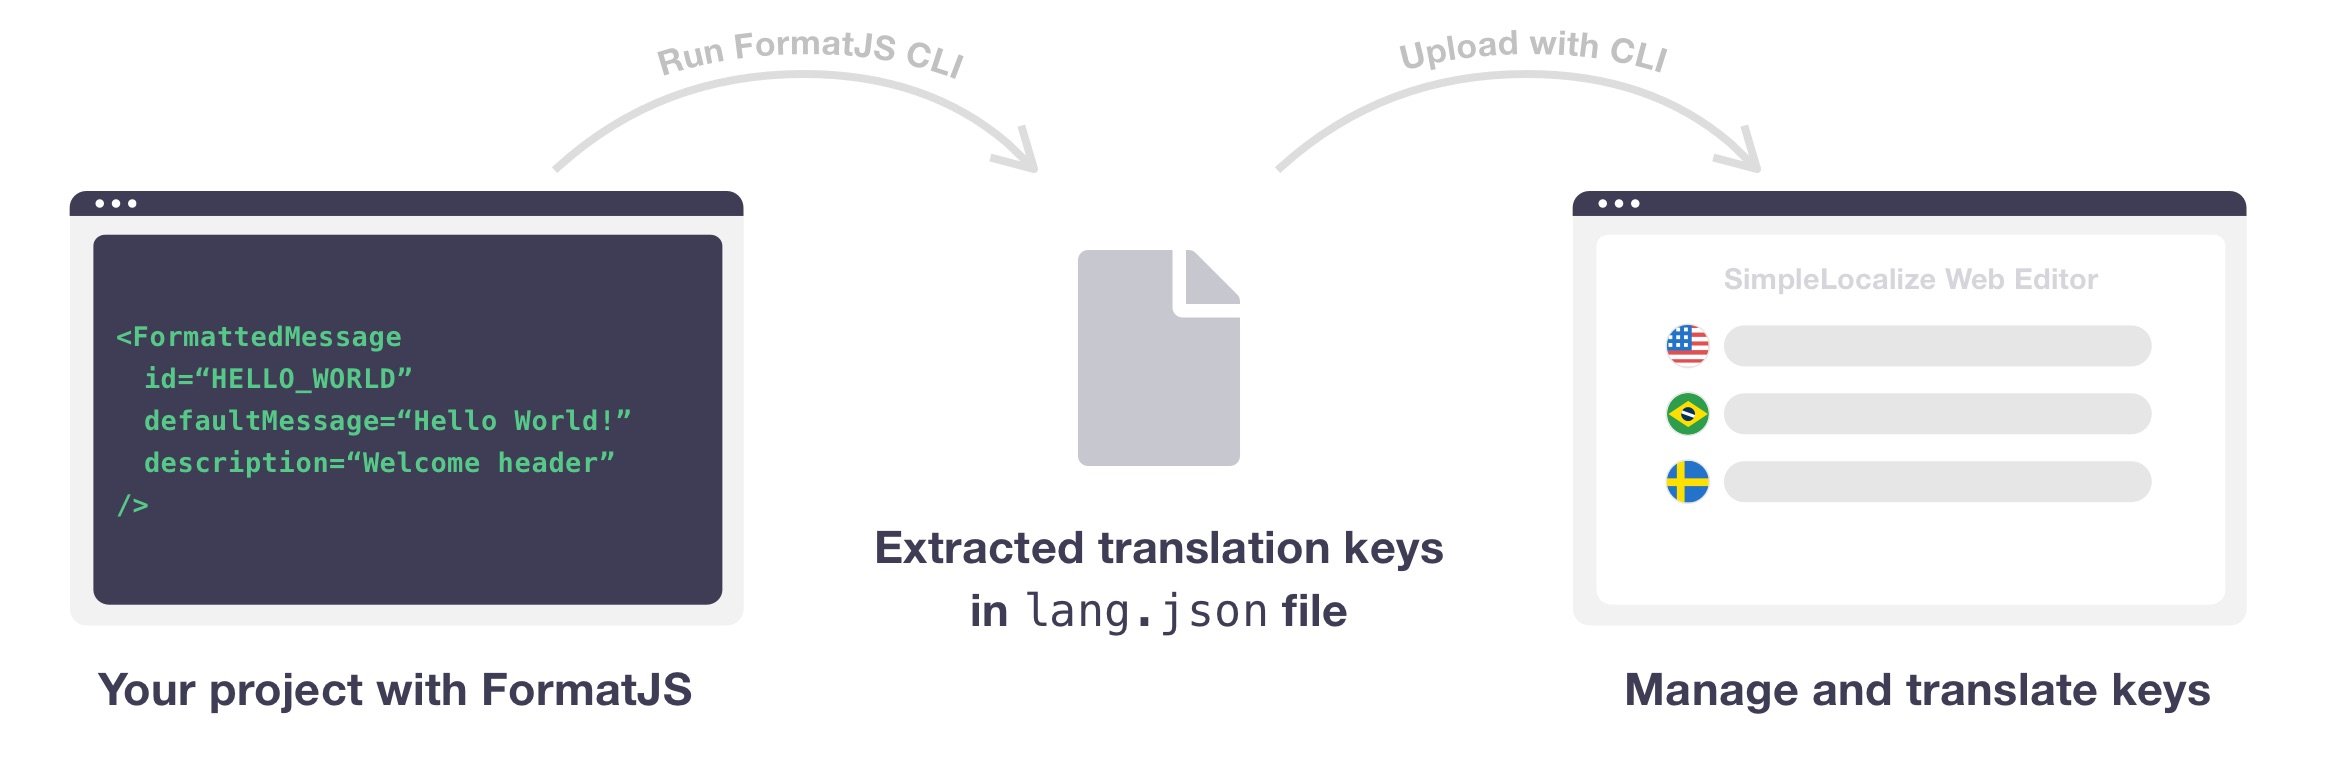
In this article, we will focus only on **message extraction from FormatJS using a dedicated CLI from FormatJS team**.
After that, I will show you how to configure and upload the output to SimpleLocalize and automate the workflow.
We also prepared a full tutorial with [configuring FormatJS and FormatJS CLI](/docs/integrations/format-js/).
## Add dependencies
Install FormatJS CLI as a development dependency to your project.
```bash
npm install --save-dev @formatjs/cli
```
## Install SimpleLocalize CLI
Install SimpleLocalize locally, to it will help us to automate the process of uploading and downloading translations from the translation editor.
## Add scripts
Add the following command to your `package.json` scripts:
```json
{
"scripts": {
"i18n:extract": "formatjs extract 'src/**/*.{ts,js,tsx,jsx}' --out-file ./lang/enq.json",
"i18n:auto-translate": "simplelocalize auto-translate --apiKey "
}
}
```
## Extract source translations
Use an extract script to start FormatJS CLI extraction. It will save all translation keys in `extracted.json` file.
```properties
npm run i18n:extract
```

## Upload source translations
Now you can use SimpleLocalize CLI to upload the exported file to the translation editor.
```properties
simplelocalize upload
--apiKey
--uploadPath ./lang/en.json
--uploadFormat simplelocalize-json
--uploadLanguageKey en
```

## Manage translations
Your translations now should be visible in the translation editor.
Validate if all keys have been extracted correctly and have proper translations.

If you want to translate your app in multiple languages fast, you can add new languages in the **Languages** tab,
and use [auto-translation](/docs/general/auto-translation/) features to speed up the process.

## Download translations
Download JSON file with translation to your project files with CLI.
Run `simplelocalize download` command like below to download JSON files with translations.
CLI will download the files to the `./i18n/messages_{lang}.json` files,
where `{lang}` is the language code set in **Languages** tab.

You can choose a different format for the downloaded files. Check the [list of available formats](/docs/general/file-formats/).
To download just one JSON file with all languages, you can use the `multi-language-json` format.
## Resources
- [FormatJS guide](/docs/integrations/format-js/)
- [FormatJS CLI message extraction](https://formatjs.github.io/docs/getting-started/message-extraction)
- [JavaScript number formatting](https://simplelocalize.io/blog/posts/number-formatting-in-javascript/)
---
# Integrations: Android (OTA SDK)
Source: https://simplelocalize.io/docs/integrations/android-ota/
## Overview
The app downloads over-the-air (OTA) translations at runtime instead of being frozen in the
APK. Fixing a typo, retranslating a sentence or adding a language becomes a **publication in
SimpleLocalize**, not a Play Store release.
The SDK is a per-key overlay on top of the localization you already have. A string is resolved in
this order:
1. over-the-air translation in the current language,
2. over-the-air translation in the configured fallback language,
3. `res/values*/strings.xml` compiled into the APK,
4. the key / resource default.
Anything you have not published keeps rendering the bundled string, key by key on the same screen
publishing three keys overrides exactly those three. Downloaded content is cached in `filesDir`, so
the app starts with the last known translations even offline, and a failed refresh never drops what
was already downloaded.
## Requirements
- `minSdk 21`, JDK 17 for the build. The library has **no runtime dependencies**
- Translations [published to Translation Hosting](/docs/translation-hosting/publishing-translations/).
- Project token from **Settings > Credentials**. It is public by design and meant to be shipped in
client code
## Installation
The library is not published to a Maven repository yet, so consume it from the repository as a
Gradle module:
```shell
git clone https://github.com/simplelocalize/simplelocalize-ota-sdk-android.git
```
```kotlin
// settings.gradle.kts
include(":simplelocalize-ota")
project(":simplelocalize-ota").projectDir =
file("../simplelocalize-ota-sdk-android/simplelocalize-ota")
```
```kotlin
// app/build.gradle.kts
dependencies {
implementation(project(":simplelocalize-ota"))
}
```
If your root build file does not declare the Android library plugin yet, add
`id("com.android.library") version "" apply false` next to the application plugin.
## Usage
Start the SDK once in `Application.onCreate()`. It reads the disk cache synchronously, so the first
frame already shows the last known translations, and refreshes on a background thread.
```kotlin
class MyApplication : Application() {
override fun onCreate() {
super.onCreate()
SimpleLocalize.start(
this,
SimpleLocalizeConfiguration(
projectToken = "5a5b1f...", // Settings -> Credentials
environment = "_production", // or "_latest"
fallbackLanguage = "en"
)
)
}
}
```
### Existing getString() and Compose
Wrap the activity context and every `getString(R.string.…)`, XML layout and Compose
`stringResource()` resolves over the air first, with no call site changes:
```kotlin
class BaseActivity : AppCompatActivity() {
override fun attachBaseContext(newBase: Context) {
super.attachBaseContext(SimpleLocalize.wrapContext(newBase))
}
}
```
The wrapped `Resources` translate a resource id to its entry name - `R.string.home_title` becomes
the key `home_title` and look that key up over the air, falling back to `strings.xml`. **Use
resource entry names as translation keys in SimpleLocalize**, a key published as `home.title` will
never match `R.string.home_title`.
Keys that have no resource in the APK are read explicitly:
```kotlin
val text = SimpleLocalize.getString("checkout.summary") ?: "Summary"
```
Views already on screen are not redrawn when new translations arrive and listen for changes:
```kotlin
SimpleLocalize.addOnTranslationsChangedListener { recreate() }
```
In Compose, hold the revision in state and key the subtree on it:
```kotlin
var revision by remember { mutableIntStateOf(SimpleLocalize.revision) }
DisposableEffect(Unit) {
val listener = SimpleLocalize.OnTranslationsChangedListener { revision = SimpleLocalize.revision }
SimpleLocalize.addOnTranslationsChangedListener(listener)
onDispose { SimpleLocalize.removeOnTranslationsChangedListener(listener) }
}
key(revision) { Text(stringResource(R.string.home_title)) }
```
### Languages and refreshing
The language is resolved from the device locales unless you set `language` explicitly. Keys are
probed in the order `en_GB`, `en-GB`, `en`; the first one published wins and is remembered across
launches. `SimpleLocalize.setLanguage("pl")` overrides it at runtime.
Translations refresh on `start()`, when an activity is resumed (throttled by
`minimumRefreshIntervalMillis`, 10 minutes by default) and on demand:
```kotlin
SimpleLocalize.refresh()
```
### Configuration
| Option | Default | Meaning |
|--------------------------------|---------------------------------|------------------------------------------------------------------------------------------------|
| `projectToken` | – | **Settings > Credentials** |
| `environment` | `_production` | `_latest`, `_production` or a [custom environment](/docs/translation-hosting/environments/) |
| `baseUrl` | `https://cdn.simplelocalize.io` | change it for a [custom hosting provider](/docs/translation-hosting/custom-hosting-providers/) |
| `namespaces` | `[]` | downloaded namespaces, passed as the `namespace` argument of `getString` |
| `language` | `null` | forced language key instead of the device locale |
| `fallbackLanguage` | `null` | language used for keys missing in the current one |
| `customerId` | `null` | [customer-specific translations](/docs/general/customer-specific-translations/) |
| `minimumRefreshIntervalMillis` | `600_000` | throttle for automatic refreshes |
| `refreshOnForeground` | `true` | refresh when an activity is resumed |
## Translation Hosting setup
The SDK reads exactly what you publish, so hosting configuration is the other half of the setup.
1. **Publish.** Nothing is served until a publication happens, editing translations changes nothing
on the CDN. Publish from the **Hosting** tab, with the CLI or through the API:
```shell
simplelocalize publish --apiKey --environment _latest
```
Full publications always hit `_latest` first and cascade to `_production` from there. See
[publishing translations](/docs/translation-hosting/publishing-translations/).
2. **Pick an environment per build.** Point debug builds at `_latest` and release builds at
`_production`. `_production` is served with `Cache-Control: max-age=3600`, so a publication
reaches users within about an hour; `_latest` is cached briefly and is the right target while
iterating. See [environments](/docs/translation-hosting/environments/).
3. **Check Settings → Hosting.** Both the flat (`{"home_title": "Hi"}`) and the nested
(`{"home": {"title": "Hi"}}`) JSON format work, nested payloads are flattened to dot separated
keys. *Missing translations* may be published as empty strings; the SDK treats an empty
translation as missing and falls back to the bundled string, so the UI never goes blank. See
[hosting settings](/docs/translation-hosting/settings/).
4. **Match the keys to resource names.** Keys are case-sensitive and, for the `wrapContext()`
integration, must equal the `strings.xml` entry names (`home_title`, not `home.title`). Upload
your `strings.xml` with the [Android strings file format](/docs/file-formats/android-strings/) and
the keys match automatically.
## Limitations
- **Plurals are not supported.** `getQuantityString()` and string arrays are never overridden, they
always come from the resources compiled into the APK. Publish plural forms as separate keys if you
need them over the air.
- The SDK is read-only: it never sends anything to SimpleLocalize, and the CDN it reads is public.
---
# Integrations: i18next
Source: https://simplelocalize.io/docs/integrations/i18next/
This guide explains how to set up SimpleLocalize in your i18next project using [translation hosting](/translation-hosting/) feature and `i18next-http-backend` library.
## Installation
Install required dependencies to your project.
```bash
npm install react-i18next i18next i18next-http-backend i18next-browser-languagedetector axios
```
## Configuration
Create `i18n.ts` file with i18next-http-backend configuration that will be responsible for:
- fetching translations from a remote server,
- creating new keys used in your project.
```tsx
import i18n from 'i18next'
import Backend from 'i18next-http-backend'
import LanguageDetector from 'i18next-browser-languagedetector'
import {initReactI18next} from 'react-i18next'
import axios from "axios";
const isProductionCode = process.env.NODE_ENV === 'production';
const fallbackLanguage = 'en'
const projectToken = "XXXXXXXXXXXXXX"; // YOUR PROJECT TOKEN
const apiKey = "XXXXXXXXXXXXXX"; // YOUR API KEY
const apiBaseUrl = "https://api.simplelocalize.io/api";
const cdnBaseUrl = "https://cdn.simplelocalize.io";
const environment = "_latest"; // or "_production"
const loadPath = `${cdnBaseUrl}/${projectToken}/${environment}/{{lng}}`;
const loadPathWithNamespaces = `${cdnBaseUrl}/${projectToken}/${environment}/{{lng}}/{{ns}}`;
const configuration = {
headers: {
'X-SimpleLocalize-Token': apiKey
}
};
const createTranslationKeys = async (requestBody) => axios.post(`${apiBaseUrl}/v1/translation-keys/bulk`, requestBody, configuration)
const updateTranslations = async (requestBody) => axios.patch(`${apiBaseUrl}/v2/translations/bulk`, requestBody, configuration)
const missing = [];
const saveMissing = async () => {
if (missing.length === 0 || isProductionCode) {
return;
}
console.info(`Saving ${missing.length} missing translation keys`);
const translationKeys = missing.map((element) => ({
key: element.translationKey,
namespace: element.namespace,
}));
await createTranslationKeys({translationKeys})
.catch((error) => console.error(`Error during creating translation keys: ${error}`));
const translations = missing.map((element) => ({
key: element.translationKey,
namespace: element.namespace,
language: element.language,
text: element.fallbackValue,
}));
await updateTranslations({translations})
.catch((error) => console.error(`Error during updating translations: ${error}`));
missing.length = 0;
}
// You can control how often a missing translation keys are sent to SimpleLocalize.
// Lowering this value may lead to hitting rate-limiter, 30 seconds is a sweet spot.
const SYNC_INTERVAL = 30 * 1000; // 30 seconds
setInterval(async () => {
await saveMissing();
}, SYNC_INTERVAL);
i18n
.use(Backend)
.use(LanguageDetector)
.use(initReactI18next)
.init({
fallbackLng: fallbackLanguage,
backend: {
loadPath: loadPath, // or loadPathWithNamespaces if you use namespaces
},
saveMissing: !isProductionCode, // save missing keys only in development mode
defaultNS: "", // you can set default namespace here
missingKeyHandler: async (languages, namespace, translationKey, fallbackValue) => {
console.debug(`[${namespace}][${translationKey}] not available in Translation Hosting`);
missing.push({
translationKey: translationKey,
namespace: namespace ?? "",
language: languages[0] ?? fallbackLanguage,
fallbackValue: fallbackValue ?? ""
});
}
})
export default i18n;
```
The code uses [official SimpleLocalize API](/docs/api/get-started/) to create new translation keys and update translations.
The `missing` array is used to store missing translation keys and send them to SimpleLocalize every 30 seconds.
### Import configuration
Import `i18n.ts` file in `index.ts` or `layout.ts` by adding `import './i18n';`.
```tsx
import React from 'react';
import ReactDOM from 'react-dom';
import './index.css';
import App from './App';
import './i18n';
ReactDOM.render (
Loading...}>
,
document.getElementById('root')
);
```
### Source code
i18next is now configured and ready to use in your application. You can use it in your components like this:
```tsx
import React from "react";
import { useTranslation } from "react-i18next";
function App() {
const { t, i18n } = useTranslation();
// uncomment if you use namespaces
// const { t, i18n } = useTranslation('MY_NAMESPACE');
const translatedMessage = t("USE_BUTTONS_BELOW");
return (
{translatedMessage}
);
}
export default App;
```
You can use `t` function to get translation for a given translation key and switch languages with `i18n.changeLanguage(language)` function, where `language` is a language key from SimpleLocalize.
## Managing translations
Now, you can use [translation editor](/docs/translation-editor/get-started/) as a control panel for all texts
in your application.
In the translation editor, you can [auto-translate strings](/auto-translation/), invite translators, and manage translations in multiple languages.
When you decide to update text in you app, click '**Save & Publish**' button to deliver translations via SimpleLocalize CDN.

Auto-translation feature can help you to translate your app in multiple languages fast with the help of machine translation and AI.

Every time you publish translations, they are automatically updated in your application in a few seconds without need to redeploy your app.
## CLI integration
Having real-time translations in your application is great, but sometimes you prefer to keep them in sync with your codebase.
To automate a process of importing and exporting translations, you can use [SimpleLocalize CLI](/docs/cli/get-started/).
## Troubleshooting
Here are the most common problems that you may encounter while using i18next with SimpleLocalize. If you have any other issues
that are not listed here, please contact us at [contact@simplelocalize.io](mailto:contact@simplelocalize.io).
### Forbidden error
If you get `Forbidden` error, please make sure that you provided a correct API Key in `apiKey` variable.
### "Origin starts with 'https://'" error
The integration is configured to work only with `http://` origins that are used in development mode by default.
It's a safety mechanism to make sure that you are not pushing missing keys from the production environment, which exposes your API Key.
### CORS error
If you get CORS error, please make your you don't send any custom headers in your Axios request in `missingKeyHandler` function.
The other reason for CORS error might be triggering a rate-limiter due to many missing translation keys requests.
Please make sure that you don't have any infinite loops in your code that trigger `missingKeyHandler` function,
which is responsible for sending missing translation keys to SimpleLocalize.
Please also make sure that you didn't deploy any other code, that sends requests to this endpoint that might trigger rate-limiter,
as requests counted are counted per API Key.
### i18next-http-backend load error
The error might be caused by the custom `requestOptions` settings in `backend` property.
Please make sure that your configuration is the same as above.
### Incorrect API Key
`Incorrect API Key` log in console means that your provided an incorrect API Key to your project. Here is how to get your API Key:
1. Go to [SimpleLocalize](https://simplelocalize.io/dashboard)
2. Click on your project
3. Click on `Settings` tab
4. Open on `Credentials` tab from the left panel
5. Copy your API Key and use in `apiKey` variable.
More resources:
- [i18next and React application localization in 3 steps](/blog/posts/i18next-reactjs-localization/)
- [Example i18next project on GitHub](https://github.com/simplelocalize/simplelocalize-i18next)
---
# Integrations: iOS & macOS
Source: https://simplelocalize.io/docs/integrations/ios-macos/
## Overview
iOS and macOS applications development there are four localization file formats:
- [**Localizable.xcstrings**](/docs/file-formats/localizable-xcstrings/) - JSON-like format introduced at WWDC 2022 (recommended)
- [**Xcode Localization Catalog (.xcloc)**](/docs/file-formats/localizable-xcloc/) - Collection of XLIFF files for translation exchange
- [**Localizable.strings**](/docs/file-formats/localizable-strings/) - Legacy format for older projects
- [**Localizable.stringsdict**](/docs/file-formats/localizable-stringsdict/) - Used for pluralization and device variants
**We support all these formats**, allowing you to manage translations in the way that best fits your project.
The XCStrings format provides better structure with translation states, comments, pluralization, device variants, and substitutions. XCLOC is ideal for working with translation management systems using industry-standard XLIFF format.
## Installation
Install SimpleLocalize CLI to automate import & export of translation files.
Intel and Apple Silicon Macs are both supported.
## XCStrings Format (Recommended)
### Upload XCStrings source file
Upload your `Localizable.xcstrings` file to SimpleLocalize:
For multiple namespace files:
```properties
simplelocalize upload --apiKey \
--uploadFormat localizable-xcstrings \
--uploadPath ./Localizable-{ns}.xcstrings
```
### Download XCStrings files
Download translated XCStrings files:
```properties
# Single file
simplelocalize download --apiKey \
--downloadFormat localizable-xcstrings \
--downloadPath ./Localizable.xcstrings
# Multiple namespaces
simplelocalize download --apiKey \
--downloadFormat localizable-xcstrings \
--downloadPath ./Localizable-{ns}.xcstrings
```
### XCStrings Features
The XCStrings format supports advanced localization features:
- **Device variants** - Different translations for iPhone, iPad, Mac, Apple Watch, Apple TV
- **Pluralization** - Proper plural forms (zero, one, two, few, many, other)
- **Translation states** - Track translation progress and review status
- **Comments** - Context for translators
- **Substitutions** - Dynamic placeholders with formatting
SimpleLocalize automatically converts these to [ICU message format](/blog/posts/what-is-icu/) for cross-platform compatibility.
## Xcode Localization Catalog (.xcloc)
XCLOC is a collection of XLIFF 1.2 files with metadata, designed for translation exchange with translation management systems. It's particularly useful when working with external translators or translation agencies.
### Upload XCLOC files
Upload XLIFF files from your XCLOC catalog:
```properties
simplelocalize upload --apiKey \
--uploadFormat xliff:1.2 \
--uploadPath ./MyApp.xcloc/Localizations/{lang}.xliff
```
### Download XCLOC files
Export translations as XCLOC-compatible XLIFF files:
```properties
simplelocalize download --apiKey \
--downloadFormat xliff:1.2 \
--downloadPath ./MyApp.xcloc/Localizations/{lang}.xliff
```
### XCLOC Structure
An XCLOC catalog appears as a single file but is actually a directory:
```bash
MyApp.xcloc/
├── Contents.json
└── Localizations/
├── en.xliff
├── de.xliff
└── fr.xliff
```
### When to use XCLOC
XCLOC is ideal when:
- Working with external translation agencies that use XLIFF
- Preserving translation metadata and states
- Maintaining compatibility with CAT (Computer-Assisted Translation) tools
- Need to preserve "Managed: Automatically" state in Xcode
## Legacy Localizable.strings Format
### Upload Localizable.strings files
For projects still using the legacy format:
### Download Localizable.strings files
```properties
simplelocalize download --apiKey \
--downloadPath ./Resources/Localization/{lang}.lproj/Localizable.strings \
--downloadFormat localizable-strings
```
## Translate messages
Now you can translate your iOS / macOS strings using SimpleLocalize.

If you want to translate your app in multiple languages fast, you use [auto-translation](/docs/general/auto-translation/).

## Migration from .strings to .xcstrings
To migrate from legacy Localizable.strings to modern XCStrings format:
1. In Xcode, select your Localizable.strings file
2. Choose Editor → Convert to String Catalog
3. Upload the new .xcstrings file to SimpleLocalize
4. Update your download commands to use `localizable-xcstrings` format
Optionally, you can import your existing Localizable.strings files into SimpleLocalize and then export them as XCStrings format.
## Resources
- [Documentation: XCStrings](/docs/file-formats/localizable-xcstrings/)
- [Documentation: Xcode Localization Catalog (.xcloc)](/docs/file-formats/localizable-xcloc/)
- [Documentation: Localizable.strings](/docs/file-formats/localizable-strings/)
- [Documentation: Localizable.stringsdict](/docs/file-formats/localizable-stringsdict/)
- [Apple: Maintaining your strings files](https://developer.apple.com/library/archive/documentation/MacOSX/Conceptual/BPInternational/MaintaingYourOwnStringsFiles/MaintaingYourOwnStringsFiles.html)
- [Apple: Localizing your app](https://developer.apple.com/library/archive/documentation/MacOSX/Conceptual/BPInternational/LocalizingYourApp/LocalizingYourApp.html#//apple_ref/doc/uid/10000171i-CH5-SW1)
---
# Integrations: angular-localize
Source: https://simplelocalize.io/docs/integrations/angular/angular-localize/
## Installation
First, add the Angular localize package to your Angular project:
```shell
ng add @angular/localize
```
This command will:
- Install the `@angular/localize` package
- Add necessary imports to your `polyfills.ts`
- Update your `angular.json` configuration
## Angular Configuration
Configure your Angular project for internationalization in `angular.json`:
```json
{
"projects": {
"your-app": {
"i18n": {
"sourceLocale": "en-US",
"locales": {
"pl": {
"translation": "src/locale/messages.pl.xlf",
"baseHref": ""
},
"es": {
"translation": "src/locale/messages.es.xlf",
"baseHref": ""
},
"fr": {
"translation": "src/locale/messages.fr.xlf",
"baseHref": ""
}
}
},
"architect": {
"build": {
"configurations": {
"production": {
"aot": true,
"outputHashing": "all",
"sourceMap": false,
"namedChunks": false,
"extractLicenses": true,
"vendorChunk": false,
"buildOptimizer": true
},
"pl": {
"aot": true,
"outputPath": "dist/pl/",
"i18nFile": "src/locale/messages.pl.xlf",
"i18nFormat": "xlf",
"i18nLocale": "pl"
},
"es": {
"aot": true,
"outputPath": "dist/es/",
"i18nFile": "src/locale/messages.es.xlf",
"i18nFormat": "xlf",
"i18nLocale": "es"
},
"fr": {
"aot": true,
"outputPath": "dist/fr/",
"i18nFile": "src/locale/messages.fr.xlf",
"i18nFormat": "xlf",
"i18nLocale": "fr"
}
}
}
}
}
}
}
```
## Usage Examples
### Basic Text Translation
```typescript
// app.component.ts
import { Component } from '@angular/core';
@Component({
selector: 'app-root',
template: `
Welcome to our website
This is a multilingual Angular application
`
})
export class AppComponent {
title = 'my-angular-app';
}
```
### Component with Variables
```typescript
// product.component.ts
import { Component, Input } from '@angular/core';
@Component({
selector: 'app-product',
template: `
```
Translation file:
```json
{
"welcome": {
"message": "Hello {{name}}, you have {{count}} items"
}
}
```
### Using the translate service
For more complex scenarios, use the TranslateService directly in your components:
```typescript
// src/app/components/user-profile.component.ts
import { Component, OnInit } from '@angular/core';
import { TranslateService } from '@ngx-translate/core';
@Component({
selector: 'app-user-profile',
template: `
```
## Language switching
Create a language switcher component:
```vue
Loading...
```
## Message extraction with FormatJS CLI
### Configure extraction
Add extraction script to your `package.json`:
```json
{
"scripts": {
"i18n:extract": "formatjs extract 'src/**/*.{vue,ts,js}' --ignore='**/*.d.ts' --out-file ./lang/en.json --id-interpolation-pattern '[sha512:contenthash:base64:6]'",
"i18n:compile": "formatjs compile-folder --ast ./lang ./compiled-lang"
}
}
```
### Extract messages
Run the extraction command to extract all translatable messages from your Vue components:
```bash
npm run i18n:extract
```
This will create an `extracted.json` file with all the translation keys found in your application.
Example extracted file:
```json
{
"welcome.title": {
"defaultMessage": "Welcome, {name}!",
"description": "Welcome message for users"
},
"welcome.description": {
"defaultMessage": "This is a Vue.js application with internationalization",
"description": "App description"
},
"profile.title": {
"defaultMessage": "User Profile",
"description": "Profile page title"
}
}
```
## Managing translations with SimpleLocalize
### Install SimpleLocalize CLI
### Configure SimpleLocalize
Create a `simplelocalize.yml` file in the root of your project:
```yaml
apiKey: YOUR_PROJECT_API_KEY
# Upload configuration
uploadFormat: simplelocalize-json
uploadPath: ./extracted.json
uploadLanguageKey: en
uploadOptions:
- UPDATE_TRANSLATIONS
# Download configuration
downloadPath: ./src/translations/{lang}.json
downloadLanguageKeys: ['en', 'es', 'fr', 'de']
downloadFormat: single-language-json
```
### Upload source translations
Extract and upload your source translations:
```bash
# Extract messages from your Vue components
npm run i18n:extract
# Upload extracted messages to SimpleLocalize
simplelocalize upload
```
### Manage translations
Now you can manage and translate your messages in the SimpleLocalize translation editor:
1. **Add new languages** in the Languages tab
2. **Use auto-translation** to quickly translate into multiple languages
3. **Manually refine translations** for better quality
4. **Add context and descriptions** to help translators
### Download translations
Download completed translations to your project:
```bash
# Download all language translations
simplelocalize download
```
This will create translation files in `./src/translations/` directory:
- `en.json`
- `es.json`
- `fr.json`
- `de.json`
### Build workflow
Add these scripts to your `package.json` for a complete workflow:
```json
{
"scripts": {
"i18n:extract": "formatjs extract 'src/**/*.{vue,ts,js}' --ignore='**/*.d.ts' --out-file ./extracted.json",
"i18n:upload": "simplelocalize upload",
"i18n:download": "simplelocalize download",
"i18n:sync": "npm run i18n:extract && npm run i18n:upload && npm run i18n:download",
"build": "npm run i18n:download && vite build"
}
}
```
## Advanced features
### Pluralization
vue-intl supports ICU message format for pluralization:
```json
{
"item.count": "{count, plural, =0 {No items} =1 {One item} other {# items}}"
}
```
Usage in component:
```vue
{{ t('item.count', { count: itemCount }) }}
```
### Rich text formatting
Support for HTML and custom components in messages:
```json
{
"terms.agreement": "By signing up, you agree to our Terms of Service"
}
```
```vue
```
### Date and number formatting
```vue
```
## TypeScript support
### Type-safe translation keys
Create type definitions for your translation keys:
```typescript
// src/types/i18n.ts
export interface TranslationKeys {
'welcome.title': string;
'welcome.description': string;
'profile.title': string;
'item.count': string;
// Add more keys as needed
}
export type TranslationKey = keyof TranslationKeys;
```
### Enhanced useI18n hook
```typescript
// src/composables/useI18n.ts
import { inject } from 'vue';
import { IntlShape } from 'vue-intl';
import type { TranslationKey } from '@/types/i18n';
export function useI18n() {
const intl = inject('intl');
if (!intl) {
throw new Error('useI18n must be used within an IntlProvider');
}
const t = (id: TranslationKey, values?: Record, defaultMessage?: string) => {
return intl.formatMessage({ id, defaultMessage }, values);
};
const formatNumber = (value: number, options?: Intl.NumberFormatOptions) => {
return intl.formatNumber(value, options);
};
const formatDate = (value: Date | number, options?: Intl.DateTimeFormatOptions) => {
return intl.formatDate(value, options);
};
const formatTime = (value: Date | number, options?: Intl.DateTimeFormatOptions) => {
return intl.formatTime(value, options);
};
return { t, formatNumber, formatDate, formatTime, locale: intl.locale };
}
```
## Resources
- [vue-intl Documentation](https://github.com/formatjs/formatjs/tree/main/packages/vue-intl)
- [FormatJS CLI Documentation](https://formatjs.io/docs/tooling/cli)
- [SimpleLocalize CLI Documentation](/docs/cli/get-started/)
- [Translation Hosting](/docs/translation-hosting/get-started/)
- [Docs: Vue.js](https://vuejs.org/guide/reusability/plugins.html#provide-inject-with-plugins)
---
# Integrations: iOS & macOS (OTA SDK)
Source: https://simplelocalize.io/docs/integrations/ios-macos-ota/
## Overview
Over-the-air (OTA) translations are downloaded by the app at runtime instead of being frozen in the
binary. Fixing a typo, retranslating a sentence or adding a language becomes a **publication in
SimpleLocalize**, not an App Store review cycle.
The SDK is a per-key overlay on top of the localization you already have. A string is resolved in
this order:
1. over-the-air translation in the current language,
2. over-the-air translation in the configured fallback language,
3. the string compiled into the app (`.strings` / String Catalog),
4. the key itself.
Anything you have not published keeps rendering the bundled string, key by key on the same screen
publishing three keys overrides exactly those three. Downloaded content is cached on disk, so the
app starts with the last known translations even offline, and a failed refresh never drops what was
already downloaded.
## Requirements
- iOS 13+, macOS 11+, tvOS 13+ or watchOS 6+, Swift 5.9+.
- Translations [published to Translation Hosting](/docs/translation-hosting/publishing-translations/).
- Project token from **Settings → Credentials**. It is public by design and meant to be shipped in
client code.
## Installation
Add the package in Xcode (**File > Add Package Dependencies...**) or in `Package.swift`:
```swift
.package(url: "https://github.com/simplelocalize/simplelocalize-ota-sdk-apple.git", branch: "main")
```
The package has no dependencies of its own.
## Usage
Start the SDK once, as early as possible. It loads the disk cache synchronously, so the first frame
already shows the last known translations, and refreshes in the background.
```swift
import SimpleLocalizeOTA
@main
struct MyApp: App {
init() {
SimpleLocalize.shared.start(
SimpleLocalizeConfiguration(
projectToken: "5a5b1f...", // Settings -> Credentials
environment: "_production", // or "_latest"
fallbackLanguage: "en"
)
)
}
}
```
Read strings through the SDK:
```swift
label.text = SLLocalizedString("home.title")
label.text = "home.title".simpleLocalized
label.text = "cart.items".simpleLocalized(arguments: 3)
```
### UIKit, storyboards and NSLocalizedString
One call makes existing code resolve over the air, with no call site changes:
```swift
SimpleLocalize.enableBundleIntegration()
```
It swaps the class of `Bundle.main`, so `NSLocalizedString` and `Bundle.main.localizedString` - and
with them UIKit code, storyboards and XIBs - ask the SDK first and fall back to the bundled strings.
### SwiftUI
`Text("key")` and `String(localized:)` do **not** go through `Bundle.main.localizedString`, so the
bundle integration does not reach them. In SwiftUI read strings explicitly:
```swift
struct ContentView: View {
@StateObject private var localization = SimpleLocalizeObservable()
var body: some View {
VStack {
Text(simpleLocalized: "home.title")
Text(localization.string("home.subtitle"))
Button("Polski") { localization.setLanguage("pl") }
}
.simpleLocalizeAware() // rebuilds the subtree when new translations arrive
}
}
```
### Languages and refreshing
The language is resolved from `Locale.preferredLanguages` unless you set `language` explicitly. Keys
are probed in the order `en_GB`, `en-GB`, `en`; the first one published wins and is remembered
across launches. `SimpleLocalize.shared.setLanguage("pl")` overrides it at runtime.
Translations refresh on `start(_:)`, when the app returns to the foreground (throttled by
`minimumRefreshInterval`, 10 minutes by default) and on demand:
```swift
SimpleLocalize.shared.refresh()
```
### Configuration
| Option | Default | Meaning |
|--------------------------|---------------------------------|------------------------------------------------------------------------------------------------|
| `projectToken` | – | **Settings → Credentials** |
| `environment` | `_production` | `_latest`, `_production` or a [custom environment](/docs/translation-hosting/environments/) |
| `baseURL` | `https://cdn.simplelocalize.io` | change it for a [custom hosting provider](/docs/translation-hosting/custom-hosting-providers/) |
| `namespaces` | `[]` | downloaded namespaces; a namespace maps to the `table` of `NSLocalizedString` |
| `language` | `nil` | forced language key instead of the device locale |
| `fallbackLanguage` | `nil` | language used for keys missing in the current one |
| `customerId` | `nil` | [customer-specific translations](/docs/general/customer-specific-translations/) |
| `minimumRefreshInterval` | `600 s` | throttle for automatic refreshes |
| `refreshOnForeground` | `true` | refresh when the app becomes active |
## Translation Hosting setup
The SDK reads exactly what you publish, so hosting configuration is the other half of the setup.
1. **Publish.** Nothing is served until a publication happens, editing translations changes nothing
on the CDN. Publish from the **Hosting** tab, with the CLI or through the API:
```shell
simplelocalize publish --apiKey --environment _latest
```
Full publications always hit `_latest` first and cascade to `_production` from there. See
[publishing translations](/docs/translation-hosting/publishing-translations/).
2. **Pick an environment per build.** Point debug builds at `_latest` and release builds at
`_production`. `_production` is served with `Cache-Control: max-age=3600`, so a publication
reaches users within about an hour; `_latest` is cached briefly and is the right target while
iterating. See [environments](/docs/translation-hosting/environments/).
3. **Check Settings → Hosting.** Both the flat (`{"home.title": "Hi"}`) and the nested
(`{"home": {"title": "Hi"}}`) JSON format work, nested payloads are flattened to dot separated
keys. *Missing translations* may be published as empty strings; the SDK treats an empty
translation as missing and falls back to the bundled string, so the UI never goes blank. See
[hosting settings](/docs/translation-hosting/settings/).
4. **Use the same keys.** A key published as `home.title` is the key you pass to
`Text(simpleLocalized: "home.title")` or that lives in your `Localizable.strings`. Keys are
case-sensitive.
## Limitations
- **Plurals are not supported.** `.stringsdict` entries and String Catalog plural variations are
never overridden. They always come from the resources compiled into the app. Publish plural forms
as separate keys if you need them over the air.
- SwiftUI `Text("key")` and `String(localized:)` are not intercepted by the bundle integration, see
[SwiftUI](#swiftui) above.
- The SDK is read-only: it never sends anything to SimpleLocalize, and the CDN it reads is public.
---
# Integrations: Spring Boot
Source: https://simplelocalize.io/docs/integrations/java/spring-boot/
In this article, you will learn how to translate API exceptions, emails, webpages and validation messages in **Spring Boot 4.1** and Java 26 using
translations from [`messages.properties` files](/docs/file-formats/java-properties/).
This guide comes with a complete example application that demonstrates how to set up internationalization (i18n) in a Spring Boot application,
manage translations using SimpleLocalize, and use them in Thymeleaf templates and controllers.
## Installation
Add the required dependencies to your `pom.xml` for Maven:
```xml
org.springframework.bootspring-boot-starter-weborg.springframework.bootspring-boot-starter-thymeleaforg.springframework.bootspring-boot-starter-validationcom.fasterxml.jackson.corejackson-databind
```
Or for Gradle (`build.gradle`):
```gradle
dependencies {
implementation 'org.springframework.boot:spring-boot-starter-web'
implementation 'org.springframework.boot:spring-boot-starter-thymeleaf'
implementation 'org.springframework.boot:spring-boot-starter-validation'
// Optional: For JSON processing
implementation 'com.fasterxml.jackson.core:jackson-databind'
}
```
## Configuration
### Configure internationalization
Create an internationalization configuration class:
```java
// src/main/java/com/example/config/InternationalizationConfig.java
package com.example.config;
import org.springframework.context.annotation.Bean;
import org.springframework.context.annotation.Configuration;
import org.springframework.context.support.ReloadableResourceBundleMessageSource;
import org.springframework.web.servlet.LocaleResolver;
import org.springframework.web.servlet.config.annotation.InterceptorRegistry;
import org.springframework.web.servlet.config.annotation.WebMvcConfigurer;
import org.springframework.web.servlet.i18n.CookieLocaleResolver;
import org.springframework.web.servlet.i18n.LocaleChangeInterceptor;
import java.util.Locale;
@Configuration
public class InternationalizationConfig implements WebMvcConfigurer {
@Bean
public ReloadableResourceBundleMessageSource messageSource() {
ReloadableResourceBundleMessageSource messageSource = new ReloadableResourceBundleMessageSource();
messageSource.setBasename("classpath:messages/messages");
messageSource.setDefaultEncoding("UTF-8");
messageSource.setCacheSeconds(3600); // Cache for 1 hour
messageSource.setFallbackToSystemLocale(false);
messageSource.setDefaultLocale(Locale.ENGLISH);
return messageSource;
}
@Bean
public LocaleResolver localeResolver() {
CookieLocaleResolver localeResolver = new CookieLocaleResolver();
localeResolver.setDefaultLocale(Locale.ENGLISH);
localeResolver.setCookieName("language");
localeResolver.setCookieMaxAge(3600 * 24 * 30); // 30 days
return localeResolver;
}
@Bean
public LocaleChangeInterceptor localeChangeInterceptor() {
LocaleChangeInterceptor interceptor = new LocaleChangeInterceptor();
interceptor.setParamName("lang");
return interceptor;
}
@Override
public void addInterceptors(InterceptorRegistry registry) {
registry.addInterceptor(localeChangeInterceptor());
}
}
```
### Application properties
Configure your `application.yml`:
```yaml
# src/main/resources/application.yml
spring:
application:
name: spring-boot-i18n-app
# Message source configuration
messages:
basename: messages/messages
encoding: UTF-8
cache-duration: 3600s
fallback-to-system-locale: false
# Thymeleaf configuration
thymeleaf:
encoding: UTF-8
mode: HTML
cache: false # Set to true in production
# Server configuration
server:
port: 8080
# Logging
logging:
level:
com.example: DEBUG
org.springframework.context.support: DEBUG
```
## Load translations
Create properties files in the `src/main/resources/messages/` directory:
```
src/main/resources/
messages/
messages.properties # Default (English)
messages_en.properties # English
messages_es.properties # Spanish
messages_fr.properties # French
messages_de.properties # German
```
Example translation files:
```properties
# src/main/resources/messages/messages_en.properties
nav.home=Home
nav.about=About
nav.services=Services
nav.contact=Contact
home.title=Welcome to Our Application
home.subtitle=This is a multilingual Spring Boot application
home.description=Built with Spring Boot and SimpleLocalize
# cut off for brevity
```
```properties
# src/main/resources/messages/messages_es.properties
nav.home=Inicio
nav.about=Acerca de
nav.services=Servicios
nav.contact=Contacto
home.title=Bienvenido a Nuestra Aplicación
home.subtitle=Esta es una aplicación Spring Boot multiidioma
home.description=Construida con Spring Boot y SimpleLocalize
# cut off for brevity
```
**Both options are valid, and you can choose the one that fits your needs.**
## Usage
### Using in Thymeleaf templates
Use the `#messages` utility in your Thymeleaf templates:
```html
Home
Welcome
Subtitle
Description
```
### Using with parameters
Use parameters in your translations:
```html
Welcome message
```
Properties file:
```properties
welcome.message=Hello {0}, you have {1} items
```
### Using in controllers
Inject `MessageSource` to use translations in your controllers:
```java
// src/main/java/com/example/controller/HomeController.java
package com.example.controller;
import org.springframework.beans.factory.annotation.Autowired;
import org.springframework.context.MessageSource;
import org.springframework.stereotype.Controller;
import org.springframework.ui.Model;
import org.springframework.web.bind.annotation.GetMapping;
import org.springframework.web.bind.annotation.RequestParam;
import java.util.Locale;
@Controller
public class HomeController {
@Autowired
private MessageSource messageSource;
@GetMapping("/")
public String home(Model model, Locale locale) {
String welcomeMessage = messageSource.getMessage("home.title", null, locale);
model.addAttribute("welcomeMessage", welcomeMessage);
return "index";
}
@GetMapping("/about")
public String about(Model model, Locale locale) {
String pageTitle = messageSource.getMessage("about.title", null, "About Us", locale);
model.addAttribute("pageTitle", pageTitle);
return "about";
}
@GetMapping("/api/message")
public ResponseEntity> getMessage(
@RequestParam String key,
Locale locale) {
String message = messageSource.getMessage(key, null, key, locale);
Map response = Map.of("message", message, "locale", locale.toString());
return ResponseEntity.ok(response);
}
}
```
### Contact form with validation
Create a contact form with internationalized validation messages:
```java
// src/main/java/com/example/dto/ContactForm.java
package com.example.dto;
import jakarta.validation.constraints.Email;
import jakarta.validation.constraints.NotBlank;
import jakarta.validation.constraints.Size;
public class ContactForm {
@NotBlank(message = "{validation.required}")
@Size(min = 2, max = 50, message = "{validation.name.size}")
private String name;
@NotBlank(message = "{validation.required}")
@Email(message = "{validation.email}")
private String email;
@NotBlank(message = "{validation.required}")
@Size(min = 5, max = 100, message = "{validation.subject.size}")
private String subject;
@NotBlank(message = "{validation.required}")
@Size(min = 10, max = 1000, message = "{validation.message.size}")
private String message;
// Constructors, getters, and setters
public ContactForm() {}
public String getName() { return name; }
public void setName(String name) { this.name = name; }
public String getEmail() { return email; }
public void setEmail(String email) { this.email = email; }
public String getSubject() { return subject; }
public void setSubject(String subject) { this.subject = subject; }
public String getMessage() { return message; }
public void setMessage(String message) { this.message = message; }
}
```
Contact form controller:
```java
// src/main/java/com/example/controller/ContactController.java
package com.example.controller;
import com.example.dto.ContactForm;
import jakarta.validation.Valid;
import org.springframework.beans.factory.annotation.Autowired;
import org.springframework.context.MessageSource;
import org.springframework.stereotype.Controller;
import org.springframework.ui.Model;
import org.springframework.validation.BindingResult;
import org.springframework.web.bind.annotation.GetMapping;
import org.springframework.web.bind.annotation.PostMapping;
import org.springframework.web.servlet.mvc.support.RedirectAttributes;
import java.util.Locale;
@Controller
public class ContactController {
@Autowired
private MessageSource messageSource;
@GetMapping("/contact")
public String contactForm(Model model) {
model.addAttribute("contactForm", new ContactForm());
return "contact";
}
@PostMapping("/contact")
public String submitContact(
@Valid ContactForm contactForm,
BindingResult bindingResult,
Model model,
RedirectAttributes redirectAttributes,
Locale locale) {
if (bindingResult.hasErrors()) {
return "contact";
}
// Process the form (send email, save to database, etc.)
// ...
String successMessage = messageSource.getMessage("contact.success", null, locale);
redirectAttributes.addFlashAttribute("successMessage", successMessage);
return "redirect:/contact";
}
}
```
Contact form template:
```html
Contact
Contact Us
```
## Managing translations
### Install SimpleLocalize CLI
### Configure SimpleLocalize
Create a `simplelocalize.yml` file in the root of your project:
```yaml
apiKey: YOUR_PROJECT_API_KEY
# Upload configuration
uploadFormat: java-properties
uploadPath: ./src/main/resources/messages/messages_en.properties
uploadLanguageKey: en
uploadOptions:
- UPDATE_TRANSLATIONS
# Download configuration
downloadPath: ./src/main/resources/messages/messages_{lang}.properties
downloadLanguageKeys: ['en', 'es', 'fr', 'de']
downloadFormat: java-properties
```
### Upload source translations
Upload your source (English) translations to SimpleLocalize:
```bash
simplelocalize upload
```
This will upload the `messages_en.properties` file to SimpleLocalize as your source translations.
### Manage translations
Now you can manage and translate your messages in the SimpleLocalize translation editor:
1. **Add new languages** in the Languages tab
2. **Use auto-translation** to quickly translate into multiple languages
3. **Manually refine translations** for better quality
4. **Add context and descriptions** to help translators
### Download translations
Download completed translations to your project:
```bash
simplelocalize download
```
This will create/update translation files in `./src/main/resources/messages/` directory:
- `messages_en.properties`
- `messages_es.properties`
- `messages_fr.properties`
- `messages_de.properties`
### Build workflow
Add these scripts to your `build.gradle` for a complete workflow:
```gradle
// Add to build.gradle
task downloadTranslations(type: Exec) {
commandLine 'simplelocalize', 'download'
}
task uploadTranslations(type: Exec) {
commandLine 'simplelocalize', 'upload'
}
// Download translations before building
build.dependsOn downloadTranslations
```
Or for Maven (`pom.xml`):
```xml
org.codehaus.mojoexec-maven-plugin3.1.0download-translationsgenerate-resourcesexecsimplelocalizedownload
```
### Custom validation messages
Add custom validation messages to your properties files:
```properties
# Validation messages in messages_en.properties
validation.required=This field is required
validation.email=Please enter a valid email address
validation.name.size=Name must be between {2} and {1} characters
validation.subject.size=Subject must be between {2} and {1} characters
validation.message.size=Message must be between {2} and {1} characters
# Bean validation messages
jakarta.validation.constraints.NotBlank.message={validation.required}
jakarta.validation.constraints.Email.message={validation.email}
jakarta.validation.constraints.Size.message=Must be between {min} and {max} characters
```
### Locale detection from request headers
Create a custom locale resolver that detects locale from Accept-Language header:
```java
// src/main/java/com/example/config/CustomLocaleResolver.java
package com.example.config;
import jakarta.servlet.http.HttpServletRequest;
import jakarta.servlet.http.HttpServletResponse;
import org.springframework.web.servlet.LocaleResolver;
import java.util.Arrays;
import java.util.List;
import java.util.Locale;
public class CustomLocaleResolver implements LocaleResolver {
private static final List SUPPORTED_LANGUAGES = Arrays.asList("en", "es", "fr", "de");
private static final Locale DEFAULT_LOCALE = Locale.ENGLISH;
@Override
public Locale resolveLocale(HttpServletRequest request) {
String acceptLanguage = request.getHeader("Accept-Language");
if (acceptLanguage == null || acceptLanguage.isEmpty()) {
return DEFAULT_LOCALE;
}
String[] languages = acceptLanguage.split(",");
for (String language : languages) {
String langCode = language.split("-")[0].split(";")[0].trim();
if (SUPPORTED_LANGUAGES.contains(langCode)) {
return new Locale(langCode);
}
}
return DEFAULT_LOCALE;
}
@Override
public void setLocale(HttpServletRequest request, HttpServletResponse response, Locale locale) {
// Not implemented for header-based resolution
}
}
```
## Resources
- [Docs: Spring Boot Internationalization](https://docs.spring.io/spring-boot/docs/current/reference/html/features.html#features.internationalization)
- [Docs: Spring Framework MessageSource](https://docs.spring.io/spring-framework/docs/current/reference/html/core.html#context-functionality-messagesource)
- [Docs: Thymeleaf Internationalization](https://www.thymeleaf.org/doc/tutorials/3.1/usingthymeleaf.html)
- [Docs: SimpleLocalize CLI Documentation](/docs/cli/get-started/)
- [Docs: Java Properties File Format](/docs/general/file-formats/)
- [Blog: Spring Boot 4.1: Internationalization](/blog/posts/spring-boot-simple-internationalization/)
- [Java 24: Internationalization](/blog/posts/java-internationalization/)
- [GitHub: simplelocalize/spring-boot-i18n](https://github.com/simplelocalize/spring-boot-i18n)
---
# Integrations: next-i18next
Source: https://simplelocalize.io/docs/integrations/next-i18next/
In this article, you will learn how to configure and use **i18next for Next.js 14+ with Page Router** library. The following article is based on a [demo application available on GitHub](https://github.com/simplelocalize/simplelocalize-next-i18next).
## Installation
To start using i18next with Next.js, you need to install `next-i18next` library.
```bash
npm install next-i18next
```
## Configuration
Create `next-i18next.config.js` file in project root.
```ts
module.exports = {
i18n: {
defaultLocale: 'en',
locales: ['en', 'es', 'pl', 'fr'],
},
};
```
Apply `i18n` from i18next to your Next.js configuration in `next.config.js` file.
```typescript
const {i18n} = require("./next-i18next.config");
const nextConfig = {
reactStrictMode: true,
i18n
}
module.exports = nextConfig
```
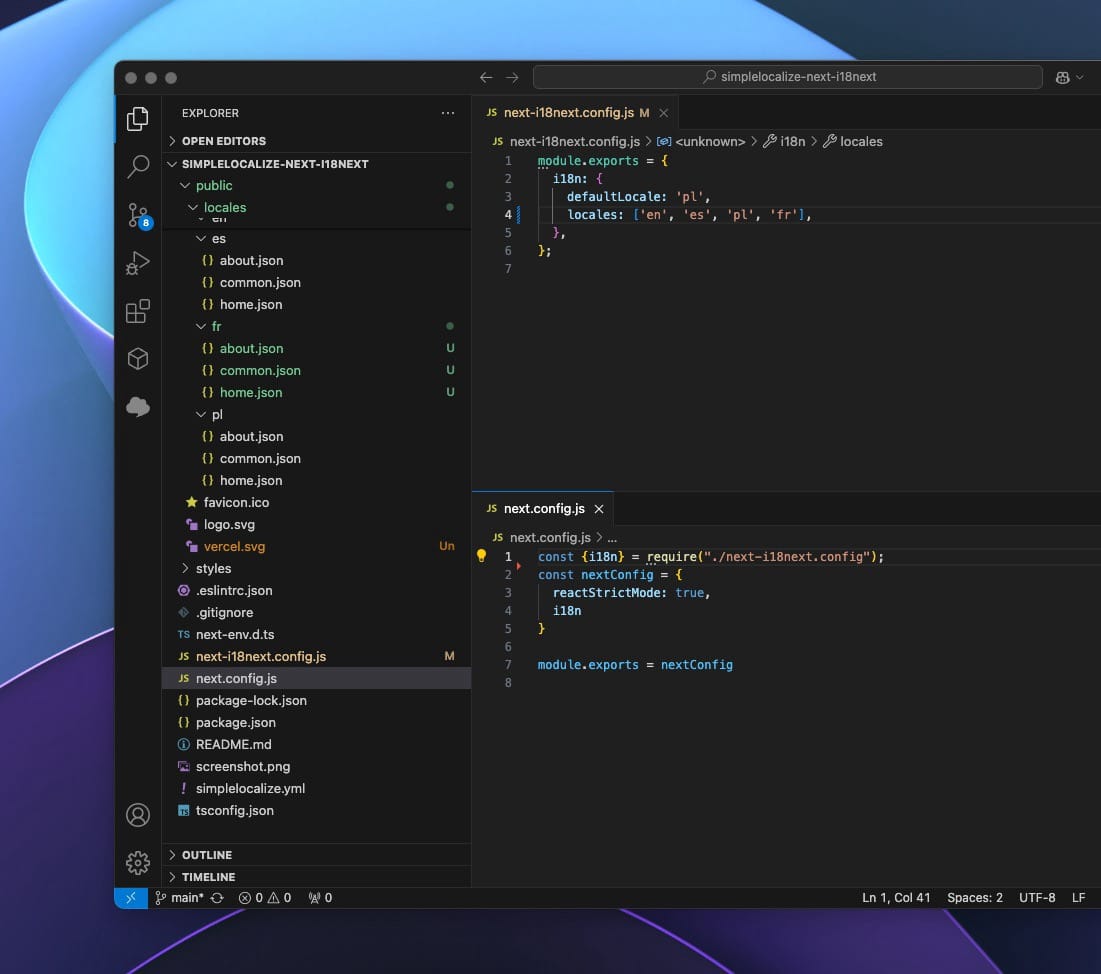
### Update `__app.tsx`
Update your `__app.tsx` file to use `appWithTranslation` from `next-i18next` library as a wrapper.
```tsx
import '../styles/globals.css'
import type {AppProps} from 'next/app'
import {appWithTranslation} from 'next-i18next';
function MyApp({Component, pageProps}: AppProps) {
return
}
export default appWithTranslation(MyApp);
```
### Update `pages/_document.tsx`
Add `serverSideTranslations` function to your page to fetch translations from the server
as follows:
```tsx
import {serverSideTranslations} from "next-i18next/serverSideTranslations";
export async function getStaticProps({ locale }: { locale: string }) {
return {
props: {
...(await serverSideTranslations(locale))
}
};
}
const Home: NextPage = () => {
//translations from common.json
const {t} = useTranslation("common");
//translations from home.json
const {t: homeT} = useTranslation("home");
const changeLanguage = (language: string) => {
window.location.replace("/" + language);
};
return (
{homeT("HELLO_WORLD")}
{t("USE_BUTTONS_BELOW")}
);
};
export default Home;
```
## Translation files
In this article, we will keep translations in the `/public/locales/{lang}/{ns}.json` directory, where:
- `lang` - is a language code (e.g.: `en`, `es`, `fr`, `pl`),
- `ns` - is a namespace (e.g.: `common` and `home`).
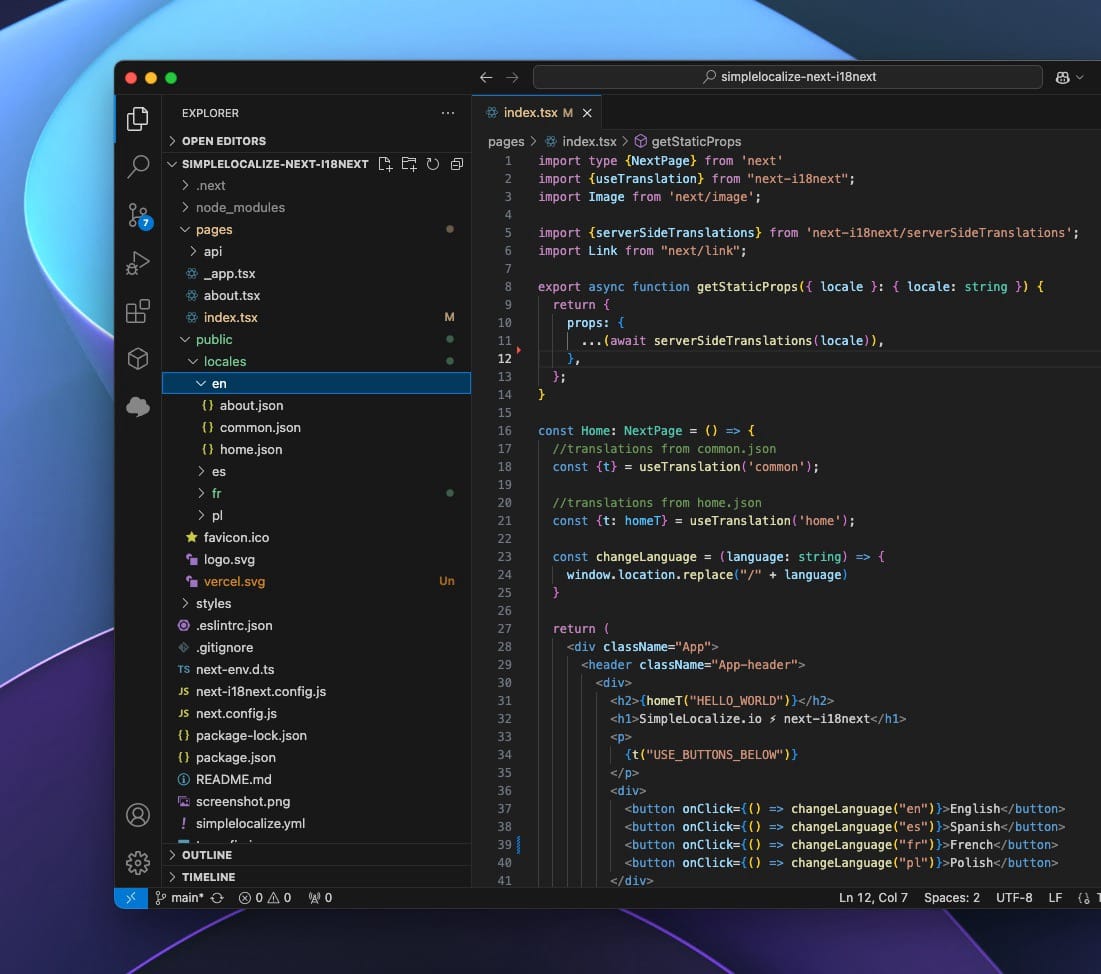
> Using **namespaces** is optional, they are used to group translations. For example, you can have a `common` namespace for translations
that are used across the application and a `home` namespace for translations that are used only on the home page.
Our file structure will look like this:
```bash
.
├── en
│ ├── common.json
│ └── home.json
├── es
│ ├── common.json
│ └── home.json
├── pl
│ ├── common.json
│ └── home.json
└── fr
├── common.json
└── home.json
```
Every directory contains two JSON files with translation for each namespace, `common` and `home`, every JSON file
contains translations for a specific language/locale.
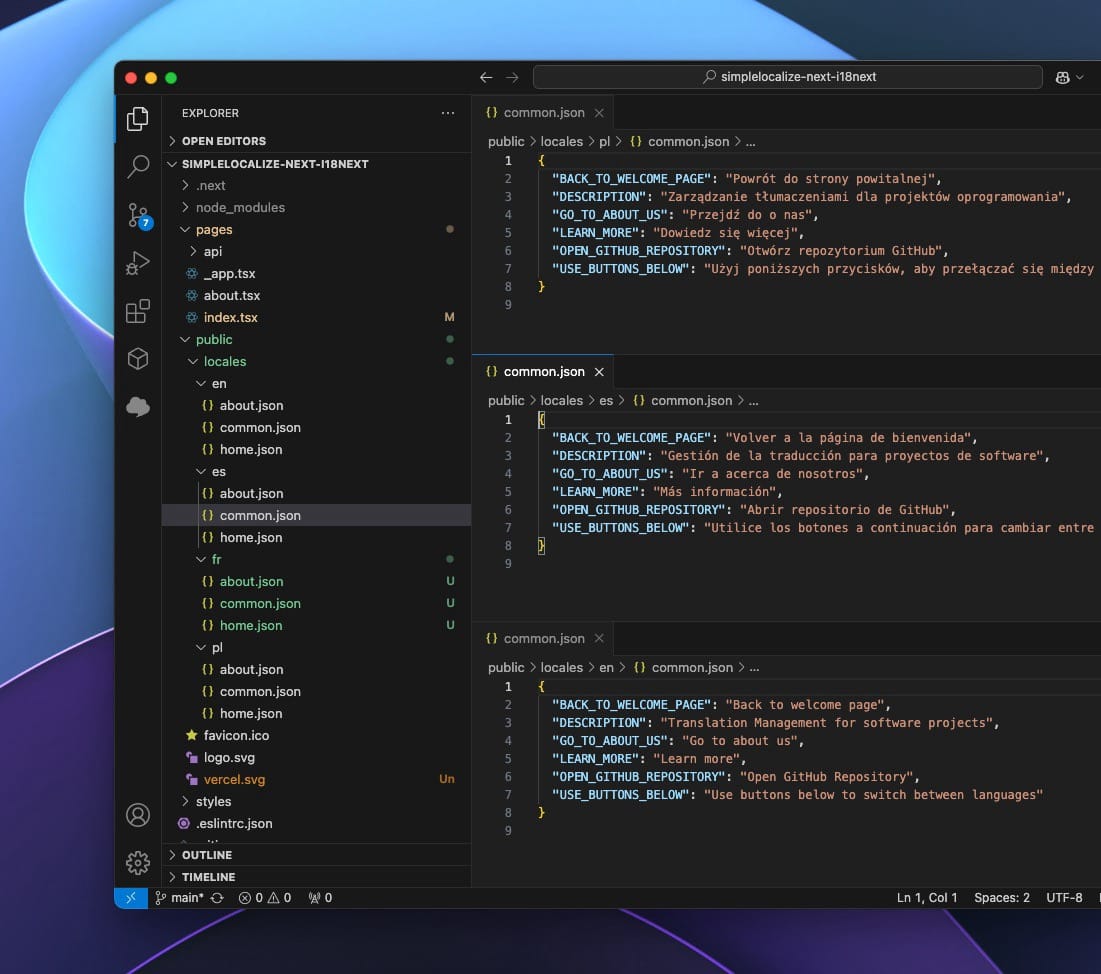
## Usage
Now we can wrap things up and start using i18next in our Next.js application.
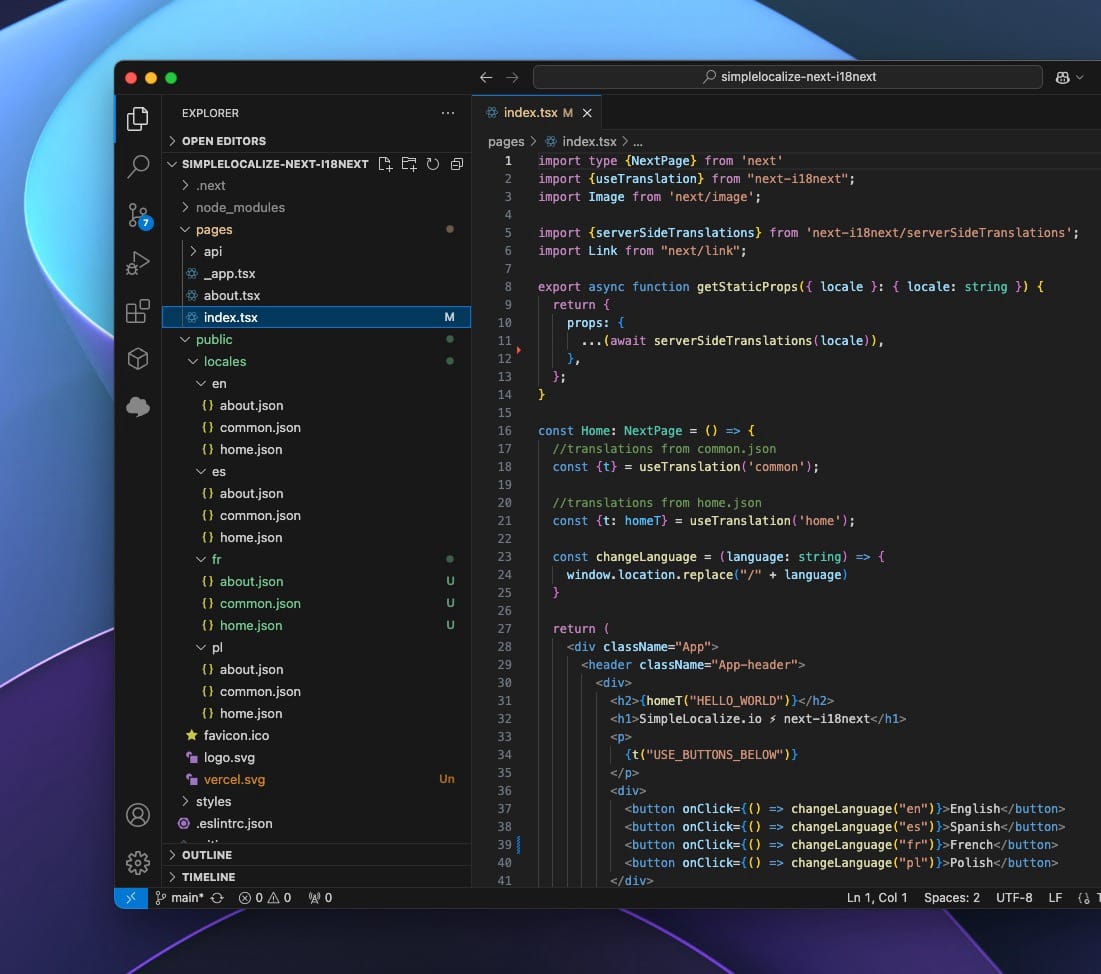
### Translations
To use translations in your Next.js application, you can use `useTranslation` hook from `next-i18next` library like this:
```tsx
import {useTranslation} from 'next-i18next';
// translations from common.json
const {t} = useTranslation('common');
console.log(t('LEARN_MORE')) // output: Learn more
// translations from home.json
const {t: homeT} = useTranslation('home');
const firstName = "Jakub";
console.log(homeT('SAY_HI', {name: firstName})) // output: Hello Jakub!
```
### Language switcher
To switch between languages, you can use the `i18n.changeLanguage` function from the `useTranslation` hook.
```tsx
import {useTranslation} from 'next-i18next';
const {i18n} = useTranslation();
```
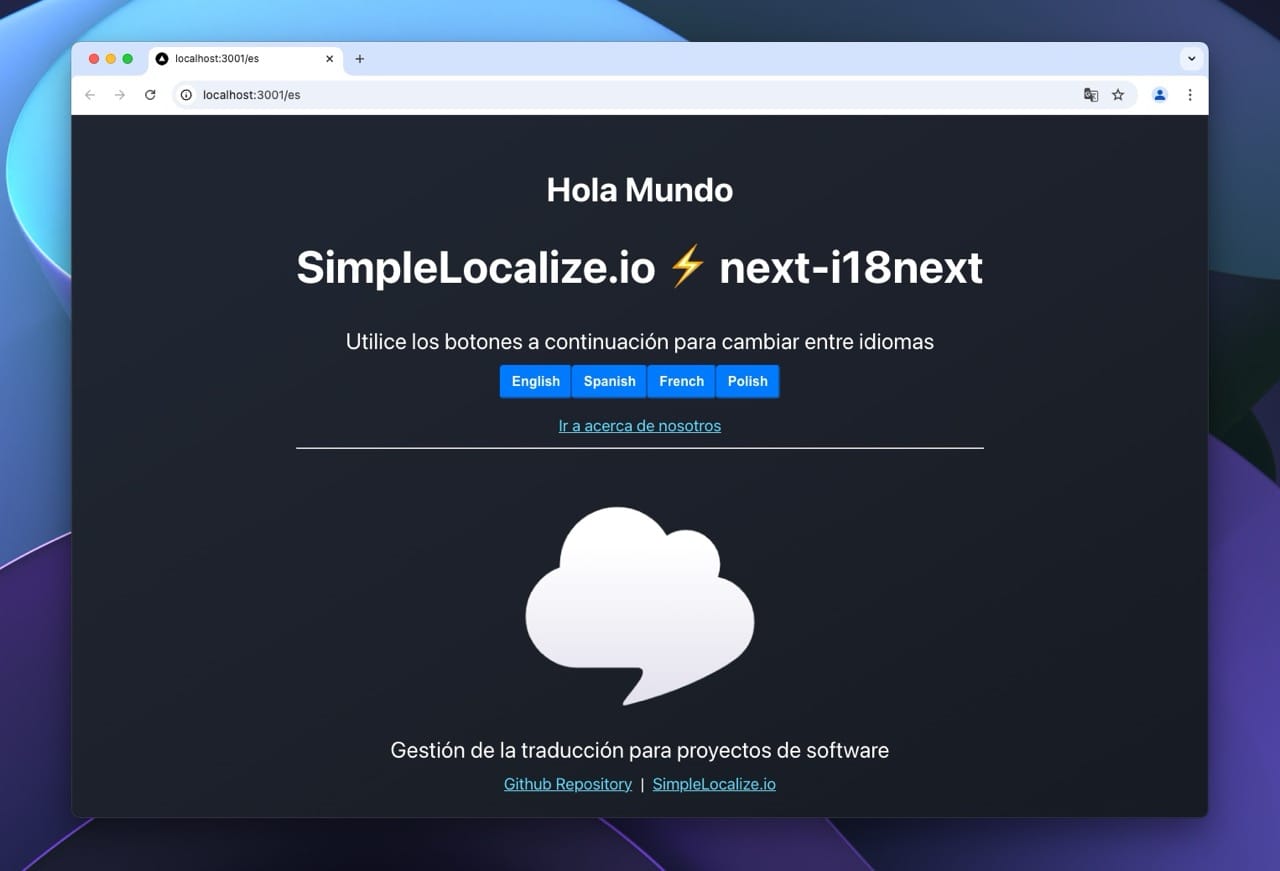
## Interpolation and plurals
`next-i18next` uses `i18next` under the hood, hence interpolation and pluralization work the same way as in `i18next`.
Pluralization, interpolation, and variables are stored directly in the translations in [`single-language-json` format](/docs/file-formats/single-language-json/#message-interpolation), can read more about it here: [message interpolation in `single-language-json` format](/docs/file-formats/single-language-json/#message-interpolation).
## Managing translation files
If you want to manage your translations in the translation editor, you can use the [SimpleLocalize CLI](/docs/cli/get-started/) to upload and download translations.
### Configuration
Create a `simplelocalize.yml` file in your project root directory:
```yaml
apiKey: YOUR_PROJECT_API_KEY
uploadFormat: single-language-json
uploadLanguageKey: en
uploadPath: ./public/locales/en/{ns}.json
uploadOptions:
- UPDATE_TRANSLATIONS
downloadFormat: single-language-json
downloadLanguageKeys: ['pl', 'fr', 'es']
downloadPath: ./public/locales/{lang}/{ns}.json
```
With this configuration, CLI will upload only English translations and download translations for Spanish, Polish, and French languages.
We use [`single-language-json`](/docs/file-formats/single-language-json/) format for both upload and download. `UPDATE_TRANSLATIONS` option will automatically update English translations
if they are found in the translation editor.
### Upload translations
To upload translations to the translation editor, run the following command:
```shell
simplelocalize upload
```
After that, you can see your translations in the translation editor.

### Download translations
To download translations from the translation editor, run the following command:
```shell
$ simplelocalize download
```

---
# Integrations: next-translate
Source: https://simplelocalize.io/docs/integrations/next-translate/
In this article,
we will show you
how to integrate SimpleLocalize with Next.js using [next-translate](https://github.com/aralroca/next-translate).
next-translate is gaining popularity among developers because of its simplicity,
ease of use, and **native support for Next.js**.
It provides a simple way to manage translations in Next.js apps.
In this guide, we will use **Next.js 14+ with Pages Router**, React 18, and next-translate 2.6.2.
## Installation
Install [next-translate](https://github.com/aralroca/next-translate) for Next.js
```bash
# with npm
npm install next-translate
```
## Configuration
Create a `i18n.json` file in project root.
```json
{
"locales": ["en", "es", "fr", "pl"],
"defaultLocale": "en",
"pages": {
"*": ["common"],
"/": ["home"]
}
}
```
Import next-translate configuration file in `next.config.js` like below:
```typescript
const nextTranslate = require('next-translate-plugin')
module.exports = nextTranslate()
```
#### Notice: Page not found error
When using some Next.js versions, you may encounter ['This page could not be found.' error](https://github.com/aralroca/next-translate/issues/1142#issuecomment-1708385197).
To fix this issue, you can set `i18n` to `undefined` in the `next.config.js` file or try to upgrade the Next.js version and/or next-translate version.
```typescript
const nextTranslate = require("next-translate-plugin");
const config = nextTranslate({});
config.i18n = undefined;
module.exports = config;
```
The issue is not present with version 2.6.2 of next-translate and 14.2.18 of Next.js.
## Translation files
**next-translate by default organizes translations in JSON files that are stored locally**.
We will place our translations in `/locales/{lang}/{ns}.json` directory, where:
- `{ns}` - is a namespace,
- `{lang}` - is a language key
> Namespaces are optional, they are used to group translations. For example, you can have a `common` namespace for translations that are used across the application and a `home` namespace for translations that are used only on the home page.
In this example there are two namespaces: `common` and `home` and 4 locales: `en`, `es`, `fr`, `pl`, and the files structure will look like this:
```bash
.
├── en
│ ├── common.json
│ └── home.json
├── es
│ ├── common.json
│ └── home.json
├── pl
│ ├── common.json
│ └── home.json
└── fr
├── common.json
└── home.json
```
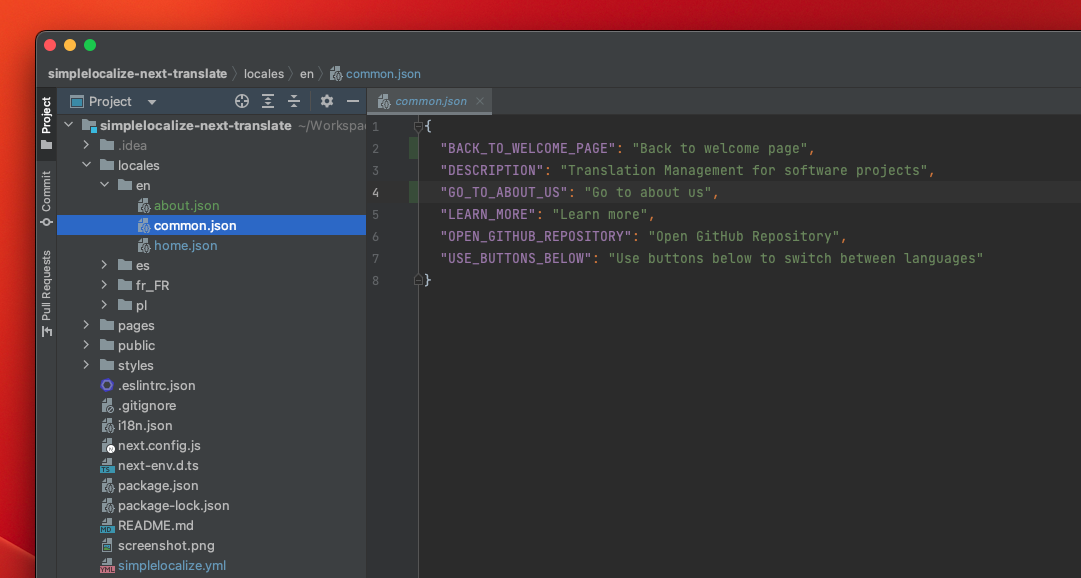
## Usage
**Usage of next-translate is straightforward and is similar to other libraries**.
You use `useTranslation` hook to get translations from JSON files,
and next-translate automatically loads translations based on the current locale.
You can also use namespaces in the `useTranslation` hook to get translations from a specific namespace.
Import `useTranslation` hook from `next-translate` package and use `t` function to get translated text.
```typescript
import useTranslation from 'next-translate/useTranslation'
// translations from common.json
const { t } = useTranslation('common')
console.log(t('LEARN_MORE')) // output: Learn more
// translations from home.json
const {t: homeT} = useTranslation('home');
console.log(homeT('HELLO_WORLD')) // output: Hello world
```
### Switching languages
next-translate uses prefix routing to switch languages. You can use `useRouter` hook from `next/router` to switch languages.
```tsx
import { useRouter } from 'next/router'
const router = useRouter()
const locale = router.locale;
console.log('Current locale:', locale);
return (
)
```
## Managing translation files
If you want to manage your translations in the translation editor, you can use the [SimpleLocalize CLI](/docs/cli/get-started/) to upload and download translations.
### Configuration
Create a `simplelocalize.yml` file in your project root directory:
```yaml
apiKey: YOUR_PROJECT_API_KEY
uploadFormat: single-language-json
uploadLanguageKey: en
uploadPath: ./locales/en/{ns}.json
uploadOptions:
- UPDATE_TRANSLATIONS
downloadFormat: single-language-json
downloadLanguageKeys: ['pl', 'fr', 'es']
downloadPath: ./locales/{lang}/{ns}.json
```
**next-translate uses one JSON file per language and namespace**,
hence we set [`single-language-json`](/docs/file-formats/single-language-json/)
format for both download and upload.
We also set the `uploadLanguageKey` to `en` to match the default language of the app,
and we set the `downloadLanguageKey` to `['pl', 'fr', 'es']` to download translations for these languages.
Additionally,
we set `uploadOptions`
to `UPDATE_TRANSLATIONS` to update translations in the translation editor with translations from the local files for the English language.
> [Language keys](/docs/general/languages/) must match the language keys in the translation editor to upload and download translations correctly.
### Uploading and downloading translations
Now you can run `upload` command to upload translations to translation editor:
```shell
simplelocalize upload
```

After you finish translating your app, you can download translations to your local files:
```shell
simplelocalize download
```

## Variables, plurals, and interpolation
next-translates works with files with [single language JSON file format](/docs/file-formats/single-language-json/) that keep translations in a simple key-value format,
so you can use interpolation and pluralization directly in the translations.
```json
{
"ITEMS_SIMPLE": "{itemCount} items",
"ITEMS_PLURAL": "I have {itemCount, plural, =0 {no items} one {1 item} other {# items}}"
}
```
Learn more about [message interpolation](/docs/file-formats/single-language-json/#message-interpolation).
## Resources
- [Blog: Next-translate integration](/blog/posts/next-translate/)
- [Blog: Number formatting in JavaScript](/blog/posts/number-formatting-in-javascript/)
---
# Integrations: next-intl
Source: https://simplelocalize.io/docs/integrations/next-intl/
In this article, you will learn how to integrate [next-intl](https://next-intl-docs.vercel.app/) with Next.js and manage your translations using SimpleLocalize. next-intl is a modern internationalization library for Next.js, supporting both App Router and Pages Router. This guide uses **Next.js 14+**, **React 18**, and **next-intl 3.x**.
## Installation
Install [next-intl](https://next-intl-docs.vercel.app/) for Next.js:
```bash
npm install next-intl
```
## Configuration
Create a `messages` directory for your translation files, e.g. `/messages/{locale}.json`.
Example file structure:
```bash
/messages
en.json
es.json
fr.json
pl.json
```
Each file contains translations for a specific language:
```json
// messages/en.json
{
"HELLO_WORLD": "Hello World!",
"LEARN_MORE": "Learn more"
}
```
## Setup in Next.js
### App Router
Wrap your app with the `NextIntlClientProvider` in `app/layout.tsx`:
```tsx
import {NextIntlClientProvider} from 'next-intl';
import messages from '../messages/en.json';
export default function RootLayout({children}) {
return (
{children}
);
}
```
To support multiple locales, load the correct messages file based on the current locale.
### Pages Router
Wrap your app in `_app.tsx`:
```tsx
import {NextIntlProvider} from 'next-intl';
import messages from '../messages/en.json';
function MyApp({Component, pageProps}) {
return (
);
}
export default MyApp;
```
## Usage
Use the `useTranslations` hook to access translations in your components:
```tsx
import {useTranslations} from 'next-intl';
export default function HomePage() {
const t = useTranslations();
return
{t('HELLO_WORLD')}
;
}
```
## Language Switcher
To switch languages, you can use Next.js routing:
```tsx
import Link from 'next/link';
export default function LanguageSwitcher() {
return (
English
Spanish
French
Polish
);
}
```
## Interpolation and Plurals
next-intl supports interpolation and pluralization:
```json
{
"GREET_USER": "Hello {name}!",
"MESSAGES": "{count} {count, plural, one {message} other {messages}}"
}
```
```tsx
const t = useTranslations();
t('GREET_USER', {name: 'Jakub'}); // Hello Jakub!
t('MESSAGES', {count: 1}); // 1 message
t('MESSAGES', {count: 5}); // 5 messages
```
## Managing translation files
To manage your translations in the SimpleLocalize translation editor, use the [SimpleLocalize CLI](/docs/cli/get-started/).
### Configuration
Create a `simplelocalize.yml` file in your project root:
```yaml
apiKey: YOUR_PROJECT_API_KEY
uploadFormat: single-language-json
uploadLanguageKey: en
uploadPath: ./messages/en.json
uploadOptions:
- UPDATE_TRANSLATIONS
downloadFormat: single-language-json
downloadLanguageKeys: ['pl', 'fr', 'es']
downloadPath: ./messages/{lang}.json
```
### Upload translations
```shell
simplelocalize upload
```
### Download translations
```shell
simplelocalize download
```
---
This guide should help you get started with next-intl and SimpleLocalize in your Next.js project!
---
# Integrations: Django
Source: https://simplelocalize.io/docs/integrations/django/
In this article, you will learn **how to configure and use Django with SimpleLocalize** to manage translations in your application.
We will show you how to generate translation files, use them in your Django application, and [manage PO files](/docs/file-formats/gettext-po-pot/) with the SimpleLocalize CLI.
You can also jump straight to the source code on GitHub:
## Configuration
Add middleware to your Django application to handle translations.
```python
# settings.py
MIDDLEWARE = [
...
'django.middleware.locale.LocaleMiddleware',
...
]
```
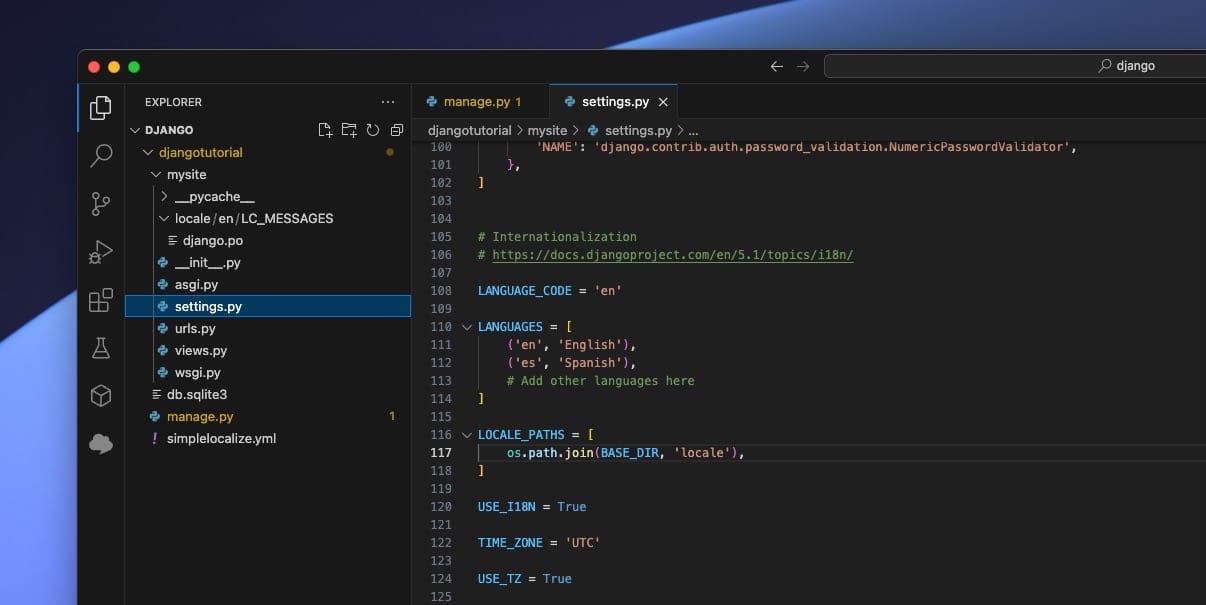
Add `LOCALE_PATHS` to your Django settings to specify the location of translation files. Add `LANGUAGE_CODE` and `LANGUAGES` to specify the default language and available languages. Ensure that the `USE_I18N` setting is set to `True`.
```python
# settings.py
LANGUAGE_CODE = 'en'
LANGUAGES = [
('en', 'English'),
('es', 'Spanish'),
# Add other languages here
]
LOCALE_PATHS = [
os.path.join(BASE_DIR, 'locale'),
]
USE_I18N = True
```
## Generate translation files
Run the following command to **generate translation files for your Django application**:
```shell
$ django-admin makemessages -l en
```
The command will generate a `locale` directory in your project root directory with the following structure:
```bash
.
├── locale
│ └── en
│ └── LC_MESSAGES
│ └── django.po
```
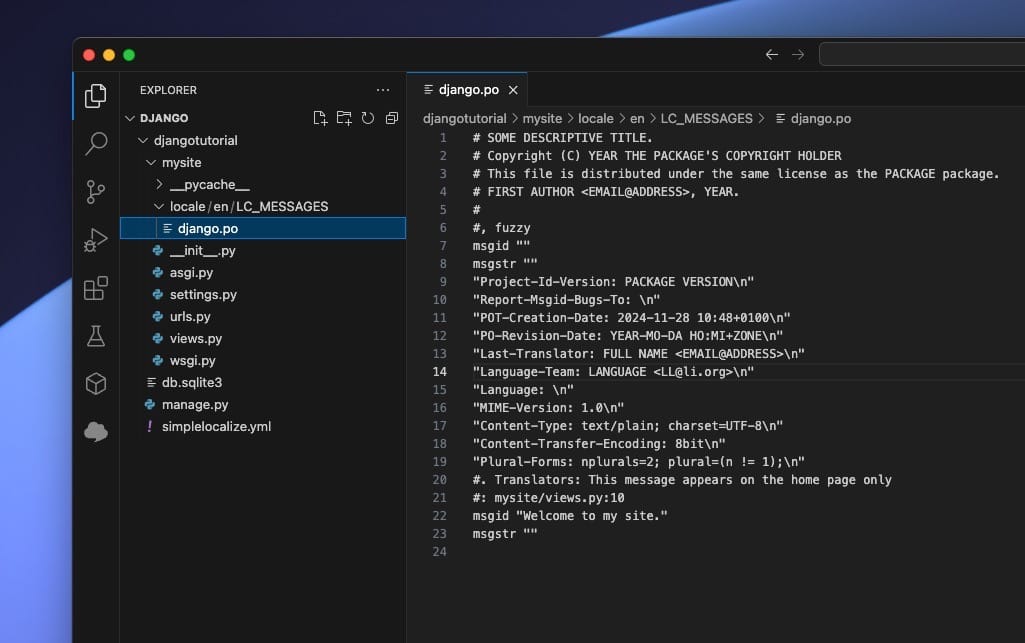
Generate MO files from PO files:
```shell
$ django-admin compilemessages
```
MO files are compiled versions of PO files that Django use to translate your application.
## Usage
To use translations in your Django application, you can use the `gettext` function.
```python
from django.http import HttpResponse
from django.shortcuts import render
from django.utils.translation import gettext as _
from django.utils.translation import activate, get_language
def hello_world(request):
activate('es')
print(f"Current language: {get_language()}")
# Translators: This message appears on the home page only
output = _("Welcome to my site.")
print(f"Translation: {output}")
return HttpResponse(output)
```
`gettext` function is used to get translated strings in Django. The `activate` function is used to set the current language for the request. The `get_language` function is used to get the current language.
> We imported `gettext` as `_` to make it easier to use.

## Localized response
Now, when you visit your Django `/hello`, you will see the translated content based on the language you set via the `activate` function,
and the `gettext` function will return the translated string.
Currently, the app doesn't offer any other languages, but you can add them by **generating translation files for other languages**.
Or use the SimpleLocalize CLI to import your source translations from PO file and export translations to other languages in the PO file format.
## Managing translation files
**SimpleLocalize simplifies the process of managing translation in PO files**, allowing you to upload and download translations from the [translation editor](/docs/general/translation-editor/).
For this purpose, you can use the SimpleLocalize CLI to **synchronize your Django translations between
your local files and the translation editor**.
### Configuration
Create a `simplelocalize.yml` file in your project root directory:
```yaml
apiKey: YOUR_PROJECT_API_KEY
uploadFormat: po-pot
uploadLanguageKey: en
uploadPath: ./locale/en/LC_MESSAGES/django.po
uploadOptions:
- UPDATE_TRANSLATIONS
- MSGCTXT_AS_NAMESPACE
downloadFormat: po-pot
downloadLanguageKeys: ['pl', 'fr', 'es']
downloadPath: ./locale/{lang}/LC_MESSAGES/django.po
downloadOptions:
- MSGCTXT_AS_NAMESPACE
```
With this configuration, CLI will upload only English translations and download translations for Spanish, Polish, and French languages.
We use [`po-pot`](/docs/file-formats/gettext-po-pot/) format for both upload and download. `UPDATE_TRANSLATIONS` option will automatically update English translations
if they are found in the translation editor during the upload process.
`MSGCTXT_AS_NAMESPACE` option is used to import context as a namespace in SimpleLocalize. This option is useful when you use `msgctxt` to distinguish different translations with the same `msgid`.
### Upload translations
To upload translations to the translation editor, run the following command:
```shell
simplelocalize upload
```
After that, you can see your translations in the translation editor.
### Download translations
To download translations from the translation editor, run the following command:
```shell
$ simplelocalize download
```
After downloading the translations, you have to compile them to MO files:
```shell
$ django-admin compilemessages
```
Now, you can use the translations in your Django application.
## Resources
- [Django documentation: Translations](https://docs.djangoproject.com/en/5.1/topics/i18n/translation/)
- [SimpleLocalize CLI: Get started](/docs/cli/get-started/)
---
# Integrations: Framer
Source: https://simplelocalize.io/docs/integrations/framer/
In this article, you will learn how to manage **Framer site translations** in SimpleLocalize.
Framer has built-in localization, and it can exchange translations with external tools using **XLIFF** files.
SimpleLocalize reads and writes the same format, so you can keep your Framer content in a proper
[translation editor](/docs/translation-editor/get-started/) with auto-translation, translation memory, glossary, and team collaboration.
---
## How localization works in Framer
Framer organizes localized content in three levels:
- **Locales** - a language with an optional region, for example `en`, `en-CA`, or `de`.
- **Localization groups** - pages, CMS items, and other containers that hold translatable content.
- **Localization sources** - the individual strings from your site, with their localized values.
When you export localization data from Framer, every source becomes a `` entry in an XLIFF file,
and every locale becomes a separate file. That is exactly what SimpleLocalize imports as translation keys and translations.
## Requirements
- A Framer project with **localization enabled** and at least one target locale added in Framer.
- A SimpleLocalize project with matching [languages](/docs/general/languages/) and a
[default language](/docs/general/languages/#default-language) set.
- Optionally the [SimpleLocalize CLI](/docs/cli/get-started/) if you want to script the whole exchange.
> Add your locales in Framer first. Framer is the place where the site structure and the list of locales live,
> SimpleLocalize is the place where the translations are produced and reviewed.
## Step 1: Export XLIFF from Framer
Open your project in Framer, switch to the **Localization** view, and run a plugin that exports XLIFF files,
for example [Locale Sync](https://www.framer.com/marketplace/plugins/locale-sync/) published by Framer.
Localization plugins appear in the **Plugins** menu of the Localization view.
Export the locales you want to translate. You will get one XLIFF file per locale.
Open one of the exported files and check the `version` attribute of the root element, you will need it in the next step:
```xml
```
- `version="1.2"` corresponds to the [XLIFF 1.2](/docs/file-formats/xliff-1.2/) format in SimpleLocalize (`xliff:1.2`),
- `version="2.0"` corresponds to the [XLIFF 2.0](/docs/file-formats/xliff-2/) format (`xliff:2`).
## Step 2: Import translations to SimpleLocalize
Upload the exported files to SimpleLocalize. Every file contains one target language, so import them one by one.
**In the web app:** open your project, go to **Translations**, and use the import action. Select the file,
pick the XLIFF format matching your export, and choose the language the file contains.
**With the CLI:**
```properties
simplelocalize upload \
--apiKey PROJECT_API_KEY \
--uploadFormat xliff:1.2 \
--uploadLanguageKey de \
--uploadPath ./framer-de.xliff
```
Repeat for every locale exported from Framer.
> Add the `--update` flag when you want the imported file to overwrite translations that already exist in SimpleLocalize.
> Without it, only new translation keys and empty translations are filled in.
Learn more about the [upload command](/docs/cli/upload-translations/).
## Step 3: Translate
Once your Framer content is in SimpleLocalize, you can work on it like on any other project:
- [Auto-translate](/docs/general/auto-translation/) everything with DeepL, Google Translate, OpenAI, or Anthropic,
- reuse previous work with [translation memory](/docs/translation-editor/translation-memory/) and keep wording consistent with a [glossary](/docs/translation-editor/glossary/),
- invite translators and reviewers, assign languages, and collect feedback without giving anyone access to your Framer project,
- run [quality checks](/docs/translation-editor/qa-checks/) to catch missing translations and formatting problems before they reach the site.
## Step 4: Export and import back to Framer
Download the finished translations in the same XLIFF version you exported from Framer:
```properties
simplelocalize download \
--apiKey PROJECT_API_KEY \
--downloadFormat xliff:1.2 \
--downloadLanguageKey de \
--downloadPath ./framer-{lang}.xliff
```
Learn more about the [download command](/docs/cli/download-translations/).
Then open the Localization view in Framer again and import the files with the same plugin you used for the export.
Publish your site to make the new translations live.
## Automating the exchange
The export and import inside Framer are manual, because Framer exposes localization data only to plugins running in the editor.
Everything on the SimpleLocalize side can be scripted, so a repeatable round trip looks like this:
```bash
# 1. export XLIFF files from Framer (manual, in the Localization view)
# 2. upload every exported locale
for lang in de fr es; do
simplelocalize upload \
--apiKey PROJECT_API_KEY \
--uploadFormat xliff:1.2 \
--uploadLanguageKey "$lang" \
--uploadPath "./framer-$lang.xliff" \
--update
done
# 3. auto-translate missing content
simplelocalize auto-translate --apiKey PROJECT_API_KEY
# 4. download translations back
simplelocalize download \
--apiKey PROJECT_API_KEY \
--downloadFormat xliff:1.2 \
--downloadPath "./framer-{lang}.xliff"
# 5. import the files back in Framer (manual, in the Localization view)
```
## Good practices
- **Do not edit the `trans-unit` identifiers.** SimpleLocalize matches content by translation key, and Framer matches it by
the same identifier, so untouched ids mean every round trip updates existing entries instead of creating duplicates.
- **Keep language codes aligned.** A locale exported as `en-CA` from Framer should be a `en-CA` language in SimpleLocalize.
- **Treat Framer as the source of truth for source texts.** Copy changes made in the Framer canvas flow into SimpleLocalize
with the next export, translations flow back with the next import.
- **Use namespaces or tags** if you manage several Framer projects in one SimpleLocalize project.
## Limitations
- There is no automatic, background synchronization between Framer and SimpleLocalize.
Framer exposes localization data only to plugins running inside the editor, so the export and import steps
are always triggered by a person with access to the Framer project.
- Source texts must be edited in Framer. Changing a source string in SimpleLocalize does not change the site content.
- Site structure, slugs, and locale settings are managed in Framer, not in SimpleLocalize.
- Content that Framer does not expose in the Localization view cannot be exported, and therefore cannot be translated this way.
## Related
- [XLIFF 1.2 file format](/docs/file-formats/xliff-1.2/)
- [XLIFF 2.0 file format](/docs/file-formats/xliff-2/)
- [Webflow integration](/docs/integrations/webflow/)
- [Command-line tool](/docs/cli/get-started/)
---
# Extensions: VS Code Extension
Source: https://simplelocalize.io/docs/integrations/vscode/
In this article, you will learn how to configure [**Visual Studio Code extension for SimpleLocalize**](https://marketplace.visualstudio.com/items?itemName=simplelocalize.simplelocalize) to manage translations directly from your code editor.
---
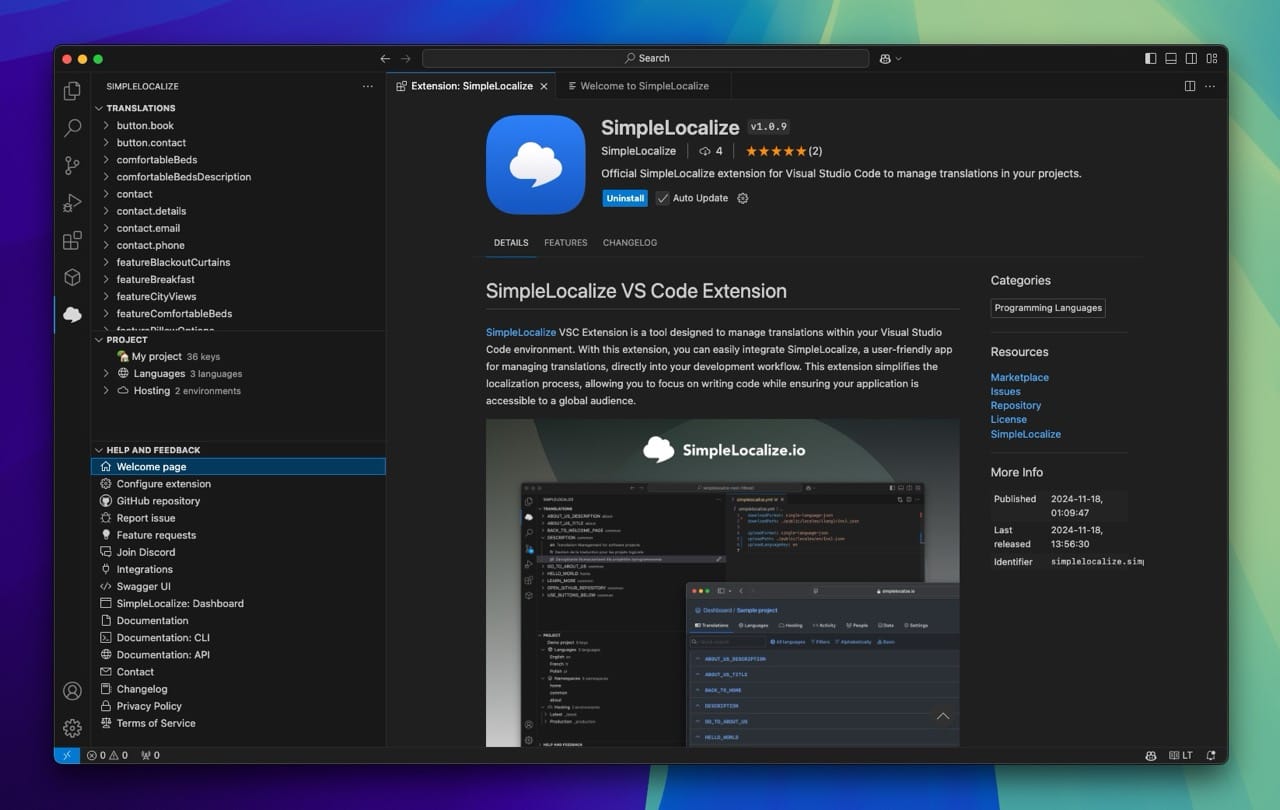
## Features
The extensions add a set of commands to the Visual Studio command palette to help you manage translations and keys. Optionally,
it can also be used with the SimpleLocalize CLI to synchronize translations between your project and SimpleLocalize, run auto-translation, and more.
[Watch videos](https://github.com/simplelocalize/vscode-simplelocalize) to learn more about all the features.
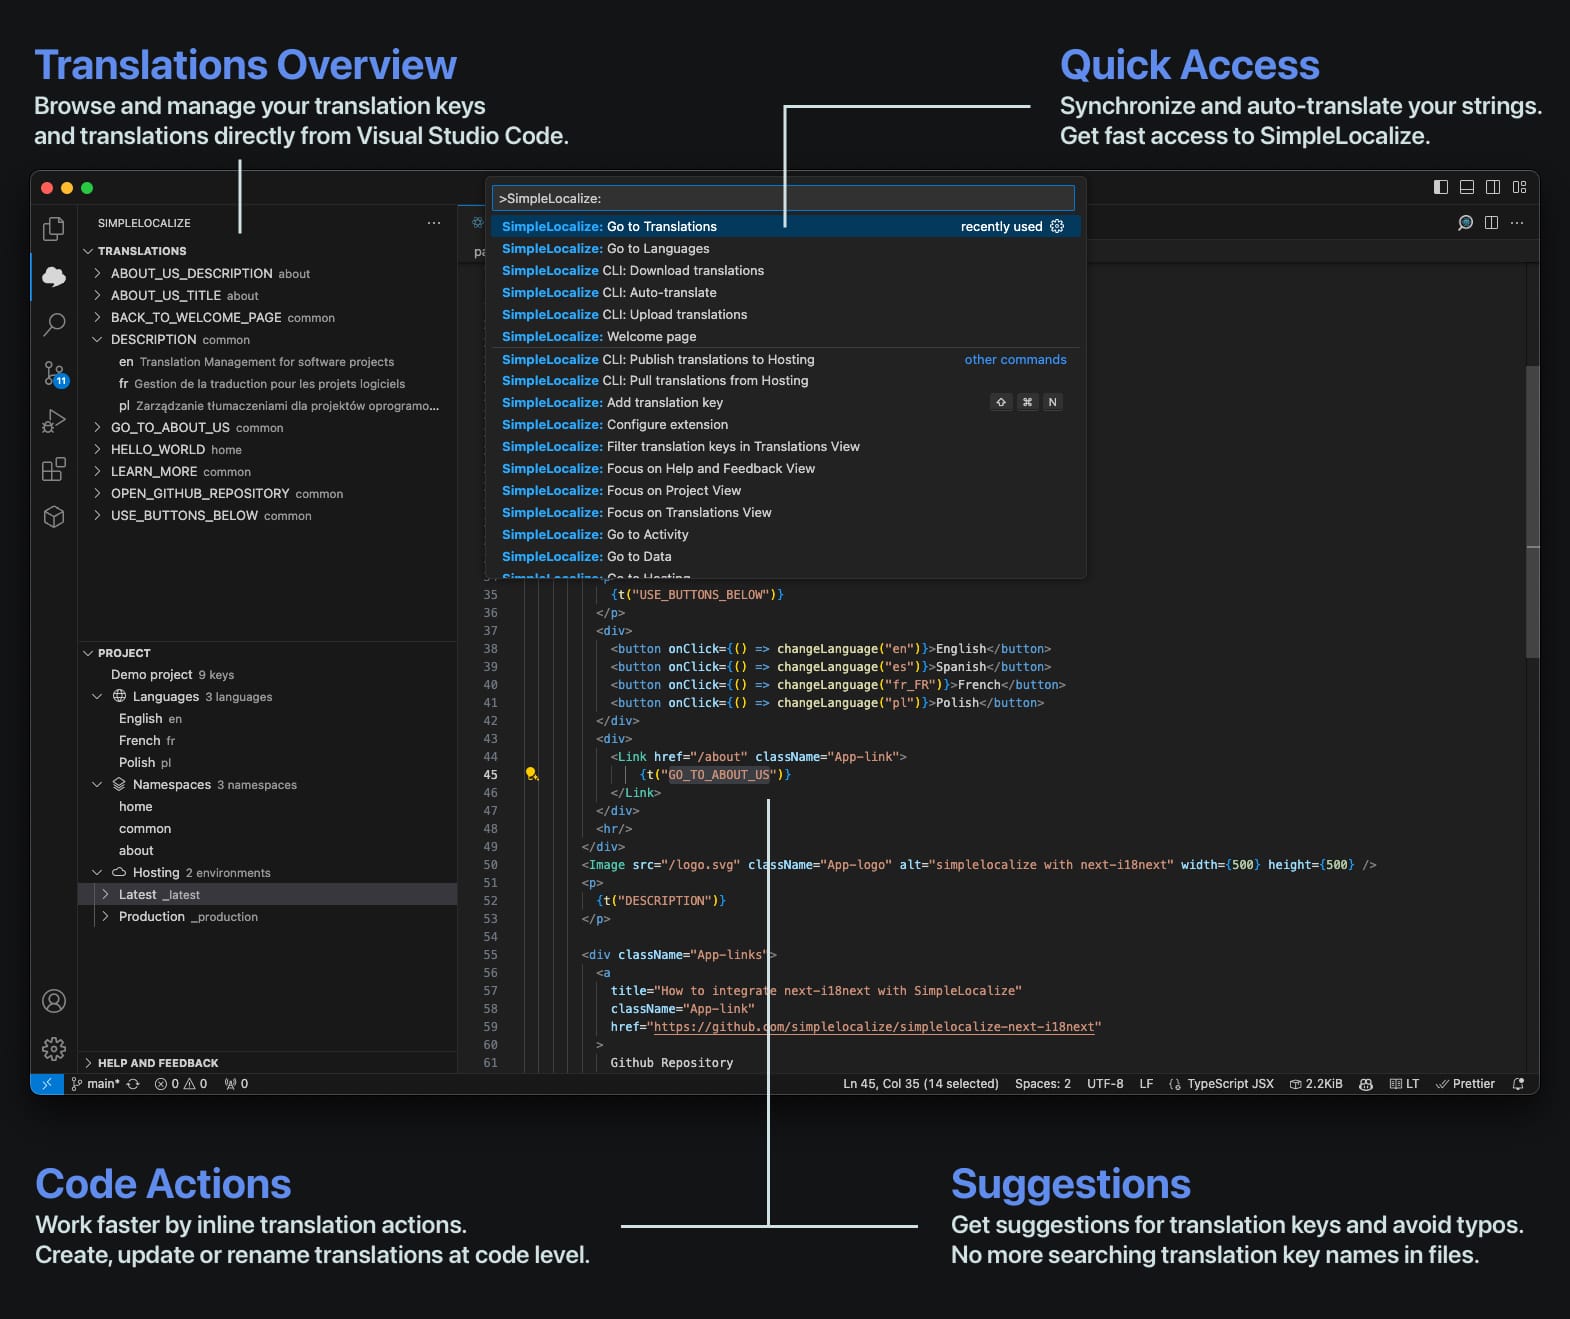
## Installation
1. Open Visual Studio Code.
2. Go to the Extensions view by clicking on the square icon in the sidebar on the left or by pressing `Ctrl+Shift+X`.
3. Search for `SimpleLocalize` in the Extensions view search box.
4. Click "Install" next to the SimpleLocalize extension.

Optionally, you can install the extension [Visual Studio Code Marketplace](https://marketplace.visualstudio.com/items?itemName=simplelocalize.simplelocalize),
or by clicking here: [Install SimpleLocalize Extension](vscode:extension/simplelocalize.simplelocalize).
## Configuration
1. [Generate new personal token](https://simplelocalize.io/dashboard/security/) for your account,
2. Open the command palette by pressing `Ctrl+Shift+P`.
3. Search for `SimpleLocalize: Configure extension`.
4. Choose "Setup personal token" and paste your token.
5. Now, you can choose a project for your current workspace.
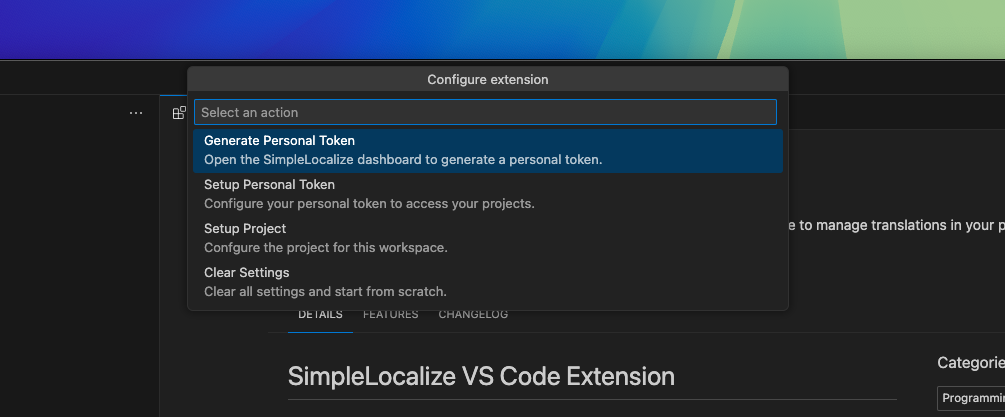
## CLI Integration
The extension can be used with the [SimpleLocalize CLI](https://github.com/simplelocalize/simplelocalize-cli) to synchronize translations between your project and SimpleLocalize, run auto-translation, and more.
To install the CLI, follow the instructions in the [CLI installation guide](/docs/cli/get-started/).
## Resources
- https://github.com/simplelocalize/vscode-simplelocalize
- https://marketplace.visualstudio.com/items?itemName=simplelocalize.simplelocalize
- https://simplelocalize.io/docs/cli/get-started/
---
# Extensions: IntelliJ IDEA plugin
Source: https://simplelocalize.io/docs/integrations/intellij/
In this article, you will learn how to configure [**IntelliJ IDEA plugin for SimpleLocalize**](https://plugins.jetbrains.com/plugin/27223-simplelocalize) to manage translations directly from the code editor.
---
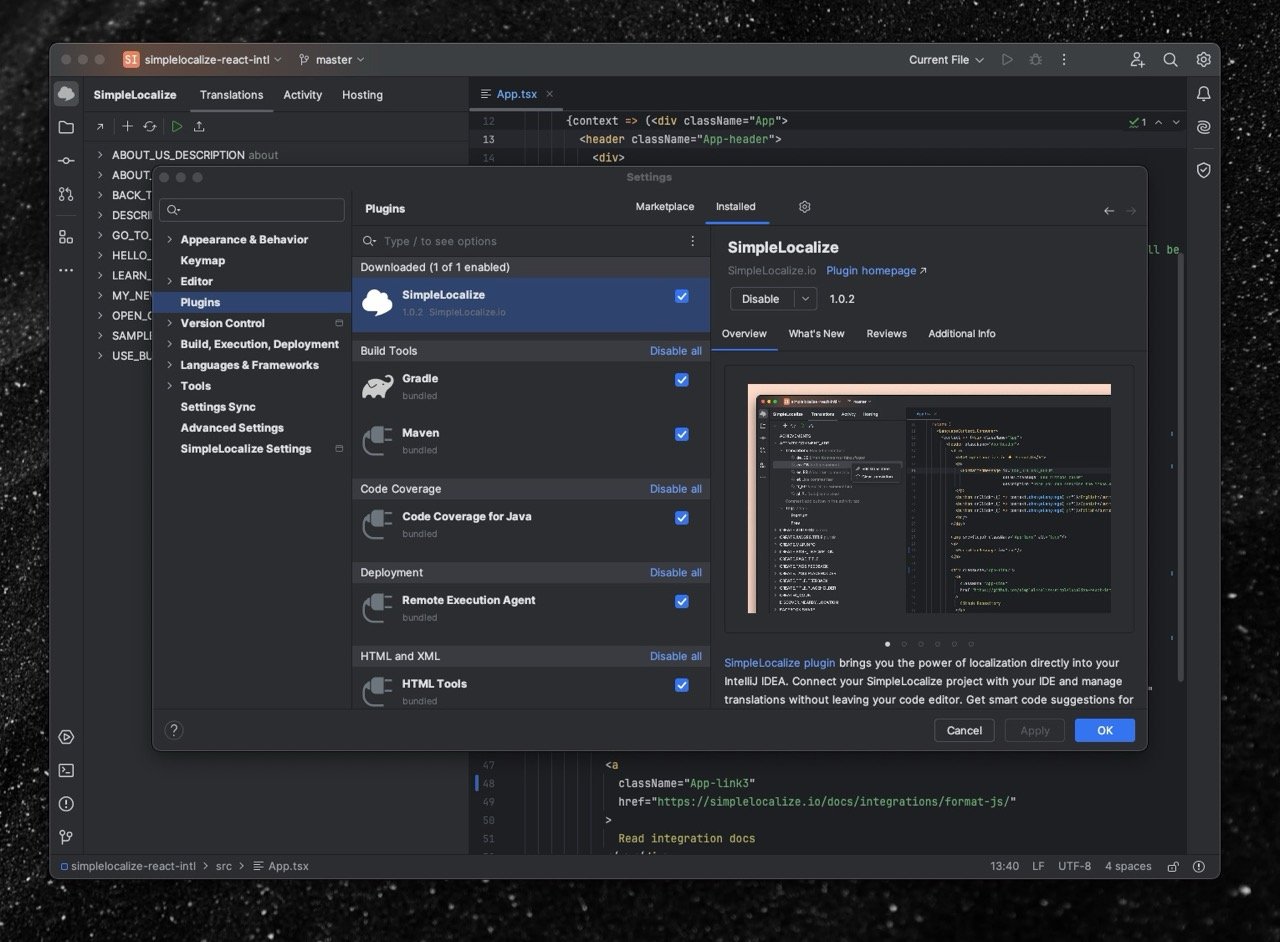
## Features
The plugin adds a set of commands to the IntelliJ IDEA actions palette to help you manage translations and keys.
[Watch videos](/integrations/intellij-plugin/) to learn more about all the features.
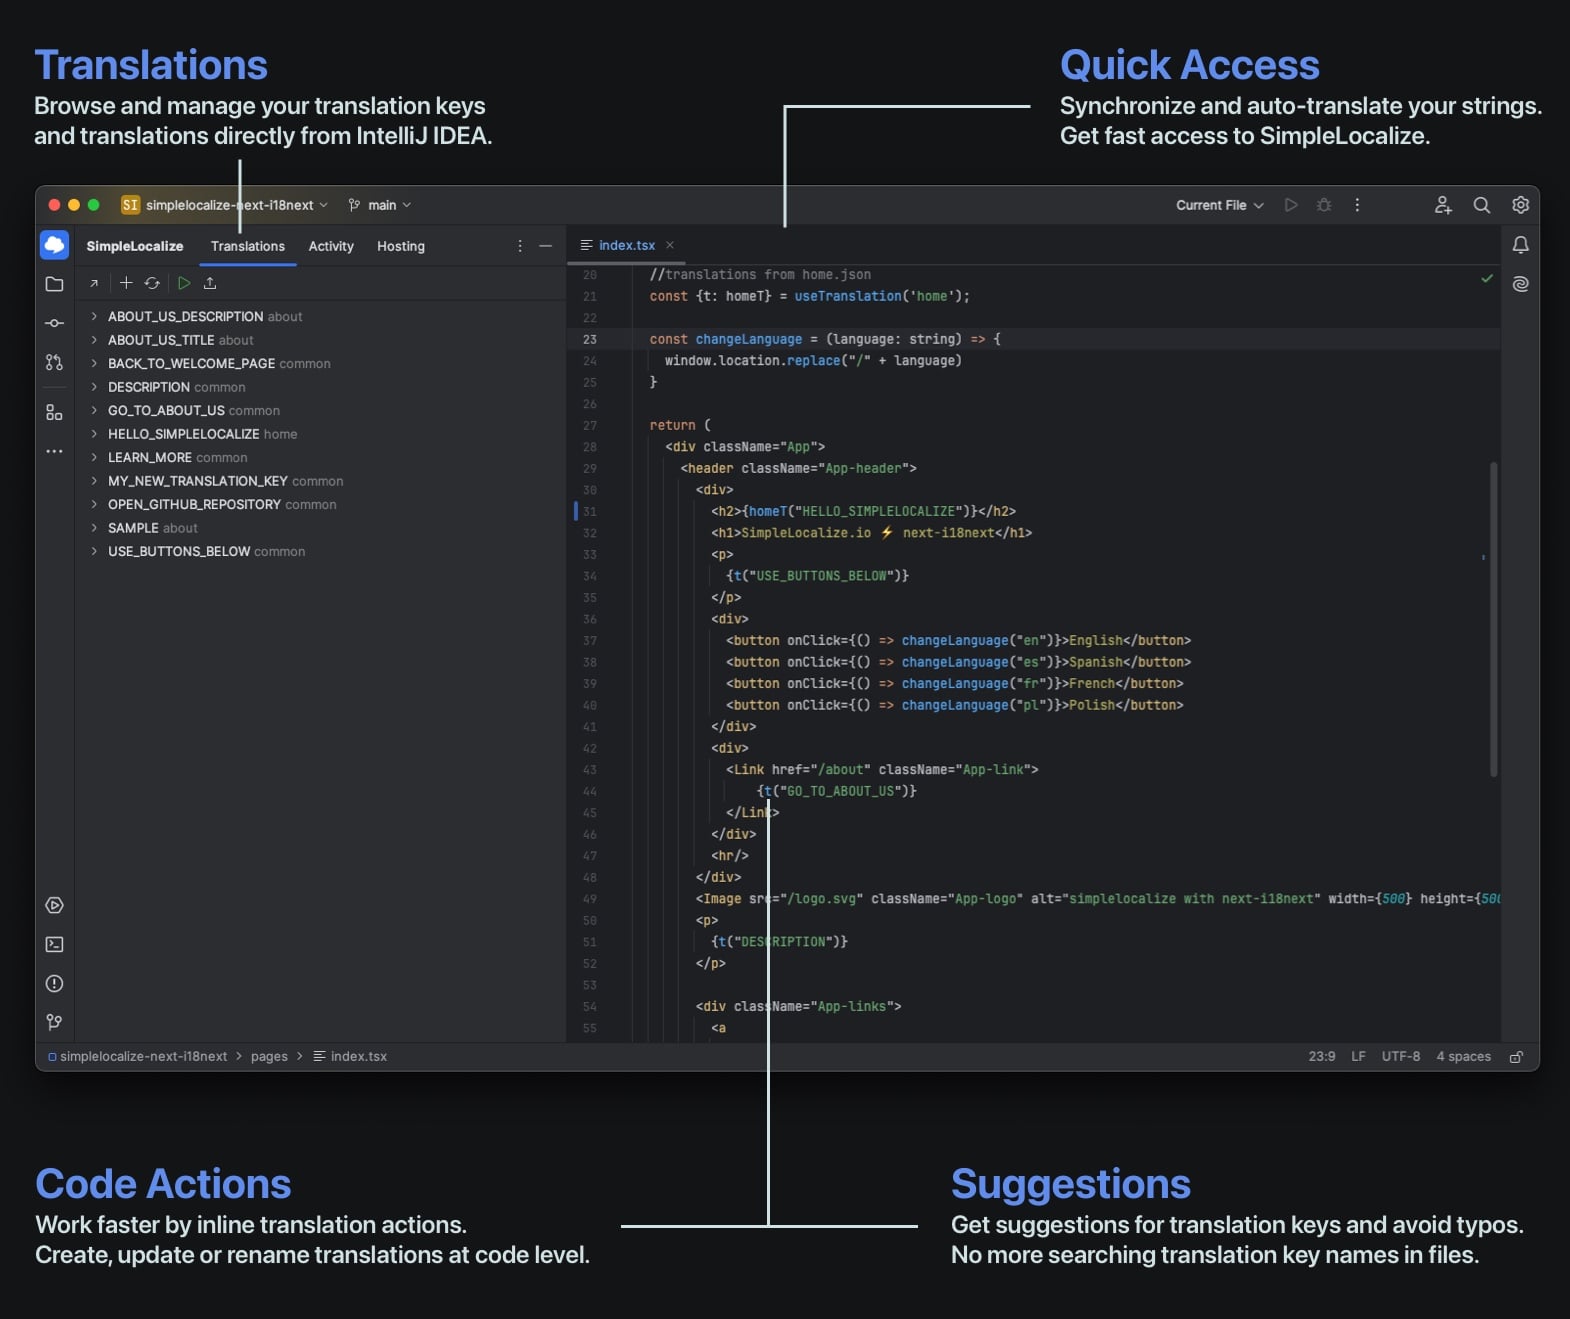
## Installation
1. Open IntelliJ IDEA Settings
2. Go to the 'Plugins' and choose 'Marketplace' tab
3. Search for `SimpleLocalize` in the search box.
4. Click "Install" next to the SimpleLocalize plugin.

Optionally, you can install the plugin from [Jetbrains Marketplace](https://plugins.jetbrains.com/plugin/27223-simplelocalize).
## Configuration
1. [Generate new personal token](https://simplelocalize.io/dashboard/security/) for your account,
2. Open IntelliJ IDEA settings and go to "SimpleLocalize settings" section
3. Paste your Personal Access Token, and choose the project
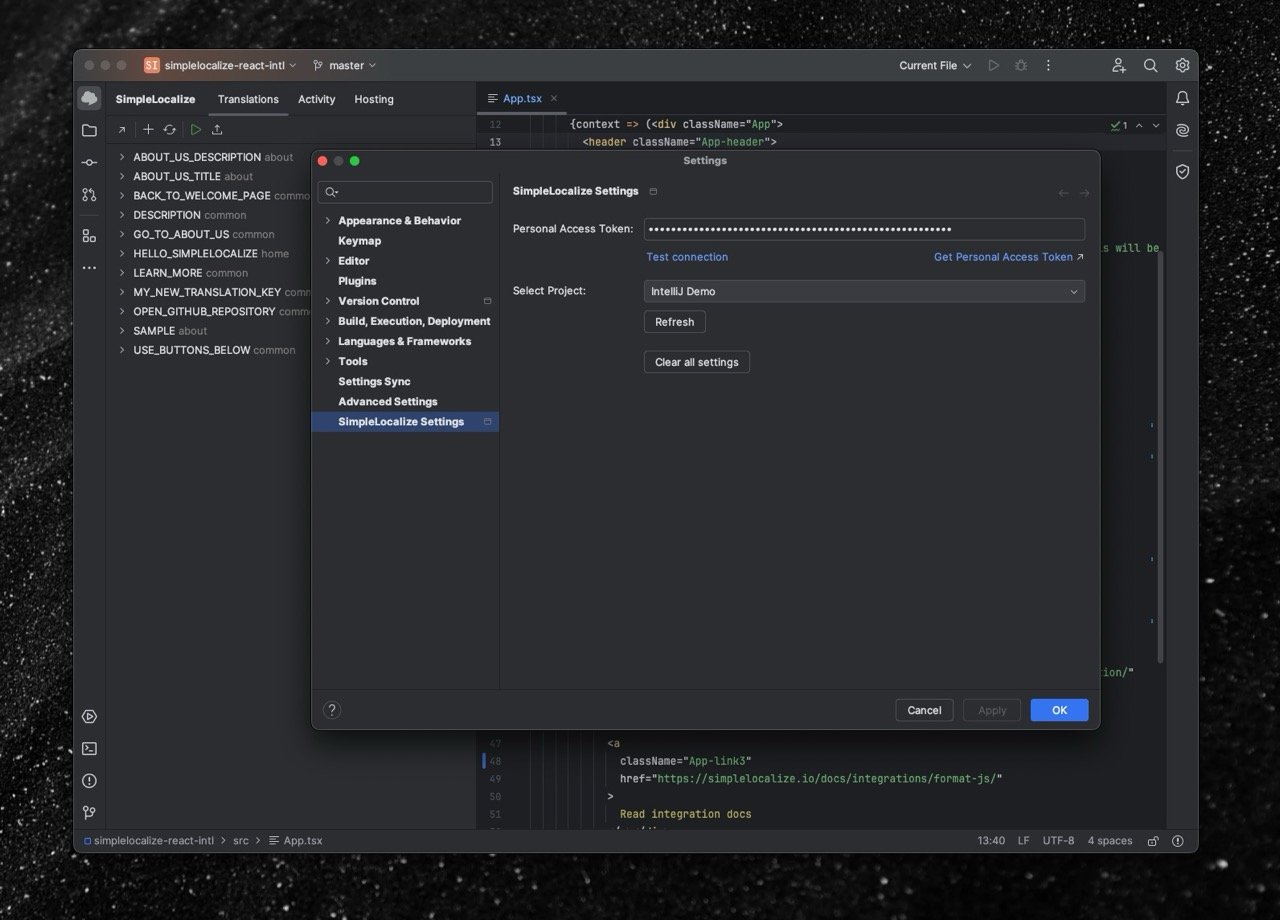
> Personal Access Token and configured project are NOT synchronized via `.idea` and they are stored only locally on your machine.
## Resources
- https://plugins.jetbrains.com/plugin/27223-simplelocalize
- https://www.youtube.com/watch?v=AFFUNodbNkY
- [https://simplelocalize.io/blog/posts/introducing-intellij-idea-plugin/](/blog/posts/introducing-intellij-idea-plugin/)
- [https://simplelocalize.io/intellij-plugin/](/intellij-plugin/)
---
# Extensions: Chrome Extension
Source: https://simplelocalize.io/docs/integrations/chrome-extension/
The SimpleLocalize Chrome extension highlights the translations on your website and opens them in Chrome's side panel,
so you can edit, review, and comment on them in context.
---

## Get started
1. Install the extension, click its icon in the Chrome toolbar (if you don't see it, pin it from the puzzle piece
menu), and sign in with a [personal access token](/dashboard/security/).
2. Open your website and click **Enable on your website**.
3. The popup shows the element your page needs, for the project and language you pick. Add it to your website,
e.g. on staging, with the language the page currently shows:
```html
```
4. Reload the page and click **Show translations**.
5. For the best results, [add translation key attributes](#mark-translatable-elements) to your elements.
## Mark translatable elements
**Key attributes are the foundation of the extension.** With `data-translation-key` on your elements, every translation is found exactly, including repeated texts, plurals, and translations you've just changed, and highlighting, review, and screenshots work best. It's worth setting them up once in your i18n library.
The extension finds translations on the page in two ways:
- **By the `data-translation-key` attribute**. This is the most
reliable option:
```html
Willkommen
```
- **By text.** Without the attributes, the extension matches the texts on the page with the translations in the
page's language. This works without any changes in your app, but a text used by several keys can't be told apart,
plurals aren't matched.
> If you use [namespaces](/docs/general/namespaces/), the extension finds the namespace of a key by itself. Add
> `data-translation-namespace` only for keys that exist in more than one namespace; without it, you pick the right
> one in the side panel.
### Add the attributes in your i18n library
You usually don't add the attributes by hand: let the code that renders your translations add them.
**Libraries that render translations with a component or directive** (e.g., a `` component, or your own
wrapper) can set the attribute on the element they render:
```tsx
function Message({ id }: { id: string }) {
const { t } = useTranslation();
return {t(id)};
}
```
**Libraries that return plain strings** (e.g., react-intl `formatMessage`, or translations used in `alt`, `title`
and `placeholder`) can't pass an attribute along with the text. Instead, each translated string can carry an
invisible marker with its key, and a small script turns the markers into `data-translation-key` on the elements
that show them. See the [example for react-intl](https://github.com/simplelocalize/chrome-extension-for-react-intl),
which turns this on only for translators, with `?i18n-keys=1` in the URL.
Every library is different, so treat these as starting points. An AI coding assistant can adapt them to your setup:
point it to this page and the example above. Consider enabling the attributes only on staging or for translators.
### Use other attribute names
If your app already uses other attribute names, set them on the element from [Get started](#get-started):
```html
```
## Work with translations
Translations on the page are outlined: green when accepted, blue when they need review, orange when not translated,
and red when the key doesn't exist. Hover a text and click its label to open it in the side panel, where you can:
- see the text in the project's default language, as the source to translate from,
- edit and accept the translation (**Accept & next** goes to the next one waiting for review),
- accept all translations on the page with the **Needs review** filter and **Accept all**,
- edit the key's description and add comments,
- open the key in the Translation Editor.
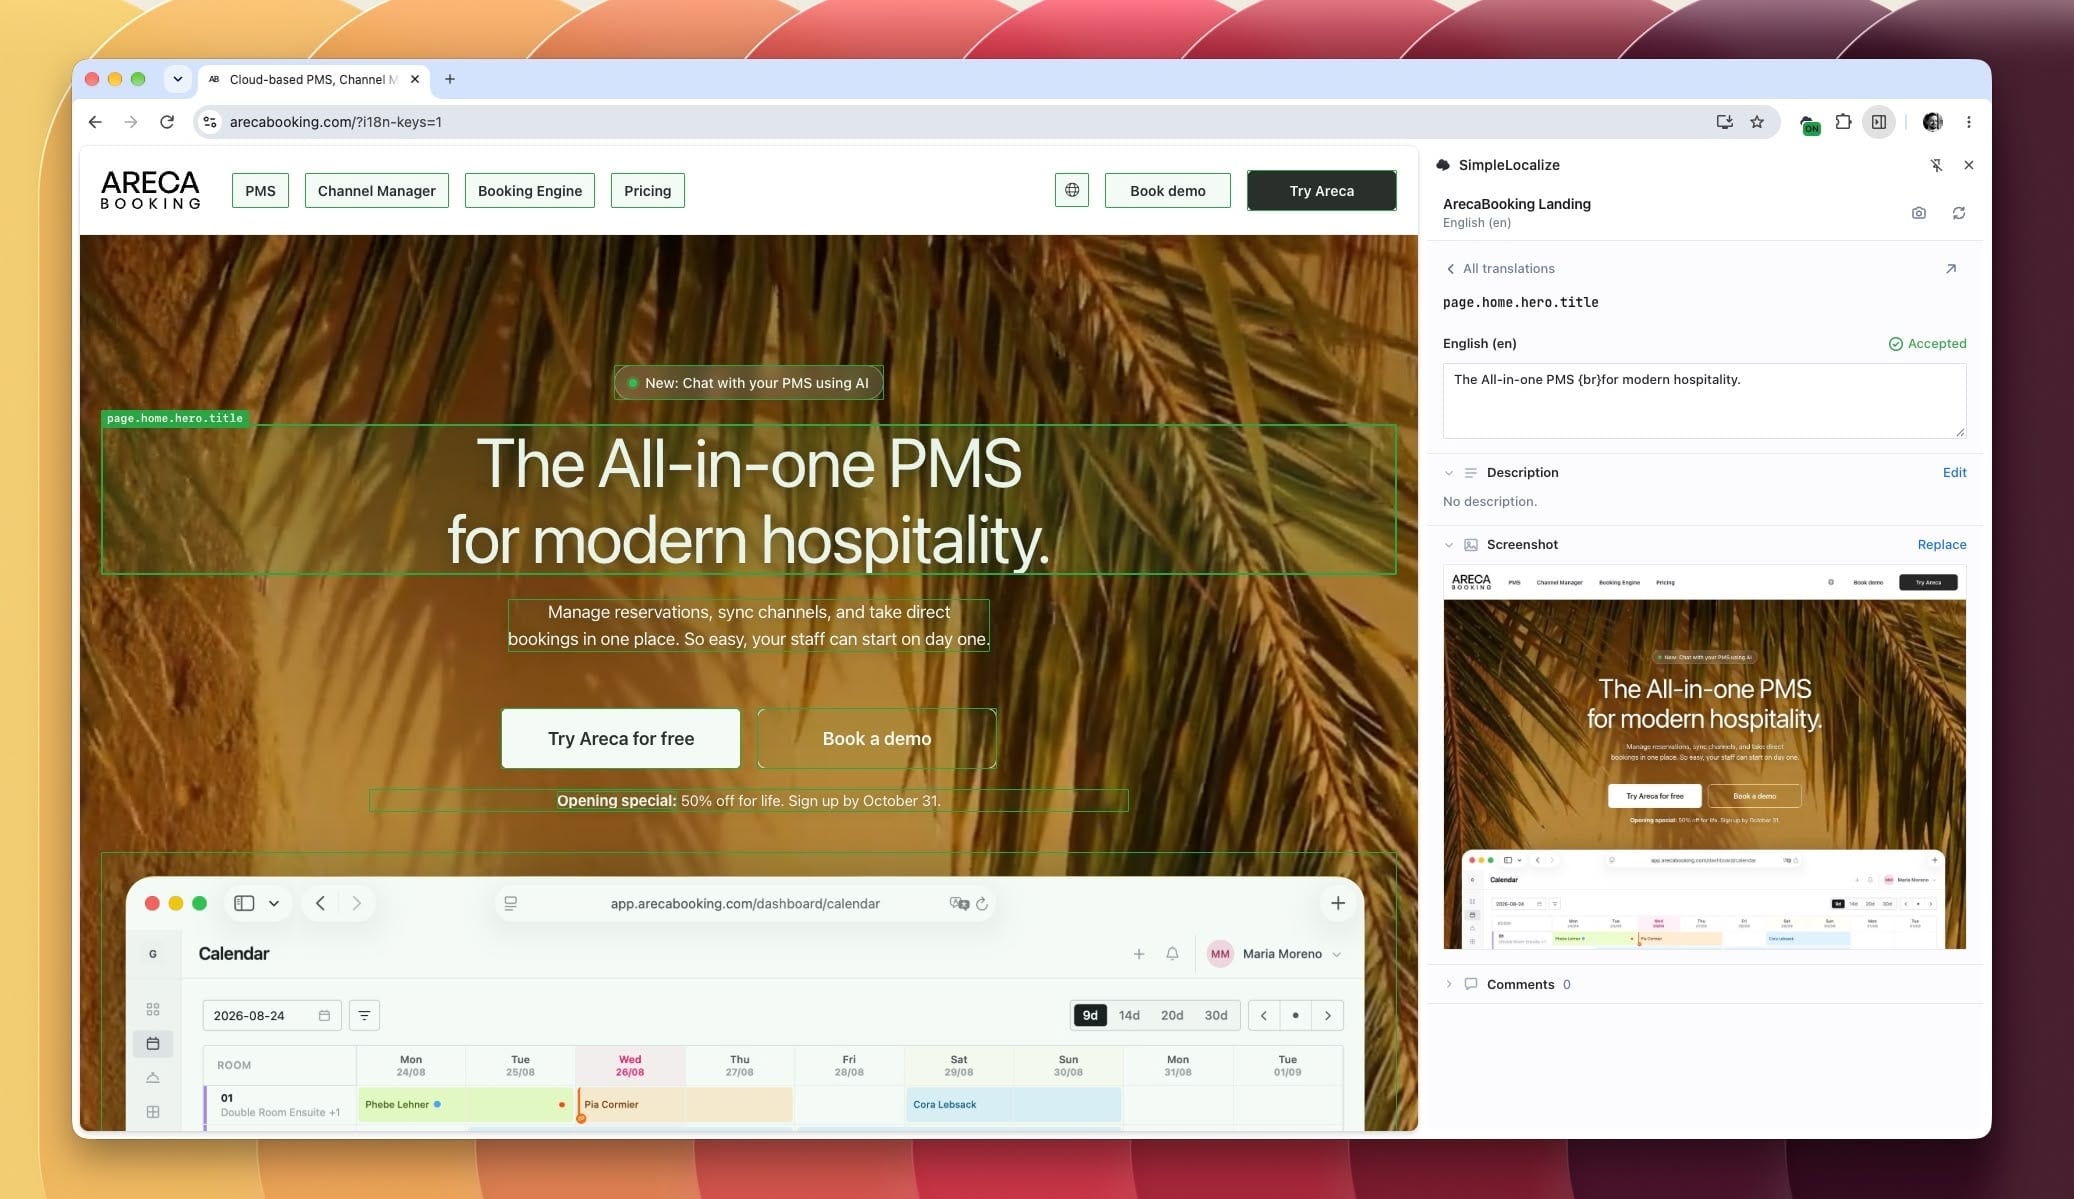
All actions follow your [permissions](/docs/general/project-sharing/) in the project.
> Your page shows a changed translation after you [publish it](/docs/general/translation-hosting/) or deploy your app.
> Until then, texts matched without key attributes are marked **Changed, not live yet**.
## Capture screenshots
Click the camera button in the side panel, or press Ctrl + Shift + S. Select the
translation keys in view and click **Attach**. The screenshot replaces the previous one of each key.
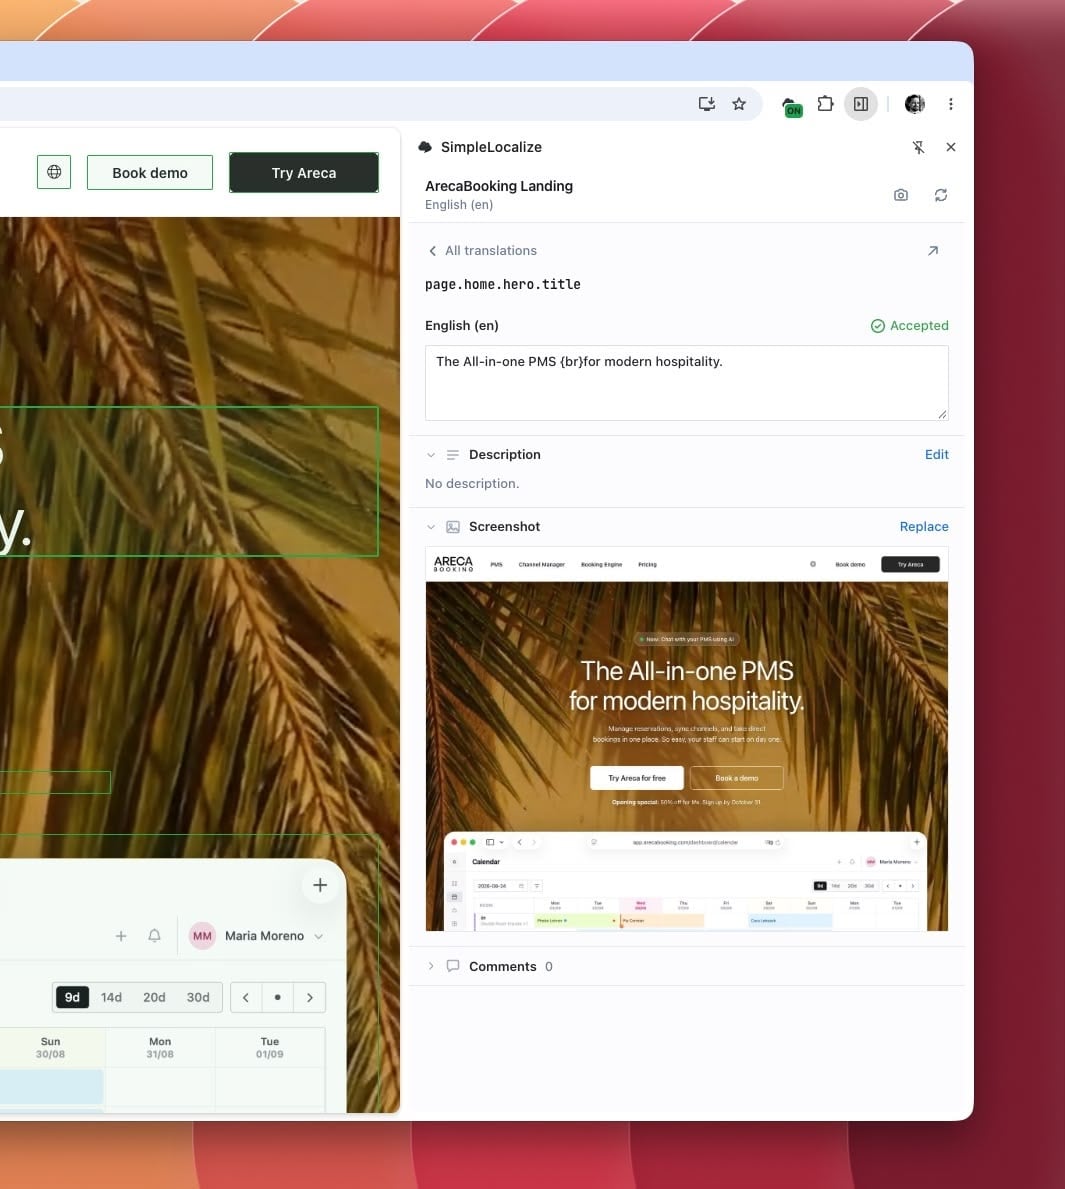
## Migrate from the In-Context Editor
The extension replaces the [In-Context Editor](/docs/integrations/in-context-editor/) script. Remove its `
```
After adding those lines, the In-Context Editor will be automatically initialized on your application and you will be able to see a small icon in the bottom right corner of your application with the SimpleLocalize logo.
## Configuration
In-Context Editor highlights the text that can be translated in your application, and the identification of the translatable text is done by the `data-translation-key` attribute on the HTML elements,
for example:
```html
Welcome to our application!
```
it also works with namespaces:
```html
Welcome to our application!
```
If you're already using other attributes to identify translatable text, you can configure the In-Context Editor to use those attributes instead of `data-translation-key` and `data-translation-namespace`,
by adding the following configuration to your `window.simplelocalize` object:
```javascript
window.simplelocalize = {
projectToken: "your-project-token",
dataAttributeKey: "data-i18n-key",
dataAttributeNamespace: "data-i18n-namespace"
};
```
### Line breaks
When you press Enter while editing text inline, the In-Context Editor needs to know how your app represents a
line break in translation content, you can configure it with `linebreakFormat` property:
```javascript
window.simplelocalize = {
projectToken: "your-project-token",
linebreakFormat: "newline" // "space" (default) | "newline" | "br"
};
```
- `space` - line breaks are collapsed into a single space when the translation is saved. Use this if
your app doesn't support multi-line translations.
- `newline` - saved as a literal `\n` character.
- `br` - saved as ` `.
If your setup uses something different, you can use `linebreakToken` property use custom string instead:
```javascript
window.simplelocalize = {
projectToken: "your-project-token",
linebreakToken: "\\n"
};
```
Whichever format you use, the In-Context Editor converts it back into real line breaks when previewing an
existing translation, so multi-line text correctly instead of showing the raw token on one line.
## Usage
Once the In-Context Editor is installed, click the SimpleLocalize logo in the bottom right corner of your
application to open the widget panel. The widget never interrupts your page on its own — nothing is requested
until you interact with it.
If your project accepts anonymous suggestions, you can start right away: pick a language and turn on
**Live Editing**. Otherwise, click **Log in** and provide a
[personal access token](/dashboard/security/) to unlock full editing.
Once a language is picked, **Live Editing** lets you click any translatable element to edit it inline,
**Highlight found keys** outlines every detected element with a small label showing its key — elements whose
key doesn't exist in SimpleLocalize yet are outlined and labeled automatically, regardless of that toggle — and
**Highlight needs review translations** outlines, in yellow, every element whose translation hasn't been
reviewed yet.
Clicking a translatable element opens a small popover with actions for that text. If you're logged in as a
project contributor, it shows **Go to translation** (jumps straight to it in the dashboard) before any edit,
plus **Accept translation** alongside it if that translation still needs review — or **Update translation** /
**Undo** once you've edited the text inline, with a **Suggest translation** button appearing alongside them if
your project has suggestions enabled. If the key doesn't exist yet, **Add translation** creates it on the spot,
prefilled with the page's own text as the source-language translation. If you're not logged in, editing an
element reveals a **Suggest translation** button; either way, it opens a small optional message field before
submitting the suggestion, so it's clear why you think the translation should change.
## Further improvements
We are continuously working to improve the In-Context Editor and its surrounding ecosystem by adding new features and automatic linking of translation keys, so you can open them directly from the SimpleLocalize editor.
Feel free to share your ideas on how we could make it even better.
- [Create a feature request](/feature-requests)
- [Email us: contact@simplelocalize.io](mailto:contact@simplelocalize.io)
- [Join our Discord community](https://discord.gg/wpm5PTCxxG)
---
# File formats: JSON - Project
Source: https://simplelocalize.io/docs/file-formats/project-json/
Project JSON carries everything about a translation key in one place: the key itself, its translations in **all
languages**, and its **metadata** (description, tags, character limit, lock state, attributes).
It combines what [multi-language-json](/docs/file-formats/multi-language-json/) and
[simplelocalize-json](/docs/file-formats/simplelocalize-json/) do separately:
| | Multi-Language JSON | SimpleLocalize JSON | **Project JSON** |
|----------------------------|---------------------|------------------------|-------------------------------|
| Many languages in one file | yes | no | **yes** |
| Metadata | no | yes | **yes** |
| Namespaces | not supported | `namespace:key` prefix | **`namespace` field** |
| Versioned format | no | no | **yes** |
> Project JSON is the best choice for backups, migrations between projects, and for uploading translations together with the context translators need.
### File format example
The smallest file you can write by hand:
```json
{
"version": 1,
"keys": [
{
"key": "signup.button",
"translations": {
"en": {
"text": "Sign up",
"reviewStatus": "REVIEWED"
},
"pl": "Zarejestruj się"
}
},
{
"key": "signup.email",
"namespace": "common",
"translations": {
"en": "Email",
"pl": "Adres e-mail"
}
}
]
}
```
The same file with everything SimpleLocalize can export:
```json
{
"version": 1,
"keys": [
{
"key": "signup.button",
"namespace": "web",
"description": "CTA on the signup page",
"tags": ["onboarding", "cta"],
"charactersLimit": 20,
"locked": false,
"attributes": { "path": "src/pages/signup.tsx" },
"translations": {
"en": { "text": "Sign up", "reviewStatus": "REVIEWED" },
"pl": "Zarejestruj się",
"de": ""
}
},
{
"key": "signup.title",
"namespace": "mobile",
"translations": {
"en": "Create your account",
"pl": "Załóż konto"
}
}
]
}
```
## File structure
### Header
| Field | Description |
|-----------|----------------------------------------------|
| `version` | Format version. Required, and it must be `1` |
| `keys` | The translation keys. Required. |
### Translation key entry
| Field | Description |
|-------------------|---------------------------------------------------------------------------|
| `key` | Translation key. Required. |
| `namespace` | Namespace of the key. When absent, the key has no namespace. |
| `description` | Description for translators. `""` or `null` removes it. |
| `tags` | Tags of the translation key. `[]` or `null` removes all of them. |
| `charactersLimit` | Character limit for translations, use `-1` or `null` to remove the limit. |
| `locked` | Locks translations of this key against modification. |
| `autoTranslation` | Set to `false` to disable auto-translation for this key. |
| `deprecated` | Exported for deprecated keys. Ignored on import. |
| `attributes` | Your own data attached to the key. Merged on import, never removed. |
| `translations` | Translations of the key, by language key. |
`description` always updates the [translator description](/docs/translation-editor/settings/#code-description),
also when uploading with the CLI. Other formats uploaded with the CLI write code descriptions by default and need
`--uploadOptions UPDATE_DESCRIPTIONS` to overwrite translator descriptions — Project JSON does not, because a file
you exported and upload back must land in the same field.
### Translations
A translation is either a plain string or an object when it carries more than the text:
```json
"translations": {
"en": "Sign up",
"pl": { "text": "Zarejestruj się", "reviewStatus": "REVIEWED" }
}
```
| Field | Description |
|----------------|-------------------------------|
| `text` | The translated message. |
| `reviewStatus` | `REVIEWED` or `NOT_REVIEWED`. |
## Missing and empty values
A field that is **not present in the file is never touched** by the import, so a file with a handful of keys is a
safe partial upload, it will not wipe the metadata of the keys it does not mention.
A field that **is present** is taken literally, including an empty value, so every metadata field can be
cleared by an import:
| Field | Removes the value in SimpleLocalize |
|-------------------|--------------------------------------|
| `description` | `""` or `null` |
| `tags` | `[]` or `null` |
| `charactersLimit` | `null` or `-1` |
| `locked` | `false` |
| `autoTranslation` | `true` (re-enables auto-translation) |
## Message interpolation
Pluralization and variable formatting is done by your translation library (e.g. [FormatJS](https://formatjs.github.io)),
exactly like in the other JSON formats.
```json
{
"version": 1,
"keys": [
{
"key": "home.welcome",
"translations": { "en": "Hello, {name}!" }
},
{
"key": "home.notifications",
"translations": { "en": "You have {itemCount, plural, =0 {no items} one {1 item} other {{itemCount} items}}." }
}
]
}
```
Learn more about [ICU message syntax](/blog/posts/what-is-icu/) or use our [ICU syntax playground](/tools/icu-message-syntax-tester/) to test your messages.
## Upload translation files
Project JSON is a multi-language format, so you do not pass a language key.
### Upload with the command-line tool
```shell
simplelocalize upload --apiKey \
--uploadFormat project-json \
--uploadPath ./translations.json
```
> Add the `--update` argument to update existing translations; otherwise, only new, missing translations will be added
Learn more about [uploading translations with CLI](/docs/cli/upload-translations/).
### Import with REST API
```shell
curl
--request POST \
--url 'https://api.simplelocalize.io/api/v2/import?uploadFormat=project-json' \
--header 'x-simplelocalize-token: ' \
--form file=@/path/to/your/file.json
```
Learn more about [importing translations with API](/docs/api/import-translations/).
## Download translation files
Metadata is always included in the exported file, so no `INCLUDE_*` export option is needed.
### Download with command-line tool
```shell
simplelocalize download --apiKey \
--downloadFormat project-json \
--downloadPath ./translations.json
```
Learn more about [downloading translations with CLI](/docs/cli/download-translations/).
### Export with REST API
```shell
curl
--request GET \
--url https://api.simplelocalize.io/api/v4/export?downloadFormat=project-json \
--header 'x-simplelocalize-token: '
```
Learn more about [exporting translations with API](/docs/api/export-translations/).
---
# File formats: JSON - Single Language
Source: https://simplelocalize.io/docs/file-formats/single-language-json/
The most basic and common JSON format for software app localization. It can be used in any kind of web projects, desktop
program or game. Simple JSON object contains translation key set by a developer during program implementation process,
and localized message for end user.
### File format example
```json
{
"home.interface.signup": "Signup",
"home.interface.email": "Email",
"home.interface.password": "Password"
}
```
You can also use [multi-language-json format](/docs/file-formats/multi-language-json/) to download all translations at
once.
SimpleLocalize also recognizes nested JSON keys, as shown below.
```json
{
"home": {
"interface": {
"signup": "Signup",
"email": "Email",
"password": "Password"
}
}
}
```
Above JSON will result with:
- `home.interface.signup`,
- `home.interface.email`,
- `home.interface.password`
translation keys in Translation Editor.
## Message interpolation
Pluralization and variables formatting is done by your translation library (e.g. [FormatJS](https://formatjs.github.io))
You can use a `{key}` argument for placing a value into the message.
The key is looked up in the input data, and the string is interpolated with its value.
### Formatting
```json
{
"home": {
"welcome": "Hello, {name}!"
}
}
```
Your variable: `name`.
### Pluralization
```json
{
"home": {
"message": "I have {numCats, number} cats.",
"notifications": "You have {itemCount, plural, =0 {no items} one {1 item} other {{itemCount} items}}."
}
}
```
Learn more about [ICU message syntax](/blog/posts/what-is-icu/) or use our [ICU syntax playground](/tools/icu-message-syntax-tester/) to test your messages.
## Upload translation files
### Upload with command-line tool
```properties
simplelocalize upload --apiKey \
--uploadFormat single-language-json \
--uploadLanguageKey en \
--uploadPath ./translations.json
```
Learn more about [uploading translations with CLI](/docs/cli/upload-translations/).
### Import with REST API
```shell
curl
--request POST \
--url 'https://api.simplelocalize.io/api/v2/import?uploadFormat=single-language-json&languageKey=en' \
--header 'x-simplelocalize-token: ' \
--form file=@/path/to/your/file.json
```
Learn more about [importing translations with API](/docs/api/import-translations/).
## Download translation files
### Download with command-line tool
```properties
simplelocalize download --apiKey \
--downloadFormat single-language-json \
--downloadPath ./translations_{lang}.json
```
To download translations with nested keys use option `WRITE_NESTED`. See [all download options](/docs/general/options/#export-options).
```properties
simplelocalize download --apiKey \
--downloadFormat single-language-json \
--downloadPath ./translations_{lang}.json \
--downloadOptions WRITE_NESTED
```
Learn more about [downloading translations with CLI](/docs/cli/download-translations/).
### Export with REST API
```shell
curl
--request GET \
--url https://api.simplelocalize.io/api/v4/export?downloadFormat=single-language-json \
--header 'x-simplelocalize-token: '
```
Learn more about [exporting translations with API](/docs/api/export-translations/).
---
# File formats: JSON - Multi Language
Source: https://simplelocalize.io/docs/file-formats/multi-language-json/
One of the most common JSON formats for apps and software localization is JSON file with all translations as shown below.
It's easy to use because you can fetch only one file and use all translations.
> Multi-language JSON is the best choice for offline apps, mobile apps, and web apps that need to load all translations at once.
### File format example
```json
{
"en": {
"home.interface.signup": "Signup",
"home.interface.email": "Email",
"home.interface.password": "Password"
},
"pl": {
"home.interface.signup": "Zarejestruj się",
"home.interface.email": "Adres email",
"home.interface.password": "Hasło"
}
}
```
You can also use [single-language-json format](/docs/file-formats/single-language-json/) to download only needed
translation messages for the requested language key.
SimpleLocalize also recognizes nested JSON keys, as shown below.
```json
{
"en": {
"home": {
"interface": {
"signup": "Signup",
"email": "Email address",
"password": "Password"
}
}
},
"pl": {
"home": {
"interface": {
"signup": "Zarejestruj się",
"email": "Adres email",
"password": "Hasło"
}
}
}
}
```
Above JSON will result with:
- `home.interface.signup`,
- `home.interface.email`,
- `home.interface.password`
translation keys in Translation Editor.
## Message interpolation
Pluralization and variables formatting is done by your translation library (e.g. [FormatJS](https://formatjs.github.io))
You can use a `{key}` argument for placing a value into the message.
The key is looked up in the input data, and the string is interpolated with its value.
### Formatting
```json
{
"en": {
"home": {
"welcome": "Hello, {name}!"
}
}
}
```
Your variable: `name`.
### Pluralization
```json
{
"en": {
"home": {
"message": "I have {numCats, number} cats.",
"notifications": "You have {itemCount, plural, =0 {no items} one {1 item} other {{itemCount} items}}."
}
}
}
```
Learn more about [ICU message syntax](/blog/posts/what-is-icu/) or use our [ICU syntax playground](/tools/icu-message-syntax-tester/) to test your messages.
## Upload translation files
### Upload with command-line tool
```shell
simplelocalize upload --apiKey \
--uploadFormat multi-language-json \
--uploadPath ./translations.json
```
Learn more about [uploading translations with CLI](/docs/cli/upload-translations/).
### Import with REST API
```shell
curl
--request POST \
--url 'https://api.simplelocalize.io/api/v2/import?uploadFormat=multi-language-json' \
--header 'x-simplelocalize-token: ' \
--form file=@/path/to/your/file.json
```
Learn more about [importing translations with API](/docs/api/import-translations/).
## Download translation files
### Download with command-line tool
```shell
simplelocalize download --apiKey \
--downloadFormat multi-language-json \
--downloadPath ./translations.json
```
To download translations with nested keys use option `WRITE_NESTED`. See [all download options](/docs/general/options/#export-options).
```shell
simplelocalize download --apiKey \
--downloadFormat multi-language-json \
--downloadPath ./translations.json \
--downloadOptions WRITE_NESTED
```
Learn more about [downloading translations with CLI](/docs/cli/download-translations/).
### Export with REST API
```shell
curl
--request GET \
--url https://api.simplelocalize.io/api/v4/export?downloadFormat=multi-language-json \
--header 'x-simplelocalize-token: '
```
Learn more about [exporting translations with API](/docs/api/export-translations/).
---
# File formats: JSON - SimpleLocalize
Source: https://simplelocalize.io/docs/file-formats/simplelocalize-json/
SimpleLocalize JSON is a universal format that can be used to import translations from different localization programs.
It works well with [FormatJS CLI](http://formatjs.github.io/) and can be used to import translations from different localization programs.
> If you are looking for a JSON format to upload metadata to SimpleLocalize, see [Project JSON](/docs/file-formats/project-json/).
Learn more about [integrating FormatJS with SimpleLocalize](/docs/integrations/format-js-cli/).
### File format example
Here is an example of a SimpleLocalize JSON file:
```json
{
"translation_key": {
"message": "my localized message"
},
"second_translation_key": {
"defaultMessage": "my localized message from FormatJS CLI output",
"description": "Your message to translators. It will also show up in the translation editor"
},
"translation_key_with_pluralization": {
"message": "You have {itemCount, plural, =0 {no items} one {1 item} other {{itemCount} items}}."
}
}
```
### Metadata
The SimpleLocalize JSON format supports the following metadata:
- `message` - localized message (optionally `defaultMessage` can be used instead)
- `description` - description of the translation key, skips empty descriptions
- `charactersLimit` - character limit for the translation key, use `-1` to remove limit
- `tags` - tags for the translation key, skips `[]`
- `lock` - lock translation modification for the given key, use `false` to unlock
Example SimpleLocalize JSON with metadata:
```json
{
"say_hi": {
"message": "Cześć!",
"description": "Welcome message",
"charactersLimit": 21,
"tags": ["my-tag-1", "my-tag-2"],
"lock": true
},
"say_goodbye": {
"message": "Do widzenia!",
"description": "Farewell message",
"charactersLimit": 37,
"tags": ["my-tag-1"],
"lock": false
}
}
```
### Namespaces
If a translation key belongs to a namespace, the exported file adds `key` and `namespace` fields to that entry,
and prefixes the top-level key with `namespace:` so it stays unique across namespaces (JSON object keys must be
unique). See example below:
```json
{
"my-namespace:say_hi": {
"key": "say_hi",
"namespace": "my-namespace",
"message": "Cześć!"
}
}
```
Use the `--downloadPath` [`{ns}` placeholder](/docs/cli/download-translations/) (or the `SPLIT_BY_NAMESPACES`
download option) to export a separate file per namespace instead.
### Export options
By default, SimpleLocalize JSON format does not export any additional metadata. Use export options to include metadata in the exported file. The following options are available:
- `INCLUDE_DESCRIPTIONS` - include translation key descriptions in the exported file
- `INCLUDE_TAGS` - include tags in the exported file
- `INCLUDE_LOCK_STATE` - include lock status in the exported file
- `INCLUDE_CHARACTERS_LIMIT` - include character limit in the exported file
- `ESCAPE_NEW_LINES` - replace native new lines in translations with `\n` characters
- `SPLIT_BY_NAMESPACES` - export a separate file per namespace
- `ENABLE_FALLBACKS` - use fallback language translation if a translation is missing in the selected language
- `EXCLUDE_DEPRECATED_KEYS` - skip deprecated keys in the exported file
See [all download options](/docs/general/options/#export-options).
### Import default messages
If you want to import messages into SimpleLocalize using CLI,
you need to pass a [language key](/docs/general/languages/#language-keys) as an argument. The language key is used to determine the language of the imported messages.
See an example CLI command below:
```bash
simplelocalize upload --apiKey \
--uploadFormat simplelocalize-json \
--uploadPath ./extracted.json \
--languageKey en
```
> Add `--update` argument to update the existing translations, otherwise, only new ones will be added.
### Import descriptions
By default, CLI imports descriptions as [Code Descriptions](/docs/translation-editor/settings/#code-description). Use `--uploadOptions UPDATE_DESCRIPTIONS` parameter to push values from 'description' fields as translator descriptions.
See an example CLI command below:
```bash
simplelocalize upload --apiKey \
--uploadFormat simplelocalize-json \
--uploadPath ./extracted.json \
--uploadOptions UPDATE_DESCRIPTIONS \
--languageKey en
```
> Code descriptions differ from the descriptions in the translation editor. They are used to provide additional context for translators from the code perspective, and they cannot be
edited or cleared in the translation editor. They are updated only by uploading new translations via CLI.
Learn more about [uploading translations with CLI](/docs/cli/upload-translations/).
## Resources
- [https://formatjs.github.io/docs/getting-started/message-extraction/](https://formatjs.github.io/docs/getting-started/message-extraction/)
---
# File formats: JSON - Browser Extension
Source: https://simplelocalize.io/docs/file-formats/browser-extension-json/
The browser extension JSON format is the standard localization format used by browser extensions for Chrome, Firefox, Edge and Safari.
Each extension stores translations in `messages.json` files within `_locales/{lang}/` directories.
For more information about the format and how to use it, see the official i18n API documentation of the respective browser:
- [Chrome Extensions](https://developer.chrome.com/docs/extensions/reference/api/i18n)
- [Firefox WebExtensions](https://developer.mozilla.org/en-US/docs/Mozilla/Add-ons/WebExtensions/Internationalization)
- [Safari Extensions](https://developer.apple.com/library/archive/documentation/Tools/Conceptual/SafariExtensionGuide/Internationalization/Internationalization.html)
## Format details
### File format example
```json
{
"appName": {
"message": "My Extension",
"description": "The name of the extension"
},
"appDescription": {
"message": "A useful browser extension.",
"description": "The description of the extension"
},
"buttonSave": {
"message": "Save"
}
}
```
Each top-level key is a **message name** (translation key). The value is an object with:
- `message` - the translated text (required)
- `description` - a note for translators (optional)
- `placeholders` - named placeholders used in the message (optional)
### Placeholders
You can use named placeholders in the `message` field. Placeholder names are wrapped with `$` signs.
```json
{
"greeting": {
"message": "Hello, $USER$! You have $COUNT$ new messages.",
"description": "Greets the user and shows the number of new messages",
"placeholders": {
"user": {
"content": "$1",
"example": "John"
},
"count": {
"content": "$2",
"example": "5"
}
}
}
}
```
### File structure
Browser extensions use the following directory structure for localization:
```text
my-extension/
├── manifest.json
├── _locales/
│ ├── en/
│ │ └── messages.json
│ ├── pl/
│ │ └── messages.json
│ ├── de/
│ │ └── messages.json
│ └── es/
│ └── messages.json
```
The `default_locale` field in `manifest.json` should point to the default language:
```json
{
"name": "__MSG_appName__",
"description": "__MSG_appDescription__",
"default_locale": "en"
}
```
## Upload translation files
Uploading English translations with descriptions to SimpleLocalize using CLI. Descriptions are read from the
file automatically whenever present, and no upload option is needed to include them:
```bash
simplelocalize upload --apiKey \
--uploadFormat browser-extension-json \
--uploadLanguageKey en \
--uploadPath ./_locales/en/messages.json
```
By default, a description uploaded from the CLI is saved as the [**code description**](/docs/general/descriptions/).
It won't overwrite a description a translator has written manually in the Translation Editor. If you'd rather
have the upload write straight into the translator-facing description instead, add the `UPDATE_DESCRIPTIONS`
upload option:
```bash
simplelocalize upload --apiKey \
--uploadFormat browser-extension-json \
--uploadLanguageKey en \
--uploadPath ./_locales/en/messages.json \
--uploadOptions UPDATE_DESCRIPTIONS
```
Learn more about [uploading translations with CLI](/docs/cli/upload-translations/) and about
[code vs. translator descriptions](/docs/general/descriptions/).
## Download translation files
Downloading Polish, German and Spanish translations from SimpleLocalize using CLI:
```bash
simplelocalize download --apiKey \
--downloadFormat browser-extension-json \
--downloadLanguageKey pl,de,es \
--downloadPath ./_locales/{lang}/messages.json
```
Optionally, you can include descriptions in the downloaded files with the `INCLUDE_DESCRIPTIONS` option:
```bash
simplelocalize download --apiKey \
--downloadFormat browser-extension-json \
--downloadLanguageKey pl,de,es \
--downloadPath ./_locales/{lang}/messages.json \
--downloadOptions INCLUDE_DESCRIPTIONS
```
By default `INCLUDE_DESCRIPTIONS` exports the **translator description**. If you want to export the
**code description** instead, to get back exactly what was uploaded from your codebase, without depending
on whether a translator has since added their own note — combine it with `USE_CODE_DESCRIPTIONS`:
```bash
simplelocalize download --apiKey \
--downloadFormat browser-extension-json \
--downloadPath ./en/messages.json \
--downloadLanguageKey en \
--downloadOptions INCLUDE_DESCRIPTIONS,USE_CODE_DESCRIPTIONS
```
Descriptions are stored per translation key, not per language, so the same description is exported regardless of
which language you download.
Learn more about [downloading translations with CLI](/docs/cli/download-translations/) and about
[code vs. translator descriptions](/docs/general/descriptions/).
---
# File formats: Excel - translations
Source: https://simplelocalize.io/docs/file-formats/excel/
The most popular office program can now be a tool for translation management. Localize your application with Microsoft Excel or any other spreadsheet tool.
Translations and translation keys can be exported using a Web client, API or CLI to the Excel spreadsheet. You can share the file with others and import it later to update the translations. Use Excel as a localization tool!
### File format example
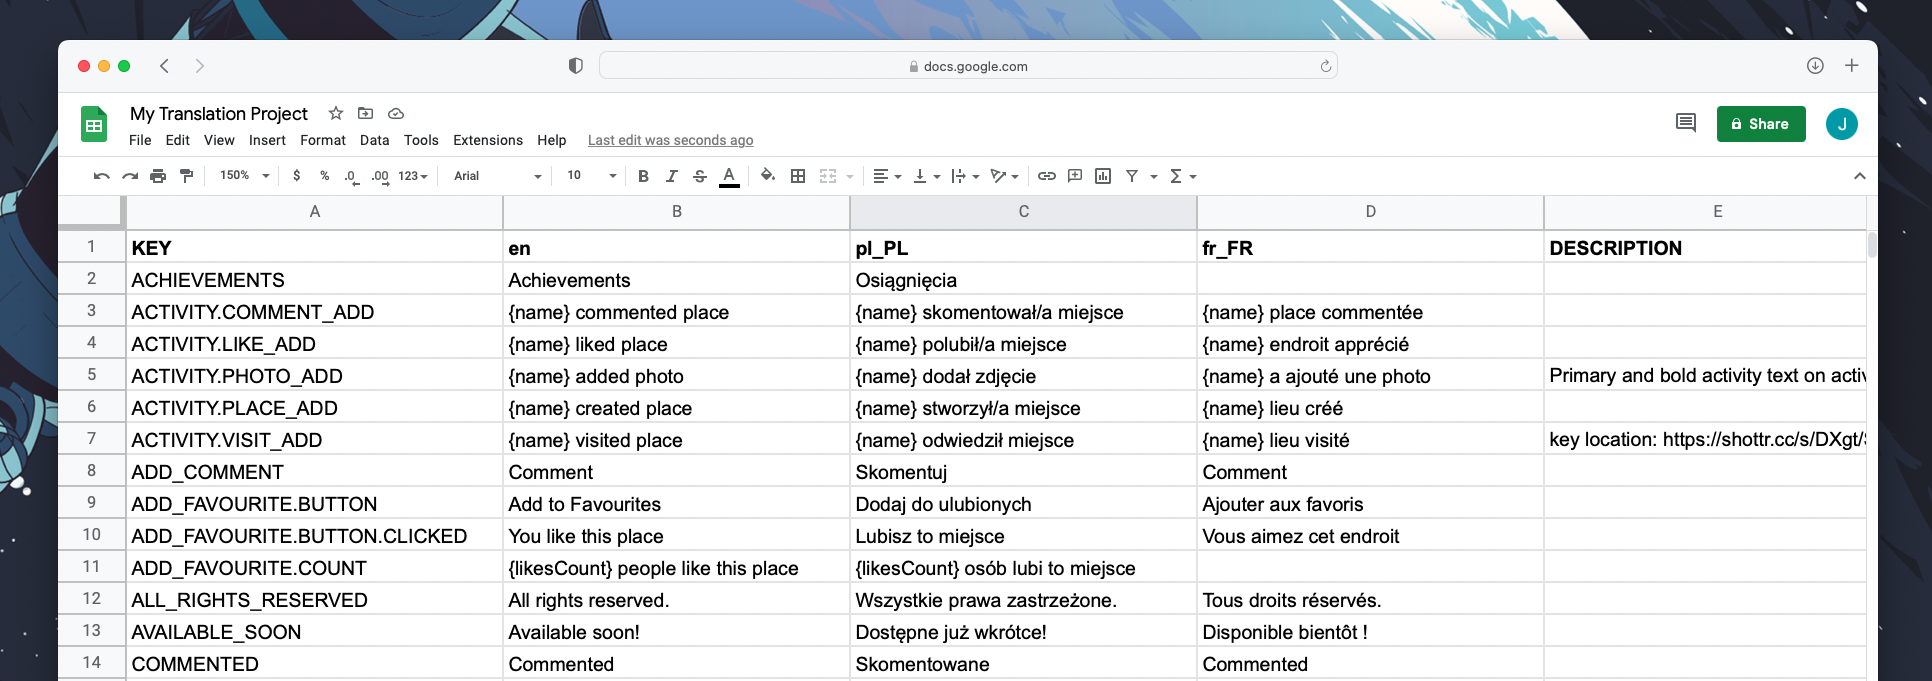
[Download Excel example file](/docs/simplelocalize-example.xlsx)
[Download Excel template file](/docs/simplelocalize-template.xlsx)
> Please note that all columns are case-sensitive.
### Description column
Use `DESCRIPTION` column for providing a description for translation keys. Descriptions uploaded via CLI are set as "Code Descriptions" by default.
If you want to update translator descriptions, you have to add `--uploadOptions UPDATE_DESCRIPTIONS` to your CLI command.
Empty cells in the `DESCRIPTION` column will be ignored, and the description will not be updated.
### Namespace column
Use `NAMESPACE` column for providing translation key namespaces. The `NAMESPACE` column is exported only if at least one translation key has a namespace.
### Tags column
Use `TAGS` column for providing tags for translation keys. A comma must separate tags, e.g. `tag1,tag2,tag3`.
Tag names must be longer than 2 characters and shorter than 16 characters. Up to 10 tags can be added to a single translation key.
Empty cells in the `TAGS` column will delete all tags from the translation key.
### Characters limit
Use `CHARACTERS_LIMIT` column for providing a soft [translation character limit](/blog/posts/introducing-character-limit/) for translation keys.
Empty cells in the `CHARACTERS_LIMIT` column will delete the character limit from the translation key.
## Upload with CLI
```properties
simplelocalize upload --apiKey \
--uploadFormat excel \
--uploadPath ./my-excel-file.xlsx
```
Learn more about [SimpleLocalize CLI and translations upload](/docs/cli/upload-translations/) feature.
## Download with CLI
```properties
simplelocalize download --apiKey \
--downloadFormat excel \
--downloadPath ./my-excel-file.xlsx
```
Learn more about [SimpleLocalize CLI and translations download](/docs/cli/download-translations/) feature.
## Import with API
```shell
curl
--request POST \
--url 'https://api.simplelocalize.io/api/v2/import?uploadFormat=excel' \
--header 'x-simplelocalize-token: ' \
--form file=@/path/to/your/my-excel-file.xlsx
```
Learn more about [importing translations with API](/docs/api/import-translations/)
## Export with API
```shell
curl
--request GET \
--url https://api.simplelocalize.io/api/v4/export?downloadFormat=excel \
--header 'x-simplelocalize-token: '
```
Learn more about [exporting translations with API](/docs/api/export-translations/)
---
# File formats: CSV - translations
Source: https://simplelocalize.io/docs/file-formats/csv-translations/
CSV Translations is the plain text file format that can be used to upload translations from your project. The csv file must start from a header, where the first column
is always a `key` column, next are language keys columns. Every value should be separated with a comma (`,`), other separators are not supported. Optionally, your values
can be wrapped with single (`'`) or double quotes (`"`).
> Use standard ASCII double quotes (") or single quotes (') to wrap text values in CSV files. Avoid using typographic quotes like “ ” or ‘ ’, as they may cause parsing issues.
### Description column
'CSV Translations' file format offers additional `description` column for providing a description for translation keys.
This column is optional, and descriptions uploaded via CLI are set as "Code Descriptions" by default.
If you want to update translator descriptions, you have to add `--uploadOptions UPDATE_DESCRIPTIONS` to your CLI command.
### Namespace column
'CSV Translations' file format offers additional `namespace` column for providing translation key namespaces.
### File format example
```css
"key","english","polish"
"welcome","Welcome!","Witajcie"
"about-us","About","O nas"
"register","Register","Rejestracja"
```
#### File format example with DESCRIPTION, and NAMESPACE
```css
"key","english","polish","description","namespace"
"welcome","Welcome!","Witajcie","","home"
"about-us","About","O nas","Description text",""
"register","Register","Rejestracja","Button text","common"
```
## Upload with CLI
```properties
simplelocalize upload --apiKey \
--uploadFormat csv-translations \
--uploadPath ./translations.csv
```
Learn more about [SimpleLocalize CLI and translations upload](/docs/cli/upload-translations/) feature.
## Download with CLI
```properties
simplelocalize download --apiKey \
--downloadFormat csv-translations \
--downloadPath ./translations.csv
```
Learn more about [SimpleLocalize CLI and translations download](/docs/cli/download-translations/) feature.
## Import with API
```shell
curl
--request POST \
--url 'https://api.simplelocalize.io/api/v2/import?uploadFormat=csv-translations' \
--header 'x-simplelocalize-token: ' \
--form file=@/path/to/your/file.csv
```
Learn more about [importing translations with API](/docs/api/import-translations/)
## Export with API
```shell
curl
--request GET \
--url https://api.simplelocalize.io/api/v4/export?downloadFormat=csv-translations \
--header 'x-simplelocalize-token: '
```
Learn more about [exporting translations with API](/docs/api/export-translations/)
---
# File formats: CSV - keys
Source: https://simplelocalize.io/docs/file-formats/csv/
> This format has been discontinued in favor of [CSV - translations](/docs/file-formats/csv-translations/). Deprecated format: `csv`, new format: `csv-translations`.
CSV is the simplest file format which can be used to upload **translation keys** from your project. Create a file with `.csv`
extension, and put there all translation keys which you can find in your project. Every translation key should be
separated with `;` or `,`.
### File format example
```css
email.user.hello; email.team;email.broken.button.instruction;email.user.created.subject
```
## Upload with CLI
```properties
simplelocalize upload --apiKey \
--uploadFormat csv \
--uploadPath ./my_keys.csv
```
Learn more about [SimpleLocalize CLI and translations upload](/docs/cli/upload-translations/) feature.
## Download with CLI
```properties
simplelocalize download --apiKey \
--downloadFormat csv \
--downloadPath ./translation-keys.csv
```
Learn more about [SimpleLocalize CLI and translations download](/docs/cli/download-translations/) feature.
## Import with API
```shell
curl
--request POST \
--url 'https://api.simplelocalize.io/api/v2/import?uploadFormat=csv' \
--header 'x-simplelocalize-token: ' \
--form file=@/path/to/your/file.csv
```
Learn more about [importing translations with API](/docs/api/import-translations/)
## Export with API
```shell
curl
--request GET \
--url https://api.simplelocalize.io/api/v4/export?downloadFormat=csv \
--header 'x-simplelocalize-token: '
```
Learn more about [exporting translations with API](/docs/api/export-translations/)
---
# File formats: TSV - translations
Source: https://simplelocalize.io/docs/file-formats/tsv/
TSV is the plain text file format that can be used to upload translations from your project. The TSV file, similarity to [CSV](/docs/file-formats/csv-translations/), must start from a header, where the first column
is always a `key` column, next are language keys columns. Every value should be separated with a tab (`\t`), other separators are not supported.
### Description column
TSV file format offers additional `description` column for providing a description for translation keys.
This column is optional, and descriptions uploaded via CLI are set as "Code Descriptions" by default.
If you want to update translator descriptions, you have to add `--uploadOptions UPDATE_DESCRIPTIONS` to your CLI command.
### Namespace column
TSV file format offers additional `namespace` column for providing translation key namespaces.
### File format example
```tsv
key english polish
welcome Welcome! Witajcie
about-us About O nas
hello_world Hello World Hejka
```
Columns are separated with tabs (`\t`), see also [CSV](/docs/file-formats/csv-translations/) file format.
#### File format example with DESCRIPTION, and NAMESPACE
```tsv
key english polish description namespace
welcome Welcome! Witajcie home
about-us About O nas Description text
register Register Rejestracja Button text common
```
Columns are separated with tabs (`\t`), see also [CSV](/docs/file-formats/csv-translations/) file format.
## Upload with CLI
```properties
simplelocalize upload --apiKey \
--uploadFormat tsv \
--uploadPath ./translations.tsv
```
Learn more about [SimpleLocalize CLI and translations upload](/docs/cli/upload-translations/) feature.
## Download with CLI
```properties
simplelocalize download --apiKey \
--downloadFormat tsv \
--downloadPath ./translations.tsv
```
Learn more about [SimpleLocalize CLI and translations download](/docs/cli/download-translations/) feature.
## Import with API
```shell
curl
--request POST \
--url 'https://api.simplelocalize.io/api/v2/import?uploadFormat=tsv' \
--header 'x-simplelocalize-token: ' \
--form file=@/path/to/your/file.tsv
```
Learn more about [importing translations with API](/docs/api/import-translations/)
## Export with API
```shell
curl
--request GET \
--url https://api.simplelocalize.io/api/v4/export?downloadFormat=tsv \
--header 'x-simplelocalize-token: '
```
Learn more about [exporting translations with API](/docs/api/export-translations/)
---
# File formats: Markdown
Source: https://simplelocalize.io/docs/file-formats/markdown/
**Markdown** is a plain text file format that allows you to export (or import) every translation key into a single file.
The Markdown file format in SimpleLocalize is a specialized format based on [translation as file (TAF)](/docs/file-formats/translation-as-file/) format.
The main difference between these two formats is that TAF one is more generic,
and it can be used with any file extension you like. While `markdown` is prepared to work with Markdown files only, that
has `.md` extension.
> This file format requires SimpleLocalize CLI version 2.8.0 or higher.
SimpleLocalize will automatically recognize and remove `.md` extension from the translation key when you upload the file.
When you download files, add the `.md` extension to the download path, because the translation key does not include it.
Learn how to set up a complete workflow in [Markdown translations](/docs/general/markdown-files/).
## Special placeholder
With the **Markdown** format, you have to use a special placeholder `{translationKey}` that will be replaced with the actual translation key value.
## Upload and download ZIP files via Web UI
You don't need the CLI to translate many Markdown files. Put them in a ZIP archive and upload it in the Web UI:
1. Choose **Markdown** as the file format and select the language of the files. All files in one ZIP must be in the same language.
2. Upload the ZIP file. Every `.md` file becomes one translation key, named after its path in the archive without the `.md` extension,
for example `docs/guide/intro.md` becomes the `docs/guide/intro` translation key. Other files, including `.mdx`, are skipped;
use [translation as file](/docs/file-formats/translation-as-file/) format for them.
3. Translate the content in the [translation editor](/docs/translation-editor/get-started/).
4. Export translations in the **Markdown** format. When more than one file is exported, you get a ZIP archive with one folder per language
and the same folder structure as the uploaded archive, for example `de/docs/guide/intro.md`.
A single ZIP archive can contain up to 200 files. Split larger sets of files into several archives.
## Upload with CLI
Example command to upload markdown blog posts:
```properties
simplelocalize upload --apiKey \
--uploadFormat markdown \
--uploadPath ./blog-posts/{lang}/{translationKey}
```
`{translationKey}` will be replaced with the actual translation key value,
and `{lang}` will be replaced with the actual language code.
Example command to upload plain text files:
```properties
simplelocalize upload --apiKey \
--uploadFormat markdown \
--uploadPath ./public/{translationKey}/{lang}
```
Learn more about [SimpleLocalize CLI and translations upload](/docs/cli/upload-translations/) feature.
## Download with CLI
Example command to download markdown blog posts:
```properties
simplelocalize download --apiKey \
--downloadFormat markdown \
--downloadPath ./blog-posts/{lang}/{translationKey}.md
```
Example command to download plain text files:
```properties
simplelocalize download --apiKey \
--downloadFormat markdown \
--downloadPath ./public/{translationKey}/{lang}
```
Learn more about [SimpleLocalize CLI and translations download](/docs/cli/download-translations/) feature.
---
# File formats: Translation as file
Source: https://simplelocalize.io/docs/file-formats/translation-as-file/
**Translation as file** is a plain text file format that allows you to export (or import) every translation key into a single file.
This file format is useful when you want to synchronize **markdown** blog posts, documentation, or any other content that is not stored in your codebase.
Learn how to set up a complete workflow in [Markdown translations](/docs/general/markdown-files/).
> This file format requires SimpleLocalize CLI version 2.8.0 or higher.
## Translation key
Unlike the [Markdown](/docs/file-formats/markdown/) format, translation as file works with any text file, for example `.mdx`, `.txt`, `.html`, or `.yml`,
and does not remove the file extension. The translation key is exactly the part of the file path matched by `{translationKey}` placeholder:
- `--uploadPath ./content/{translationKey}` uploads `content/snippets/footer.html` as the `snippets/footer.html` translation key,
- `--uploadPath ./content/{translationKey}.html` uploads the same file as the `snippets/footer` translation key.
Use the same pattern in the download path, so the files are saved with the same names.
## Special placeholder
With the **translation as file** format, you have to use a special placeholder `{translationKey}` that will be replaced with the actual translation key value.
## Upload and download ZIP files via Web UI
You don't need the CLI to translate many files. Put them in a ZIP archive and upload it in the Web UI:
1. Choose **Translation as file** as the file format and select the language of the files. All files in one ZIP must be in the same language.
2. Upload the ZIP file. Every file becomes one translation key, named after its full path in the archive including the extension,
for example `docs/guide/intro.mdx` becomes the `docs/guide/intro.mdx` translation key.
3. Translate the content in the [translation editor](/docs/translation-editor/get-started/).
4. Export translations in the **Translation as file** format. When more than one file is exported, you get a ZIP archive with one folder per language
and the same folder structure as the uploaded archive, for example `de/docs/guide/intro.mdx`.
A single ZIP archive can contain up to 200 files. Split larger sets of files into several archives.
## Upload with CLI
Example command to upload plain text files:
```properties
simplelocalize upload --apiKey \
--uploadFormat translation-as-file \
--uploadPath ./blog-posts/{lang}/{translationKey}.txt
```
`{translationKey}` will be replaced with the actual translation key value,
and `{lang}` will be replaced with the actual language code.
Example command to upload plain text files:
```properties
simplelocalize upload --apiKey \
--uploadFormat translation-as-file \
--uploadPath ./public/{translationKey}/{lang}.txt
```
Learn more about [SimpleLocalize CLI and translations upload](/docs/cli/upload-translations/) feature.
## Download with CLI
Example command to download plain text files:
```properties
simplelocalize download --apiKey \
--downloadFormat translation-as-file \
--downloadPath ./blog-posts/{lang}/{translationKey}.txt
```
Example command to download plain text files:
```properties
simplelocalize download --apiKey \
--downloadFormat translation-as-file \
--downloadPath ./public/{translationKey}/{lang}.txt
```
Learn more about [SimpleLocalize CLI and translations download](/docs/cli/download-translations/) feature.
---
# File formats: Java properties
Source: https://simplelocalize.io/docs/file-formats/java-properties/
One of the most common formats used for localization in all Java and JVM apps are property files as shown below. Every
file contains translations for a different language translation. It's a common case where those files have naming
convention like `messages_{language}.properties`. For example: `messages_pl-PL.properties`.
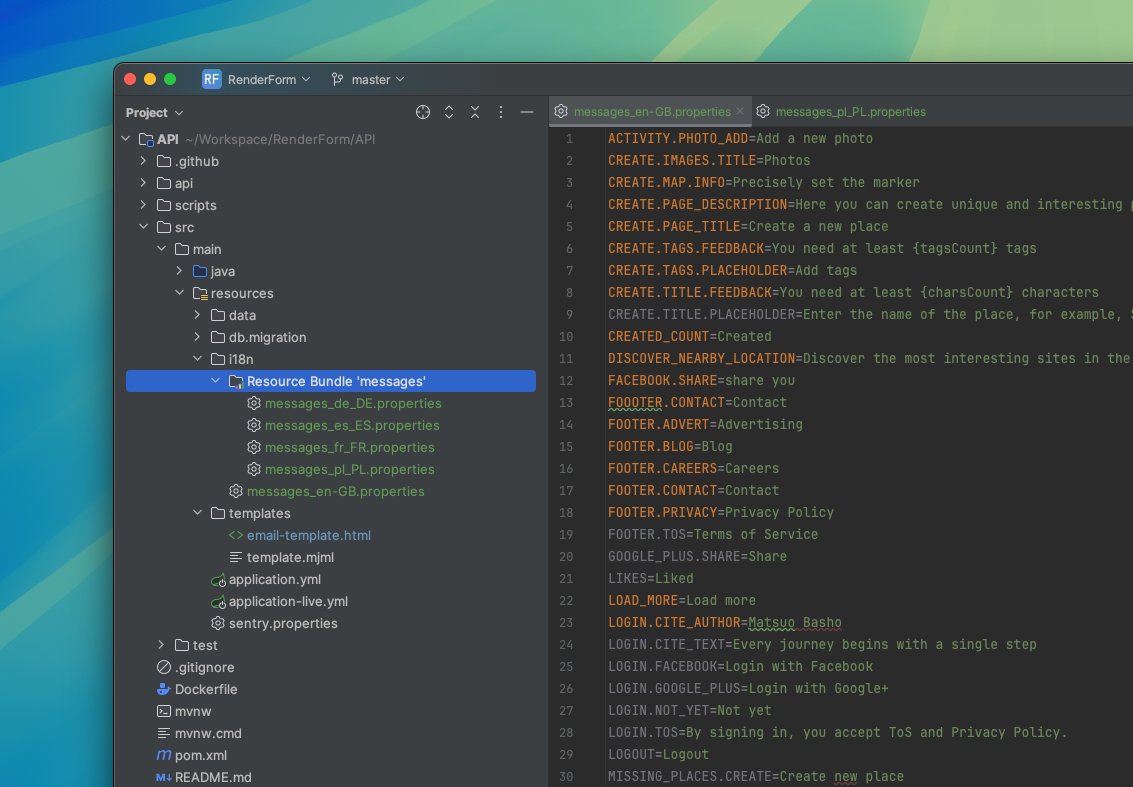
Such files are often used together
with [Thymeleaf template engine](https://www.thymeleaf.org/doc/tutorials/3.0/thymeleafspring.html#spring-mvc-configuration)
and for e-mail translations.
### File format example
```properties
# common
email.user.hello=Hello, {0}
email.team=SimpleLocalize.com Team
email.broken.button.instruction=In case the button link doesn't work for you, please copy and paste the link in your browser
# user created
email.user.created.subject=Setup password for SimpleLocalize account
email.user.created.instruction.button=In order to set up a new password, click on the button below:
email.user.created.button.text=Setup password
```
### Characters escaping
When exporting translations to Java properties file, SimpleLocalize will escape special characters like `\t`, `\n`, `\r`, `\f`, `\`, `#` and `=` by default. Those characters are also unescaped automatically when importing translations to SimpleLocalize.
### Spring Boot and MessageSource
If you are using Spring Boot and [`MessageSource`](https://docs.spring.io/spring-framework/docs/current/javadoc-api/org/springframework/context/MessageSource.html),
you may want to escape single quotes `'` in your messages. To do that, add `ESCAPE_SINGLE_QUOTES` as an export option in your CLI or API request.
There is also option to unescape single quotes by replacing every two single-quotes to one single-quote when importing translations back to SimpleLocalize. To do that, add `UNESCAPE_SINGLE_QUOTES` as an import option.
> Remember to set `ResourceBundleMessageSource.setAlwaysUseMessageFormat` to `true` in your bean configuration.
## Upload with CLI
```properties
simplelocalize upload --apiKey \
--uploadFormat java-properties \
--uploadPath ./messages_{lang}.properties
```
Learn more about [SimpleLocalize CLI and translations upload](/docs/cli/upload-translations/) feature.
## Download with CLI
```properties
simplelocalize download --apiKey \
--downloadFormat java-properties \
--downloadPath ./messages_{lang}.properties
```
Learn more about [SimpleLocalize CLI and translations download](/docs/cli/download-translations/) feature.
## Import with API
```shell
curl
--request POST \
--url 'https://api.simplelocalize.io/api/v2/import?uploadFormat=java-properties' \
--header 'x-simplelocalize-token: ' \
--form file=@/path/to/your/messages.properties
```
Learn more about [importing translations with API](/docs/api/import-translations/)
## Export with API
```shell
curl
--request GET \
--url https://api.simplelocalize.io/api/v4/export?downloadFormat=java-properties \
--header 'x-simplelocalize-token: '
```
Learn more about [exporting translations with API](/docs/api/export-translations/)
---
# File formats: XLIFF 1.2
Source: https://simplelocalize.io/docs/file-formats/xliff-1.2/
**XLIFF 1.2** is a standard format for exchanging localization data between tools. It is widely used in the localization industry and is supported by many translation management systems.
It is an XML-based format that allows you to store translations, comments, and other localization-related information in a structured way. XLIFF 1.2 is also widely used in Xcode projects for iOS and macOS applications,
you can find it in `.xcloc` files.
## Format structure
The XLIFF 1.2 format consists of a root `` element, which contains one or more `` elements. Each `` element represents a single translation file and contains one or more `` elements.
```xml
Hello WorldWitaj ŚwiecieMy comment
```
The file usually contains translations for two languages, the source language and the target language.
The `source-language` attribute specifies the source language, and the `target-language` attribute specifies the target language.
## Attributes
- `source-language`: The language code of the source language.
- `target-language`: The language code of the target language.
- `datatype`: The type of data in the file. It can be `plaintext`, `html`, or `xhtml`.
- `original`: The name of the original file.
- `xml:space`: The `xml:space` attribute specifies how whitespace should be handled. It can be `preserve` or `default`.
## Comments
You can add comments and description to your translation units using the `` element. The `` element can be used to provide additional information about the translation, such as context or usage notes.
## Review status
SimpleLocalize supports the `state` attribute on `` elements for review status handling.
**On import:**
- `state="final"` or `state="signed-off"` sets the translation status to **REVIEWED**.
- Any other value leaves the status unchanged.
**On export:**
- Reviewed translations are exported with `state="final"`.
- Translations that exist but are not reviewed are exported with `state="translated"`.
## translate attribute
SimpleLocalize supports the `translate` attribute on `` elements.
If `translate="no"` or `translate="false"`, translation is locked in the editor.
This attribute is preserved during both import and export.
## resname attribute
The `resname` attribute on `` elements is imported and stored in the translation key attributes. It is also exported back to the XLIFF file.
## Context support
XLIFF 1.2 context groups (``) are imported and saved in translation key attributes, and exported back to the XLIFF file.
## Custom attributes
SimpleLocalize stores XLIFF 1.2 file metadata in key attributes so it can be reused during export.
Supported keys:
- `resname` — exported as `resname` attribute on ``
- Context groups — preserved and exported back as `` elements
## Limitations
The following limitations apply:
- The `xml:space` attribute is always set to `preserve` in the exported file. It will be ignored during import.
- The `datatype` attribute is always set to `plaintext` in the exported file. It will be ignored during import.
- The `original` attribute can have up to 128 characters. If it exceeds this limit, it will be skipped during import/export.
- For export, some of the newer features (review status, context, resname, translate attribute) are only available for projects created after April 10, 2026. For older projects, the `XLIFF_12_VERSION_2` upload/download option is required to enable these features.
## Automatic namespace detection
When importing XLIFF 1.2 files, SimpleLocalize can automatically detect namespaces based on the `original` attribute of the `` element.
To enable this feature, use the `ORIGINAL_AS_NAMESPACE` import option.
> Projects created before November 23, 2025, have this option enabled by default to maintain backward compatibility.
## Upload source translations
To upload source translations to SimpleLocalize, use the `upload` command with the `--uploadFormat xliff:1.2` parameter, and provide the path to your `en.xliff` file using the `--uploadPath` parameter,
and the language key using the `--languageKey` parameter.
```properties
simplelocalize upload \
--apiKey PROJECT_API_KEY \
--uploadLanguageKey en \
--uploadFormat xliff:1.2 \
--uploadPath ./en.xliff
```
Learn more about [upload command](/docs/cli/upload-translations/).
> Add `--update` flag to update existing translations in SimpleLocalize from the imported file. Otherwise, only new translations will be added.
## Export translations
> Your project needs a [default language](/docs/general/languages/#default-language) set for `` to be populated on export. Without one, `` is exported empty.
To export translations from SimpleLocalize to the Android Strings file format, use the `download` command with the `--downloadFormat xliff:1.2` parameter, and provide the path to the output file using the `--downloadPath` parameter.
```properties
simplelocalize download \
--apiKey PROJECT_API_KEY \
--downloadFormat xliff:1.2 \
--downloadLanguageKey pl,de \
--downloadPath ./{lang}.xliff
```
Please note that the `--downloadLanguageKey` parameter is optional.
If you don't provide it, all translations will be downloaded.
However, it's recommended to provide it to download only the necessary translations.
---
# File formats: XLIFF 2.0
Source: https://simplelocalize.io/docs/file-formats/xliff-2/
**XLIFF 2.0** is a standard XML-based format for exchanging localization data between tools.
Compared to XLIFF 1.2, version 2.0 uses a slightly different structure (translation units are represented by `` and `` elements).
## Format structure
The XLIFF 2 format consists of a root `` element, which contains one or more `` elements.
Each `` element groups translation units (``), and each unit contains one or more segments (``).
```xml
Welcome to our application!Bienvenue dans notre application !Displayed on the login pageHello, !Bonjour, !
```
## Attributes
- `srcLang`: Source language code.
- `trgLang`: Target language code.
- `file@id`: File identifier.
- `file@original`: Original filename (optional).
- `unit@id`: Translation key.
### translate="no"
In XLIFF 2, the `translate` attribute can be defined on `unit` and/or `segment`.
SimpleLocalize supports `translate="no"` (and common non-standard variants like `false`/`0`).
When present, the imported key will be marked as **non-translatable** (equivalent to disabling auto-translation).
## Comments
You can add comments/description using the `` element.
In SimpleLocalize, `` is imported as a key description and exported back as ``.
## Review status
SimpleLocalize supports the `state` attribute on `` elements for review status handling.
**On import:**
- `state="final"` or `state="reviewed"` sets the translation status to **REVIEWED**.
- Any other value leaves the status unchanged.
**On export:**
- Reviewed translations are exported with `state="final"`.
- Translations that exist but are not reviewed are exported with `state="translated"`.
## translate attribute
SimpleLocalize supports the `translate` attribute on `` and `` elements.
If `translate="no"` or `translate="false"`, translation is locked in the editor.
This attribute is preserved during both import and export.
## Placeholders and inline markup
XLIFF 2.0 supports inline elements such as:
- `` for placeholders
- `` for marked spans (e.g. plural forms)
SimpleLocalize preserves inline markup during import and export.
## Namespaces (Original as namespace)
When importing XLIFF 2 files, SimpleLocalize can automatically detect namespaces.
- If `ORIGINAL_AS_NAMESPACE` is enabled, SimpleLocalize uses `file@original` as namespace.
- If `file@original` is missing, it falls back to `file@id`.
## Custom attributes
SimpleLocalize can store XLIFF 2.0 file metadata in `customAttributes` on each `KeyTranslationWord` so it can be reused during export.
Supported keys:
- `xliff2:file:id` - exported as ``
- `xliff2:file:original` - exported as ``
This is useful when you want to keep original file information even if your export namespaces differ.
## Limitations
- SimpleLocalize reads translations from the **first** `` in each ``.
- If `` exists but is empty, an empty translation is imported (no fallback to ``).
Use the `IMPORT_SOURCE_TRANSLATIONS` import option to read translations from `` instead of ``.
## Upload source translations
To upload source translations to SimpleLocalize, use the `upload` command with `--uploadFormat xliff:2`.
```properties
simplelocalize upload \
--apiKey PROJECT_API_KEY \
--uploadLanguageKey en \
--uploadFormat xliff:2 \
--uploadPath ./en.xliff
```
Learn more about [upload command](/docs/cli/upload-translations/).
## Export translations
> Your project needs a [default language](/docs/general/languages/#default-language) set for `` to be populated on export. Without one, `` is exported empty.
To export translations from SimpleLocalize, use the `download` command with `--downloadFormat xliff:2`.
```properties
simplelocalize download \
--apiKey PROJECT_API_KEY \
--downloadFormat xliff:2 \
--downloadLanguageKey fr,de \
--downloadPath ./{lang}.xliff
```
`--downloadLanguageKey` is optional. If you omit it, all translations will be downloaded.
---
# File formats: PHP Array
Source: https://simplelocalize.io/docs/file-formats/php-array/
PHP Arrays are simple objects which can contain simple key-value entries. PHP Arrays are simple objects which can contain simple key-value entries. The key is treated as a unique translation key, and value which is translated message. One PHP file array contains language translations for only on language. For example:
`messages_de_DE.php` contains translated message for German (Germany) locale.
### File format example
```php
"Hello world!",
"MY_TRANSLATION_KEY" => "This is my translation message!"
];
?>
```
SimpleLocalize also recognizes nested PHP arrays, as shown below.
```php
[
"HELLO_WORLD" => "First level - Hello world!",
"LEVEL_2" => [
"HELLO_WORLD" => "Second level - Hello world!",
]
],
"MY_TRANSLATION_KEY" => "This is my translation message!"
];
?>
```
Above PHP file will result with:
- `LEVEL_1.HELLO_WORLD`,
- `LEVEL_1.LEVEL_2.HELLO_WORLD`,
- `MY_TRANSLATION_KEY`
translation keys in Translation Editor.
## Upload translation files
### Upload with command-line tool
```properties
simplelocalize upload --apiKey \
--uploadFormat php-array \
--uploadPath ./messages_{lang}.php
```
Learn more about [uploading translations with CLI](/docs/cli/upload-translations/).
### Import with REST API
```shell
curl
--request POST \
--url 'https://api.simplelocalize.io/api/v2/import?uploadFormat=php-array&languageKey=en' \
--header 'x-simplelocalize-token: ' \
--form file=@/path/to/your/messages.php
```
Learn more about [importing translations with API](/docs/api/import-translations/).
## Download translation files
### Download with command-line tool
```properties
simplelocalize download --apiKey \
--downloadFormat php-array \
--downloadPath ./messages_{lang}.php
```
To download translations with nested keys use option `WRITE_NESTED`. See [all download options](/docs/general/options/#export-options).
```properties
simplelocalize download --apiKey \
--downloadFormat php-array \
--downloadPath ./messages_{lang}.php \
--downloadOptions WRITE_NESTED
```
Learn more about [downloading translations with CLI](/docs/cli/download-translations/).
### Export with REST API
```shell
curl
--request GET \
--url https://api.simplelocalize.io/api/v4/export?downloadFormat=php-array \
--header 'x-simplelocalize-token: '
```
Learn more about [exporting translations with API](/docs/api/export-translations/).
---
# File formats: Android Strings
Source: https://simplelocalize.io/docs/file-formats/android-strings/
**String resources (Android Strings) is a common format used in Android localization and translation.**
Files are regular XML files with `.xml` extension.
One file contains translations for one language, including strings, plurals, and arrays.
Android Strings format is our internal successor of the [Android XML](/docs/file-formats/android-xml/) file format.
## Format structure
The Android Strings file format is a regular XML file with the following structure:
```xml
Witaj Świecie!%s!]]>
Znaleziono %d piosenkę.Znaleziono %d piosenki.Znaleziono %d piosenek.MerkuryVenusZiemiaMars
```
The file contains translations for one language. Each translation is defined by a `` tag with a `name` attribute
and a localized message inside the tag. The `name` attribute is a translation key used in the application code to
get the translation.
```xml
Witaj Świecie!
```
In the example above, the `hello_world` key has a translation for the Polish language.
> The `name` attribute is a unique identifier for the translation key, it must be unique in the file and should not contain spaces or special characters.
## File structure
In Android world, translation files are usually named `strings.xml` and placed in `res/values-XX` directories, where `XX`
is a language code. For example:
- `res/values-en` for English,
- `res/values-pl` for Polish,
- `res/values-de` for German.
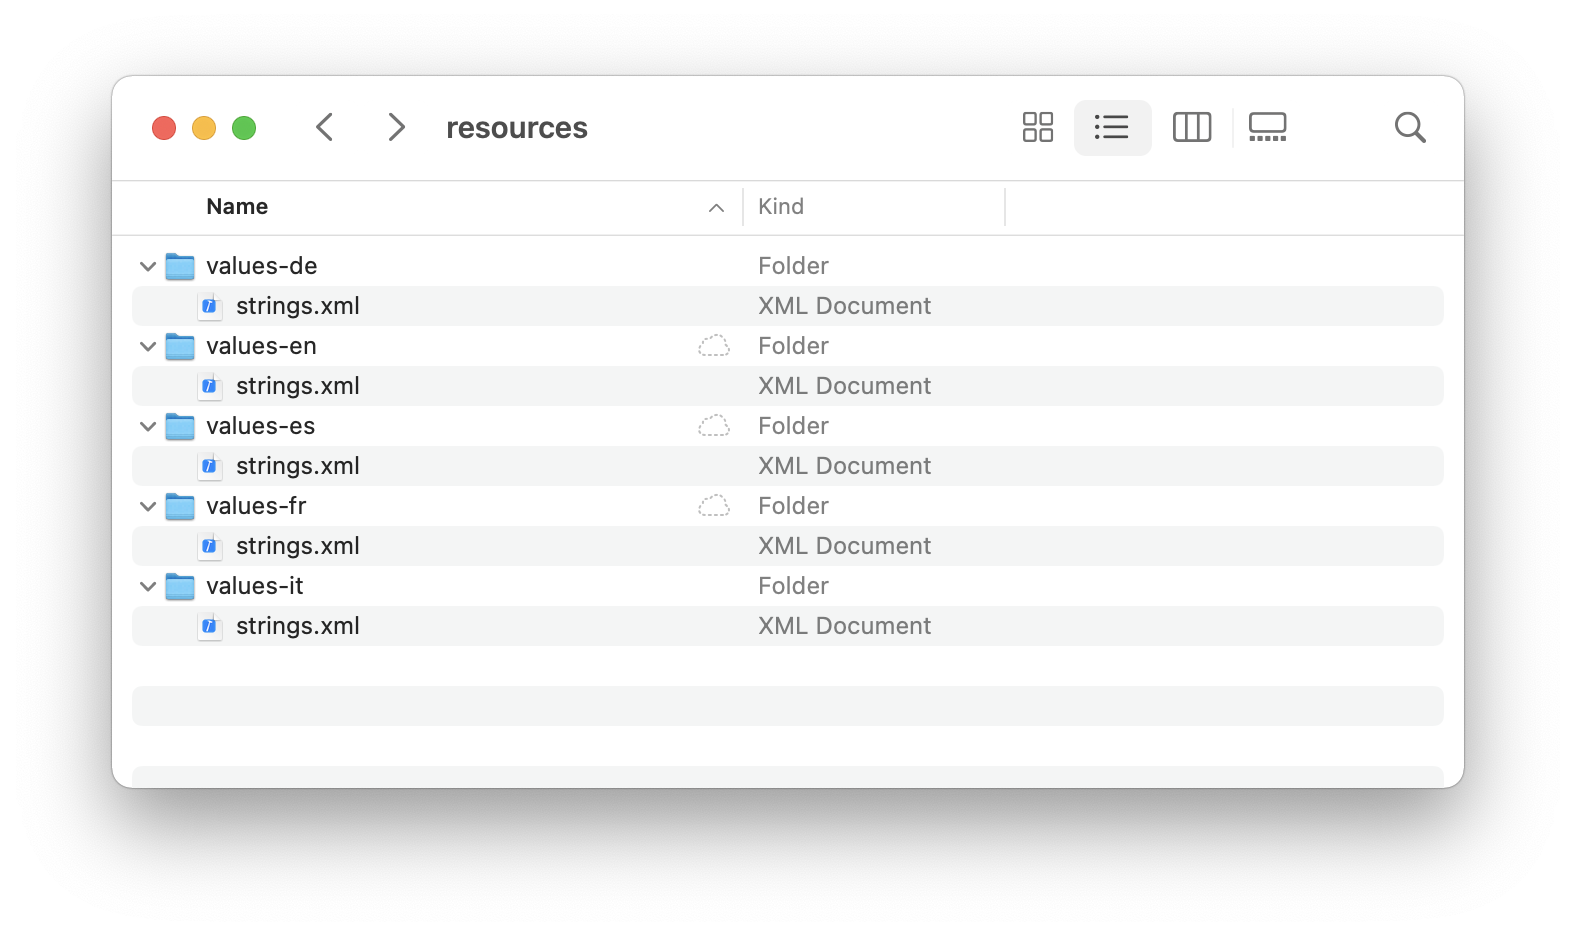
## Pluralization
Pluralization is a feature that allows you to define different translations for different numbers. For example, in English
you can say "1 song" or "2 songs", but in Polish you need to say "1 piosenka" or "2 piosenki". To support this
feature, you need to use `` tag instead of `` tag. The `quantity` attribute defines the number of items
that the translation is for. The following values are supported:
- `zero`
- `one`
- `two`
- `few`
- `many`
- `other`
```xml
Znaleziono %d piosenkę.Znaleziono %d piosenki.Znaleziono %d piosenek.
```
In the example above, the `numberOfSongsAvailable` key has pluralized translations for the Polish language.
During import **SimpleLocalize converts pluralized translations to [ICU message format](/blog/posts/what-is-icu/)**.
```
{COUNT, plural, one {Znaleziono %d piosenkę.} few {Znaleziono %d piosenki.} other {Znaleziono %d piosenek.}}
```
> `COUNT` is a variable that represents the count of things, `plural` is an ICU message format keyword, and `one`, `few`, and `other` are the pluralization values.
## Arrays
You can define arrays of strings using `` tag. The array can be accessed in Java code using
`R.array.array_name` and in XML layout files using `@array/array_name`.
```xml
MerkuryVenusZiemia
```
Translation editor shows string arrays as separate translation keys for each index.
- `planets_array.0` = 'Merkury',
- `planets_array.1` = 'Venus',
- `planets_array.2` = 'Ziemia'.
## Comments
You can add comments and description to your strings, string-arrays, and plurals using `<--` and `-->` tags. The comments
and description are not visible in the app, but they are visible in the source code. Comments above the translation keys
are automatically imported to [translation editor](/docs/translation-editor/get-started/) as code descriptions.
```xml
Witaj Świecie!
```
## Translatable attributes
You can use `translatable` attribute to mark translations that should not be translated. For example, you can use it for
translations that are used in the code and should not be changed. The value of the `translatable` attribute can be `true` or `false`. By default, it is set to `true`.
```xml
My App
```
Setting `translatable="false"` will prevent the translation key from being auto-translated by SimpleLocalize.
## Untranslated keys
By default, SimpleLocalize exports every key, including ones that have no translation yet, and those come out as
``.
> **Watch out:** Android resolves a missing translation by falling back to the default `res/values/strings.xml`
> file, but only when the key is **absent** from the language-specific file. An empty ``
> is a valid (blank) translation as far as Android is concerned, so it wins over the fallback, and the app
> shows blank text instead of the default-language string.
If you're exporting a file that will actually ship in your app, add the
[`ONLY_TRANSLATED`](/docs/general/options/) download option so untranslated keys are left out entirely and the
fallback to `res/values/strings.xml` keeps working:
```properties
simplelocalize download \
--apiKey PROJECT_API_KEY \
--downloadFormat android-strings \
--downloadLanguageKey pl \
--downloadPath ./values-pl/strings.xml \
--downloadOptions ONLY_TRANSLATED
```
## HTML tags
You can use HTML tags in your strings. On export, SimpleLocalize checks every tag against the set that Android string resources actually support.
| Description | Tags |
|:------------------------------------|:---------------------------------|
| **Annotation** | `` |
| **Bold** | `` |
| **Italic** | ``, ``, ``, `` |
| **25% larger text** | `` |
| **20% smaller text** | `` |
| **Setting font properties** | `` |
| **Setting a monospace font family** | `` |
| **Strikethrough** | ``, ``, `` |
| **Underline** | `` |
| **Superscript** | `` |
| **Subscript** | `` |
| **Bullet points** | `
`, `
` |
| **Line breaks** | ` ` |
| **Division** | `
` |
| **CSS style** | `` |
| **Paragraphs** | `
` |
```xml
Witaj %s!
```
Anything else that Android doesn't recognize as styling markup is wrapped in `` instead, so
it survives as literal text rather than confusing the XML parser:
```xml
%s!]]>
```
> **Note:** ` on which tags a string contains.
To wrap every translation with HTML tags in ``, including the supported ones, use
the [`WRAP_HTML_IN_CDATA`](/docs/general/options/#wrap_html_in_cdata) export option:
```properties
simplelocalize download \
--apiKey PROJECT_API_KEY \
--downloadFormat android-strings \
--downloadPath ./values-{lang}/strings.xml \
--downloadOptions WRAP_HTML_IN_CDATA
```
## Upload source translations
To upload source translations to SimpleLocalize, use the `upload` command with the `--uploadFormat android-strings` parameter, and provide the path to your `strings.xml` file using the `--uploadPath` parameter,
and the language key using the `--languageKey` parameter.
```properties
simplelocalize upload \
--apiKey PROJECT_API_KEY \
--uploadLanguageKey en \
--uploadFormat android-strings \
--uploadPath ./values/strings-en.xml
```
Learn more about [upload command](/docs/cli/upload-translations/).
> Add `--update` flag to update existing translations in SimpleLocalize from the imported file. Otherwise, only new translations will be added.
## Export translations
To export translations from SimpleLocalize to the Android Strings file format, use the `download` command with the `--downloadFormat android-strings` parameter, and provide the path to the output file using the `--downloadPath` parameter.
```properties
simplelocalize download \
--apiKey PROJECT_API_KEY \
--downloadFormat android-strings \
--downloadLanguageKey pl,de \
--downloadPath ./values-{lang}/strings.xml
```
Please note that the `--downloadLanguageKey` parameter is optional.
If you don't provide it, all translations will be downloaded.
However, it's recommended to provide it to download only the necessary translations.
## Multi-file support
If you split translations in your application into multiple files,
and you want to manage them separately in SimpleLocalize.
Then you can use [namespaces](/blog/posts/namespace/),
that will allow you to group translations into separate files, and manage them in the translation editor.
```properties
# Upload with namespaces
simplelocalize upload \
--apiKey PROJECT_API_KEY \
--uploadLanguageKey en \
--uploadFormat android-strings \
--uploadPath ./values/strings-en-{ns}.xml
# Download with namespaces
simplelocalize download \
--apiKey PROJECT_API_KEY \
--downloadFormat android-strings \
--downloadLanguageKey pl,de \
--downloadPath ./values-{lang}/strings-{ns}.xml
```
`{ns}` is a placeholder for the namespace name.
## Universal placeholders
SimpleLocalize supports [**universal placeholders**](/docs/general/universal-placeholders/) that allow you to convert native Android format specifiers
(like `%s`, `%d`, `%1$s`, `%.2f`) into a platform-independent format.
This feature is useful when you manage translations for multiple platforms (e.g., Android and iOS) and want
to keep a consistent placeholder format across all of them.
The universal placeholder format uses curly braces `{}` around the format specifier:
| Android native | Universal placeholder | Description |
|----------------|-----------------------|---------------------------------|
| `%s` | `{%s}` | String |
| `%d` | `{%i}` | Integer |
| `%f` | `{%f}` | Float |
| `%1$s` | `{%1$s}` | Positional string |
| `%1$d` | `{%1$i}` | Positional integer |
| `%.2f` | `{%.2f}` | Float with precision |
| `%1$.2f` | `{%1$.2f}` | Positional float with precision |
### Enabling universal placeholders
To enable universal placeholders, add `UNIVERSAL_PLACEHOLDERS` to the `--uploadOptions` or `--downloadOptions` parameter.
**Import (upload)** — converts native Android placeholders to universal format:
```properties
simplelocalize upload \
--apiKey PROJECT_API_KEY \
--uploadLanguageKey en \
--uploadFormat android-strings \
--uploadPath ./values/strings-en.xml \
--uploadOptions UNIVERSAL_PLACEHOLDERS
```
**Export (download)** — converts universal placeholders back to native Android format:
```properties
simplelocalize download \
--apiKey PROJECT_API_KEY \
--downloadFormat android-strings \
--downloadLanguageKey pl,de \
--downloadPath ./values-{lang}/strings.xml \
--downloadOptions UNIVERSAL_PLACEHOLDERS
```
### Example
Given the following Android string:
```xml
Hello %1$s, you have %2$d new messages worth %.2f USD
```
After import with `UNIVERSAL_PLACEHOLDERS` option, the translation in SimpleLocalize will be stored as:
```
Hello {%1$s}, you have {%2$i} new messages worth {%.2f} USD
```
During export with `UNIVERSAL_PLACEHOLDERS` option, it will be converted back to the native Android format.
> If you export to [Localizable XC Strings for iOS/macOS format](/docs/file-formats/localizable-xcstrings/), the same universal placeholders will be converted to the appropriate Apple format specifiers.
## Markdown styling
The rich text editor in SimpleLocalize stores text styled as Markdown. Android string resources don't understand Markdown,
but they support a set of [HTML tags](#html-tags) for styling. You can convert between the two during upload and download,
and keep a single translation key for Android and iOS (SwiftUI `Text` renders Markdown natively).
| Markdown in SimpleLocalize | HTML in Android file |
|----------------------------|------------------------|
| `**bold**` | `bold` |
| `_italic_` | `italic` |
| `~~strikethrough~~` | `strikethrough` |
Only bold, italic and strikethrough are converted. Other Markdown (links, lists, headings) and other HTML tags (e.g. ``) are left unchanged.
### Enabling Markdown styling
**Export (download)** — add the [`MARKDOWN_TO_HTML`](/docs/general/options/#markdown_to_html) option to convert Markdown styling to HTML tags:
```properties
simplelocalize download \
--apiKey PROJECT_API_KEY \
--downloadFormat android-strings \
--downloadLanguageKey pl,de \
--downloadPath ./values-{lang}/strings.xml \
--downloadOptions MARKDOWN_TO_HTML
```
**Import (upload)** — add the [`HTML_TO_MARKDOWN`](/docs/general/options/#html_to_markdown) option to convert HTML tags back to Markdown:
```properties
simplelocalize upload \
--apiKey PROJECT_API_KEY \
--uploadLanguageKey en \
--uploadFormat android-strings \
--uploadPath ./values/strings-en.xml \
--uploadOptions HTML_TO_MARKDOWN
```
> If you upload files that were downloaded with `MARKDOWN_TO_HTML`, always use `HTML_TO_MARKDOWN` as well.
> Otherwise, the Markdown styling in SimpleLocalize will be replaced with HTML tags, which iOS doesn't render.
### Example
Given the following translation in SimpleLocalize:
```
Tap **Save** to keep _all_ changes
```
After export with `MARKDOWN_TO_HTML` option, the Android string will look like this:
```xml
Tap Save to keep all changes
```
During import with `HTML_TO_MARKDOWN` option, it will be converted back to Markdown.
Learn how to display Markdown styling in Android and iOS apps in our blog post: [How to use Markdown in Android and iOS translations](/blog/posts/markdown-in-android-and-ios/).
## Mapping language keys
When you use `{lang}` placeholder in your upload or download path, it will be replaced with the actual language key configured in SimpleLocalize. For example:
```properties
./res/values-{lang}/strings.xml
```
will be converted to
```properties
./res/values-en/strings.xml
./res/values-fr/strings.xml
./res/values-de/strings.xml
./res/values-pl/strings.xml
```
In the Android world, the default translations should be placed in `res/values/strings.xml` file, so to achieve this, you can use [`mappings.lang` field in configuration files](/docs/cli/configuration/).
```yaml
# simplelocalize.yaml
mappings:
lang:
- languageKey: "en"
placeholder: ""
- languageKey: "fr"
placeholder: "-fr"
- languageKey: "de"
placeholder: "-de"
- languageKey: "pl"
placeholder: "-pl"
```
With this configuration, the default translations will be placed in `res/values/strings.xml` file, and the other translations will be placed in `res/values-{lang}/strings.xml`.
## Resources
- [Developer Android: String resources](https://developer.android.com/guide/topics/resources/string-resource)
---
# File formats: Android XML
Source: https://simplelocalize.io/docs/file-formats/android-xml/
> This file format has been discontinued in favor of [Android Strings](/docs/file-formats/android-strings/). Deprecated format: `android-xml`, new format: `android-strings`.
A common format used in Android localization and translation is XML. Regular `strings.xml` files keep translation keys
in `name` attribute, and the value of `` tag is a localized message.
Values from `strings.xml` can be used in Android Java code using a reference `R.string.string_name`. You can also access
localized strings in your XML layout files by using `@string/string_name`. The `string_name` value used in examples is a
translation key.
### File format example
```xml
SimpleLocalize.ioWelcome in SimpleLocalize!SaveBack
```
Every `string.xml` file sits in a separate `values-{lang}` directory, as shown below.

> We have special integration for Android! See [Android - quick integration guide](/docs/integrations/android/) to make your
> work with this platform less time-consuming.
## Upload with CLI
```properties
simplelocalize upload --apiKey \
--uploadFormat android-xml \
--uploadPath ./values-{lang}/strings.xml
```
Learn more about [SimpleLocalize CLI and translations upload](/docs/cli/upload-translations/) feature.
## Download with CLI
You cannot download translations in CSV format. In the example below we put `excel` format which allow you to see all the
translations and translation keys in spreadsheet format.
```properties
simplelocalize download --apiKey \
--downloadFormat android-xml \
--downloadPath ./values-{lang}/strings.xml
```
Learn more about [SimpleLocalize CLI and translations download](/docs/cli/download-translations/) feature.
## Import with API
```shell
curl
--request POST \
--url 'https://api.simplelocalize.io/api/v2/import?uploadFormat=android-xml' \
--header 'x-simplelocalize-token: ' \
--form file=@/path/to/your/strings.xml
```
Learn more about [importing translations with API](/docs/api/import-translations/)
## Export with API
```shell
curl
--request GET \
--url https://api.simplelocalize.io/api/v4/export?downloadFormat=android-xml \
--header 'x-simplelocalize-token: '
```
Learn more about [exporting translations with API](/docs/api/export-translations/)
---
# File formats: Localizable Strings
Source: https://simplelocalize.io/docs/file-formats/localizable-strings/
Localization on macOS and iOS looks very similar. Both platforms share the same concepts, programming language and
localization approach. In Swift world, the most commonly used localization format for messages are *.strings files.
Each *.strings file contains translated messages and sits in a separate directory, see an example below.
> **Note:** Localizable strings file format has been replaced by [Localizable.xcstrings file format](/docs/file-formats/localizable-xcstrings/)
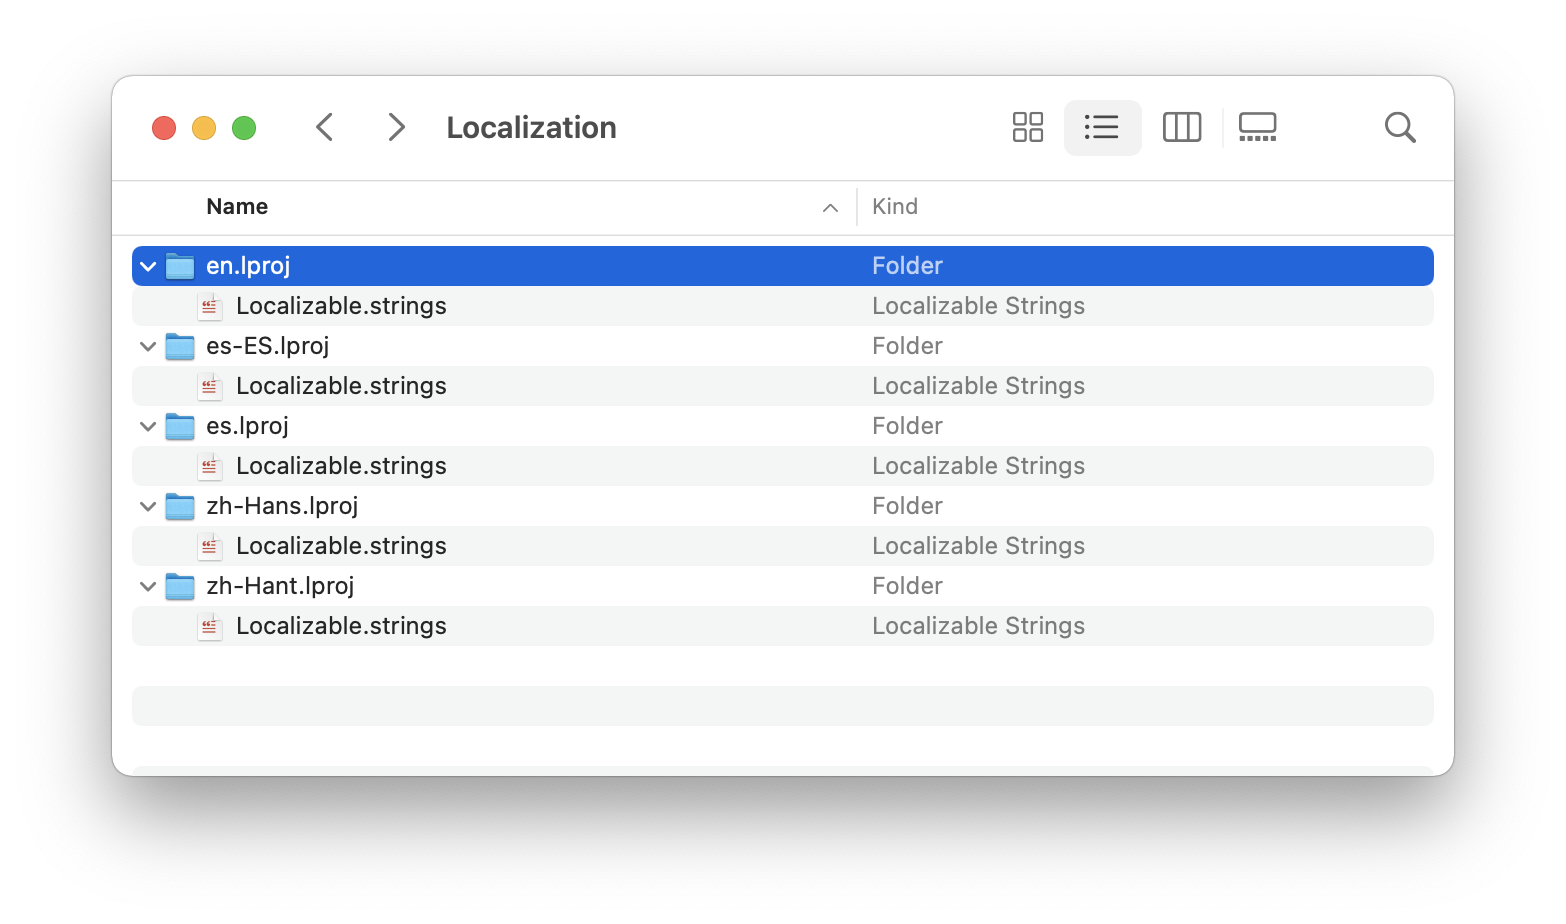
Translations format is straightforward. The first value is a translation key used by a programmer during software
development, and the second is a translated message which will be visible for the end user.
### File format example
```json
"Access denied!" = "¡Acceso denegado!";
"Accurate to approx. 15 decimal places" = "Accurate to approx. 15 decimal places";
"Accurate to approx. 7 decimal places" = "Accurate to approx. 7 decimal places";
```
## Upload with CLI
```properties
simplelocalize upload --apiKey \
--uploadFormat localizable-strings \
--uploadPath ./{lang}/Localizable.strings
```
Learn more about [SimpleLocalize CLI and translations upload](/docs/cli/upload-translations/) feature.
## Download with CLI
```properties
simplelocalize download --apiKey \
--downloadFormat localizable-strings \
--downloadPath ./{lang}/Localizable.strings
```
Learn more about [SimpleLocalize CLI and translations download](/docs/cli/download-translations/) feature.
## Universal placeholders
SimpleLocalize supports [**universal placeholders**](/docs/general/universal-placeholders/) that allow you to convert native iOS/macOS format specifiers
(like `%@`, `%lld`, `%d`, `%f`, `%1$@`) into a platform-independent format.
This feature is useful when you manage translations for multiple platforms (Android + iOS/macOS) and want
to keep a consistent placeholder format across all of them.
The universal placeholder format uses curly braces `{}` around the format specifier:
| iOS/macOS native | Universal placeholder | Description |
|------------------|-----------------------|---------------------------------|
| `%@` | `{%s}` | String (object) |
| `%lld` | `{%i}` | Integer (long long) |
| `%d` | `{%i}` | Integer |
| `%f` | `{%f}` | Float |
| `%1$@` | `{%1$s}` | Positional string |
| `%1$lld` | `{%1$i}` | Positional integer |
| `%.2f` | `{%.2f}` | Float with precision |
| `%1$.2f` | `{%1$.2f}` | Positional float with precision |
### Enabling universal placeholders
To enable universal placeholders, add `UNIVERSAL_PLACEHOLDERS` to the `--uploadOptions` or `--downloadOptions` parameter.
**Import (upload)** - converts native iOS/macOS placeholders to universal format:
```properties
simplelocalize upload --apiKey \
--uploadFormat localizable-strings \
--uploadPath ./{lang}/Localizable.strings \
--uploadOptions UNIVERSAL_PLACEHOLDERS
```
**Export (download)** - converts universal placeholders back to native iOS format:
```properties
simplelocalize download --apiKey \
--downloadFormat localizable-strings \
--downloadPath ./{lang}/Localizable.strings \
--downloadOptions UNIVERSAL_PLACEHOLDERS
```
### Example
Given the following iOS/macOS string:
```
"welcome_message" = "Hello %1$@, you have %2$lld new messages worth %.2f USD";
```
After import with `UNIVERSAL_PLACEHOLDERS` option, the translation in SimpleLocalize will be stored as:
```
Hello {%1$s}, you have {%2$i} new messages worth {%.2f} USD
```
During export with `UNIVERSAL_PLACEHOLDERS` option, it will be converted back to the native Apple format.
> If you export to [Android Strings](/docs/file-formats/android-strings/) format, the same universal placeholders will be converted to the appropriate Android format specifiers.
## Import with API
```shell
curl
--request POST \
--url 'https://api.simplelocalize.io/api/v2/import?uploadFormat=localizable-strings' \
--header 'x-simplelocalize-token: ' \
--form file=@/path/to/your/Localizable.strings
```
Learn more about [importing translations with API](/docs/api/import-translations/)
## Export with API
```shell
curl
--request GET \
--url https://api.simplelocalize.io/api/v4/export?downloadFormat=localizable-strings \
--header 'x-simplelocalize-token: '
```
Learn more about [exporting translations with API](/docs/api/export-translations/)
---
# File formats: Localizable Strings Dict
Source: https://simplelocalize.io/docs/file-formats/localizable-stringsdict/
Localization on macOS and iOS looks the same. Both platforms share the same concepts, programming language and
localization approach. In Swift world, the most commonly used localization format for pluralization are *.stringsdict files.
Each *.stringsdict file contains translated messages that has plural forms and device variants.
Translations format is based on XML, and it's similar to [Android strings.xml format](/docs/file-formats/android-strings/).
Each translation file contains a dictionary with keys and values. Each value can be a string or a dictionary with plural forms. Each plural form is
a dictionary with a key and a value. The key is a plural form name and the value is a translated message.
> **Note:** Localizable.stringsdict files are used only for pluralization and device variants. For simple translations, use [Localizable.strings](/docs/file-formats/localizable-strings/) file format.
### File format example
```xml
%d home(s) foundNSStringLocalizedFormatKey%#@value@valueNSStringFormatSpecTypeKeyNSStringPluralRuleTypeNSStringFormatValueTypeKeydzeroNo homes foundone%d home foundother%d homes foundUserInstructionsNSStringDeviceSpecificRuleTypeiphoneTap heremacClick hereappletvPress here
```
## Upload with CLI
```properties
simplelocalize upload --apiKey \
--uploadFormat localizable-strings-dict \
--uploadPath ./{lang}/Localizable.stringsdict
```
Learn more about [SimpleLocalize CLI and translations upload](/docs/cli/upload-translations/) feature.
## Download with CLI
```properties
simplelocalize download --apiKey \
--downloadFormat localizable-strings-dict \
--downloadPath ./{lang}/Localizable.stringsdict
```
Learn more about [SimpleLocalize CLI and translations download](/docs/cli/download-translations/) feature.
## Universal placeholders
SimpleLocalize supports [**universal placeholders**](/docs/general/universal-placeholders/) that allow you to convert native iOS/macOS format specifiers
(like `%@`, `%lld`, `%d`, `%f`, `%1$@`) into a platform-independent format.
This feature is useful when you manage translations for multiple platforms (Android + iOS/macOS) and want
to keep a consistent placeholder format across all of them.
The universal placeholder format uses curly braces `{}` around the format specifier:
| iOS/macOS native | Universal placeholder | Description |
|------------------|-----------------------|---------------------------------|
| `%@` | `{%s}` | String (object) |
| `%lld` | `{%i}` | Integer (long long) |
| `%d` | `{%i}` | Integer |
| `%f` | `{%f}` | Float |
| `%1$@` | `{%1$s}` | Positional string |
| `%1$lld` | `{%1$i}` | Positional integer |
| `%.2f` | `{%.2f}` | Float with precision |
| `%1$.2f` | `{%1$.2f}` | Positional float with precision |
### Enabling universal placeholders
To enable universal placeholders, add `UNIVERSAL_PLACEHOLDERS` to the `--uploadOptions` or `--downloadOptions` parameter.
**Import (upload)** - converts native iOS/macOS placeholders to universal format:
```properties
simplelocalize upload --apiKey \
--uploadFormat localizable-strings-dict \
--uploadPath ./{lang}/Localizable.stringsdict \
--uploadOptions UNIVERSAL_PLACEHOLDERS
```
**Export (download)** - converts universal placeholders back to native iOS format:
```properties
simplelocalize download --apiKey \
--downloadFormat localizable-strings-dict \
--downloadPath ./{lang}/Localizable.stringsdict \
--downloadOptions UNIVERSAL_PLACEHOLDERS
```
### Example
Given the following stringsdict plural value:
```xml
one%d home foundother%d homes found
```
After import with `UNIVERSAL_PLACEHOLDERS` option, the translations in SimpleLocalize will be stored with universal placeholders:
```
{%i} home found
{%i} homes found
```
During export with `UNIVERSAL_PLACEHOLDERS` option, they will be converted back to the native Apple format (`%lld`).
> If you export to [Android Strings](/docs/file-formats/android-strings/) format, the same universal placeholders will be converted to the appropriate Android format specifiers.
## Resources
- [Localizing strings that contain plurals](https://developer.apple.com/documentation/xcode/localizing-strings-that-contain-plurals)
- [Creating width and device variants of strings](https://developer.apple.com/library/archive/documentation/Cocoa/Conceptual/LoadingResources/Strings/Strings.html)
- [Apple documentation](https://developer.apple.com/library/archive/documentation/Cocoa/Conceptual/LoadingResources/Strings/Strings.html)
---
# File formats: Localizable XC Strings
Source: https://simplelocalize.io/docs/file-formats/localizable-xcstrings/
**XC String format is a JSON-like format introduced by Apple at WWDC 2022 for localization purposes in Xcode. It includes translations for all messages used in macOS and iOS applications.**
XC Strings format is a successor of the [Localizable.strings](/docs/file-formats/localizable-strings/) and [Localizable.stringsdict](/docs/file-formats/localizable-stringsdict/) file formats.
Unlike the Localizable.strings format, the XC Strings is more structured, because it includes much more information about the translation state, comments, source language, variations, pluralization, and substitutions.
You may also have a look at the [Xcode Localization Catalog (.xcloc)](/docs/file-formats/localizable-xcloc/) file format, which is a collection of XLIFF files and a `Contents.json` file that describes the catalog.
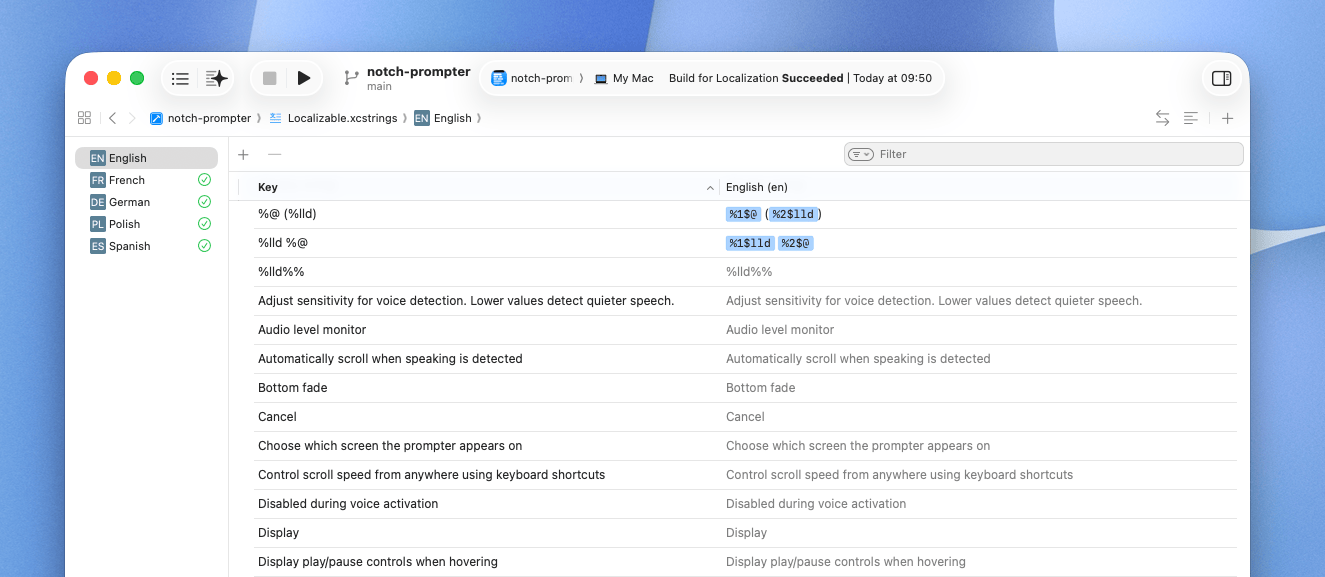
## File format example
Every XC String file format requires a `version` field that specifies the version of the format. The `sourceLanguage` field contains the language code of the source language.
The `strings` field contains all translations for the given key.
Each translation key has information about if the translation should be translated, a comment for the translator, extraction state, and **localizations for each language.**
```json
{
"version": "1.0",
"sourceLanguage" : "en",
"strings" : {
"hello_world" : {
"shouldTranslate": true,
"comment" : "Here is a comment for the translator",
"extractionState" : "manual",
"localizations" : {
"en" : {
"stringUnit" : {
"state" : "translated",
"value" : "Hello World"
}
},
"pl" : {
"stringUnit" : {
"state" : "translated",
"value" : "Witaj świecie"
}
},
"de" : {
"stringUnit" : {
"state" : "translated",
"value" : "Hallo Welt"
}
}
}
}
}
}
```
In the example above, the `hello_world` key has translations for the English, Polish, and German languages.
> During file export,
SimpleLocalize will use the [default language key](/docs/general/languages/#default-language) of your project for the source language.
If the default language is not set in your project, the source language will be set to `en`.
## Device variants
Device variants are used to specify a translation for a specific Apple device,
such as iPhone, Mac, iPad, or Apple Watch.
The device variants are specified in the `localizations` field as `variants`.
```json
{
"version": "1.0",
"sourceLanguage" : "en",
"strings" : {
"search_label" : {
"comment" : "Device variant translation example",
"extractionState" : "manual",
"localizations" : {
"en" : {
"stringUnit" : {
"state" : "translated",
"value" : "Find"
}
},
"de" : {
"variations" : {
"device" : {
"mac" : {
"stringUnit" : {
"state" : "translated",
"value" : "Suche"
}
},
"other" : {
"stringUnit" : {
"state" : "translated",
"value" : "Finde"
}
}
}
}
}
}
}
}
}
```
In the example above, the German ('__de__') language has two translations for the `search_label` key.
The first translation ('__Suche__') is for computers ('__mac__'), and the second translation ('__Finde__') is for all other devices ('__other__').
The English language has only one translation for the key for all devices.
List of available device variants:
- `mac`
- `iphone`
- `ipad`
- `watch`
- `tv`
**SimpleLocalize converts XC Strings device variants to [standard ICU message format](/blog/posts/what-is-icu/)**,
so they can be exported to other file formats, and maintain the device variant information, for example:
```
# English translation
Find
# German translation
{DEVICE, select, mac {Suche} other {Finde}}
```
> `DEVICE` is a variable that represents the device variant and `select` is an ICU message format keyword. The `mac` and `other` are the device variant values.
## Pluralized translations
```json
{
"version": "1.0",
"sourceLanguage" : "en",
"strings" : {
"things_label" : {
"comment" : "Pluralized translation",
"localizations" : {
"en" : {
"variations" : {
"plural" : {
"one" : {
"stringUnit" : {
"state" : "translated",
"value" : "%lld thing"
}
},
"other" : {
"stringUnit" : {
"state" : "translated",
"value" : "%lld things"
}
}
}
}
},
"de" : {
"variations" : {
"plural" : {
"one" : {
"stringUnit" : {
"state" : "translated",
"value" : "%lld Ding"
}
},
"other" : {
"stringUnit" : {
"state" : "translated",
"value" : "%lld Dinge"
}
}
}
}
}
}
}
}
}
```
In the example above, the `things_label` key has pluralized translations for the English and German languages.
Same as with device variants, **SimpleLocalize converts pluralized translations to [ICU message format](/blog/posts/what-is-icu/)**.
```
# English translation
{COUNT, plural, one {%lld thing} other {%lld things}}
# German translation
{COUNT, plural, one {%lld Ding} other {%lld Dinge}}
```
> `COUNT` is a variable that represents the count of things, `plural` is an ICU message format keyword, and `one` and `other` are the pluralization values.
List of available pluralization values:
- `zero`
- `one`
- `two`
- `few`
- `many`
- `other`
## Substitutions
Substitutions are used to replace placeholders in the translation with dynamic values.
```json
{
"sourceLanguage" : "en",
"version": "1.0",
"strings" : {
"%d of %d left" : {
"localizations" : {
"en" : {
"stringUnit" : {
"state" : "translated",
"value" : "%d of %#@left@"
},
"substitutions" : {
"left" : {
"formatSpecifier" : "d",
"variations" : {
"plural" : {
"other" : {
"stringUnit" : {
"state" : "translated",
"value" : "%@ left"
}
}
}
}
}
}
},
"es" : {
"stringUnit" : {
"state" : "translated",
"value" : "%d de %#@left@"
},
"substitutions" : {
"left" : {
"formatSpecifier" : "d",
"variations" : {
"plural" : {
"one" : {
"stringUnit" : {
"state" : "translated",
"value" : "%@ queda"
}
},
"other" : {
"stringUnit" : {
"state" : "translated",
"value" : "%@ quedan"
}
}
}
}
}
}
}
}
}
}
}
```
In the example above, the `%d of %d left` key has substitutions for the `left` placeholder in the English and Spanish languages.
> Substitutions are currently not supported in the SimpleLocalize translation editor, but this [feature is planned for the future](https://feedback.simplelocalize.io/feature-requests/p/support-for-xc-strings-substitutions).
## Universal placeholders
SimpleLocalize supports [**universal placeholders**](/docs/general/universal-placeholders/) that allow you to convert native iOS/macOS format specifiers
(like `%@`, `%lld`, `%d`, `%f`, `%1$@`) into a platform-independent format.
This feature is useful when you manage translations for multiple platforms (Android + iOS/macOS) and want
to keep a consistent placeholder format across all of them.
The universal placeholder format uses curly braces `{}` around the format specifier:
| iOS/macOS native | Universal placeholder | Description |
|------------------|-----------------------|---------------------------------|
| `%@` | `{%s}` | String (object) |
| `%lld` | `{%i}` | Integer (long long) |
| `%d` | `{%i}` | Integer |
| `%f` | `{%f}` | Float |
| `%1$@` | `{%1$s}` | Positional string |
| `%1$lld` | `{%1$i}` | Positional integer |
| `%.2f` | `{%.2f}` | Float with precision |
| `%1$.2f` | `{%1$.2f}` | Positional float with precision |
### Enabling universal placeholders
To enable universal placeholders, add `UNIVERSAL_PLACEHOLDERS` to the `--uploadOptions` or `--downloadOptions` parameter.
**Import (upload)** - converts native iOS/macOS placeholders to universal format:
```properties
simplelocalize upload --apiKey \
--update \
--uploadFormat localizable-xcstrings \
--uploadPath ./Localizable.xcstrings \
--uploadOptions UNIVERSAL_PLACEHOLDERS
```
**Export (download)** - converts universal placeholders back to native iOS format:
```properties
simplelocalize download --apiKey \
--downloadFormat localizable-xcstrings \
--downloadPath ./Localizable.xcstrings \
--downloadOptions UNIVERSAL_PLACEHOLDERS
```
### Example
Given the following iOS/macOS string:
```
Hello %1$@, you have %2$lld new messages worth %.2f USD
```
After import with `UNIVERSAL_PLACEHOLDERS` option, the translation in SimpleLocalize will be stored as:
```
Hello {%1$s}, you have {%2$i} new messages worth {%.2f} USD
```
During export with `UNIVERSAL_PLACEHOLDERS` option, it will be converted back to the native Apple format.
> If you export to [Android Strings](/docs/file-formats/android-strings/) format, the same universal placeholders will be converted to the appropriate Android format specifiers.
## Markdown styling
Translations styled in the SimpleLocalize rich text editor are saved as Markdown (e.g. `**bold**` or `_italic_`), and they are exported to XC Strings files without changes.
SwiftUI `Text` renders Markdown natively, so no conversion is needed.
Learn more in our blog post: [How to use Markdown in Android and iOS translations](/blog/posts/markdown-in-android-and-ios/).
## Multi-file support
If you split translations in your application into multiple files,
and you want to manage them separately in SimpleLocalize.
Then you can use [namespaces](/blog/posts/namespace/),
that will allow you to group translations into separate files, and manage them in the translation editor.
## Import & Export
SimpleLocalize supports an importing and exporting XC Strings file format via the [SimpleLocalize CLI](/docs/cli/get-started/),
which allows you to automate the process of keeping translations in sync with your application.
### Import XC Strings
Example of importing XC Strings file format to SimpleLocalize using the CLI.
```properties
# Single file
simplelocalize upload --apiKey \
--update \
--uploadFormat localizable-xcstrings \
--uploadPath ./Localizable.xcstrings
# Multiple files (namespaces)
simplelocalize upload --apiKey \
--update \
--uploadFormat localizable-xcstrings \
--uploadPath ./Localizable-{ns}.xcstrings
```
Learn more about [SimpleLocalize CLI and translations upload](/docs/cli/upload-translations/) feature.
> Add `--update` flag to update existing translations in SimpleLocalize from the imported file. Otherwise, only new translations will be added.
### Export translations to XC Strings
Example of exporting translations from translation editor to XC Strings file format using the CLI.
```properties
# Single file
simplelocalize download --apiKey \
--downloadFormat localizable-xcstrings \
--downloadPath ./Localizable.strings
# Multiple files (namespaces)
simplelocalize download --apiKey \
--downloadFormat localizable-xcstrings \
--downloadPath ./Localizable-{ns}.strings
```
Learn more about [SimpleLocalize CLI and translations download](/docs/cli/download-translations/) feature.
---
# File formats: Xcode Localization Catalog
Source: https://simplelocalize.io/docs/file-formats/localizable-xcloc/
**Xcode Localization Catalog (.xcloc or XC Catalog)** is a collection of localization files in [XLIFF 1.2 format](/docs/file-formats/xliff-1.2/), [Localizable.xcstrings](/docs/file-formats/localizable-xcstrings/), Notes, and a `contents.json` file that describes the catalog. It is used to manage translations in Xcode projects.
The .xcloc format together with [Localizable.xcstrings](/docs/file-formats/localizable-xcstrings/) are successors to the [Localizable.strings](/docs/file-formats/localizable-strings/) and [Localizable.stringsdict](/docs/file-formats/localizable-stringsdict/) file formats.

## XC Catalog structure
The .xcloc format is a bundle (directory) file type that contains files and folders inside. In macOS it shows as a single file with the .xcloc extension, but it is actually a directory that contains multiple files.
```bash
es.xcloc/
├── contents.json
├── Localized Contents/
│ └── es.xliff
├── Notes/
│ └── [any additional notes]
└── Source Contents/
└── [.xcstrings files]
```
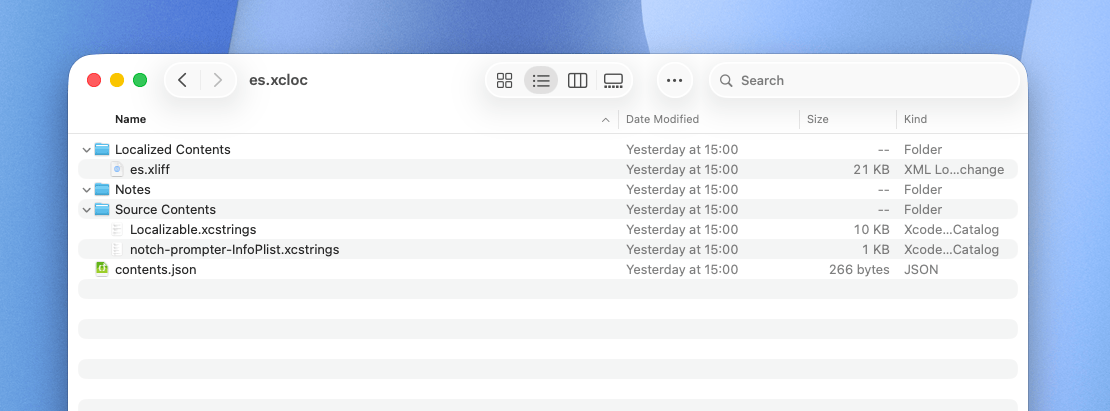
The bundle structure of the .xcloc file is as follows:
- `Localized Contents` - directory contains files for the target language in [XLIFF 1.2 format](/docs/file-formats/xliff-1.2/),
- `Source Contents` - directory contains the source translation files in [XC Strings format](/docs/file-formats/localizable-xcstrings/),
- `Notes` - directory can contain any additional notes related to localization,
- `contents.json` - file describes the catalog and contains metadata about the project.
## XC Catalog vs XC Strings
The .xcloc is a collection of localization files, while [XC Strings](/docs/file-formats/localizable-xcstrings/) is a single JSON-like file format that acts as a source of truth for translations in Xcode projects.
| Feature | .xcstrings | .xcloc |
|------------------------|-----------------------------|----------------------------------------|
| Format | JSON | Directory with translations + metadata |
| Purpose | Project repository | Translation exchange |
| Source of truth | Yes | No |
| Managed: Automatically | Lost when manually replaced | Preserved on import |
The .xcloc file can be exported from Xcode and imported back solely using the Xcode UI or `xcodebuild` command line tool, while XC Strings can be edited manually or synchronized with translation management systems like SimpleLocalize.
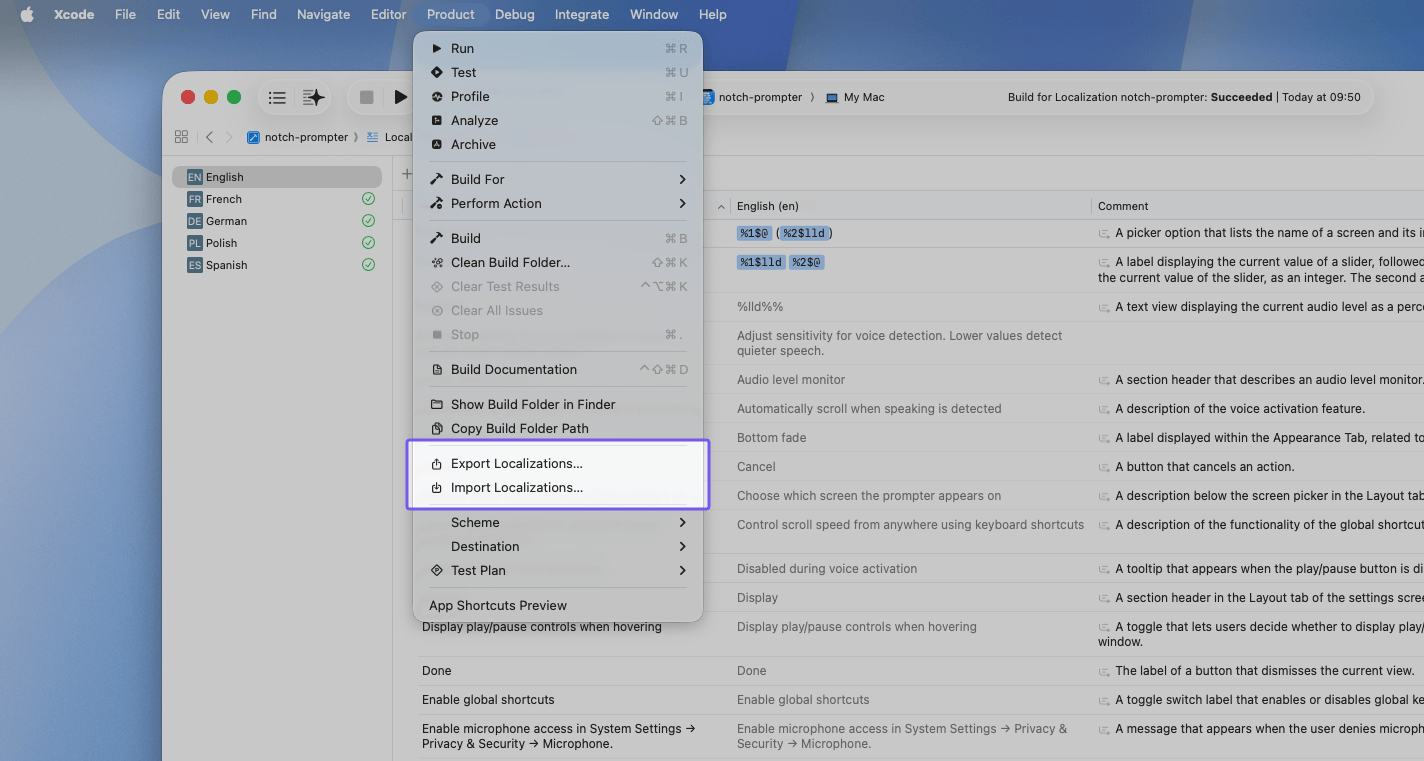
## How to manage XC Catalog?
There are 3 ways to sync translations:
- synchronize your [Localizable.xcstrings](/docs/file-formats/localizable-xcstrings/) file,
- synchronize [XLIFF 1.2](/docs/file-formats/xliff-1.2/) files inside .xcloc,
- synchronize .xcloc files using Xcode UI or `xcodebuild` command line tool.
### Localizable.xcstrings
Upload translations to SimpleLocalize
```properties
simplelocalize upload --apiKey \
--update \
--uploadFormat localizable-xcstrings \
--uploadPath ./MyApp.xcstrings
```
Download translations to Xcode
```properties
simplelocalize download --apiKey \
--downloadFormat localizable-xcstrings \
--downloadPath ./MyApp.xcstrings
```
### .xliff files
Upload translations to SimpleLocalize
```properties
simplelocalize upload --apiKey \
--update \
--uploadFormat xliff:1.2 \
--uploadPath ./MyApp.xcloc/Localized Contents/{lang}.xliff
```
Download translations to Xcode
```properties
simplelocalize download --apiKey \
--downloadFormat xliff:1.2 \
--downloadPath ./MyApp.xcloc/Localized Contents/{lang}.xliff
```
### .xcloc files
You can also synchronize translations by importing and exporting .xcloc files directly in Xcode or using the `xcodebuild` command line tool. This method allows you to keep the "Managed: Automatically" state in Xcode.
Export translations from Xcode to a .xcloc file and upload to SimpleLocalize
```bash
# Export translations from Xcode to .xcloc file
xcodebuild -exportLocalizations -project MyApp.xcodeproj
# Upload the exported .xcloc file to SimpleLocalize
simplelocalize upload --apiKey \
--update \
--uploadFormat xcloc \
--uploadLanguageKey en \
--uploadPath ./MyApp/en.xcloc
```
Download translations from SimpleLocalize to a .xcloc file and import back to Xcode
```bash
# Download translations from SimpleLocalize to .xcloc file
simplelocalize download --apiKey \
--downloadFormat xcloc \
--downloadLanguageKey de,es,fr \
--downloadPath ./{lang}.xcloc
xcodebuild -importLocalizations -project MyApp.xcodeproj -localizationPath ./de.xcloc
xcodebuild -importLocalizations -project MyApp.xcodeproj -localizationPath ./es.xcloc
xcodebuild -importLocalizations -project MyApp.xcodeproj -localizationPath ./fr.xcloc
```
## Resources
- [SimpleLocalize CLI upload](/docs/cli/upload-translations/)
- [SimpleLocalize CLI download](/docs/cli/download-translations/)
- [XLIFF 1.2 format](/docs/file-formats/xliff-1.2/)
- [Localizable.xcstrings format](/docs/file-formats/localizable-xcstrings/)
- [Localizable.strings format](/docs/file-formats/localizable-strings/)
- [Localizable.stringsdict format](/docs/file-formats/localizable-stringsdict/)
---
# File formats: Gettext - PO/POT
Source: https://simplelocalize.io/docs/file-formats/gettext-po-pot/
**PO files (Portable Object) are plain-text files used by the Gettext system for software localization and internationalization.**
PO file format was released initially in 1990, and it's still widely used in many Unix-like systems, and modern frameworks like **[Django](/docs/integrations/django/), Ruby on Rails, WordPress, and many others.**
**PO files are used to store translations for a single language.** They contain message ids (translation key), comments, and contexts, and translated messages. We can distinguish two different file formats:
- **POT file format** (Portable Object Template) is used as a template for translating
text, it does not contain translated messages, only message ids, comments, and contexts. You can treat it as a template.
- **PO file format** is a translation record that contains the same
values as a POT file, but it also contains translated strings for a single language.
## Recommended settings
Enable '**Use translation keys as translations**' import option, if your PO files don't have translations under the `msgstr` values and your
translations are in `msgid`. In CLI and API, this option is named `USE_KEYS_AS_TRANSLATIONS`.
Enable '**Import context as namespace**' option for import and '**Use namespace as message context**' option for export, if
you use `msgctxt` in your PO/POT files. This will allow distinguishing different translations with the same `msgid`.
In CLI and API, both options are named `MSGCTXT_AS_NAMESPACE`.
## File format example
Each translation unit consists of a message id, a message string, and optional metadata like comments, contexts, and plural forms.
```text
msgid ""
msgstr ""
"Content-Type: text/plain; charset=UTF-8\n"
"Plural-Forms: nplurals=3; plural=(n == 1 ? 0 : (n % 10 >= 2 && n % 10 <= 4 && (n % 100 < 10 || n % 100 >= 20) ? 1 : 2));\n"
"Language: pl\n"
# Single line
msgctxt "Translation context"
msgid "Translation key"
msgstr "Translation message"
# Multiple lines
msgid ""
"The input text "
"split to several "
"lines"
msgstr ""
"Translation "
"can also be splitted."
```
Many PO files contain metadata at the beginning of the file,
which is used to describe the file format, language, and plural forms.
The metadata is stored in the form of key-value pairs, separated by colons.
In the example above, the metadata contains the following keys:
- `Content-Type` - specifies the content type of the file
- `Plural-Forms` - specifies the plural forms used in the file
- `Language` - specifies the language of the translations
Some frameworks and tools require the metadata to be present in the file,
for example, the `Plural-Forms` and `Content-Type` headers are required by the Gettext library.
## Message id
The message id is the original text that needs to be translated.
```text
msgid "Hello, world!"
```
## Message string
The message string is the translated text that corresponds to the message id.
```text
msgstr "Witaj, świecie!"
```
## Context
The context is used to provide additional information about the translation.
```text
msgctxt "Greeting"
msgid "Hello"
msgstr "Witaj"
```
> If you use `msgctxt` to distinguish different translations with the same `msgid`, consider importing the context as namespace in SimpleLocalize. You can find 'Import context as namespace' option in the import settings.
## Plural forms
Plural forms are used to handle different grammatical forms of the same word.
The plural form is defined in the `Plural-Forms` header, which contains a formula that determines the correct plural form based on the number of items.
```text
msgid "There is one apple"
msgid_plural "There are %d apples"
msgstr[0] "Jest jedno jabłko"
msgstr[1] "Są %d jabłka"
msgstr[2] "Są %d jabłek"
```
SimpleLocalize fills the `Plural-Forms` header automatically for the language for which the translations are exported.
## Comments
Comments in PO files can be single-line or multi-line.
They can be used to describe the context of the translation,
provide additional information. Comments are prefixed with a hash sign `#`, `#.`, `#:` or `#,`.
```text
# This is a translator comment
#. Translators: This message appears on the home page only
#: mysite/views.py:7 templates/home.html:12
#, python-format
```
- `#` - translator comment, written by hand in the PO file
- `#.` - extracted comment, added by `xgettext` from the source code to provide additional information about the message
- `#:` - reference comment, used to specify the location of the message in the code
- `#,` - flags, e.g. `python-format`, `c-format` or `fuzzy`
On import, the translator comment (`#`) becomes the [key description](/docs/general/descriptions/). If there is no translator
comment, the extracted comment (`#.`) is used instead. On export, the key description is written back as a `#` comment
(or as `#.` with the `REFERENCE_COMMENTS` export option).
## Metadata stored in key attributes
SimpleLocalize keeps the remaining gettext metadata in the translation key [attributes](/docs/api/add-translations/) under the `po-pot` key,
so that it survives the round trip between your repository and the Translation Editor and can be used as context for
[auto-translation](/docs/general/auto-translation/):
```json
{
"po-pot": {
"msgctxt": "Greeting",
"references": ["mysite/views.py:7", "templates/home.html:12"],
"flags": ["python-format"],
"translator-comment": "This is a translator comment",
"extracted-comment": "Translators: This message appears on the home page only"
}
}
```
- `msgctxt` - message context, unless you import the context as namespace
- `references` - all `#:` locations of the message in the code
- `flags` - format flags from `#,`; the `fuzzy` flag is not stored, because it describes a single translation rather than the message
- `translator-comment` and `extracted-comment` - both comments kept separately, with line breaks preserved
Attributes are stored per translation key, not per language, so the values from the most recently imported PO file are kept.
Imports only replace the `po-pot` entry and leave attributes from other sources, such as Figma or other file formats, untouched.
On export, all of them are written back to the PO file. Keys without any gettext metadata are exported exactly as before.
## Example gettext usage
```cpp
printf(gettext("Hello world! I'm %s.\n"), application_title);
printf(_("Hello world! I'm %s.\n"), application_title);
```
## Upload with CLI
Upload source language translations to SimpleLocalize using CLI.
```properties
simplelocalize upload --apiKey PROJECT_API_KEY \
--uploadFormat po-pot \
--uploadLanguageKey en \
--uploadPath ./messages_en.po
```
Learn more about [SimpleLocalize CLI and translations upload](/docs/cli/upload-translations/) feature.
## Download with CLI
```properties
simplelocalize download --apiKey \
--downloadFormat po-pot \
--downloadLanguageKey pl,fr,de \
--downloadPath ./messages_{lang}.po
```
Learn more about [SimpleLocalize CLI and translations download](/docs/cli/download-translations/) feature.
## References
- [Gettext documentation](https://www.gnu.org/software/gettext/manual/gettext.html)
- [Django integration guide](/docs/integrations/django/)
---
# File formats: QT Linguist
Source: https://simplelocalize.io/docs/file-formats/qt-linguist/
**QT Linguist (.ts) file format is an XML-based format used by the Qt framework to manage and store translations** for internationalization (i18n) and localization (l10n) of applications.
It allows developers to easily translate application strings into multiple languages, making software globally accessible. The .ts files can be edited with Qt Linguist, a tool that simplifies the process of translation. By utilizing the .ts format, developers can ensure efficient management of multilingual content, localization workflows, and improve the user experience across different regions and languages.
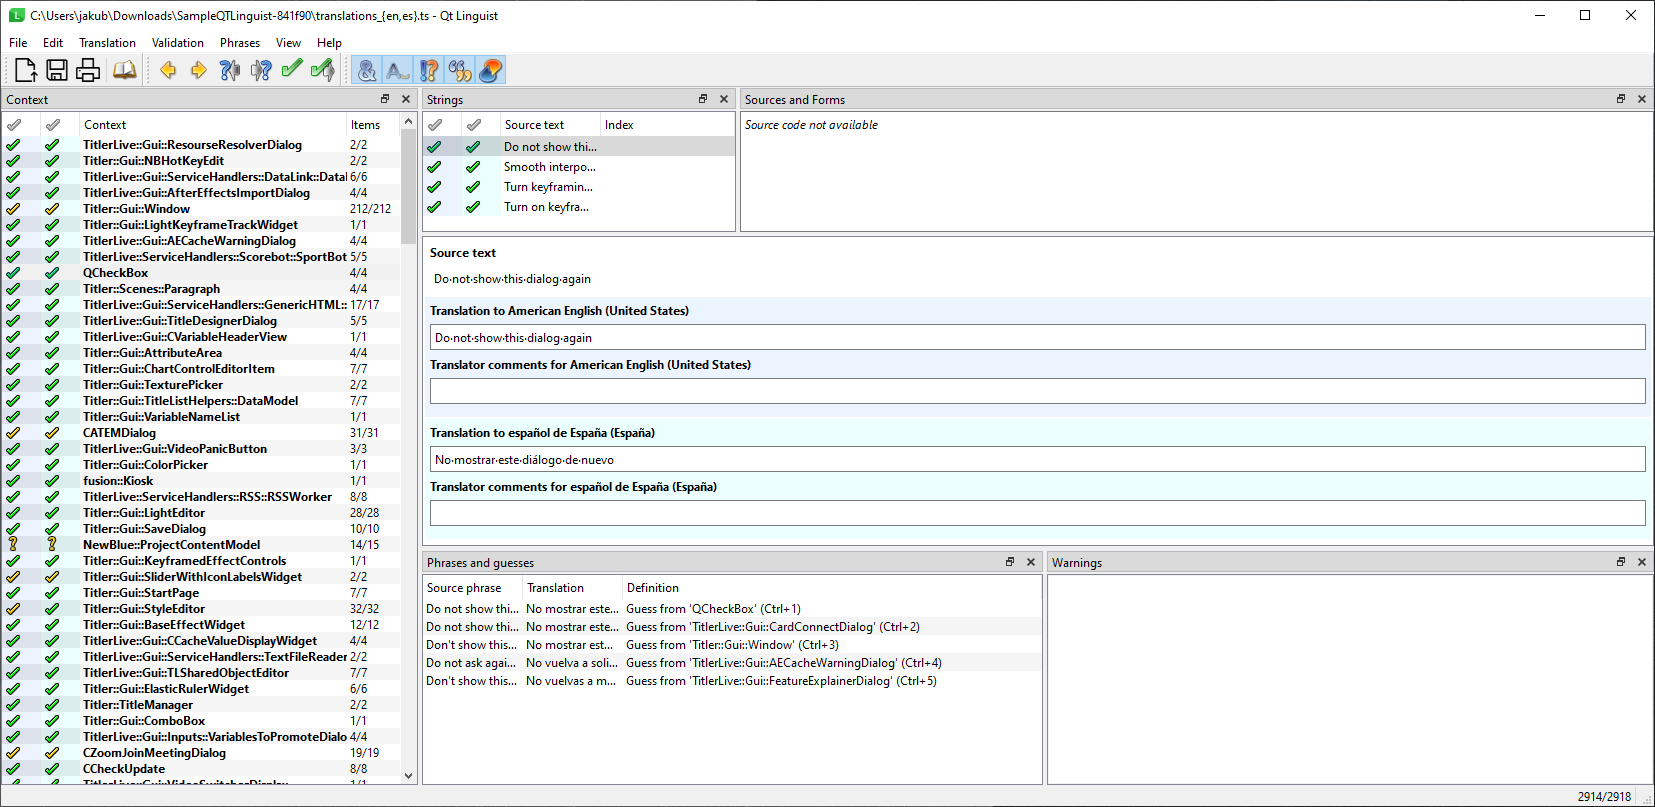
### File format example
```xml
AboutPageAuthorAutorWebsiteStrona WWWVersionWersjaFound %n filesZnaleziono %n plikZnaleziono %n plikiZnaleziono %n plików
```
## Contexts
Contexts are used to group translations that are related to a specific part of the application.
They help translators understand the context in which the translation will be used, making it easier to provide accurate translations.
In the example above, the context is `AboutPage`, which groups translations related to the about page of the application.
In SimpleLocalize, contexts are represented as namespaces, which allow you to organize translations into logical groups.
## Pluralization and variables
QT Linguist supports pluralization and variables in translations,
allowing developers to create dynamic and context-aware translations.
SimpleLocalize supports these features, making it easy to manage and translate complex strings.
```xml
Found %n filesZnaleziono %n plikZnaleziono %n plikiZnaleziono %n plików
```
In the example above, the `%n` variable is used to represent the number of files found.
The translation contains three different forms based on the value of `%n`, allowing for accurate pluralization in different languages.
SimpleLocalize will automatically create one translation key with multiple plural forms based on the ICU message syntax.
Learn more about [ICU message syntax](/blog/posts/what-is-icu/) or use our [ICU syntax playground](/tools/icu-message-syntax-tester/) to
learn how to create complex pluralization and variable translations.
## Comments
A Qt message can carry three different kinds of comments, and Qt treats them differently:
```xml
OpenverbLabel of the button that opens the selected fileKeep it short, the button is narrowÖffnen
```
- `` - added by `lupdate` from `//:` comments in the source code, written by developers for translators
- `` - typed by translators in Qt Linguist
- `` - the disambiguation passed as the second argument of `tr("Open", "verb")`; it is part of the message identity in Qt, not a note
On import, `` becomes the [code description](/docs/general/descriptions/) and `` becomes
the translator description. On export, the code description is written back as `` and the translator description as ``.
Both are always exported, so the `USE_CODE_DESCRIPTIONS` export option is not supported by this format and is rejected.
## Vanished and obsolete messages
When a string disappears from your sources, `lupdate` keeps its message in the `.ts` file but marks the translation as
`vanished` (translated) or `obsolete` (still unfinished):
```xml
Legacy headlineAlte Überschrift
```
On import, such messages are imported with their translations and the translation key is marked as deprecated. On export, deprecated keys are written back as `vanished` (with a translation)
or `obsolete` (without), so `lrelease` skips them the same way it does for your local files. Use the `EXCLUDE_DEPRECATED_KEYS`
reactivate the key on its own; use the `ACTIVATE_PRESENT_KEYS` import option for that.
## Metadata stored in key attributes
SimpleLocalize keeps the remaining Qt metadata in the translation key [attributes](/docs/api/add-translations/) under the
`qt-linguist` key, so that can be used as context for [auto-translation](/docs/general/auto-translation/):
```json
{
"qt-linguist": {
"comment": "verb",
"filename": "../../src/qml/components/ReadinessCheck.qml",
"line": "2137"
}
}
```
Attributes are stored per translation key. On export, `` and `` are written back to the file. Keys without any Qt metadata are exported exactly as before.
## Upload and download translation files
Use the [SimpleLocalize CLI](/docs/cli/get-started/) to upload and download translations in the QT Linguist format.
Use `qt-linguist` as the format argument, provide the path to the translation file and the language key for upload.
### Upload source translations in QT Linguist format
```properties
simplelocalize upload --apiKey \
--format qt-linguist \
--languageKey en \
--path ./translations.ts
```
Learn more about [uploading translations with CLI](/docs/cli/upload-translations/).
### Download translations to QT Linguist format
```properties
simplelocalize download --apiKey \
--format qt-linguist \
--path ./translations_{lang}.ts
```
Learn more about [downloading translations with CLI](/docs/cli/download-translations/).
## Resources
- [Source code examples](https://code.qt.io/cgit/qt/qtbase.git/tree/examples/widgets/tools/i18n/translations?h=5.15)
- [QT Linguist - i18n plural rules](https://doc.qt.io/qt-6/i18n-plural-rules.html)
- [QT Linguist - QLocale](https://doc.qt.io/qt-6/qlocale.html)
---
# File formats: RESX
Source: https://simplelocalize.io/docs/file-formats/resx/
**RESX (.resx) file format** is an XML-based format used by the .NET framework to store resources for different data types, such as strings, images, and other objects.
It's commonly used for internationalization (i18n) and localization (l10n) of applications developed with .NET technologies.
### File format example
```xml
¡Bienvenido a nuestra aplicación!Este es el mensaje de bienvenida mostrado en la pantalla principal.¿Está seguro de que quiere salir?Mensaje que pregunta si el usuario desea salir de la aplicación.EnviarTexto en el botón de enviar.
```
## Pluralization and variables
RESX files don't have built-in support for pluralization or variables.
To handle pluralization, you can create multiple keys for different plural forms.
For example, you can create keys like `FoundFile`, `FoundFiles`, and `FoundFilesPlural` to handle different plural forms.
## Upload and download translation files
Use the [SimpleLocalize CLI](/docs/cli/get-started/) to upload and download translations in the RESX format.
Use `resx` value as the format argument, provide the path to the translation file and the language key for upload.
### Upload source translations in RESX format
```properties
simplelocalize upload --apiKey \
--format resx \
--languageKey en \
--path ./Strings.resx
```
Learn more about [uploading translations with CLI](/docs/cli/upload-translations/).
### Download translations in RESX format
```properties
simplelocalize download --apiKey \
--format resx \
--path ./Strings.{lang}.resx
```
Learn more about [downloading translations with CLI](/docs/cli/download-translations/).
## Culture-neutral RESX file
Visual Studio expects a culture-neutral `Strings.resx` next to the localized `Strings..resx` files: the
neutral file is the one its single-file generator turns into the strongly-typed `Strings.Designer.cs` accessor
class. By default, the CLI names every downloaded file after its SimpleLocalize language key, so the source language
would come out as `Strings.en.resx`.
To download the source language as `Strings.resx`, move the culture suffix together with its leading dot into
the [language mapping](/docs/cli/download-translations/#language-mapping) and leave the source language with an
empty placeholder:
```yaml
# simplelocalize.yml
apiKey:
downloadFormat: resx
downloadPath: ./Resources/Strings{lang}.resx
uploadFormat: resx
uploadPath: ./Resources/Strings{lang}.resx
mappings:
lang:
- languageKey: "en"
placeholder: "" # Strings.resx (culture-neutral)
- languageKey: "pl-PL"
placeholder: ".pl-PL" # Strings.pl-PL.resx
- languageKey: "de-DE"
placeholder: ".de-DE" # Strings.de-DE.resx
```
```properties
simplelocalize download
```
produces
```properties
./Resources/Strings.resx
./Resources/Strings.da-DK.resx
./Resources/Strings.de-DE.resx
```
The mapping is applied in reverse on upload, so `simplelocalize upload` with the same configuration sends
`Strings.resx` as `en` and `Strings.pl-PL.resx` as `pl-PL` without any `--languageKey` argument.
## Resources
- [Microsoft .NET RESX docs](https://learn.microsoft.com/en-us/dotnet/core/extensions/work-with-resx-files-programmatically)
---
# File formats: ARB
Source: https://simplelocalize.io/docs/file-formats/arb/
ARB file format is used by Flutter framework for localization. It is a JSON file format that contains translation keys and localized messages.
Basically it is a JSON file with a specific structure that is used by Flutter framework to localize your app. It's very similar to a [single-language JSON file format](/docs/file-formats/single-language-json/), but with a few differences.
ARB format uses key-value pairs to store translations, where the key is a translation key and the value is a localized message.
It's usually used with the [Intl](https://pub.dev/packages/intl) package in Flutter, thus it doesn't support nested keys, arrays or other complex structures as the Intl package doesn't support them.
### File format example
This is the most basic example of an ARB file with a few translation keys, localized messages and descriptions.
```json
{
"@@locale": "en",
"home.interface.signup": "Signup",
"@home.interface.signup": {
"description": "The text on the signup button"
},
"home.interface.email": "Email",
"home.interface.password": "Password",
"@home.interface.password": {
"description": "The text on the password input field"
},
"notifications_zero": "No notifications",
"notifications_one": "You have one notification",
"notifications_other": "You have {count} notifications",
"@notifications_other": {
"description": "The text that shows the number of notifications"
}
}
```
Every translation key is a key in the JSON object, and the value is the localized message. The key can also have a description, which is a comment that describes the translation key.
The description is a key-value pair with the key starting with `@` and the value being the description. Under "@" + translation key object you can add specify more metadata about the translation key.
## Message interpolation
Pluralization and variables formatting are done by your translation library (e.g. [Intl](https://pub.dev/packages/intl))
and the library you use for localization in your Flutter app. You can use a `{key}` argument for placing a value into the message.
The key is looked up in the input data, and the string is interpolated with its value.
### Formatting
```json
{
"hello": "Hello, {name}!"
}
```
Your variable: `name`.
### Pluralization
```json
{
"notifications_zero": "No notifications",
"notifications_one": "You have one notification",
"notifications_other": "You have {count} notifications"
}
```
Learn more about [ICU message syntax](/blog/posts/what-is-icu/) or use our [ICU syntax playground](/tools/icu-message-syntax-tester/) to test your messages.
## Custom properties
You can also add custom properties to your ARB files. Custom properties are key-value pairs that you can use to store additional information about your translations.
Custom properties are added as key-value pairs with the key starting with `@` and the value being the custom property.
```json
{
"home.interface.signup": "Signup",
"@home.interface.signup": {
"description": "The text on the signup button",
"context": "Button text",
"author": "John Doe"
}
}
```
SimpleLocalize uses the description in the `description` as the description of the translation key, and the rest of the custom properties are stored as metadata of the translation key. You can use custom properties to store any additional information about your translations, such as context, author, etc.
## Upload translation files
### Upload with command-line tool
```properties
simplelocalize upload --apiKey \
--uploadFormat arb \
--uploadLanguageKey en \
--uploadPath ./app_en.arb
```
Learn more about [uploading translations with CLI](/docs/cli/upload-translations/).
### Import with REST API
```shell
curl
--request POST \
--url 'https://api.simplelocalize.io/api/v2/import?uploadFormat=arb&languageKey=en' \
--header 'x-simplelocalize-token: ' \
--form file=@/path/to/your/file.arb
```
Learn more about [importing translations with API](/docs/api/import-translations/).
## Download translation files
### Download with command-line tool
```properties
simplelocalize download --apiKey \
--downloadFormat arb \
--downloadPath ./app_{lang}.arb
```
### Export with REST API
```shell
curl
--request GET \
--url https://api.simplelocalize.io/api/v4/export?downloadFormat=arb \
--header 'x-simplelocalize-token: '
```
Learn more about [exporting translations with API](/docs/api/export-translations/).
---
# File formats: JavaScript
Source: https://simplelocalize.io/docs/file-formats/javascript/
JavaScript file format is a simple way to store translations in JavaScript or TypeScript format. This format is useful when you want to store translations in a single file and use it in your application.
### File format example
```js
export default {
"HELLO_WORLD": "Hello world!",
"TRANSLATION_KEY": "This is my translated text!"
}
```
## Upload with CLI
```properties
simplelocalize upload --apiKey \
--uploadFormat javascript \
--uploadPath ./messages_{lang}.js
```
Learn more about [SimpleLocalize CLI and translations upload](/docs/cli/upload-translations/) feature.
## Download with CLI
```properties
simplelocalize download --apiKey \
--downloadFormat javascript \
--downloadPath ./messages_{lang}.js
```
Learn more about [SimpleLocalize CLI and translations download](/docs/cli/download-translations/) feature.
## Import with API
```shell
curl
--request POST \
--url 'https://api.simplelocalize.io/api/v2/import?uploadFormat=javascript&languageKey=en' \
--header 'x-simplelocalize-token: ' \
--form file=@/path/to/your/file.js
```
Learn more about [importing translations with API](/docs/api/import-translations/)
## Export with API
```shell
curl
--request GET \
--url https://api.simplelocalize.io/api/v4/export?downloadFormat=javascript \
--header 'x-simplelocalize-token: '
```
Learn more about [exporting translations with API](/docs/api/export-translations/)
---
# File formats: CommonJS
Source: https://simplelocalize.io/docs/file-formats/module-exports/
CommonJS uses `module.exports` syntax to load various data. One of them are localization files. File format looks
very similar to the standard JSON file, but it starts with `module.exports = ` and it's saved as `JavaScript` with `.js` extension.
### File format example
```js
module.exports = {
"HELLO_WORLD": "Hello world!",
"TRANSLATION_KEY": "This is my translated text!"
}
```
## Upload with CLI
```properties
simplelocalize upload --apiKey \
--uploadFormat module-exports \
--uploadPath ./messages_{lang}.js
```
Learn more about [SimpleLocalize CLI and translations upload](/docs/cli/upload-translations/) feature.
## Download with CLI
```properties
simplelocalize download --apiKey \
--downloadFormat module-exports \
--downloadPath ./messages_{lang}.js
```
Learn more about [SimpleLocalize CLI and translations download](/docs/cli/download-translations/) feature.
## Import with API
```shell
curl
--request POST \
--url 'https://api.simplelocalize.io/api/v2/import?uploadFormat=module-exports&languageKey=en' \
--header 'x-simplelocalize-token: ' \
--form file=@/path/to/your/file.js
```
Learn more about [importing translations with API](/docs/api/import-translations/)
## Export with API
```shell
curl
--request GET \
--url https://api.simplelocalize.io/api/v4/export?downloadFormat=module-exports \
--header 'x-simplelocalize-token: '
```
Learn more about [exporting translations with API](/docs/api/export-translations/)
---
# File formats: Yaml
Source: https://simplelocalize.io/docs/file-formats/yaml/
YAML is a human-readable data serialization format commonly used for configuration files and data exchange.
SimpleLocalize supports importing and exporting translations in YAML format with various options to structure the file.
By default, the system recognizes nested keys in YAML files for importing translations.
## File format example
Basic YAML file example with translations in English.
```yaml
hello-world: Hello world!
home.interface.signup: Signup
home.interface.email: Email address
home.interface.password: Password
```
Nested keys in YAML file example:
```yaml
hello-world: Hello world!
home:
interface:
signup: Signup
email: Email address
password: Password
```
Importing both files will create the following keys:
- `hello-world`
- `home.interface.signup`
- `home.interface.email`
- `home.interface.password`
Nested keys are automatically recognized and joined with a dot to create a key name.
## Multi-language file
Use `MULTI_LANGUAGE` option to import or export a translation file with multiple languages, where
each language is separated by a language code. In the example below, translations are grouped by language code `en` and `pl`.
```yaml
en:
hello-world: Hello world!
home.interface.signup: Signup
home.interface.email: Email address
home.interface.password: Password
pl:
hello-world: Witaj świecie!
home.interface.signup: Zarejestruj się
home.interface.email: Adres email
home.interface.password: Hasło
```
## Nested translation keys
Use `WRITE_NESTED` option to export translations as nested keys in YAML files.
```yaml
hello-world: Hello world!
home:
interface:
signup: Signup
email: Email address
password: Password
```
## Nested language keys
Combine `LANGUAGES_NESTED`, `MULTI_LANGUAGE`, `WRITE_NESTED` as import or export options resulting in nested translations and language keys in one file.
In the example below, `en` and `pl` are nested under `translations`.
```yaml
hello-world:
en: Hello world!
pl: Witaj świecie!
home:
interface:
signup:
en: Signup
pl: Zarejestruj się
email:
en: Email address
pl: Adres email
password:
en: Password
pl: Hasło
```
## Upload with CLI
Upload YAML files with CLI using the following command:
```properties
simplelocalize upload --apiKey \
--uploadFormat yaml \
--uploadPath ./translations_{lang}.yaml
```
CLI will find all files matching the pattern `./translations_*.yaml` and upload them to the SimpleLocalize project.
Language code is extracted from the `{lang}` placeholder and used to set the language of the translations.
Learn more about [uploading translations with CLI](/docs/cli/upload-translations/).
## Upload with API
```shell
curl
--request POST \
--url 'https://api.simplelocalize.io/api/v2/import?uploadFormat=yaml' \
--header 'x-simplelocalize-token: ' \
--form file=@/path/to/your/file.yaml
```
Learn more about [importing translations with API](/docs/api/import-translations/).
## Download with CLI
```properties
simplelocalize download --apiKey \
--downloadFormat yaml \
--downloadPath ./translations_{lang}.yaml
```
Learn more about [downloading translations with CLI](/docs/cli/download-translations/).
## Download with API
```shell
curl
--request GET \
--url https://api.simplelocalize.io/api/v4/export?downloadFormat=yaml \
--header 'x-simplelocalize-token: '
```
Learn more about [exporting translations with API](/docs/api/export-translations/)