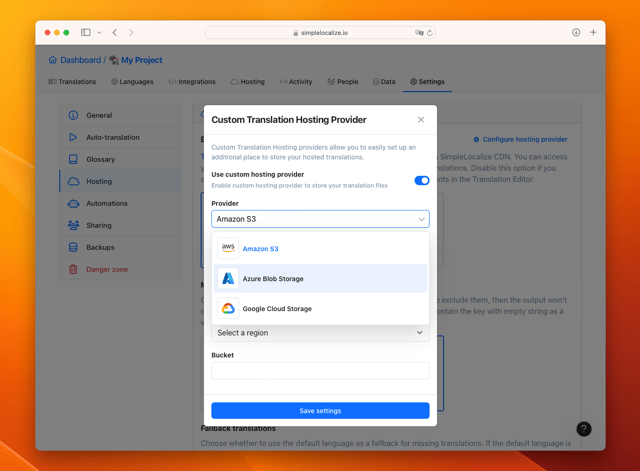
Translation Hosting feature by default stores all translations in the SimpleLocalize managed storage, but you can also use your own storage provider like Amazon S3, Azure Blob Storage, Google Cloud Storage.
In this section, you will learn how to publish translation files to your own storage provider. Configuring a custom hosting provider doesn't require any additional fees, but you need to have an account with the selected provider.

Configuring a custom hosting provider is a great way to have full control over your translations and store them in your own cloud storage. It's also a good option if you want to integrate SimpleLocalize with your existing infrastructure. Configuring a custom hosting provider doesn't replace the SimpleLocalize managed storage, so you can always switch back to the SimpleLocalize managed storage if you want to, without losing any data.
How to configure a custom hosting provider
To store translation files on cloud, simply go to your 'Settings' > 'Hosting', click on "Configure hosting provider" button and provide credentials of the service you’d like to use as your hosting provider.
Amazon S3 Bucket
Amazon S3 as a translation hosting service is a popular choice among developers. To add an Amazon S3 Bucket, you need to provide your Amazon Access Key, Secret Access Key, Region, and Bucket name in the configuration section. Read more about how to obtain your Amazon S3 Access Keys.
Azure Blob Storage
To add an Azure Blob Storage container, you need to provide your Azure Storage Account key and the name of the container in the Translation Hosting configuration section. You can read here about how to obtain your Azure Storage Access Keys.
Google Cloud Storage
SimpleLocalize can connect to a GCS bucket using a service account key.. Ensure the service account has the Storage Object Admin role. Depending on your internal GCS settings, additional permissions like Storage Admin, Storage Object Creator, and Storage Object Viewer may also be necessary. Obtain the JSON key for this account and select it in the file picker for the Credentials JSON field in the configuration popup.