


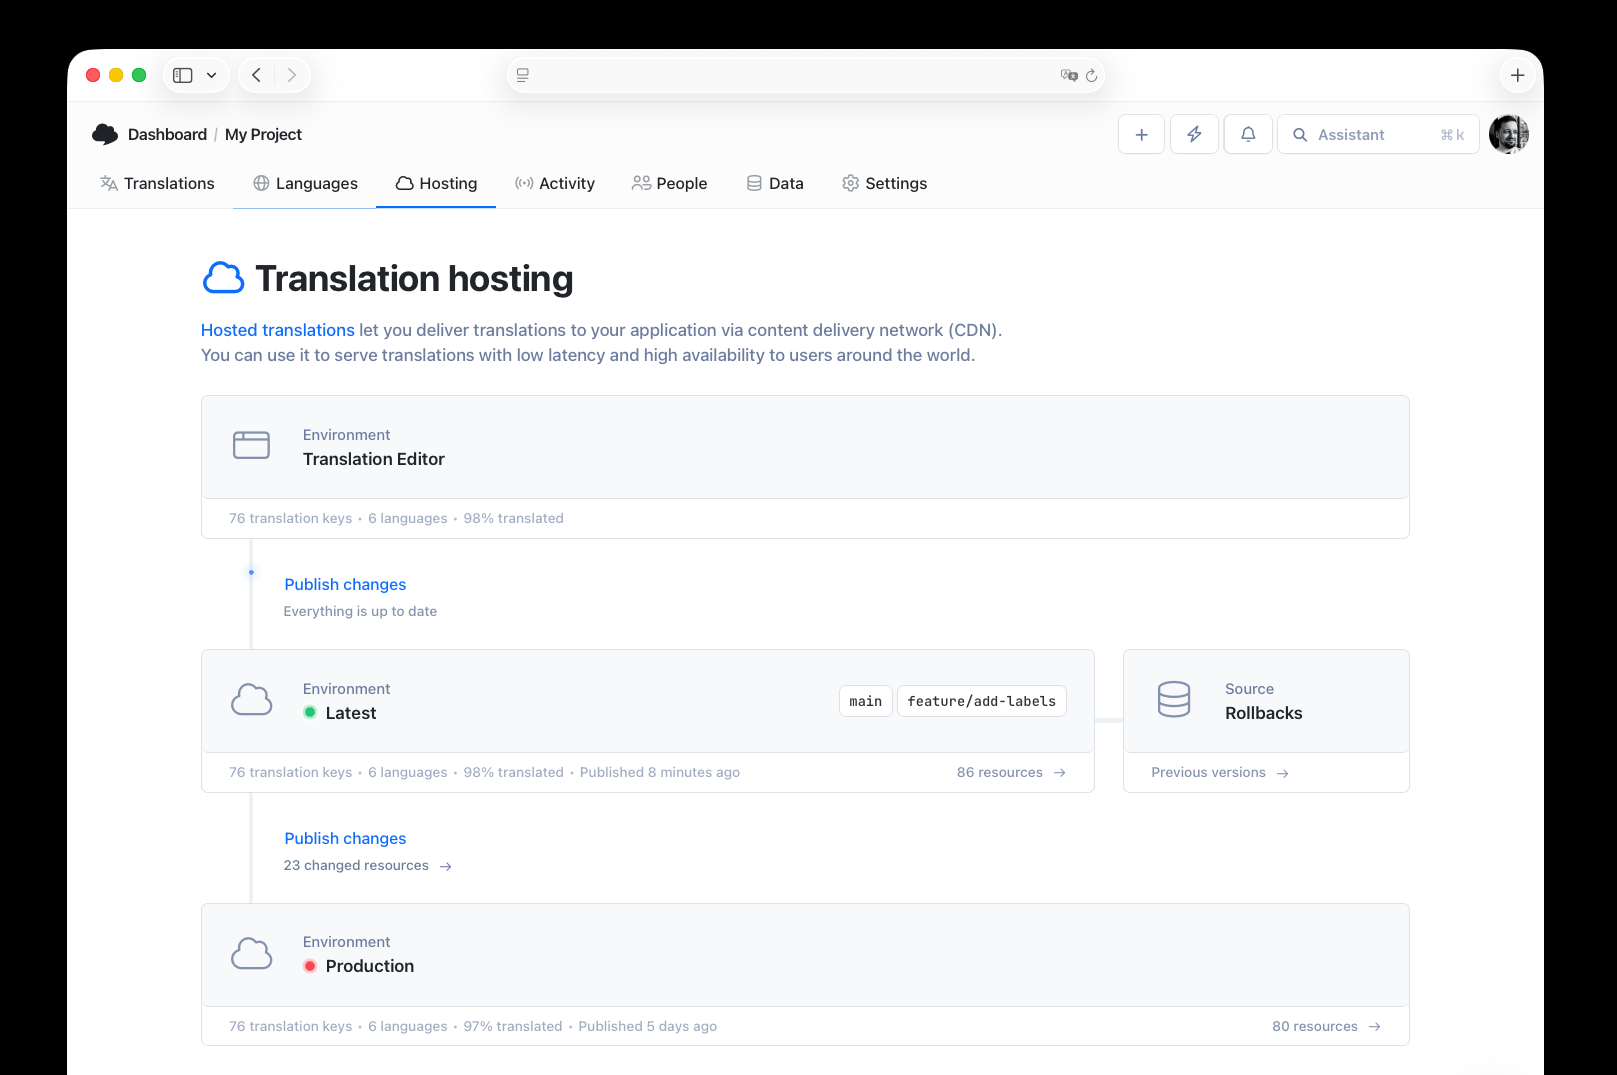
Translation Hosting comes with two default environments: Latest and Production. These are separate spaces where translations are stored. Translations are always published from the Translation Editor to the Latest environment.
Every environment has its own key, which is used in the URL to fetch translations, and in the REST API and CLI commands to perform operations like publishing translations or fetching the list of resources.
Latest environment
The Latest environment (key: _latest) is the default environment where translations are stored after publishing them from the Translation Editor.
It's a place where you can test translations before deploying them to your application. Thanks to the relatively short cache time, you can quickly see changes in your application.
Production environment
The Production environment (key: _production) is a place where you store translations that are ready to be deployed to your application.
They have a longer cache time, and they are optimized for production use.
Unpublished changes
When you make changes in the Translation Editor, they are not automatically published to the Latest environment. You have to publish them manually by clicking the 'Publish' button in the Translation Editor or in the Hosting tab. In the 'Hosting' tab, you can see the number of unpublished changes in the Latest environment card. It's a sum of all changes between the latest published version and the current state of translations.
Differences between environments
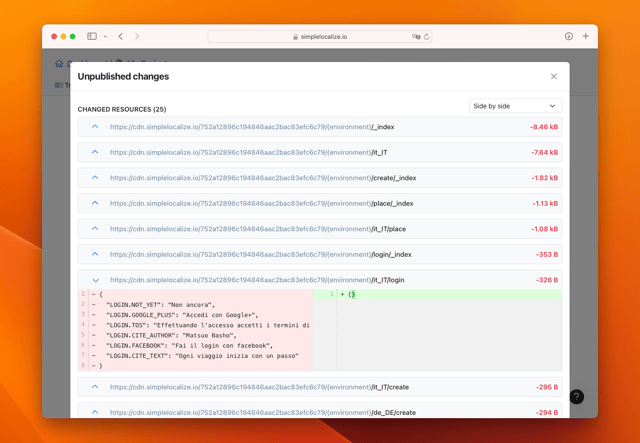
You can show differences between environments by clicking on the 'X changed resources' button below the environment cards. In the popup, you can see the differences between the two environments, including added, removed, and changed resources.
Custom environments
SimpleLocalize offers an option to create custom environments, which can be used to better suit your workflow. For example, you can create a staging environment to test translations before deploying them to the Production environment. This feature works also with custom hosting providers option.
To create a custom environment, go to the 'Settings' > 'Hosting' tab, and at the bottom of the page, you will find the 'Custom environments' section.
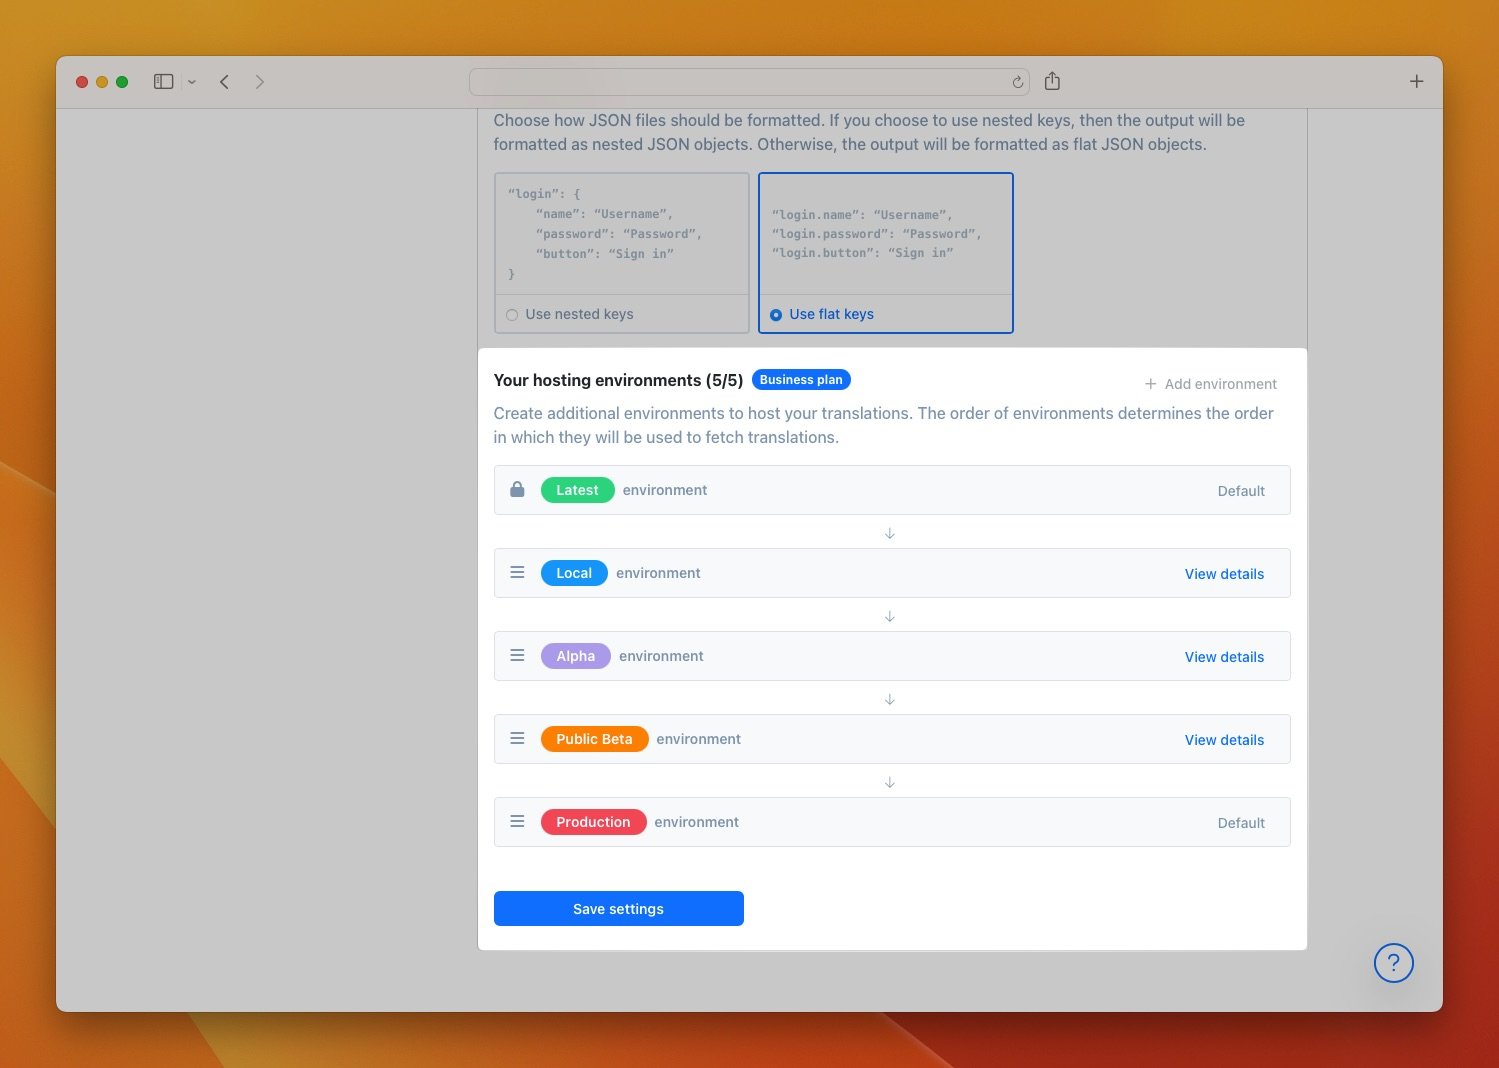
Here you can add a new environment by providing a display name (e.g.: Staging) a unique environment key (e.g.: staging) that will be used in the URL to fetch translations, and color that will be used to distinguish environments in the dashboard.
Watch out for the environment key, as it must be unique across all environments in your project and can't be changed after creation.
After creating a custom environment, you can move it up or down on the list to change the order of environments in the dashboard, as translations are always published to the first environment on the list, where the Latest environment is always the first one.
Deleting custom environments
To delete a custom environment, click on the trash icon next to the environment you want to remove. Hosting resources associated with the environment will be removed as well and can't be restored. Hosting files are not remove from the storage provider, so you can always fetch them by URL if needed. They are also not removed immediately, so you can still access them after some time.