


In this article, you will learn how to localize your Figma designs using SimpleLocalize plugin and translation editor. Use Figma integration to manage your design translations and collaborate with your team on project localization.
Plugin installation
In the first step, configure the Figma SimpleLocalize plugin in your Figma project. Start by logging in to your Figma account and opening a project you would like to translate.
Go to Resources > Plugins and search for SimpleLocalize.
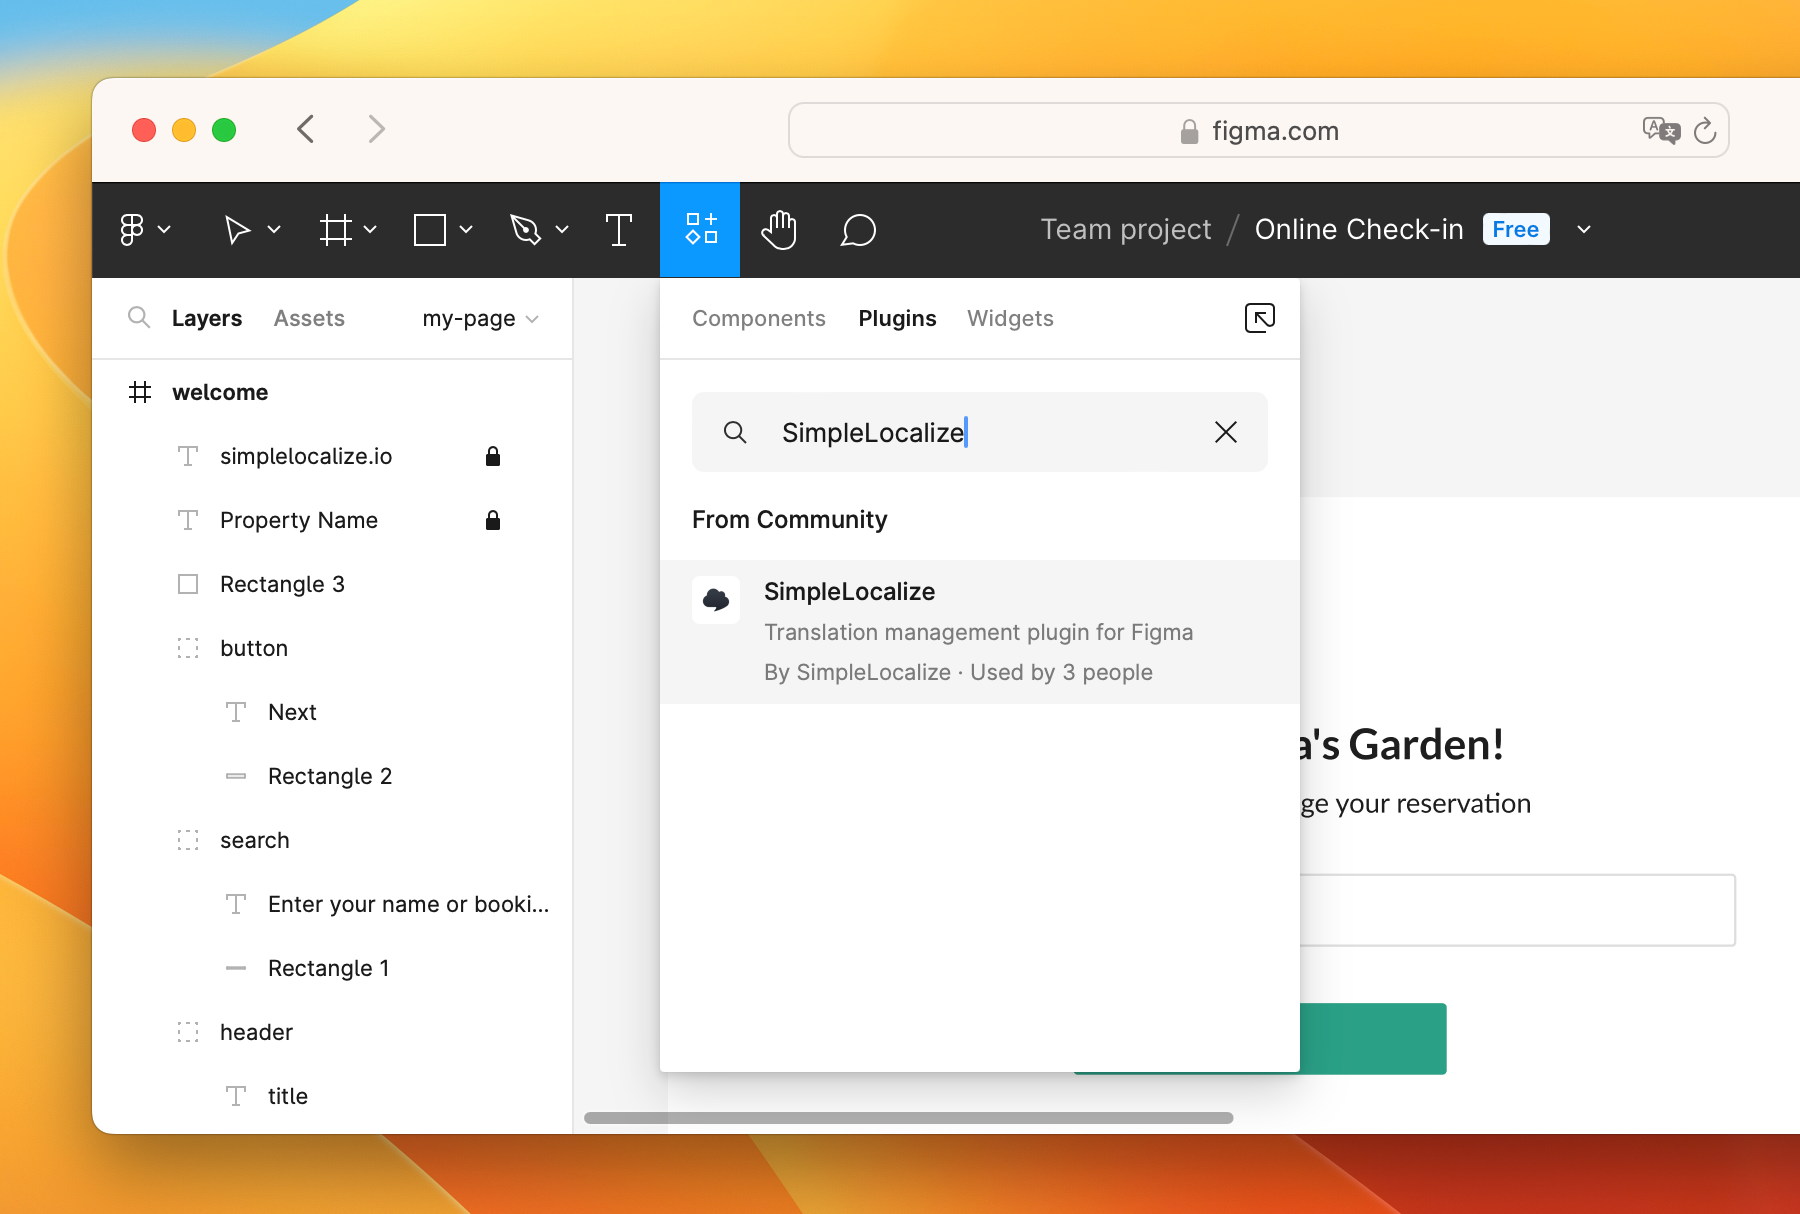
Open the plugin and connect it to your SimpleLocalize account. For that, you will need your personal token generated in account settings. Next, choose which project corresponds to the open Figma design.
Deep linking integration
You can also enable deep linking that will allow you to navigate from SimpleLocalize translation editor directly to the Figma element connected to the translation key. To enable deep linking, go to Figma settings in SimpleLocalize and provide your Figma file key or URL.
The file key is the unique identifier of your Figma file and can be found in the URL of your Figma design.
For example:
https://www.figma.com/file/ABCDEFG1234567890/https://www.figma.com/design/ABCDEFG1234567890/
In both cases, the file key is ABCDEFG1234567890.
Working with translations
SimpleLocalize Figma plugin is built around two main actions:
- Push translations - to send texts from Figma to SimpleLocalize,
- Pull translations - to import translations from SimpleLocalize to Figma.
With these actions, you can synchronize your Figma designs with SimpleLocalize translation editor in both directions, allowing you to manage translations directly in Figma and collaborate with your team.
Push translations
Push translations sends texts from Figma to SimpleLocalize. On every push, the plugin will check if the text element is connected to a translation key in SimpleLocalize and update the translation. If the text component is not connected, it will:
- Create a new translation key in SimpleLocalize,
- Connect it to the Figma text element,
- Update the translation text in SimpleLocalize.
- Optionally, upload a screenshot of the Figma frame as a translation key screenshot.
By default, when you push multiple translations from the plugin, it will update only empty translations in SimpleLocalize to prevent making unintentional changes to existing translations.
If you push a single text element from the Select tab, it will always update the translation in SimpleLocalize, even if it is not empty.
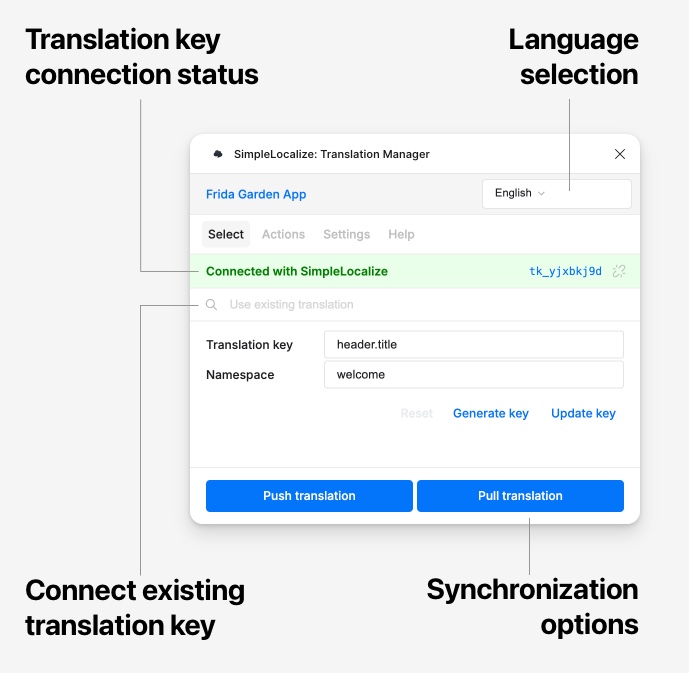
Connection state
Connection state is a status of the Figma text element in relation to SimpleLocalize translation key. It can be one of the following:
- Connected - the text element is connected to a translation key in SimpleLocalize, and you can push/pull translations for this element.
- Not connected - the text element is not connected to any translation key in SimpleLocalize, and you can create a new translation key by pushing translations.
You can check the connection state of the Figma text element in the Select tab of the plugin. Connections are made automatically when you push translations from the Select or Actions tab.
Pull translations
Pull translations downloads translations from SimpleLocalize to Figma, allowing you to see your design in different languages. You can switch between languages in the plugin and see what your design looks like with translations. Translations are pulled from the language you have selected in the plugin. You can pull translation for all Figma text elements in the Actions tab or just for the selection in the Select tab.
Plugin settings
Once the plugin is installed, configure the connection between Figma design and the SimpleLocalize project by adjusting plugin settings. You can find all the configuration options in the Settings tab.
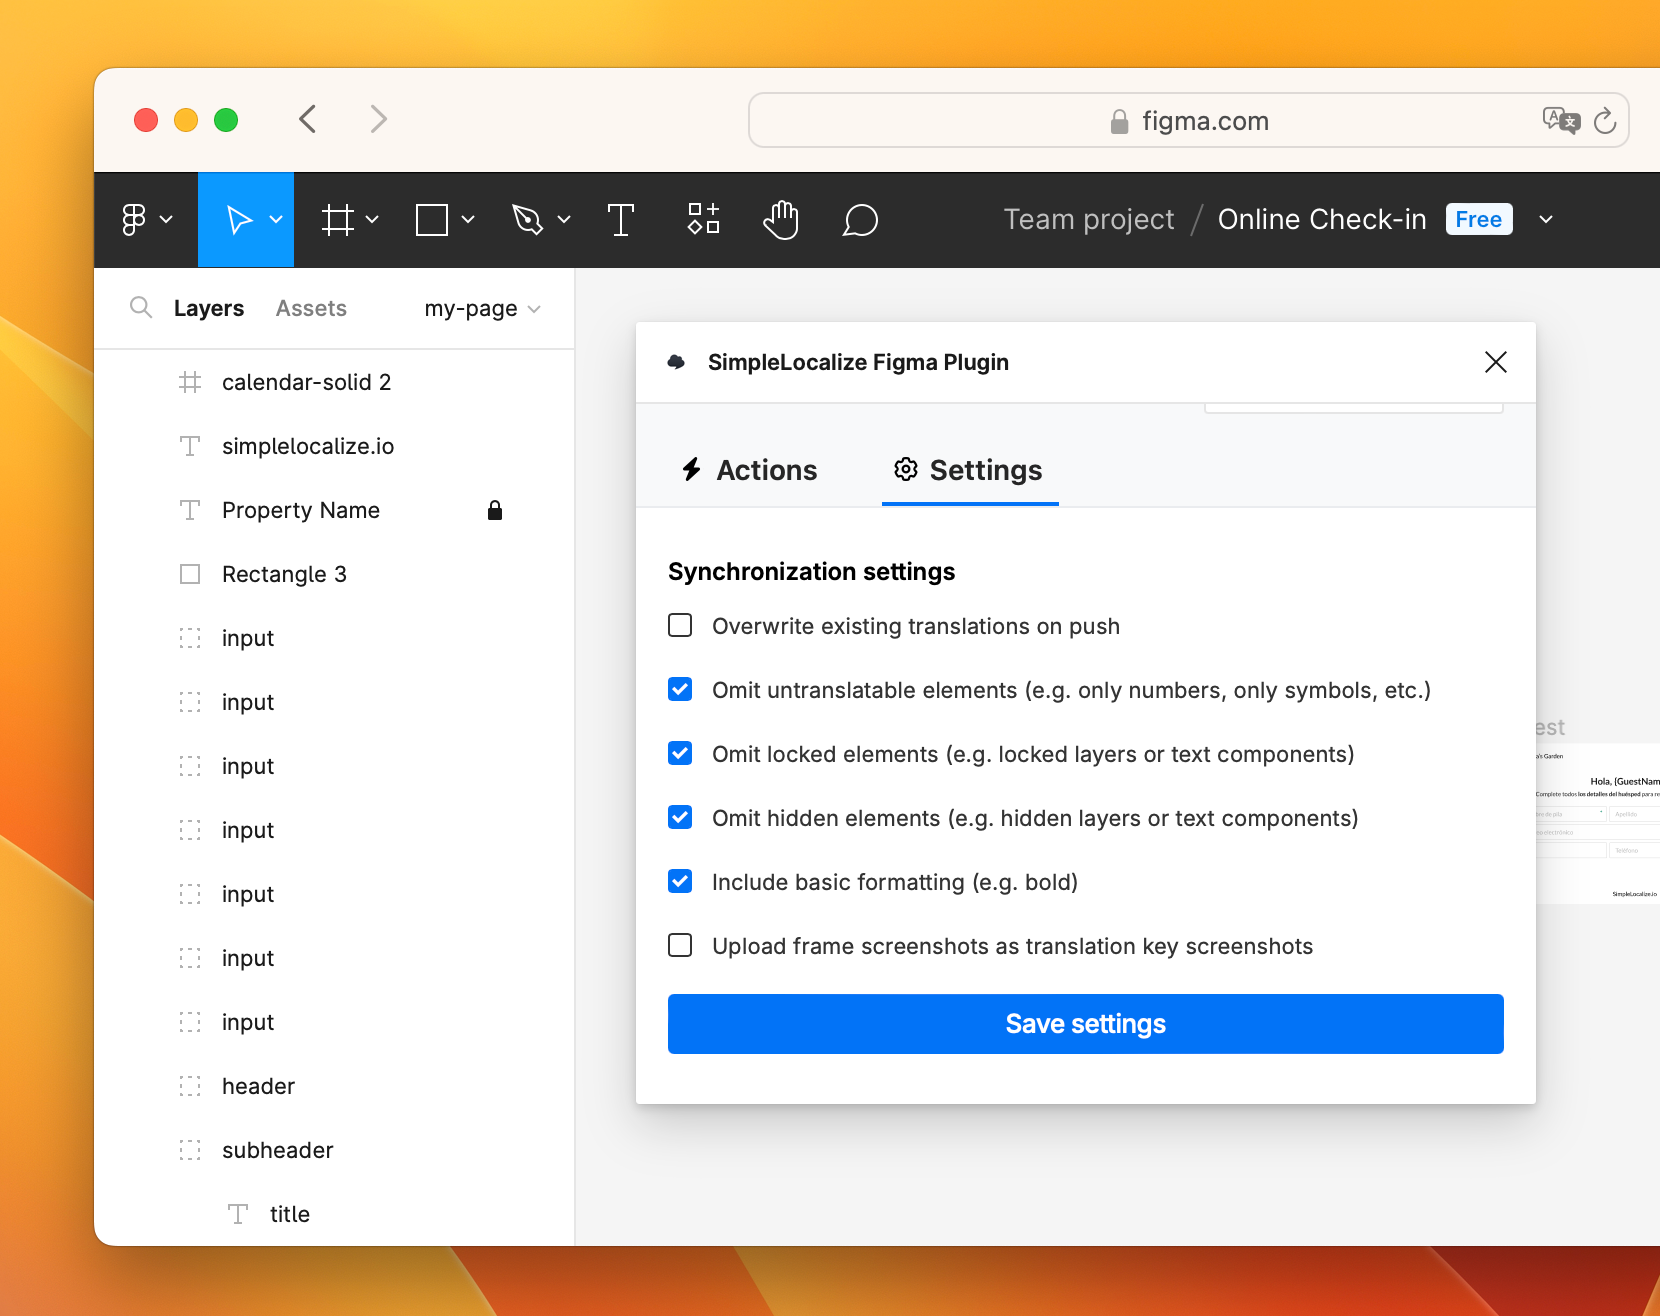
Synchronization settings
In the Synchronization settings tab of the plugin, you can find the following options:
- Overwrite existing translations on push
- Omit untranslatable elements (e.g., elements with only numbers or symbols)
- Omit locked elements; if an element in Figma is locked, it won't be included in push
- Omit hidden elements
- Include basic text formatting
- Upload frame screenshots as translation key screenshots.
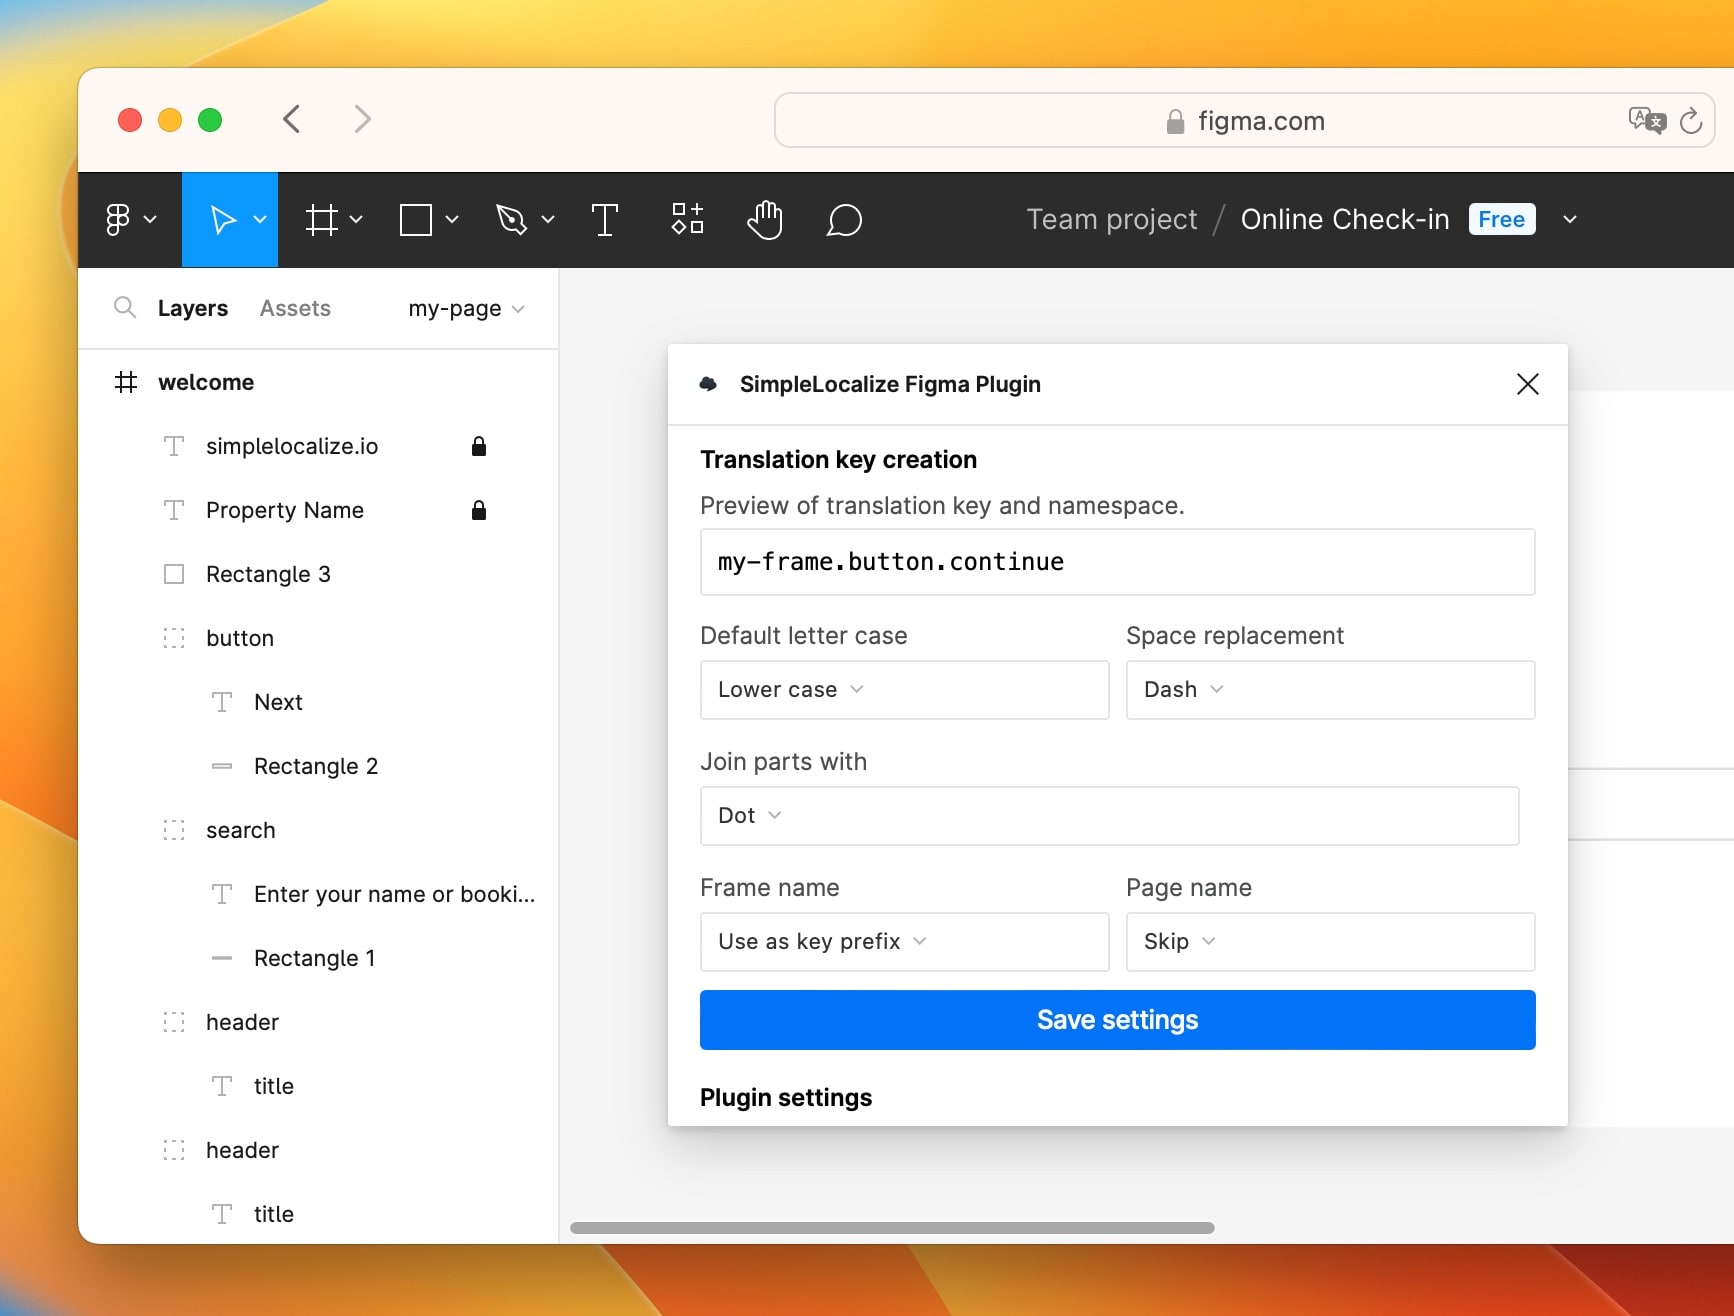
Translation key creation
Translation key creation settings allow you to customize how translation keys are created from Figma text elements when you push new translations.
You can choose to use the frame name, group name, and element name as part of the translation key.
By default, the key format is my-frame.button.continue which uses the frame as a prefix and then adds the group name (if used) and element name.
Troubleshooting
Translation or key has not been created/updated
Please remember that Figma plugins take into consideration only Figma plugins that are in Frame, and it may also skip synchronization for components that are locked or hidden if you changed the default Synchronization settings. If you have any issues with translations or keys not being created or updated, check if the elements meet these criteria. If the problem still occurs you can check logs in Developer Console by clicking the "Plugins > Development > Open Console... > 'Console' tab".
Translation has not been updated in SimpleLocalize
By default, the plugin will update only empty translations in SimpleLocalize. If you want to overwrite existing translations, you can change this setting in the Synchronization settings tab of the plugin. Make sure to check the Overwrite existing translations on push option.
Access denied
If you see Access denied error, it means that the plugin is not able to access the SimpleLocalize API. Make sure your Personal Token is valid, you can generate a new token Personal Token and change it in the Figma > Plugin > 'Settings' tab -> Personal Token and click 'Update Personal Token' button.