Custom integrations for SimpleLocalize
SimpleLocalize is an app that provides a UI to manage translations for your application—but it’s more than just a UI. You can explore a wide range of custom-built integrations for tools like Cursor AI, VS Code, Figma, IntelliJ, the command line, and many more. Our goal has always been to offer users maximum extensibility and flexibility, allowing them to use their preferred tools while keeping the translation workflow as simple as possible.
In this article, we’ll share advice and tips on how to create your own custom integration for SimpleLocalize. We will walk you through some useful API endpoints and explain how to use them to ensure your integration is solid and reliable.

Why would you need a custom integration?
While we offer a wide variety of pre-built integrations for many popular apps and development tools, there are still cases where you might need something more tailored. You may want to integrate with a tool that SimpleLocalize doesn’t support yet, or perhaps you have specific workflow requirements that demand a custom solution.
Over time, we have helped many developers and organizations build their own integrations—and we are happy to help you do the same! In this article, we’ve gathered all the essential information you need to create a custom integration with SimpleLocalize, and we’ll walk you through it step by step.
Making an impact
As a developer, you might enjoy exploring new ideas and building tools that boost your productivity. You may want to create a custom integration for your IDE or develop a translation tool that helps you translate your app more efficiently.
Saving time
Reducing the time spent on managing translations is a strong reason to build a custom integration. If you are already familiar with the tool or platform you want to integrate, the process can be quite manageable. With a bit of support from us, you can build an integration that saves you a significant amount of time.
Discounts for Developers
ICreating a custom integration can be a big task, and we understand it takes time and effort. If you are planning to build an integration that benefits the SimpleLocalize community, we’d love to support you in that process.
We’re also happy to offer a discount or extend your SimpleLocalize plan if you create an integration that others can use. Feel free to reach out—even if you are not sure yet what kind of integration you want to build. We are here to help!
How to get started quickly?
Starting a new project can feel overwhelming—there’s test data to gather, documentation to read, and uncertainty about what’s possible. We understand that feeling, and we are here to make it easier for you.
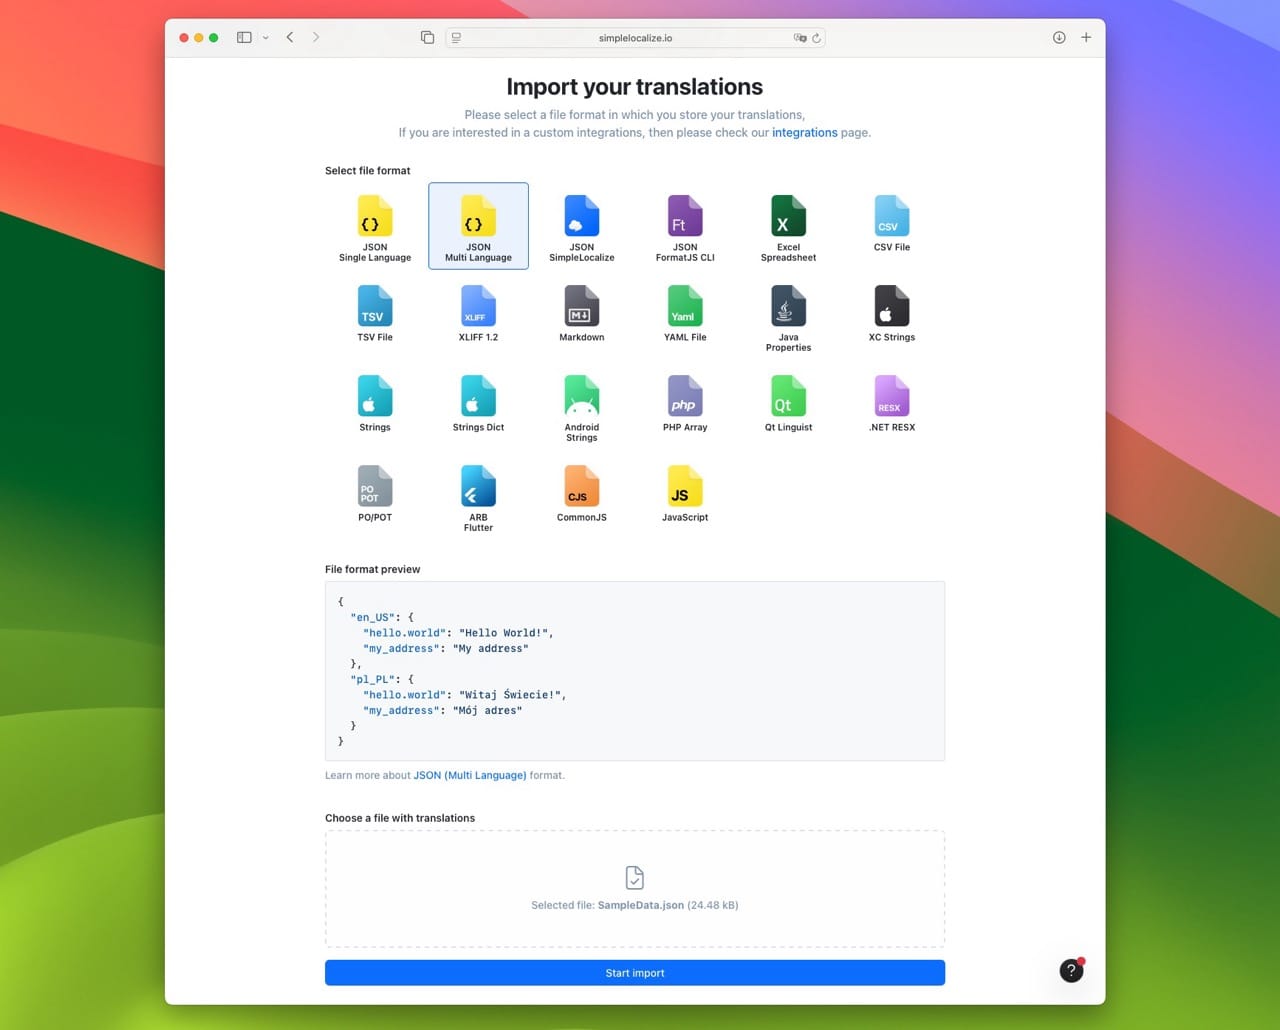
1. Create a new project
The easiest way to begin is by creating a new project in SimpleLocalize. Import a sample translations file for testing using the 'multi-language-json' format to get things up and running quickly.
2. Get your API Key
After setting up your project, retrieve the API key to authenticate your requests to the SimpleLocalize API. Run Command Assistant (CMD + k or Ctrl + k), type 'Copy API Key' and click 'Enter' to copy the API key to your clipboard, or go to the project settings, and copy the API key manually from there.

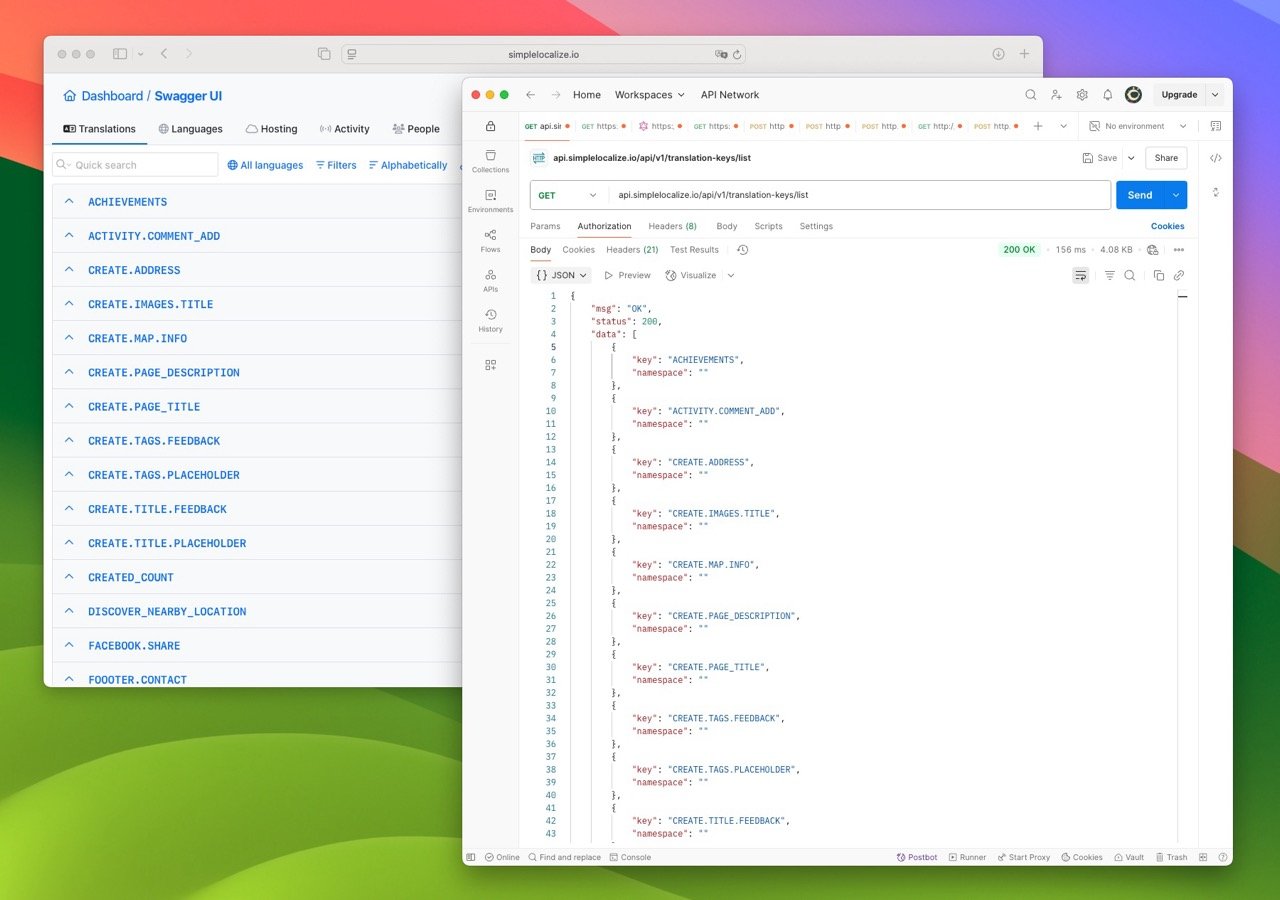
3. Test the API
Use our Swagger UI to test the API. Use the API Key you copied in the previous step to authenticate your requests by using it in X-SimpleLocalize-Token header.
Alternately, you can use tools like Postman or Insomnia to explore the API. You can create your own collection of requests by importing our OpenAPI specification file.
Integration ideas
There are many different ways to integrate SimpleLocalize with your app, and we are happy to help you with that, for example:
- IntelliJ IDEA plugin - integration with IntelliJ IDEA for managing translations in IDE
- VS Code extension - integration with Visual Studio Code
- Figma plugin - integration with Figma, for pushing translations from Figma to SimpleLocalize
- Command-line tool - integration with command-line, for managing files via CLI
- Model Context Protocol - integration with LLM agents
Getting access to the API
Every project in SimpleLocalize has its own API Key and Project Token. API Key is used to authenticate your requests, and you provide it via X-SimpleLocalize-Token header.
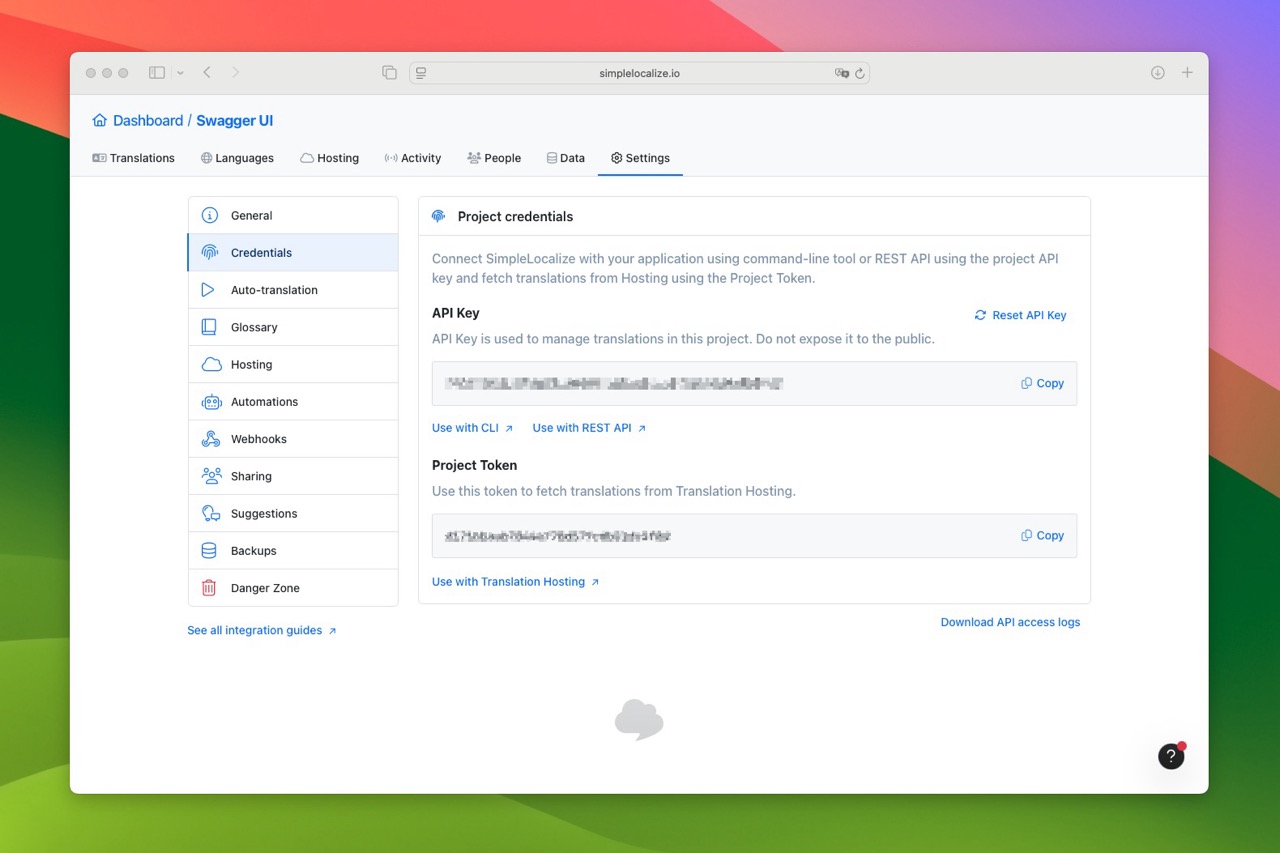
Project Token is used mostly for Translation Hosting, allowing you to fetch translations from CDN. Hosted translations are a great way to get lightning fast access to translations on the client-side without exposing your API key to the end users.
Personal Access Tokens (PAT) are used to authorize specific endpoints and are tied to individual user accounts.. For example, you can use a PAT to get a list of all projects. The PAT is always sent in the Authorization header.
You can send it with every request, but it is not necessary.
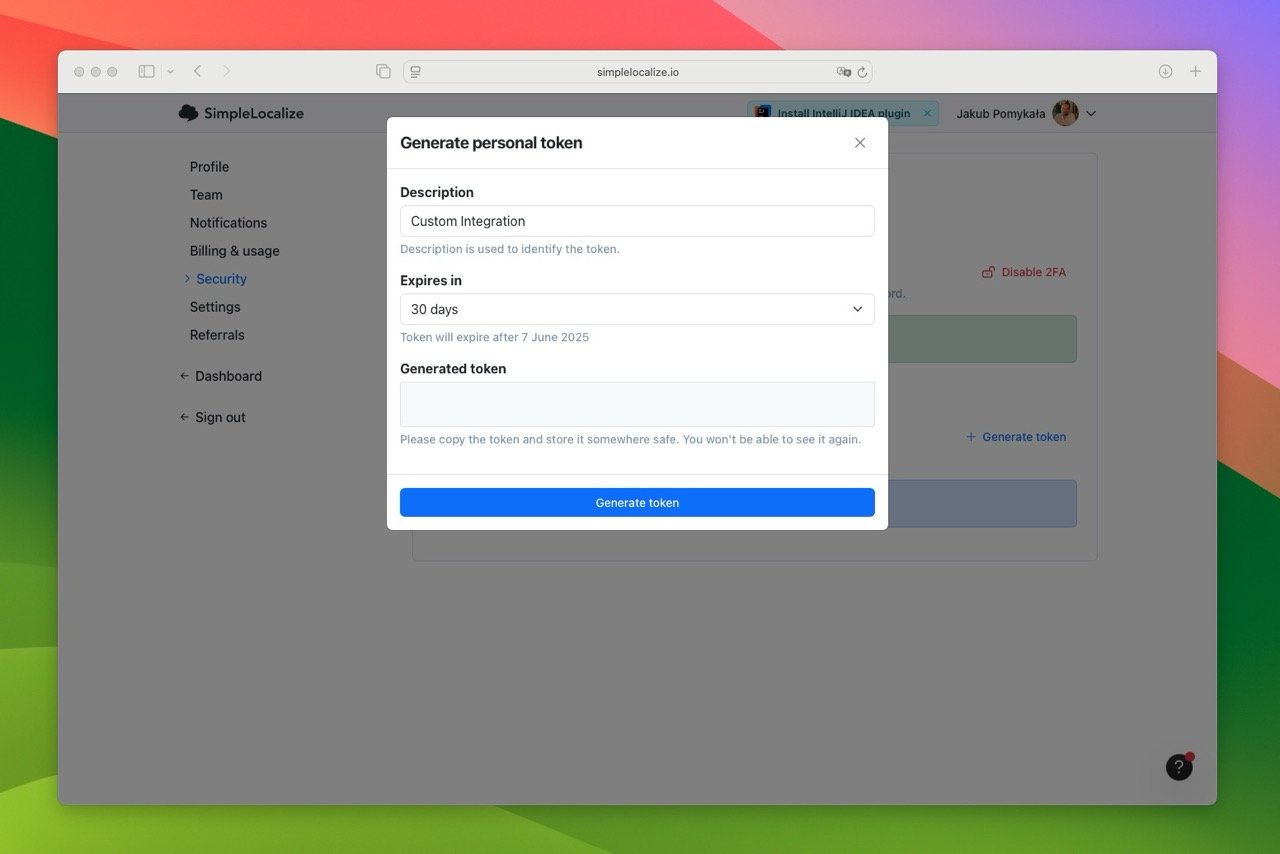
Tip: Start small—build an integration that works with a single project using the API Key. Once it’s running smoothly, you can expand it to support multiple projects using a PAT.
Understanding translation keys
In SimpleLocalize, translation keys don’t rely on a single universal identifier. Instead, each key is identified by a combination of a key name and a namespace. The key name is the actual identifier of the translation string, while the namespace helps group related keys together. This combination—key name + namespace—must be unique within the project.
For example, you can have a translation key named key in the namespace namespace, and another translation key with the name key in a different namespace namespace2.
Both key names and namespaces are case-sensitive, so key and Key are treated as different keys, even within the same namespace. The same rule applies to namespaces themselves
Namespaces are useful for organizing translation keys, typically by separating different parts of an application or different source files. For instance, you might use one namespace for your login page and another for your dashboard.
Key rules to keep in mind:
- Translation keys can be up to 500 characters long,
- By default, SimpleLocalize uses an empty string as the default namespace.
- Namespaces can be up to 128 characters long.
Important: Some i18n setups—especially in backends or mobile apps—don’t commonly use namespaces. However, your integration should always support namespaces and never assume they will be empty.
Interacting with the API
Let's dive into the API and see how to interact with it. We will show you some of the most important endpoints you can use to create your custom integration.
1. Fetch translation keys
One of the most common pieces of data you’ll likely need is a list of available translation keys. We offer two endpoints for this purpose:
Get translation keys with metadata
or get translations without metadata
You might wonder why we offer two endpoints for the same task. The difference lies in the amount of data each endpoint returns.
- The first endpoint provides a lot of metadata about each translation key.
- The second endpoint only returns the key name and namespace.
The first endpoint requires pagination, while the second one does not.
The second endpoint is much faster and easier to use. It’s perfect for checking whether a translation key exists or to identify duplicate keys across different namespaces.
2. Project details
With one request, you can fetch all necessary details about the project, including the project name, list of languages, hosting environments, namespaces, and more.
This endpoint is also a great way to check if the project is still active, and if the API key is still valid.
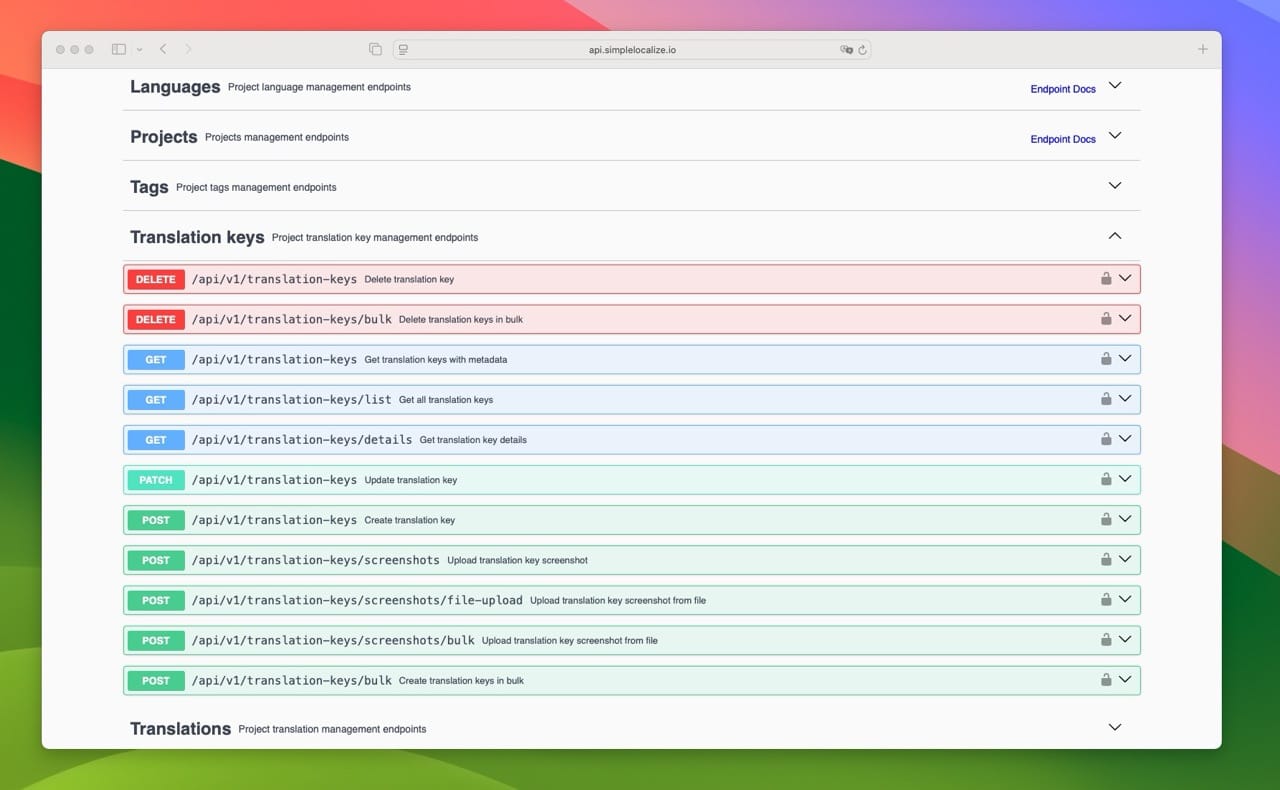
3. Basics of managing translations
SimpleLocalize offers a variety of endpoints for managing translation keys and translations. But don't get confused, you don't need to use all of them. You can categorize the endpoints into two main groups:
- Translation keys - for managing translation keys and their details
- Translations - for managing translations and their details
Each of these groups can be further divided into two categories:
- bulk endpoints - for managing multiple translation keys or translations at once
- single endpoints - for managing one translation key or translation at a time
Bulk endpoints are generally much faster and more efficient, especially if you're working with large sets of data. They also help avoid hitting rate limits. On the other hand, single endpoints are ideal for more specific actions, such as updating or deleting individual translation keys or translations.
4. Auto-translation: Start and wait
If your integration needs to initiate auto-translation jobs, you’ll need to use this endpoint:
But how do you know when the job is finished? It's simple: use the following endpoint to check the job status:
Provide the jobId you received in the response of the previous endpoint to check the status of the job.
Another way, much simpler, is to fetch all running jobs for the project:
And see if any of the jobs are still running. In a number of cases, you will want to use the second endpoint, it's easier to use, and it can help prevent you from starting a new job while others are still running.
5. Translation hosting: Publish and get
Similarly to auto-translation, if your integration plans to publish translations, then you will have to use the following endpoint:
and you will have to wait for the job to finish. If you try to publish translations while the previous job is still running, you will get an error.
6. List of projects
Listing projects might be a little bit tricky, as it requires using a Personal Access Token (PAT) to retrieve all projects associated with a user. By fetching this information, you will also gain access to the API Key and Project Token for each project.
To get a list of all projects, use the following endpoint:
Keep in mind that users can reset their API Key at any time, but the Project Token remains unchanged. If you plan to store information about a specific project, the Project Token is the best option to use.
7. CLI-like integration
SimpleLocalize provides a command-line tool that can be used on most of the popular platforms like Windows, macOS, and Linux, including ARM-based variants. If you want to build your own integration that behaves similarly to the CLI, you can use the following two endpoints:
Export translations from a file:
Use this to export translations from SimpleLocalize into a file format of your choice, based on the parameters you include in the request.
Secondly, you can use the following endpoint to import translations from a file:
This endpoint allows you to import translations from a file into SimpleLocalize.
Note that it supports uploading one file per request, so if you need to import multiple files, you’ll need to send separate requests for each.
Swagger
Swagger is a great way to explore our API, and it will also give you a lot of examples of how to use the API. It also provides OpenAPI specification, which is a standard way to describe REST APIs. You can use it to generate integration code in many programming languages and frameworks.
Swagger UI
SimpleLocalize: Swagger UI is the best place to explore our API. It provides up-to-date documentation and interactive examples for each endpoint.
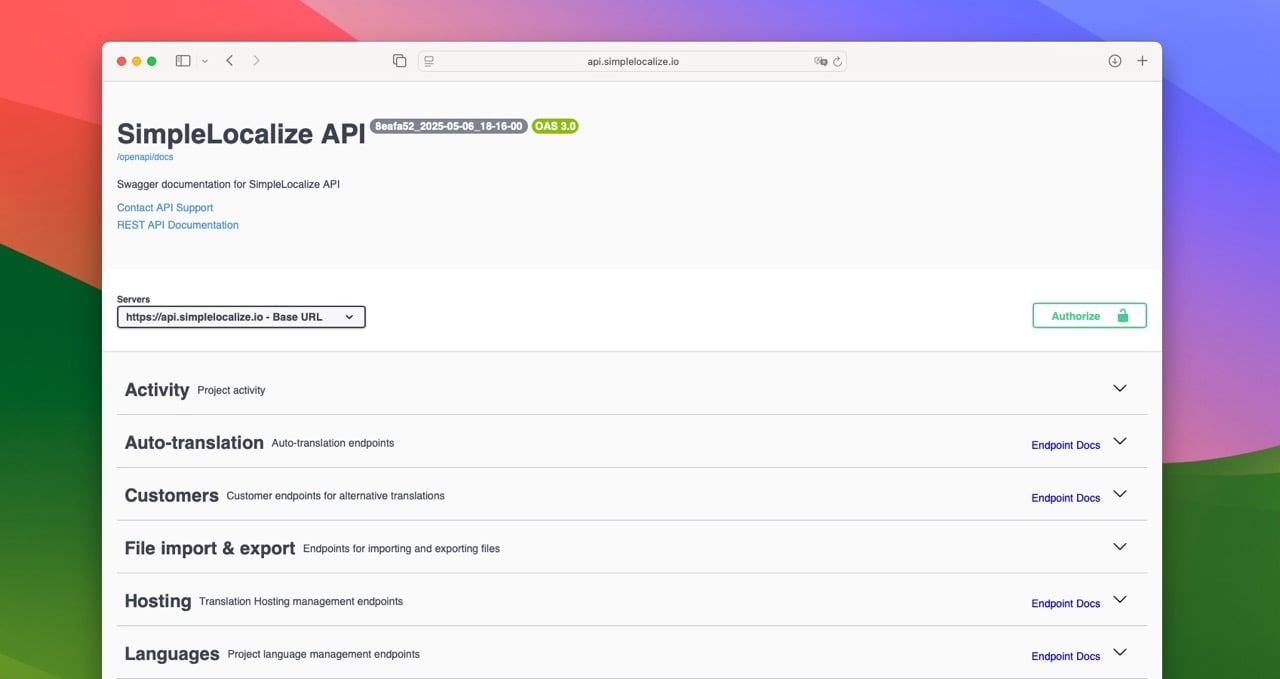
With Swagger, you can not only test API calls but also generate ready-to-use Java model classes, TypeScript interfaces, complete API clients for any supported programming language or framework.
OpenAPI generator
You can use the OpenAPI generator CLI to automatically generate code for your integration. This tool supports many programming languages and frameworks, making it easy to get started quickly.
The generator uses our OpenAPI specification to create client code tailored to your chosen language.
openapi-generator-cli generate -i https://api.simplelocalize.io/openapi/docs -g <language> -o ./simplelocalize-api
Replace <language> with the language you want to use for your integration. You can find the list of available languages here.
TypeScript
To generate TypeScript interfaces along with an Axios-based client, run:
openapi-generator-cli generate \
  -i https://api.simplelocalize.io/openapi/docs \
  -g typescript-axios \
  -o ./simplelocalize-api
This command will generate a folder containing all the files you need to start using the SimpleLocalize API in your TypeScript project.
Java
You can also generate Java code for the SimpleLocalize API using the OpenAPI Generator. Here’s a basic command to generate the full client:
openapi-generator-cli generate -i https://api.simplelocalize.io/openapi/docs -g java -o ./simplelocalize-api
If you only want to generate model classes (without full API client logic), use the following command:
openapi-generator generate -i https://api.simplelocalize.io/openapi/docs -g java \
  --model-package com.example.api.model \
  --invoker-package com.example.api.http \
  --api-package com.example.api \
  --skip-validate-spec \
  --ignore-file-override \
  --additional-properties=java11=true,useRuntimeException=true \
  --global-property modelDocs=false,apiDocs=false,modelTests=false,apiTests=false
Python
You can use the following command to generate Python code for the API:
openapi-generator-cli generate \
  -i https://api.simplelocalize.io/openapi/docs \
  -g python \
  -o ./simplelocalize-api
Please refer to the official generators documentation for more information.
Note: It's recommended to NOT generate model classes during the build process, as this can lead to breaking your build if we make any (even minor) change to the API.
Good practices
1. Add the 'Authorization' header
When you are using the SimpleLocalize API, always include the x-simplelocalize-token header—this is required for every request.
Optionally, you can also include the Authorization header with a Personal Access Token (PAT). While it doesn't do much currently,
it may allow enhanced functionality in the future, such as identifying which user made a request or applying user-level permissions.
2. Set client name
You should include the x-simplelocalize-client header in your requests. This is optional but strongly recommended,
as it helps us identify and support your integration more effectively.
3. Use the latest API version
Always use the most recent version of our API. We frequently release improvements and new features—using the latest version ensures access to the newest capabilities and best performance.
4. Be nice to our API
You should always be nice to the API—not just SimpleLocalize's, but any API you work with. This means that you should Avoid sending large bursts of requests or overwhelming the server with simultaneous calls. Keeping your requests within reasonable limits helps prevent rate-limiting or temporary blocks and ensures a smoother experience for all users.
5. Never expose API keys in client-side code
Never use your API key in frontend code or expose it to end users. In the past, there was a case where a developer accidentally included the API key and all the translation management logic directly in the production frontend. This caused a flood of requests to the API from unaware users just browsing the website. Eventually, the project hit its rate limits, and the API became blocked for the developer.
Always handle translation updates and API interactions securely on the server side to avoid similar issues.
6. Be prepared for changes
We are constantly working on improving our API, and we are adding new features and endpoints. This means that you should be prepared for changes in the API. While we don’t remove or break existing endpoints, we do add new fields to responses as the API evolves. Most modern clients handle this gracefully, but if you're using a stricter parser (like Java’s RestTemplate), make sure your deserialization logic is flexible or updated regularly.
7. Encode request parameters
When you are sending request parameters to the API with translation key or namespace, you should always encode them. Use URLEncoder.encode() in Java, or encodeURIComponent() in JavaScript to encode the request parameters.
Failing to do so may result in failed or incorrect updates due to malformed requests.
Conclusion
We’ve put a lot of care into designing and maintaining our API, and we’re always working to make it better. While we occasionally add new fields to enhance functionality, we make sure even our oldest endpoints continue to work as expected—ensuring your existing integrations remain reliable.
Think there’s an endpoint missing that would help your integration? Or maybe an existing one could return more data? In such cases, contact us directly.
If you need logos or icons for your integration, check out our brand assets page. And if you’d like help or want to be featured on our website, don’t hesitate to reach out. We’re here to support you in any way we can.


