Auto-translation (AT) is a feature that allows you to translate your texts automatically using MT (machine translation) services, or AI models (LLMs). It's a great way to pre-translate your content quickly, and then review and edit translations as needed.
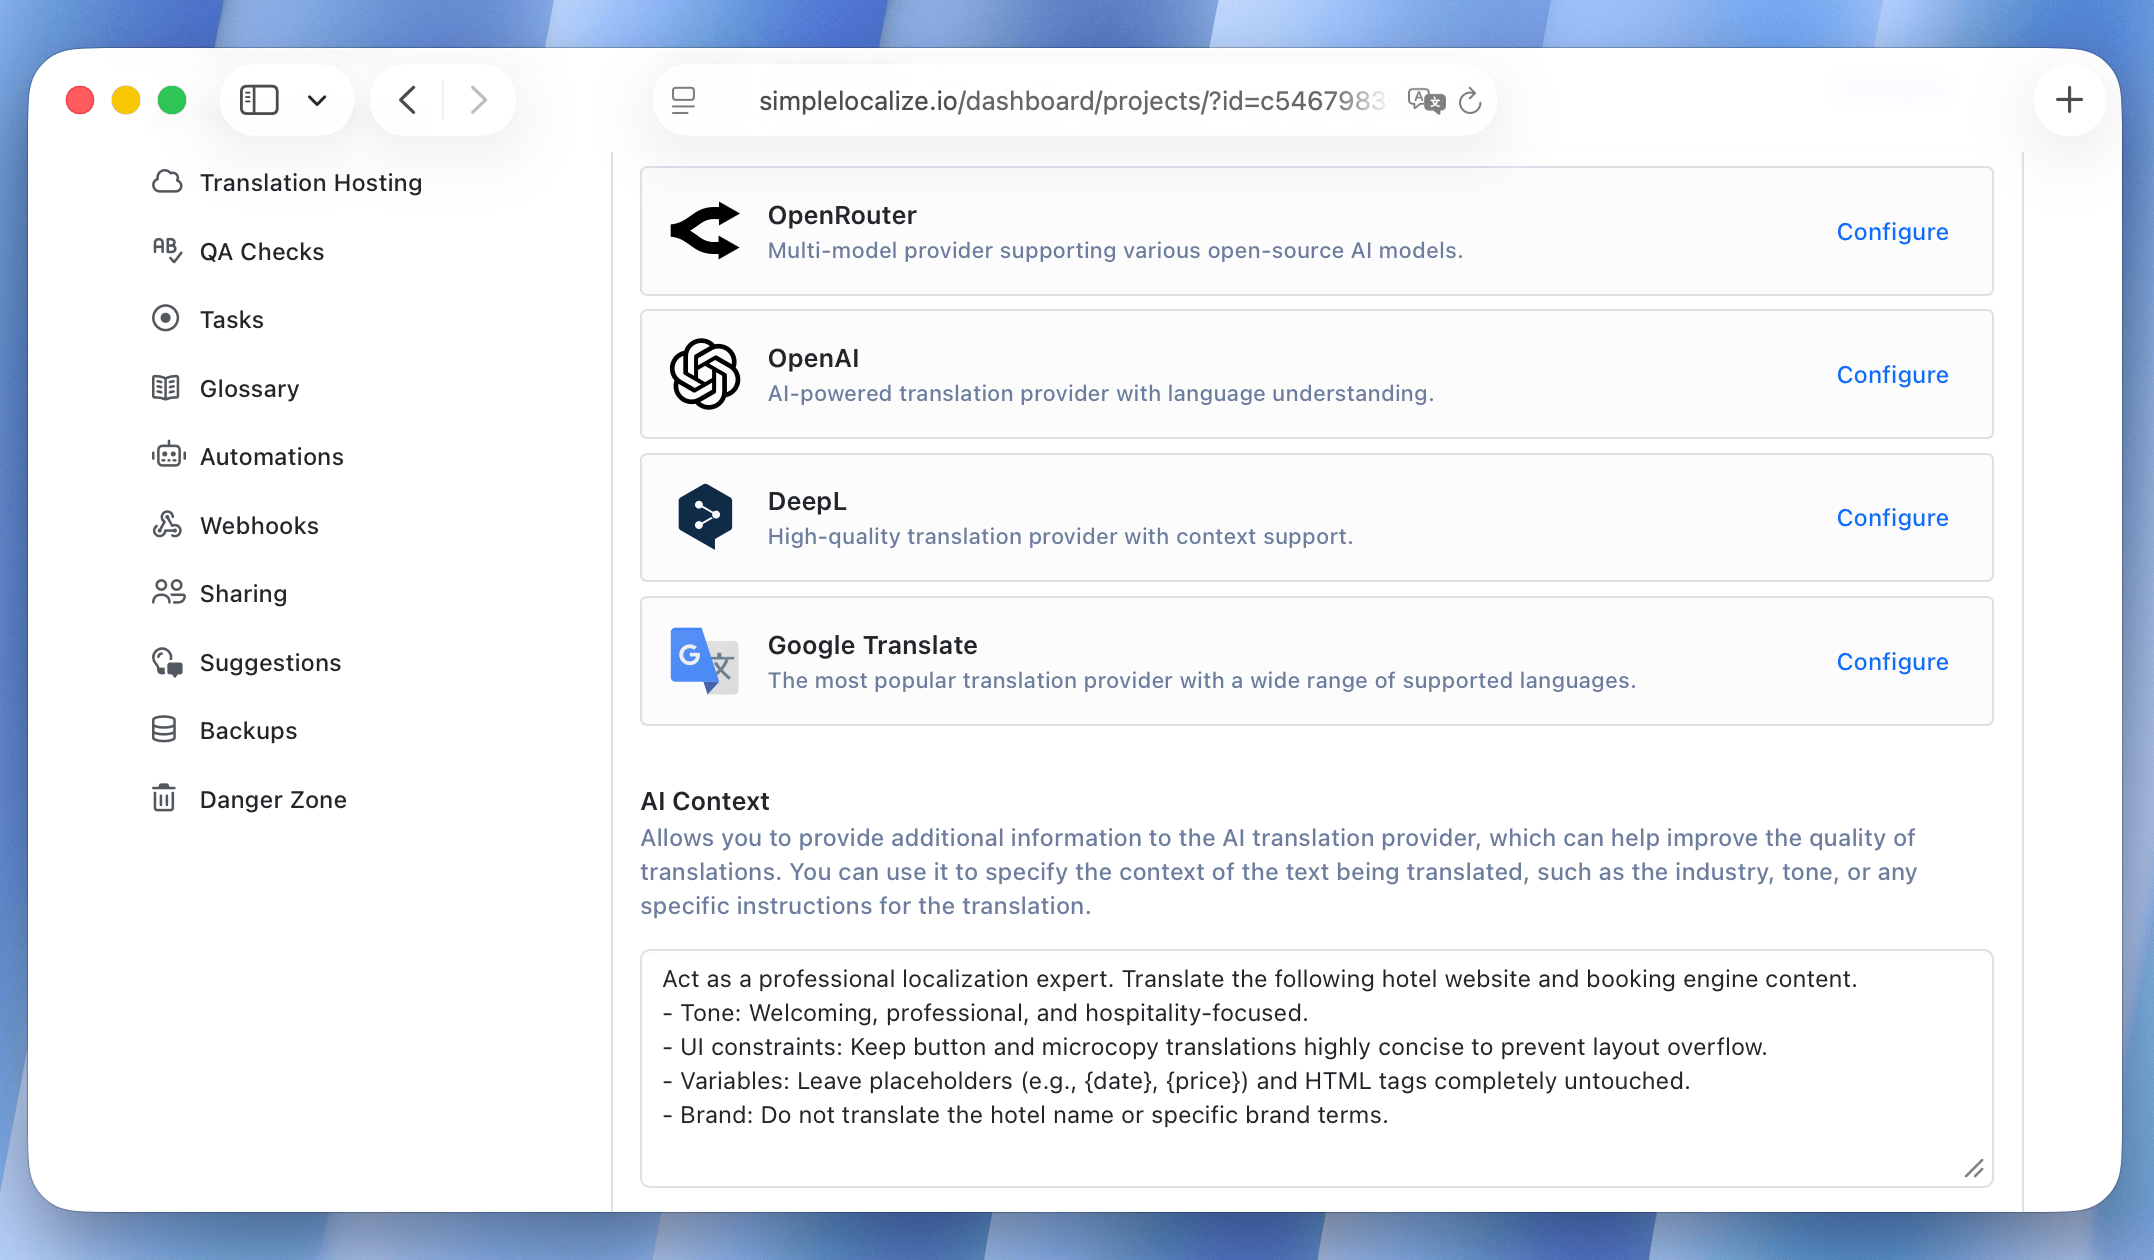
Supported auto-translation providers:
- OpenAI: AI-powered service that can translate texts with a very good quality and understanding of context and variables.
- Google Translate: One of the most popular translation services. Decent quality translations and fast processing times.
- DeepL: Machine translation service with AI features. Known for its high-quality translations, especially for European languages.
- OpenRouter.ai: Service that allows you to connect more AI providers and models for auto-translation, including OpenAI, Anthropic, Mistral, Gemini, LLaMA and others.
- Custom AI: You can also use your own AI model for auto-translation by providing a endpoint and API key in your project settings.
Auto-translation is available for all plans, but the number of characters you can translate depends on your plan. See pricing for more details.
How to auto-translate?
With the auto-translation feature, you can translate automatically a single translation, an entire language or all languages at once.
By default, all auto-translation requests update only untranslated texts in your project. You can change this behavior in the additional options section to force translate all texts.
Single translation
Directly in the Translation Editor click on the Auto-translation button.
Quick Auto-translate option uses the translation provider configured in the language settings.
You can also click on the auto-translation button with Shift key pressed to open the auto-translation popup and select a different provider.
All translations in a key
Right-click on a translation key in the Translation Editor and select Auto-translate from the context menu to translate all missing texts in that key.
One language
Head to the Languages tab, click on options button (three dots) and choose Auto-translate to translate all missing texts in that language.
In the auto-translation popup you can select the translation provider, adjust source and target language, and choose additional options:
- Override existing translations (to re-translate all texts, even those that already have a translation)
- Allow using keys as source text (for keys without source text).
The auto-translation process runs in the background, so you can continue working on your project while the translations are being processed.
All languages
To translate all missing texts in all languages, use Auto-translate option in the Languages tab. SimpleLocalize will select all not translated languages, but you can uncheck the ones you would rather not translate.
Next, check the translation provider and extra options, and click Auto-translate.
Automation
You can automate the auto-translation process by using the Automations feature.
With auto-translation automation, you can run auto-translation automatically when:
- new texts are added to your project
- source texts are updated
AI context
You can fine-tune the auto-translation process by providing additional context to translation services that use AI like OpenAI, OpenRouter.ai and DeepL. For example, you can specify the tone of voice, style, or any other specific instructions for the translation, or just give more background information about your project.
To provide additional context, navigate to your project Settings and then to the Auto-translation tab. There, scroll down to the AI Context section and enter your instructions in the text field.
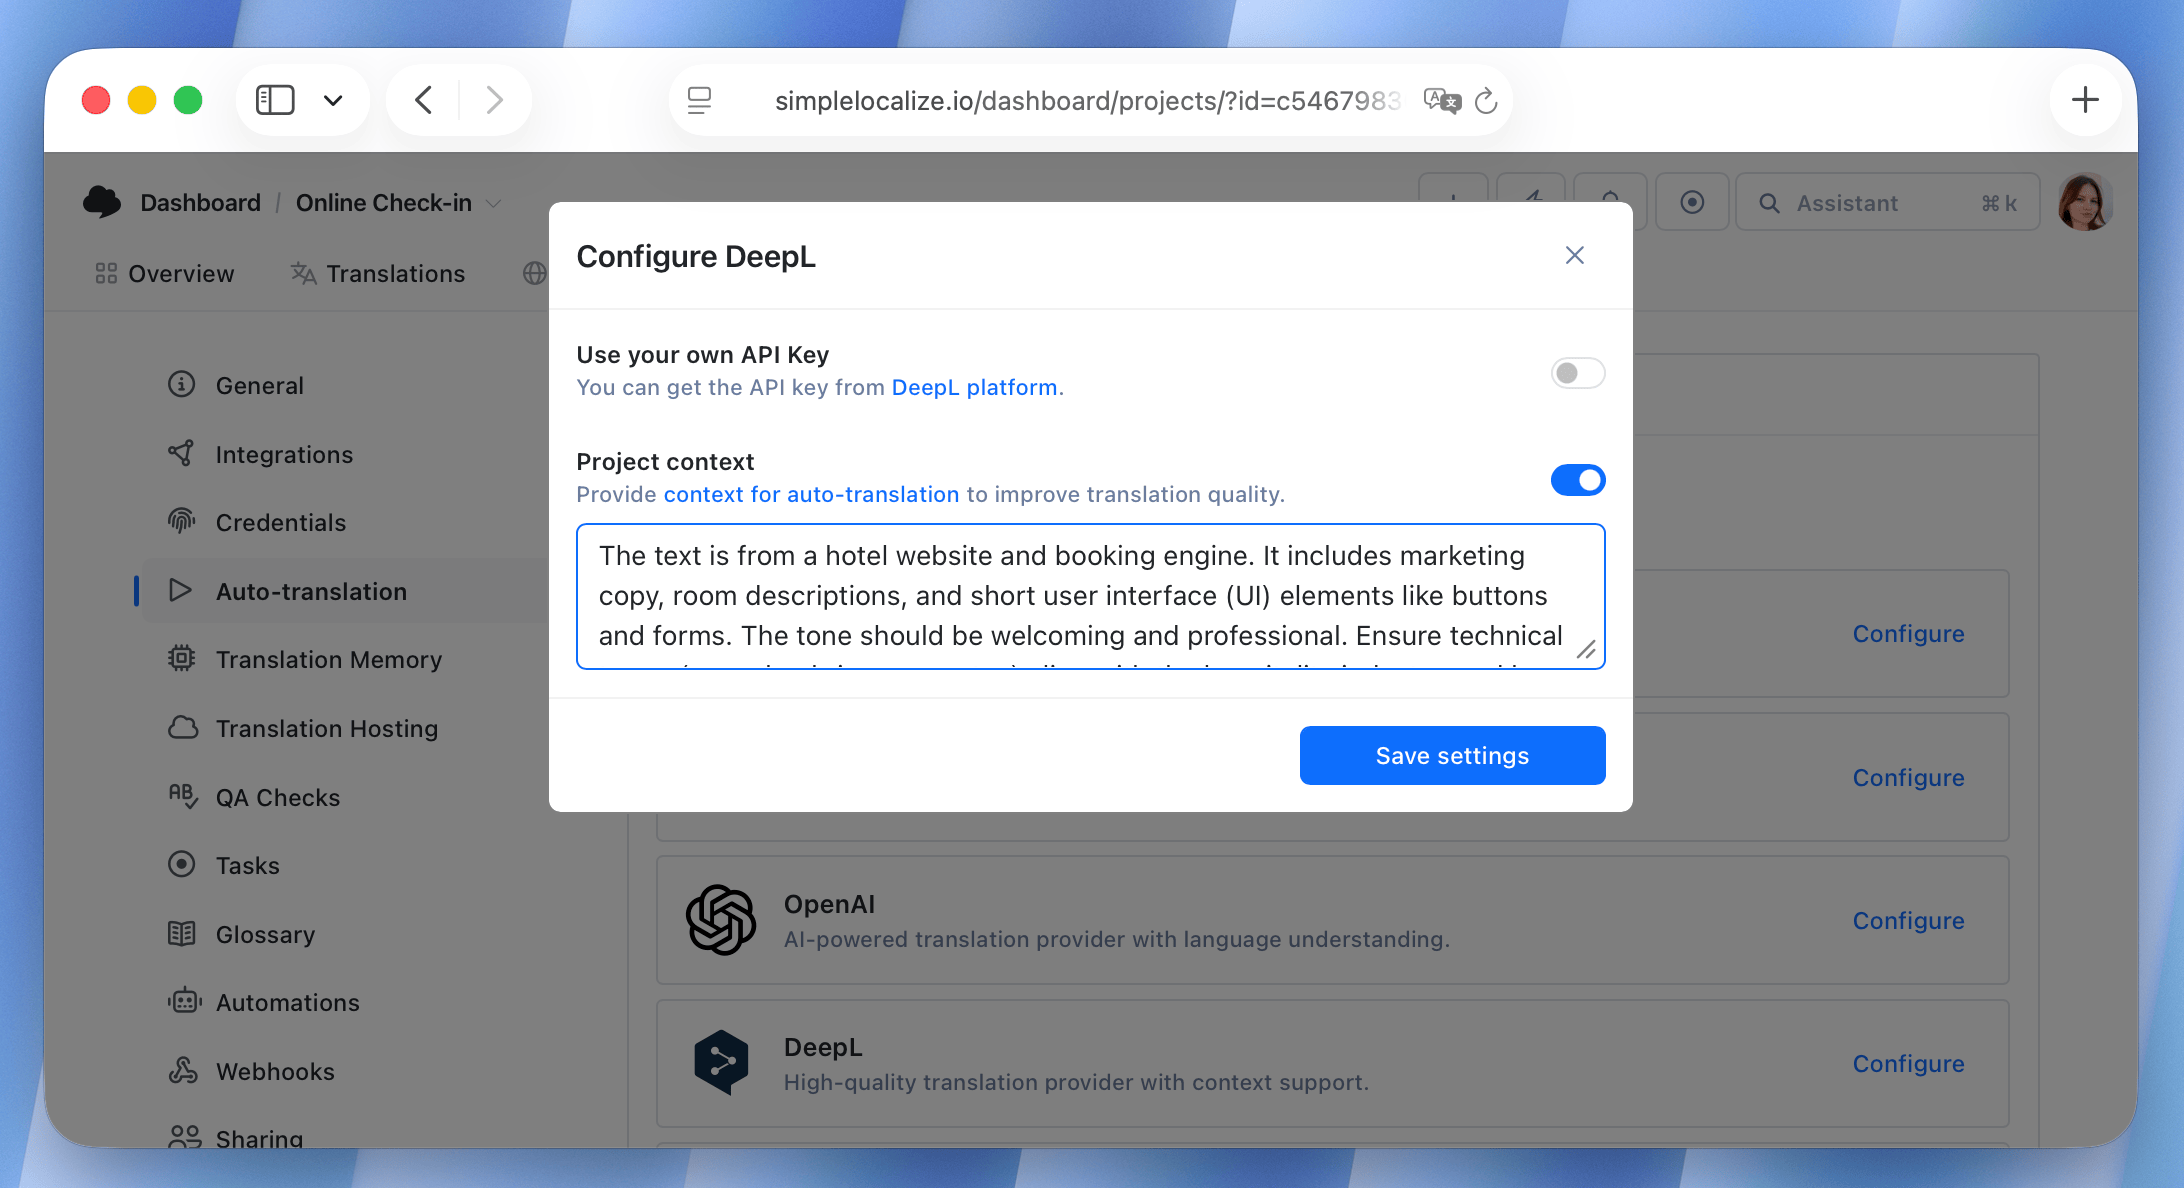
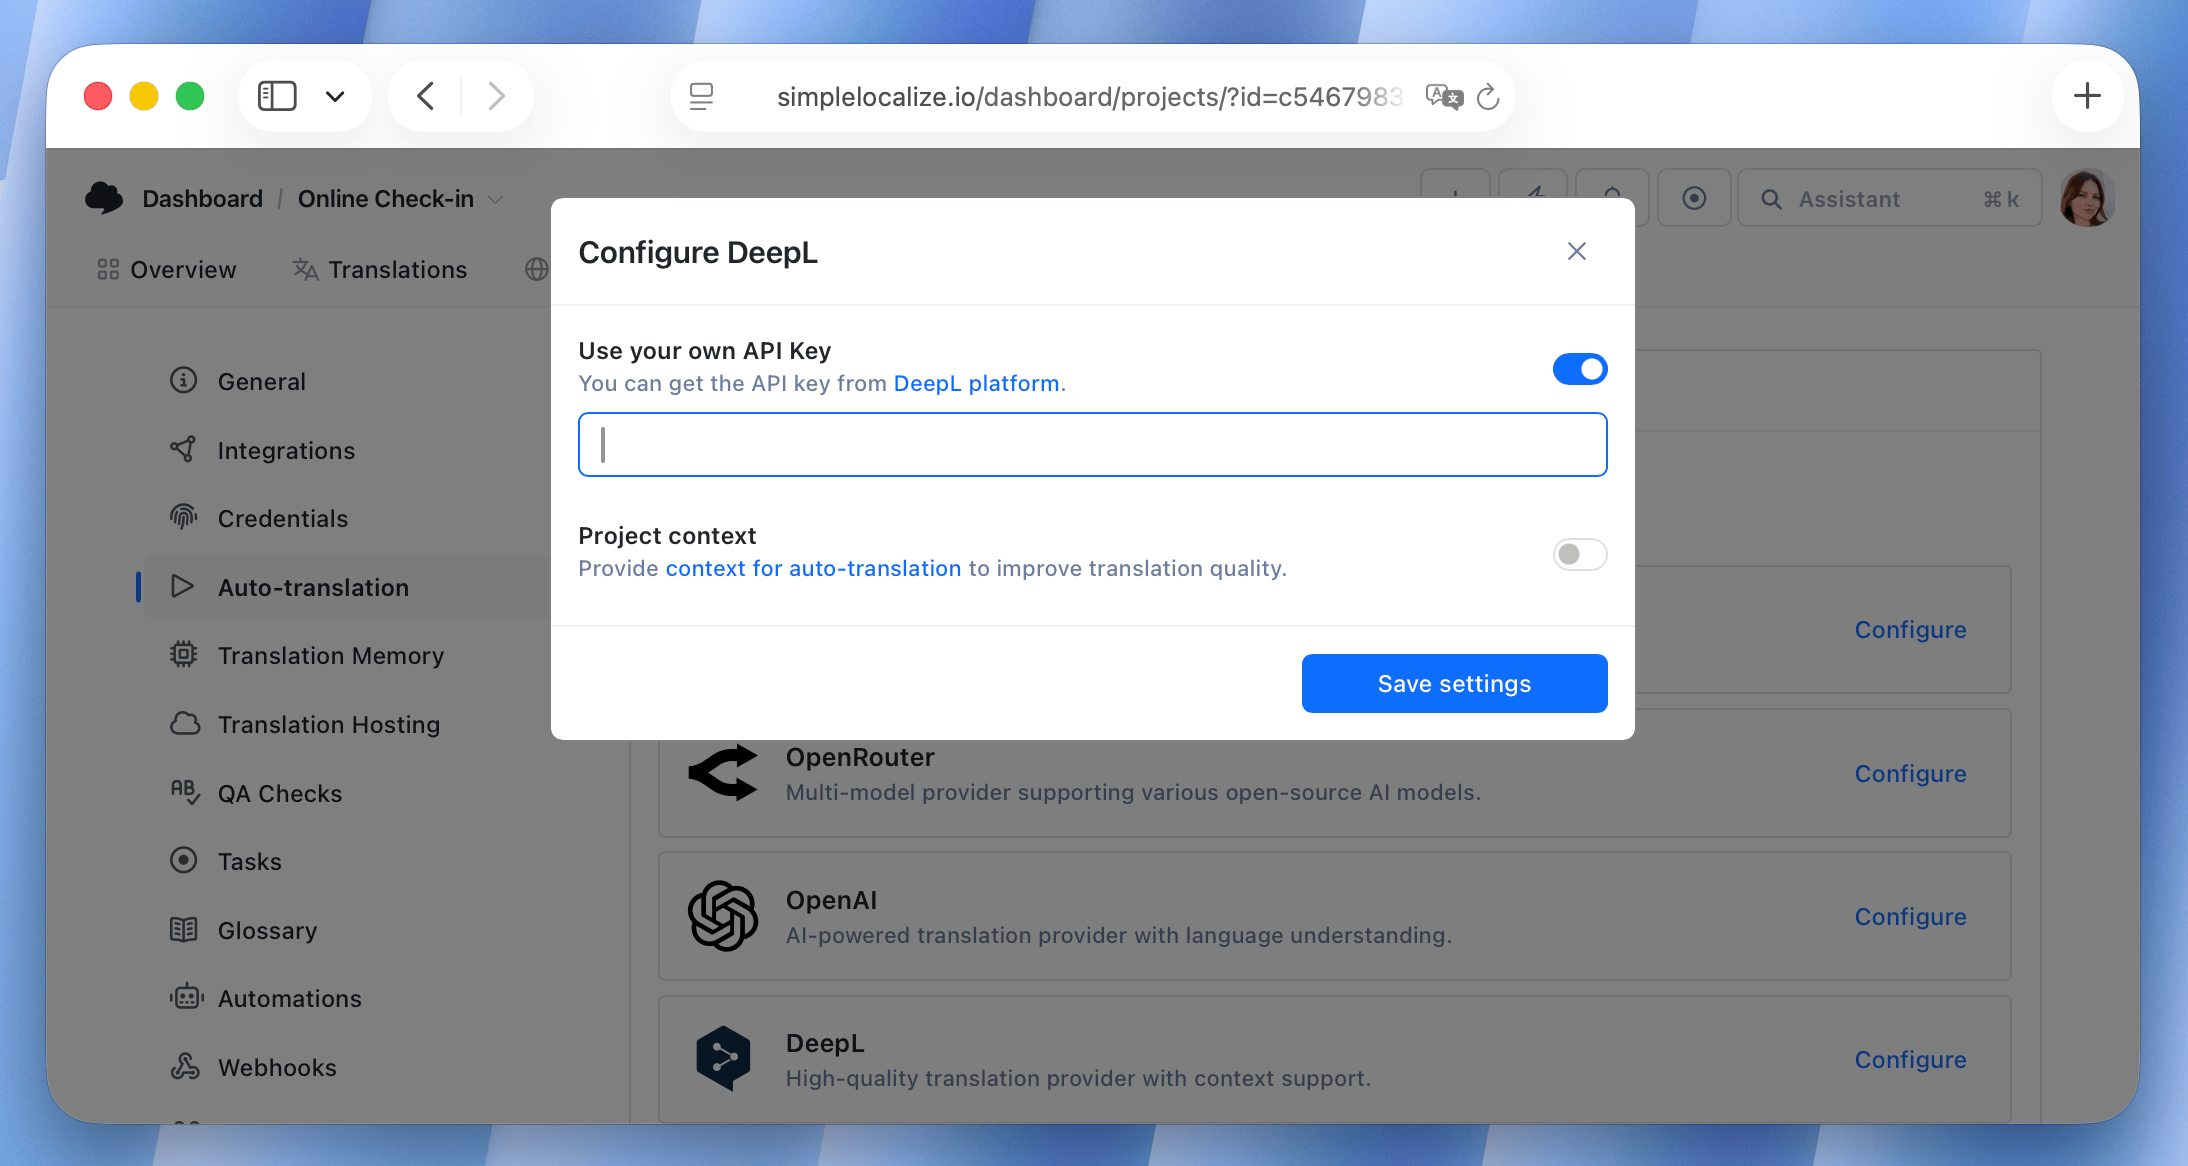
To provide context for DeepL, click on the Configure button next to the DeepL provider and and provide your instructions in the Project context field.
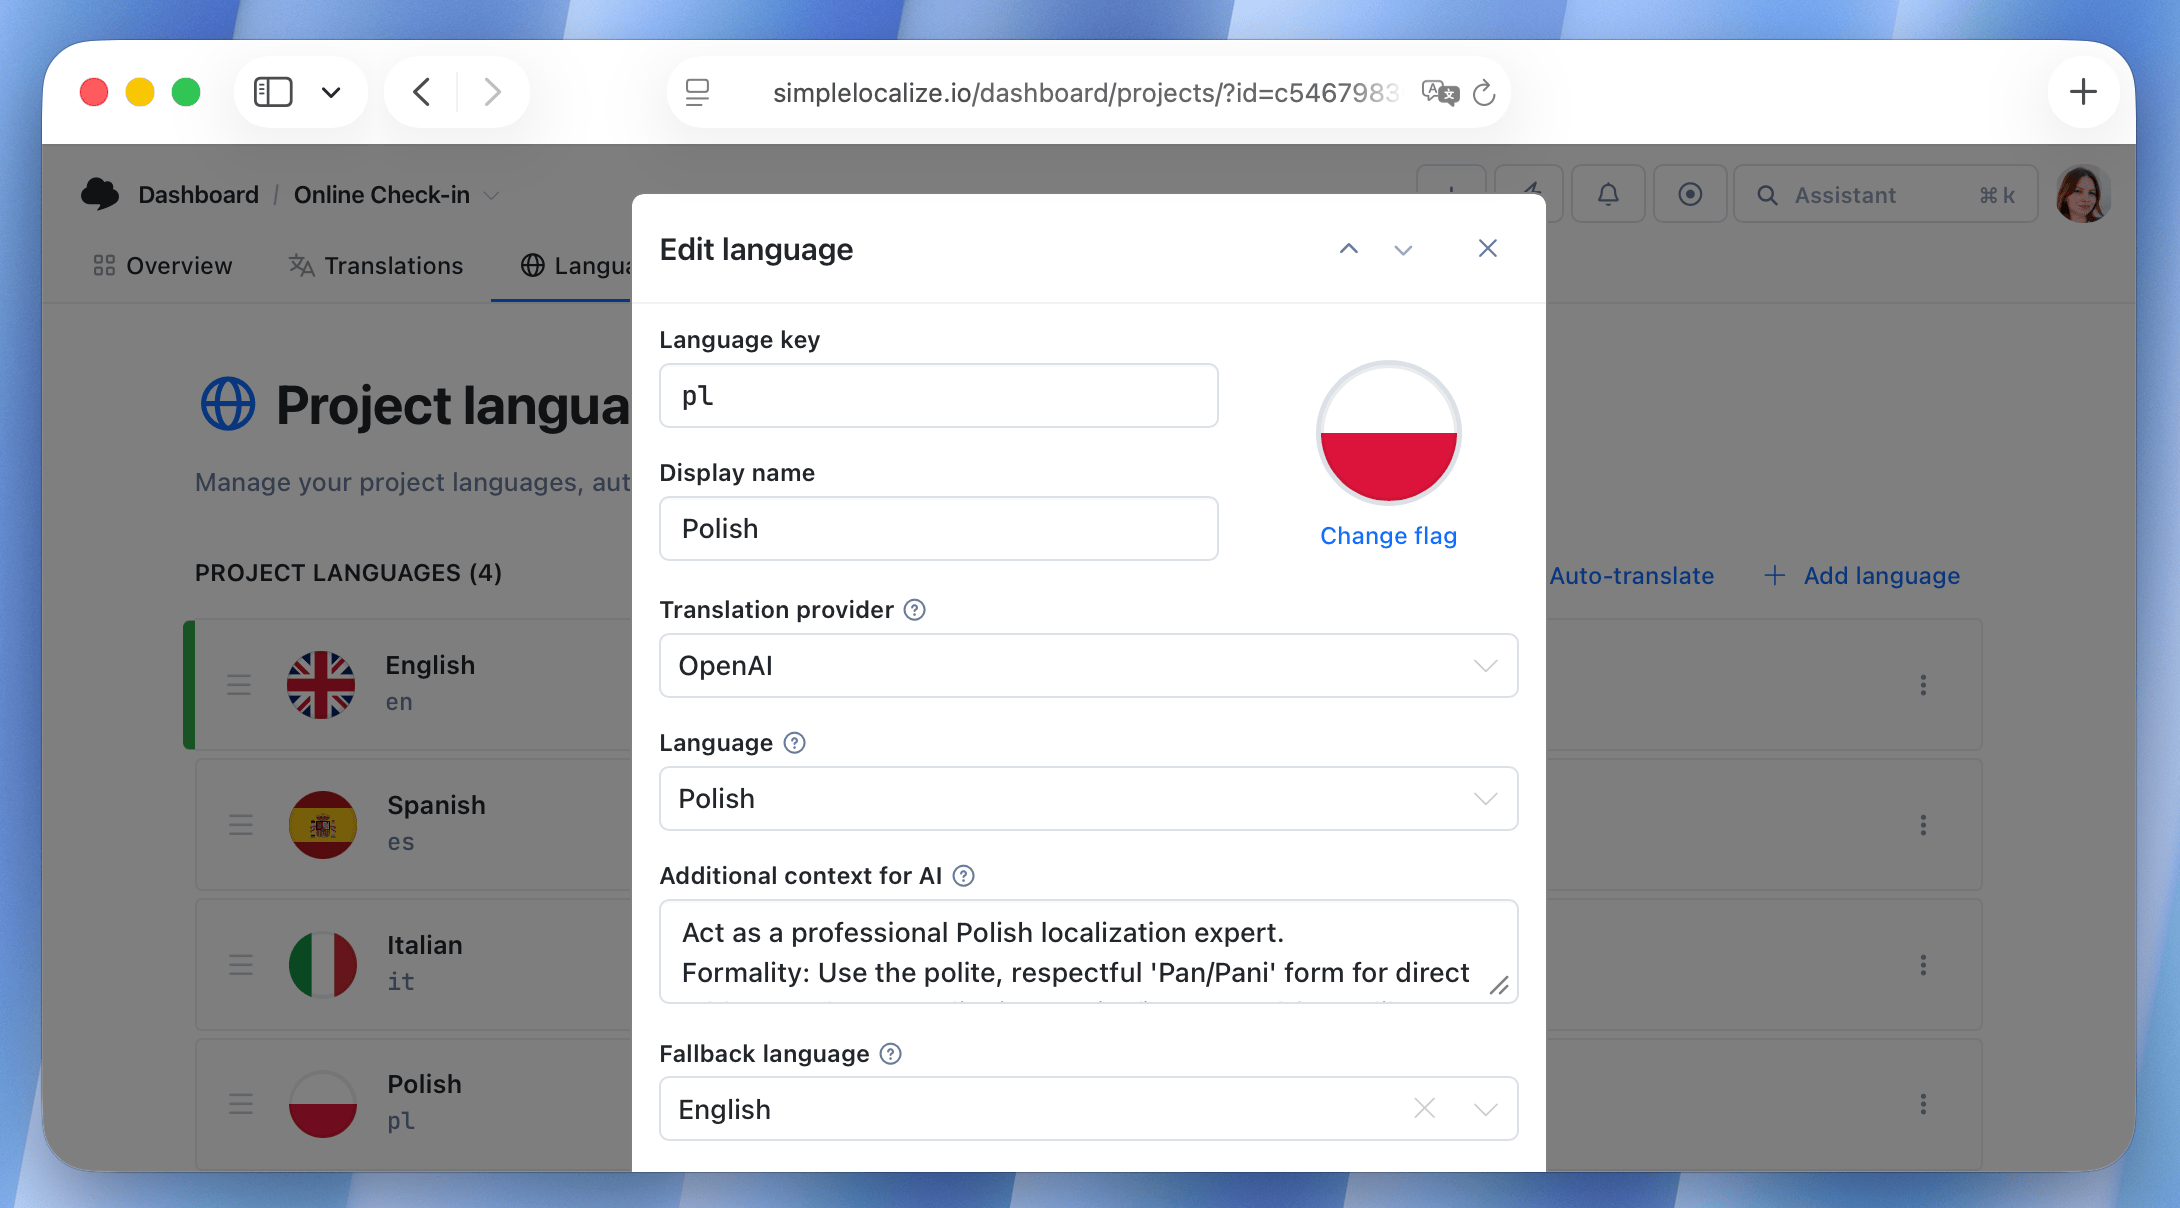
For AI models, you can also set the context for specific languages in the Languages tab. Click on the language options (three dots), open Settings, and enter your custom prompt in the Additional context for AI field.
SimpleLocalize additionally provides the AI provider with context from translation keys and translation data (e.g. key description, key settings), which helps improve translation quality.
Read more: Tips for effective auto-translation in software localization.
Glossary
Glossary helps keep translations consistent when using auto-translation. They allow you to give AI provider or DeepL hints on how to translate specific words or phrases.
To create a glossary, navigate to project Settings and then to the Glossary tab. Enter the terms you want to include in the glossary, along with their translations.
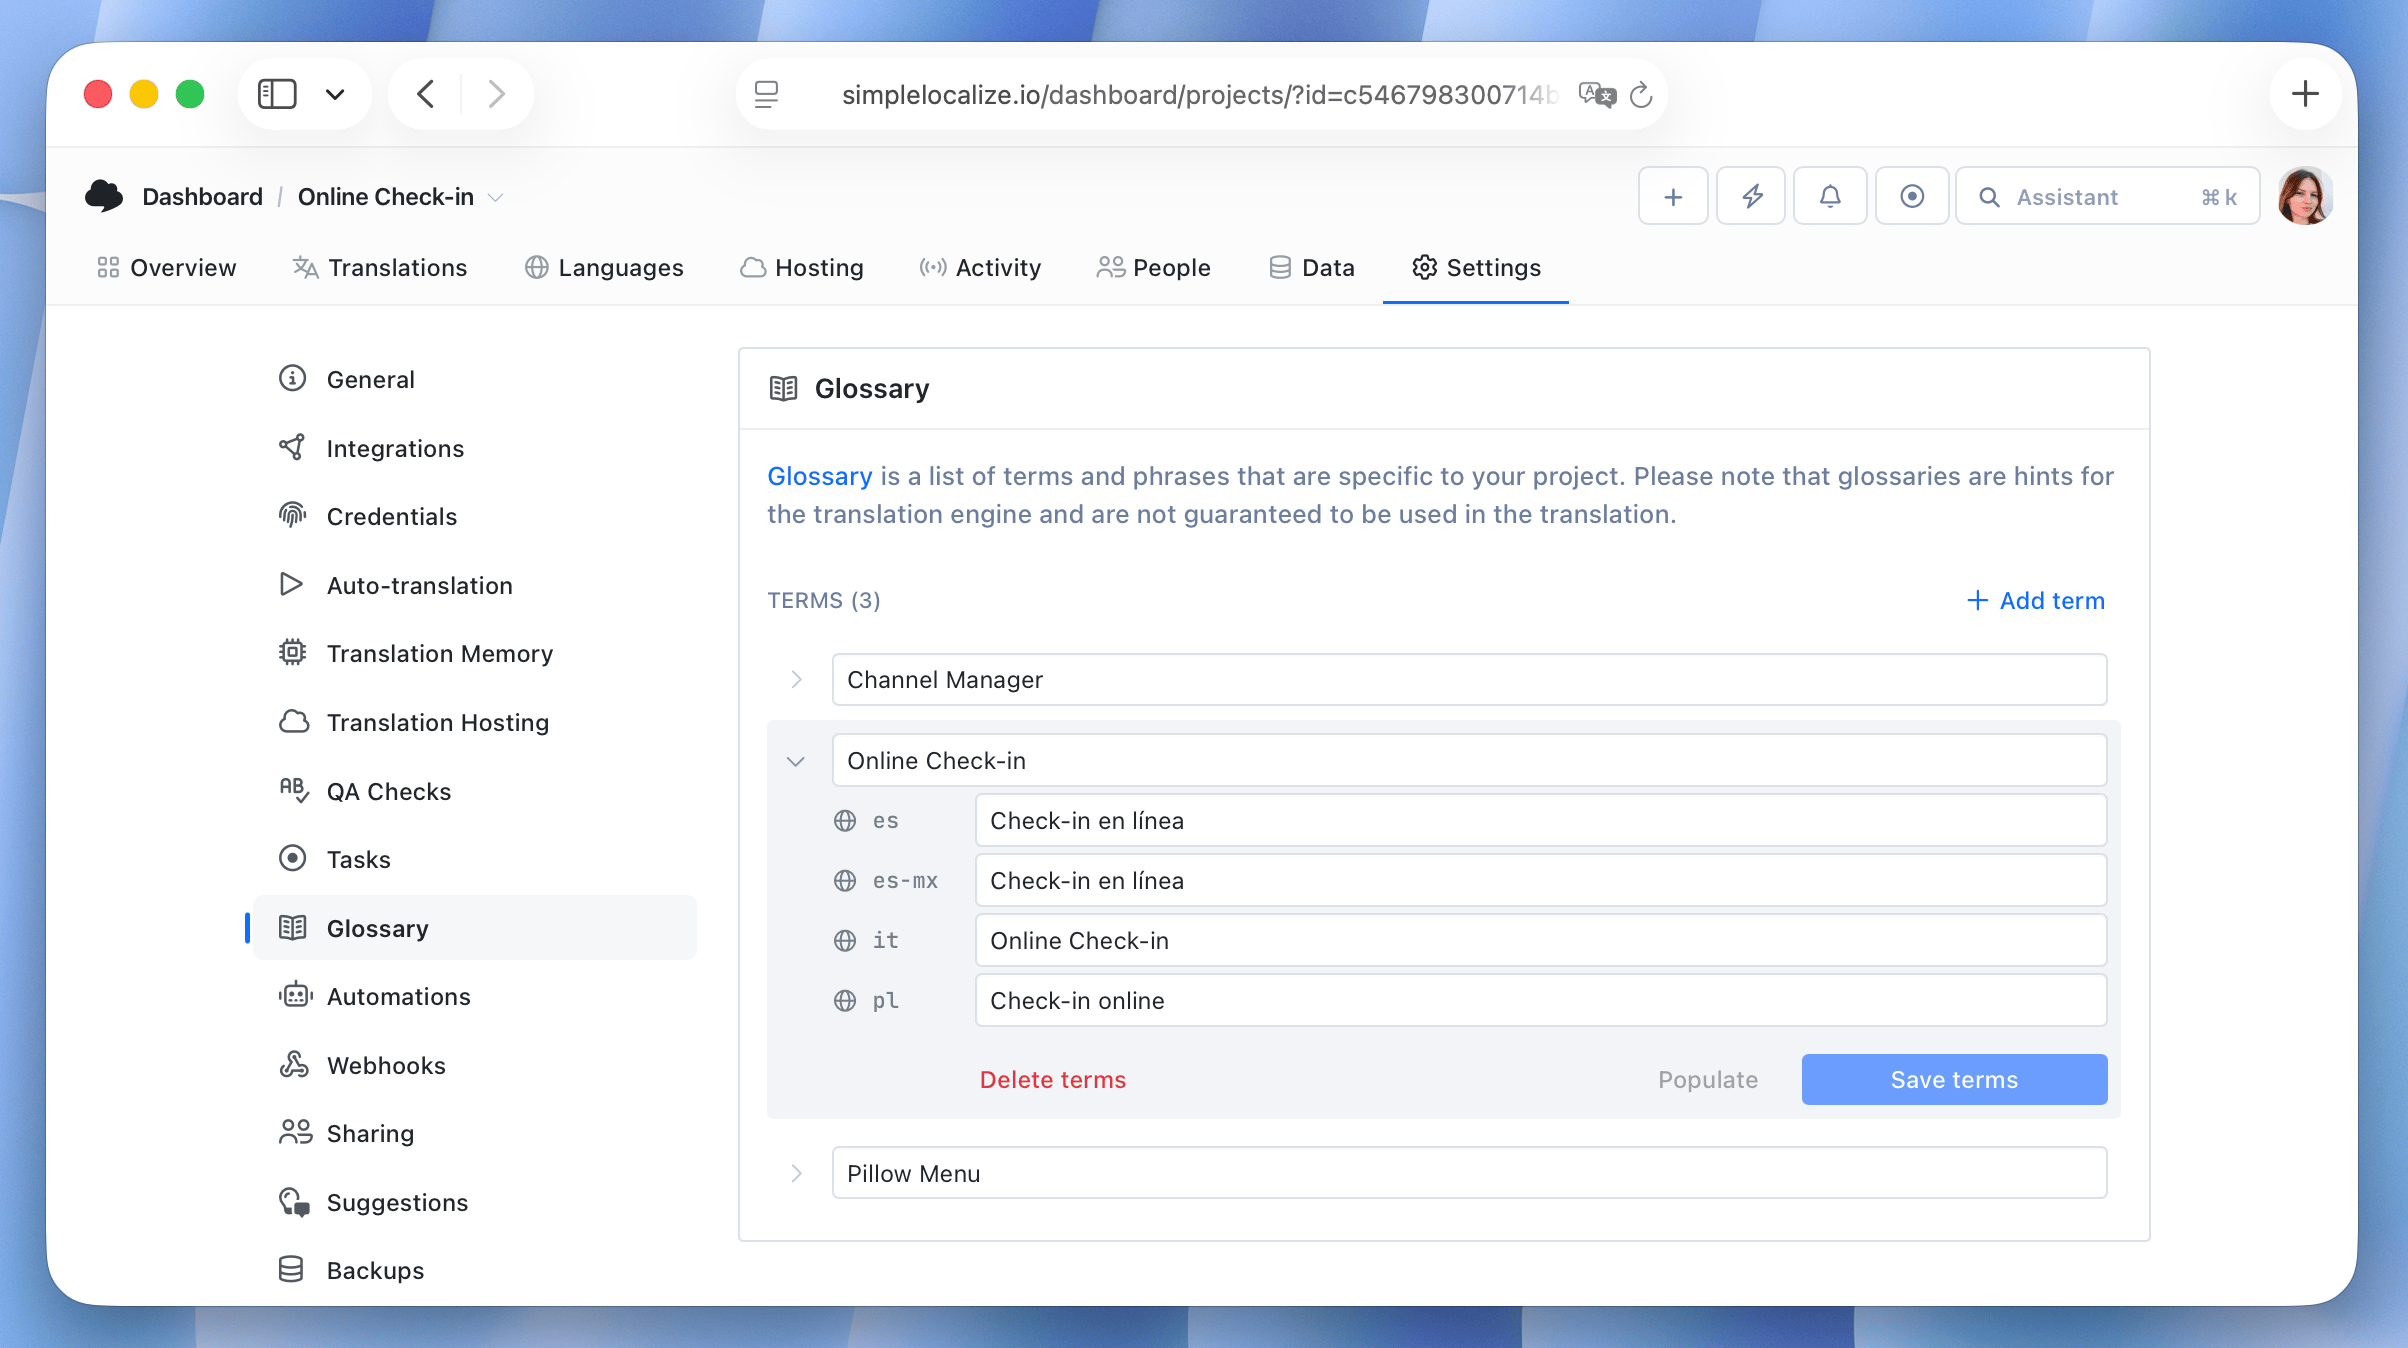
Please note that glossaries are hints and are not guaranteed to be used in the translation.
DeepL glossary
When using your own DeepL API key, SimpleLocalize automatically fetches glossaries from your DeepL account and uses them during auto-translation. Glossaries are automatically matched based on the source and target language pair. If there are multiple glossaries for the same language pair, the most recently created one is used.
When using SimpleLocalize built-in DeepL, you can create and manage glossaries directly in SimpleLocalize project settings (available from Team plan).
Custom AI models
You can use your own AI models for auto-translation by providing an endpoint and API key in your project settings. This option allows you to use any AI model that supports one of the popular endpoints:
/v1/responses- newer endpoint, that supports more features (recommended)/v1/chat/completions- legacy but still widely supported
Responses endpoint
Example request:
{
  "model": "model name",
  "input": "prompt text"
}
Expected response:
{
  "output": {
    "type": "message",
    "content": [
      {
        "type": "output_text",
        "text":  "Translated text"
      }
    ]
  }
  // cut other fields for brevity
}
More details: OpenAI responses endpoint documentation
Example OpenAI-compatible API providers:
Local AI models
You can also run an AI model locally on your machine for auto-translation. To do this, set up a local server that exposes one of the supported endpoints mentioned above. Use LM Studio to run your local models and expose the API endpoint to SimpleLocalize via ngrok.
Settings
You can find more auto-translation settings in your project Settings under the Auto-translation tab.
- Apply perfect matches: When enabled, SimpleLocalize will automatically apply translations that are an exact match in the Translation Memory, before running auto-translation. This can save you time and reduce costs if you have many repeated texts in your project.
- Allow to auto-translate large texts (over 10,000 characters)
Custom API key
Use your own API key to auto-translate texts using OpenAI, DeepL, Google Translate API, or OpenRouter. Choose your provider, click on Configure and enter your API key to use your own translation service.
Using your own API key for auto-translation doesn't affect the auto-translation quota, so you can translate as many characters as you want.
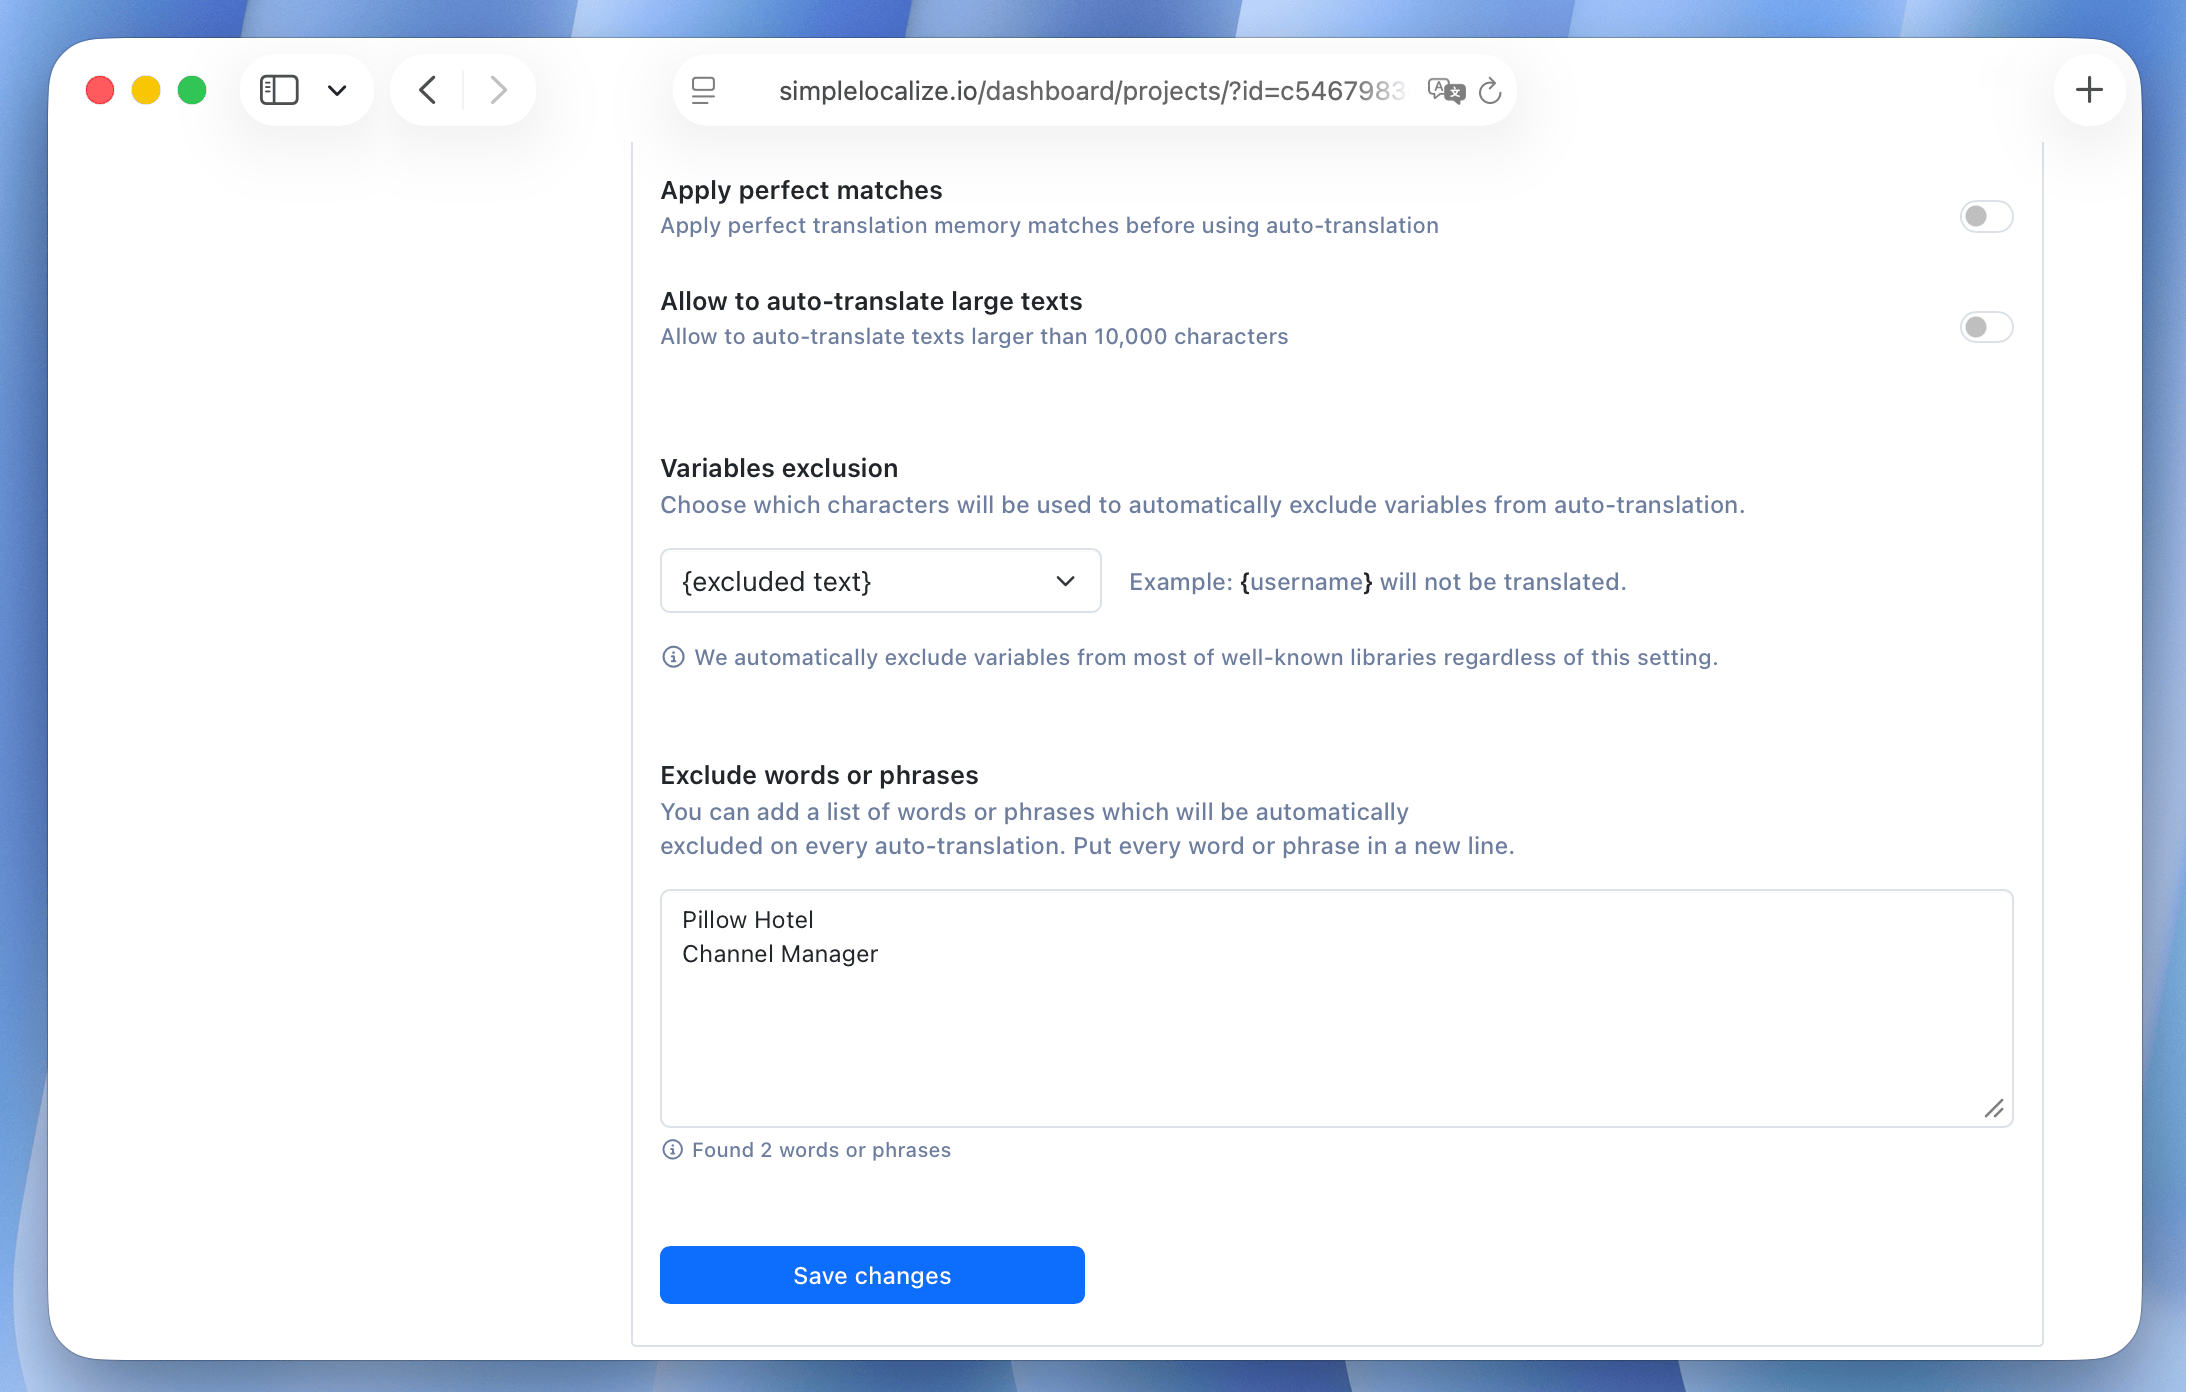
Variable exclusion
Exclusion variables help auto-translation providers to better understand which words or phrases should NOT be translated during the auto-translation process.
Example
Translation: Hello {firstName}, how are you?
Found variable: {firstName} won't be translated.
Translated into Polish: Witaj {firstName}, jak się masz?
You can change the default brackets {} used for excluding words to:
[]-Hello [username], how are you?<>-Hello <username>, how are you?()-Hello (username), how are you?
Exclude words or phrases
You can add a list of words or phrases which will be automatically excluded on every auto-translation. This option is always enabled. Put every word or phrase in a new line.
Message format (ICU) exclusion
ICU formatting is a widely used format used in many frameworks and apps. SimpleLocalize automatically detects ICU messages and excludes variables used in those messages.
{gender, select,
    male {He}
    female {She}
    other {They}
} will respond shortly.
SimpleLocalize will find additional values to translate: He, She, They and will respond shortly.
The example translated into Polish will produce a translation like below:
{gender, select,
    male {On}
    female {Ona}
    other {Oni}
} odpowie wkrótce.