Cloudflare Workers and Website Localization (1/5)
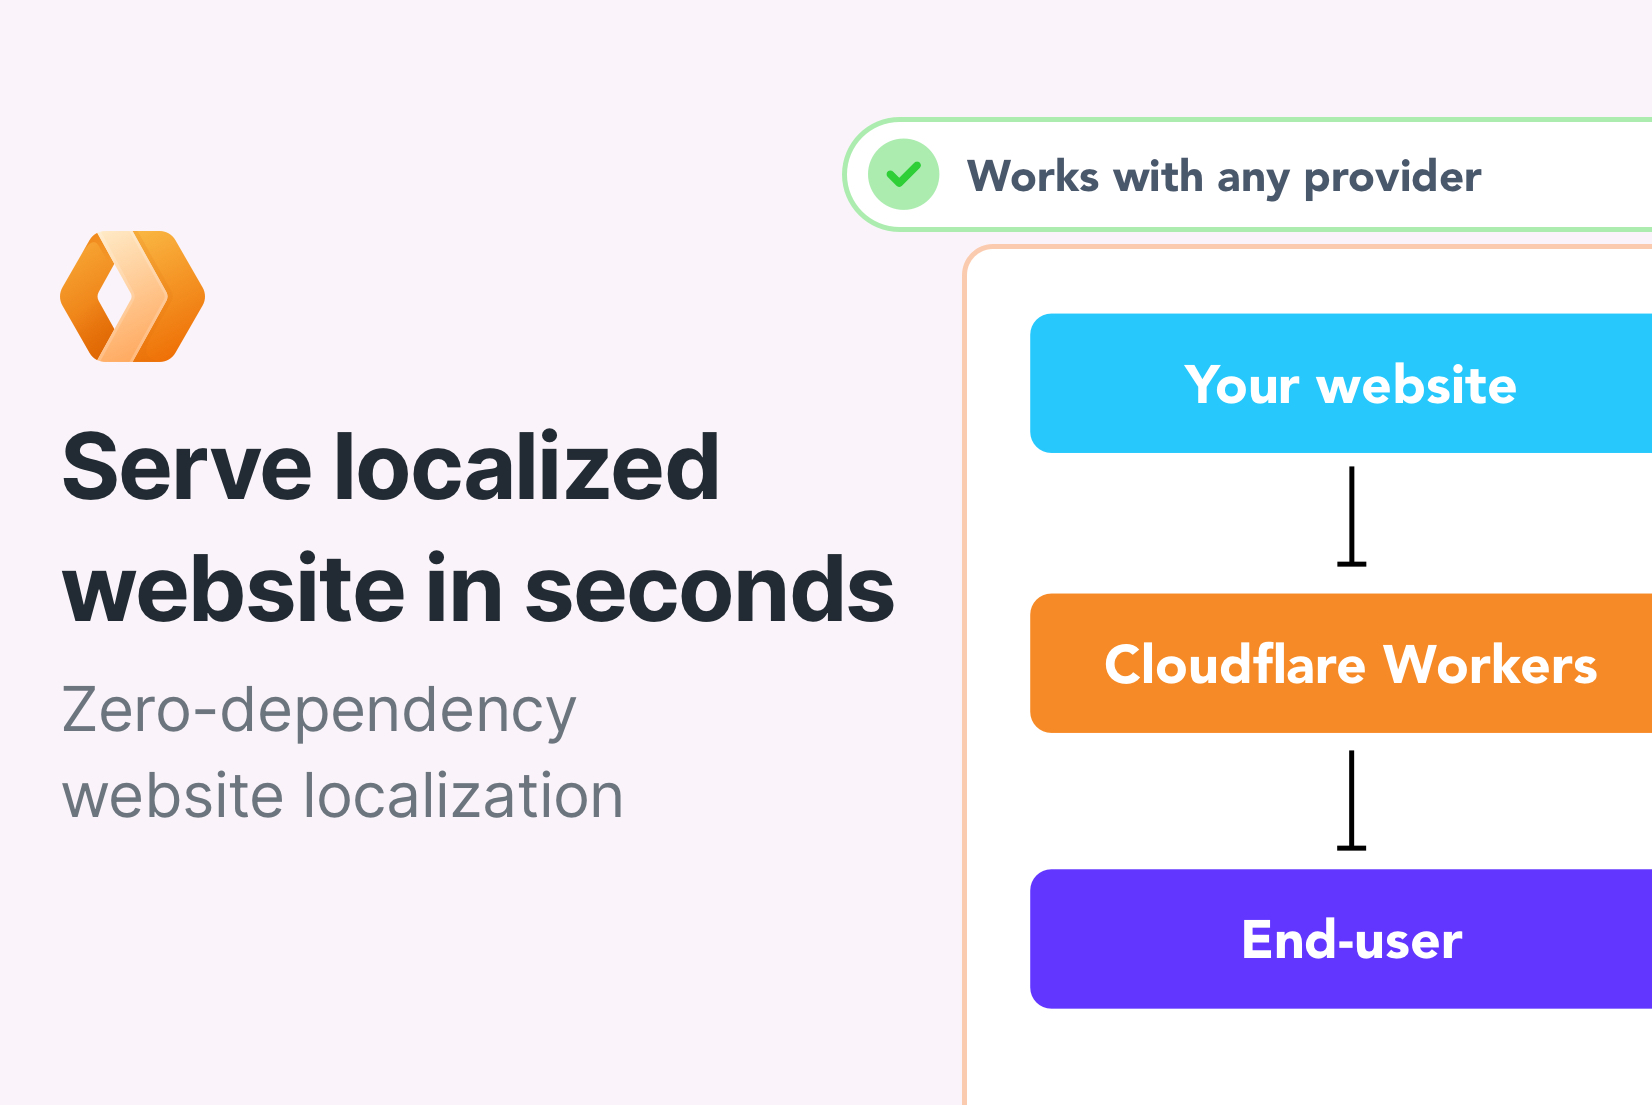
In this tutorial, we will show you how to use Cloudflare Workers to create a simple website localization feature, without the need to install any additional dependencies. This edge-based approach is one pattern in the broader landscape of locale detection and server-side localization strategies covered in our complete technical guide to i18n. We will localize a simple static HTML website hosted on GitHub Pages, but you can use the same approach to localize any website, including those built with React, Angular, or Vue.js.
Let's get started!
Prerequisites
Before you begin, you will need the following:
- Cloudflare account
- SimpleLocalize account
- Basic knowledge of JavaScript and web development
How it works
Cloudflare Worker will act as a proxy between the user and the website. It will intercept incoming requests and serve the appropriate localized content based on the lang query parameter or
use a default language if the lang query parameter is not present. In the further examples, will use the accept-language header to detect the user's preferred language
if the lang query parameter is not present.
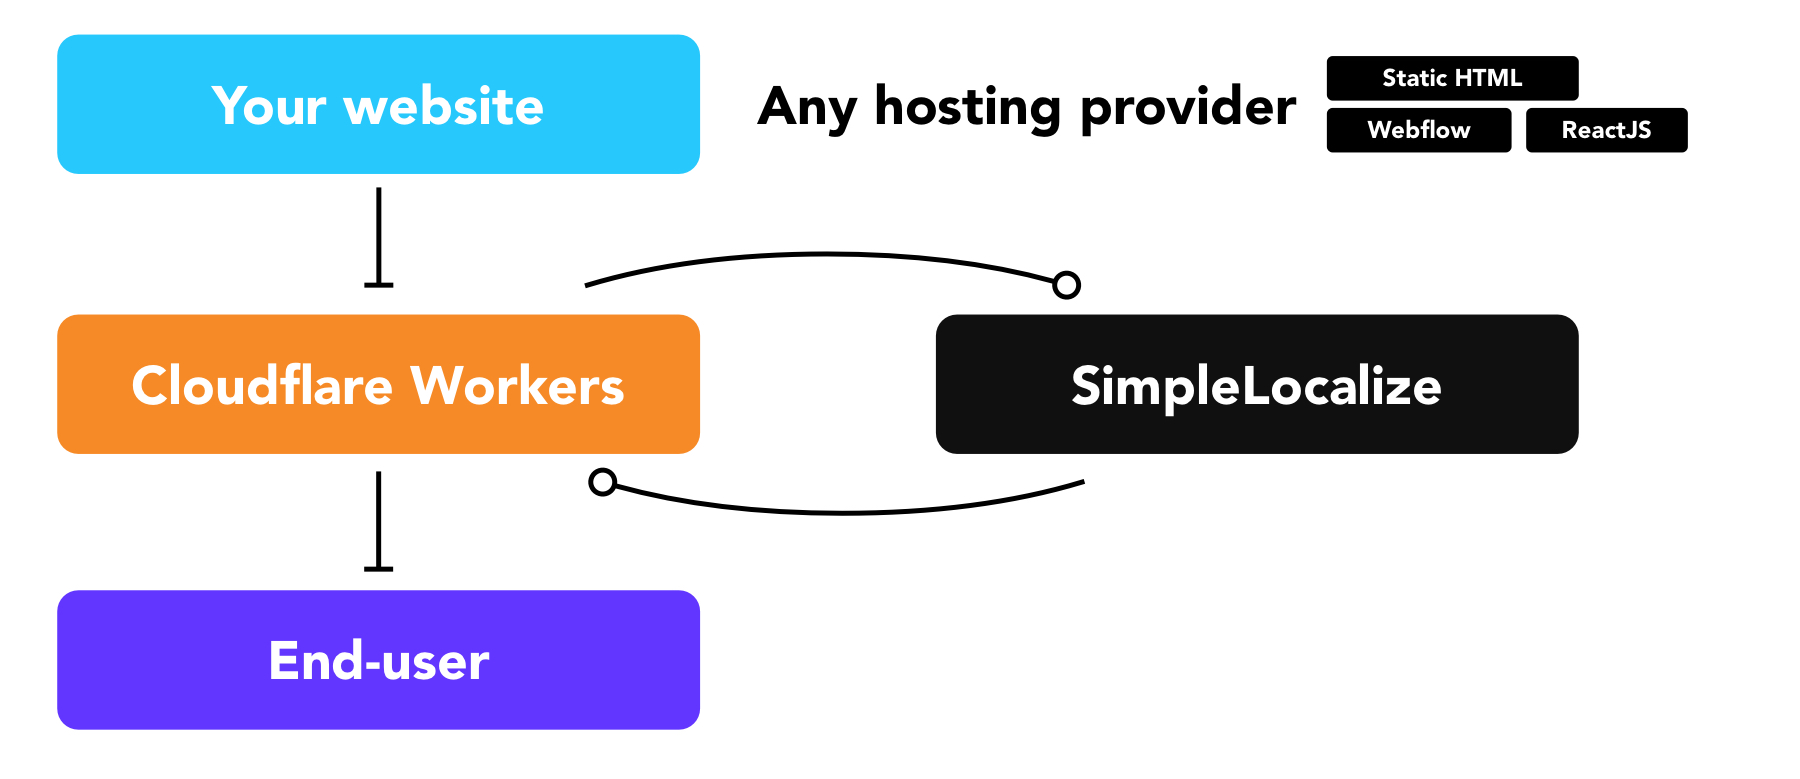
We will use the SimpleLocalize Translation Hosting to fetch the localized content for the website. SimpleLocalize provides a CDN for translations, so the localized content will be served quickly and efficiently.
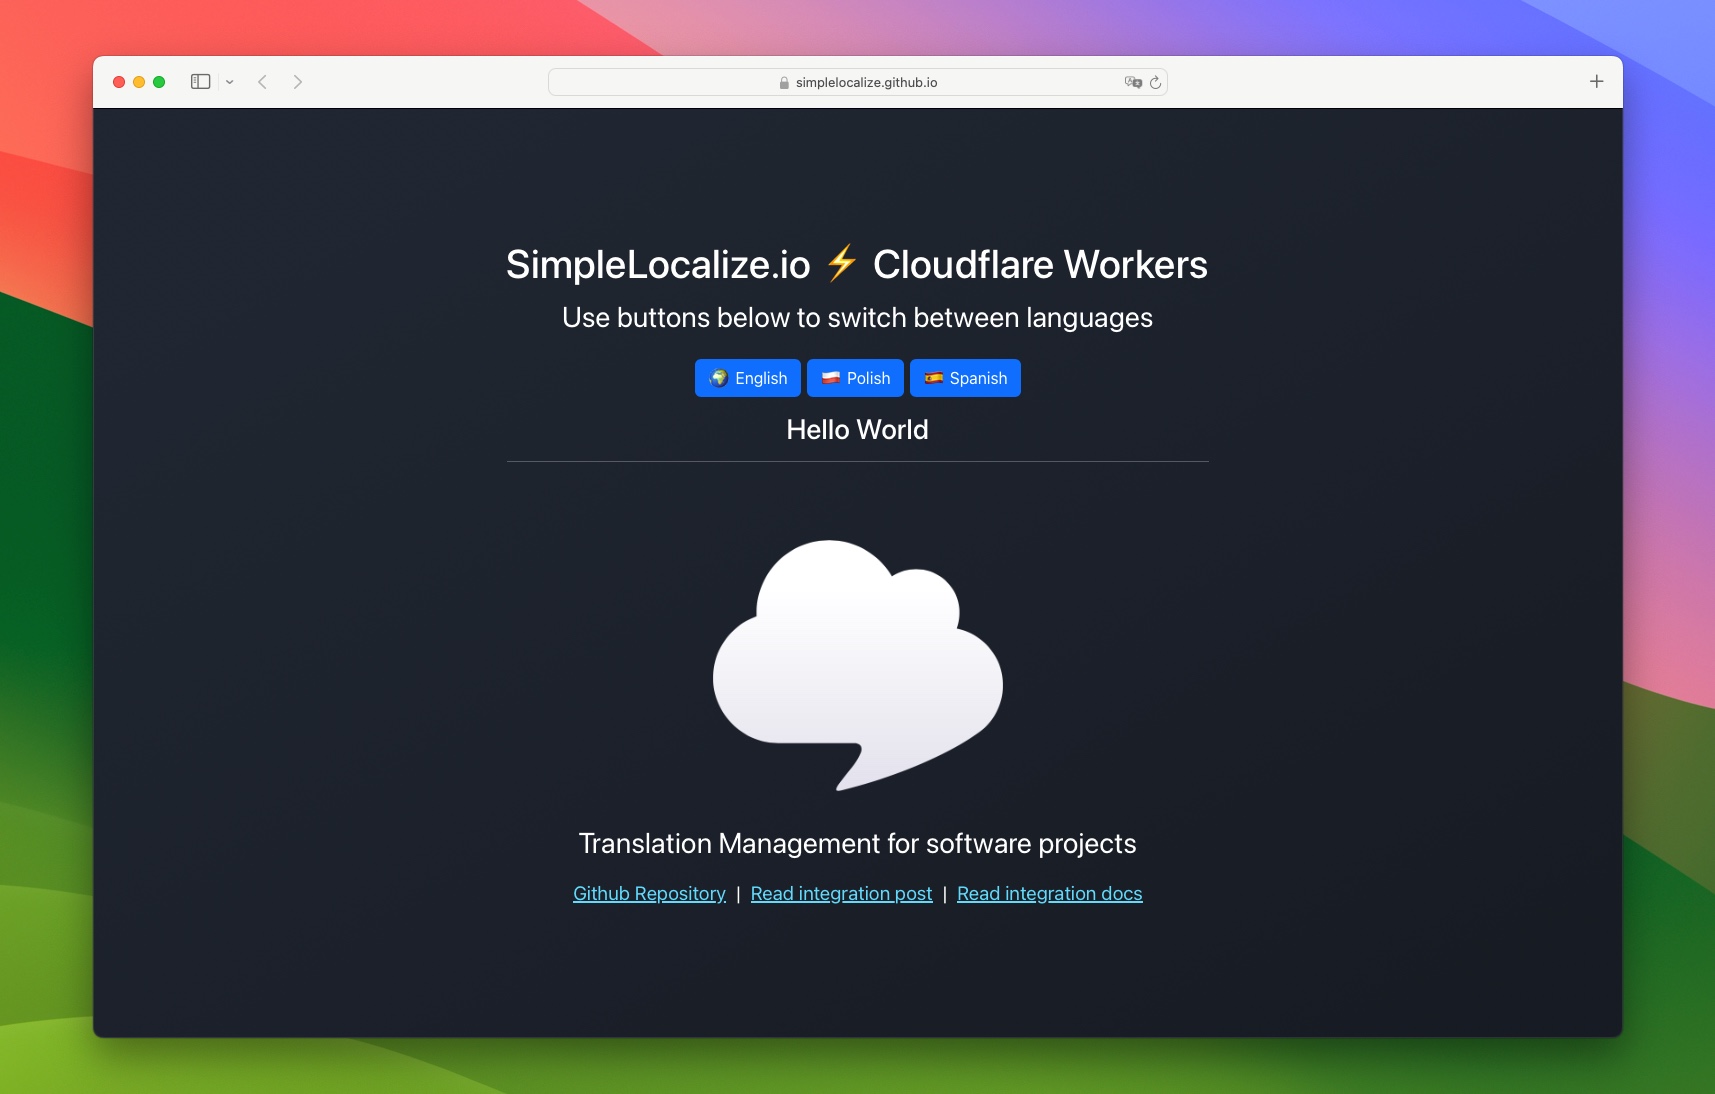
Sample website
For the purpose of this tutorial, we will use a simple HTML website with a few strings. The website has a few strings that need to be localized, and three buttons to switch between languages.
I've added data-i18n-key attribute to the HTML elements that need to be localized, for example:
<!-- Before -->
<h3 class="mt-3">Hello World</h3>

<!-- After -->
<h3 class="mt-3" data-i18n-key="hello_world">Hello World</h3>
and buttons to switch between languages:
<a href="?lang=en" data-i18n-key="languages.english">English</a>
<a href="?lang=pl" data-i18n-key="languages.polish">Polish</a>
<a href="?lang=es" data-i18n-key="languages.spanish">Spanish</a>
The way how the keys are created is up to you. You can use any naming convention you like, but it's a good practice to use a hierarchical structure to keep the keys organized. You can learn more about the best practices for naming keys on our blog post What is a translation key?.
Setting up SimpleLocalize
I already have a SimpleLocalize project with translation keys from the sample website, and auto-translated content into Spanish and Polish.
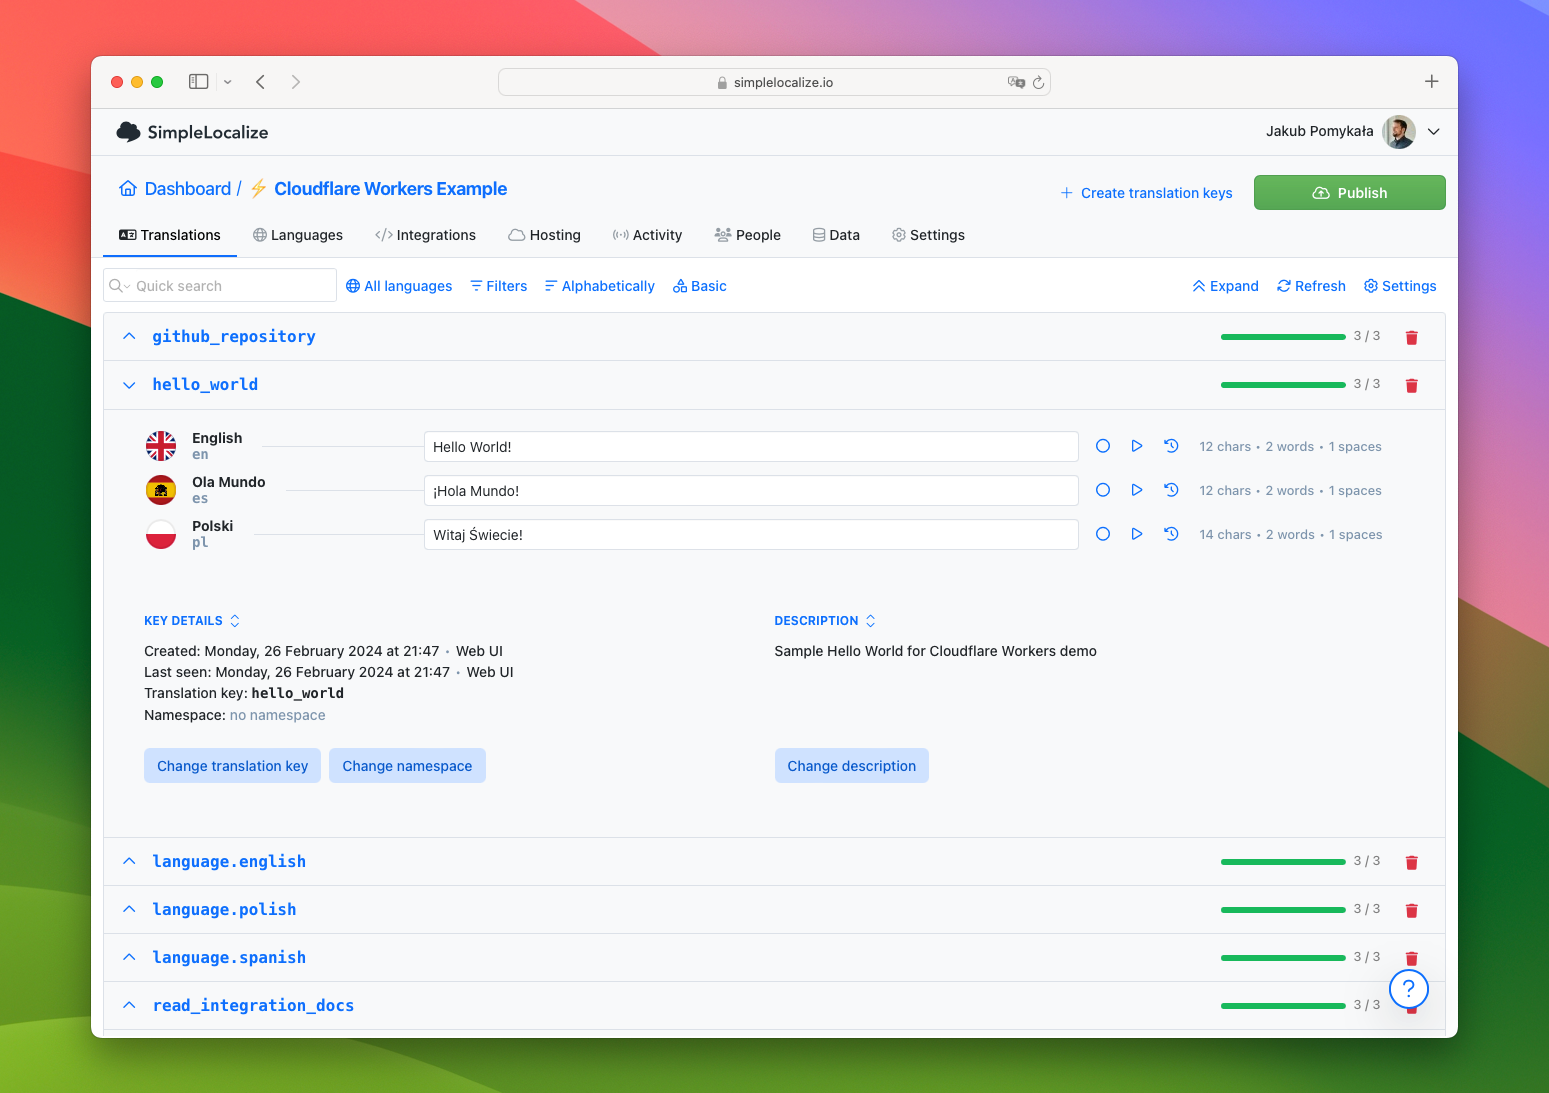
I've also published the translations to the CDN, so they are available at the following URLs:
https://cdn.simplelocalize.io/{your-project-token}/_latest/enhttps://cdn.simplelocalize.io/{your-project-token}/_latest/eshttps://cdn.simplelocalize.io/{your-project-token}/_latest/pl
Setting up Cloudflare Workers
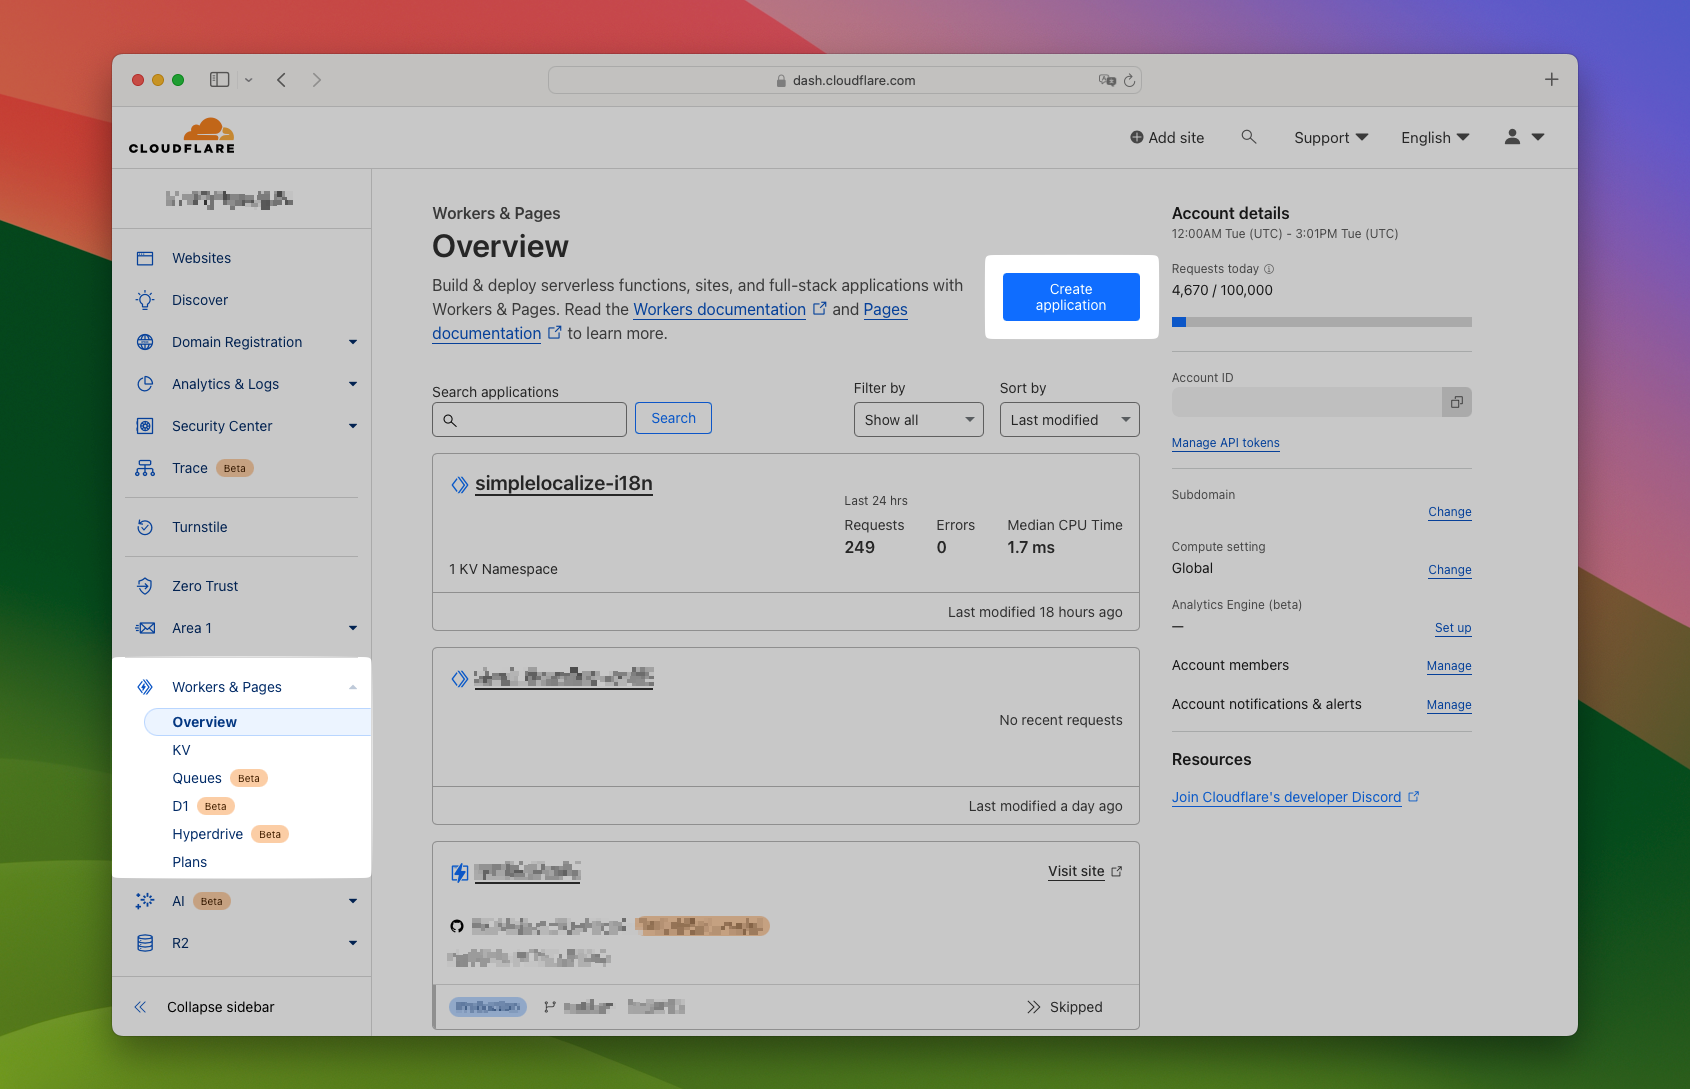
First, we need to set up a Cloudflare Worker to handle the localization logic. You can create a new Worker by navigating to the Workers section in the Cloudflare dashboard and clicking on the "Create application" button in the "Workers & Pages" section.
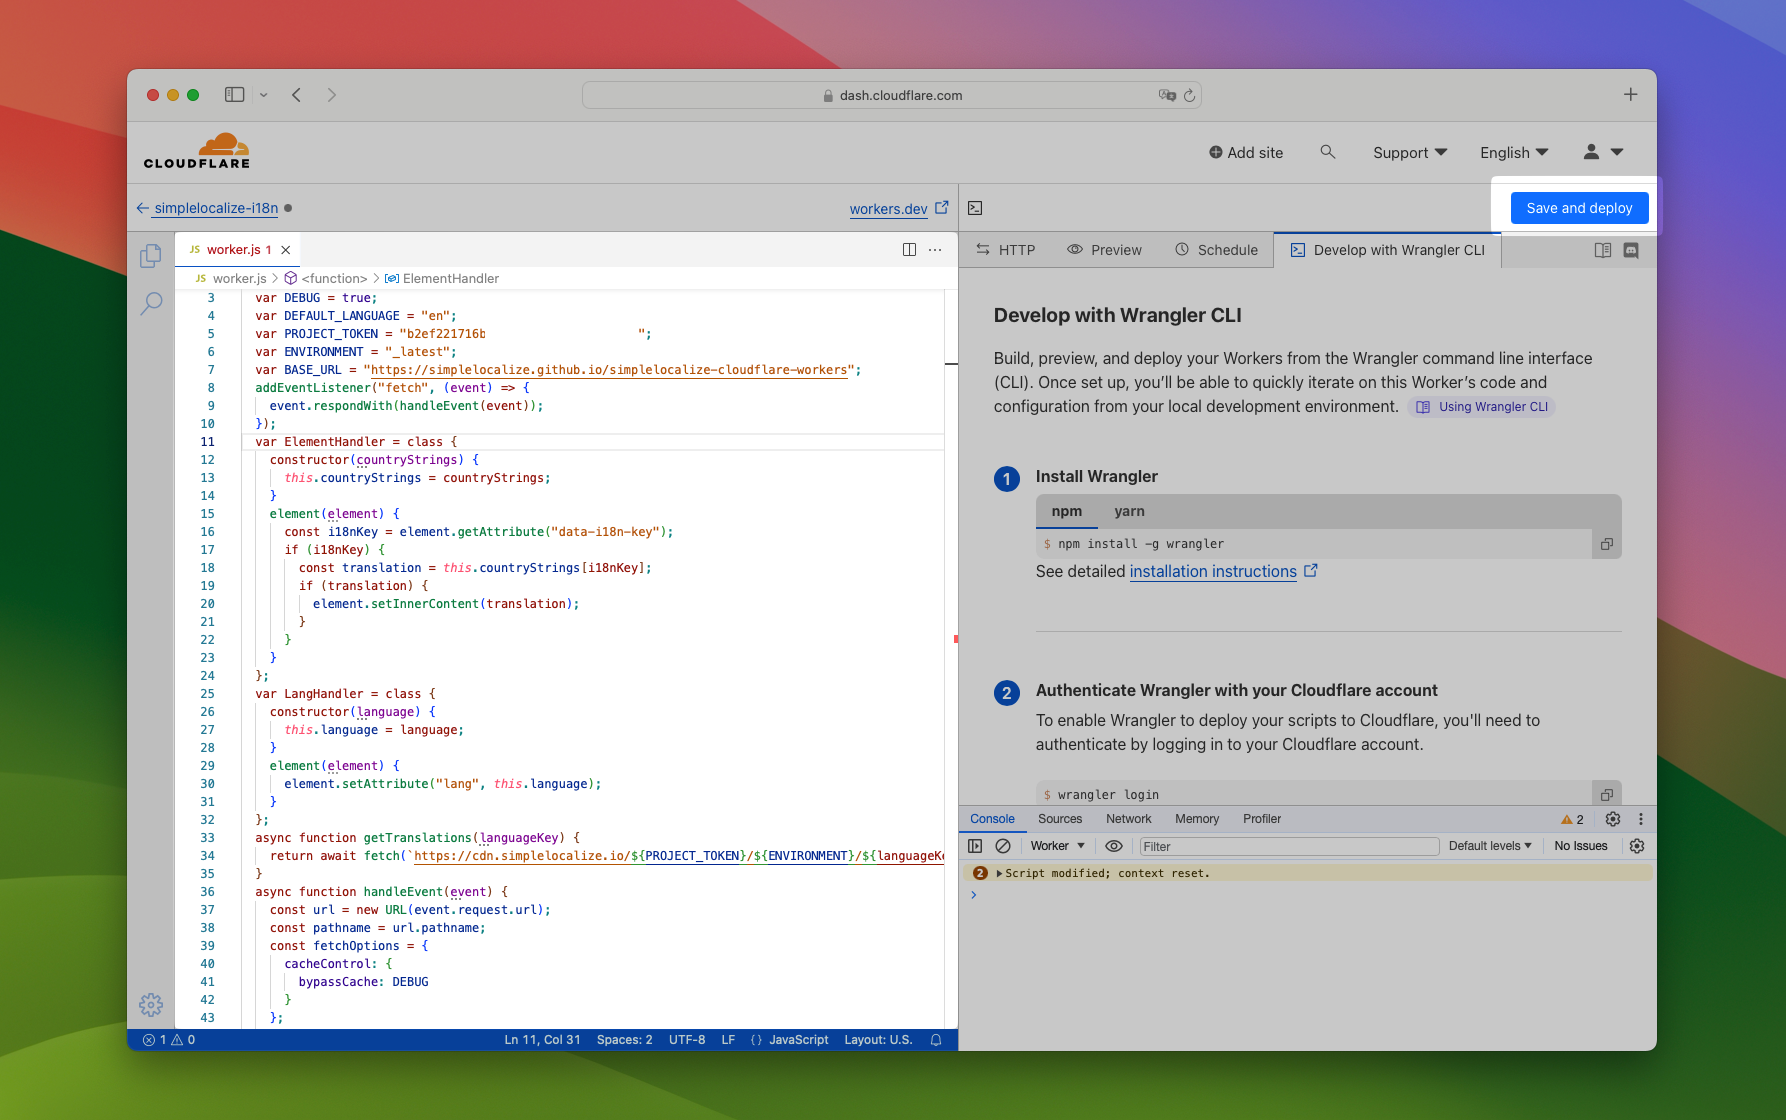
Next, you can paste the following code into the Worker editor and replace the placeholders with your project token from SimpleLocalize, default language, and website URL.
The addEventListener function is used to intercept incoming requests.
const DEBUG = true; // Set to true to bypass cache
const DEFAULT_LANGUAGE = "en"; // Replace with your default language
const PROJECT_TOKEN = "YOUR-PROJECT-TOKEN"; // Replace with your project token
const ENVIRONMENT = "_latest"; // Replace with your environment name
const BASE_URL = "https://example.com"; // Replace with your website URL

addEventListener('fetch', event => {
  event.respondWith(handleEvent(event));
});
Let's add two classes to the Worker code: ElementHandler and LangHandler.
class ElementHandler {
  constructor(countryStrings) {
    this.languageTranslations = countryStrings;
  }

  element(element) {
    const i18nKey = element.getAttribute('data-i18n-key');
    if (i18nKey) {
      const translation = this.languageTranslations[i18nKey];
      if (translation) {
        element.setInnerContent(translation);
      }
    }
  }
}

class LangHandler {
  constructor(language) {
    this.language = language;
  }

  element(element) {
    element.setAttribute('lang', this.language);
  }
}
The ElementHandler class will be used to replace the content of HTML elements with the localized version, e.g.:
<!-- Before -->
<h3 class="mt-3" data-i18n-key="hello_world">Hello World</h3>

<!-- After -->
<h3 class="mt-3" data-i18n-key="hello_world">Hola Mundo</h3>
The LangHandler class will be used to set the lang attribute of the HTML element to the specified language.
<!-- Before -->
<html lang="en">

<!-- After -->
<html lang="es">
Next, we need to add the getTranslations function to fetch the localized content from SimpleLocalize based on the specified language key.
async function getTranslations(languageKey) {
  return await fetch(`https://cdn.simplelocalize.io/${PROJECT_TOKEN}/${ENVIRONMENT}/${languageKey}`)
    .then(response => response.json())
    .catch(() => ({}));
}
Finally, we need to add the handleEvent function to handle incoming requests and serve the appropriate localized content.
async function handleEvent(event) {
  const url = new URL(event.request.url);
  const pathname = url.pathname;
  const fetchOptions = {
    cacheControl: {
      bypassCache: DEBUG
    }
  };

  try {
    const languageKey = url.searchParams.get('lang') ?? DEFAULT_LANGUAGE;
    const translations = await getTranslations(languageKey);
    const originalContentAtPath = await fetch(BASE_URL + pathname, fetchOptions);
    return new HTMLRewriter()
      .on('[data-i18n-key]', new ElementHandler(translations))
      .on('[lang]', new LangHandler(languageKey))
      .transform(originalContentAtPath);
  } catch (e) {
    console.error(e);
    return new Response(`Not found`, {
      status: 404
    });
  }
}
You can find the complete code in the Cloudflare Workers and Website Localization repository.
Once you have added the code to the Worker editor, you can click on the "Save and Deploy" button to deploy the Worker to the Cloudflare network.
Remember that you have to open the website from the Cloudflare domain to see the changes. If you open the website from the original domain, the Worker will not be triggered. You can also configure Worker routes to match your website domain and path in the "Routes" section of the Cloudflare dashboard. We will cover this in the following tutorials.
Testing the Cloudflare Worker
To test the Cloudflare Worker, you can add the lang query parameter to the URL of your website to specify the desired language.
For example, you can add ?lang=es to the end of the URL to specify Spanish as the desired language.
Conclusion
In this tutorial, we showed you how to use Cloudflare Workers to create a simple website localization feature.
We used the lang query parameter to specify the desired language to serve the appropriate version of the website, and SimpleLocalize as a single source of truth for translations.
In the following tutorials, we will show you how to:
- extract all i18n keys from the website and upload them to SimpleLocalize,
- use the
accept-languageheader to detect the user's preferred language, - use the Cloudflare Workers KV to store and serve the localized content, and
- configure Worker routes to match your website domain and path.
Stay tuned for the next tutorials!


")

")
