FormatJS and React application localization
React localization is one of the topics discussed vividly among developers. There are many i18n libraries built for React, React Native, and NextJS, that focus on app internationalization. Website or app translation is so important because it positively affects the product visibility and performance, increases the customer base and satisfaction by creating a special relation. It's all thanks to adjusting the product to their language, customs, and culture. Developers have a great choice of tools and libraries that can help them in i18n of the product, and one of them is FormatJS.
About FormatJS
FormatJS, originally yahoo/react-intl, is a localization and internationalization set of libraries built mainly for React apps. It helps in i18n process, focusing on numbers, dates, and strings formatting. It provides i18n tools and packages that help with localization and app translation management.
A sample i18n file structure in FormatJS looks like this:
projectRoot
|-- src
|   |-- App.js
|-- lang
|   |-- en-US.json
|   |-- fr.json
|-- package.json
|-- .eslintrc.js
In lang we create json files with supported languages, for example, en-US or fr. FormatJS focuses or improving development process of app internationalization and helps in future translation management.
How to translate React app with FormatJS?
The installation and translation process is quite straightforward. We will start with creating a sample project, then FormatJS installation and setup, and finally building and translating our app. Sounds fun, right? 😎
Create a sample project
Let's start with something simple. I will create a new project using create-react-app. Use NPM or Yarn like in the example below.
yarn create react-app simplelocalize-react-intl-example
Or download the demo app from GitHub repository.
Install dependencies
Add react-intl library to your newly created project.
# Using NPM
npm i -S react react-intl

# Using yarn
yarn add react react-intl
Add Language Context
In this project, I will use Context to keep translations and option to change language in real-time.
import React from 'react';

const LanguageContext = React.createContext("en");

export default LanguageContext;
Read more about React Context API.
react-intl configuration
Let's create main configuration for i18n with react-intl and SimpleLocalize wrapper.
// 📦 file: ./SimpleLocalize.js

import React from "react";
import {IntlProvider} from 'react-intl'
import LanguageContext from "./LanguageContext";

class SimpleLocalize extends React.Component {

  constructor(props) {
    super(props);
    this.state = {
      messages: undefined,
      language: "en"
    };
  }

  componentDidMount() {
    this.setupLanguageMessages(this.state.language);
  }

  setupLanguageMessages = (language) => {
    const projectToken = "5e13e3019cff4dc6abe36009445f0883";
    const translationsUrl = `https://cdn.simplelocalize.io/${projectToken}/_latest/${language}`;
    return fetch(translationsUrl)
      .then((data) => data.json())
      .then((messages) => this.setState({language, messages}));
  };

  render() {
    return (
      <LanguageContext.Provider
        value={{
          changeLanguage: (language) => this.setupLanguageMessages(language)
        }}>
        <IntlProvider
          locale={this.state.language}
          messages={this.state.messages}>
          {this.state.messages ? this.props.children : null}
        </IntlProvider>
      </LanguageContext.Provider>
    )
  }
}

export default SimpleLocalize;
This wrapper will keep translations in our LanguageContext and it will also provide a function to change language in fly.
Translate your app with FormatJS and SimpleLocalize
Now, it's time to work on i18n and localization process. We use SimpleLocalize to extract translation keys and as a translation management and i18n online editor.
Create project
Create a SimpleLocalize.io project to get your unique messages variable. For this demo project, you can use the messages from the example above!
Wrap your application
Now let's use our newly created SimpleLocalize wrapper to provide translations for React application.
// 📦 file: ./index.js

import React from 'react';
import ReactDOM from 'react-dom';
import './index.css';
import App from './App';
import SimpleLocalize from "./SimpleLocalize";

ReactDOM.render(
    <SimpleLocalize>
      <App/>
    </SimpleLocalize>,
  document.getElementById('root')
);
Done! React will now fetch translations from SimpleLocalize CDN and provide them to your app. Let's check how to use it in the source code.
Translating React app
Now, let's start using translations, and create a basic web page.
FormatJS setup
See below how to apply translations for your React app. For that, we will use FormattedMessage component which wraps up all translation keys.
// 📦 file: ./App.js

import React from 'react';
import logo from './logo.svg';
import './App.css';
import {FormattedMessage} from "react-intl";
import LanguageContext from "./LanguageContext";

function App() {

  return (
    <LanguageContext.Consumer>
      {context => (<div className="App">
        <header className="App-header">
          <div>
            <p>
              <FormattedMessage id="USE_BUTTONS_BELOW"/>
            </p>
            <button onClick={() => context.changeLanguage("en")}>English</button>
            <button onClick={() => context.changeLanguage("es")}>Spanish</button>
            <button onClick={() => context.changeLanguage("pl")}>Polish</button>
            <hr/>
          </div>

          <img src={logo} className="App-logo" alt="logo"/>
          <p>
            <FormattedMessage id="DESCRIPTION"/>
          </p>

          <a
            className="App-link"
            href="https://simplelocalize.io"
            target="_blank"
            rel="noopener noreferrer"
          >
            <FormattedMessage id="LEARN_MORE"/>
          </a>
        </header>
      </div>)}
    </LanguageContext.Consumer>
  );
}

export default App;
FormattedMessage component
<FormattedMessage/> usage is very easy:
<FormattedMessage id="YOUR_TRANSLATION_KEY"/>
React will convert FormattedMessage tag into span tag and put concrete translation into it. You can also use <FormattedHTMLMessage id="TRANSLATION_WITH_CSS"/> which will also produce a message with HTML inside span tag.
A sample translation key could look like the following:
TRANSLATION_WITH_CSS = This is my <strong>text</strong>
Switch between languages
In the presented example, I used LanguageContext.Consumer to provide function. This function can trigger language change and fetch proper messages from the CDN.
 <LanguageContext.Consumer>
      {context => (<div className="App">
        <header className="App-header">
          <div>
            <p>
              <FormattedMessage id="USE_BUTTONS_BELOW"/>
            </p>
            <button onClick={() => context.changeLanguage("en")}>English</button>
            <button onClick={() => context.changeLanguage("es")}>Spanish</button>
            <button onClick={() => context.changeLanguage("pl")}>Polish</button>
            <hr/>
          </div>
          //...
        </header>
      </div>)}
    </LanguageContext.Consumer>
You need Language.Consumer tag only in places where you would like to change the language. It's not needed for <FormattedMessages/> tags.
Let's try it!
Note that translation works in real-time! How cool is that? Very cool!
Project code is available on GitHub.
Translation management for FormatJS
FormatJS is a great tool for translating your React app. It is intuitive and not too complicated to introduce to your project. Using react-intl together with SimpleLocalize can really speed up the translation process with great auto translation tools (OpenAI, DeepL or Google Translate), many integrations and easy to use i18n online editor. It's a great help in development process thanks to SimpleLocalize CLI for FormatJS, which extracts all translation keys from your project with a simple command.
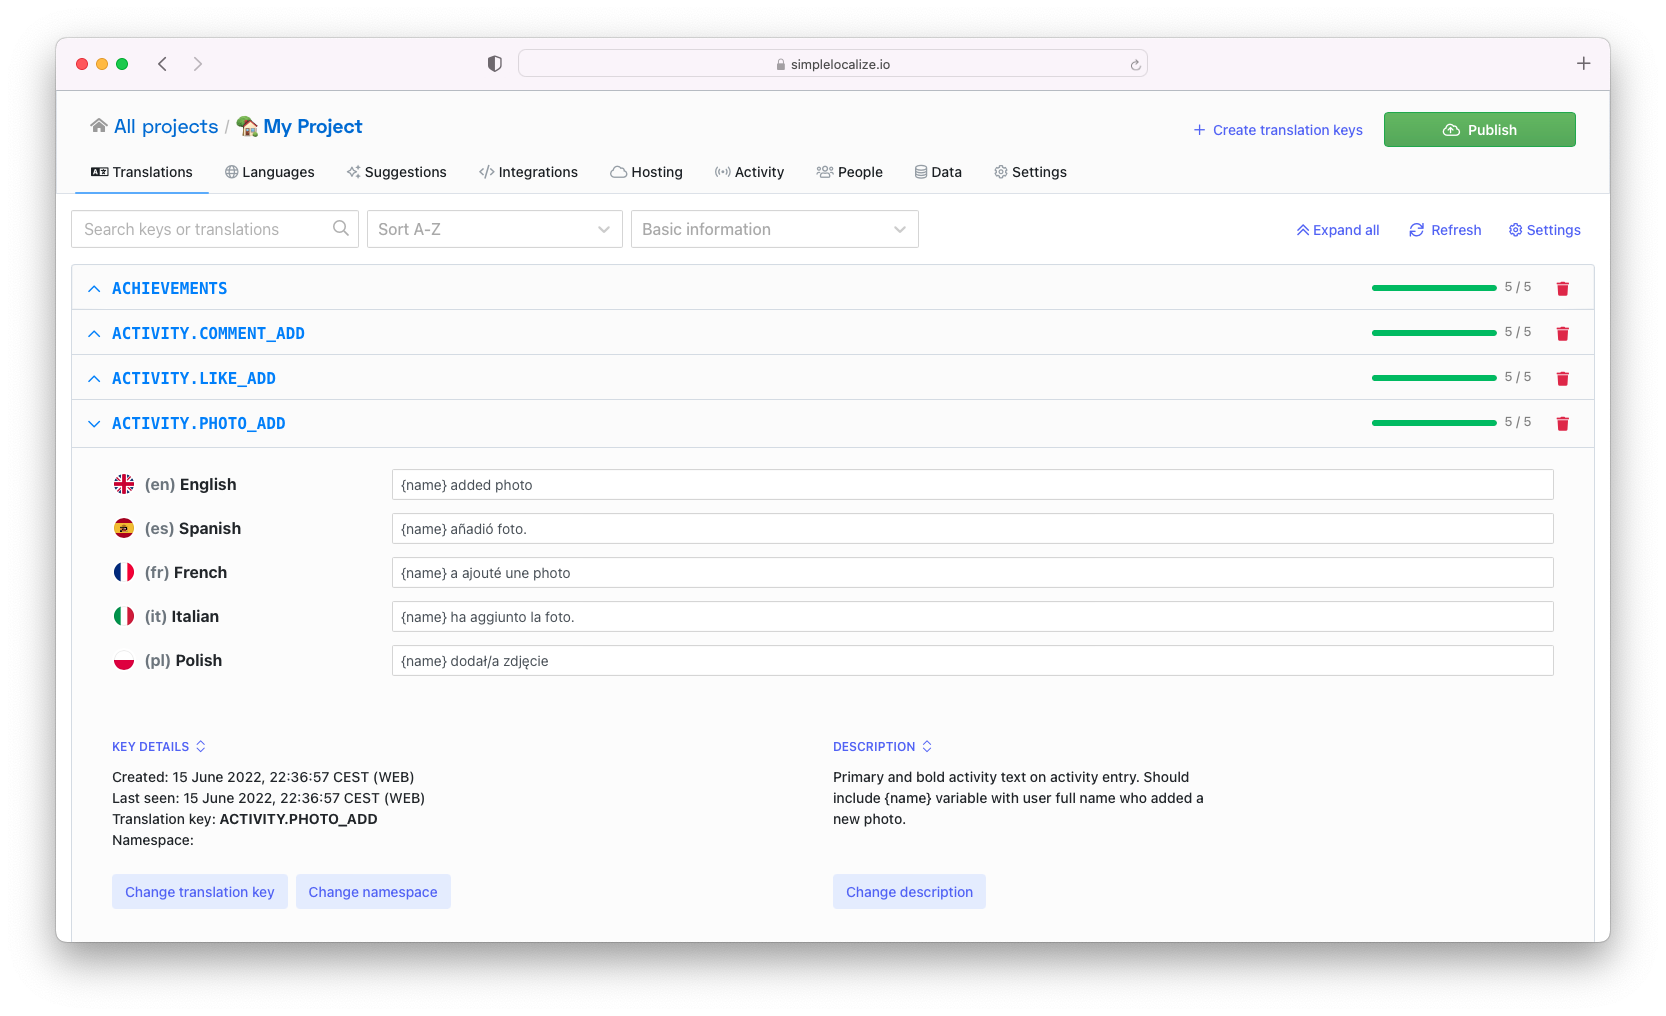
Check our docs for FormatJS integration in SimpleLocalize and translate your app in our feedback-driven app. Get in touch or send us your feedback at contact@simplelocalize.io.
