How to auto-translate YAML files
Auto-translating YAML files turns localization from a manual chore into a repeatable step in your build. If you're new to YAML localization, how the format works, common errors to avoid, and framework-specific conventions for Rails, Symfony, and others, start with our guide to translating YAML files first. For the full picture of how YAML fits into your broader i18n architecture alongside CI/CD pipelines and translation workflows, see our complete technical guide to internationalization and software localization. With SimpleLocalize, you can import your YAML, run machine translation automatically, review quality, and export validated files back to your repo, all without leaving your CI/CD pipeline.
This guide walks you through the end-to-end automation flow, including project setup, one-click pre-translation, review, and continuous integration examples.
Why auto-translate YAML?
Auto-translation saves time and reduces errors by eliminating manual copy-paste. It also offers:
- Speed: Generate high-quality drafts for every locale in minutes.
- Consistency: Keep keys in sync across languages automatically.
- Safety: Guard placeholders, plural forms, and YAML syntax with built-in checks.
- Scalability: Easily add new languages and strings as your app grows.
What you'll automate
Not only will you auto-translate YAML files, but you'll also integrate the process into your development workflow. The key steps are:
- Upload YAML files: Push your source YAML files from your repo (e.g. GitHub, GitLab), using CLI or API, or import them manually.
- Pre-translate with MT: Use SimpleLocalize's batch machine translation to auto-translate all strings.
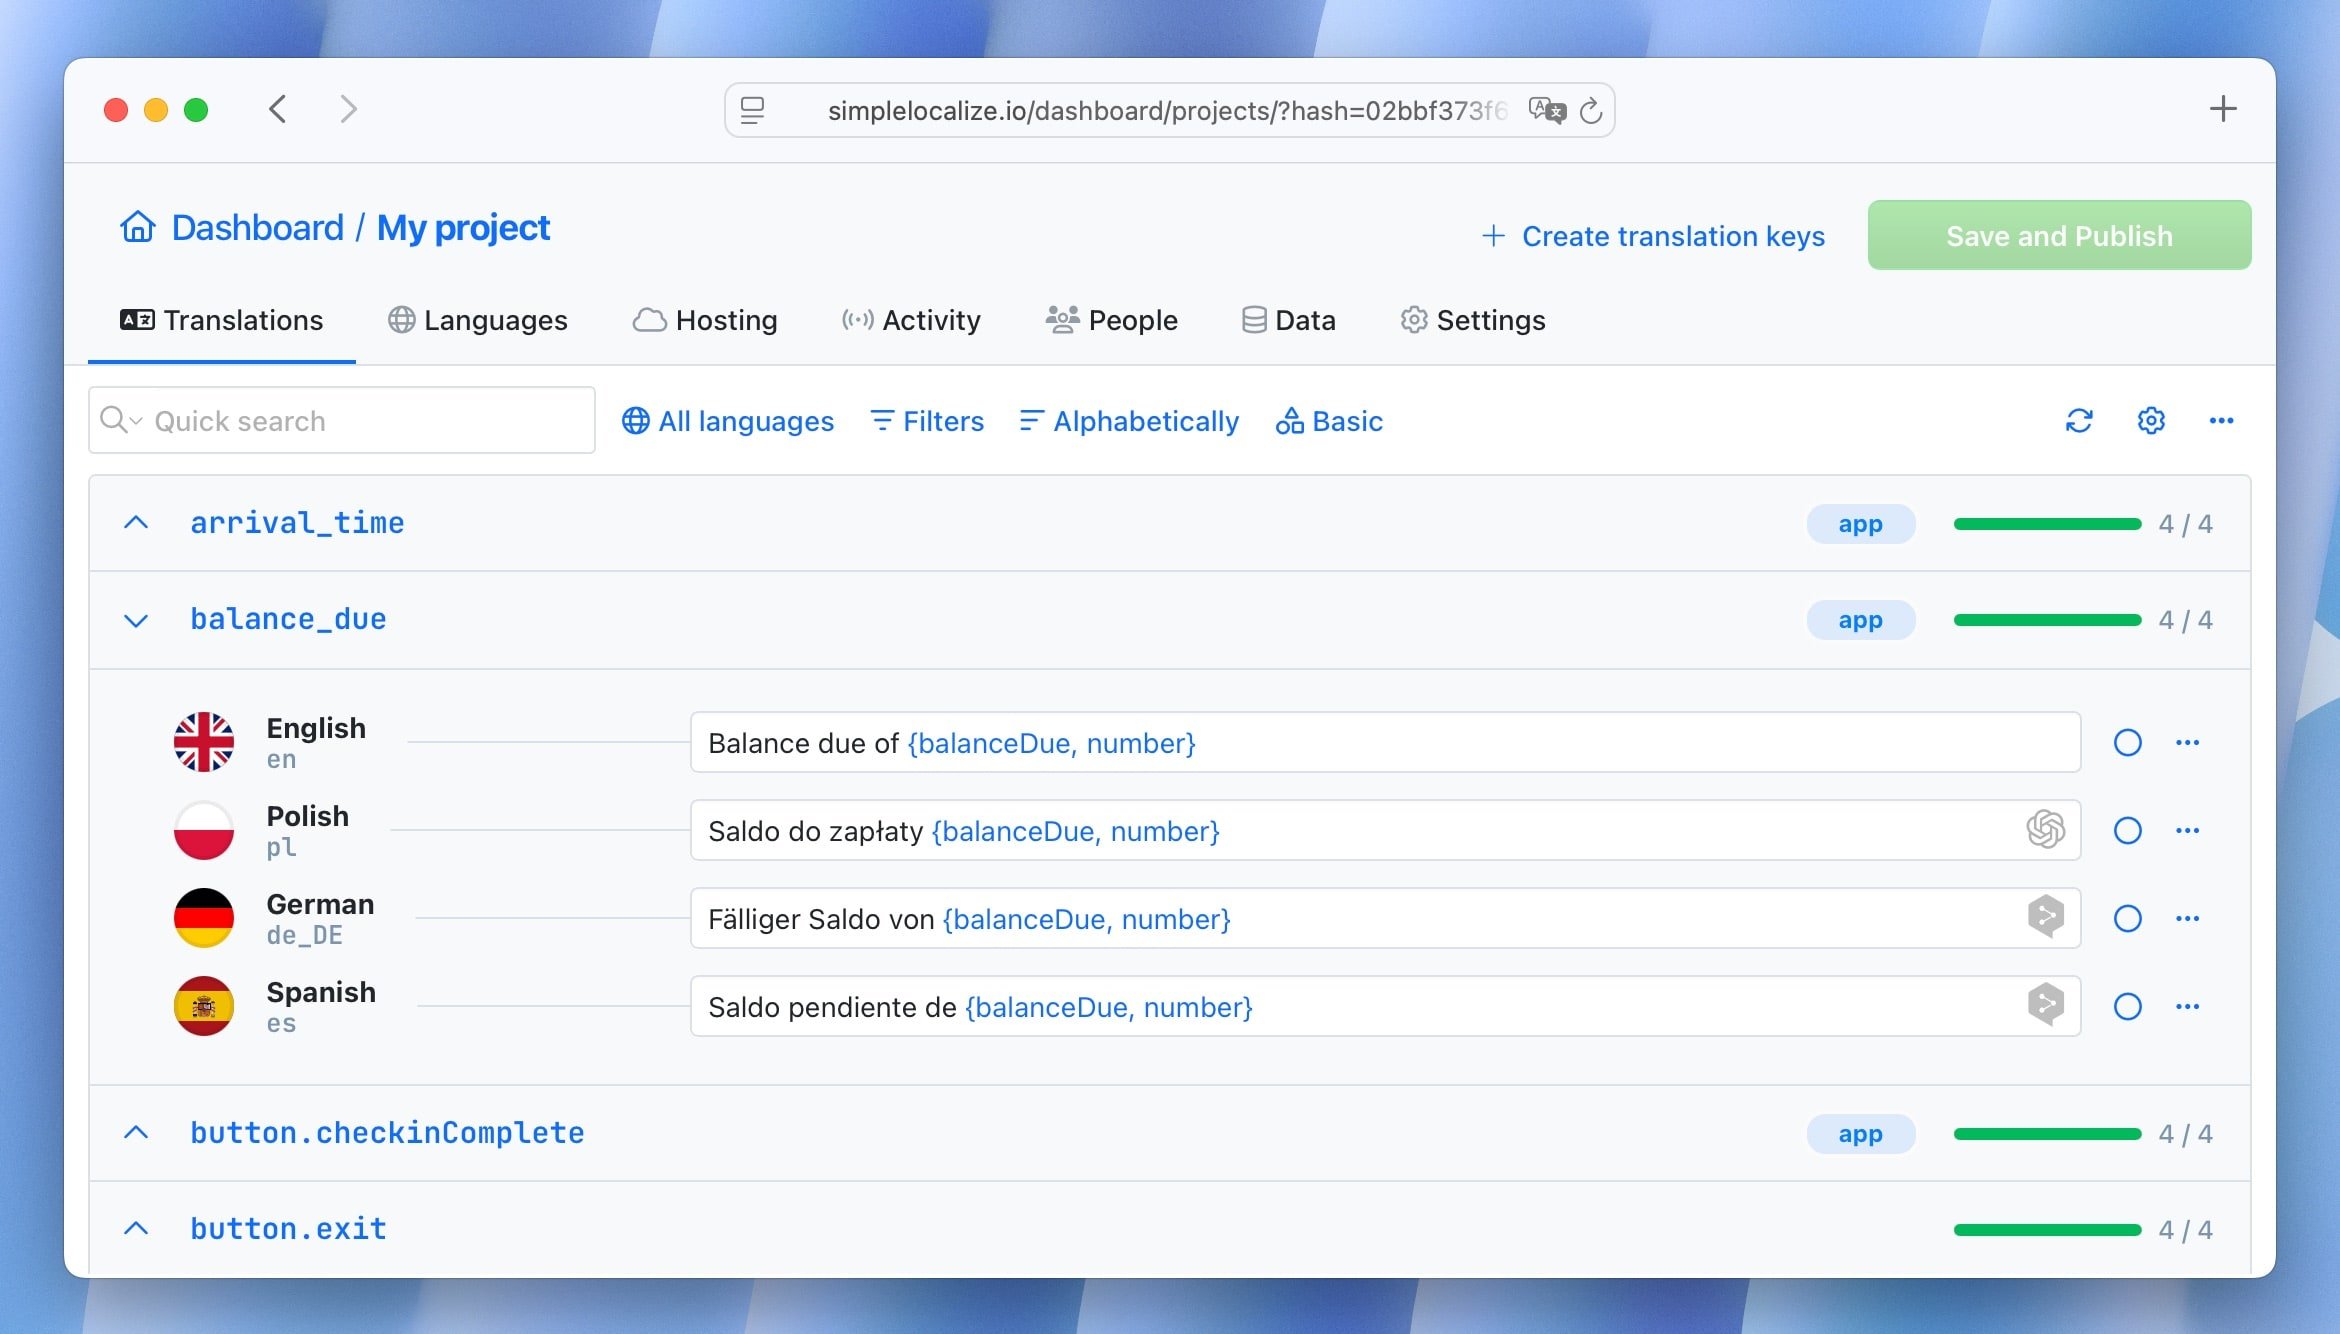
- Review and edit: Optionally review and refine translations in the SimpleLocalize editor.
- Export translated YAML: Download the translated files or push them back to your repo.
- Repeat on every push via CI.
Project setup (one time)
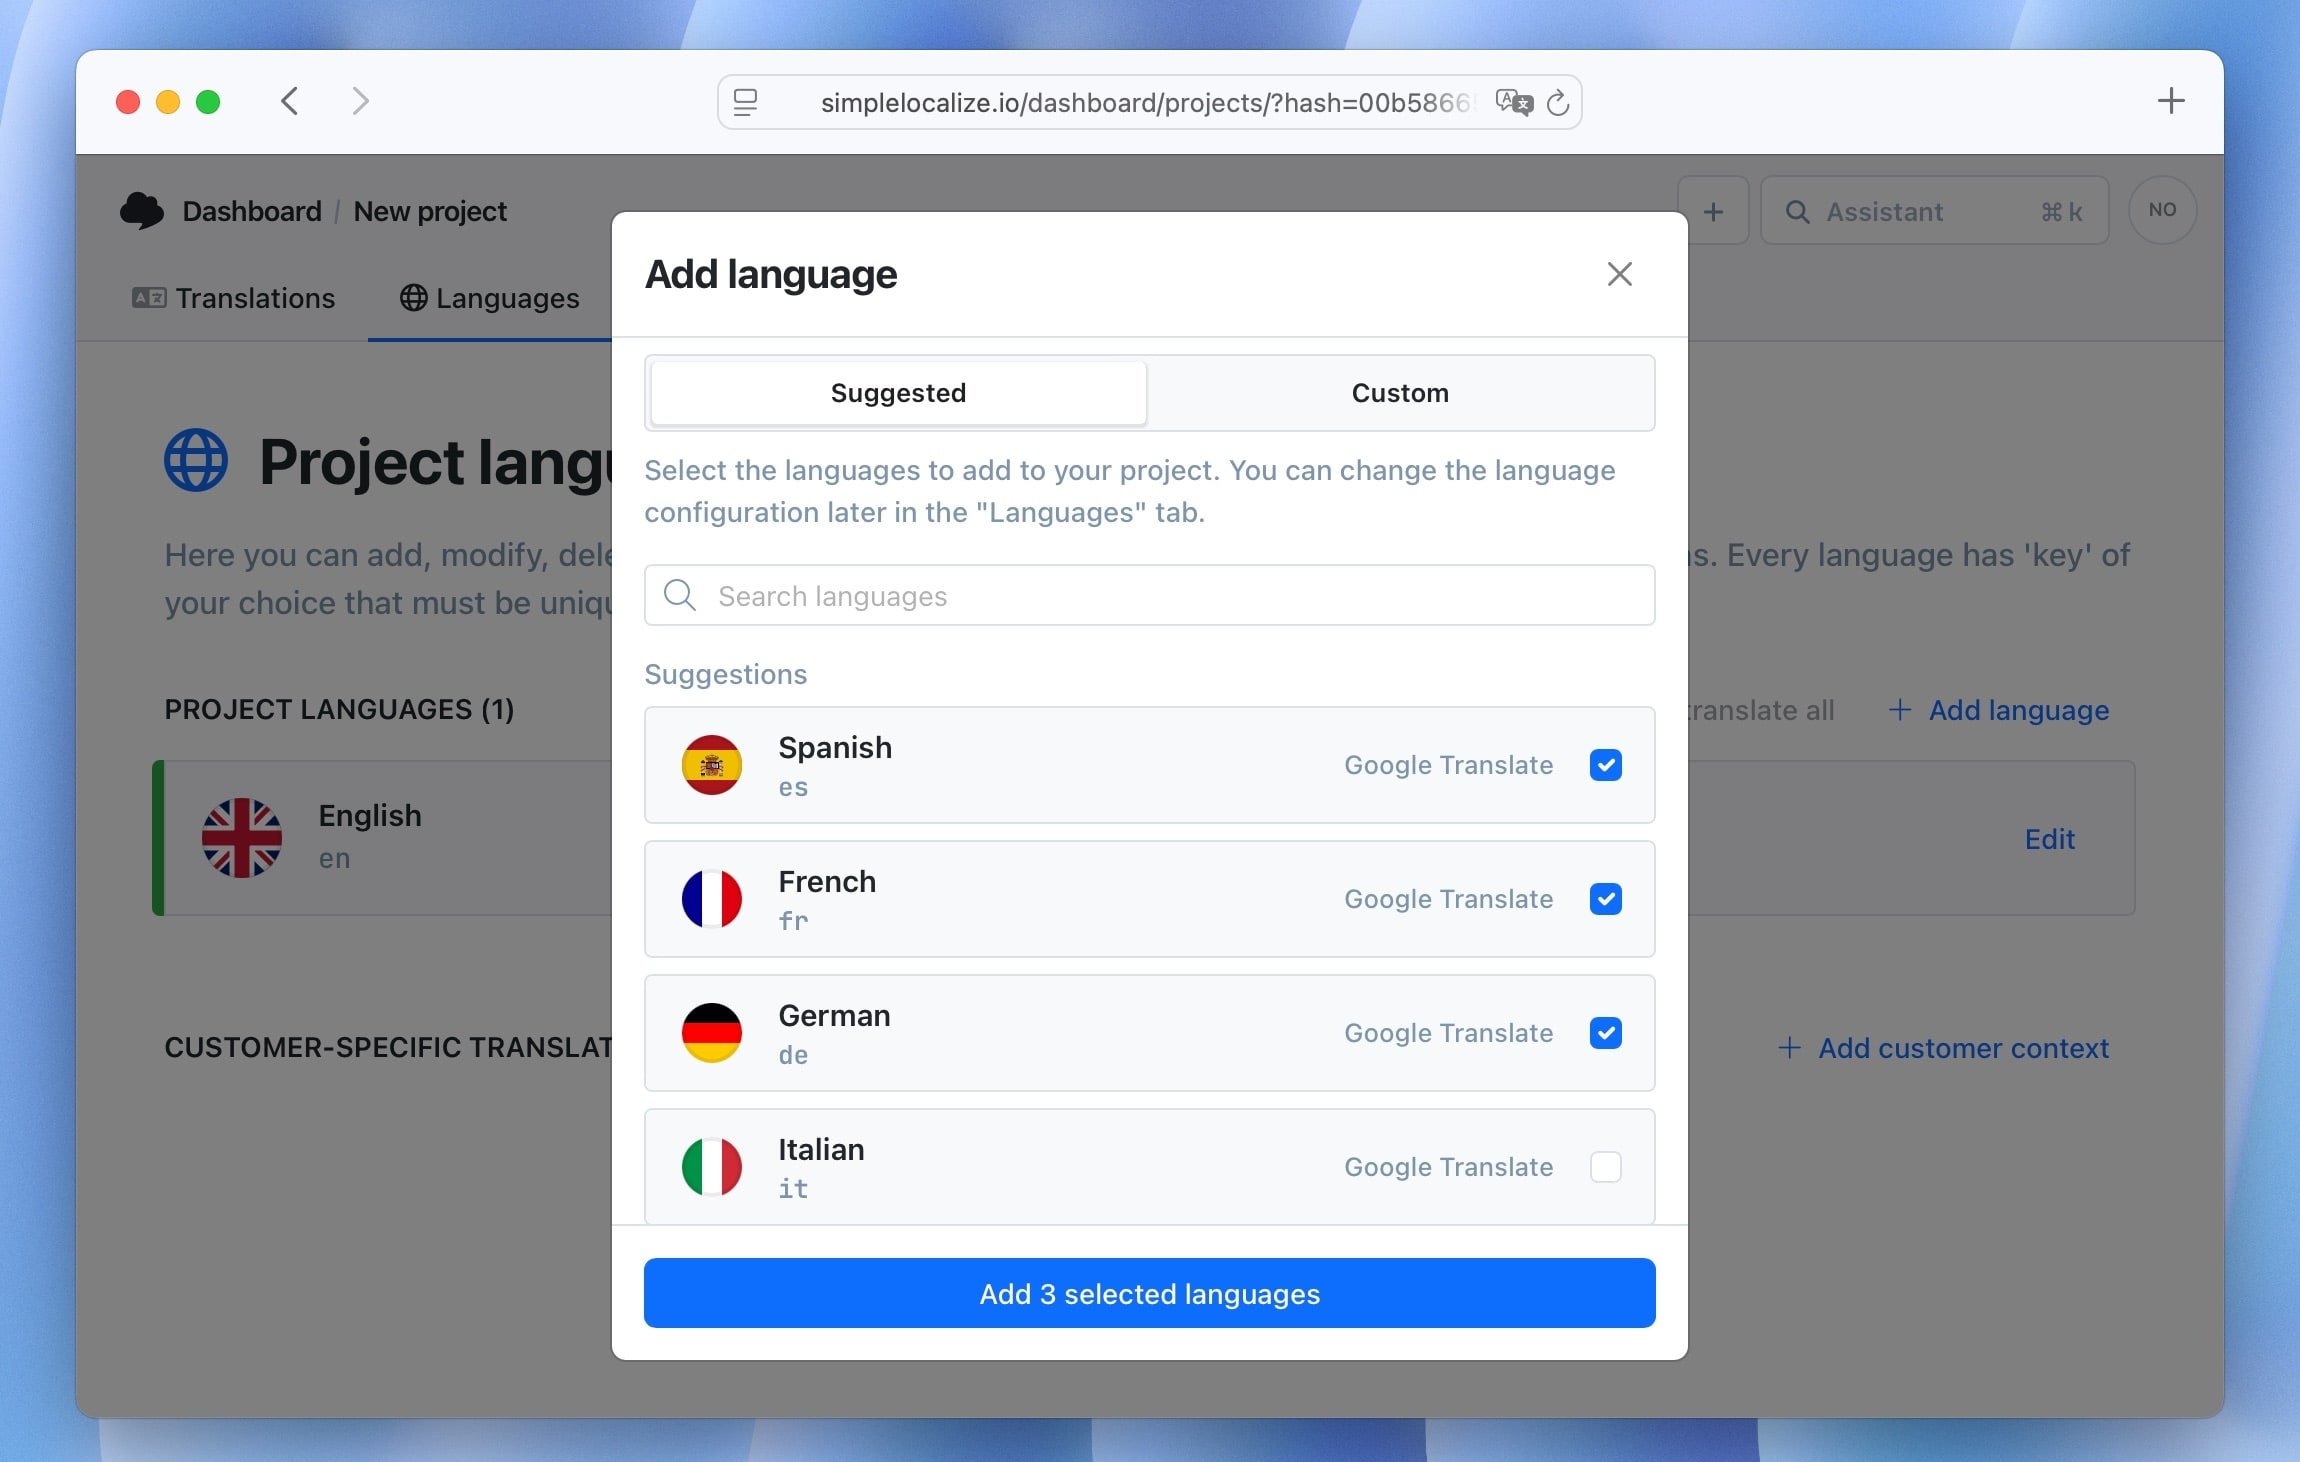
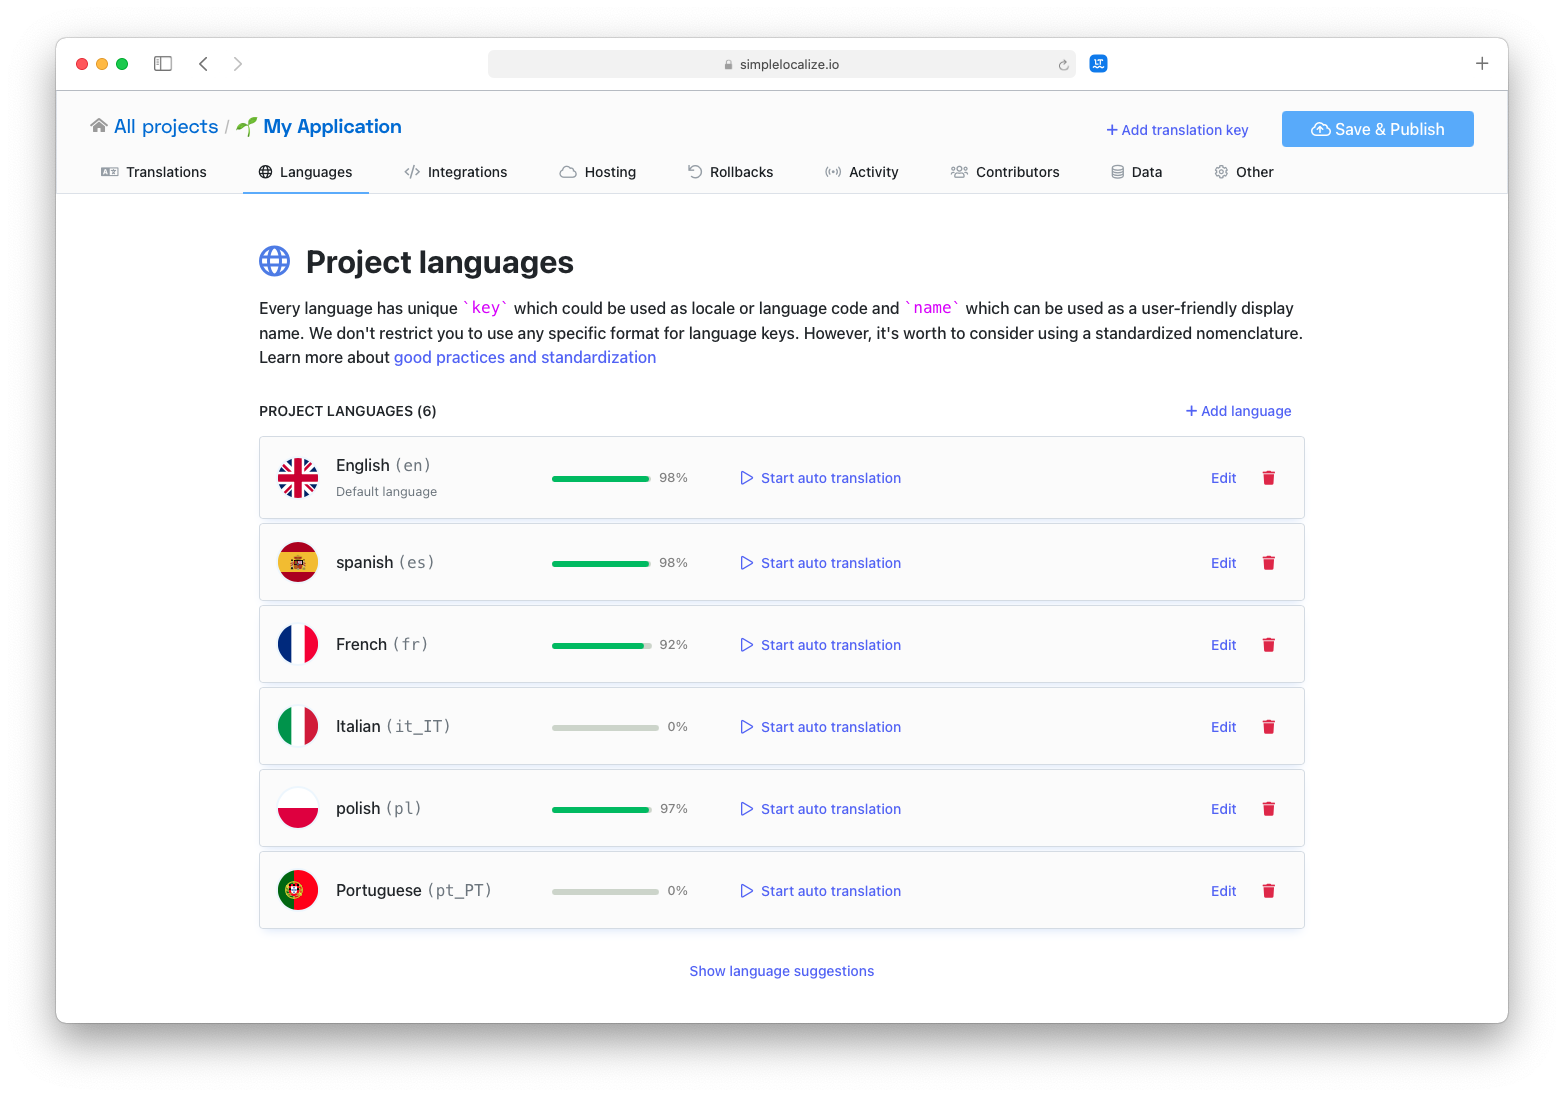
First, create a SimpleLocalize account and set up a new project. Next go to the Languages tab and add your target locales (e.g. es, fr, de).
Next, connect your repository. Use the new SimpleLocalize GitHub App for first-class Git integration, automatic imports/exports, and safe PR workflows.
Check docs for GitLab CI, Bitbucket Pipelines or use the CLI or API for custom workflows.
Import your YAML files
You can import your YAML files in several ways:
Manual upload
Once your project is set up, open Translations tab and choose YAML as the file format. Choose your file configuration (one file per language or one file with all languages) and upload your source YAML file.
Using CLI
Use the upload command to push YAML files from your local machine or CI/CD pipeline.
# Upload YAML files from your repo to SimpleLocalize

simplelocalize upload \
  --api-key PROJECT_API_KEY \
  --uploadPath "i18n/english-translations.yaml" \
  --uploadFormat yaml
  --uploadLanguageKey en
See the how to import translations vis CLI.
Using API (cURL)
You can also use the REST API to upload YAML files programmatically.
curl
  --request POST \
  --url 'https://api.simplelocalize.io/api/v2/import?uploadFormat=yaml&languageKey=en' \
  --header 'x-simplelocalize-token: <API_KEY>' \
  --form file=@/english-translations.yaml
Using the GitHub App (recommended)
Install the SimpleLocalize GitHub App to your repository or organization. Once installed, the app can:
- Automatically import translations from a specific path (e.g.,
i18n/english.yml). - Open pull requests with translation files for target languages.
- Trigger automations when new keys are added or changed.
See the GitHub App installation and configuration guide for step-by-step instructions.
Run auto-translation (pre-translate)
Now, run auto-translation. You can do this manually in the UI from the Languages by clicking Auto-translate all. This will use machine translation to pre-translate all untranslated strings in your target languages.
Learn more about using auto-translation.
You can also trigger auto-translation via the CLI:
simplelocalize auto-translate \
  --apiKey PROJECT_API_KEY \
  --languageKeys es,fr,de
or start auto-translation via API:
curl
    --location
    --request POST 'https://api.simplelocalize.io/api/v1/jobs/auto-translate' \
    --header 'X-SimpleLocalize-Token: <API_KEY>' \
    --header 'Content-Type: application/yaml' \
    --data-raw '{
        "translationProvider": "DEEPL",
        "options": ["FORCE_REPLACE"],
        "targetProjectLanguage": "es",
        "targetLanguage": "es",
        "sourceProjectLanguage": "en",
        "sourceLanguage": "en",
    }'
Check our tips for effective auto-translation to improve quality.
Automate auto-translation
You can also set up automations to run auto-translation whenever new keys are added or existing keys are updated.
See the automation docs for more examples.
Edit & review
After auto-translation, you can review and edit translations in the SimpleLocalize editor. This step is optional but recommended for quality assurance.
- Customize the editor view and options to focus on untranslated or auto-translated strings.
- Use filters to find specific keys or languages.
- Add screenshots and key descriptions to provide context for translators.
- Invite team members or professional translators to review and improve translations.
- Add comments and collaborate with team members.
You can also control the translation review status, marking translations as Accepted or Needs review.
Learn more about controlling the translation quality with review statuses.
Export translated YAML files
Once you're happy with the translations, you can export the translated YAML files. You can do this manually from the Data tab by selecting YAML as the export format, choosing the structure, and downloading the files.
You can also use the CLI to export files:
# Export translated YAML files from SimpleLocalize to your repo

simplelocalize download
  --apiKey <PROJECT_API_KEY> \
  --downloadFormat yaml \
  --downloadPath ./translations_{lang}.yaml
See the CLI docs for more download options.
Or use the API:
curl
    --request GET \
    --url https://api.simplelocalize.io/api/v4/export?downloadFormat=yaml \
    --header 'x-simplelocalize-token: <API_KEY>'
See the API docs for exporting translations for more details.
Wire it into CI/CD
Finally, integrate the entire flow into your CI/CD pipeline to ensure translations are always up-to-date with every push. The easiest way to automate YAML translation is with the SimpleLocalize GitHub App.
Here's an example simplelocalize.yaml config for a project that uses frontend JSON namespaces and backend YAML files:
# simplelocalize.yaml

# Pull request configuration
pull-request:
  title: "🌐 Update translations"
  body: |
    This PR contains updated translations from SimpleLocalize.

    Please review the changes before merging.
  labels:
    - "translations"
    - "i18n"

# Upload configuration
upload:
  when:
    push:
      branches:
        - "main"
        - "develop"
        - "feature/*"
  files:
    - path: "src/locales/en/{ns}.json"
      format: "single-language-json"
      language-key: "en"
      tags:
        - "frontend"
      options:
        - REPLACE_TRANSLATION_IF_FOUND
        - TRIM_LEADING_AND_TRAILING_WHITESPACES
    - path: "api/locales/en.yml"
      format: "yaml"
      language-key: "en"
      tags:
        - "backend"

# Download configuration
download:
  files:
    - path: "src/locales/{lang}/{ns}.json"
      format: "single-language-json"
      tags:
        - "frontend"
      language-keys:
        - "en"
        - "es"
        - "fr"
        - "de"
    - path: "api/locales/{lang}.yml"
      format: "yaml"
      tags:
        - "backend"
      language-keys:
        - "en"
        - "es"
        - "fr"
        - "de"
How it works:
- On push to
main,develop, orfeature/*, the GitHub App uploads your English source files (.jsonand.yml) into SimpleLocalize. - New or changed keys are automatically pre-translated into your target locales (
es,fr,de). - A pull request is created with updated translation files for frontend JSON and backend YAML.
- You review, approve, and merge, keeping translations always in sync with your codebase.
Conclusion
Auto-translating YAML with SimpleLocalize gives you fast drafts, safe placeholders, correct plurals, and clean exports, all wired into CI. Import your YAML, run pre-translation, review the bits that matter, and ship every locale alongside your code.
Ready to try it? Import your YAML, enable auto-translation, and connect your pipeline, your next release can ship in every language by default.


")
: The complete guide for iOS localization")
