In this article, you will learn how to configure and use i18next for Next.js 14+ with Pages Router library. The following article is based on a demo application available on GitHub.
Installation
To start using i18next with Next.js, you need to install next-i18next library.
npm install next-i18next
Configuration
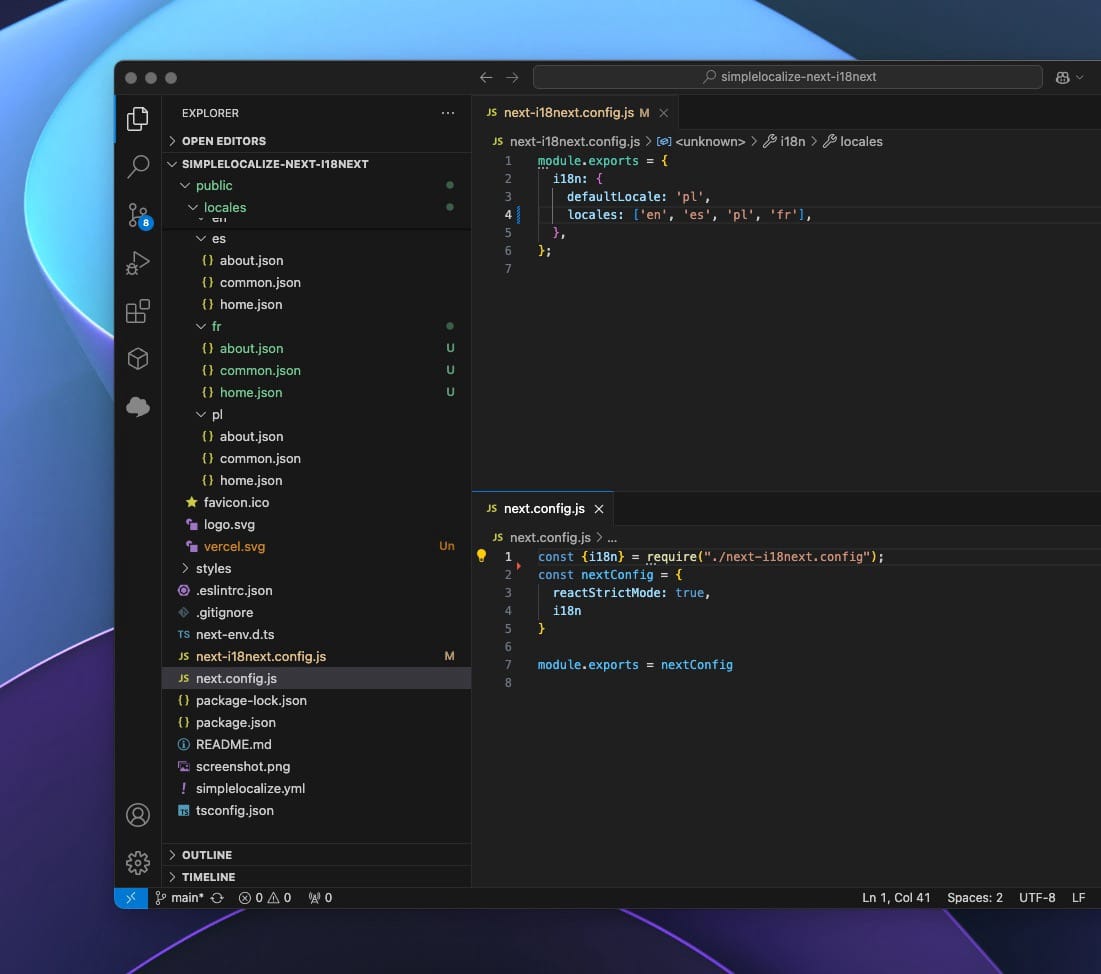
Create next-i18next.config.js file in project root.
module.exports = {
  i18n: {
    defaultLocale: 'en',
    locales: ['en', 'es', 'pl', 'fr'],
  },
};
Apply i18n from i18next to your Next.js configuration in next.config.js file.
const {i18n} = require("./next-i18next.config");
const nextConfig = {
  reactStrictMode: true,
  i18n
}

module.exports = nextConfig
Update __app.tsx
Update your __app.tsx file to use appWithTranslation from next-i18next library as a wrapper.
import '../styles/globals.css'
import type {AppProps} from 'next/app'
import {appWithTranslation} from 'next-i18next';


function MyApp({Component, pageProps}: AppProps) {
  return <Component {...pageProps} />
}

export default appWithTranslation(MyApp);
Update pages/_document.tsx
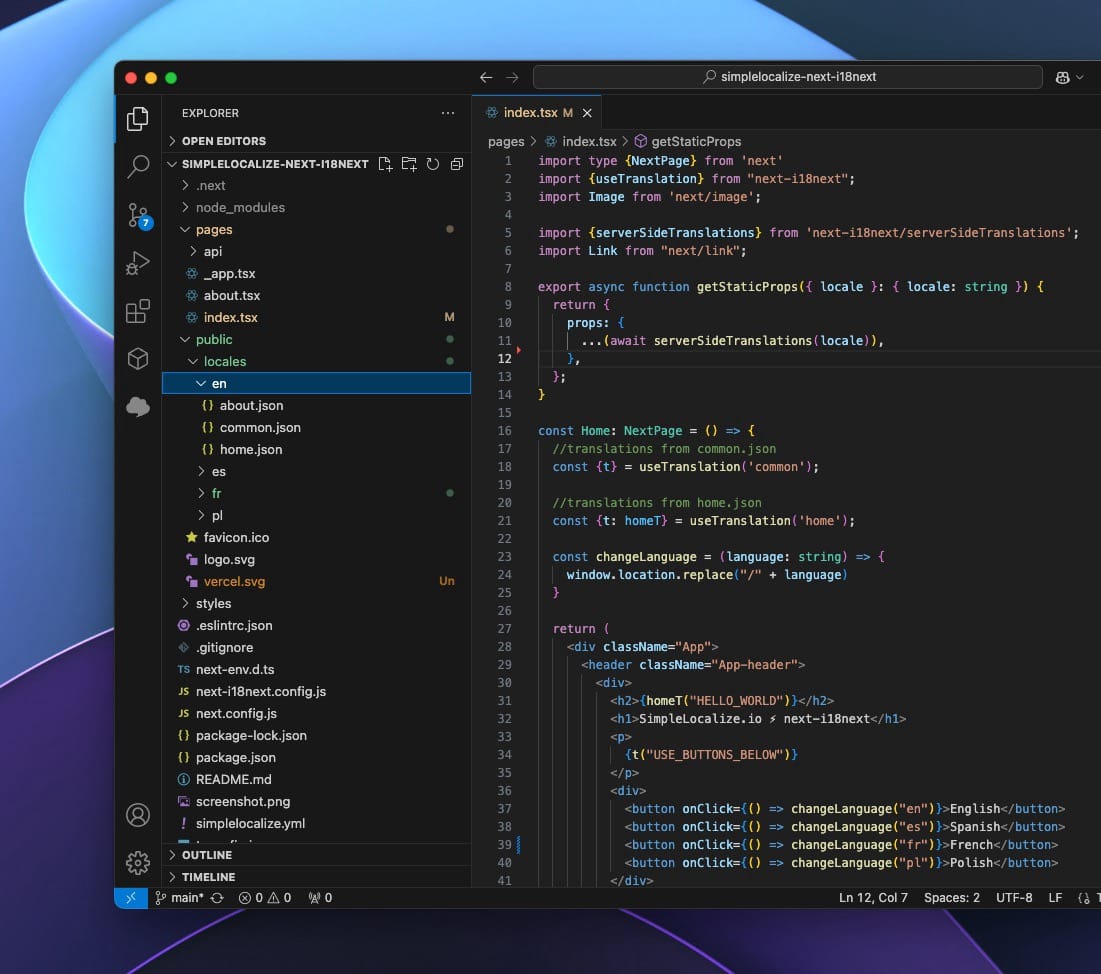
Add serverSideTranslations function to your page to fetch translations from the server
as follows:
import {serverSideTranslations} from "next-i18next/serverSideTranslations";
export async function getStaticProps({ locale }: { locale: string }) {
return {
props: {
...(await serverSideTranslations(locale))
}
};
}
const Home: NextPage = () => {
//translations from common.json
const {t} = useTranslation("common");
//translations from home.json
const {t: homeT} = useTranslation("home");
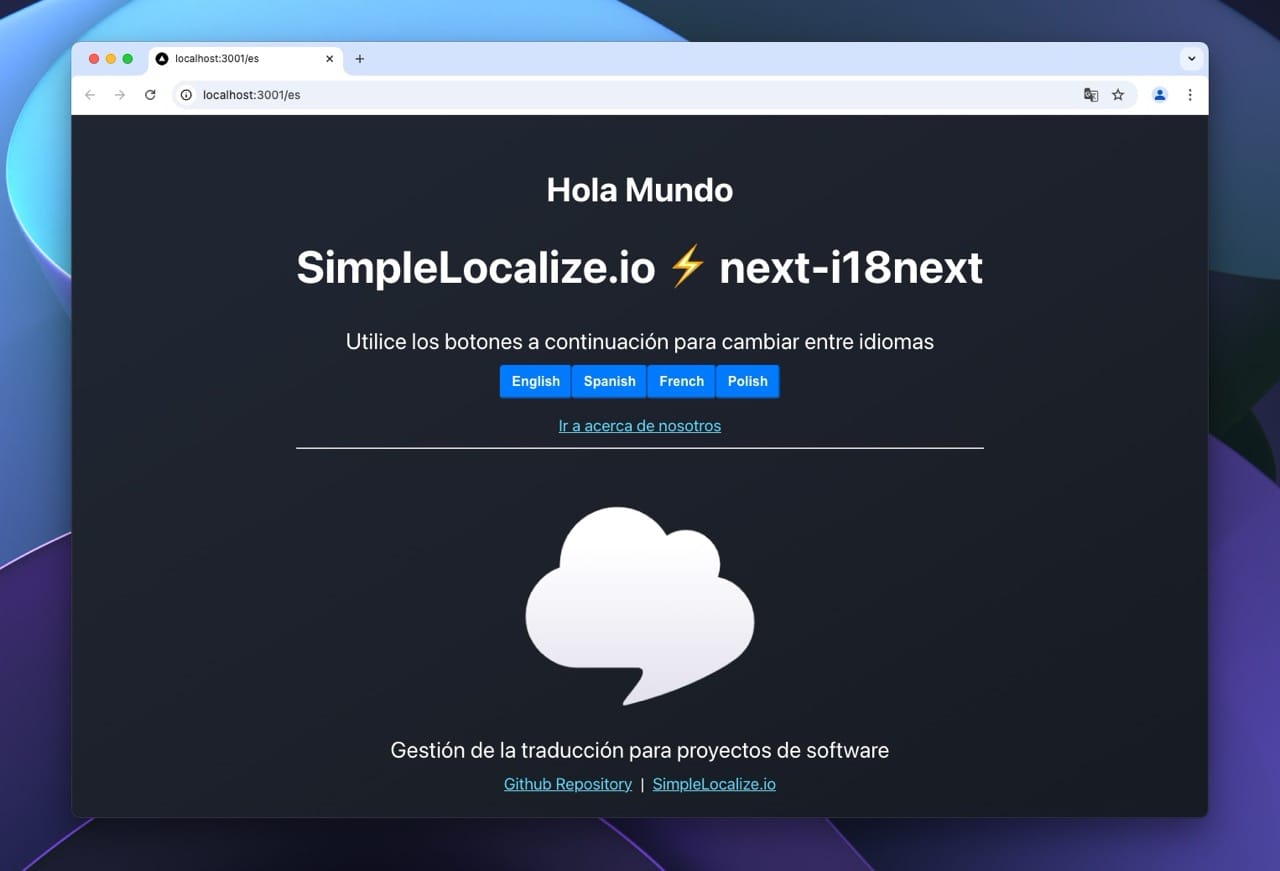
const changeLanguage = (language: string) => {
window.location.replace("/" + language);
};
return (
<div className="App">
<h1>{homeT("HELLO_WORLD")}</h1>
<p>
{t("USE_BUTTONS_BELOW")}
</p>
<div>
<button onClick={() => changeLanguage("en")}>English</button>
<button onClick={() => changeLanguage("es")}>Spanish</button>
<button onClick={() => changeLanguage("fr")}>French</button>
<button onClick={() => changeLanguage("pl")}>Polish</button>
</div>
</div>
);
};
export default Home;
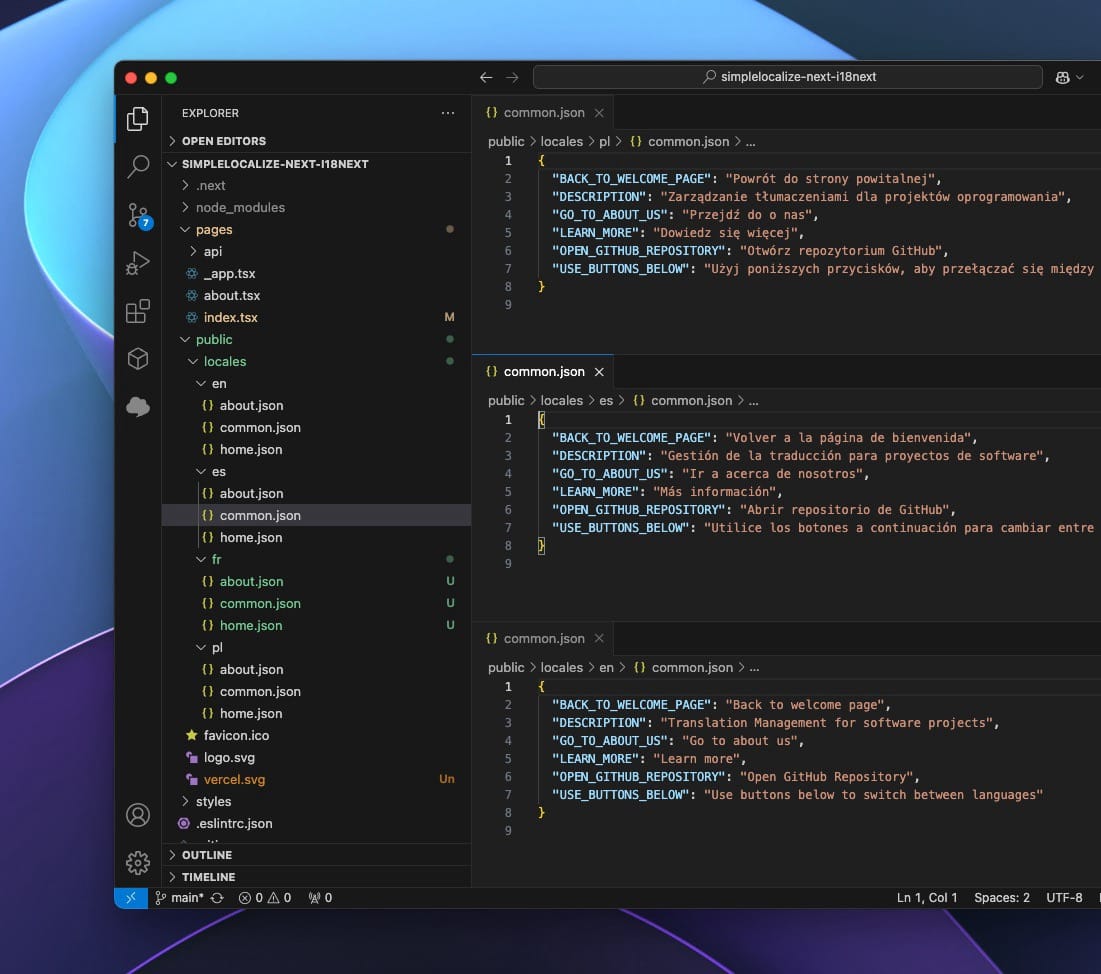
Translation files
In this article, we will keep translations in the /public/locales/{lang}/{ns}.json directory, where:
lang- is a language code (e.g.:en,es,fr,pl),ns- is a namespace (e.g.:commonandhome).
Using namespaces is optional, they are used to group translations. For example, you can have a
commonnamespace for translations that are used across the application and ahomenamespace for translations that are used only on the home page.
Our file structure will look like this:
.
├── en
│   ├── common.json
│   └── home.json
├── es
│   ├── common.json
│   └── home.json
├── pl
│   ├── common.json
│   └── home.json
└── fr
    ├── common.json
    └── home.json
Every directory contains two JSON files with translation for each namespace, common and home, every JSON file
contains translations for a specific language/locale.
Usage
Now we can wrap things up and start using i18next in our Next.js application.

Translations
To use translations in your Next.js application, you can use useTranslation hook from next-i18next library like this:
import {useTranslation} from 'next-i18next';

// translations from common.json
const {t} = useTranslation('common');
console.log(t('LEARN_MORE')) // output: Learn more

// translations from home.json
const {t: homeT} = useTranslation('home');
const firstName = "Jakub";
console.log(homeT('SAY_HI', {name: firstName})) // output: Hello Jakub!
Language switcher
To switch between languages, you can use the i18n.changeLanguage function from the useTranslation hook.
import {useTranslation} from 'next-i18next';

const {i18n} = useTranslation();

<button onClick={() => i18n.changeLanguage("en")}>English</button>
<button onClick={() => i18n.changeLanguage("es")}>Spanish</button>
Interpolation and plurals
next-i18next uses i18next under the hood, hence interpolation and pluralization work the same way as in i18next.
Pluralization, interpolation and variables are stored directly in the translations in single-language-json format, can read more about it here: message interpolation in single-language-json format.
Managing translation files
If you want to manage your translations in the translation editor, you can use the SimpleLocalize CLI to upload and download translations.
Configuration
Create a simplelocalize.yml file in your project root directory:
apiKey: YOUR_PROJECT_API_KEY
uploadFormat: single-language-json
uploadLanguageKey: en
uploadPath: ./public/locales/en/{ns}.json
uploadOptions:
  - REPLACE_TRANSLATION_IF_FOUND

downloadFormat: single-language-json
downloadLanguageKeys: ['pl', 'fr', 'es']
downloadPath: ./public/locales/{lang}/{ns}.json
With this configuration, CLI will upload only English translations and download translations for Spanish, Polish, and French languages.
We use single-language-json format for both upload and download. REPLACE_TRANSLATION_IF_FOUND option will automatically update English translations
if they are found in the translation editor.
Upload translations
To upload translations to the translation editor, run the following command:
simplelocalize upload
After that, you can see your translations in the translation editor.
Download translations
To download translations from the translation editor, run the following command:
$ simplelocalize download